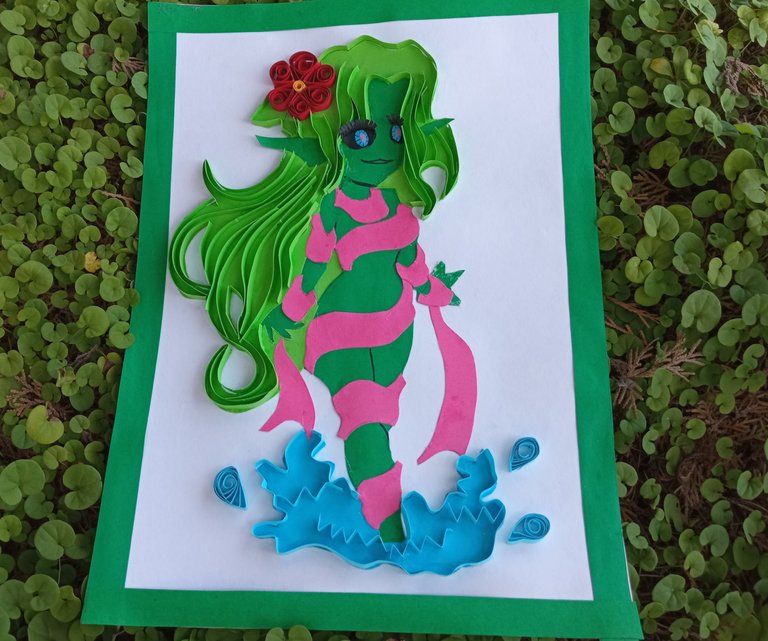
Hola queridos amigos de #Hivediy, espero que todos se encuentren bien al lado de sus seres amados, hoy les traigo un tutorial de un cuadro de una bella ninfa del bosque, esta es una manera linda de embellecer nuestros espacios en casa, y los materiales usados son muy económicos, los podemos conseguir en cualquier librería, por lo general siempre los tenemos en casa de sobrantes de trabajos que hemos realizado.
Hello dear friends of #Hivediy, I hope you are all well with your loved ones, today I bring you a tutorial of a picture of a beautiful forest nymph, this is a nice way to beautify our spaces at home, and the materials used are very inexpensive, we can get them in any bookstore, usually we always have them at home from leftovers of work we have done.
Para elaborar este cuadro me inspiré en la ninfa del bosque de splinterland, ya saben ando leyendo sobre el juego y cuando ví el dibujo de la ninfa me gustó mucho y decidí hacerla y plasmar en ella la técnica del filigrana, que consiste en enrrollar tiras de papel, todos mis post en esta comunidad han estado relacionados a esta técnica que cada día me gusta más.
To make this painting I was inspired by the splinterland forest nymph, you know I'm reading about the game and when I saw the drawing of the nymph I liked it a lot and decided to make it and capture in it the filigree technique, which consists of rolling strips of paper, all my posts in this community have been related to this technique that every day I like more and more.
Las ninfas son seres mitológicos mágicos son jóvenes y lindas, habitan en lugares hermosos, bosques, manantiales, ríos, mares, y en el juego de splinterland es un monstruo del splinter tierra que posee grandes habilidades, así que vamos acompáñame al paso a paso.
Nymphs are magical mythological beings are young and cute, they inhabit beautiful places, forests, springs, rivers, seas, and in the splinterland game is a monster of splinter earth that has great abilities, so come with me to the step by step.
Ninfa del Bosque
.
Forest Nymph
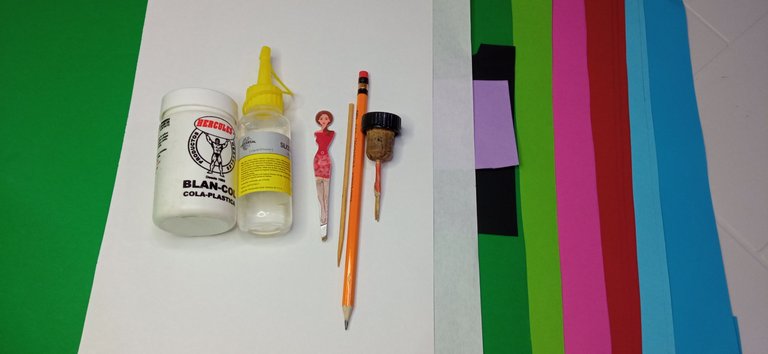
Materiales
Materials
Cardstock (green, pink, red, black, blue, white, yellow and blue) PencilLiquid silicone Pencil Rolling pin Tweezers Stick Scissors White glue Plantilla
Pasos para la elaboración
Processing steps
.
Paso 1
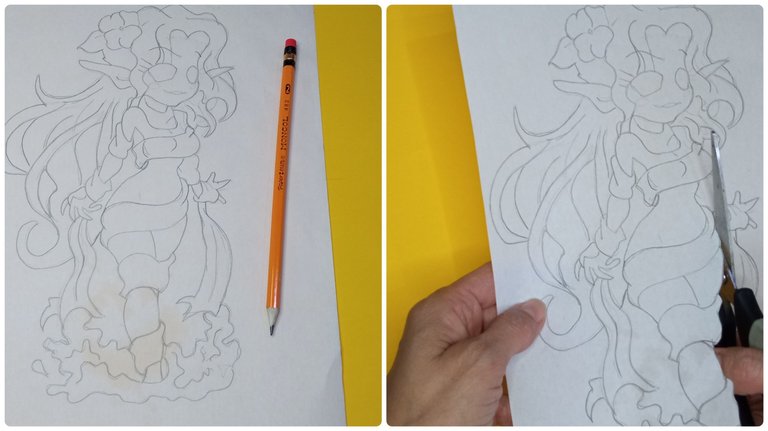
Lo primero que haremos es dibujar la bella ninfa del bosque y luego procedemos a recortar la imagen para separar toda la silueta, separando el cuerpo, la parte del cabello, el agua y las cintas que cubren su cuerpo, lo haremos con cuidado para no estropear los moldes.Step 1
The first thing we will do is draw the beautiful forest nymph and then proceed to cut out the image to separate the entire silhouette, separating the body, the hair part, the water and the ribbons that cover her body, we will do it carefully so as not to spoil the molds.
Paso 2
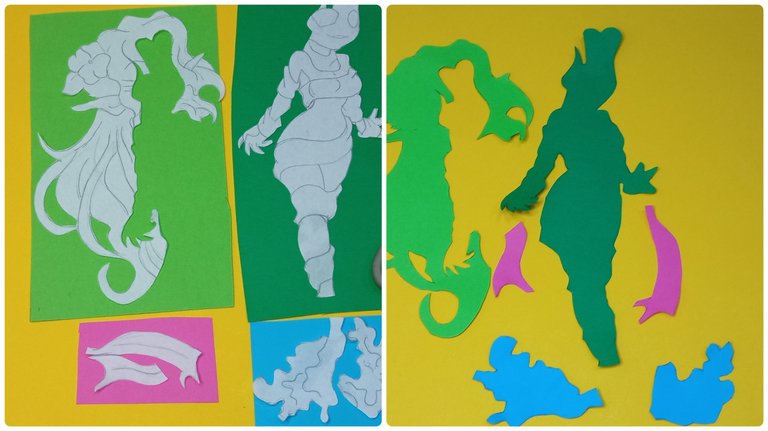
Seguidamente transferimos las partes de nuestra ninfa a la cartulina del color que corresponda a cada una y procedemos a recortar.Step 2
Then we transfer the parts of our nymph to the cardboard of the color that corresponds to each one and proceed to cut out.
Paso 3
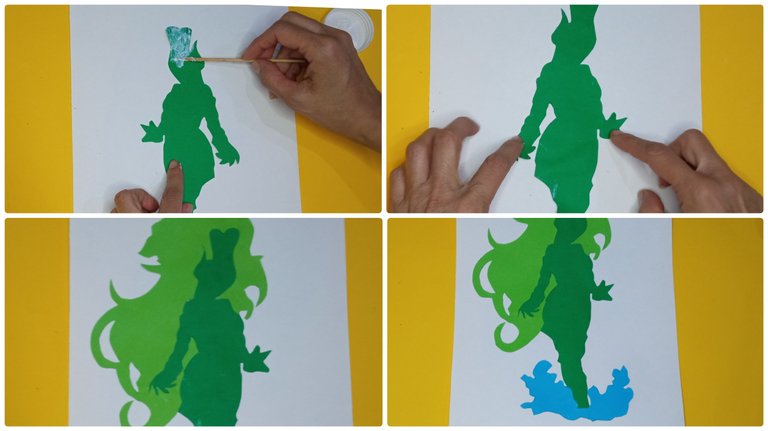
Ahora pegamos cada parte en la cartulina blanca que será nuestra base del cuadro para juntar de nuevo la ninfa del bosque.Step 3
Now we glue each part on the white cardboard that will be our base of the picture to put the wood nymph back together.
Paso 4
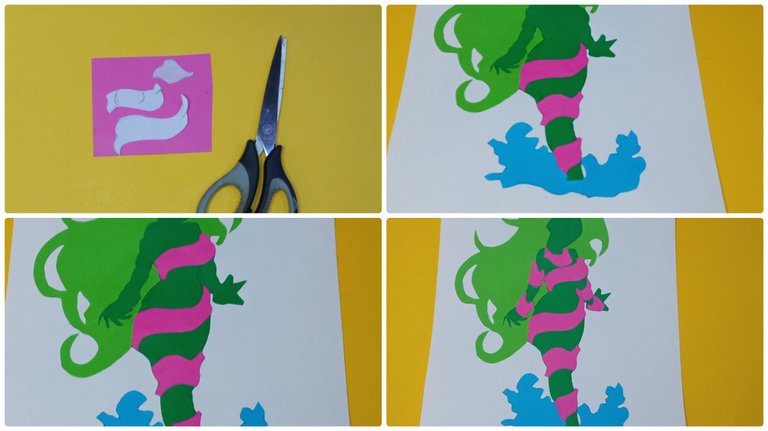
Después recortamos y pegamos la cinta que cubre el cuerpo de la ninfa.Step 4
Then cut out and glue the ribbon covering the nymph's body.
Paso 5
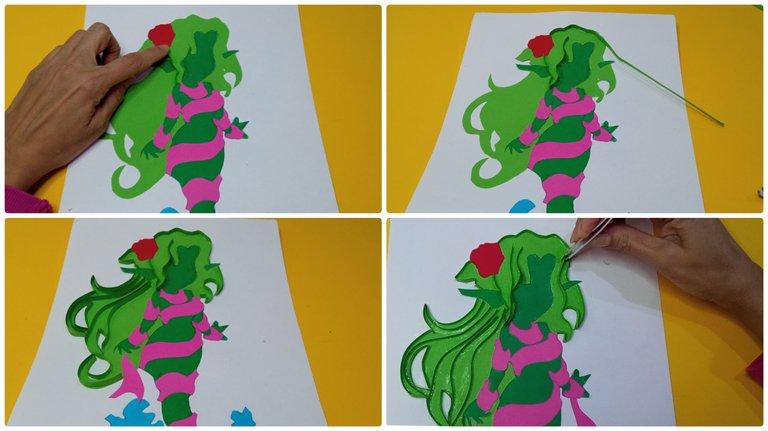
Luego pegamos las orejas puntiagudas de la ninfa y la base de la flor, luego con tiras de 0.5 cm por 17 cm vamos bordeando toda la bella cabellera y rellenando la misma con pequeñas tiras que asemejan los cabellos.Step 5
Then we glue the pointed ears of the nymph and the base of the flower, then with strips of 0.5 cm by 17 cm we go bordering all the beautiful hair and filling it with small strips that resemble hair.
Paso 6
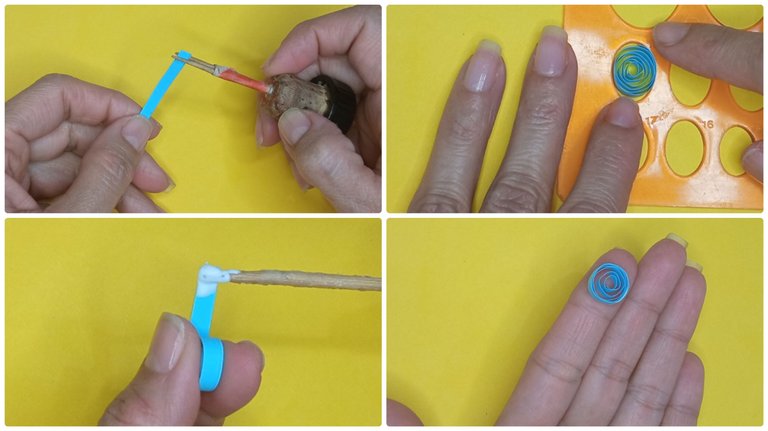
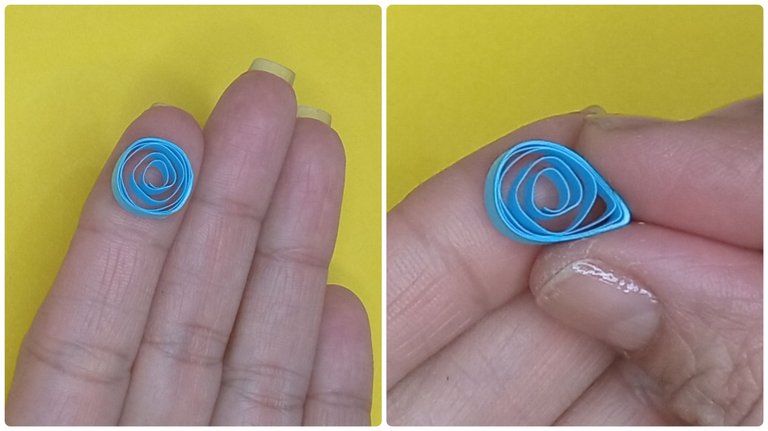
Haremos un círculo abierto que es una de las formas básicas del filigrana para luego formar un gota, tomamos una tira de 0,5 cm por 17 cm y la metemos en el enrrollador, vamos dando vueltas sobre ella misma y luego la soltamos en la plantilla o en un círculo que podemos hacer en una hoja del tamaño deseado, pegamos en la punta con pegamento blanco y ya tenemos nuestro círculo abierto.Step 6
We will make an open circle which is one of the basic forms of the filigree to then form a drop, we take a strip of 0.5 cm by 17 cm and put it in the winder, we go around it and then we release it in the template or in a circle that we can make on a sheet of the desired size, we glue at the tip with white glue and we have our open circle.
Paso 7
Ahora tomamos el círculo abierto y formamos una gota, esta la haremos haciendo presión con los dedos índice y pulgar.Step 7
Now we take the open circle and form a drop, this we will do by pressing with the index finger and thumb.
Paso 8
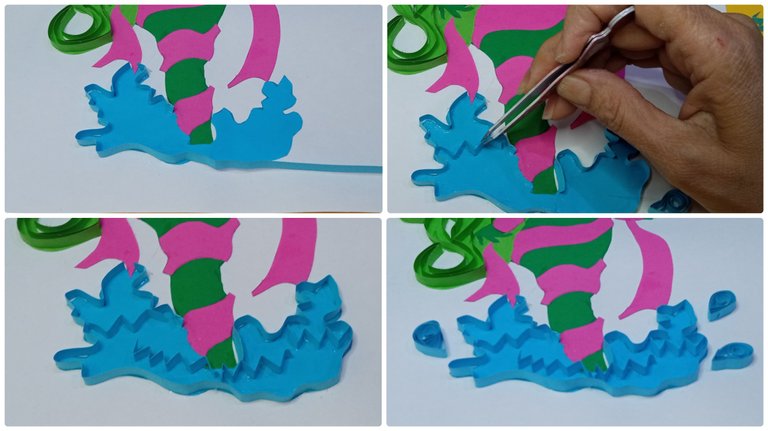
Luego bordeamos toda la parte azul que representa el agua y luego pegamos unas tiritas en forma de zigzag, colocamos las gotas que hicimos en el paso anterior, representan gotas chispeando.Step 8
Then we border all the blue part that represents the water and then we glue some strips in a zigzag shape, we place the drops that we made in the previous step, they represent sparkling drops.
Paso 9
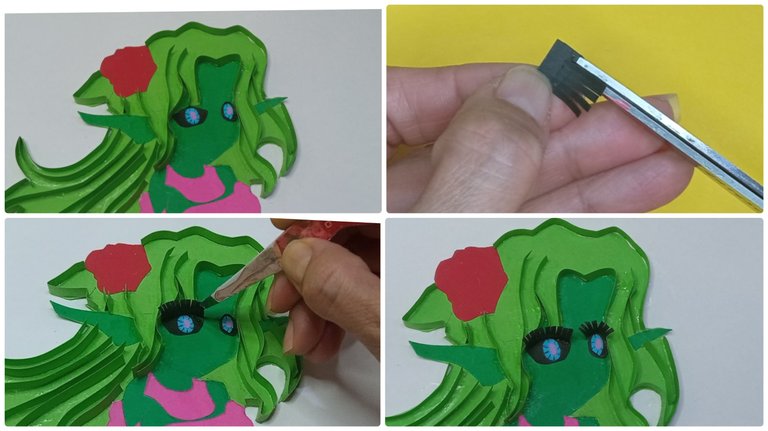
Después hacemos unos ojos grandes y los pegamos, luego hacemos las pestañas con un pedacito de cartulina negra, cortamos sin llegar al final y damos forma, las pegamos en el borde de los ojos.Step 9
Then we make some big eyes and glue them, then we make the eyelashes with a little piece of black cardboard, cut them without reaching the end and shape them, glue them on the edge of the eyes.
Paso 10
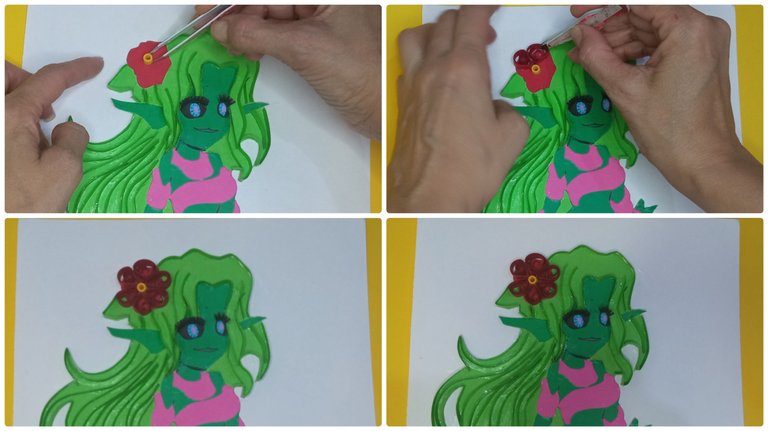
Seguidamente rellenaremos la flor, primero pegamos un rollito amarillo y luego haremos 6 gotas con la forma de filigrana, las haremos de la misma manera como explicamos en los pasos 6 y 7, luego las pegamos formando una linda flor.Step 10
Next we will fill the flower, first we glue a yellow roll and then we will make 6 drops with the filigree shape, we will do them in the same way as we explained in steps 6 and 7, then we glue them forming a nice flower.
Paso 11
Por último pegamos en el borde tiras de cartulina verde para formar un marco y así se verá más lindo nuestro cuadro de ninfa del bosque.Step 11
Finally, we glue strips of green cardboard around the edge to form a frame to make our wood nymph picture even prettier.
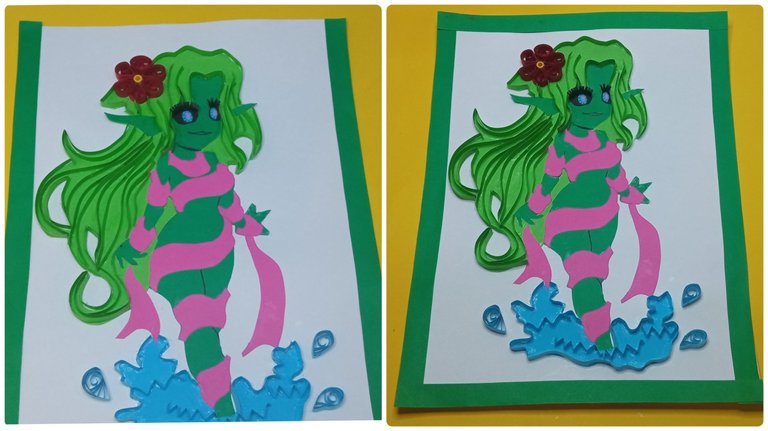
Listo amigos, así quedó mi bella ninfa del bosque, espero sea del agrado de todos ustedes.
Ready friends, this is how my beautiful forest nymph turned out, I hope you all like it.
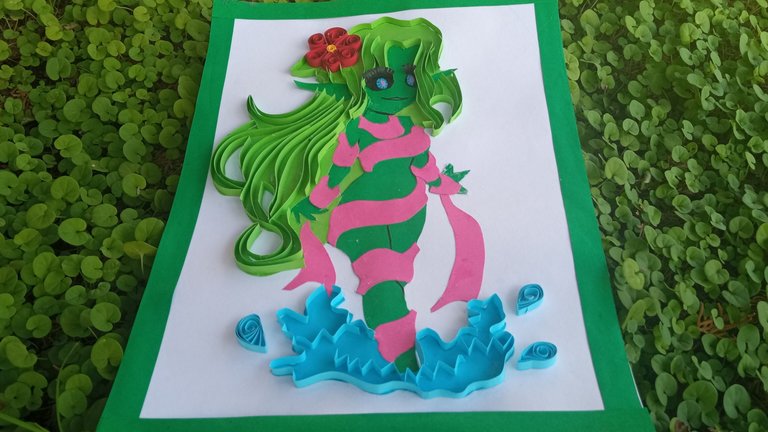
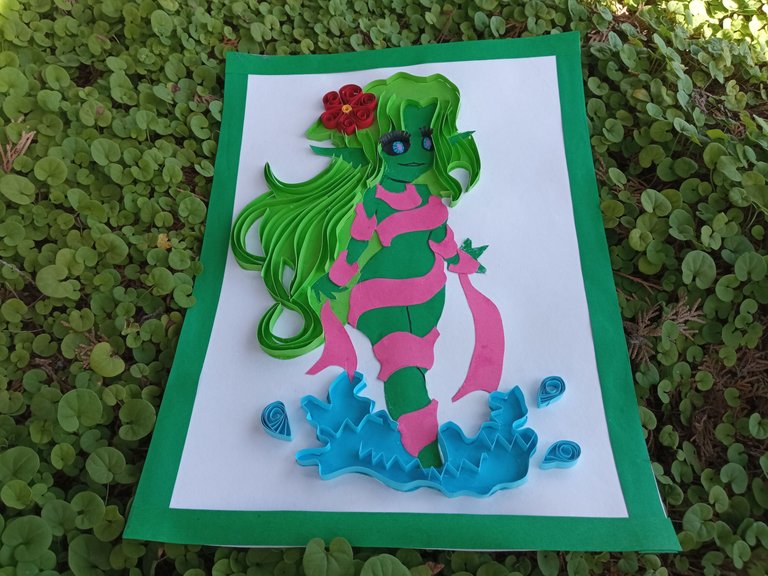
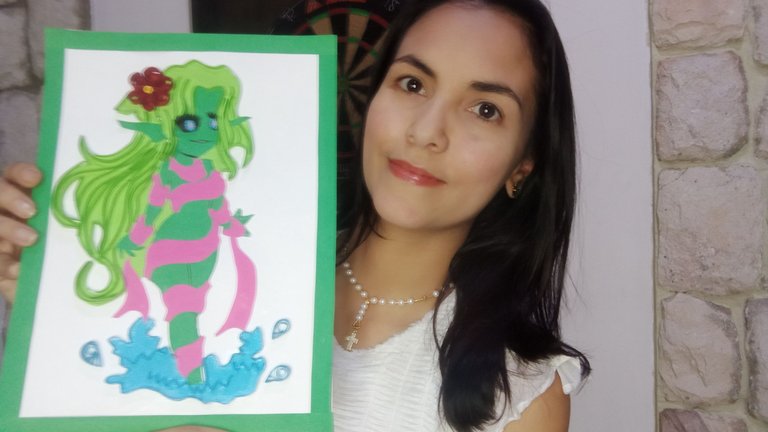
Todas las fotos están tomadas desde mi teléfono Redmi 9, para los collages usé la aplicación collage maker y para la traducción usé el traductor DeepL.
All photos are taken from my Redmi 9 phone, for the collages I used the collage maker application and for the translation I used the translator DeepL.
😉🤗😃😊👍🏼☺️😁
Gracias.
Congratulations @lilianap15! You have completed the following achievement on the Hive blockchain and have been rewarded with new badge(s):
Your next target is to reach 800 upvotes.
You can view your badges on your board and compare yourself to others in the Ranking
If you no longer want to receive notifications, reply to this comment with the word
STOPSupport the HiveBuzz project. Vote for our proposal!