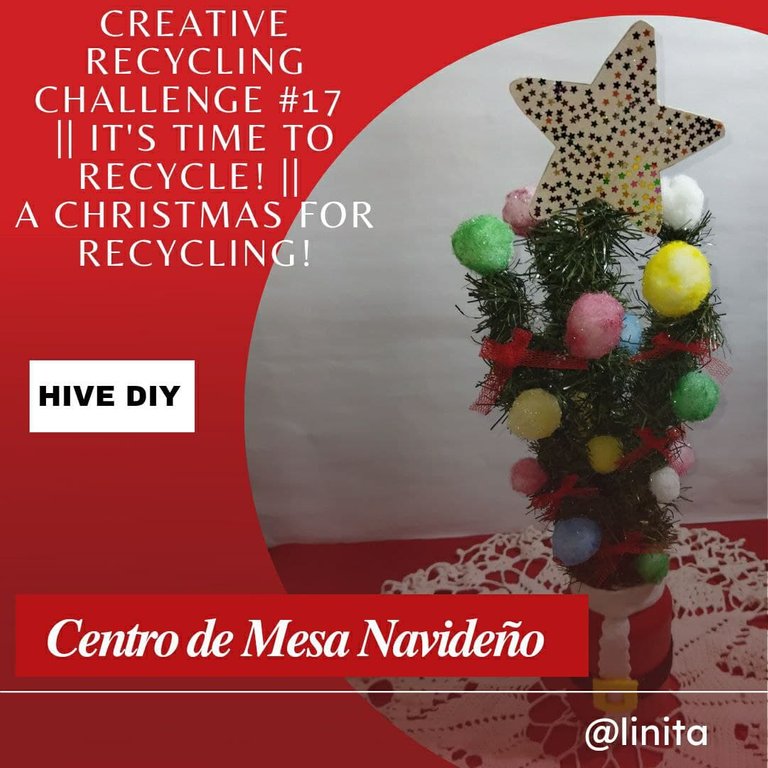
¡Holaaaaaaaa! Mis queridos amigos de Hive Diy
El reciclaje es una de las actividades que deberíamos fomentar a su práctica empezando desde nuestros hogares y ser una asignatura más en las escuelas, de esta manera formaremos personas con el hábito de la conservación y la transformación de nuestro ambiente a partir de desechos orgánicos. Desde hace un tiempo para acá he participado con muchas ganas en los concursos que promueve nuestra amiga @jennizer, porque es una temática que debemos darle el valor y toda la utilidad que merece el recliclaje.
Para este concurso utilicé varios materiales de desechos como frasco de mayones y caja de bomillos, algunos retazos de de fieltro, guata o relleno y poliestireno (anime) que pueden ser utilizados en vez de ser desechados. También reutilizaré unos palitos de altura que fueron utilizados para unas brochetas y algunas piezas de unas guirnaldas que conseguí en el depósito de mi casa.
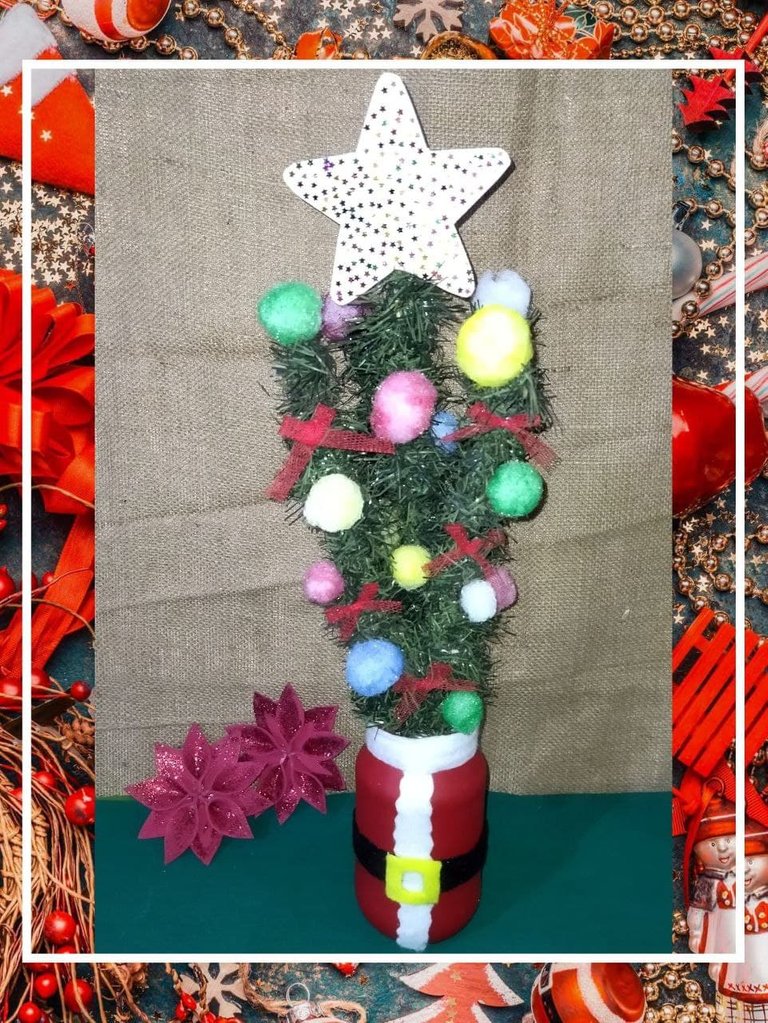
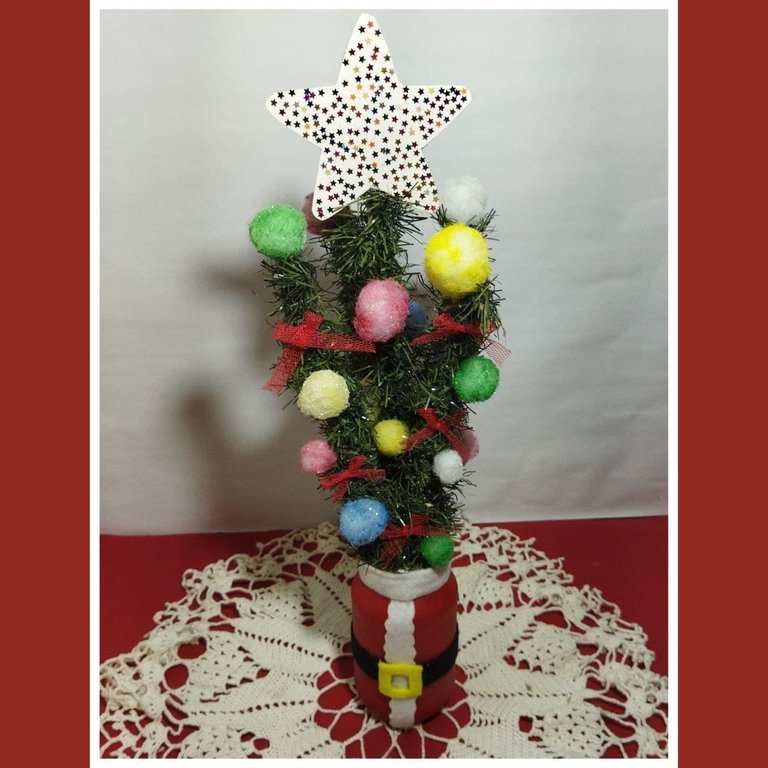
Con estos materiales realicé un hermoso centro de mesa para decorar mi mesa en la cena de noche buena.
Ahora sin más, comencemos.
Helloooooo! My dear Hive Diy friends
Recycling is one of the activities that we should encourage to practice starting from our homes and being one more subject in schools, in this way we will train people with the habit of conserving and transforming our environment from organic waste. For some time now I have participated with great enthusiasm in the contests promoted by our friend @jennyzer, because it is a theme that we must give the value and all the utility that recycling deserves.
For this contest I used various waste materials such as mayonnaise jar and light bulb box, some scraps of felt, wadding or stuffing, and polystyrene (anime) that can be used instead of being thrown away. I will also reuse some tall sticks that were used for skewers and some pieces of garlands that I got in the warehouse at my house.
With these materials I made a beautiful centerpiece to decorate my table at Christmas Eve dinner.
Now without further ado, let's get started.

MATERIALES
1 Envase de vidrio de mayonesa
1 caja de bombillo
1 Retazos de fieltro, guata, anime y tela malla
Guirnalda
Palillos de altura
Pinturas al frío colores variados
Escarchas y confites escarchados
Pinceles
Tijeras
Lápiz de grafito
Pega blanca
Pistola de silicón y barra de silicón
MATERIALS
1 glass container of mayonnaise
1 box of light bulb
1 Scraps of felt, wadding, anime and mesh fabric
Wreath
Tall chopsticks
Cold paints assorted colors
Frosted and frosted confections
Brushes
Pair of scissors
Graphite pencil
White glue
Glue Gun and Glue Stick
PASO Nº 1
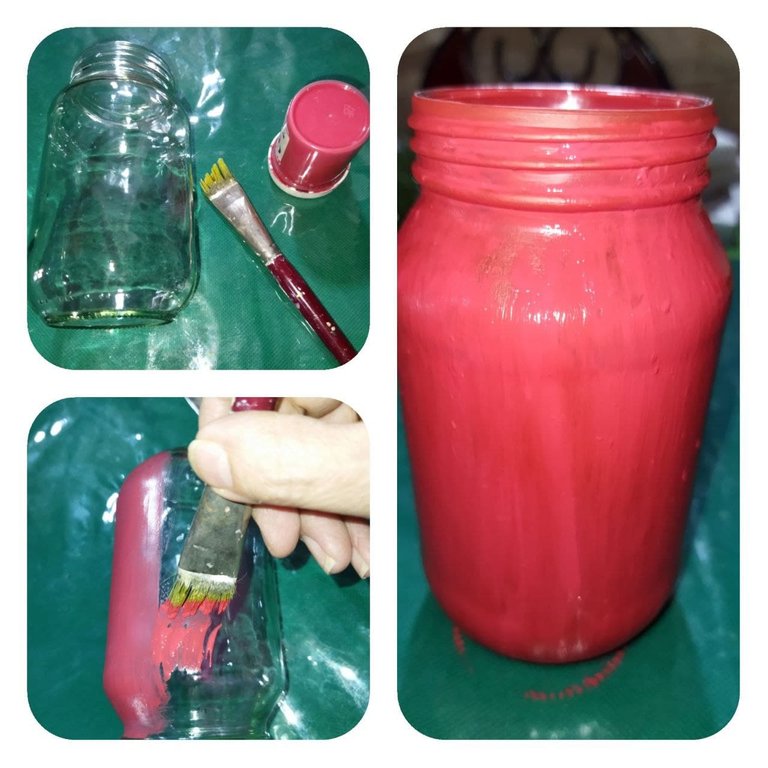
Lo primero que haremos será pintar el envase con cuantas capas requiera hasta cubrir, eso dependerá de la calidad de la pintura que utilicemos. En mi caso, fueron tres capas de pintura roja. Dejamos secar muy bien.
STEP # 1
The first thing we will do is paint the container with as many layers as required to cover, that will depend on the quality of the paint that we use. In my case, it was three coats of red paint. We let it dry very well.
PASO Nº 2
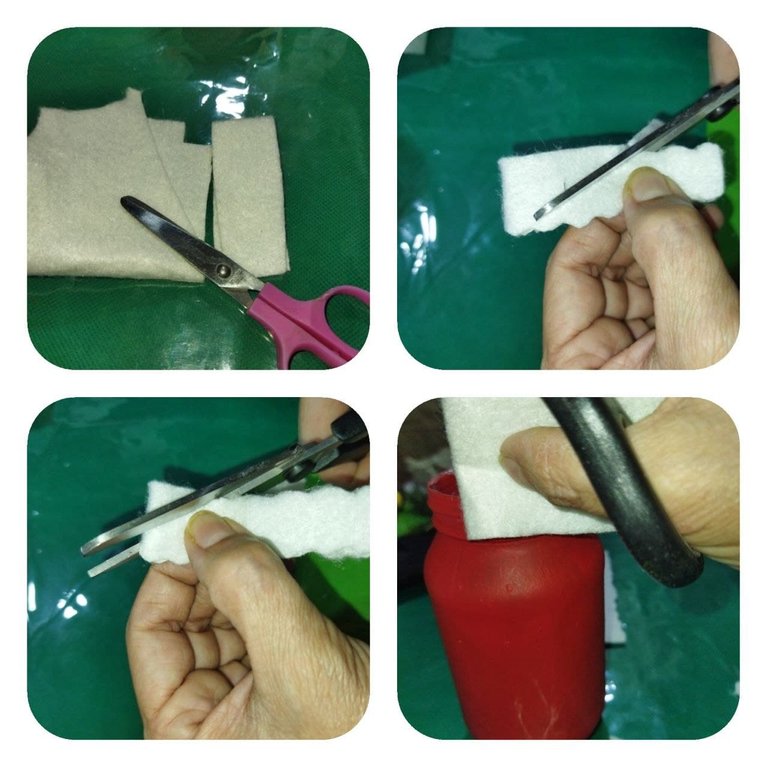
Mientras dejamos secar el envase procedemos a cortar lo que será el cinturón de nuestro envase. Para ello cortamos una tira de fieltro negro de 2cm x 22cm. Y con un retazo de amarillos haremos la hebilla del cinturón.
STEP # 2
While we let the container dry, we proceed to cut what will be the belt of our container. For this we cut a strip of black felt measuring 2cm x 22cm. And with a patch of yellow we will make the belt buckle.

PASO Nº 3
Cortamos dos retazos de fieltro blanco, uno para simular la parte delantera del abrigo, la cual haremos un corte curvilíneo en cada extremos. y el otro para forrar el cuello del envase.
STEP # 3
We cut two pieces of white felt, one to simulate the front part of the coat, which we will make a curvy cut at each end. and the other to line the neck of the container.
PASO Nº 4
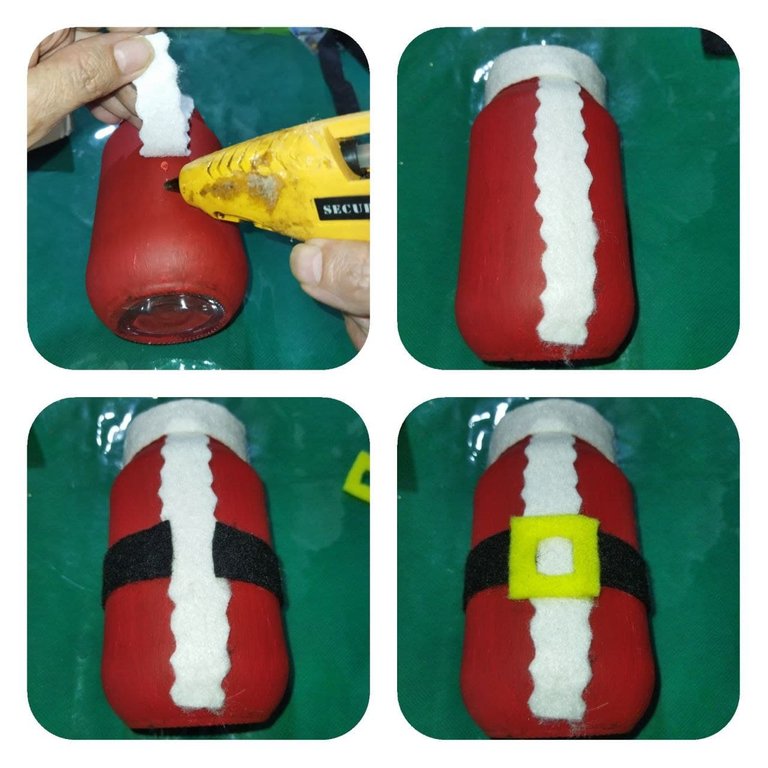
Ahora procedemos a pegar las piezas elaboradas con el fieltro en nuestro envase ya seco. Para ello utilizamos la pistola de silicón.
STEP #4
Now we proceed to glue the pieces made with the felt in our already dry container. For this we use the silicone gun.
PASO Nº 5
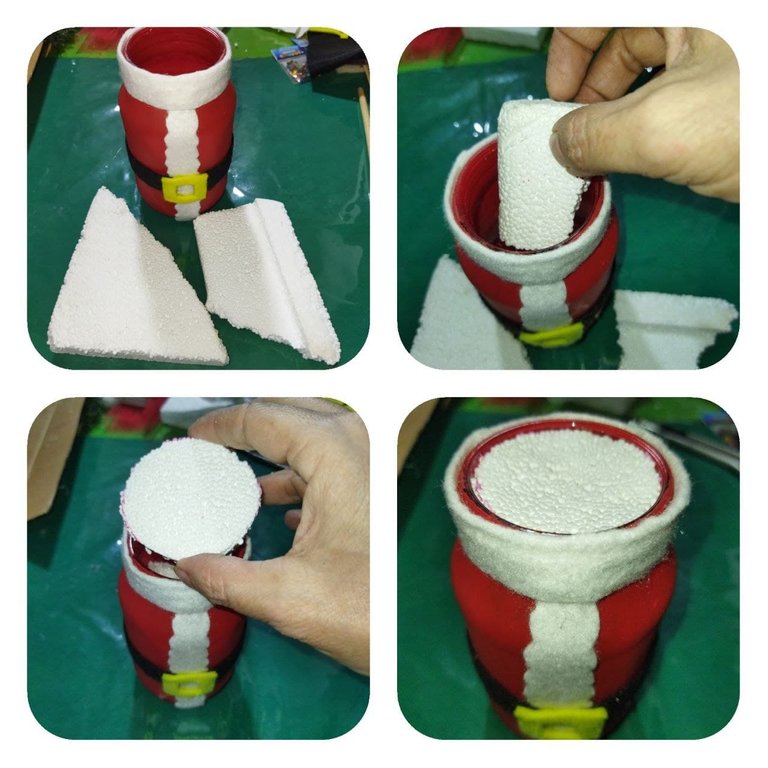
Rellenamos el envase con retazos de anime y elaboramos un circulo que utilizaremos de tapa y para introducir los palillos de altura para formar nuestro centro de mesa.
STEP # 5
We fill the container with pieces of anime and make a circle that we will use as a lid and to introduce the tall toothpicks to form our centerpiece.
PASO Nº 6
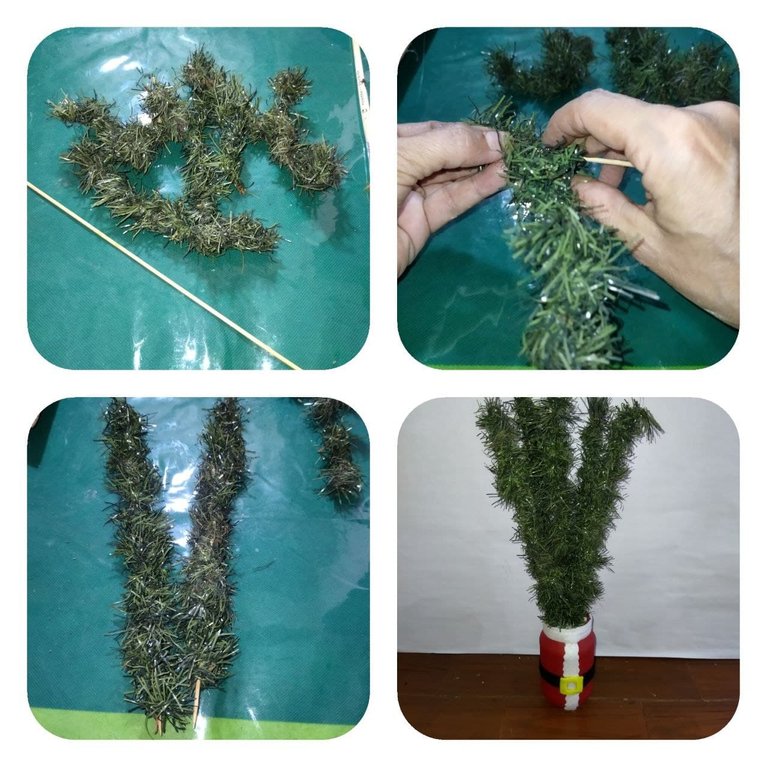
Con los palillos de altura y la guirnalda haremos especie de unos pinitos para simular un arbolito. Para ello desarmamos la guirnalda y con cada pieza forramos los palillos de altura. Puedes utilizar la cantidad que desees y darle la forma que quieras. Yo utilicé 5 palillos forrados.
STEP # 6
With the tall toothpicks and the garland we will make a kind of little first steps to simulate a little tree. To do this we disassemble the garland and with each piece we line the tall toothpicks. You can use the amount you want and give it the shape you want. I used 5 lined toothpicks.
PASO Nº 7
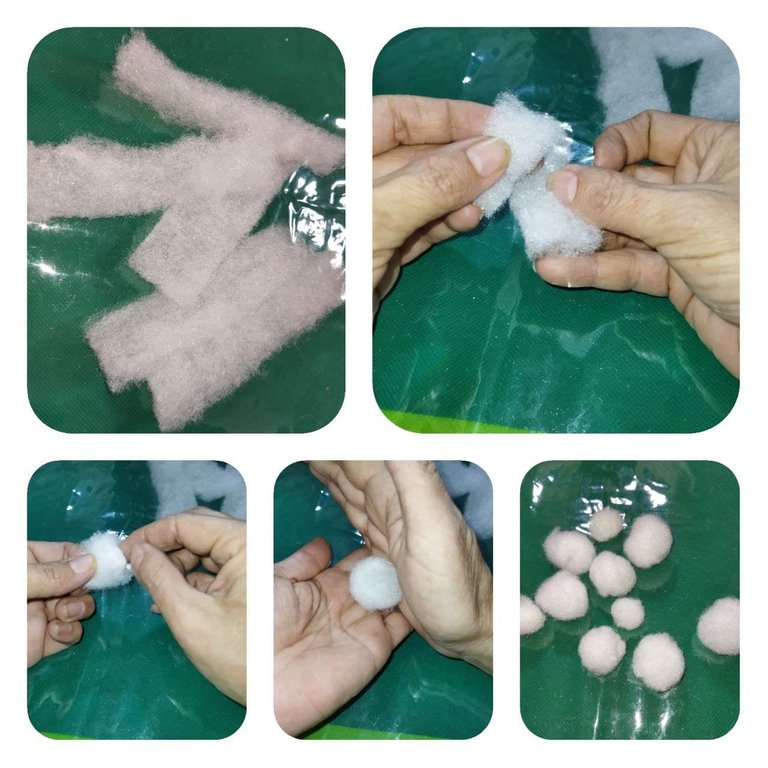
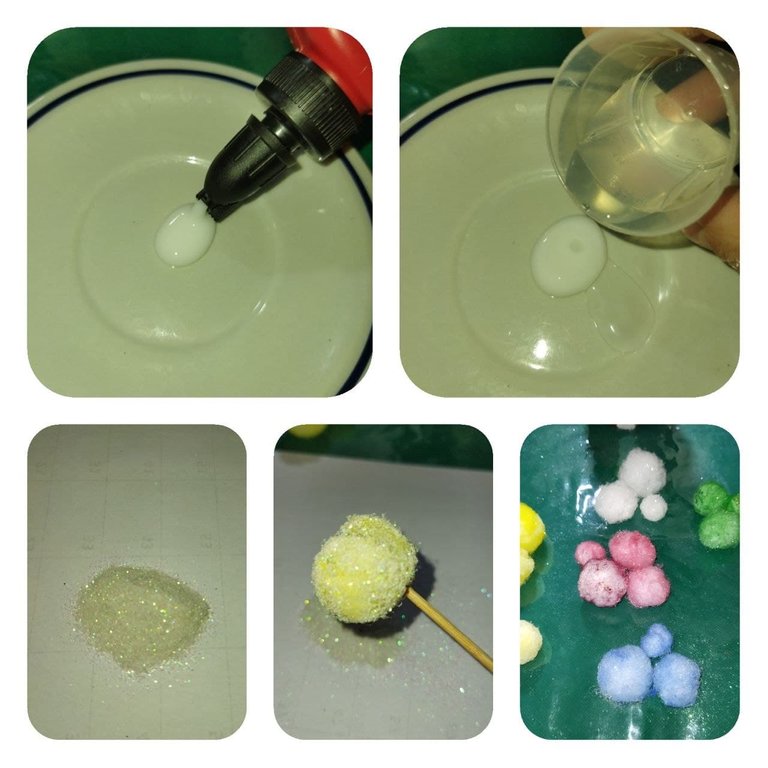
Con los retazos de guara o rellenos elaboraremos unas bolitas. Para ellos hacemos un amarre y luego damos forma de bolitas del tamaño que deseemos.
STEP # 7
With the pieces of guara or fillings we will make some balls. For them we make a tie and then we shape balls of the size we want.
PASO Nº 8
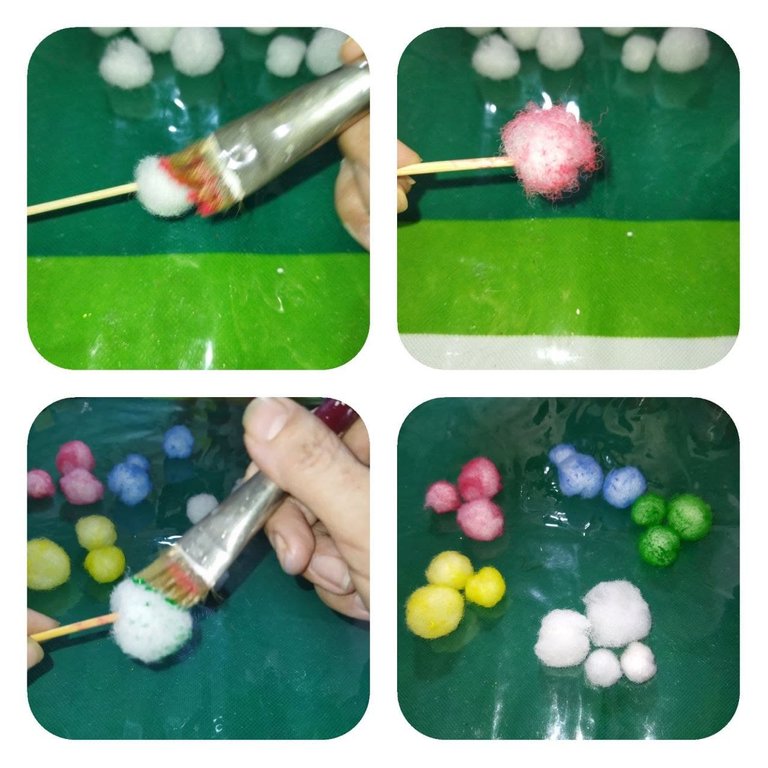
Con la pintura al frío y un pincel plano procedemos a pintar cada bolita. Mojamos el pincel del color que deseemos y damos suaves pinceladas en cada bolita y dejamos secar.
STEP # 8
With cold paint and a flat brush we proceed to paint each ball. We wet the brush of the color we want and lightly brush each ball and let it dry.
PASO Nº 9
Hacemos un pegamento suave mezclando un poco de pega blanca con agua y pincelamos ligeramente las bolitas y luego las bañamos con escarcha.
STEP # 9
We make a soft glue by mixing a little white glue with water and lightly brush the balls and then bathe them with glitter.
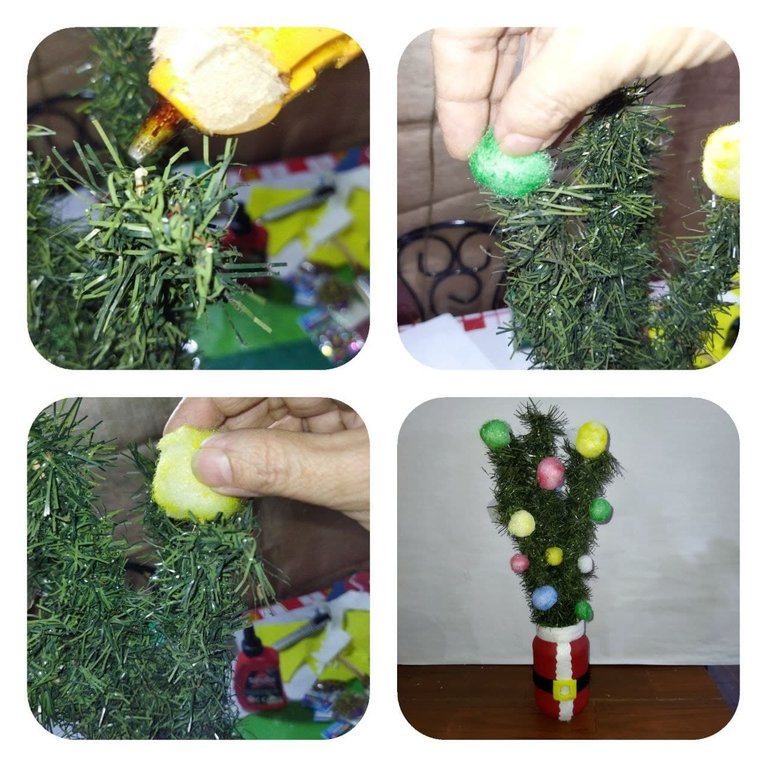
PASO Nº 10
Una vez secas las bolitas colocamos en nuestras ramitas de forma dispersa variando los colores. Para ello utilizaremos la pistola de silicón.
STEP # 10
Once the balls are dry, we place them on our twigs in a scattered way, varying the colors. For this we will use the silicone gun.
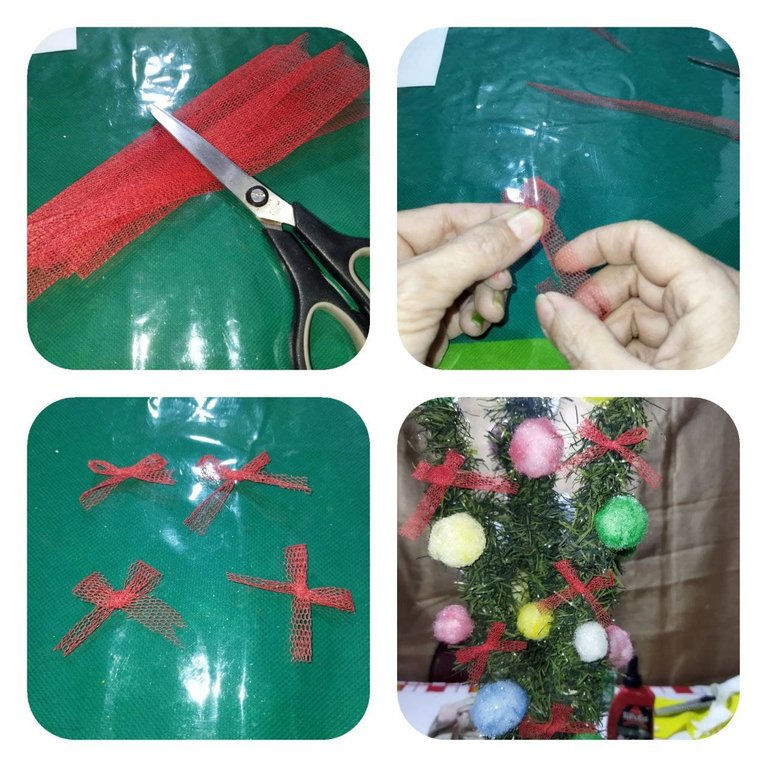
PASO Nº 11
Ahora cortamos tiras de la tela de malla y elaboramos unos lazos para darle más vida a nuestro adorno. Pegamos con la pistola de silicón.
STEP #11
Now we cut strips of the mesh fabric and make some bows to give more life to our ornament. We hit with the glue gun.
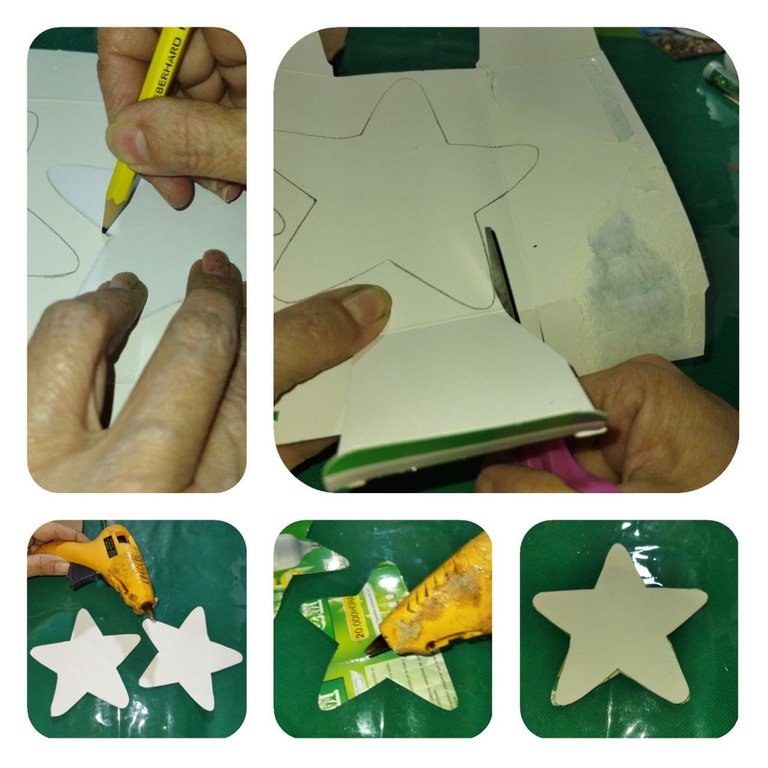
PASO Nº 12
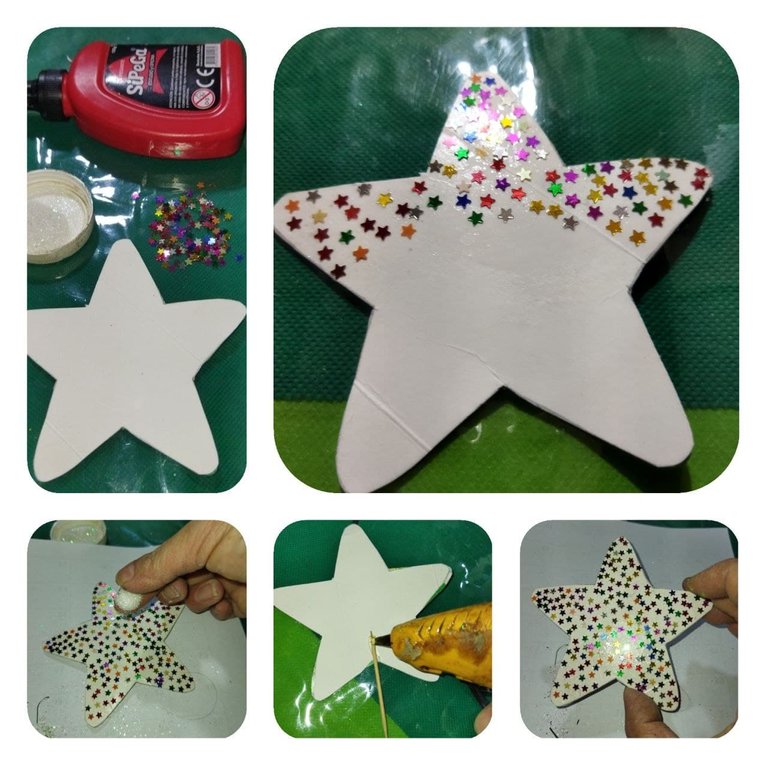
Y por último, para dar el toque final, con la caja de bombillo, realizamos dos estrellas, recortamos y las unimos con la pistola de silicón, luego agregamos pega blanca y colocamos confites de estrellitas y rellenamos con escarcha tornasol para darle más brillo y colocamos un palillo en en centro.
Una vez lista, la colocamos en la parte superior central de nuestro adorno.
STEP # 12
And finally, to give the final touch, with the light bulb box, we make two stars and join them with the glue gun, then we add white glue and place star sprinkles and fill with litmus frost to give it more shine and place a toothpick in in center.
Once ready, we place it in the upper central part of our ornament.
Nos vemos en la próxima entrega.Y de esta manera obtenemos un lindo centro de mesa de navidad para colocar y darle vida a nuestra mesa en noche buena o para adornar cualquier espacio de nuestro hogar. Y una vez más apoyamos esta valiosa iniciativa y ayudamos a salvar nuestro planeta. Invito a @agathalara, @creacioneslelys, @vicmito74 y a @kattycrochet a participar y a darnos más ideas de cómo fomentar el reciclaje desde nuestros hogares. Y como dice nuestra amiga @jennyzer, hagamos del reciclaje un hábito.
See you in the next installment.And in this way we obtain a nice Christmas centerpiece to place and give life to our table on Christmas Eve or to decorate any space in our home. And once again we support this valuable initiative and help save our planet. I invite @agathalara, @creacioneslelys, @vicmito74 and @kattycrochet to participate and give us more ideas on how to promote recycling from our homes. And as our friend @jennyzer says, let's make recycling a habit.
Todas las fotos son de mi autoría, tomadas con mi teléfono POCO M3
Para la edición de la portada y las fotos Canva y PolishUtilicé https://translate.google.com para la traducción

Para la edición de la portada y las fotos Canva y PolishUtilicé https://translate.google.com para la traducción

Hola, gracias por la invitación, muy original tu centro de mesa, en realidad reciclar es un reto, y estas iniciativas son motivadoras.
Hi linita,
Join the Curie Discord community to learn more.
Hola @linita te quedó realmente lindo tu adorno navideño. Le diste un excelente uso a esos retazos de fieltro, frasco de vidrio y restos de guirnalda, pero lo que más me atrae de tu diseño es cómo elaborarste los pompones. Se ven geniales. El toque de pega escarchada le dió una apariencia brillante muy linda.
Para finalizar los lacitos que le pusiste al adorno lo hace ver más llamativo. Me encanta. Seguro que te ganas un lugar en el concurso. Felicidades.
Hola @creacioneslelys aprecio mucho tu comentario. me gusta mucho hacer cosas nuevas a partir de materiales de provecho. Muchas veces me ha sorprendido la transformación que le damos a algunos objetos para obtener creaciones hermosas.
Congratulations @linita! You have completed the following achievement on the Hive blockchain and have been rewarded with new badge(s):
Your next target is to reach 1750 upvotes.
You can view your badges on your board and compare yourself to others in the Ranking
If you no longer want to receive notifications, reply to this comment with the word
STOPTo support your work, I also upvoted your post!
Check out the last post from @hivebuzz:
Support the HiveBuzz project. Vote for our proposal!
Un proceso bastante detallado y extenso pero el resultado valió la pena, me gusta mucho cada elemento que usaste para decorar, reutilizando al máximo gracias por formar parte de esta edición navideña.
Felicidades por tu segundo puesto en este concurso. Espero que te sirva de motivación para fomentar aún más si cabe el tema del reciclaje, un bien común a todos y del que todos nos podemos aprovechar para hacer de este mundo un lugar más habitable