Welcome to my blog!
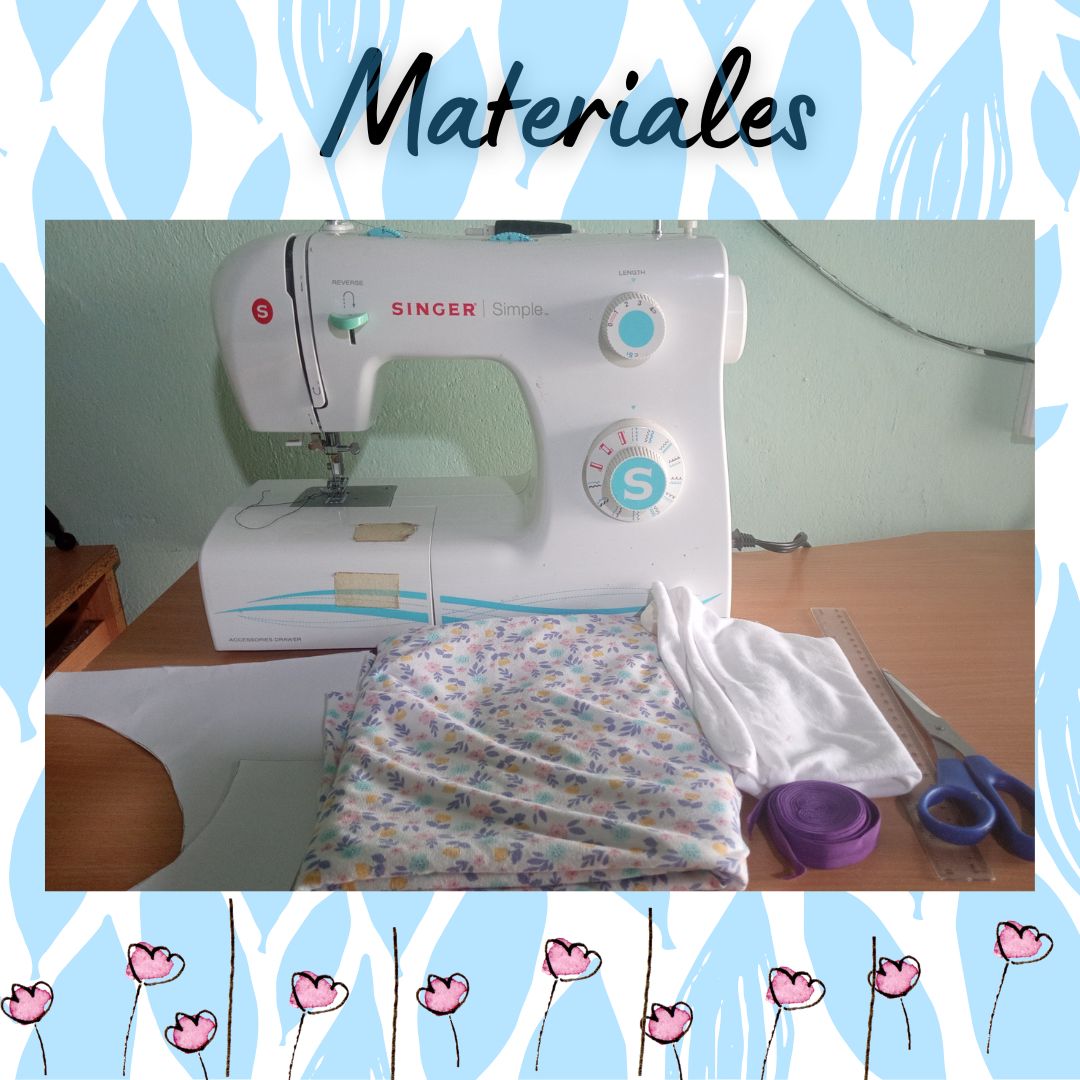
1/4 cotton pajama fabric
White fabric for the inside.
3 meters of elastic bias
Pattern
Thread and needle
Sewing machine
Scissors
Pins
Workmanship
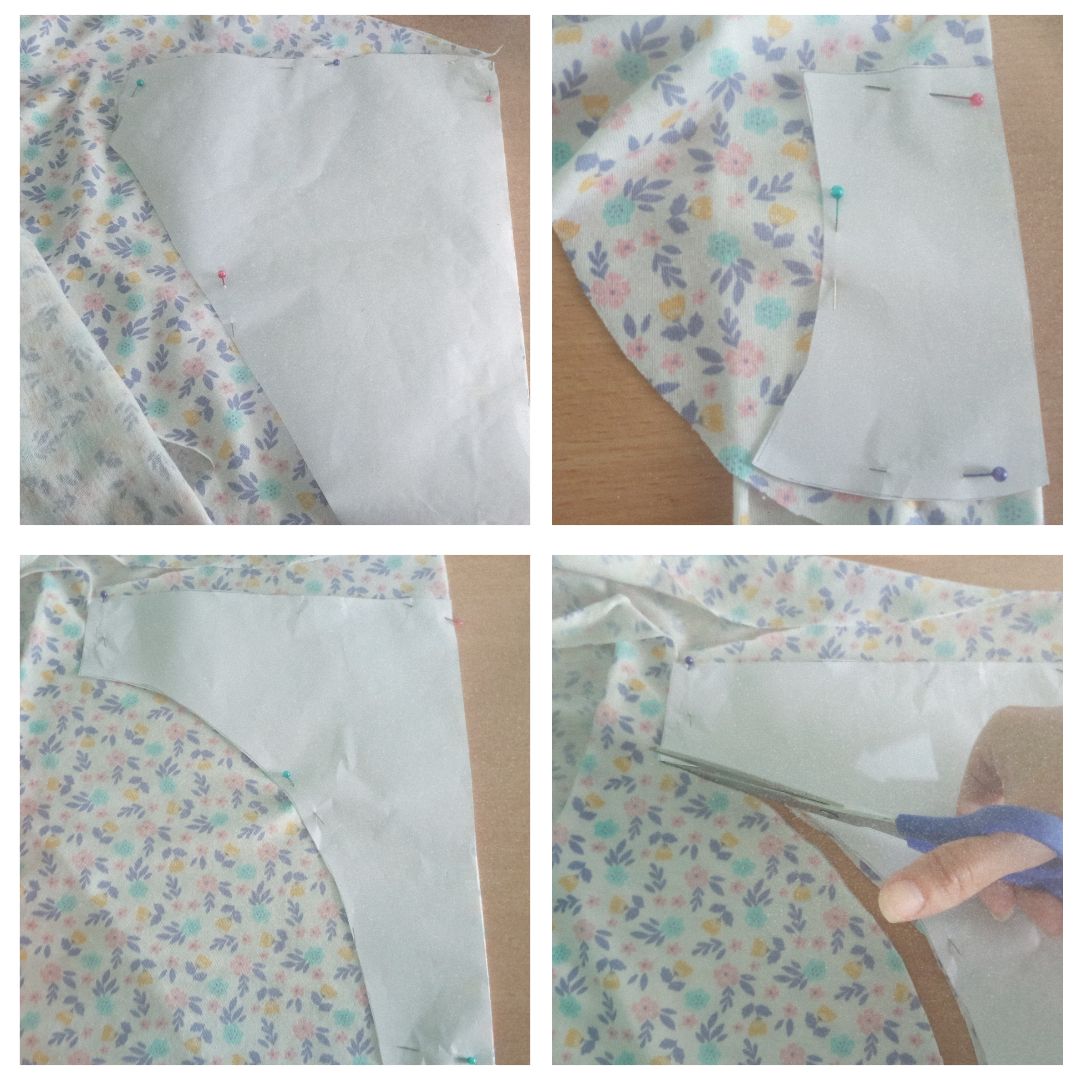
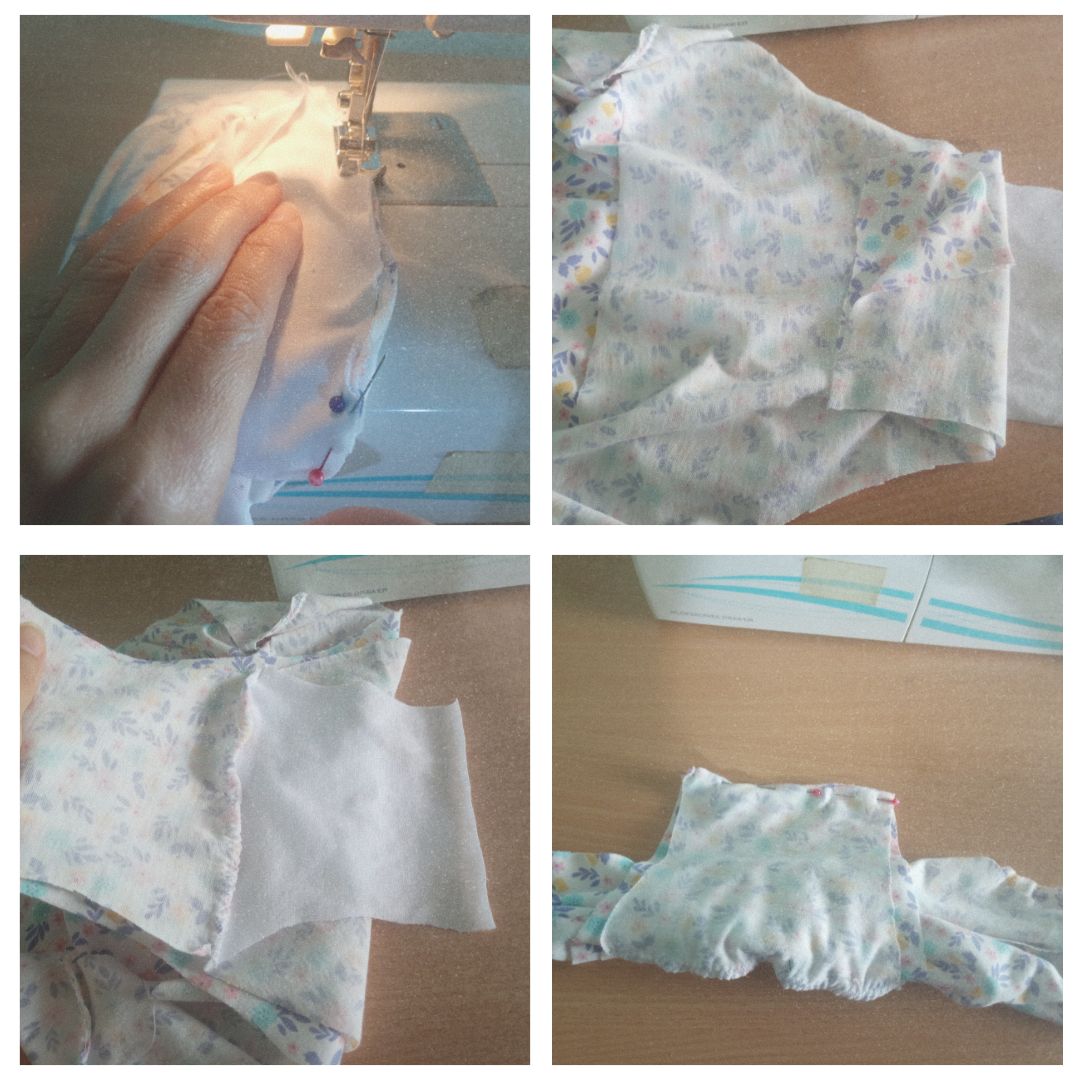
The first step is to transfer the main pattern on bond paper so that it will last, for this project use the size M that is traced from the pattern, made this step we place the fabric to the thread, where it stretches is placed across the width, it is folded so that it is flush with the pattern, pins are placed to fix the pattern of the fabric and each part is cut, the front, the back and is cut for the cover or the bottom of the blumer one of white fabric and one of flowered fabric.
Once each of the pieces are cut out, they are arranged in order to double the fabric, each one is joined together, first the sides of the blumer by zig zag stitching twice so that it is well glued and will not come loose with the passage of time due to use and washing.
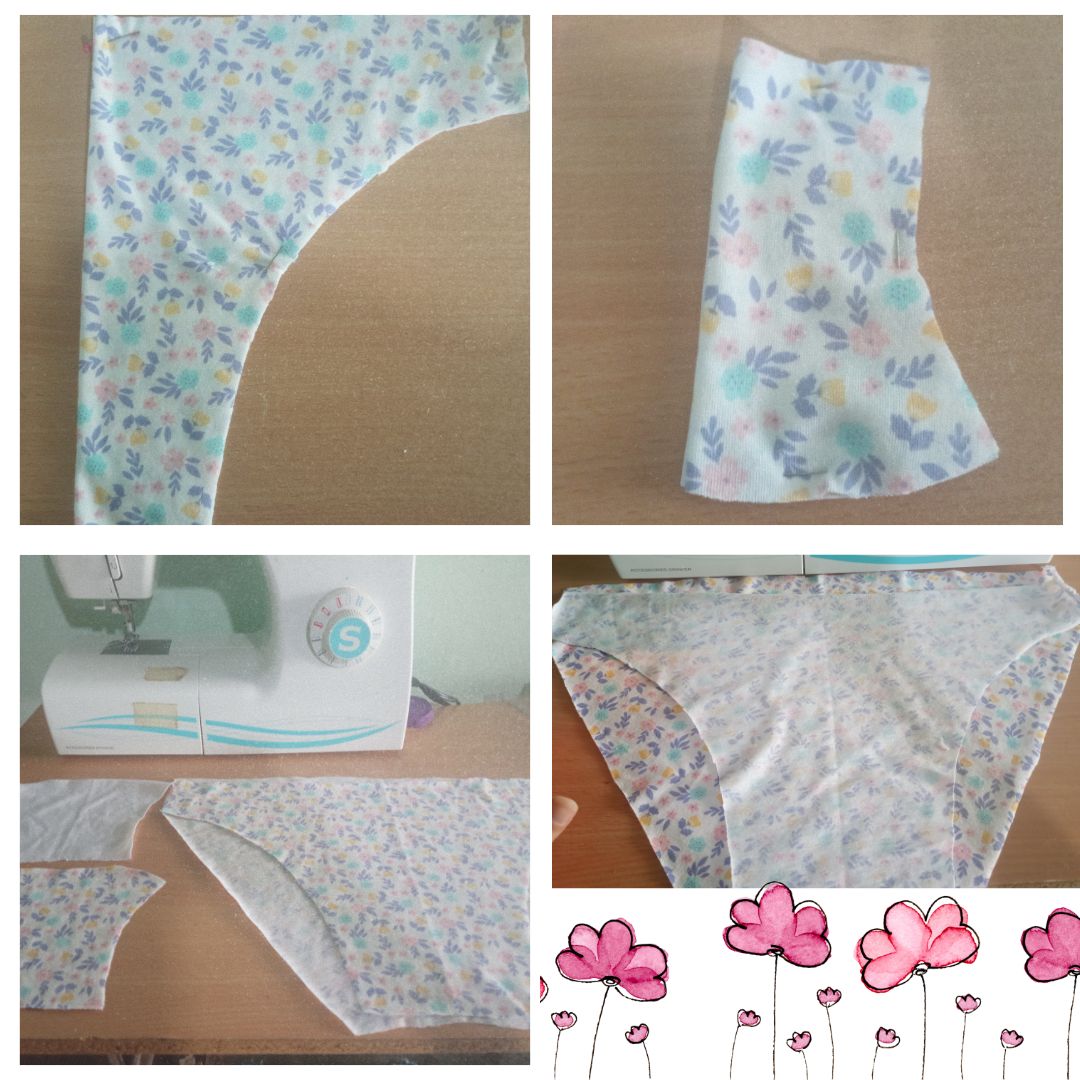
Take the bottom and the flowered fabric with the flowered fabric of the blumer right side together, the white fabric is placed on the left side but in the same position so that when sewing the seam of the bottom is covered with the white fabric, the first one is sewn, to sew the second fabric on the bottom, both fabrics are folded and joined together, in the image number four can be visualized, and the seam is sewn twice to secure it, then it is flipped over, leaving the seam invisible since the white fabric will cover the seams and thus avoid later discomfort due to the seams.
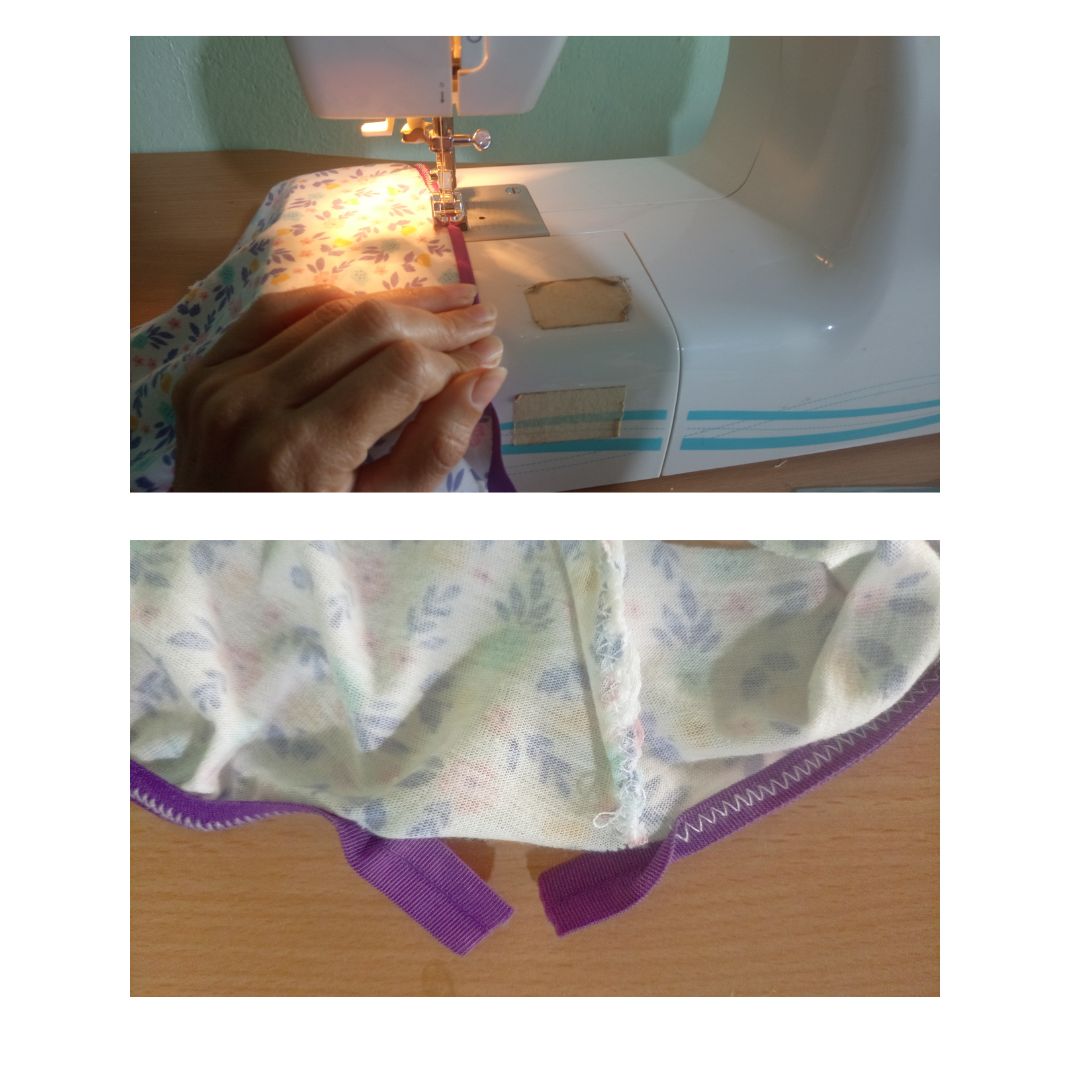
In this step the elastic or elastic bias is taken and folded so that it is on both sides of the edge (inside and outside) and is passed zig zag stitching once, so that it is well attached I set the machine so that the seam makes each stitch less long and thus ensure that the garment is more sewn.
Finally, with the thread and needle, both elastics are fixed and then the seam is sewn so that the joints between both elastics or elastic bias remain on the inside. Trim the excess thread, many seamstresses usually place a loop on the front of the piece so that there is no confusion when placing the piece but in this case as the front and back are of different sizes to simple times you can see which part corresponds to which, I for my part I dispensed to place the bow because I had no purple ribbon so I left it without that ornament for this occasion.
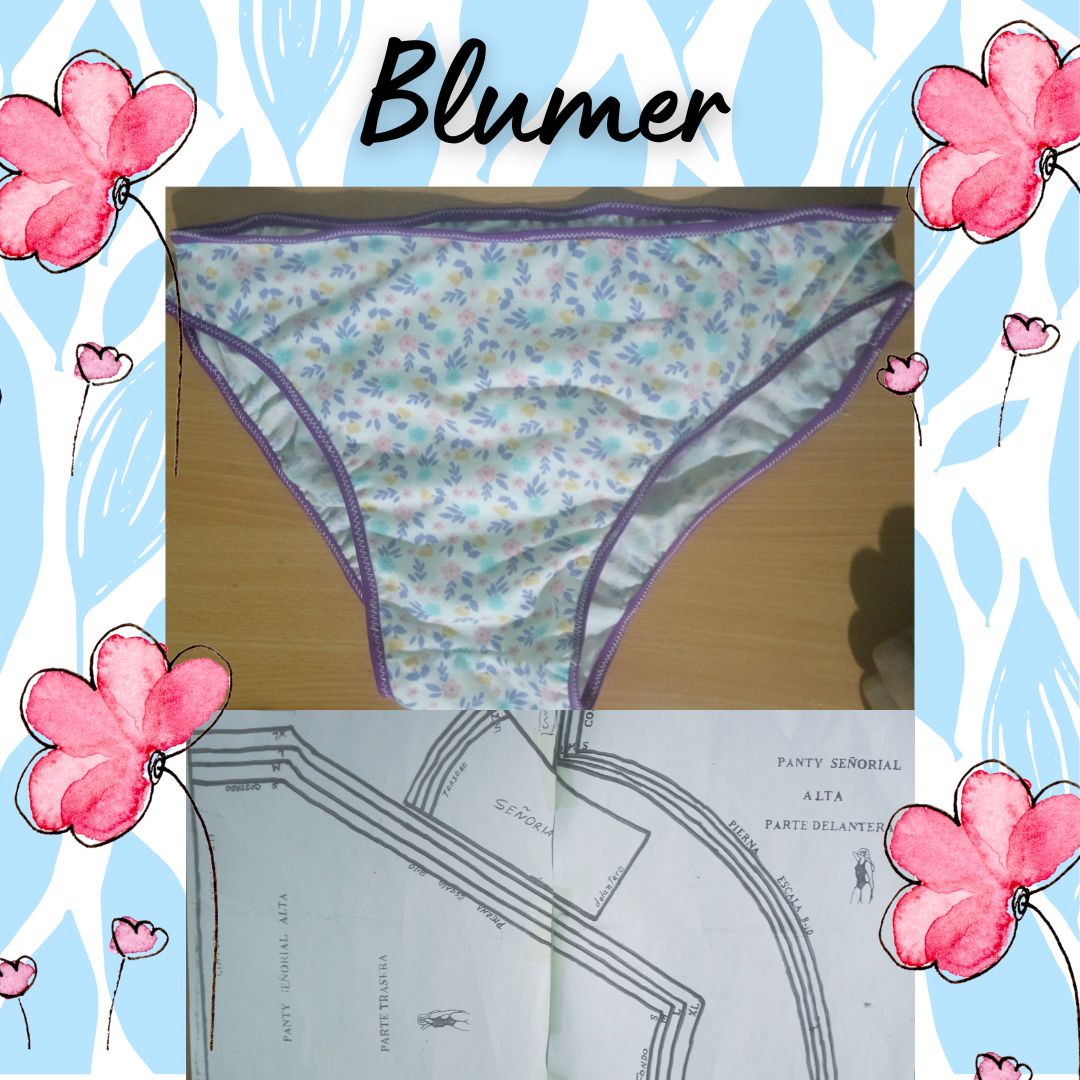
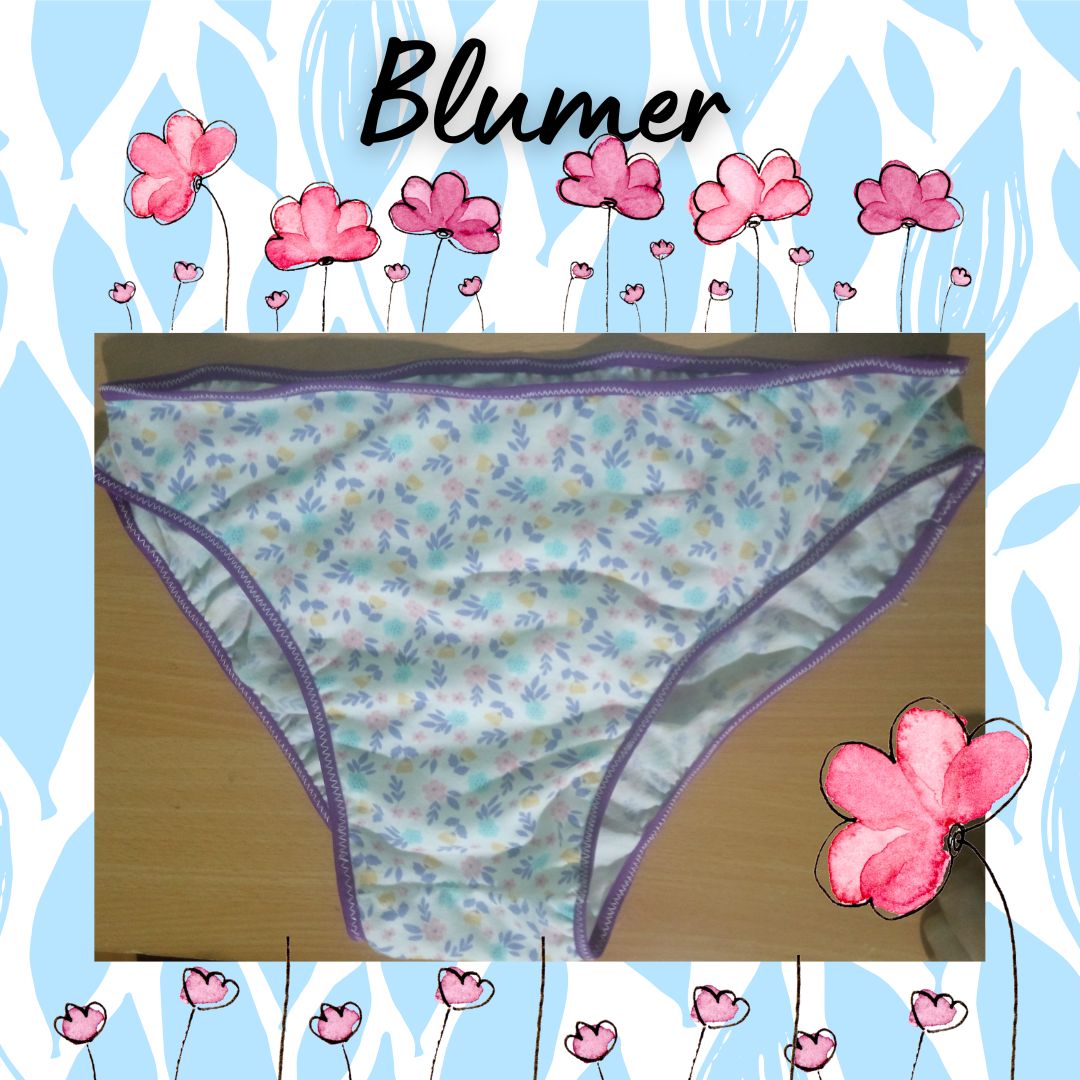
And then I show you the completion of the work, this is a stately blouse, which is high-waisted, this time I made it to give it to a special person so I tried to make it very nice and very stately, giving elegance.
What did you think of the day's sewing? I loved that it is a 100% cotton garment, this being a natural and soft material, it helps health, I hope that those who are encouraged to make this type of pieces.
See you next time with another craft.

Bienvenidos a mi blog!!
1/4 de tela pijamera de algodón
Tela blanca para el interior.
3 metros de Sesgo elastico
Patron
Hilo y aguja
Maquina de coser
Tijera
Alfileres
Elaboración
El primer paso es traspasar en papel bond el patrón principal para que así perdure, para este proyecto use la talla M que se calco del patrón, hecho este paso colocamos la tela al hilo, por donde estira se coloca a lo ancho, se dobla de manera que quede al ras del patrón, se coloca los alfileres para fijar el patrón de la tela y se recorta cada parte, la parte delantera, la parte trasera y se recorta para el fundillo o la parte de abajo de la blumer una de tela blanca y una de tela floreada.
Recortada cada una de las piezas se van ordenado al dobles de la tela, se unen cada una, primero los lados de la blumer pasando costura en forma de zig zag dos veces de forma que quede bien pegada y no se vaya a soltar con el paso del tiempo por el uso y las lavadas.
Se toma la parte de abajo y la tela floreada con la tela floreada de la blumer derecho con derecho, la tela blanca se coloca a la izquierda pero en la misma posición para que al coser la costura de la parte inferior quede tapada con la tela blanca, se cose la primera, para coser la segunda tela de la parte de abajo se dobla ambas telas y se unen, en la imagen número cuatro se puede visualizar, y se le pasa costura dos veces para asegurar, posteriormente se voltea, quedando así la costura invisible ya que la tela blanca tapara las costuras y así evitar molestias posteriores por las costuras.
En este paso se toma la elástica o sesgo elástico y se dobla que quede en ambos lados de la orilla (por dentro y por fuera) y se le pasa costura en forma de zig zag una vez, para que quede bien pegada yo configuro la maquina para que la costura realice cada puntada menos larga y así asegurar que la prenda quede mas cosida.
Para finalizar con el hilo y la aguja se fija ambas elásticas y luego se pasa costura con el fin que quede en la parte interna las uniones entre ambas elásticas o sesgo elastico. Se recortan los excesos de hilo, muchas costureras suelen colocarle un lazo en la parte de adelante de la pieza para que no haya confusión a la hora de colocar la pieza pero en este caso como la parte delantera y trasera son de diferentes tamaños a simple veces se puede visualizar cual parte corresponde a cual, yo por mi parte prescindi de colocarle el lacito porque no tenia cinta de color morado asi que la deje sin ese adorno por esta ocasión.
Y les muestro a continuación la terminación del trabajo, esta es una bluma señorial, que es de talle alto, en esta ocasión la realice para regalarla a una persona especial asi que trate de que quedara muy bonita y muy señorial, dando elegancia.
Que les parecio la costura del dia? Me encanto que es una prenda 100% de algodón, este al ser un material natural y suave, ayuda a la salud, espero que las que se animen en realizar este tipo de piezas.
Nos vemos en una próxima oportunidad con otra manualidad.
Diseño en Canva.com
Fotografías propias exclusivas para Hive
Translated with DeepLcom (free version)