
design in canva.com
This time I had a need for some pot holders for my kitchen since the ones I currently have needed a replacement, so I thought of making a pair to reuse a jean fabric that I had saved and so I could kill two birds with the same stone, to have a new pot holder which is essential for the kitchen, also to give a second life to a jean fabric and some scraps and why not, to bring you the step by step of a pair of pot holders for those who want to make their own pot holders and protect their hands in the kitchen.
Hola, amigos creativos, ¿cómo van sus creaciones? Espero que muy bien.
En esta oportunidad tuve una necesidad de unos agarra ollas para mi cocina ya que los que tengo actualmente necesitaban un reemplazo, así que pensé en realizar un par para así reutilizar una tela de jean que tenía guardada y así podía matar dos pájaros con el mismo tiro, tener un nuevo agarra ollas que es imprescindible para la cocina, también darle una segunda vida a una tela de jean y a unos pedacitos de retazos y por qué no, traerles el paso a paso de unos agarra ollas para los que quieran realizar sus propios agarra ollas propios y protejan sus manitos en la cocina.
I also remembered that my grandmother made her own pot holders, but at that time she didn't have a sewing machine so she sewed them by hand and they were very beautiful, so if you need a pot holder and you don't have a sewing machine you can also sew them by hand and they will be just as beautiful as the ones sewn by machine.
También recordé que mi abuelita realizaba sus propios agarra ollas, pero ella en ese momento no tenía máquina de coser así que los cosía a mano y le quedaban bien bonitos, así que si necesitas unos agarra ollas y no tienes máquina de coser también lo puedes realizar a mano y quedaran igual de hermosos que los que se cosen a máquina.
design in canva.com
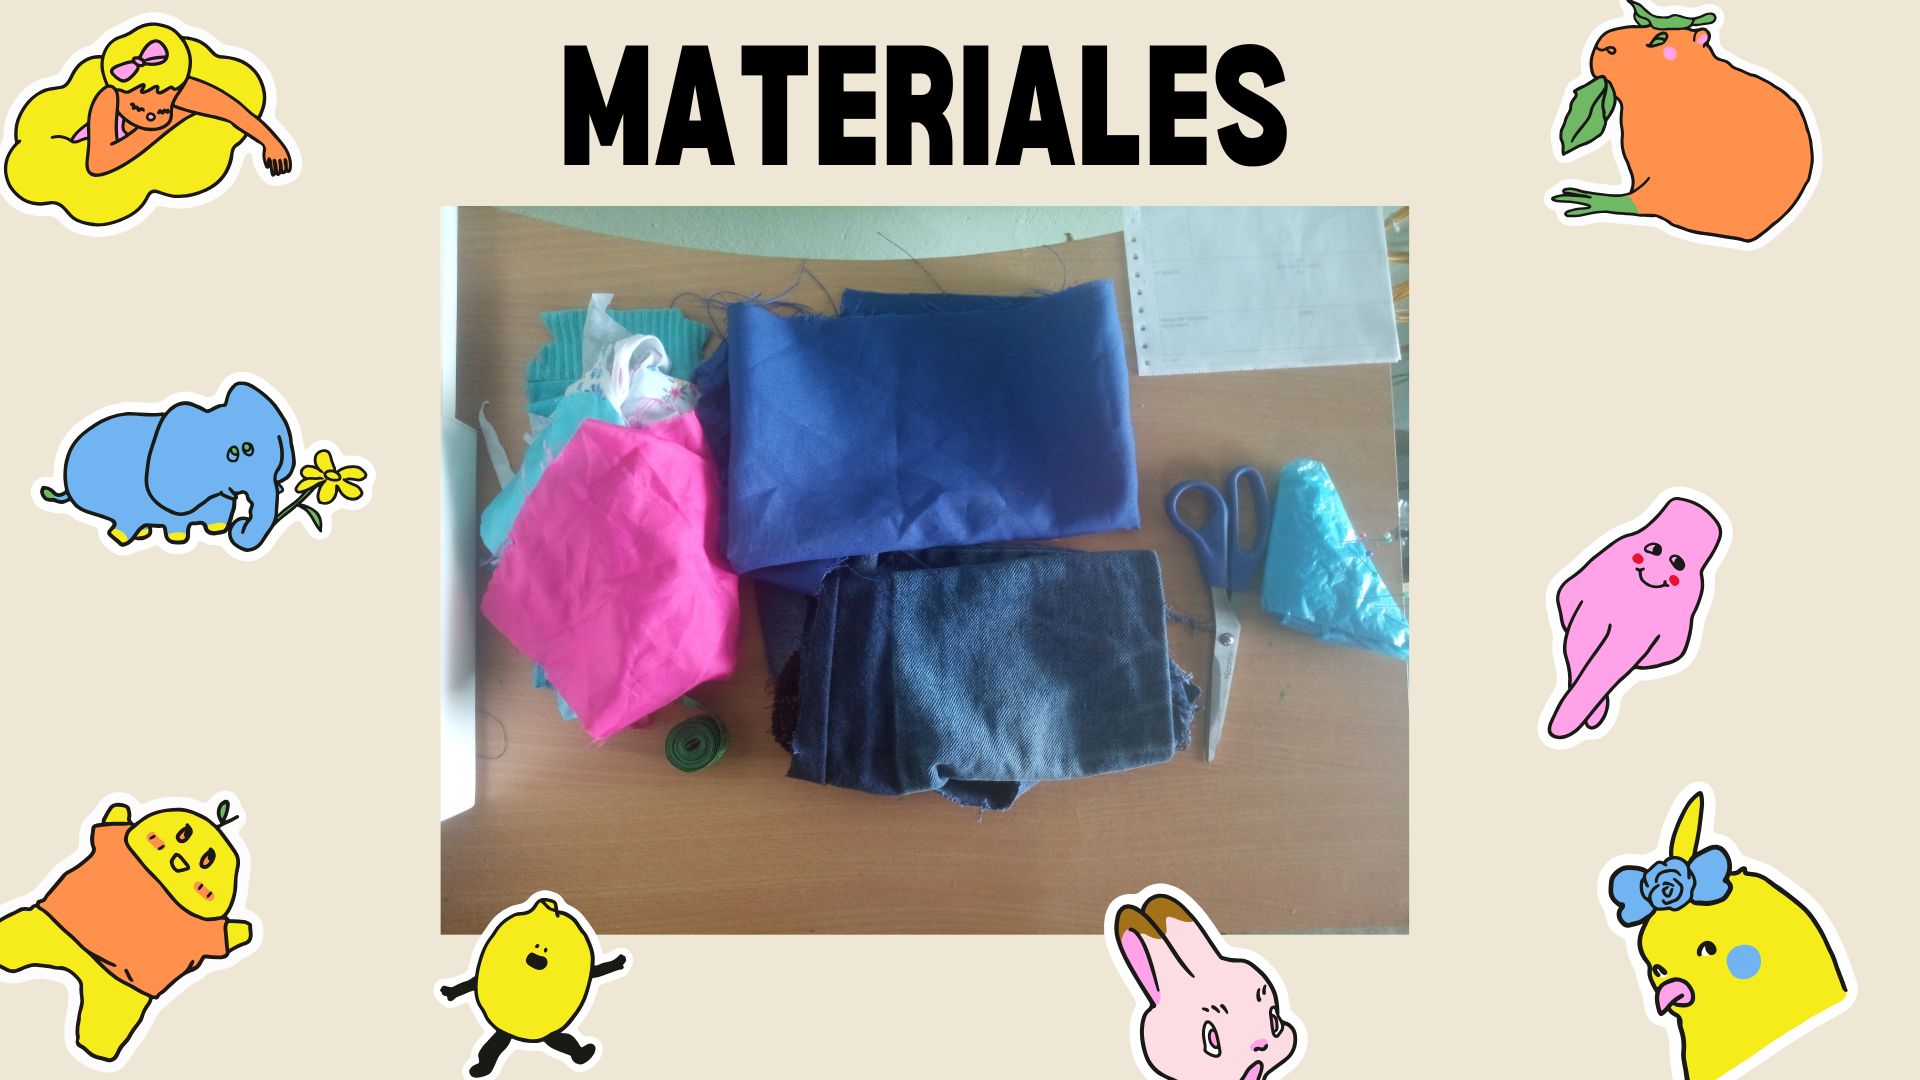
Here are the materials I used to make this practical project:
Denim fabric
Fabric to make the edges
Fabric scraps for the stuffing.
Scissors
Thread and needle
Pins
A pattern made from a recycled sheet
Something to mark the fabric (I used a piece of dry bath soap).
Ruler or tape measure for measuring.
Sewing machine
A continuación, te describo los materiales que utilice para realizar este práctico proyecto:
Tela de jean
Tela para hacer las orillas
Retazos de tela para el relleno.
Tijera
Hilo y aguja
Alfileres
Un patrón hecho con una hoja de reciclaje
Algo para marcar la tela (yo use un pedacito de jabón de baño seco)
Regla o cinta métrica para medir.
Máquina de coser
Procedure.
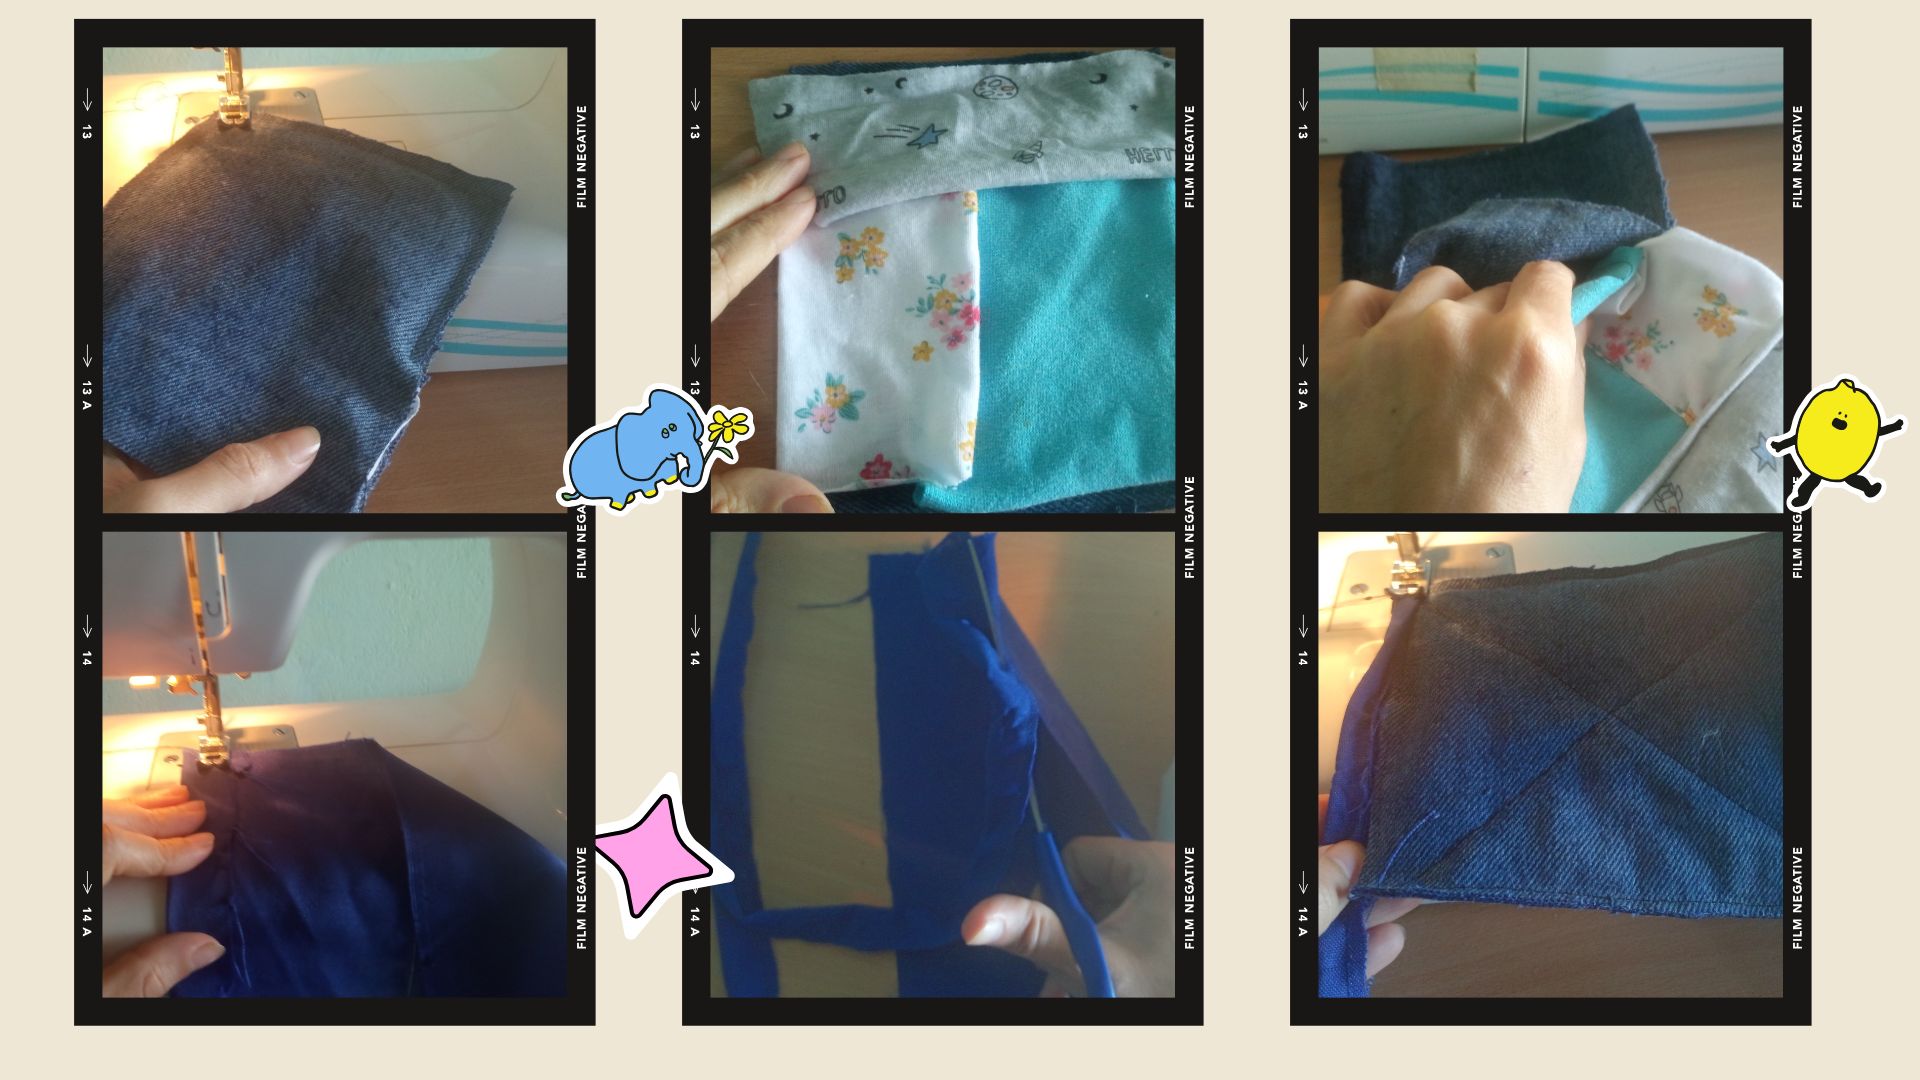
We take the sheet and with a ruler we measure a square of 17 cm wide by 15 cm high, cut, place on the fabric and make 4 squares, here we can fix with pins so that the pattern does not move on the fabric, after fixing the pattern on the fabric we help ourselves with a little piece of soap to mark the lines, then cut it out.
Place two squares with both sides facing the right side of the fabric and sew a straight seam along the edge of the square, leaving an unsewn edge to fill in, if you want to reinforce the seam you can sew it twice for safety. Repeat the operation with the other squares to obtain a pair.
Procedimiento.
Tomamos la hoja y con una regla medimos un cuadro de 17 cm de ancho por 15 cm de alto, recortamos, colocamos en la tela y haremos 4 cuadros, aquí podemos fijar con alfileres para que no se mueva el patrón en la tela, luego de fijado el patrón en la tela nos ayudamos de un pedacito de jabón para marcar las líneas, posteriormente se recorta.
Se coloca dos cuadritos con ambas caras al derecho de la tela y se le pasa costura recta por la orilla del cuadrado dejando una orilla sin coser para rellenar, si quieres reforzar la costura la puedes pasar dos veces por seguridad. Repetimos la operación con los otros cuadritos obteniendo un par.

We take several scraps and measure with the square that we sew and place it in such a way that they fill the box, then with the sewing machine we join the scraps so that the square remains, then we fill the pot holder and sew in the form of X so that the filling is fixed, then we close the opening that we left initially.
We take the fabric, in my case I used blue fabric and 4 centimeters wide, sew it with a straight seam to make a ribbon that will be placed around the pot holder.
Se agarra varios retazos y medimos con el cuadrado que cosimos y la colocamos de tal forma que rellenen el cuadro, luego con la máquina de coser unimos los retazos para que quede el cuadrito, posteriormente rellenamos el agarra ollas y cosemos en forma de X para que el relleno quede fijo, luego cerramos la abertura que dejamos inicialmente.
Tomamos la tela en mi caso use tela de color azul y 4 centímetros de ancho, se cose con costura recta para realizar una cinta que se colocara alrededor del agarra olla.
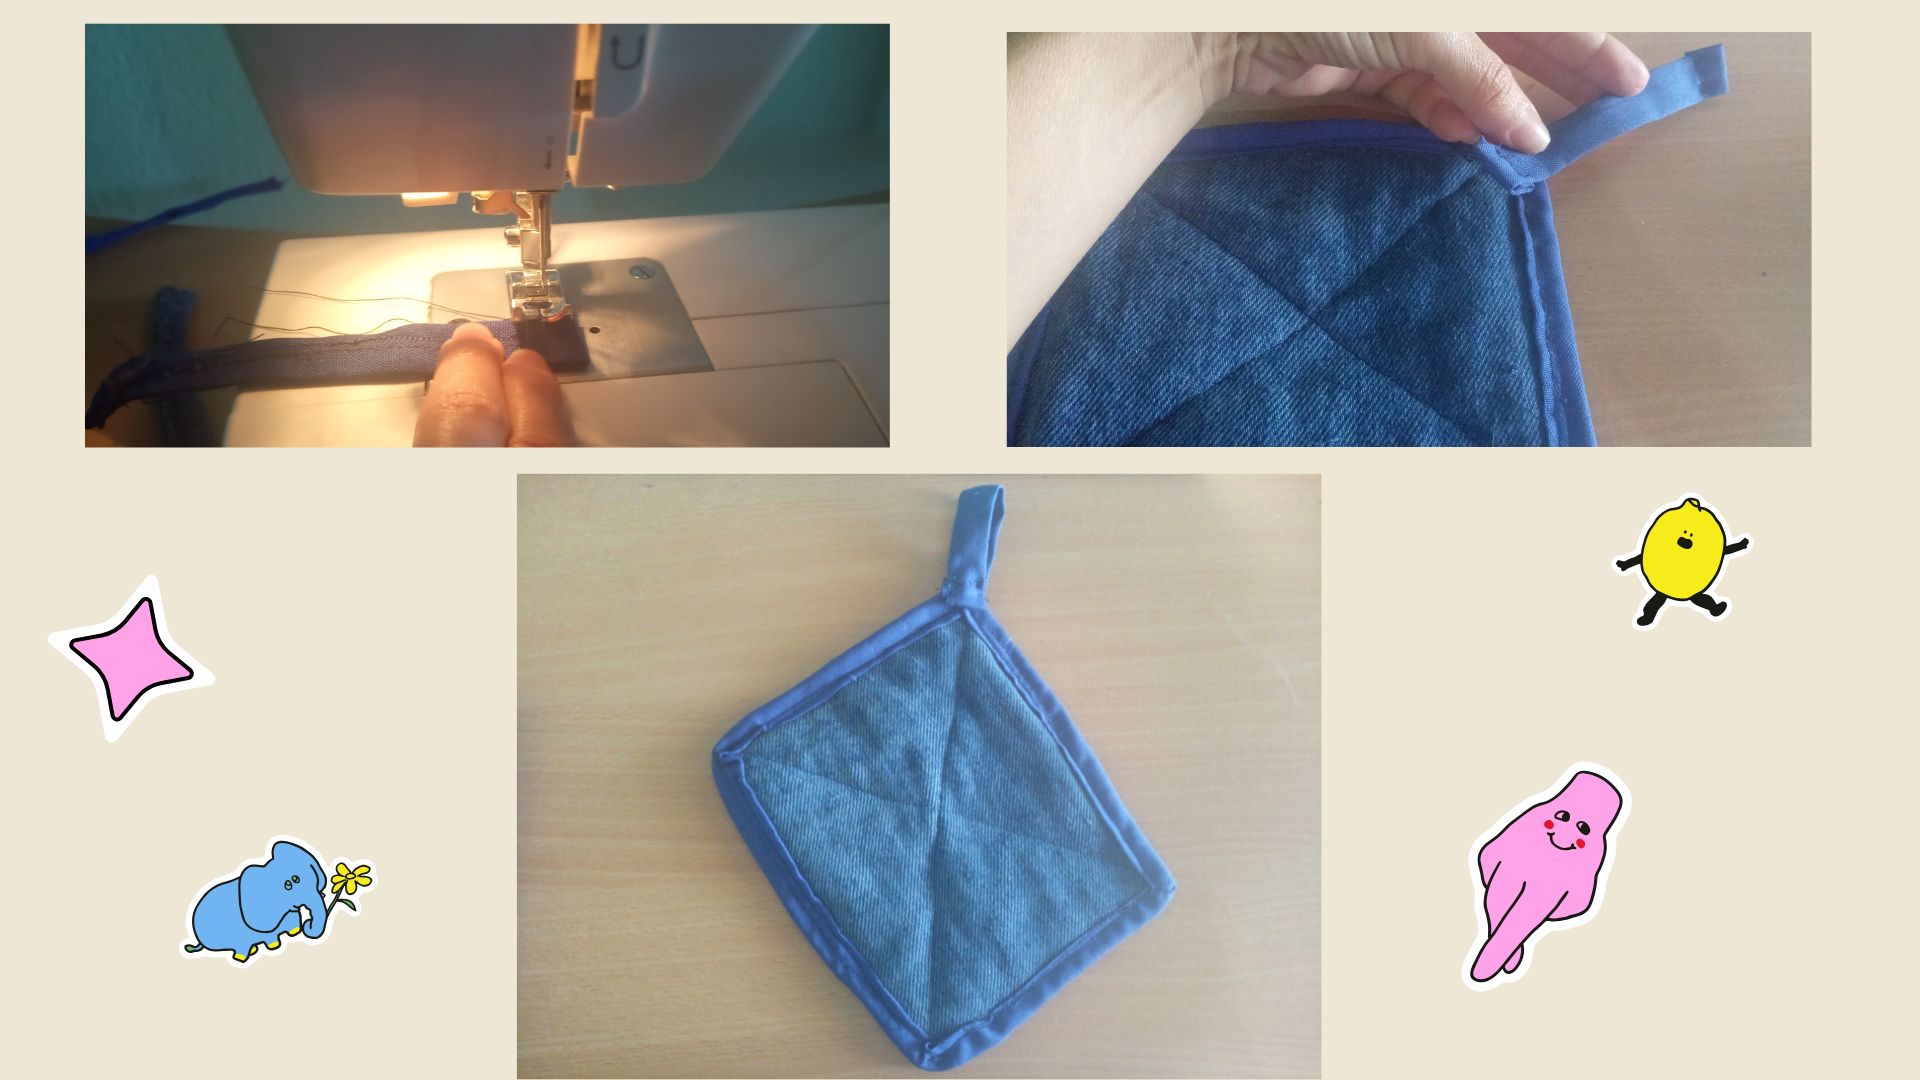
After sewing, the excess fabric is trimmed if necessary and the seam is placed in the middle of the tape to cover the seam.
It is placed around the pot holder covering the edge and with thread and needle it is enough so that the seam does not move (I did this step after I made a mistake and I had to unravel it because the fabric moved). Then sew with a straight seam all around.
Take a small piece of ribbon and make a holder where the pot holders will be hung and sew it manually with thread and needle.
Después de cosido se recorta los excesos de tela si fuese el caso y se coloca la costura realizada en el medio de la cinta para tapar la costura.
Se coloca alrededor del agarra ollas tapando la orilla y con hilo y aguja se bastea para que no se nos mueva la costura, (este paso lo realice luego de equivocarme y tener que desbaratar por moverse la tela). Después se cose con costura recta por todo el alrededor.
Se toma un pedacito de cinta y se hace un sostenedor donde va a estar guindado los agarra olla y se cose manualmente con hilo y aguja.
And so we are left with the craft of the day, beautiful pot holders that are so useful when it comes to cooking and thus avoid accidents due to burns. I hope you liked the pot holder, I loved it because I was able to reuse those little scraps that I had too many.
See you another time with another creation, see you then.
Y así nos queda la manualidad del día, unos hermosos agarra ollas que son tan útiles a la hora de cocinar y así evitar accidentes por quemaduras. Espero que les haya gustado el agarra olla, a mí me encanto porque pude reutilizar esos retazos pequeñitos que tenía en demasía.
Nos vemos en otra oportunidad con otra creación, hasta entonces.

Design on canva.com
translator deepl.com
own photos taken with a Redmi 10 cell phone.
Es un accesorio muy útil que no puede faltar en mi cocina porque de no tenerlos me siento muy incómoda, te quedaron muy bien.
Si, es imprescindible tenerlo en la cocina para no hacernos dano, saludos, gracias por pasar
Gracias también, por compartir tu excelente proyecto