
EN
For my part I tell you that these last days I have returned to sewing, I had months that I did not touch a sewing machine because I was focused on the realization of other crafts because I like to use crafts made by me according to what I need.
Today I bring you a tutorial of a set of ladies underwear, this time I'm going to make the complete set, something new for me, as the top should be to the body so there are no mishaps, when I tried this model it fit as I wanted. Next, I show you the step by step of the creation of my project.
Materials we will need
.jpg)
Printed cotton fabric
White cotton fabric
Old pink elastic bias
Scissors
Pattern
Thread
Water
Tape
Sewing machine.
Pins
Procedure
We take the printed fabric and place it where it stretches, we take the pattern from the back of the blouse and we fix it to the fabric using pins, then we cut it leaving an extra centimetre which will be the seam allowance.
We remove the pins and now we take the pattern of the front part of the blouse and we pin it again and cut it out.
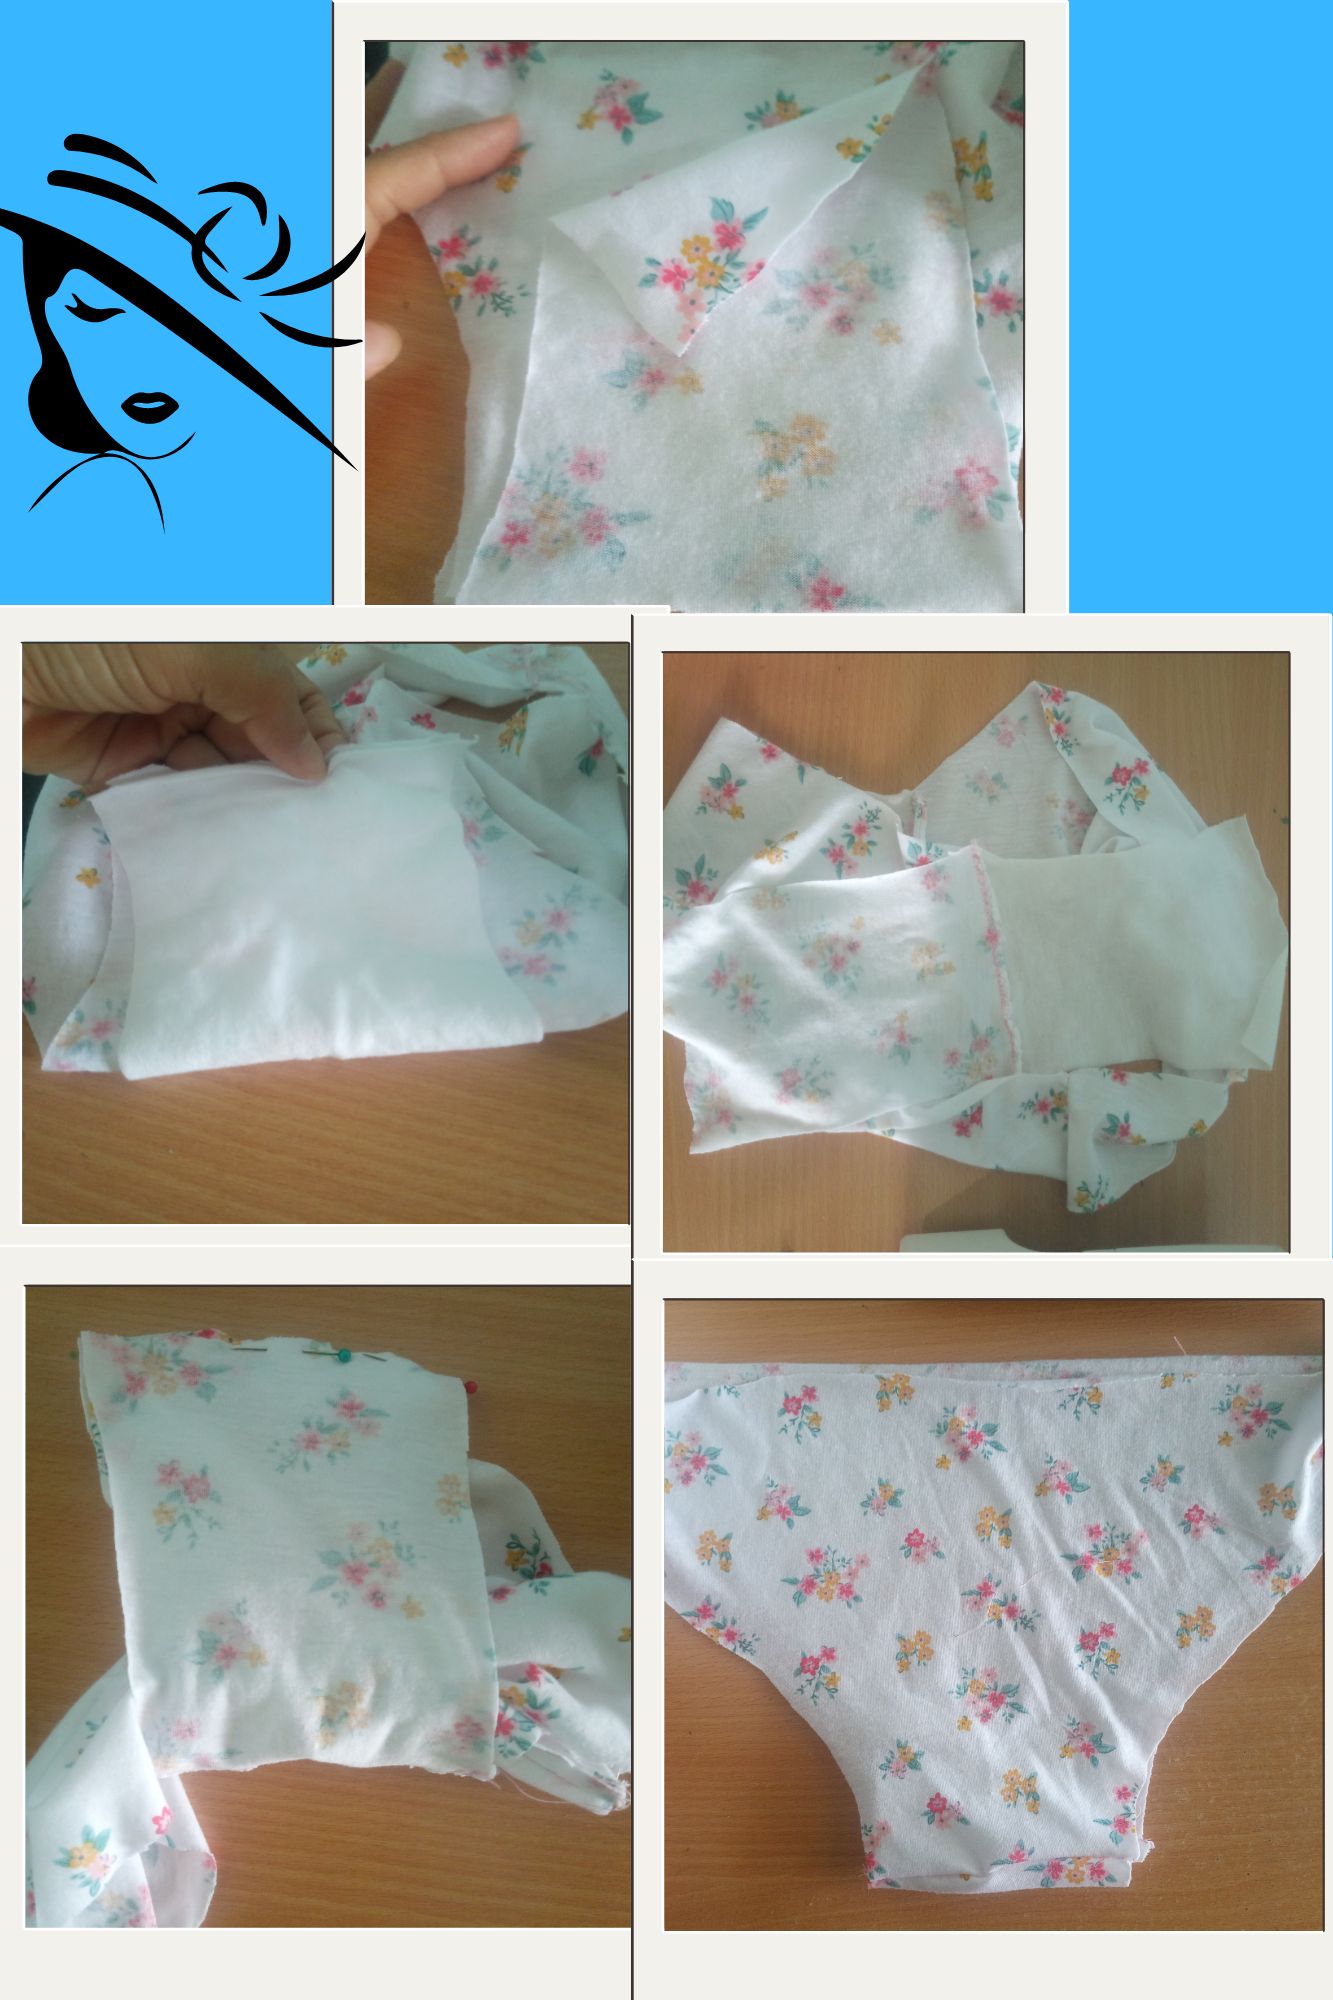
For the bottom part we take the square, pin and cut out a piece of printed fabric and another piece of white fabric, join the pieces together and sew.
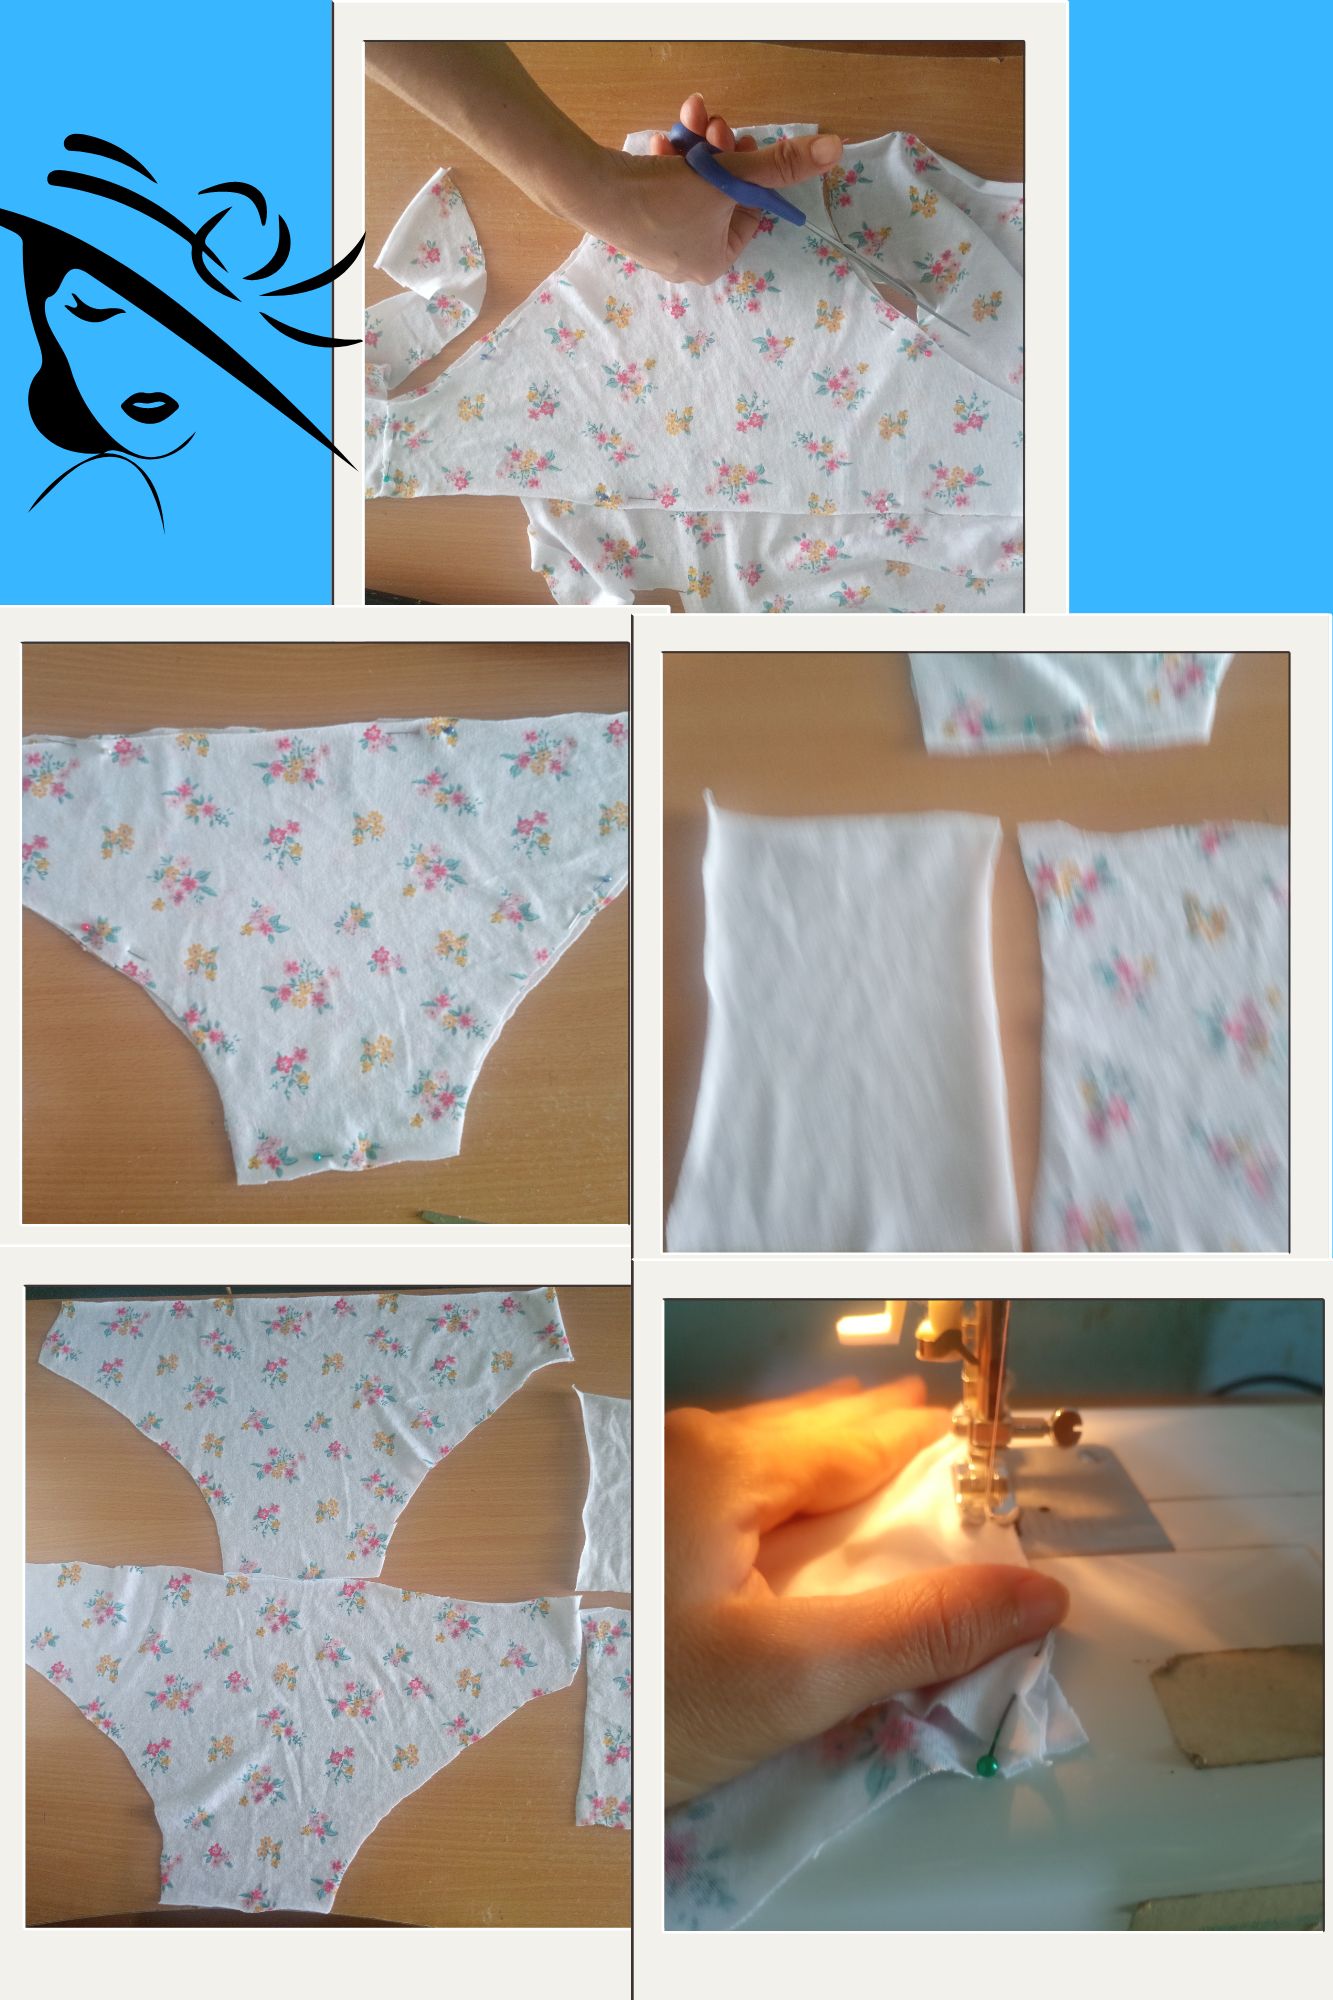
We place both fabrics, the front and the back, on the back of the fabric and sew with the machine.
To sew the bottom side, place both fabrics on the patterned side next to the white fabric and sew, then turn over so that the seam is on the inside.
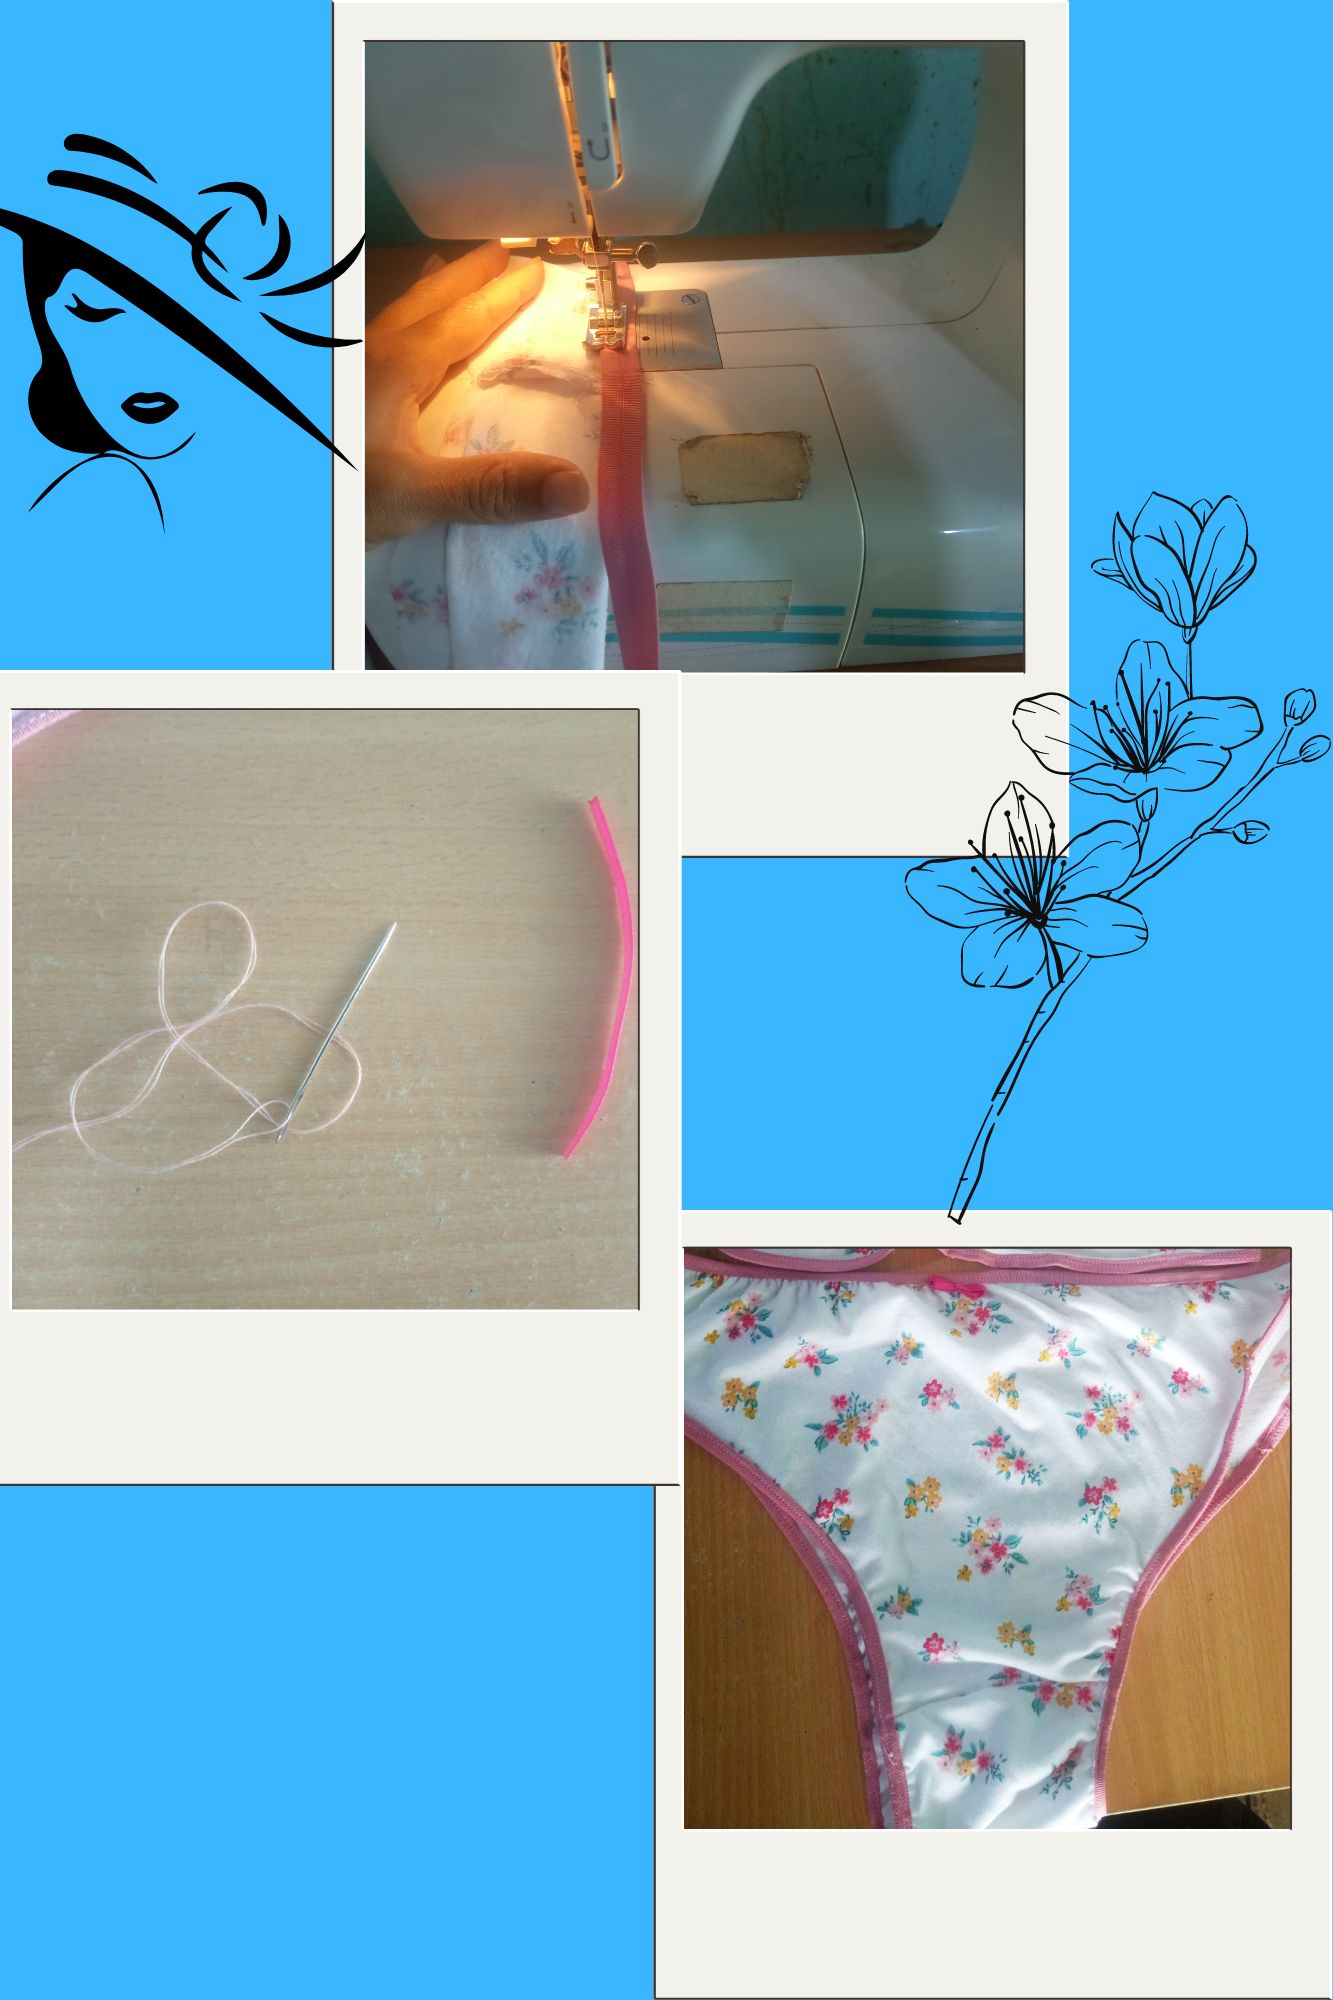
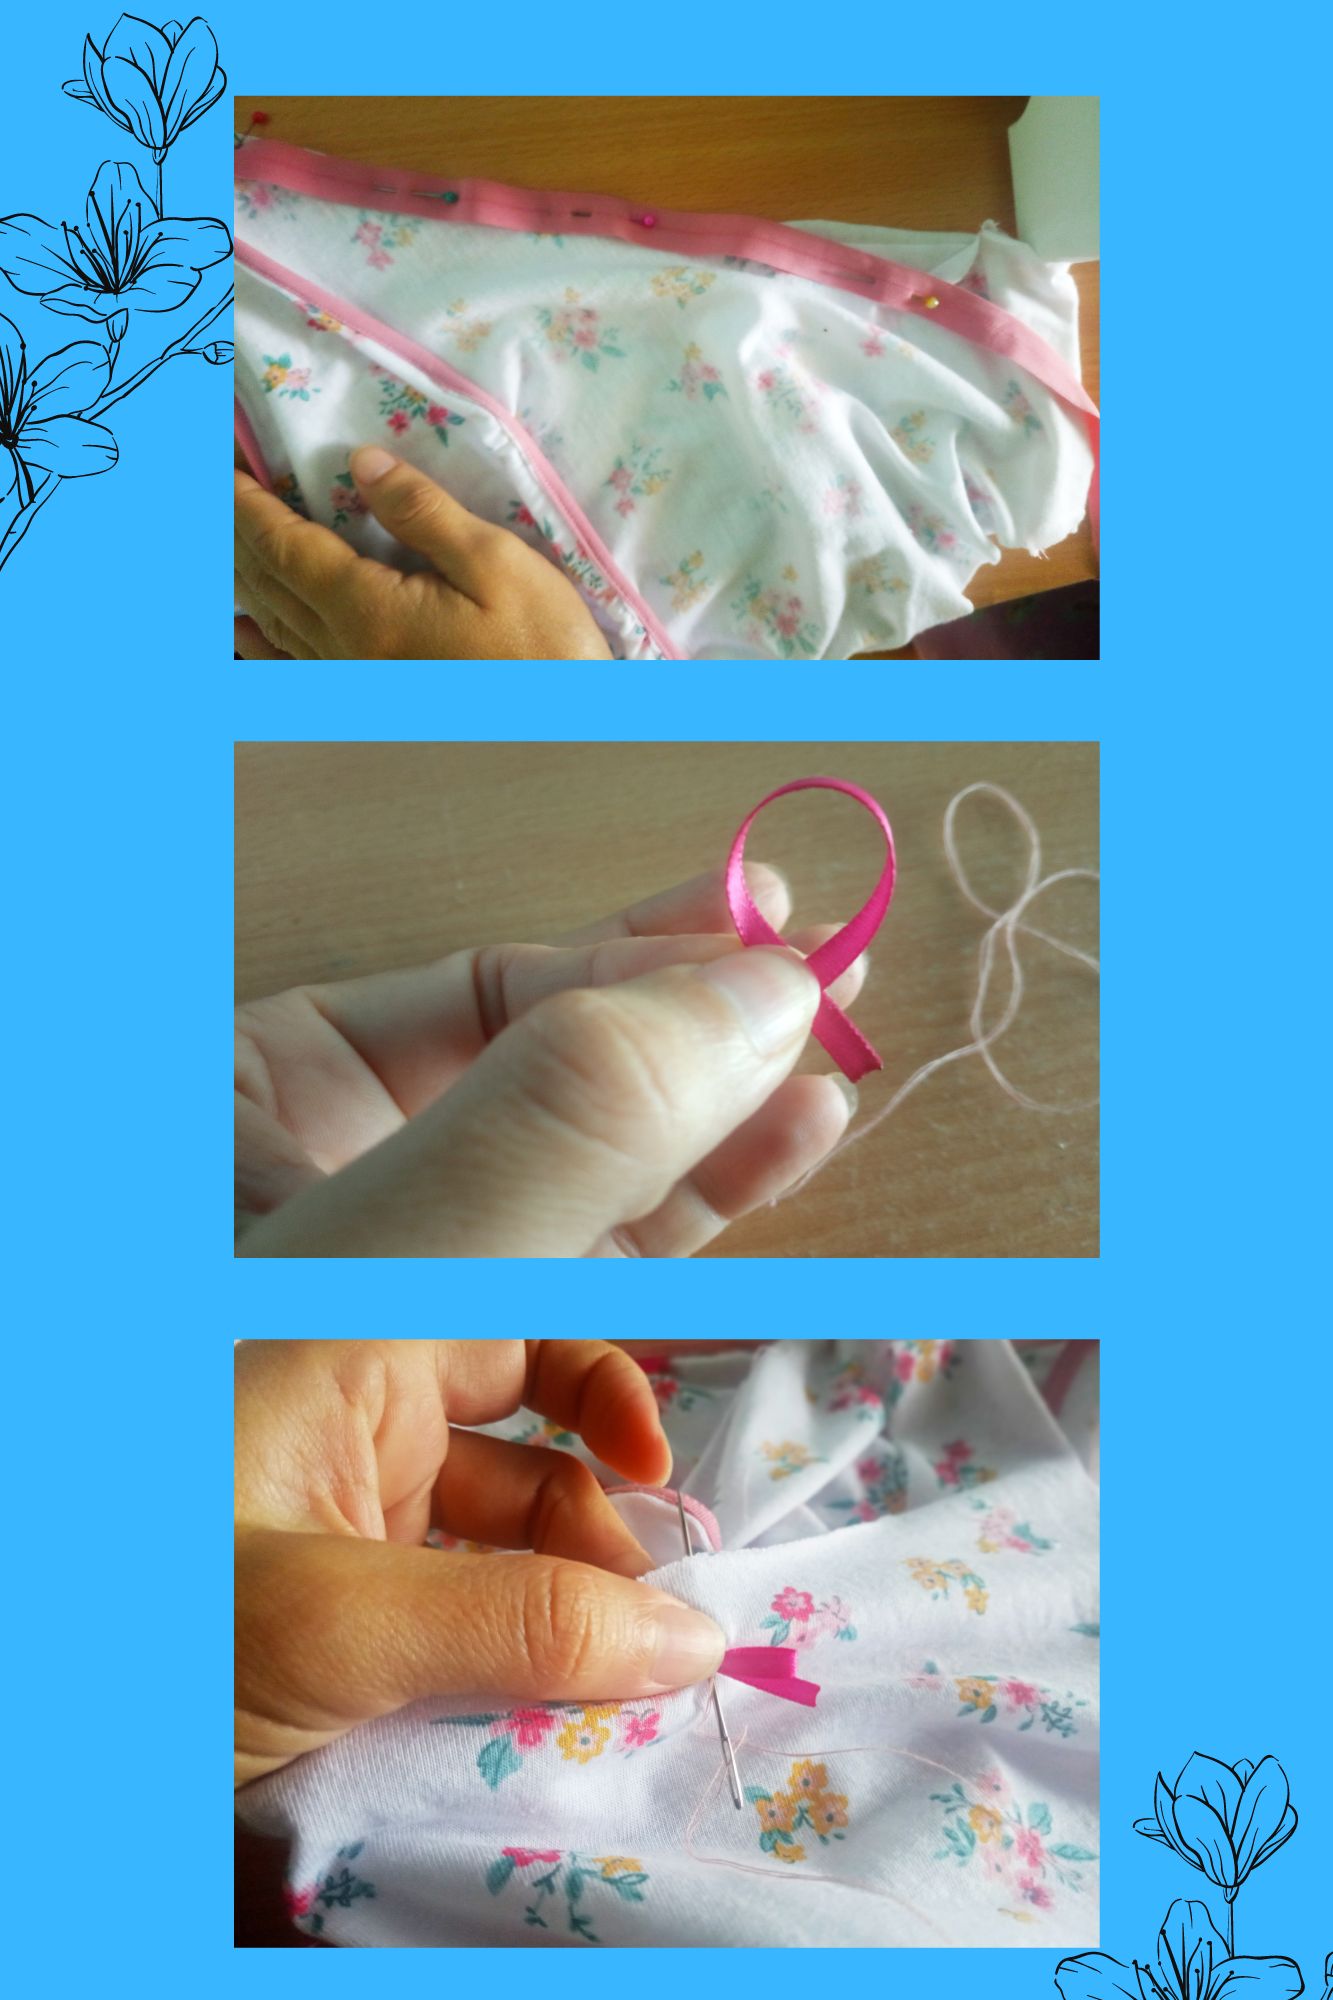
To place the elastic bias binding, pin the fabric flush and then sew a straight seam, after finishing, fold the elastic bias binding in half and sew again with a straight seam, to seal, sew with a zigzag seam.
Find the middle of the blouse and make a bow with the ribbon and proceed to sew, thus completing the first piece.
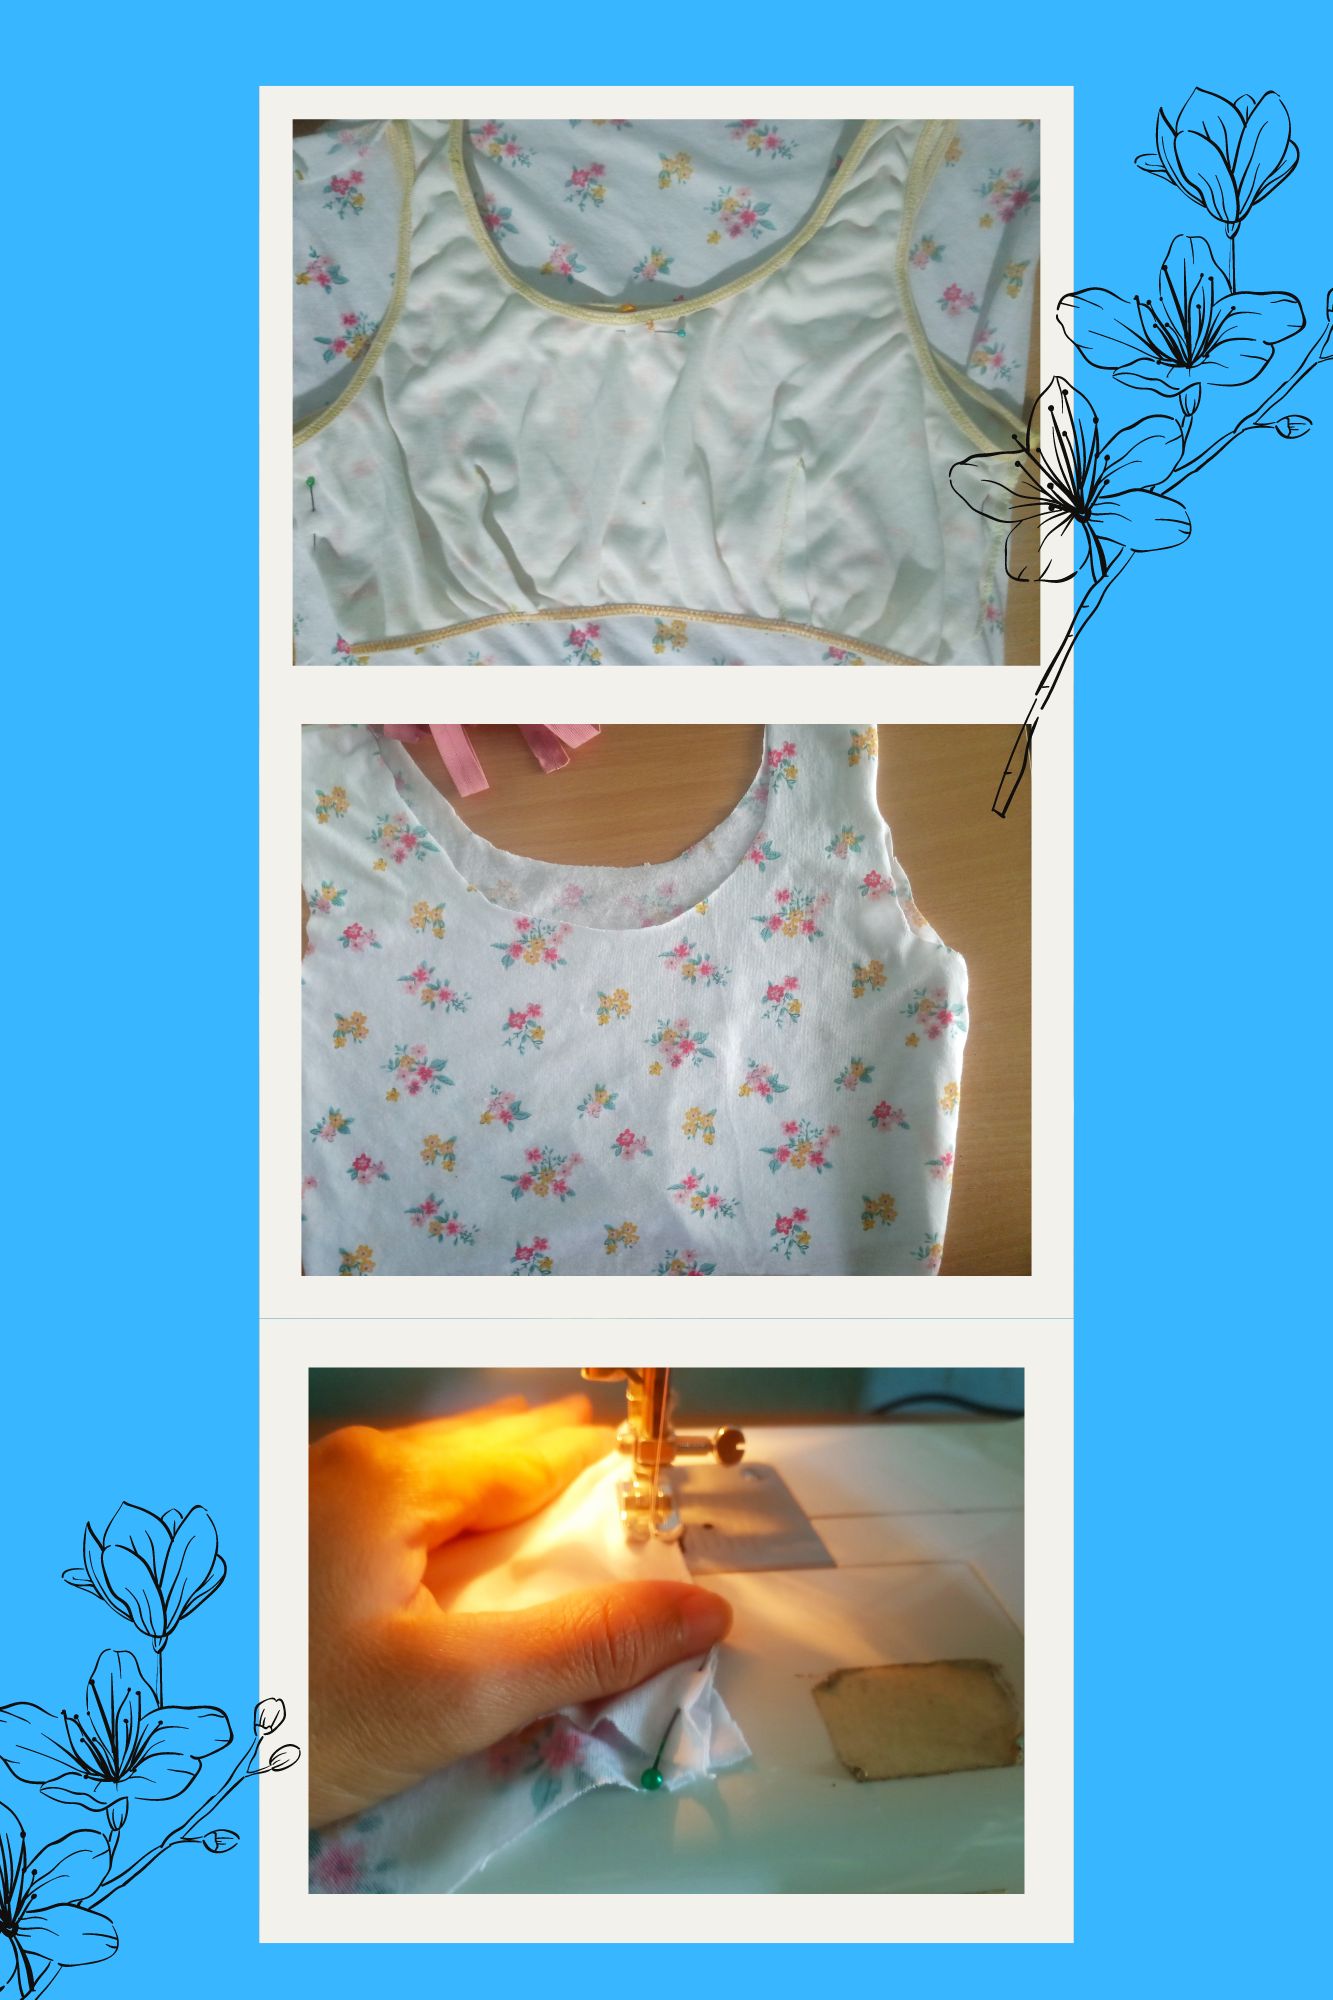
For the top part we take the printed fabric and fold it where it stretches, we take the pattern, we fix it with pins and we cut it leaving a centimetre more for the seam.
Then we place both fabrics inside out and proceed to sew first with a straight seam and then with a zigzag seam.
To attach the bias binding, sew the front part stretching the bias binding to about 5cm, then fold the bias binding and sew it again with straight stitching to finish it off with zigzag stitching.
Find the centre of the fabric on the front and sew the loop to finish.
And so we are left with our ladies underwear set, which is very comfortable because it is made of cotton, and we can also save money by making our own clothes.
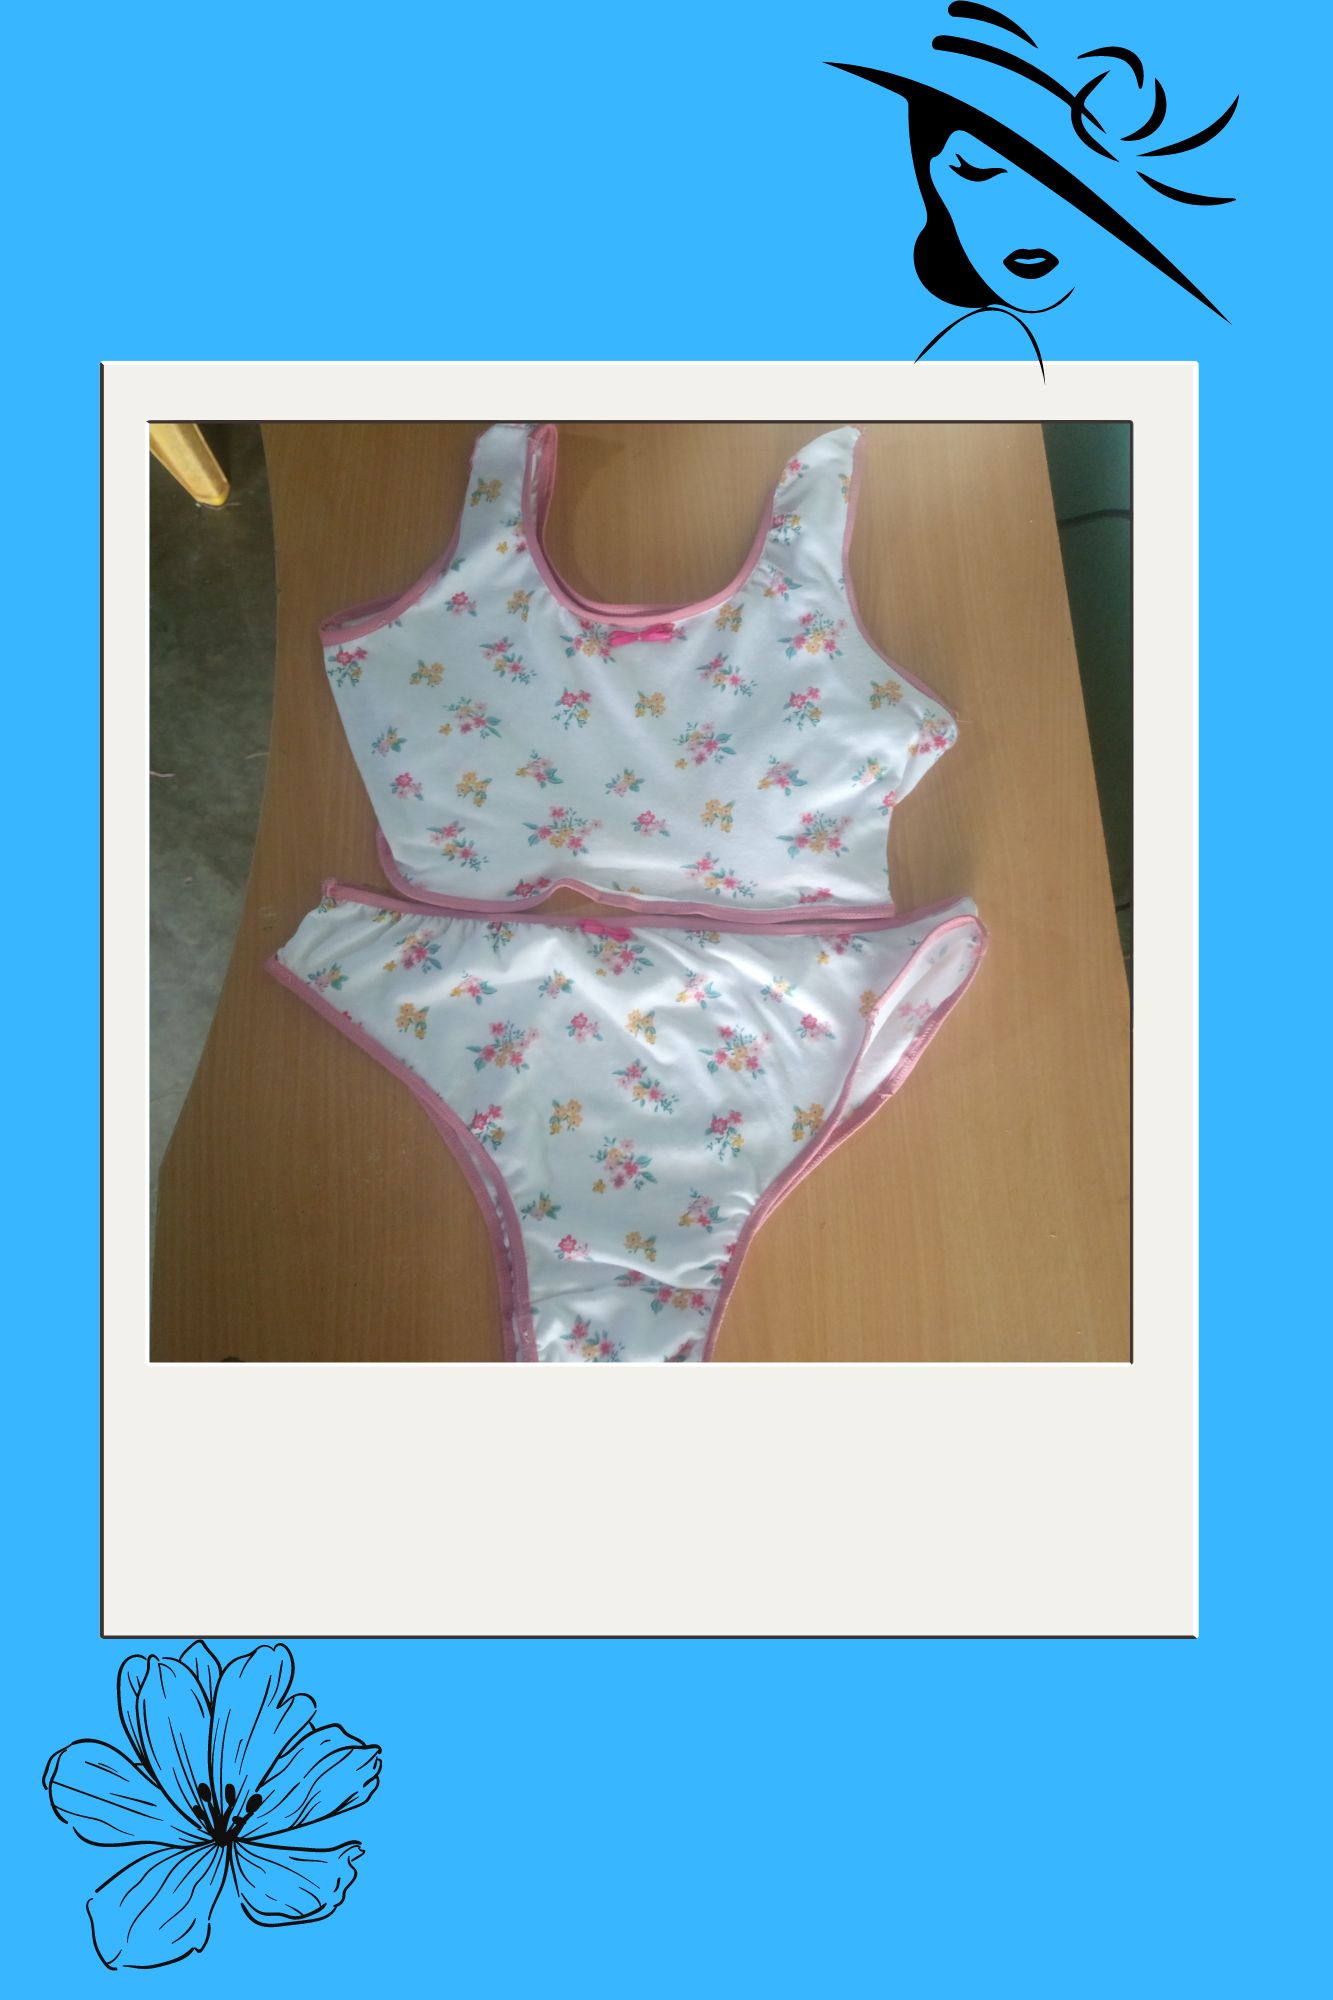
What do you think about the craft of the day? I hope you liked it like me, when you try the garments feel comfortable because it is 100% cotton fabric and more because it was made with dedication and love, thanks for stopping by, see you in a next craft project soon.

ES
Por mi parte les cuento que estos últimos días he vuelto a coser, tenía meses que no tocaba una máquina de coser ya que estaba enfocada en la realización de otro tipo de artesanías ya que me gusta usar artesanías realizadas por mí según lo que voy necesitando.
El día de hoy les traigo un tutorial de conjunto de ropa interior de dama, esta vez voy a realizar el conjunto completo, algo nuevo para mí, ya que la parte de arriba debe quedar al cuerpo para que no haya percances, cuando probé este modelo se ajustó como deseaba. A continuación, les muestro el paso a paso de la creación de mi proyecto.
Materiales que vamos a necesitar
Tela de algodón estampada
Tela de algodón blanca
Sesgo elástico color rosa vieja
Tijera
Patrón
Hilo
Agua
Cinta
Máquina de coser.
Alfileres
Procedimiento
Tomamos la tela estampada y la colocamos por la parte donde estira, tomamos el patrón de la parte trasera de la bluma y lo fijamos a la tela usando alfileres, posteriormente recortamos dejando un centímetro de más que será el centímetro de costura.
Quitamos los alfileres y ahora tomamos el patrón de la parte delantera de la bluma y volvemos a fijar con alfileres y recortamos.
Para la parte de abajo tomamos el cuadro, fijamos con alfileres y recortamos una pieza de tela estampada y otra pieza de tela de color blanco, unimos las piezas y cosemos.
Colocamos ambas telas, la parte delantera y la trasera por el detrás de la tela y cosemos con la máquina.
Para coser la parte de abajo colocamos ambas telas por el estampado junto a la tela de color blanco y cosemos, después volteamos para que quede la costura por la parte interna.
Para colocar el sesgo elástico se fija con alfileres la tela al ras y luego se pasa costura recta, después de terminar se dobla a la mitad el sesgo elástico y se vuelve a coser con costura recta, para sellar se pasa con costura en zigzag.
Se busca la mitad de la bluma y se realiza un lacito con la cinta y procedemos a coser y asi nos queda terminada la primera pieza.
Para la cotica o parte de arriba tomamos la tela estampada y la doblamos por la parte donde estira, tomamos el patrón, lo fijamos con alfileres y recortamos dejando un centímetro demás para la costura.
Luego colocamos ambas telas por el revés y procedemos a coser primero con costura recta y luego con costura en forma de zigzag.
Para pegar el sesgo se va cosiendo la parte delantera estirando a unos 5cm el sesgo, luego se dobla el sesgo y se vuelve a coser con costura recta para rematar se fija con costura en forma de zigzag.
Se busca el centro de la tela en la parte delantera y se cose el lazo para finalizar.
Y así nos queda nuestro conjunto de ropa interior para damas, que es muy cómodo por ser de algodón, además de ello podemos ahorrar dinero realizando nuestras propias prendas.
Que te parece la manualidad del día? Espero que te haya gustado como a mi, al probar las prendas se sienten cómodas porque es de 100% tela de algodón y mas porque se realizo con dedicación y cariño, gracias por pasar, nos vemos en un próximo proyecto de manualidad próximamente.
Diseño en Canva.com
Fotografias propias exclusivas para Hive
Translated with DeepL.com (free version)
.jpg)
I'm not so fond of floral underwear, but these are cute and creative. Nice job!
There are unicolour fabrics that I think would make nice underwear. Thank you for your visit.
Congratulations @liyuxiexie! You have completed the following achievement on the Hive blockchain And have been rewarded with New badge(s)
Your next target is to reach 700 replies.
You can view your badges on your board and compare yourself to others in the Ranking
If you no longer want to receive notifications, reply to this comment with the word
STOPCheck out our last posts:
Thanks