
Diseño en Canva. com
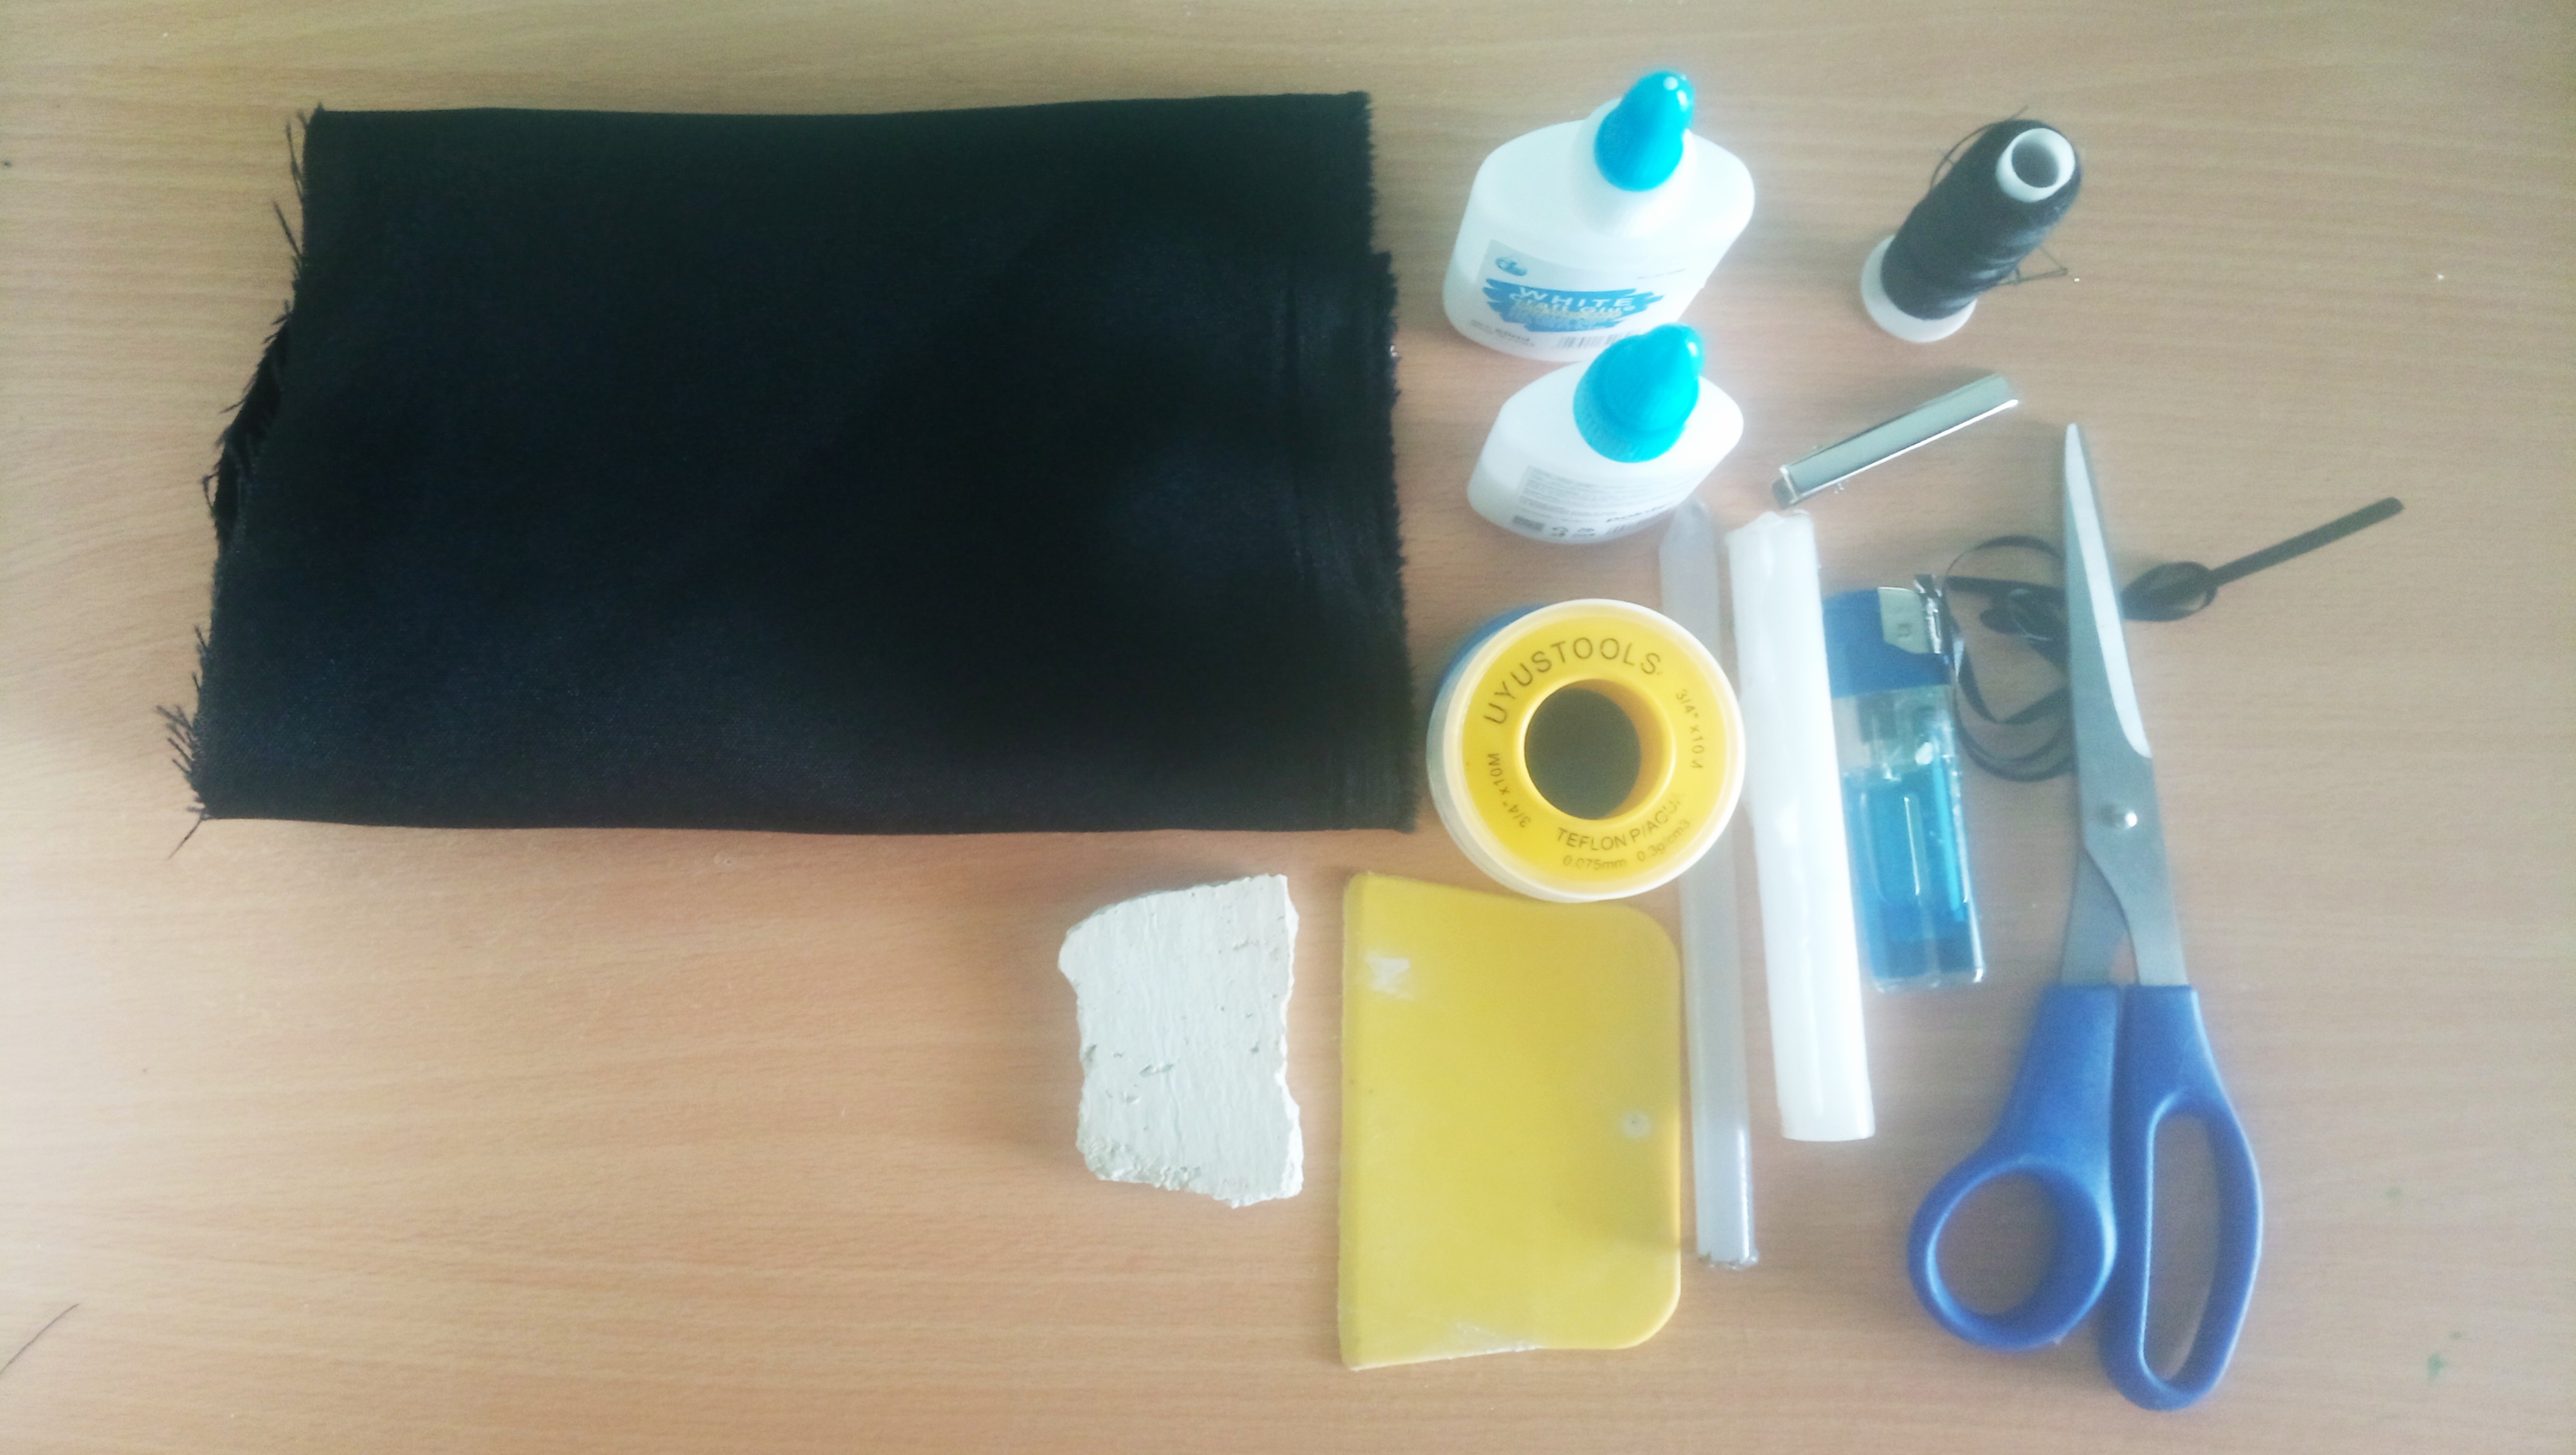
MATERIALES
Tela poliéster del color que desee
Un cilindro y un redondo que servirá como patrón
Un pedacito de cartón con forma de un pétalo de flor
Cinta de tela delgada
Pega escolar
Espátula pequeña
Silicon
Tiza
Tijera
Vela
Encendedor
Hijo y aguja
Pinza tipo caimán grande
PROCEDIMIENTO
El primer paso es tomar la tela de poliéster y colocarle pegamento luego con la espátula se pasa por toda la tela y se pone a secar por dos horas aproximadamente para que seque bien, este procedimiento se realiza con el fin de que la tela se ponga más dura.
Con un círculo se coloca sobre la tela y con una tiza se marca cada circulo, yo marque 31 círculos, el numero de círculos dependerá del ancho de la boquilla del cilindro.
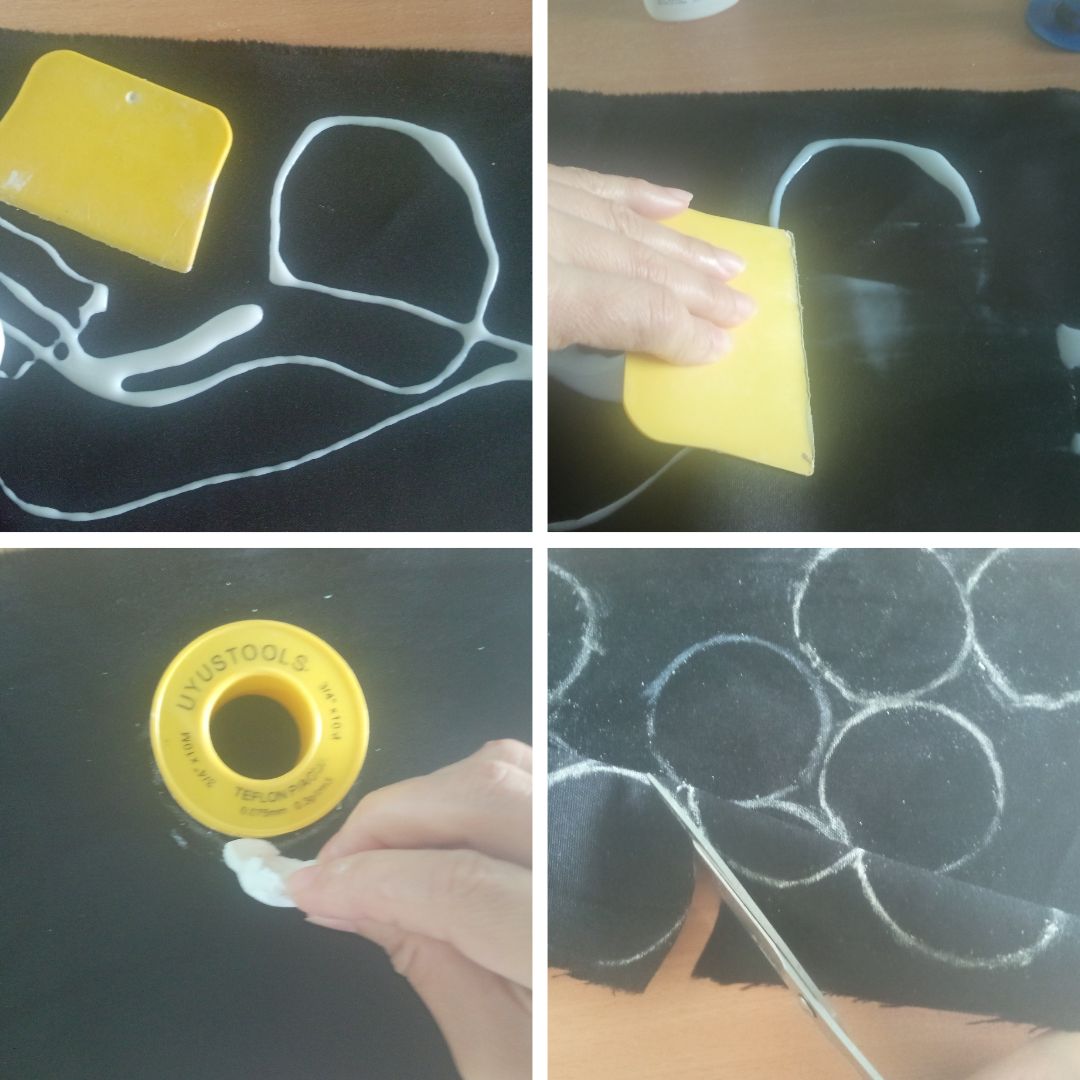
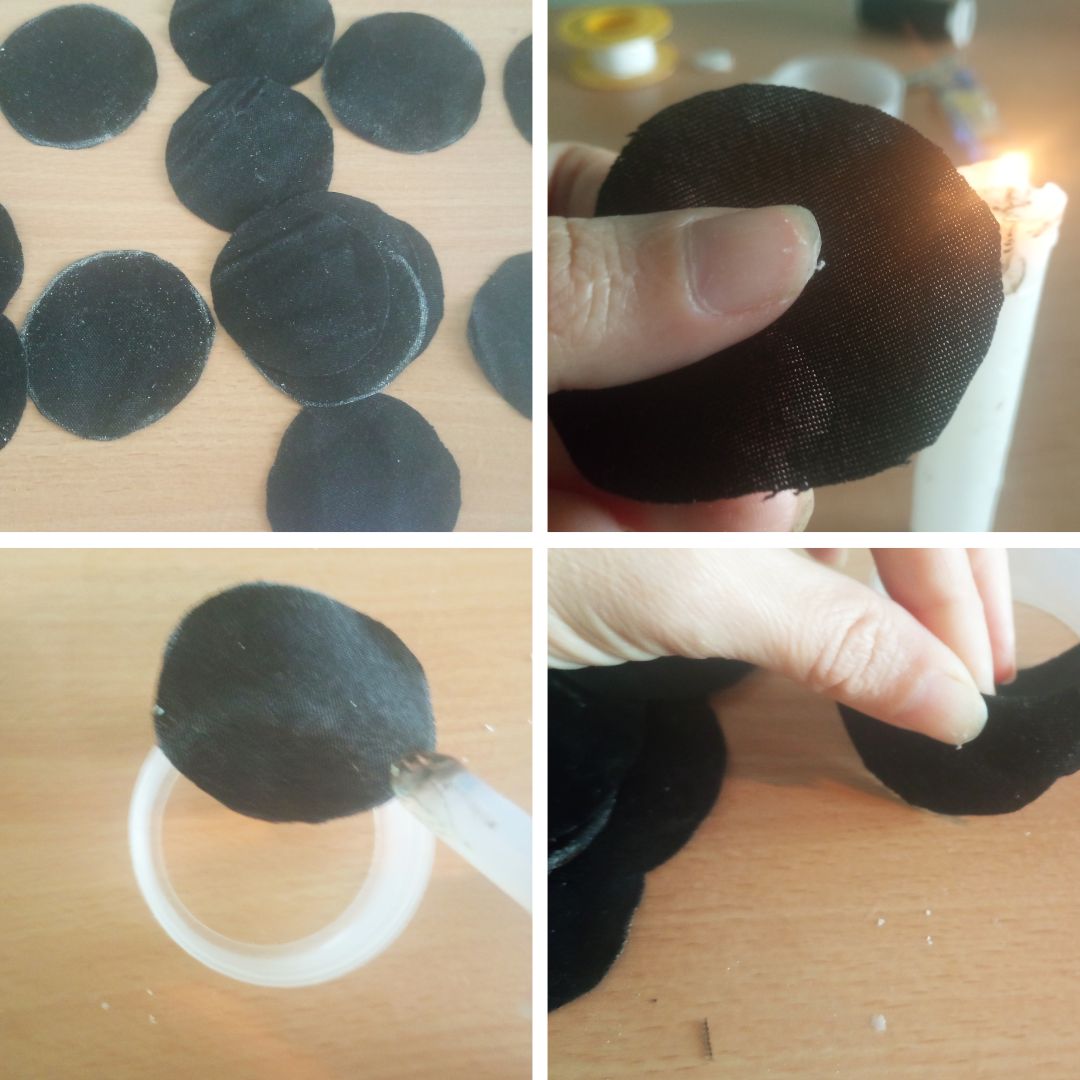
Se recorta la forma y luego con una vela se pasa cada circulo por el fuego para sellar la tela y que no se deshínchale para que así perdure el trabajo.
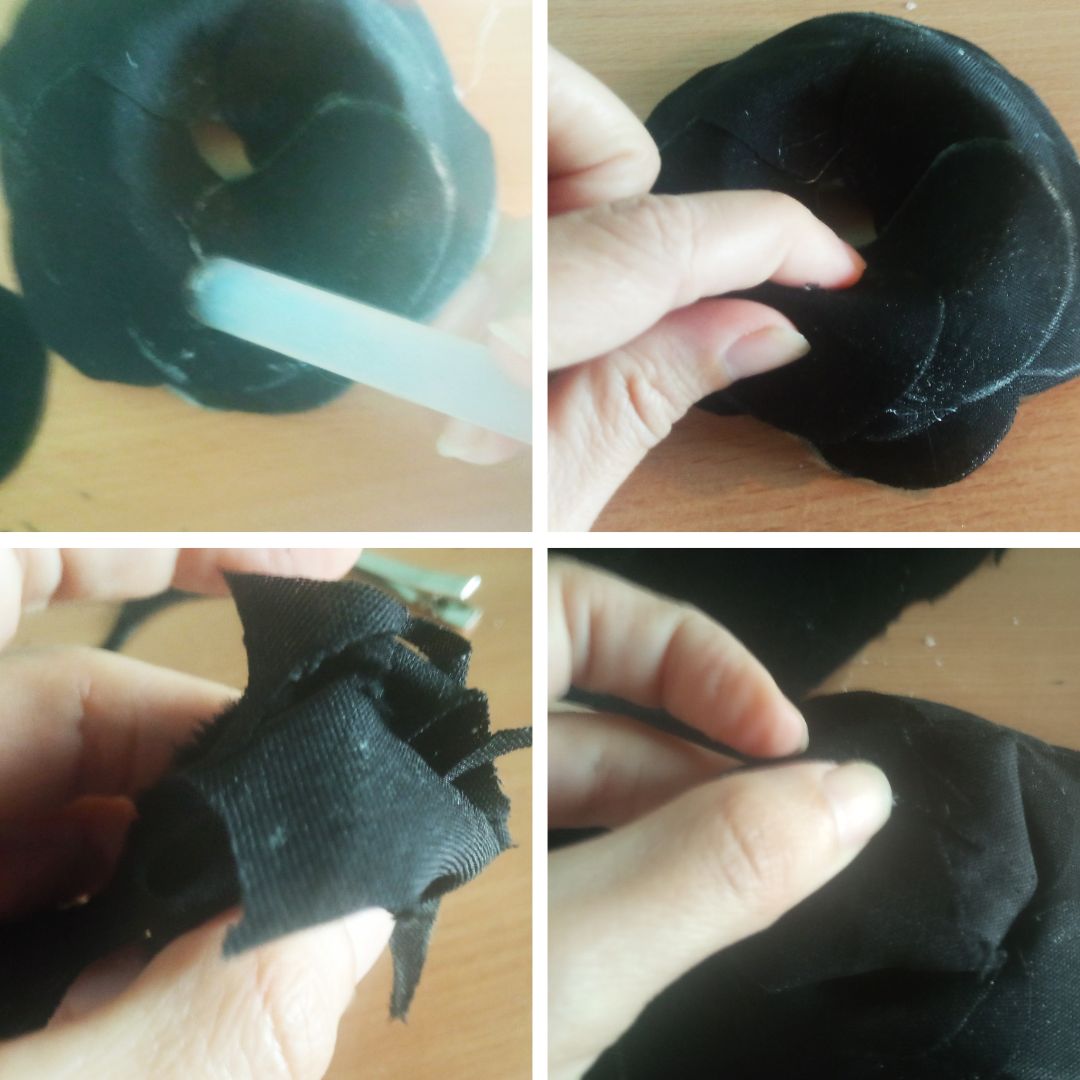
Tomamos un cilindro y empezamos a colocar cada circulo de tela y se va pegando son silicona alternando cada uno de los círculos para darle forma a la rosa.
Cada pétalo se pega hasta que quede sin ningún orificio los pétalos dela rosa, luego se toma retazos de tela y se le da forma circular pegándose con silicona para pegarlo a la base de la rosa y se le echa silicona para sellarlo. Se saca la rosa del cilindro y se acomoda para que quede bien prolijo, ademas de ello se quita cualquier sobra o hilito de silicon que este en la pieza. Para limpiar los bordes blancos dejados por la tiza se agarra un cepillo de cerdas suaves y se quita las marcas de tiza de las orillas.
Se pega la pinza a la base con silicona y luego se cose la pinza con la base para tener mas seguridad de que no se vaya a despegar con el uso. posteriormente tomamos un pedacito de tela rectangular y la cinta de tela delgada, se dobla a la mitad y se coloca cerca de la pinza y se pega junta al rectángulo y la pinza, luego se recorta la cinta para que quede una mas larga que la otra.
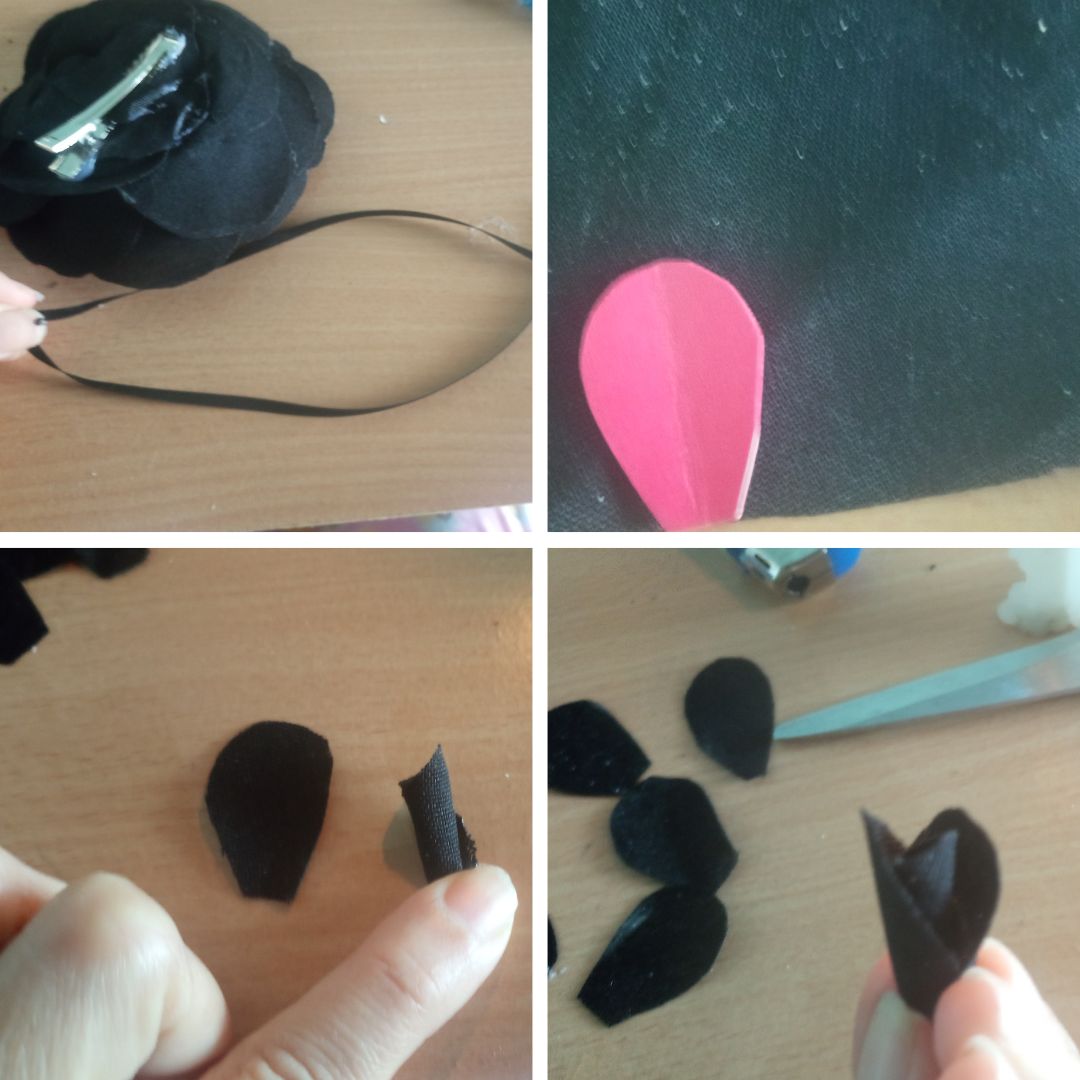
Se toma el pedacito de cartón y se le hace una figura de un pétalo de flor, se coloca sobre la tela y se marca, para cada flor use 8 pétalos.
Se toma un pedacito de tela y se hace un pequeño cilindro que sera la base o pistilo, se va pegando cada uno de los pétalos con silicona caliente.
Al tener ya lista la flor se toma la base y con una tijera se presiona hasta abrir, con cuidado se mete la cinta de tela poco apoco ayudándose de la tijera, luego con silicon se pega la flor de la cinta, este procedimiento se repite con las dos florecitas que van a ir guindadas a la rosa principal

Y así nos queda nuestra gancheta de Rosa Boutique, cabe resaltar que el cilindro debe ser pequeño porque mientras mas ancho queda, la rosa quedara mas grande, a mi me quedo mediana.
Bueno amigos espero que les haya gustado la manualidad que les traje en esta oportunidad, que es útil y nos sirve para embellecer nuestra melena, espero que te animes y la realices del color que prefieras.
.jpg)

ENGLISH
Design on Canva. com
MATERIALS
Polyester fabric in the color of your choice
A cylinder and a round that will serve as a pattern.
A piece of cardboard in the shape of a flower petal
Thin fabric tape
School glue
Small spatula
Silicon
Chalk
Scissors
Candle
Lighter
Son and needle
Large alligator clip
PROCEDURE
The first step is to take the polyester fabric and put glue on it, then with the spatula it is passed all over the fabric and put it to dry for approximately two hours so that it dries well, this procedure is done so that the fabric becomes harder.
With a circle is placed on the fabric and with a chalk mark each circle, I marked 31 circles, the number of circles will depend on the width of the nozzle of the cylinder.
The shape is cut out and then with a candle each circle is passed through the fire to seal the fabric so that it does not fray and so that the work lasts.
We take a cylinder and begin to place each circle of fabric and glue it with silicone alternating each one of the circles to give shape to the rose.
Each petal is glued until there are no holes in the petals of the rose, then take pieces of fabric and give it a circular shape and glue it with silicone to stick it to the base of the rose and put silicone to seal it. Take the rose out of the cylinder and arrange it so that it looks neat and tidy, also remove any leftover silicone that may be on the piece. To clean the white edges left by the chalk, take a soft bristle brush and remove the chalk marks from the edges.
Glue the clamp to the base with silicone and then sew the clamp to the base to make sure that it will not come off with use. Then take a small piece of rectangular fabric and the thin fabric tape, fold it in half and place it near the clamp and glue it together with the rectangle and the clamp, then cut the tape so that one is longer than the other.
Take a small piece of cardboard and make a flower petal shape, place it on the fabric and mark it, for each flower use 8 petals.
Take a piece of fabric and make a small cylinder that will be the base or pistil, glue each of the petals with hot silicone.
Once the flower is ready, take the base and with a scissors press it until it opens, carefully insert the fabric ribbon little by little with the help of the scissors, then with silicone glue the flower to the ribbon, this procedure is repeated with the two little flowers that will be attached to the main rose.
And so we have our Boutique Rose hook, it should be noted that the cylinder should be small because the wider it is, the larger the rose will be, I got a medium size.
Well friends, I hope you liked the craft that I brought you on this occasion, which is useful and helps us beautify our hair, I hope you are encouraged and make it in the color you prefer.
own photos
Canvas Design
Translated with DeepL.com (free version)
Congratulations @liyuxiexie! You have completed the following achievement on the Hive blockchain And have been rewarded with New badge(s)
Your next target is to reach 900 comments.
You can view your badges on your board and compare yourself to others in the Ranking
If you no longer want to receive notifications, reply to this comment with the word
STOPCheck out our last posts: