Saludos, hoy les presento este proyecto de esta pieza interesante que lleva engastada una piedra de azabache, para que sepan la técnica del engaste de piedras, es un asunto que tengo pendiente y que debo atreverme a hacer más y experimentar.
Sobre el azabache, que es el eje central de esta joya, es una especie de carbón fosilizado y al cual se le atribuyen propiedades vinculadas sobre todo a la protección, muchas personas lo usan con esa finalidad, además el azabache es bastante sencillo de tallar y grabar, en comparación a otras piedras.
En cuanto a los materiales y herramientas están los siguientes:
- Azabache
- Limas y lijas 220 / 360 / 400.
- Fresas para abrir agujeros sobre metal.
- Lámina y cinta de bronce de 0.5 mm, hilo de bronce 1 mm
- Dremel.
- Motor de banco, discos de tela para pulir y cera de pulir.
- Tijera para cortar metal.
- Arco de segueta y segueta 2/0
- Soldadura, soplete.
- Martillo
A continuación les mostraré parte del proceso de elaboración de esta pieza.
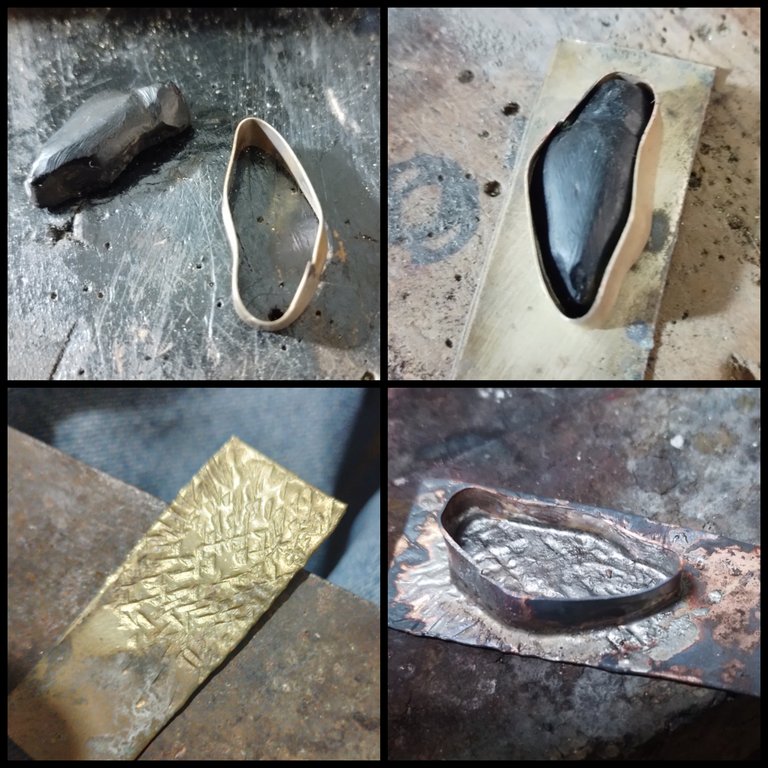
Antes de empezar con el proyecto ya había probado de darle forma al azabache con limas, fresas y lijas, hasta que llego a un punto que me gusto, revise y afortunadamente ya tenía una cinta de bronce de 0,5 mm cortada, lo que hice fue envolver esta cinta alrededor del azabache, marcar el punto de corte y luego con la tijera para metal lo corte.
Igualmente, tenía otro pedazo de bronce de 0.5 mm que me servía para avanzar con el proyecto, así que probé poner sobre este pedazo de lámina el azabache para imaginar como avanzaría con la pieza.
Decidí martillar la superficie de la lámina para texturizar y que la pieza se vea más interesante, para finalizar coloqué la cinta sobre la lámina y la soldé.
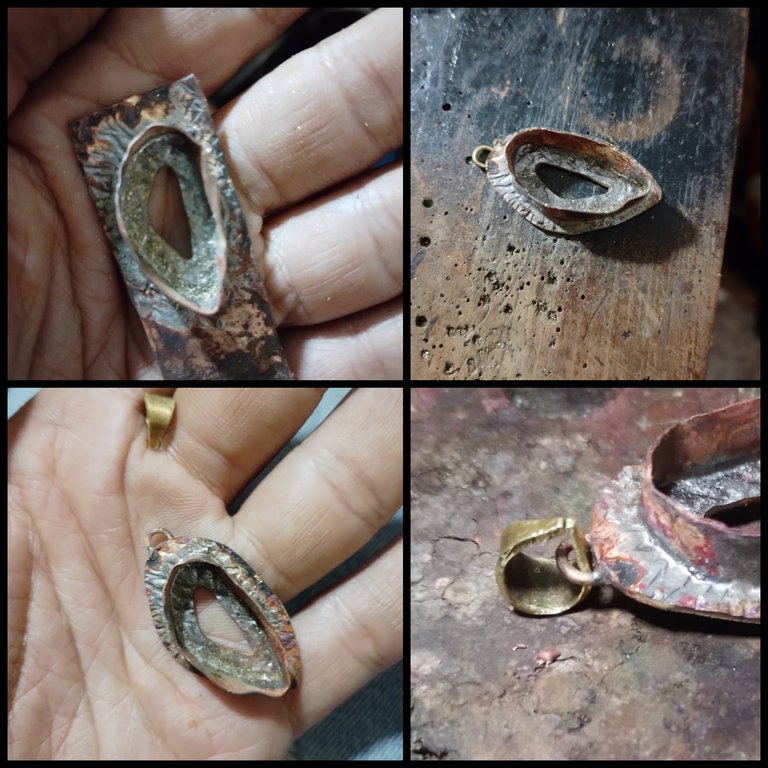
Use una fresa de 1 mm y abrí un hueco en el medio de la pieza y corte con la segueta, con la intención de que el usuario de esta joya pueda tener contacto más directo con la piedra, luego corte con la segueta alrededor de donde se hará el engaste, ubique un hilo de bronce de 1 mm lo pique y puse en forma de "U", para luego soldar.
Solo faltaba el aro por donde pasara el collar, así que agarre un pedazo de bronce para hacer el pasador del collar, la corte con la segueta y lime, para juntar las partes use la pinza redonda y mis dedos, lo metí en su sitio para luego soldar.
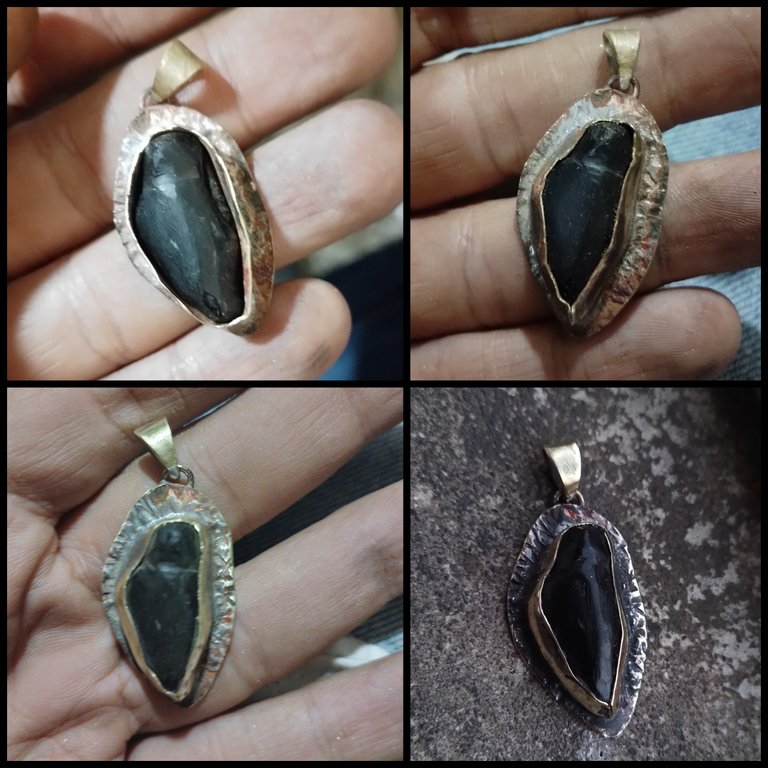
Llego el momento de engastar, entonces metí el azabache dentro, con una pinza plana, fui haciendo presión hacia dentro de la caja que forme con la cinta de bronce, llego un momento en el proceso de engaste que se hizo un pliegue en la parte de abajo del engaste, esto lo corte con la segueta y lime, el corte lo pueden notar en las fotos, después pase lijas 220, 360 y 400 antes de pulir.
Pase al motor de banco para poder darle brillo a la pieza, utilice un disco de tela de algodón y aplique cera de pulir, en esta etapa también intentaba pulir la piedra y suavizar un poco los detalles del engaste, al no aplicarme tanto en lijar las texturas, esta quedaron con esos detalles de color oscuro y rojizo, pero esto es parte también del acabado que me gusta para que se sienta más robusto y se aprecie rústico.
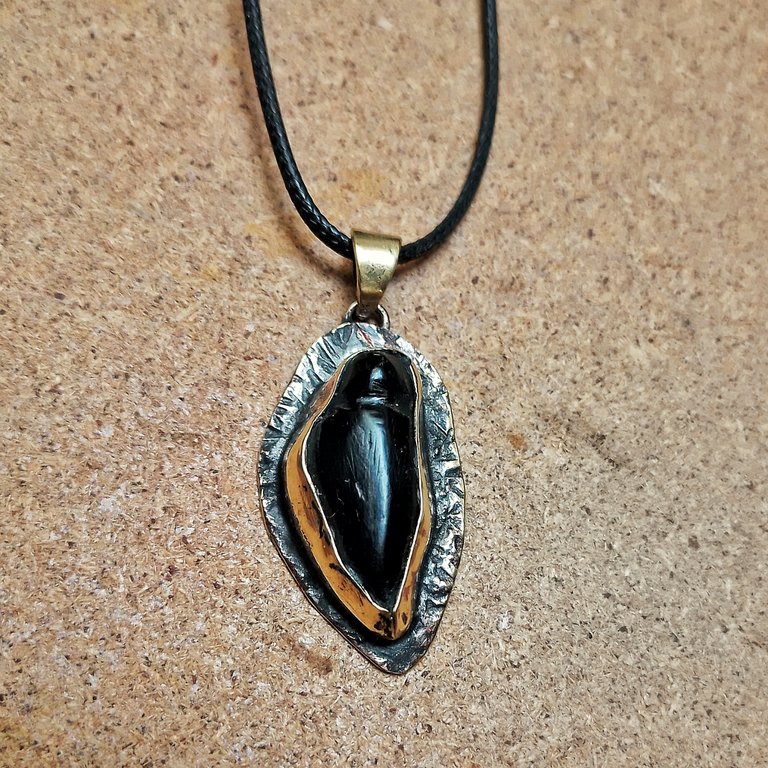
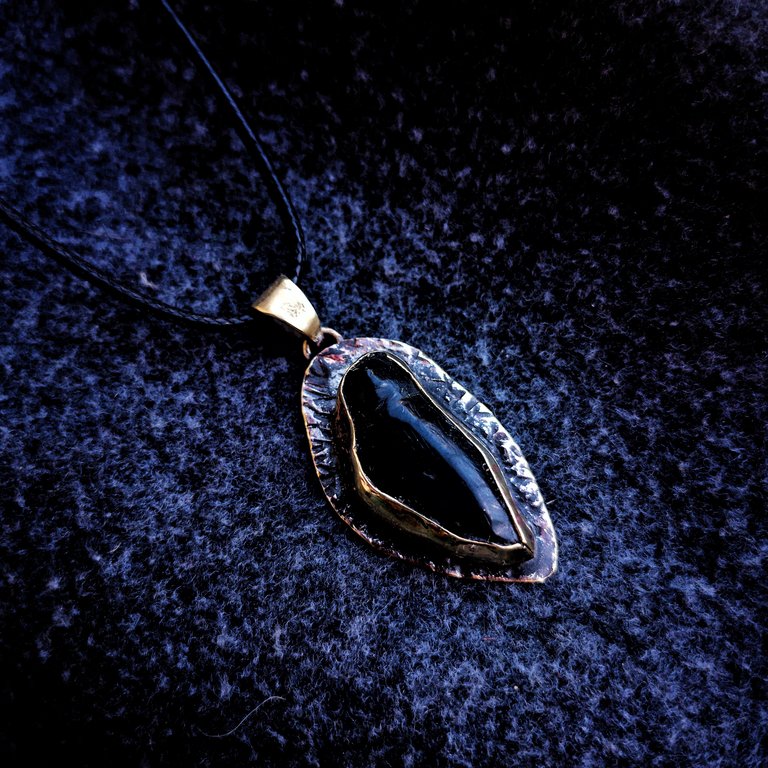
Esta es la pieza final con más detalle, a mí me pareció que quedo con mucho carácter y fuerza, exótica y poderosa.
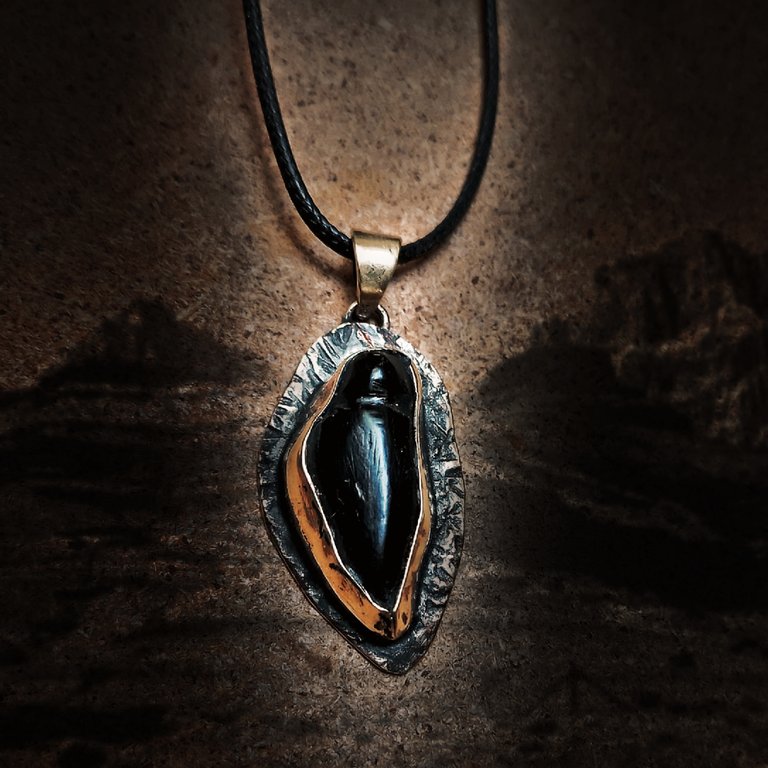
Aquí edite la imagen usando Picsart para que se vea más interesante para redes sociales, bueno tampoco me gusta mentir, lo hice porque me gusta editar las imágenes, eso me relaja.
Espero les haya gustado y me den su opinión sobre esta pieza. Si gustan me pueden seguir por: https://www.instagram.com/m16ueljoyas
///////
English / google translator
Greetings, today I present this project of this interesting piece that has a jet stone set in it, so that you know the technique of setting stones, it is a matter that I have pending and that I must dare to do more and experiment with.
Regarding jet, which is the central axis of this jewel, it is a kind of fossilized coal and to which properties linked above all to protection are attributed, many people use it for that purpose, in addition, jet is quite simple to carve and engrave, compared to other stones.
As for the materials and tools, the following are available:
- Jet
- Files and sandpaper 220/360/400.
- Drills to open holes in metal.
- 0.5 mm bronze sheet and tape, 1 mm bronze wire
- Dremel.
- Bench motor, cloth discs for polishing and polishing wax.
- Scissors for cutting metal.
- Hacksaw arch and 2/0 hacksaw
- Welding, blowtorch.
- Hammer
Below I will show you part of the process of making this piece.
Before starting the project I had already tried to shape the jet with files, milling cutters and sandpaper, until I got to a point that I liked, I checked and fortunately I already had a 0.5 mm bronze strip cut, what I did was wrap this strip around the jet, mark the cutting point and then cut it with the metal scissors.
Likewise, I had another piece of 0.5 mm bronze that I used to move forward with the project, so I tried to put the jet on this piece of sheet metal to imagine how the piece would progress.
I decided to hammer the surface of the sheet to give it texture and make the piece look more interesting, and finally I placed the tape on the sheet and soldered it.
I used a 1mm cutter and opened a hole in the middle of the piece and cut it with the hacksaw, with the intention that the wearer of this jewel can have more direct contact with the stone, then cut with the hacksaw around where the setting will be made, locate a 1mm bronze wire, cut it and put it in a "U" shape, and then solder it.
The only thing missing was the ring through which the necklace would pass, so I grabbed a piece of bronze to make the necklace pin, cut it with the hacksaw and filed it, to join the parts I used the round pliers and my fingers, I put it in place and then soldered it.
The time came to set the setting, so I put the jet inside, with a flat pliers, I was applying pressure towards the inside of the box that I formed with the bronze strip, there came a moment in the setting process that a fold was made in the bottom part of the setting, I cut this with the hacksaw and filed, the cut can be seen in the photos, then I sanded it with 220, 360 and 400 before polishing.
I moved on to the bench motor to be able to give the piece a shine, use a cotton cloth disc and apply polishing wax, at this stage I also tried to polish the stone and soften the details of the setting a bit, by not applying so much effort to sand the textures, they ended up with those dark and reddish details, but this is also part of the finish that I like to make it feel more robust and look rustic.
This is the final piece with more detail, to me it seemed to have a lot of character and strength, exotic and powerful.
Here I edited the image using Picsart to make it look more interesting for social networks, well I don't like to lie either, I did it because I like to edit images, it relaxes me.
I hope you liked it and give me your opinion on this piece. If you like, you can follow me at: https://www.instagram.com/m16ueljoyas
Como siempre, un trabajo espectacular y muy bonito. Me encanta es te dije.
!discovery 35
gracias y por alli tengo mas pendientes
Bueno manos a la obra, muéstranos tus hermosos trabajos 🙂
Un trabajo muy curioso y detallado, me gustó mucho el proceso que describiste, está a tono con el resultado final que es excelente. Felicidades, gracias por compartir. Saludos
Faltan detalles pero más o menos se entiende.... jajaja me alegra que te gustara
Gracias por compartir el paso a paso. Saludos @m16uellop.
💖🥰
Amé el producto acabado y el proceso.
Que hermosura. Es que me haz hecho anhelarla jjj
Gracias
Gracias. Tu dime y se te hace 😏
Demasiado bueno el trabajo y el acabado final me encantó.
Me gustaría tener uno así, algún día. 🙋
Muchas gracias por compartir 😌
Gracias estoy a la orden
Wow, this is really amazing work, the results are really beautiful.
Thank you, buddy
Yes, you're welcome.
Hermosa pieza! 😍👏
Gracias amiga
This post was shared and voted inside the discord by the curators team of discovery-it
Join our Community and follow our Curation Trail
Discovery-it is also a Witness, vote for us here
Delegate to us for passive income. Check our 80% fee-back Program
This is a beautiful piece of goldsmithing, this protective pendant with a built-in jet looks wonderful on you. Thanks as always for letting us know your good work.
Congratulations @m16uellop! You have completed the following achievement on the Hive blockchain And have been rewarded with New badge(s)
Your next target is to reach 35000 upvotes.
You can view your badges on your board and compare yourself to others in the Ranking
If you no longer want to receive notifications, reply to this comment with the word
STOPThe final result is very charming :) :)
thank you so much