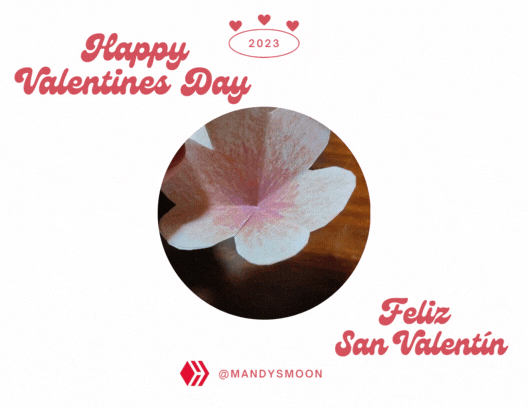
Hi, dear Hive users!✨
¡Hola, queridos usuarios de Hive!✨
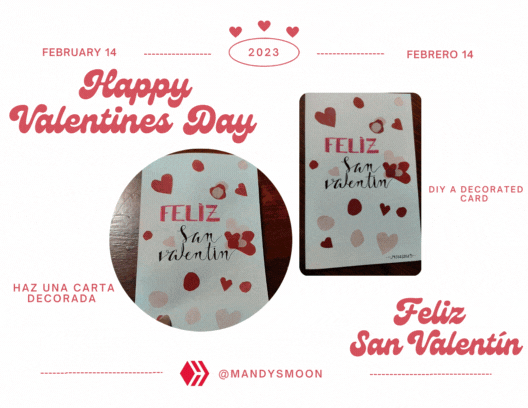
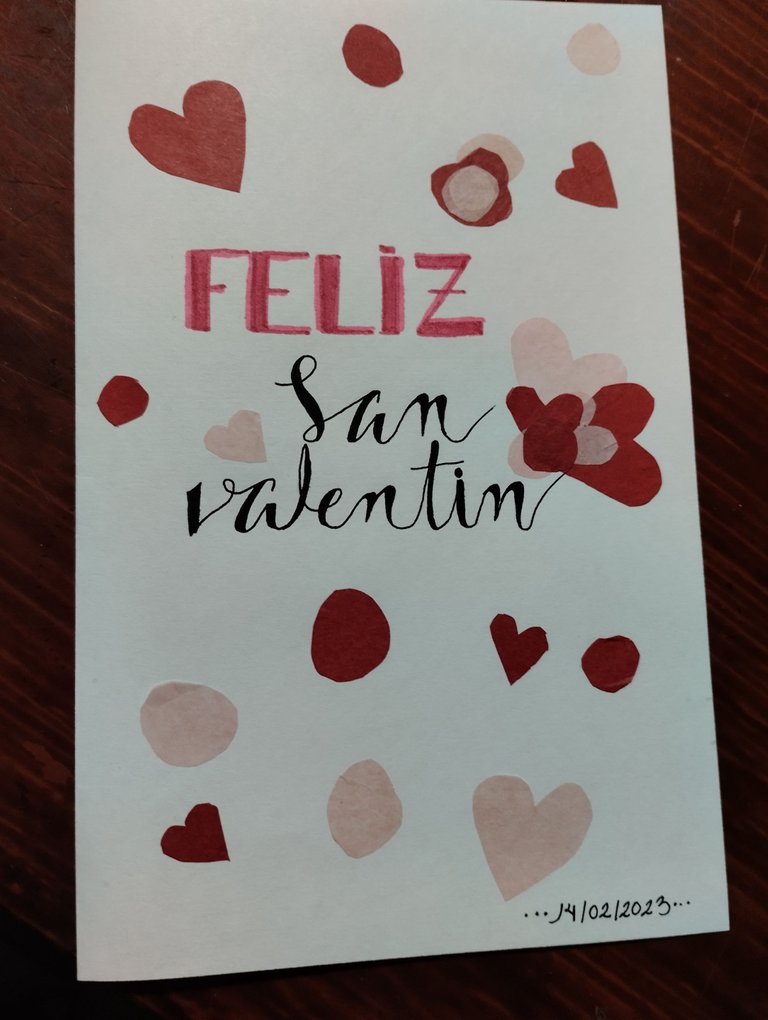
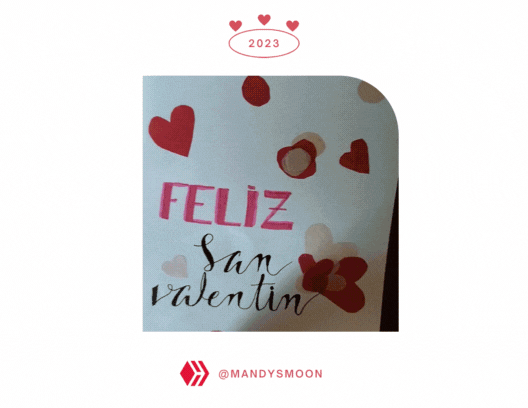
Como sabrán ya casi es San Valentín, ese día donde se celebra el amor y la amistad por lo que muchos buscan darle un pequeño regalo o detalle a aquella persona especial. Aunque claro está, en muchas ocasiones escoger un regalo puede ser difícil o incluso, siendo honestos, no podemos costearlo. Por eso hoy quiero compartir con ustedes una pequeña idea para regalar que puede ayudarte a demostrarle a esa persona un poco de tu amor ❤. ¡Hagamos una tarjeta decorada!✨
As you must know it's almost Valentine's day, that day when we cherish love and friendship and that's why many people try to give a little gift or detail to that especial person. Although it's clear that in plenty occasions choosing a gift can be difficult or, to be honest, maybe we can't even afford it. That's why today I want to share with you guys a small idea to gift that can help you show to that someone a little bit of your love❤. Let's do a decorated card!✨
En primer lugar estos serían los materiales necesarios:
1.- Una hoja de papel blanco
2.- Siete hojas pequeñas de 8x8 (cuadrados)
3.- Colores y marcadores
4.- Lápiz y lapicero
5.- Pega y tijeras
6.- Papel de seda
First of all these are the needed materials:
1.- One white paper sheet
2.- Seven 8x8 small paper sheets (squares)
3.- Color pencils and markers
4.- Pencil and pen
5.- Glue and scissors
6.- Silk paper
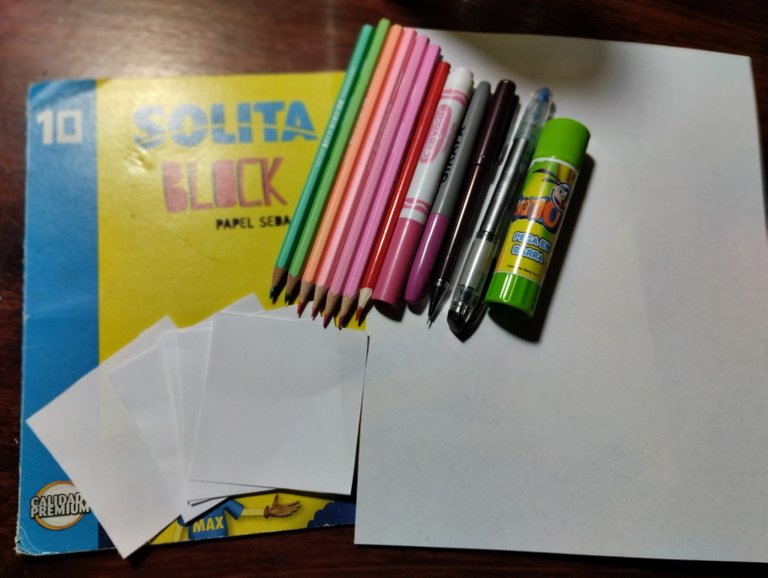

Por supuesto, los colores y los tamaños son opcionales al igual que el tipo de papel utilizado. Puedes ir variando y adaptando la tarjeta a tu gusto😊.
Of course, colors and size are optional, same for the type of paper that you want to use. You can go with variations and adapting the card to your own taste😊.
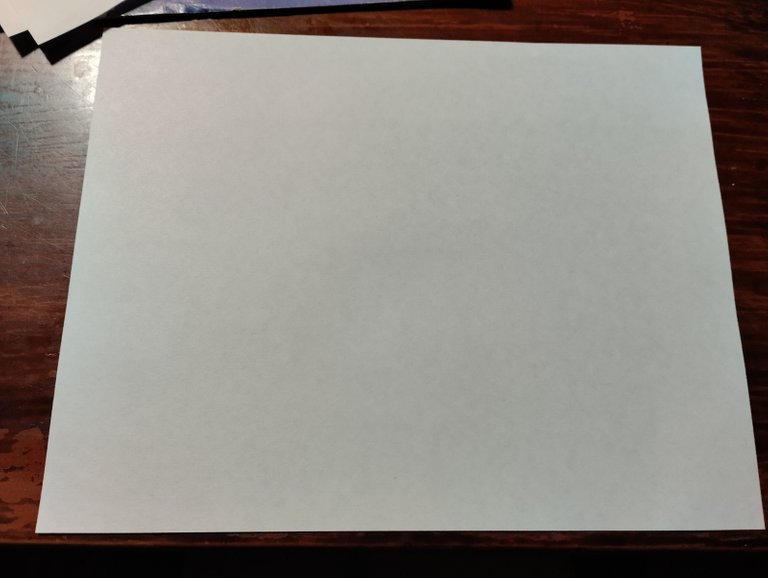
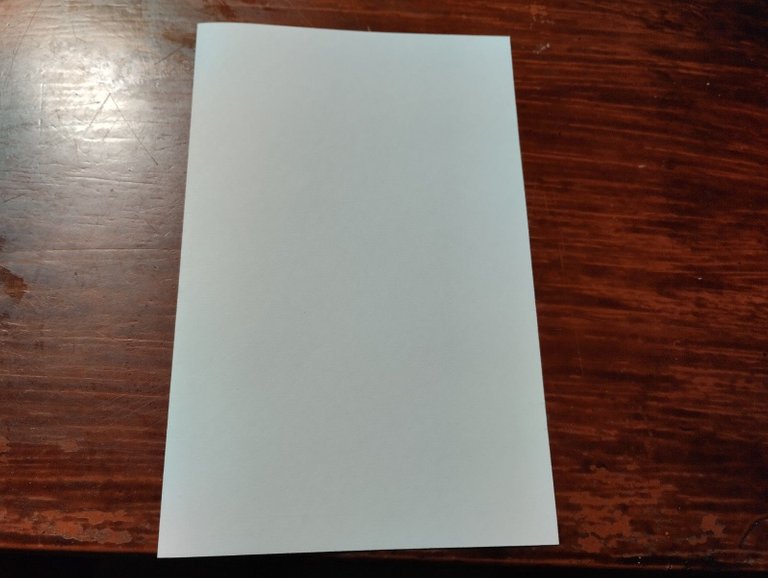
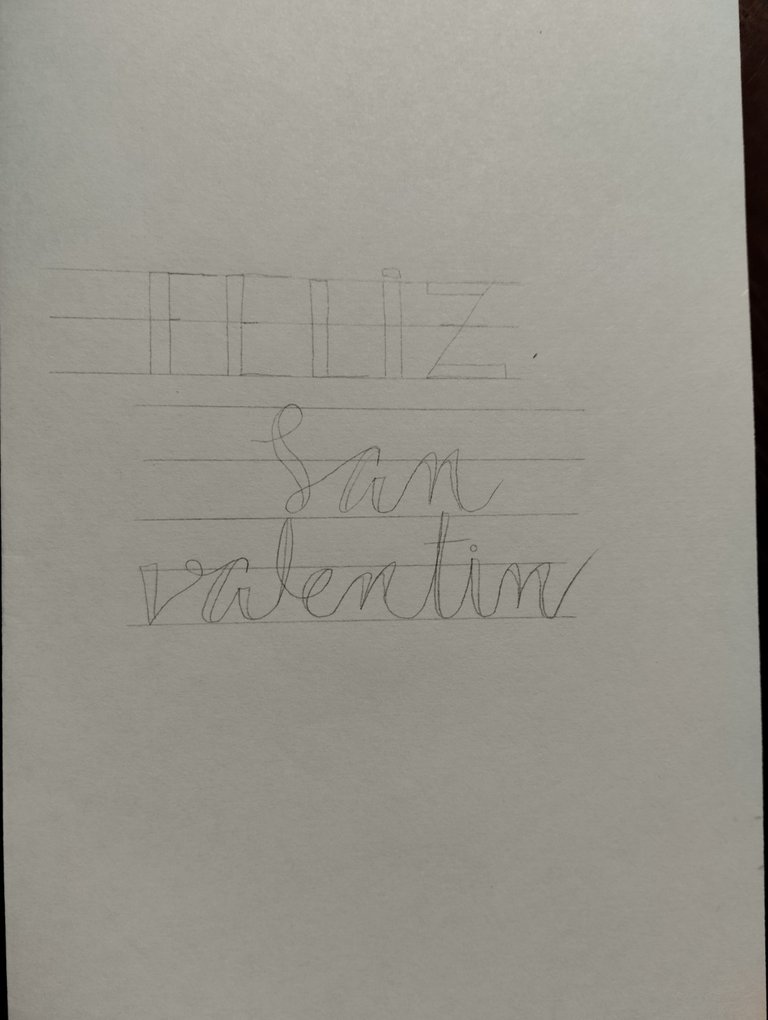
Ahora sí. En primer lugar hagamos la parte exterior de la tarjeta, el cuerpo. Para ello tomamos la hoja de papel blanco, la colocamos de forma horizontal y doblamos justo a la mitad. Luego quise hacer la dedicatoria sencilla pero que se viera bonita, así que hice lo que se me da bien: lettering... Falso😅.
Now, in first place let's do the exterior part, the body of the card. To do that we take the white paper sheet and put it horizontal and fold it right in the half. Then I wanted to make a simple but cute dedication so I did something I'm good at: lettering... Fake lettering 😅.
 |  |
|---|
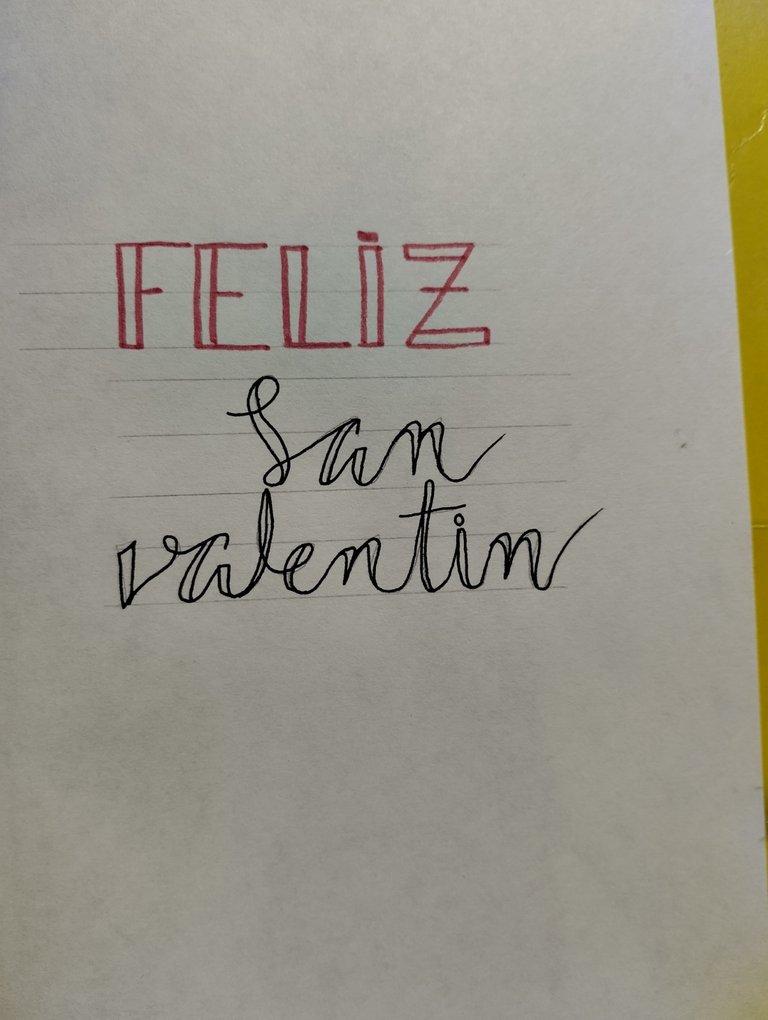
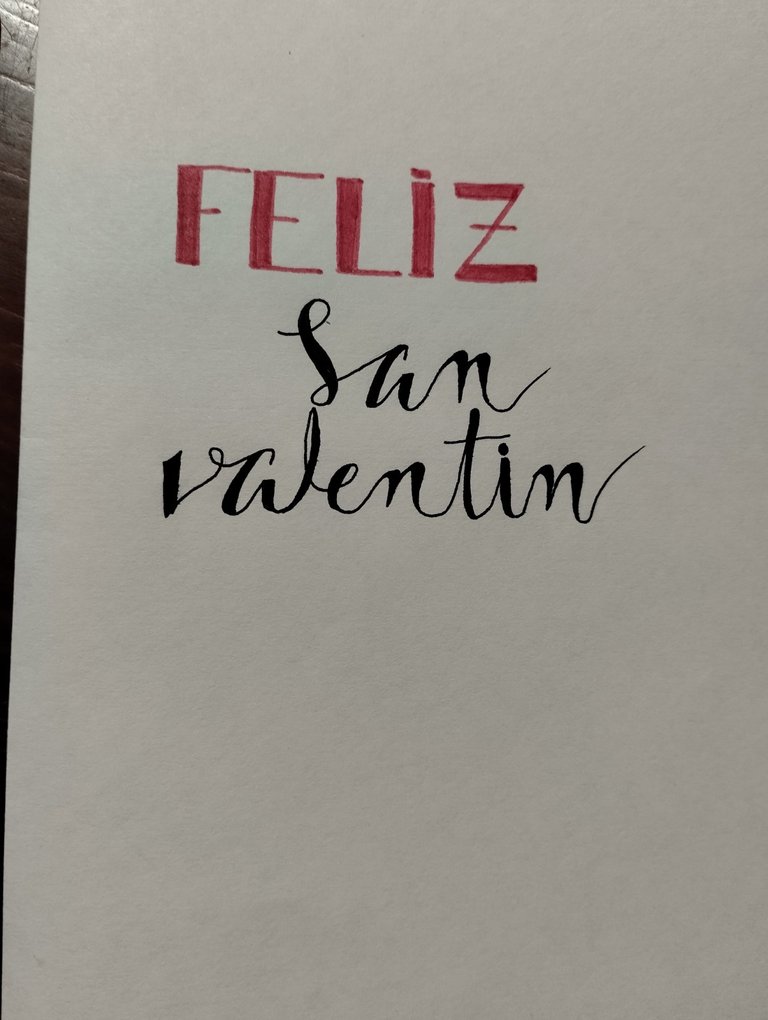
Para ello tracé unas líneas guías para asegurar que las letras queden derechas. Después dibujé cada letra con una fuente que me gusta. Una vez listo eso, remarqué los bordes, borré las líneas guías y finalmente rellené las letras con marcadores. Creo que quedó bastante bien💕
To do so I trace some guide lines to make sure that the letters were on a straight line. Then I draw every letter in the font that I like. Once it was done I remarked the edges, erased the guide lines and finally refill the letters with the markers. I think it turned out pretty well 💕
 |  |  |
|---|
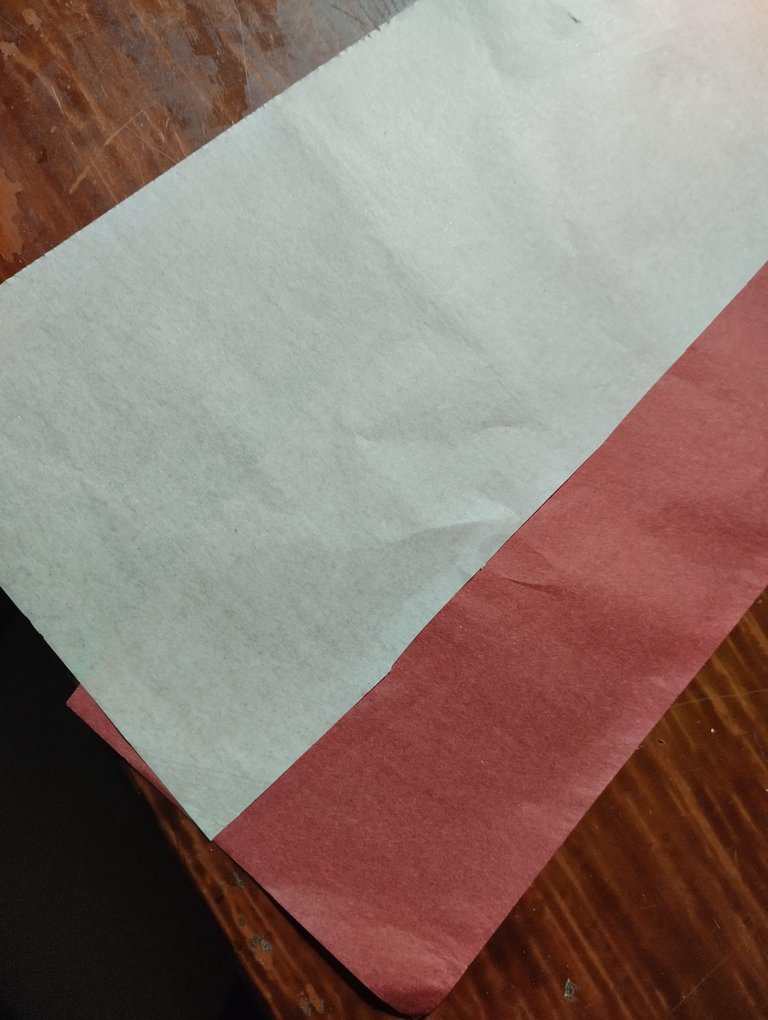
Pero obviamente la portada se ve un tanto vacía así, por lo que decidí agregar pequeños recortes en forma de corazones y círculos. Utilicé papel de seda porque me gusta mucho el toque satinado que tiene; lo escogí en rojo y rosa porque me parece que son los colores más acordes con la celebración❤💖.
Debo advertir que este tipo de papel se rompe bastante fácilmente, por lo que recomiendo que si no se puede manejar con delicadeza se utilice otro tipo de papel.
But obviously the cover looks a bit empty like this, so I decided to add little cutouts in the shape of hearts and circles. I used silk paper because I really like the satin touch it has; I chose it in red and pink because I think they are the colors that are most in line with the celebration❤💖.
I must warn you that this type of paper tears quite easily, so I recommend that if you cannot handle it delicately, use another type of paper.
 |  |
|---|
Ahora, para el interior quise hacer un grupo de flores de origami que al abrir la tarjeta, éstas se abrieran también. Que quedase algo así como en 3D. Para esto usé las pequeñas hojas cuadradas. Toma una y dobla la parte de abajo hacia arriba. Quedará como un rectángulo.
Now, for the interior, I wanted to make a group of origami flowers that when you open the card, they would also open. Something like 3D. For this I use the small square sheets. Take one and fold the bottom up. It will look like a rectangle
 |  |
|---|
Luego toma la parte izquierda del rectángulo y dobla hacia la derecha, que quede nuevamente como un cuadrado.
Then take the left part of the rectangle and fold it over to the right, so it's a square again
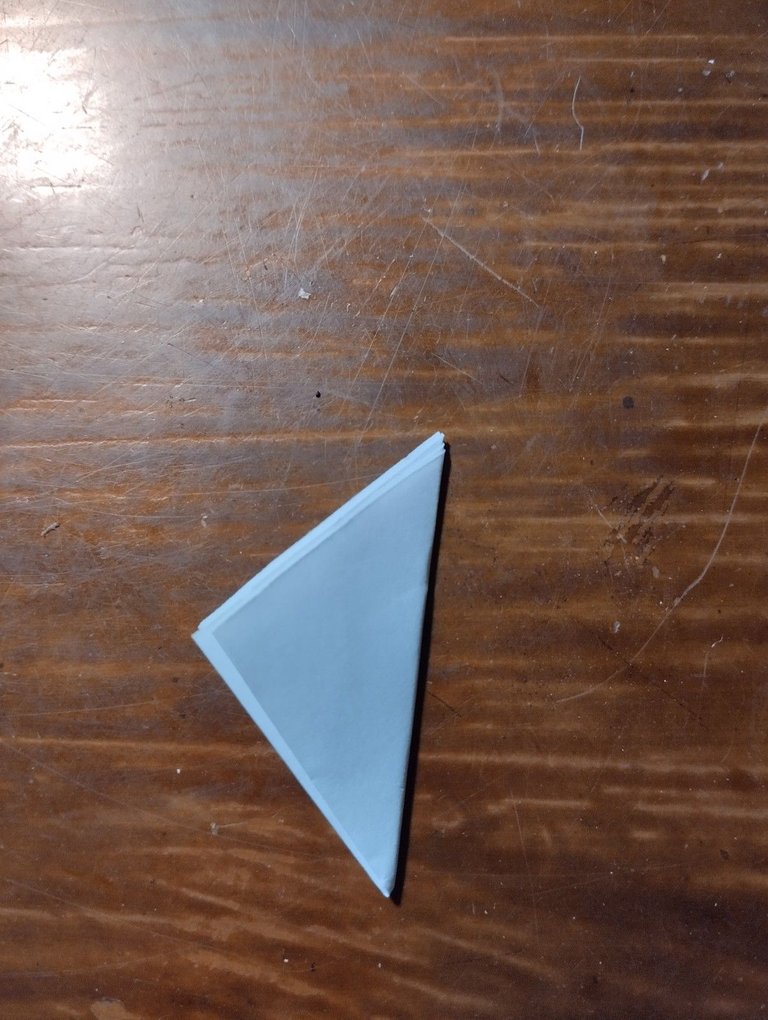
Después toma la esquina inferior derecha y únela a la esquina superior izquierda para hacer así un triángulo. Te debe quedar de esta forma:
Then take the bottom right corner and join it to the top left corner to make a triangle. It should look like this:
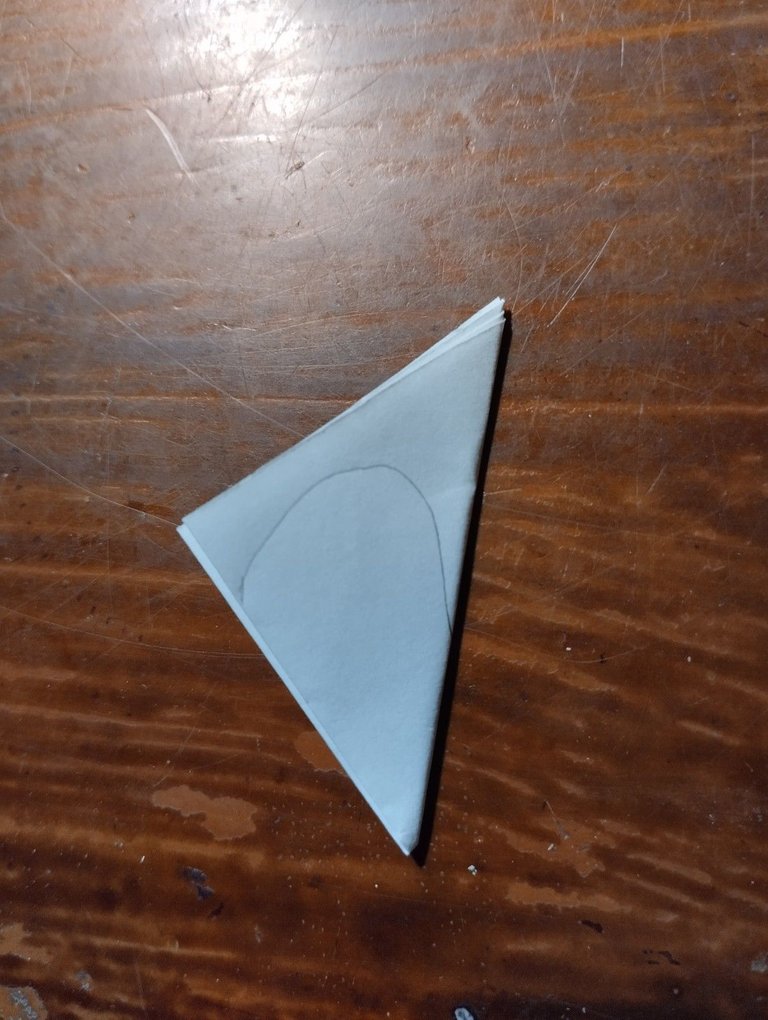
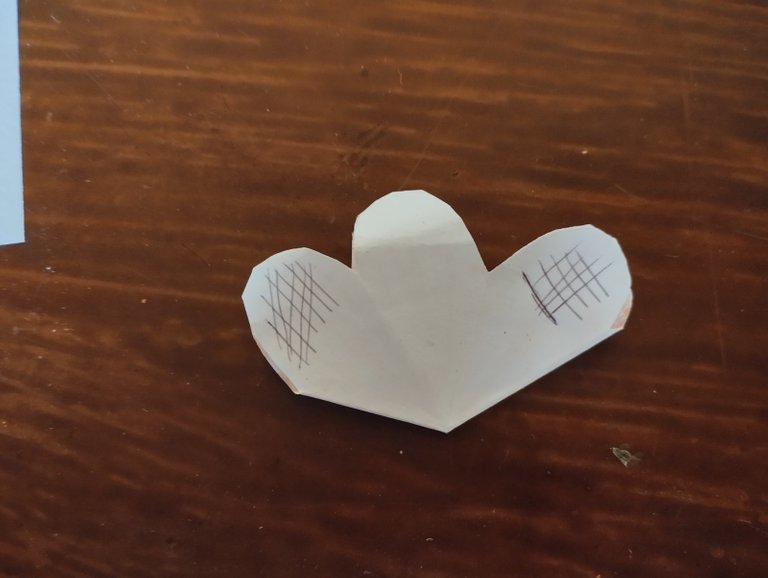
Tomamos ese triángulo y dibujamos una línea guía curva. Allí recortaremos el sobrante y nos quedará una especie de pétalo.
We take that triangle and draw a curved guide line. There we will cut the excess and we will have a kind of petal.
 |  |
|---|
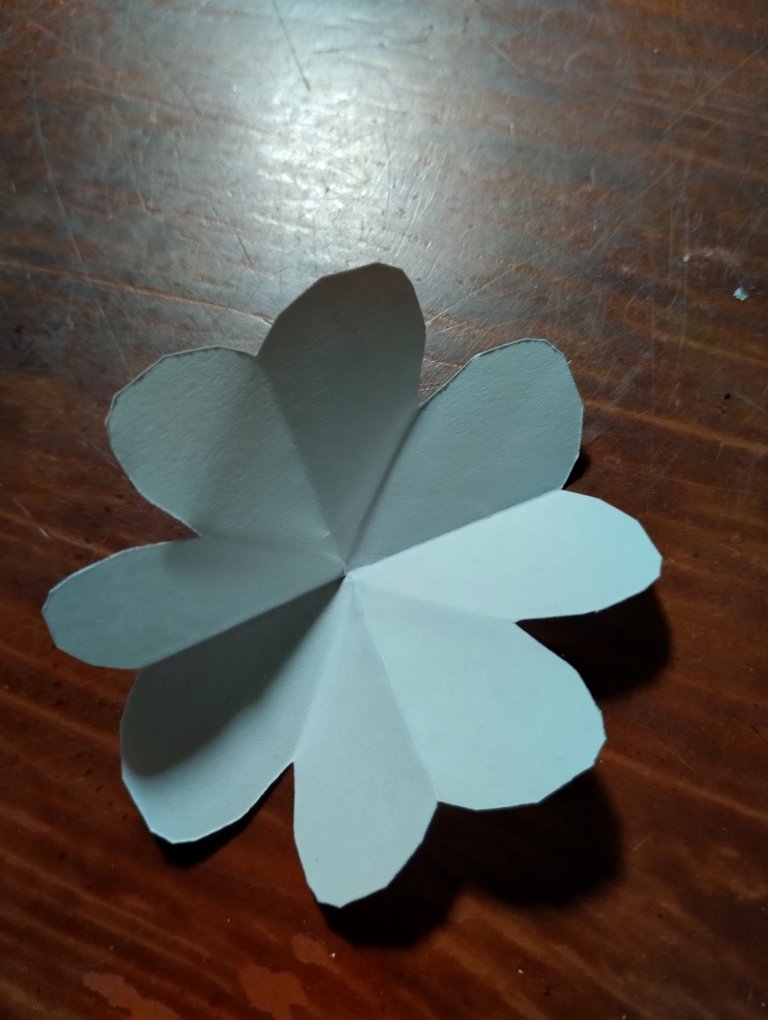
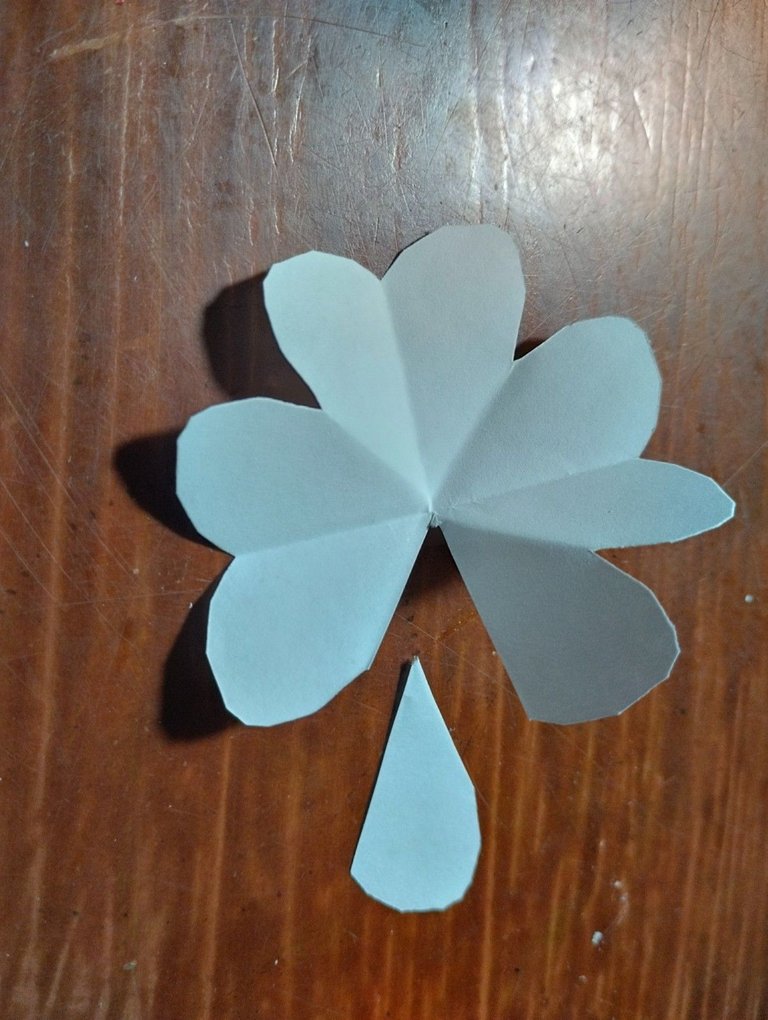
Al abrirlo nos debe quedar una flor así:
When we open it we should have a flower like this:
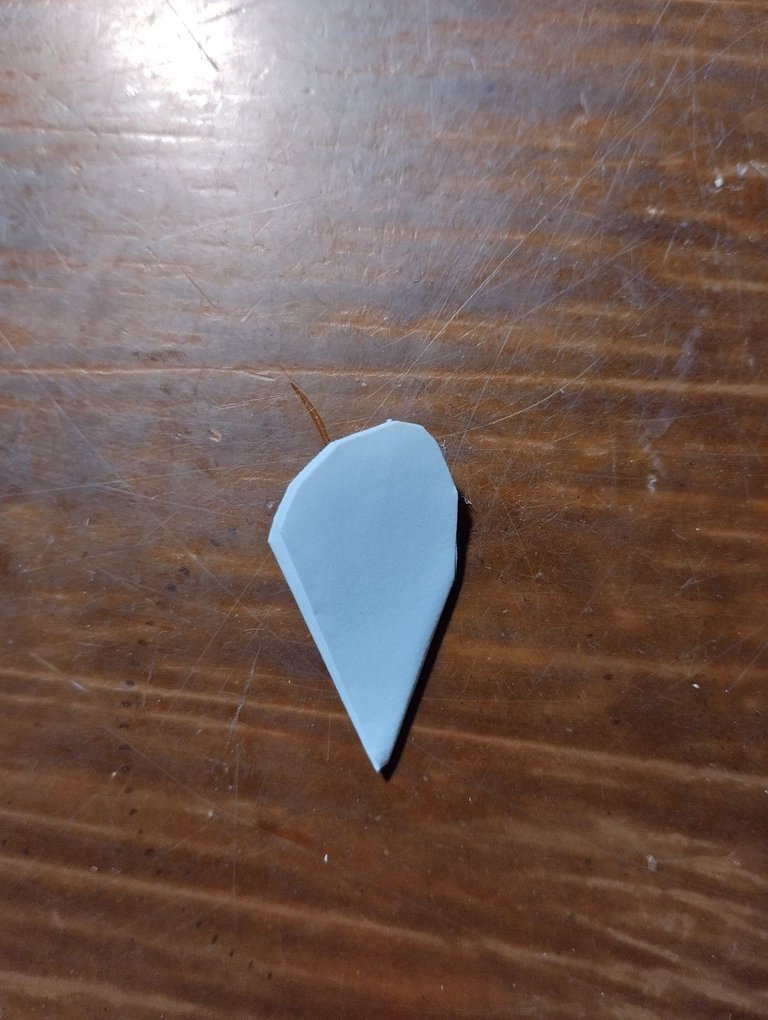
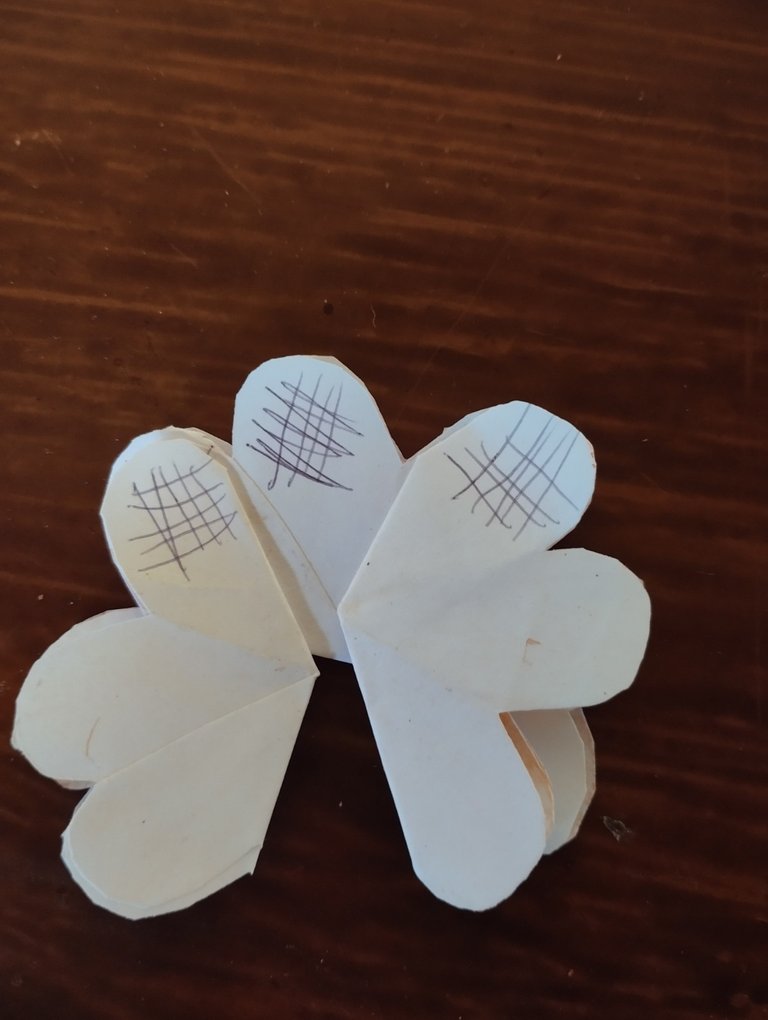
Cuando tengamos esa flor le recortaremos uno de los pétalos, de esta forma:
When we have that flower we will cut one of the petals, in this way:
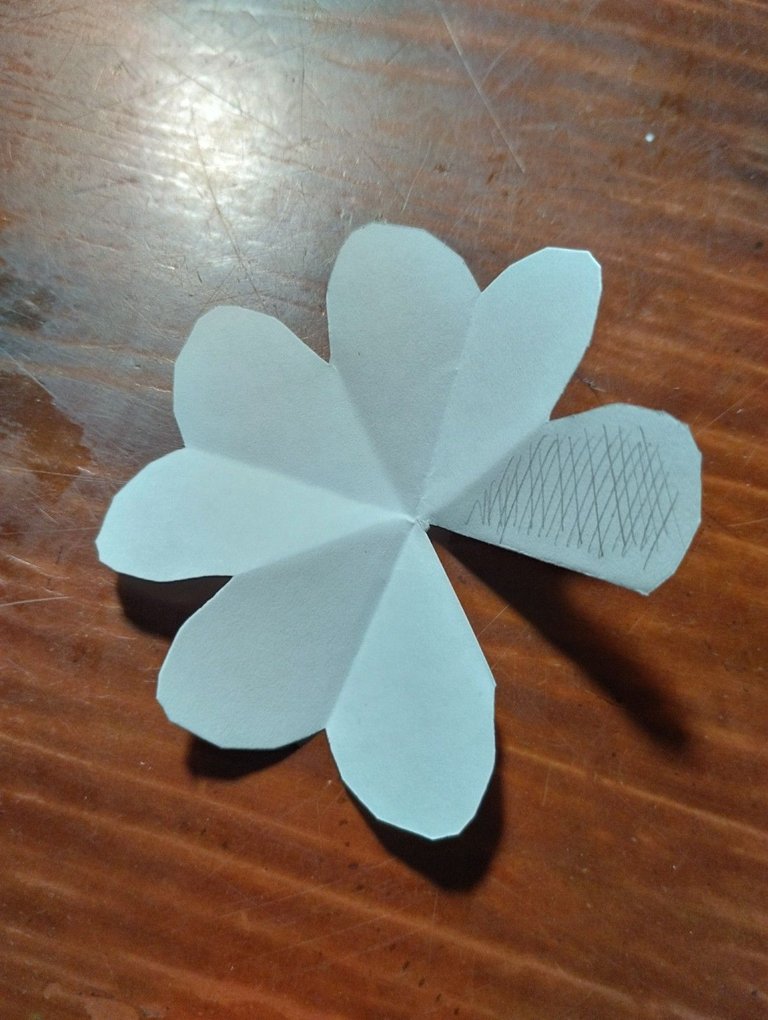
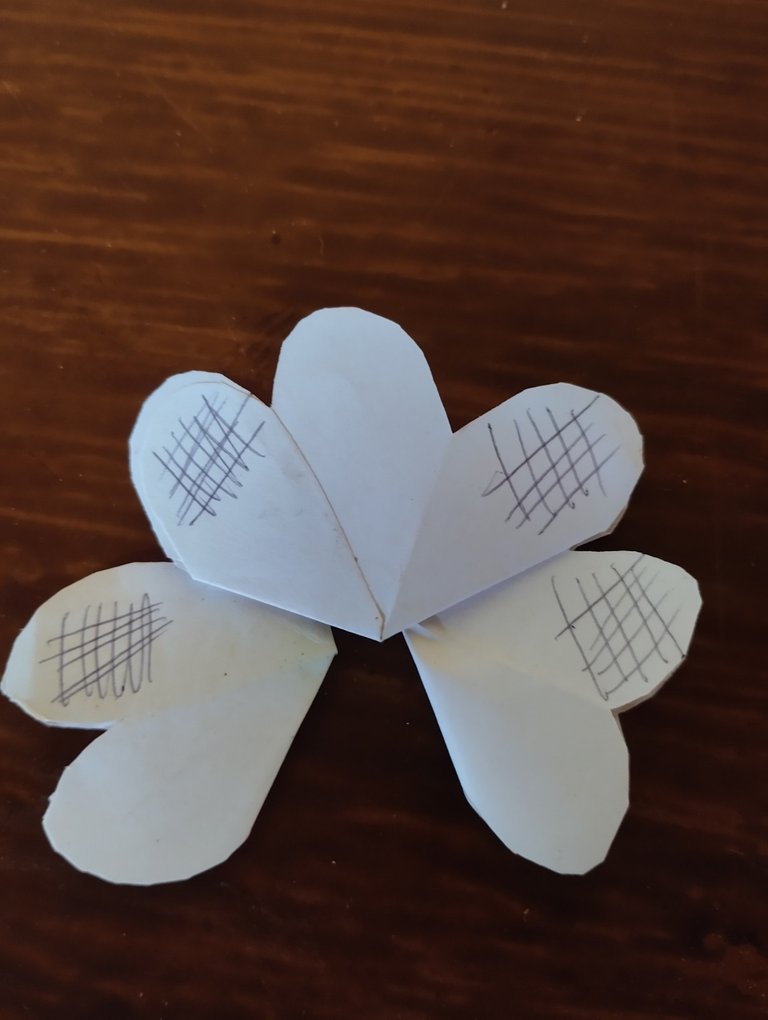
Entonces para darle vida a esa flor, vamos a colorear a nuestro gusto excepto por uno de los últimos pétalos. Así:
So to give life to that flower, we are going to color it to our liking except for one of the last petals. Like this:
 |  |
|---|
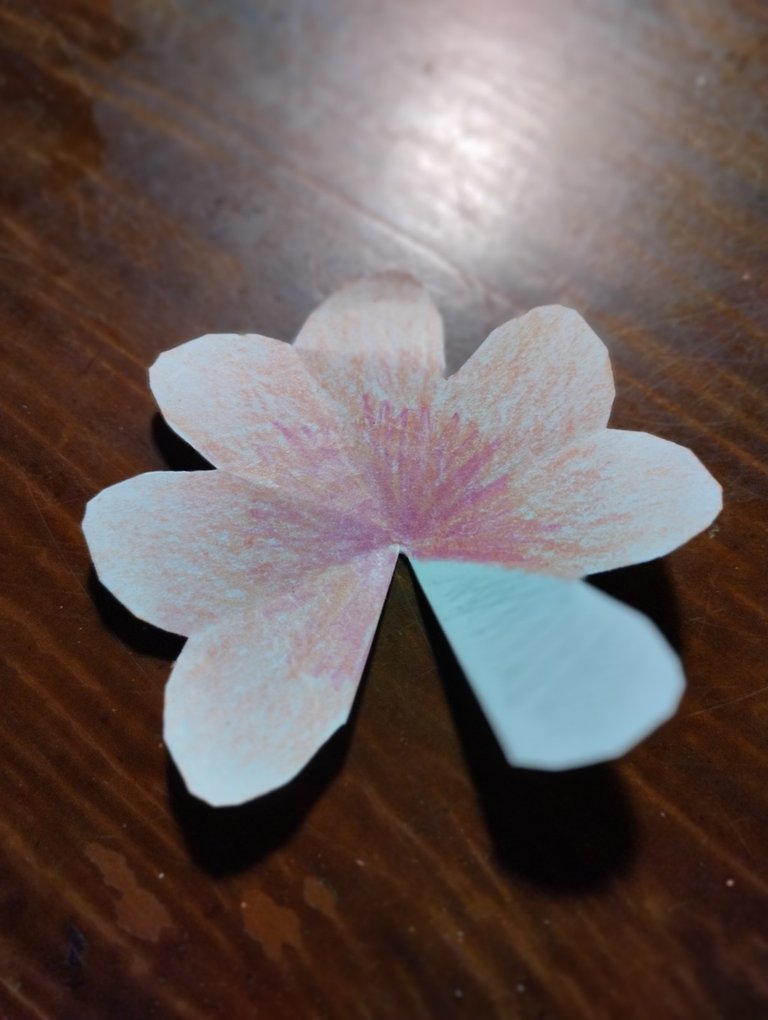
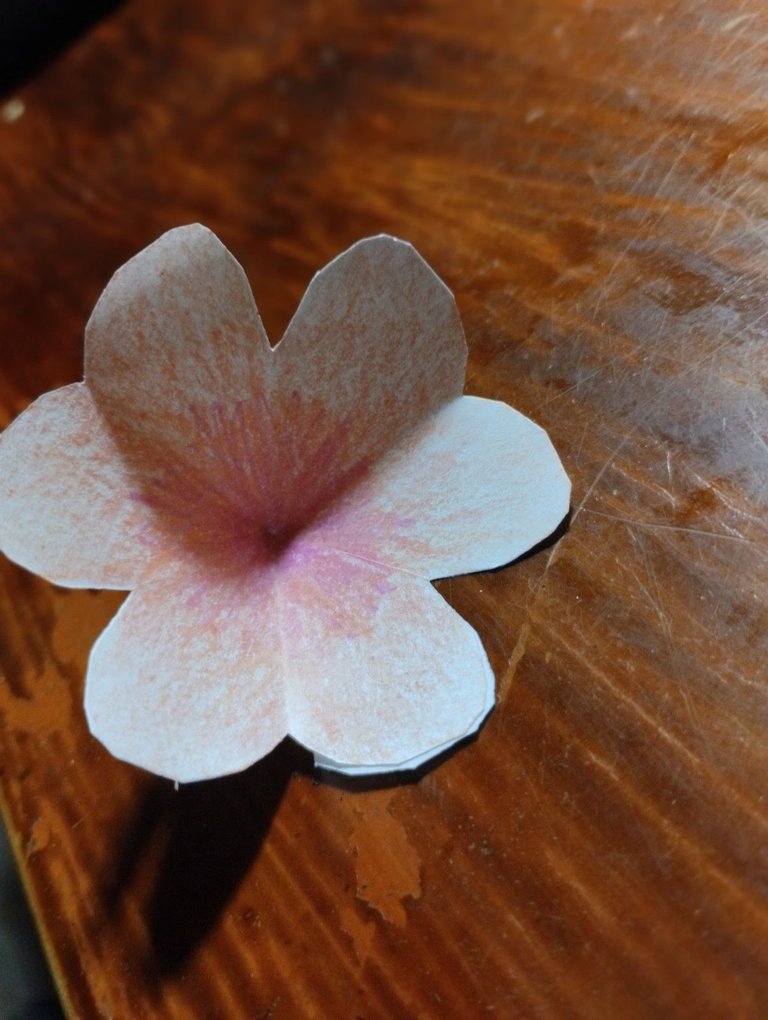
Usaremos pega en ese pétalo en blanco, en mi caso para este tipo de manualidades prefiero la pega en barra. Así pegamos los dos extremos para cerrar la flor.
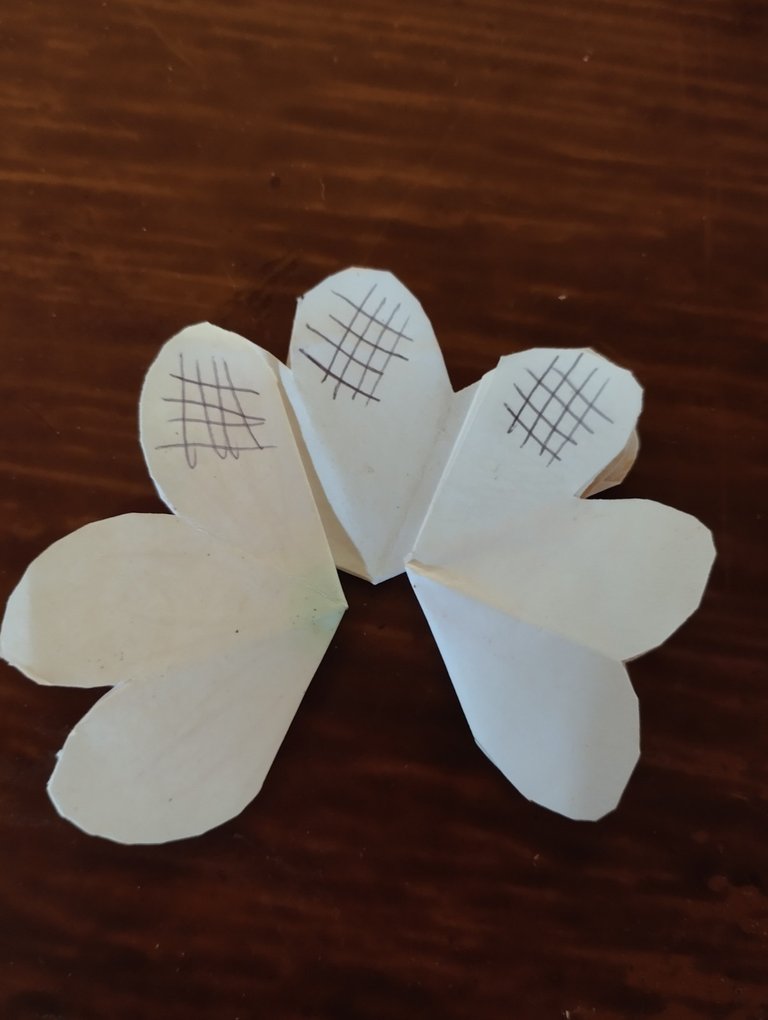
Repite el procedimiento hasta tener siete flores de papel. Puedes colorear cada una a tu gusto🌸🌹
We will use glue on that blank petal, in my case for this type of craft I prefer the glue stick. So we glue the two ends to close the flower.
Repeat the procedure until you have seven paper flowers. You can color each one to your liking 🌸🌹
 |  |
|---|
Ahora, dobla cada flor del siguiente modo:
Now fold each flower as follows:

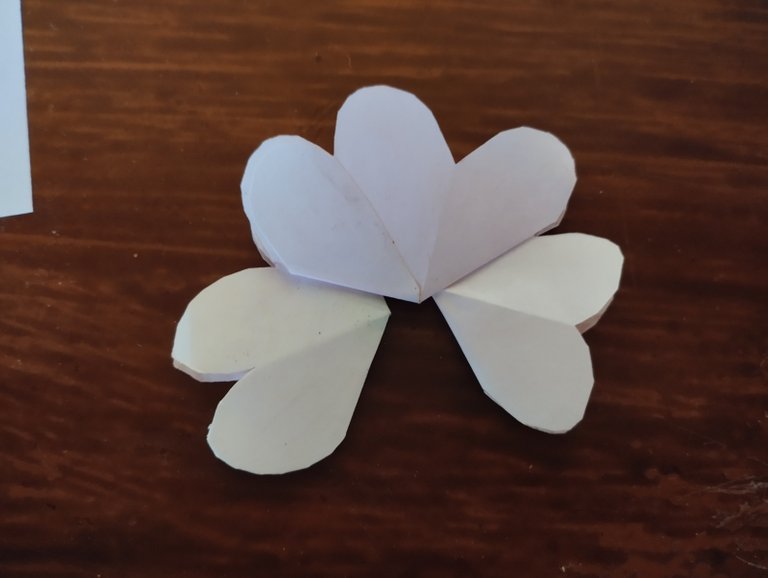
A continuación en cada área que marcaré en la flor debes agregar pegamento e ir uniendo cada una de la flores. Fíjate bien en cada paso:
Next, in each area that I will mark on the flower, you must add glue and join each of the flowers. Take a good look at each step:
 |  |
|---|
 |  |
|---|
Una vez tengas esta forma, agregas pega a la parte que marcaré y la pegarás hacia el centro de la tarjeta en esta dirección:
Once you have this shape, you add glue to the part that I will mark and you will glue it towards the center of the card in this direction:
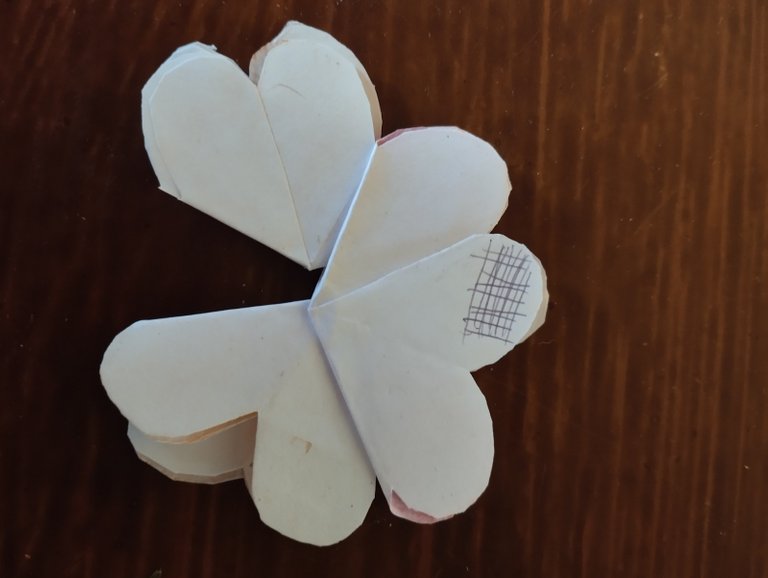
La abertura debe quedar hacia la izquierda, así:
The opening should be to the left, like this:
Una vez uno de los lados esté pegado a la tarjeta, agregas pega nuevamente en la zona marcada (la opuesta a la anterior) y la unes a el otro lado de la tarjeta. Simplemente cierras la tarjeta y aprietas firme🌷.
Once one of the sides is glued to the card, you add glue again in the marked area (the opposite of the previous one) and join it to the other side of the card. You just close the card and press firmly 🌷.
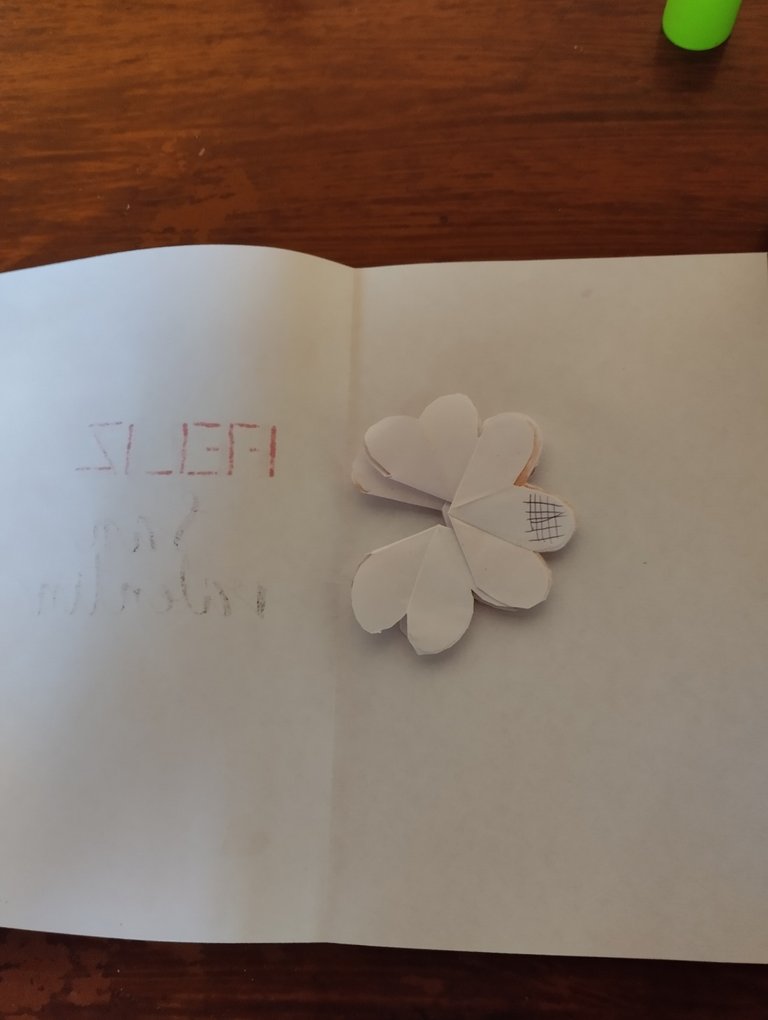
Al abrir la tarjeta las flores también se abrirán💓🌸
When you open the card the flowers will also open💓🌸
Una vez más, para llenar los espacios vacíos hice más recortes de papel de seda y los fui pegando al azar pero cuidando que se vieran bien. También busqué cómo decir "Te amo" en diferentes idiomas y con un lapicero lo escribí al rededor de la tarjeta. Español, inglés, italiano, japonés, danés... Todos podemos decir cuánto amamos💘💘
Once again, to fill in the empty spaces, I made more silk paper cut-outs and glued them on randomly but taking care to make them look nice. I also looked up how to say "I love you" in different languages and with a pen I wrote it around the card. Spanish, English, Italian, Japanese, Danish... We can all say how much we love💘💘
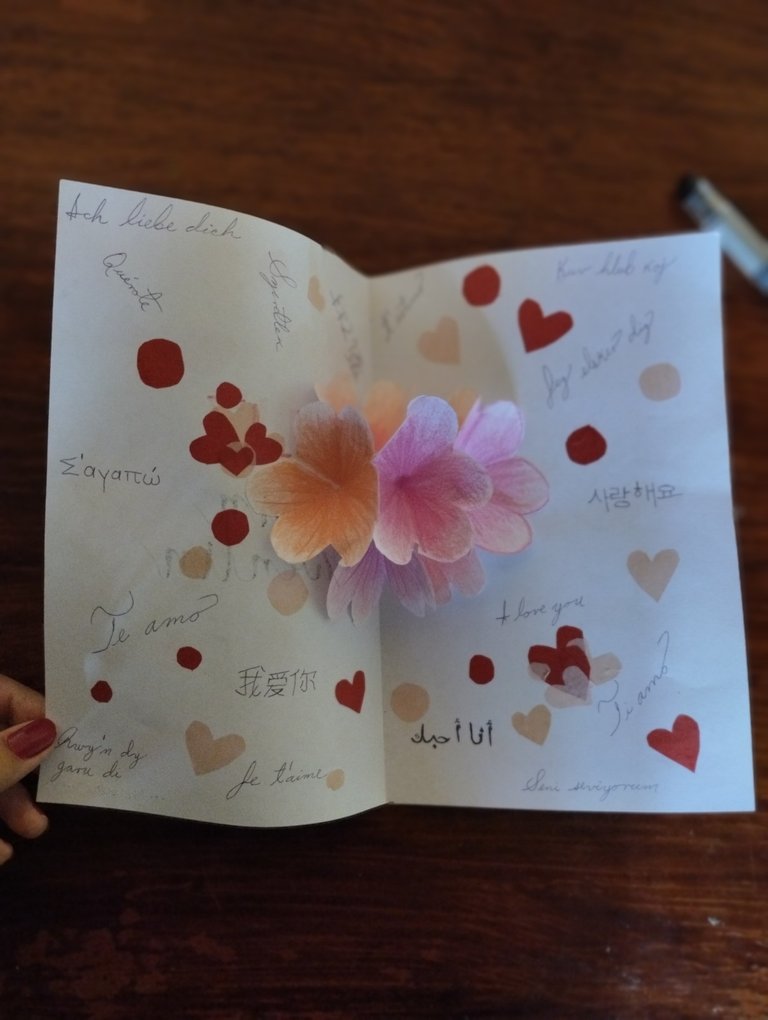
💞¡Y quedó así!:💞
💞And it turned out like this!:💞
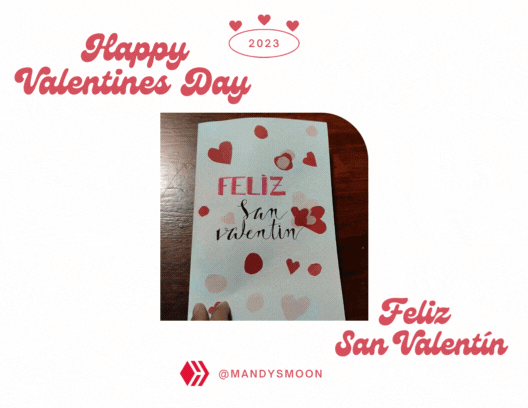
Realmente me encantó el resultado final. Es colorido y una forma sencilla pero bonita de regalarle un pequeño presente a ese amor, amistad o vínculo tan significativo en ese día especial💘.
Te animo a probar hacer esta manualidad y contarme qué tal te fue🌹💕.
I really loved the end result. It's a colorful and simple but beautiful way to give a small present to that significant love, friendship or bond on that special day💘.
I encourage you to try making this craft and tell me how it went🌹💕.
All pics are my property
Todas las fotos son de mi propiedad
Instagram: @mandismoon
The rewards earned on this comment will go directly to the people sharing the post on Twitter as long as they are registered with @poshtoken. Sign up at https://hiveposh.com.
Congratulations @mandysmoon! You have completed the following achievement on the Hive blockchain And have been rewarded with New badge(s)
Your next target is to reach 2750 upvotes.
You can view your badges on your board and compare yourself to others in the Ranking
If you no longer want to receive notifications, reply to this comment with the word
STOPCheck out our last posts:
Una tarjeta con sorpresa que idea tan original, muchos compañeros hivers están llevando su creatividad al límite para estas fechas, tú no eres la excepción.
¡Muchísimas gracias! ✨