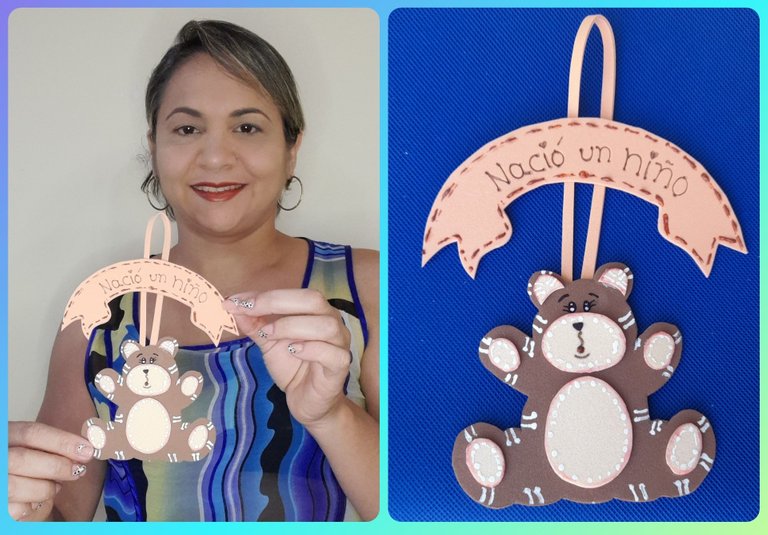
Well, the fact is that today I was not sure what to do and while I was in my creative process I listened to my sister explain something about the types of words, to my daughter what it meant and that we have many words from other languages in our language. Suddenly she turned on the light bulb, from a word for which they discussed its spelling: souvenir and that we pronounce "souvenir" and sometimes we write it as is. In short, because the story is long, a souvenir is a travel memento, but maybe when we give something away we are giving a moment to remember. Every time the person looks at that object they will have a reason, a thought towards that person or the event that occurred. And what better reason to remember than the birth of a baby. In Venezuela it is very common when a baby is going to be met, relatives give the visitor a small gift. My project today is how to make a sweet teddy bear souvenir to give at the birth of a baby. It is really very easy, fast and simple to make, I invite you to read this step by step.Greetings friends of #hivediy. As I have been telling you, February goes with the skates well on. Today Wednesday I didn't know what project to make, when I'm in my creative process my mind flies and thousands of ideas come to mind and I always opt for the most practical ones and those that seem very nice to me, sometimes I listen to suggestions, although I must admit that my "ideas" ask for complacencies that are beyond my abilities, in addition to not having the necessary tools. Although when they ask me for things like the ones I have shown Tata making, bookmarks and other projects, I have been able to please them.
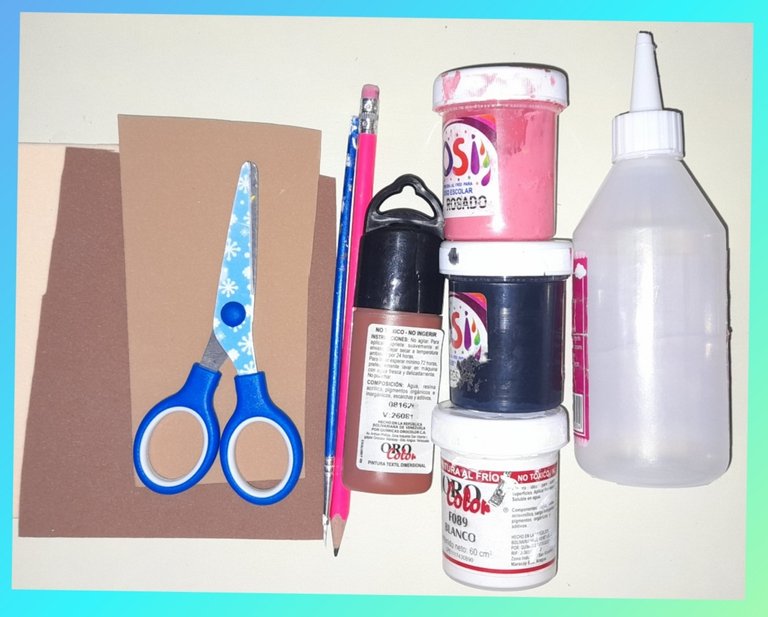
Materiales:
- Foami de colores marrón,piel y durazno.
- Pintura al frío blanca, negro y rosada.
- Pintura bordado líquido marrón.
- Pincel.
- Lápiz.
- Silicón.
Materials:
- Foami in brown, skin and peach colors.
- White, black and pink cold paint.
- Brown liquid embroidery paint.
- Brush.
- Pencil.
- Silicon.
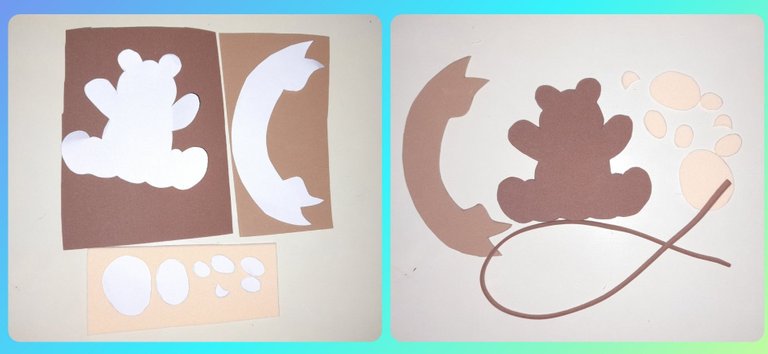
Paso a paso:
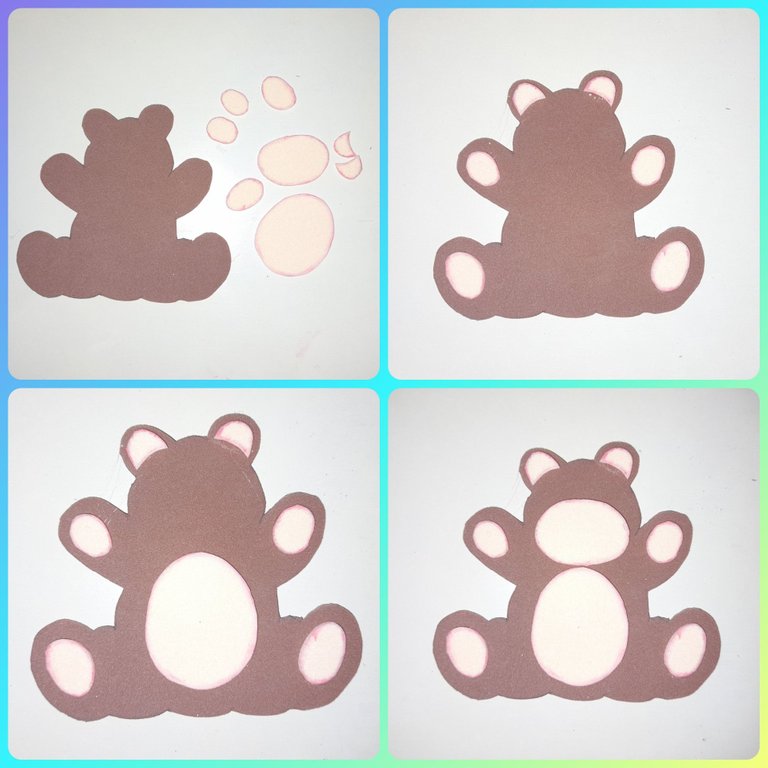
Recortamos el patrón y los trasladamos al foami en el color que corresponde. Cortamos el cuerpo de color marrón,las manos, las patas, la barriga y la cara de color piel, para hacer el aviso utilizamos el foami color melocotón.
Step by Step:
We cut out the pattern and transfer them to the foami in the corresponding color. We cut the brown body, the hands, the legs, the belly and the skin-colored face, to make the notice we used the peach-colored foami.
Luego con el pincel y la pintura rosada vamos sombreando toda la orilla del pecho, cara, manos y patas del osito.
Then with the brush and the pink paint we go shading the entire edge of the chest, face, hands and paws of the bear.
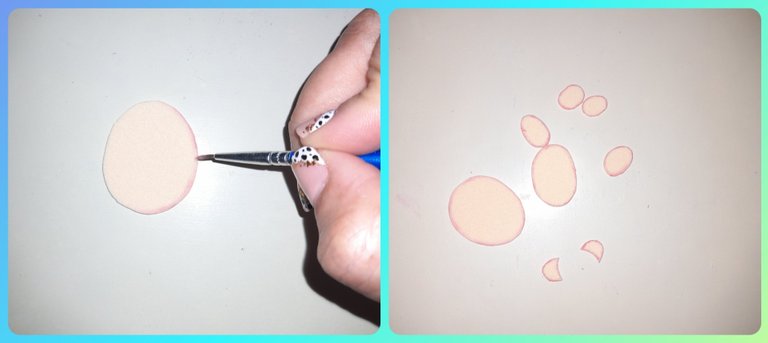
Una vez que las piezas estén sombreadas las vamos pegando al cuerpo del osito en el lugar que le corresponde.
Once the pieces are shaded, we stick them to the body of the bear in the corresponding place.
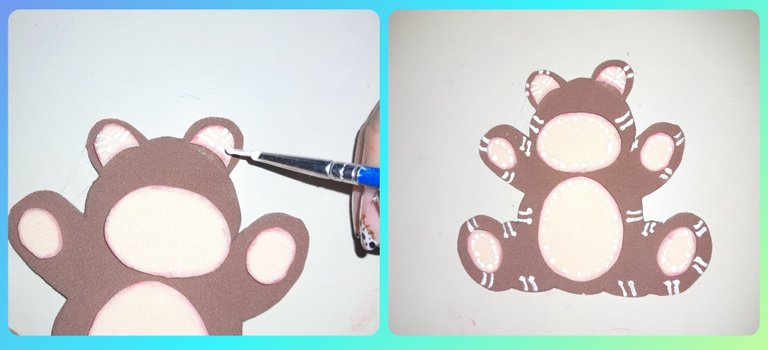
Con la pintura al frío blanca y el pincel trazamos pequeñas líneas alrededor del osito.
With the white cold paint and the brush we draw small lines around the bear.
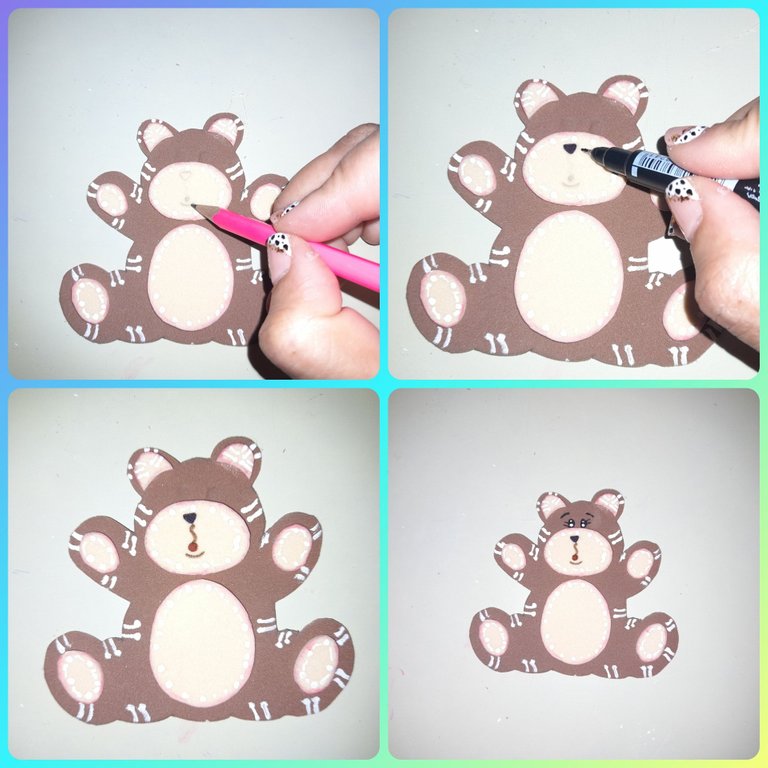
Ahora le vamos a pintar la facciones de la cara, para esto con el lápiz dibujamos la nariz, boca y ojos, luego con el marcador puntafina negro pintamos la nariz y los ojos, con el marcador marrón pintamos la nariz y la boca. La punta de la nariz lleva un punto que se lo coloque con pintura para bordar líquida marrón. Con la pintura blanca pintamos unos pequeños círculos a los ojos para darles brillo.
Now we are going to paint the features of the face, for this with the pencil we draw the nose, mouth and eyes, then with the black fine tip marker we paint the nose and eyes, with the brown marker we paint the nose and mouth. The tip of the nose is dotted with brown liquid embroidery paint. With the white paint we paint some small circles to the eyes to give them shine.
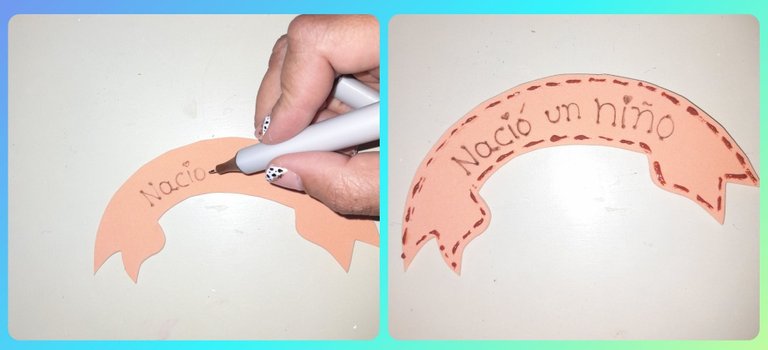
Para elaborar el aviso utilizamos el foami color melocotón, escribimos la frase "Nació un niño" con el marcador marrón, luego con la pintura de bordado líquido pasamos una línea punteada por toda la orilla del aviso.
To make the announcement we used the peach-colored foami, we wrote the phrase "A boy was born" with the brown marker, then with the liquid embroidery paint we passed a dotted line along the entire edge of the announcement.
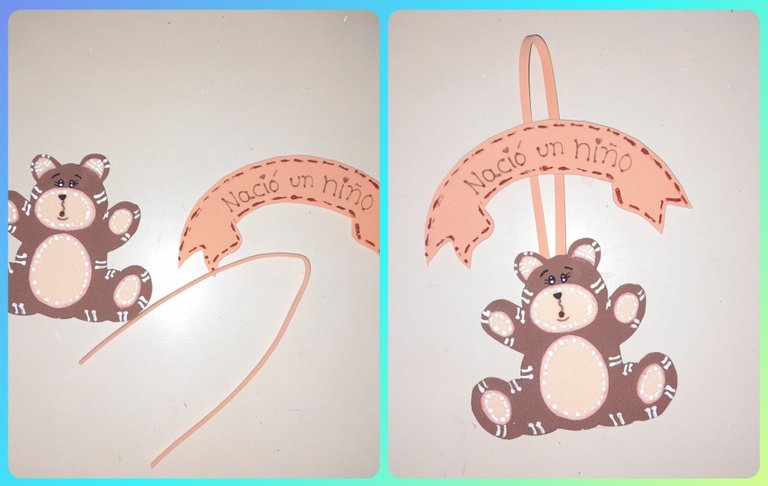
Una vez que ya tenemos listos el oso y el aviso unimos a través de un cordón delgado de foami pegando el oso al cordón y luego el aviso en la parte superior del oso anunciado la llegada del bebé.
Once we have the bear and the announcement ready, we join them through a thin foami cord, gluing the bear to the cord and then the announcement on the top of the bear announcing the arrival of the baby.
-Las fotos son de mi propiedad, tomadas un Samsung A21S,cámara de 48MP.
-Para la traduccion Google Traductor.
-The photos are my property, taken with a Samsung A21S, 48MP camera.
-For Google Translate translation.

Thank you for sharing this amazing post on HIVE!
non-profit curation initiative!Your content got selected by our fellow curator @rezoanulvibes & you just received a little thank you via an upvote from our
You will be featured in one of our recurring curation compilations and on our pinterest boards! Both are aiming to offer you a stage to widen your audience within and outside of the DIY scene of hive.
Join the official DIYHub community on HIVE and show us more of your amazing work and feel free to connect with us and other DIYers via our discord server: https://discord.gg/mY5uCfQ !
If you want to support our goal to motivate other DIY/art/music/homesteading/... creators just delegate to us and earn 100% of your curation rewards!
Stay creative & hive on!
Que lindo te quedó amiga 😊