¡Saludos Comunidad Creativa! | ¡Greetings Creative Community!
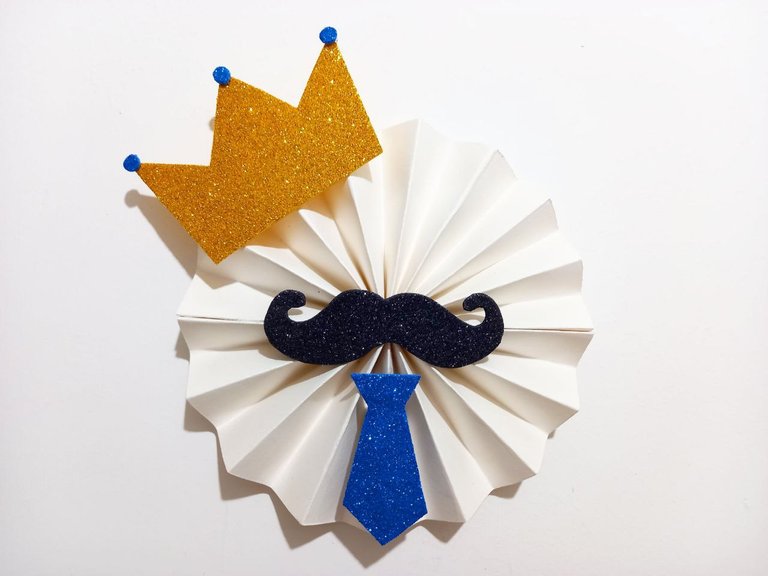
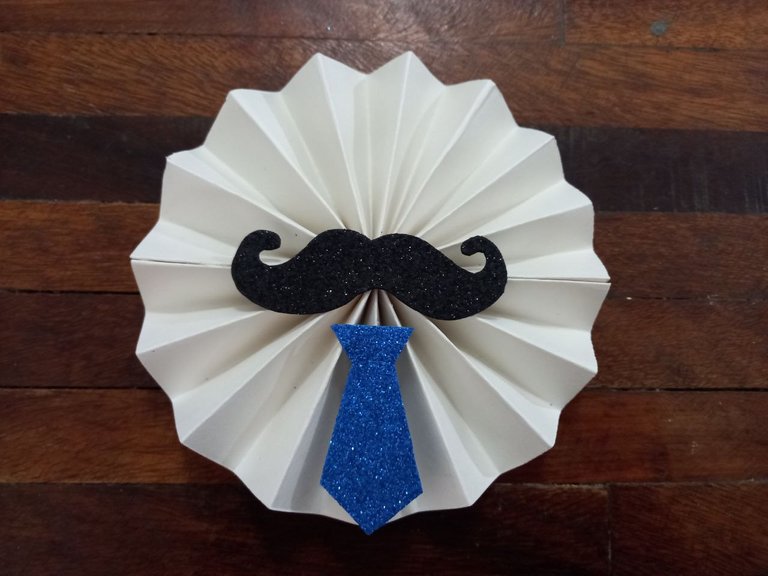
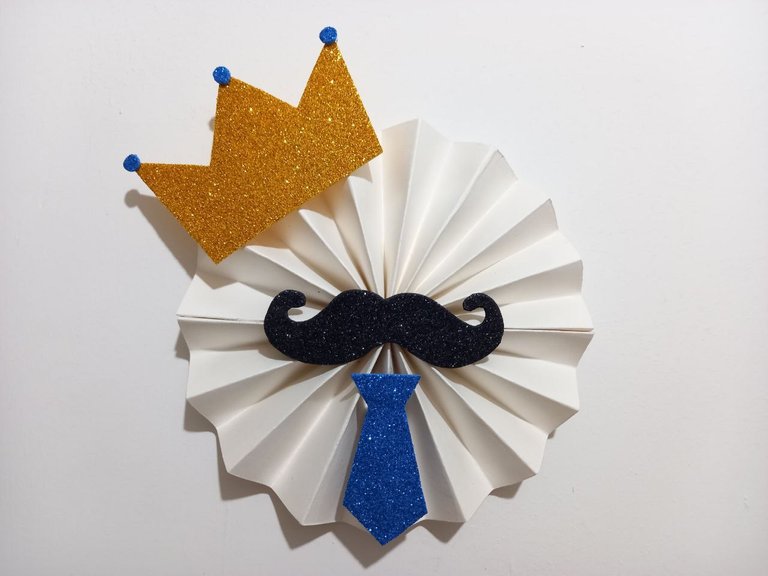
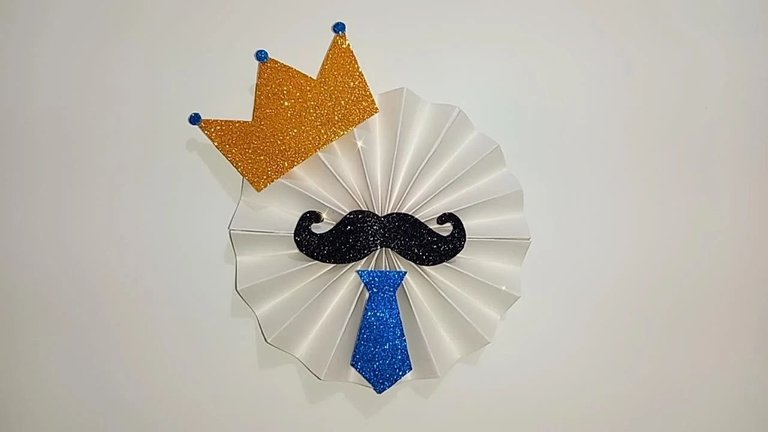
¡Feliz Viernes! Espero que tengan un increíble fin de semana, en esta linda mañana les traigo mi segunda manualidad para celebrar el día del padre, se trata de un hermoso rosetón de cartulina decorado con un bigote, corona y corbata de foami, ideal para usarse como topper, complementar arreglos de dulces y globos o simplemente para decorar en ese día especial, es muy lindo y luce muy bien para decorar espacios, su elaboración es fácil y solo se necesitan pocos materiales, espero que les guste, sin mas, aquí les dejo el procedimiento.
¡Happy Friday! I hope you have an incredible weekend, this beautiful morning I bring you my second craft to celebrate Father's Day, it is a beautiful cardboard rosette decorated with a foami mustache, crown and tie, ideal to be used as a topper, complement arrangements of sweets and balloons or simply to decorate on that special day, it is very cute and looks great to decorate spaces, its preparation is easy and only a few materials are needed, I hope you like it, without further ado, here is the procedure .

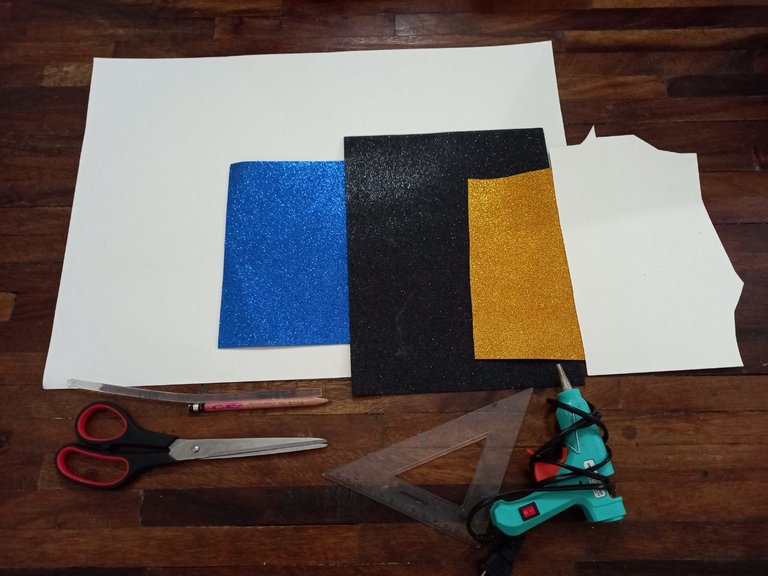
👔 Cartulina escolar blanca.
👔 Foami escarchado dorado, negro y azul rey.
👔 Tijera.
👔 Lápiz.
👔 Regla.
👔 Hoja de papel.
👔 Silicón caliente.
👔 White school cardboard.
👔 Foami frosted gold, black and royal blue.
👔 Scissor.
👔 Pencil.
👔 Rule.
👔 Sheet of paper.
👔 Hot silicone.

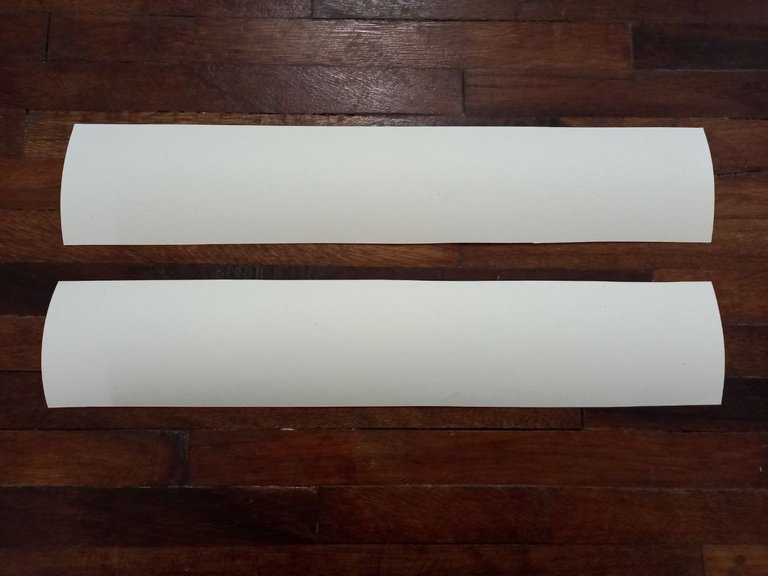
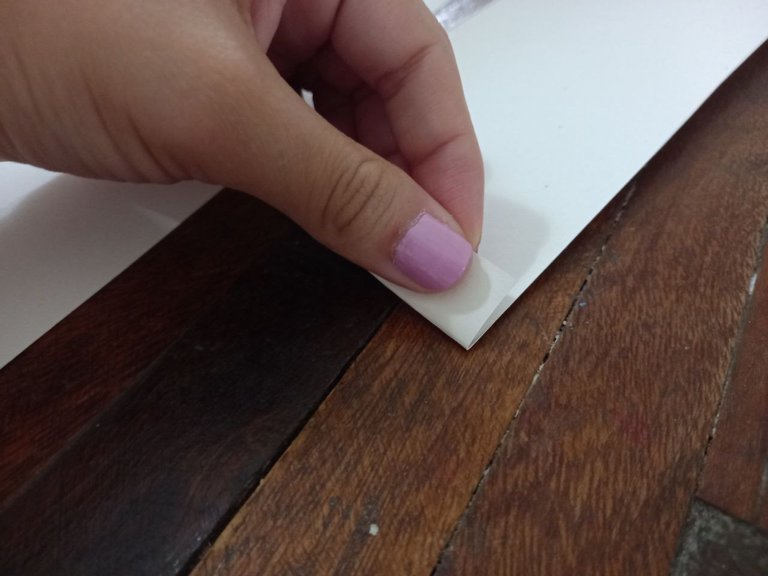
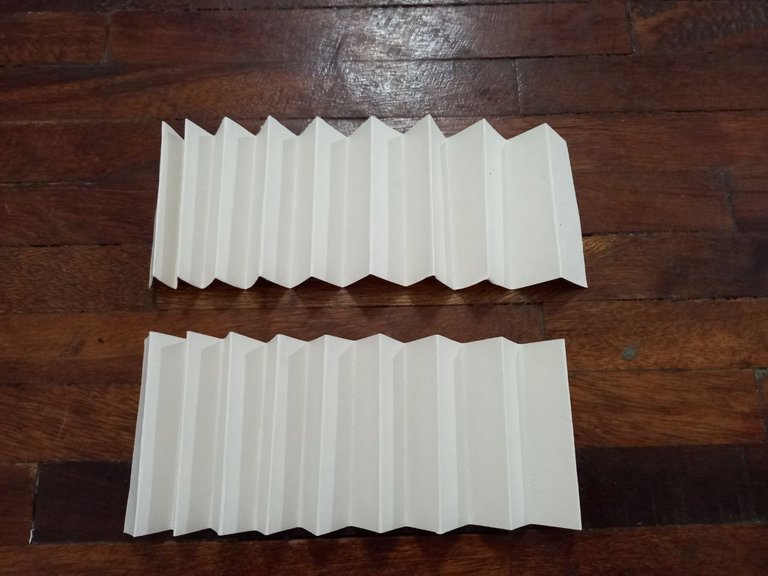
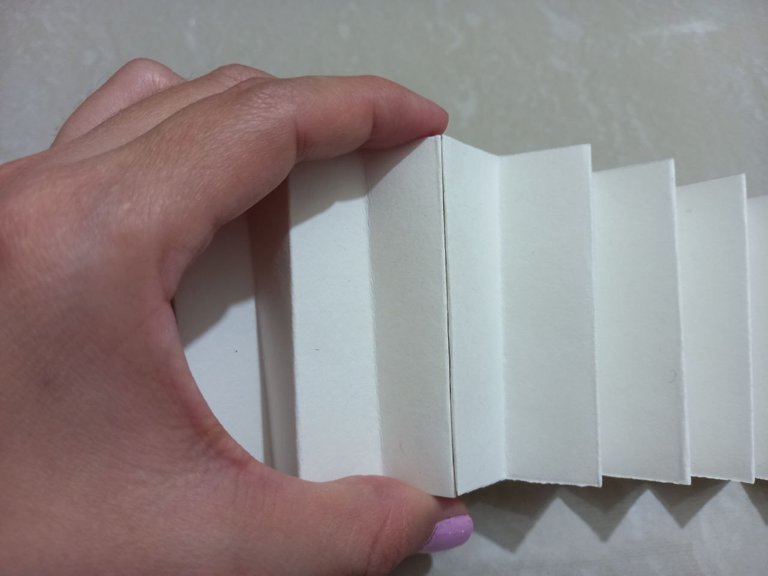
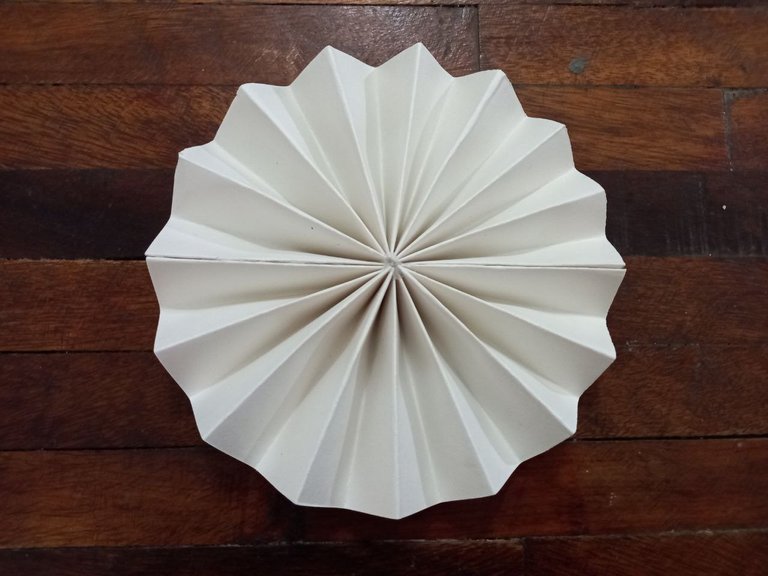
👔 PASO 1. Primero debemos hacer la roseta de cartulina, para ello vamos a recortar 2 tiras de cartulina escolar blanca del mismo tamaño, las medidas que utilicé fueron 7 cm de ancho y de largo el tamaño de la cartulina, al tener las 2 tiras comenzamos doblando una de 1 en 1 cm pero debemos hacer los dobleces de tal forma que el resultado sea como un acordeón, luego repetimos con la otra tira.
👔 STEP 1. First we must make the cardboard rosette, for this we are going to cut 2 strips of white school cardboard of the same size, the measurements I used were 7 cm wide and the size of the cardboard long, having the 2 strips we start by folding one 1 by 1 cm but we must make the folds in such a way that the result is like an accordion, then we repeat with the other strip.

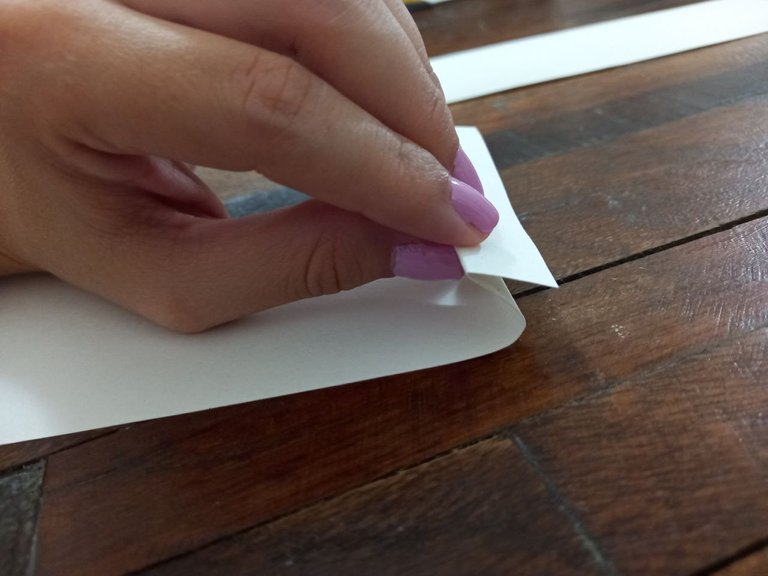
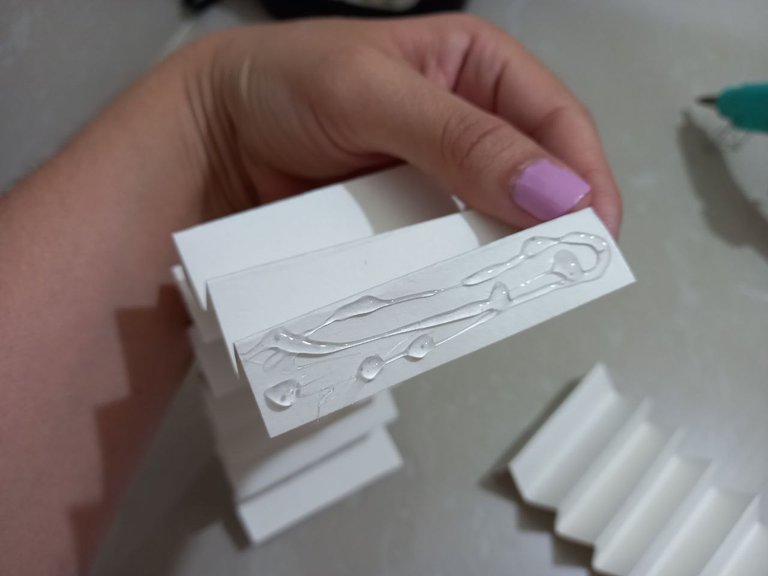
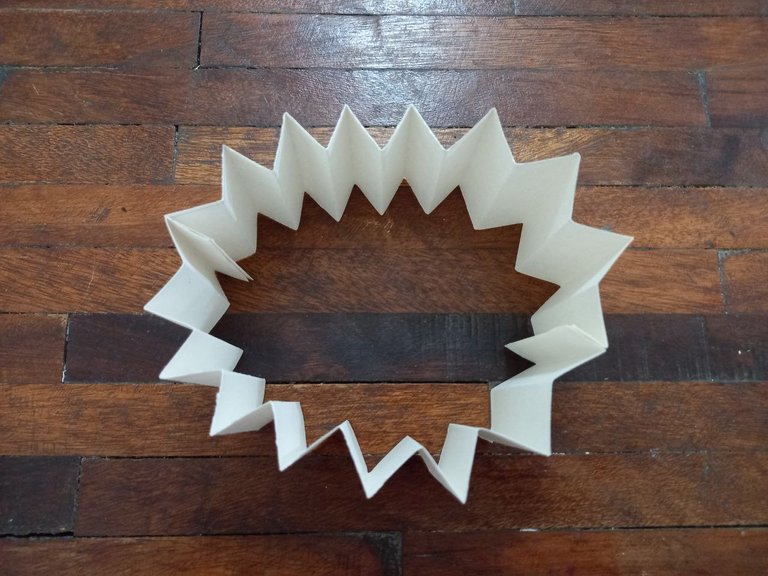
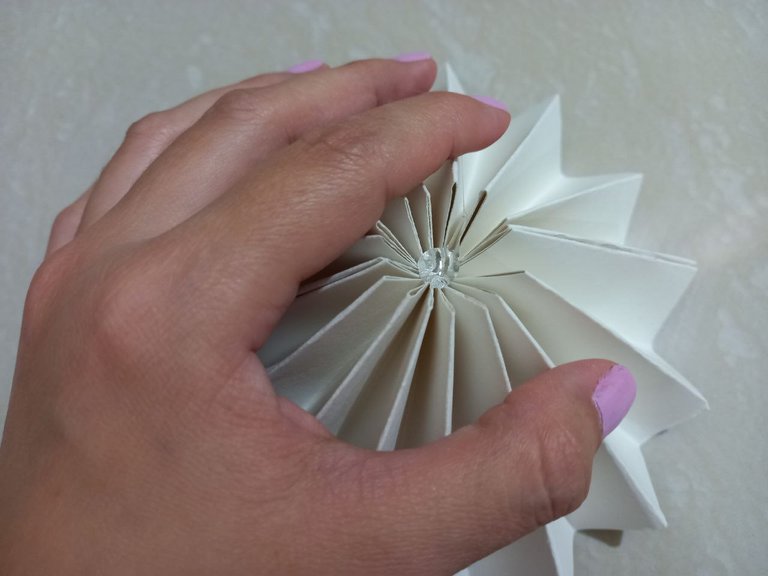
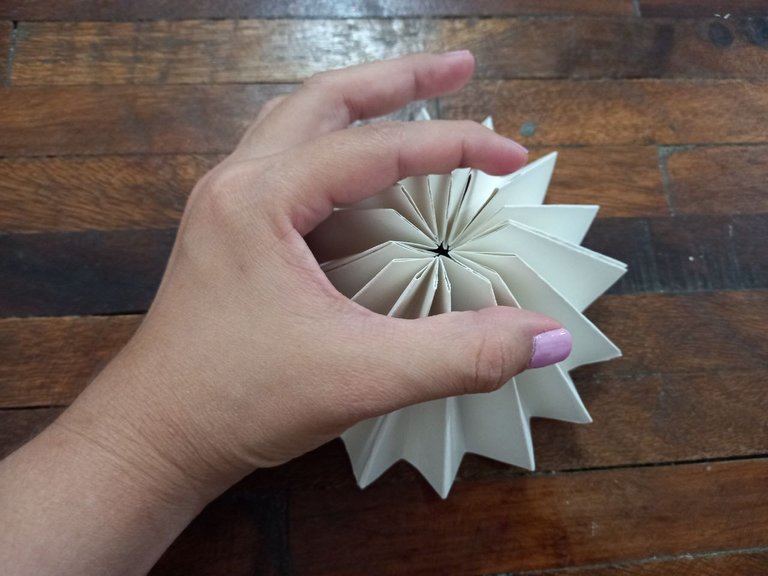
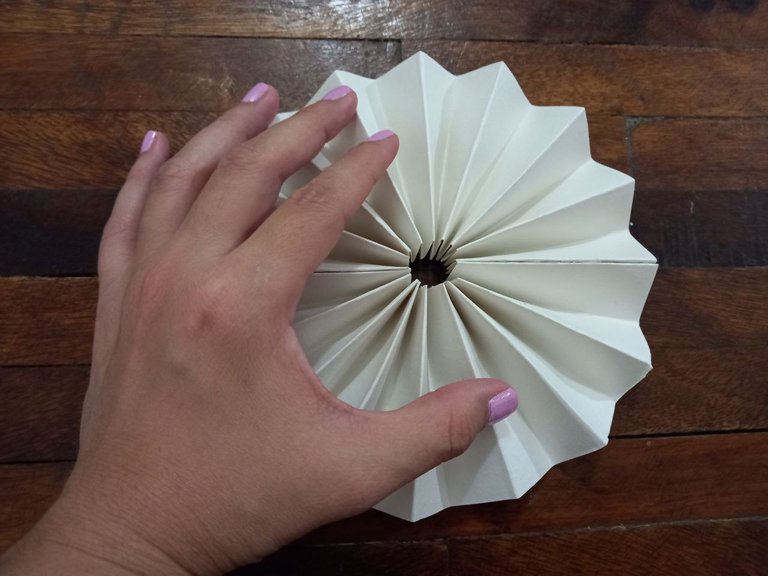
👔 PASO 2. Unimos ambas piezas de cartulina escolar con silicón caliente pegando el extremo de una a un extremo de la otra, luego pegamos los otros 2 extremos y formaremos una pieza, la cual debemos presionar hacia adentro, aplicar silicón caliente en el centro y así formar el rosetón.
👔 STEP 2. We join both pieces of school cardboard with hot silicone by gluing the end of one to one end of the other, then we glue the other 2 ends and we will form a piece, which we must press inwards, apply hot silicone in the center and thus form the rose window.
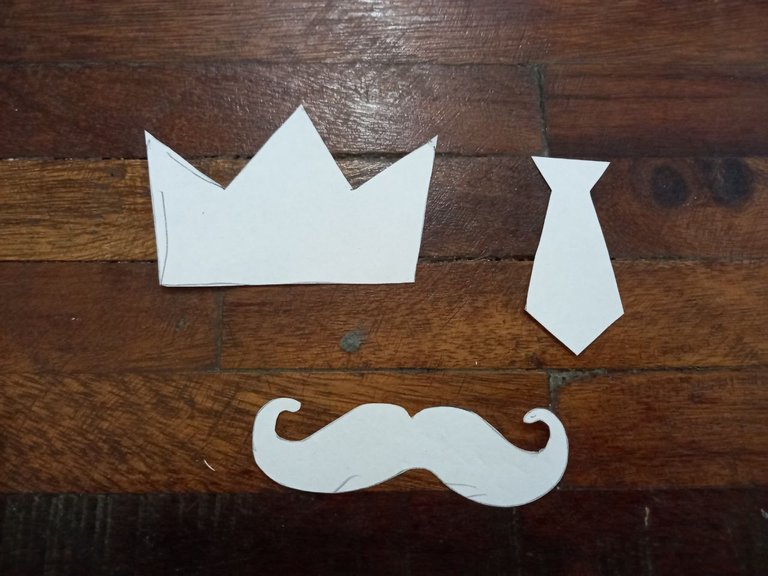
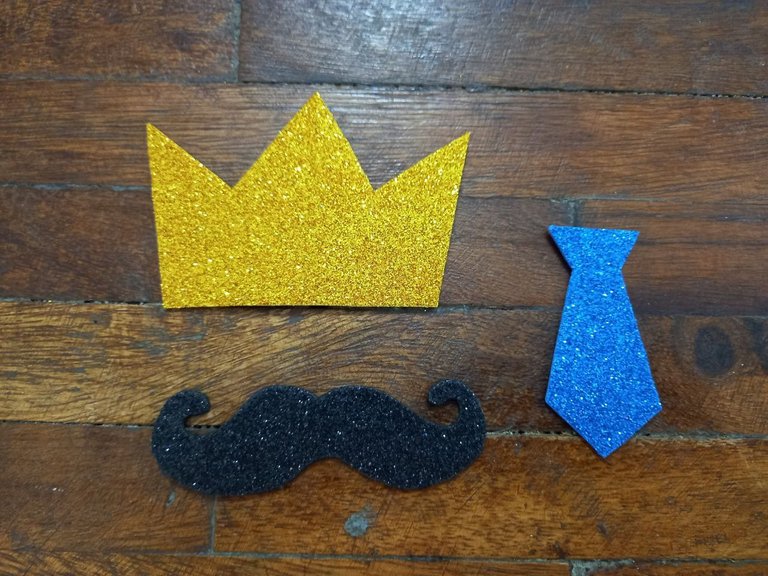
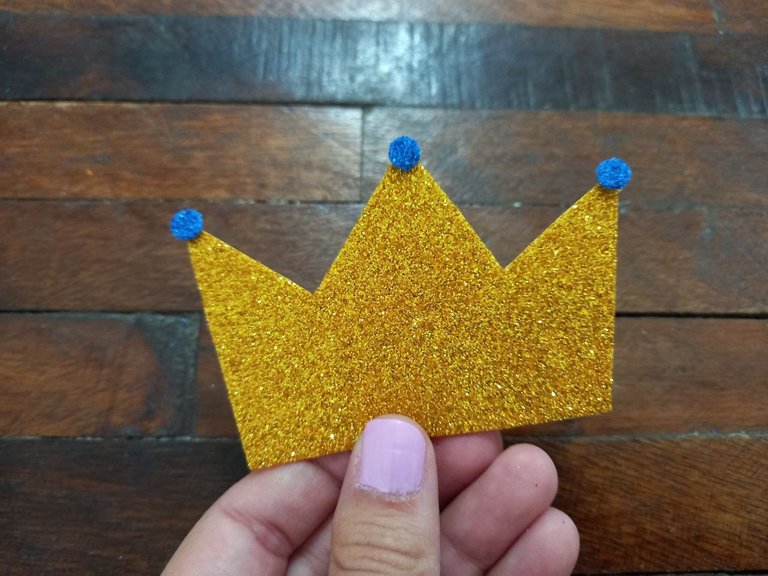
👔 PASO 3. En la hoja de papel dibujaremos la forma de una corona, una corbata y un bigote, recortamos y pasamos al foami, la corona la hacemos en foami escarchado dorado, la corbata la hacemos en foami escarchado azul rey y el bigote lo hacemos en foami escarchado negro, luego de hacerlos recortamos.
👔 STEP 3. On the sheet of paper we will draw the shape of a crown, a tie and a mustache, we will cut it and pass it to the foami, we will make the crown in gold frosted foami, the tie will be made in king blue frosted foami and the mustache we do in black frosted foami, after making them we cut them.
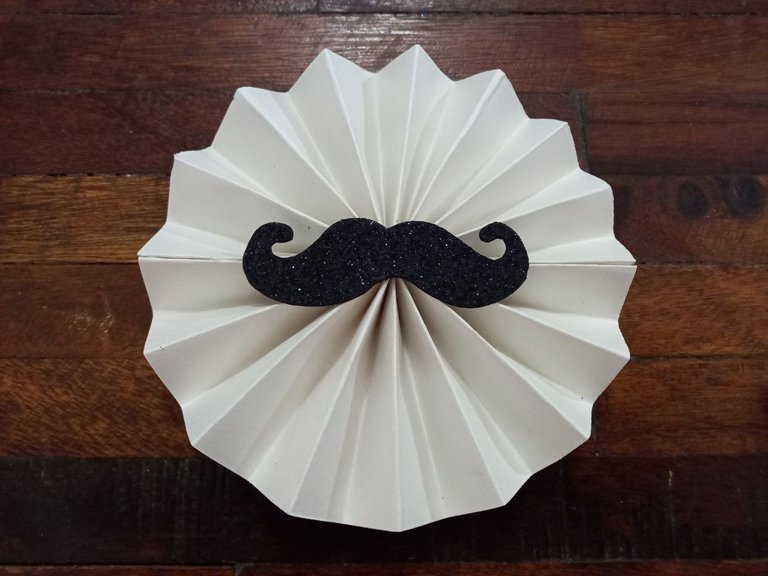
👔 PASO 4. Comenzamos a decorar el rosetón pegando el bigote de foami justo en el centro de este, y debajo del bigote pegamos la corbata, debemos asegurarnos que ambos estén centrados.
👔 STEP 4. We begin to decorate the rose window by gluing the foami mustache right in the center of it, and below the mustache we glue the tie, we must make sure that both are centered.
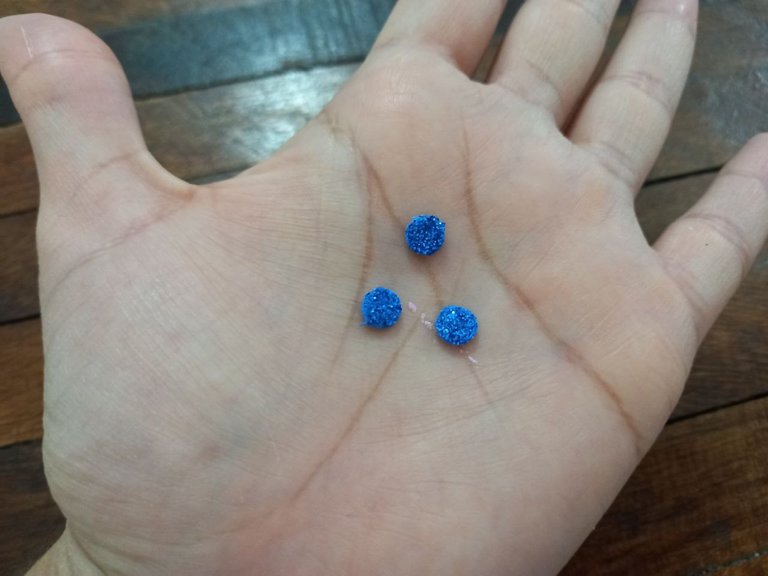
👔 PASO 5. Hacemos unos pequeños círculos de foami escarchado azul rey (puede ser con ayuda de un abre huecos) y los pegamos las puntas de la corona de foami, luego pegaremos la corona al rosetón, yo la coloqué en la parte superior del rosetón y en diagonal pero ustedes pueden colocarla como más les guste.
👔 STEP 5. We make some small circles of royal blue frosted foami (it can be with the help of a hole opener) and we glue them to the tips of the foami crown, then we will glue the crown to the rosette, I placed it in the upper part of the rosette and diagonally but you can place it as you like.
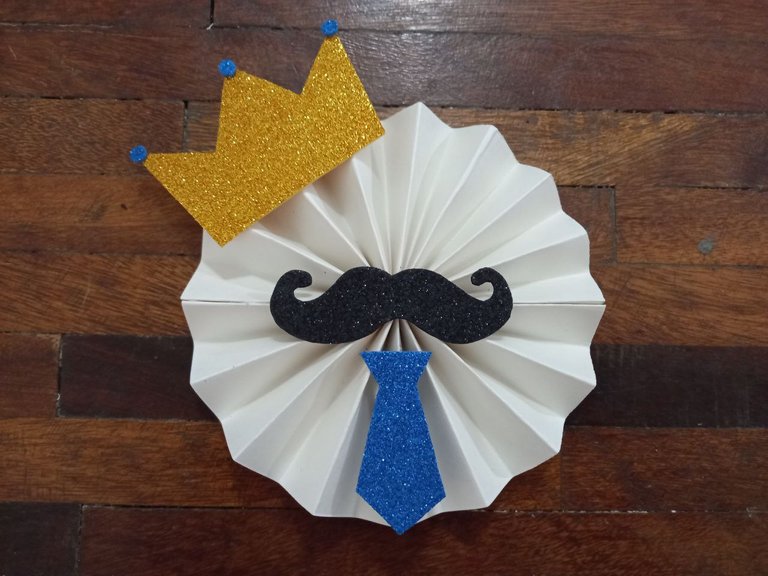
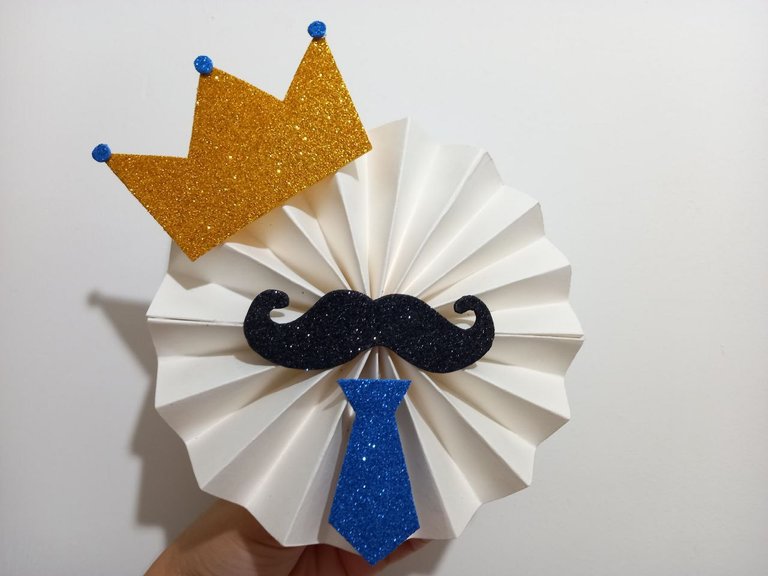
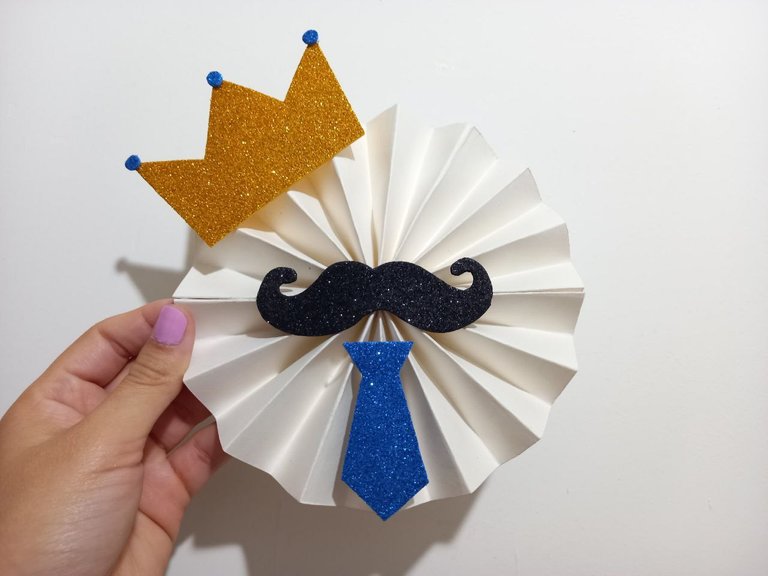
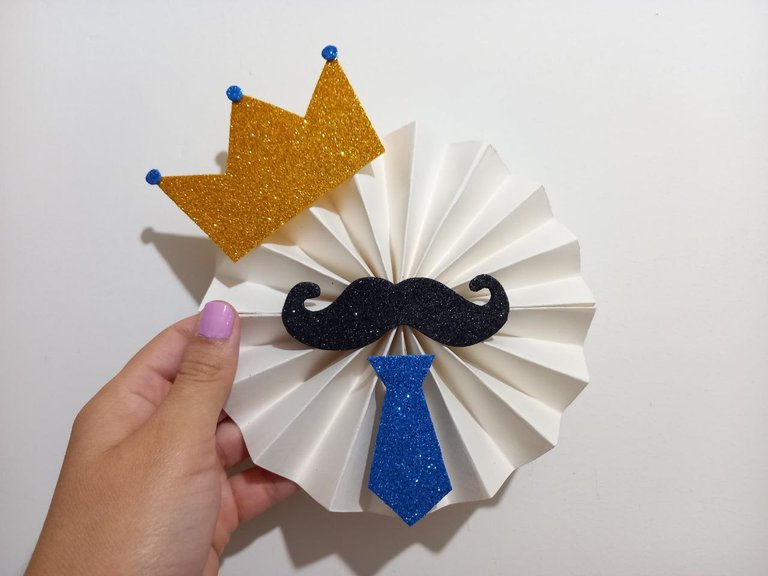
¡Y listo! De esta manera tan sencilla hemos elaborado un hermoso rosetón de cartulina decorado para el día del padre, si le colocamos un palito de altura en su parte trasera puede servirnos de topper para una torta o para un arreglo de dulces y globos, también podemos usarlo para decorar la pared pegándolo a ella con cinta adhesiva, quedamos lindo de cualquier forma y es un adorno que sin duda no puede faltar para decorar el día del padre, espero que les haya gustado este tutorial y esta idea, nos vemos en un siguiente post con una nueva idea creativa.
¡And ready! In this simple way we have made a beautiful cardboard rosette decorated for Father's Day, if we place a tall stick on its back it can serve as a topper for a cake or for an arrangement of sweets and balloons, we can also use it to decorate the wall by sticking it to it with adhesive tape, we look cute in any way and it is an ornament that without a doubt cannot be missing to decorate Father's Day, I hope you liked this tutorial and this idea, see you in a next post with a new creative idea.


Todas las fotografías son de mi propiedad.
Fotografías capturadas con mi Samsung Galaxy A12
Separador de texto elaborado en Canva.
Nos vemos en mi próxima publicación.
¡Tengan un feliz día!
All photographs are my property.
Photos captured with my Samsung Galaxy A12
Text separator made in Canva.
See you in my next post.
¡Have a happy day!
The rewards earned on this comment will go directly to the person sharing the post on Twitter as long as they are registered with @poshtoken. Sign up at https://hiveposh.com.
Gracias por compartirlo y por tus buenos deseos, Feliz tarde.Hola @mariajcastro28, me encanto esa manualidad ya que puede usarse hasta como lazo del obsequio.
Hola linda muchas gracias, que bueno que te gustó, estoy trabajando en manualidades para el día del padre y poco a poco las ire compartiendo en mi blog, esta linda roseta decorada tiene muchos usos y eso la hace perfecta para usar en lo que sea, gracias por tu comentario, saludos!
Muy bien, empezamos temprano con el día del padre... gracias por compartir te quedó hermoso
💙✨🎊🌷🌺🐞💖🌻💜🎉💐🍄🌈⭐🌹🌱🌙🍁🌳🌟🌲🌼🏵️💮🌸🌵🍀💫🍂🥀🌺🌷🎊✨💙
Hola amiga, así es, desde ya trabajando en manualidades para el día del padre, tengo muchas ideas y todas las quiero compartir 😍
A veces es difícil crear trabajos para los hombres, y este es muy original y divertido. Felicidades por tu publicación, es muy completa y detallada
Hola, tienes razón, al menos en cuanto a regalos para hombres siempre me ha costado conseguir algo pero creo que para manualidades hay mas que abarcar, tengo muchas ideas en mente y creo que todas quedarán bien, gracias por tu comentario, me alegra que te gustara esta pequeña creación 😊 Saludos!
Muchas gracias por el apoyo ♥️😍
Thank you for sharing this amazing post on HIVE!
non-profit curation initiative!Your content got selected by our fellow curator @stevenson7 & you just received a little thank you via an upvote from our
You will be featured in one of our recurring curation compilations and on our pinterest boards! Both are aiming to offer you a stage to widen your audience within and outside of the DIY scene of hive.
Join the official DIYHub community on HIVE and show us more of your amazing work and feel free to connect with us and other DIYers via our discord server: https://discord.gg/mY5uCfQ !
If you want to support our goal to motivate other DIY/art/music/homesteading/... creators just delegate to us and earn 100% of your curation rewards!
Stay creative & hive on!
Thank you very much for supporting my content ♥️