Un gusto saludarles amigos de la comunidad de Hive Diy, hoy realicé un lindo y fácil muñeco de nieve con un plato de cartón y unos pocos materiales, ideal para decorar espacios en esta época del año tan hermosa, les dejaré el procedimiento de este fácil proyecto.
Nice to meet you friends from the Hive Diy community, today I made a cute and easy snowman with a cardboard plate and a few materials, ideal for decorating spaces during this beautiful time of year, I'll leave you the procedure for this easy project.

Diy: Muñeco de Nieve hecho con plato de cartón ☃️
Materiales
Plato de cartón
Tijera
Lápiz
Foami negro y rojo escarchado
Un retazo de tela estampada
Marcador negro y anaranjado
Corrector
Rubor para dar color
Patrón de sombrero
Silicón caliente
DIY: Snowman made with a cardboard plate ☃️
Materials
Cardboard plate
Scissors
Pencil
Black and red frosted foam
A piece of patterned fabric
Black and orange marker
Corrector
Blush to add color
Hat pattern
Hot glue

Procedimiento
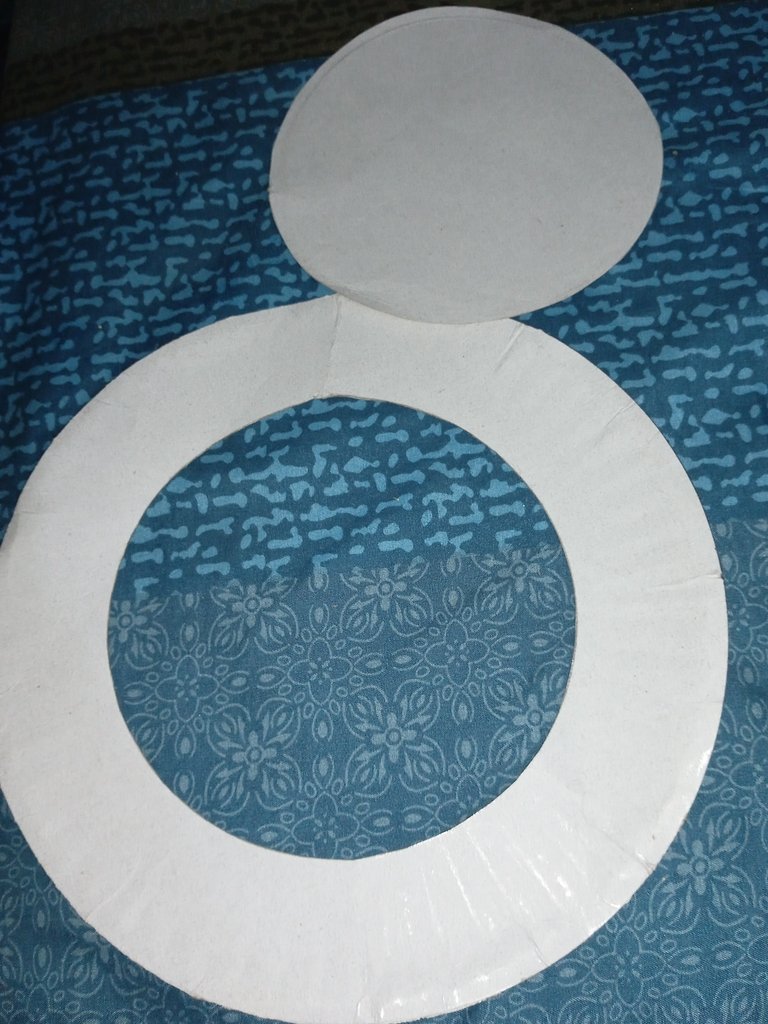
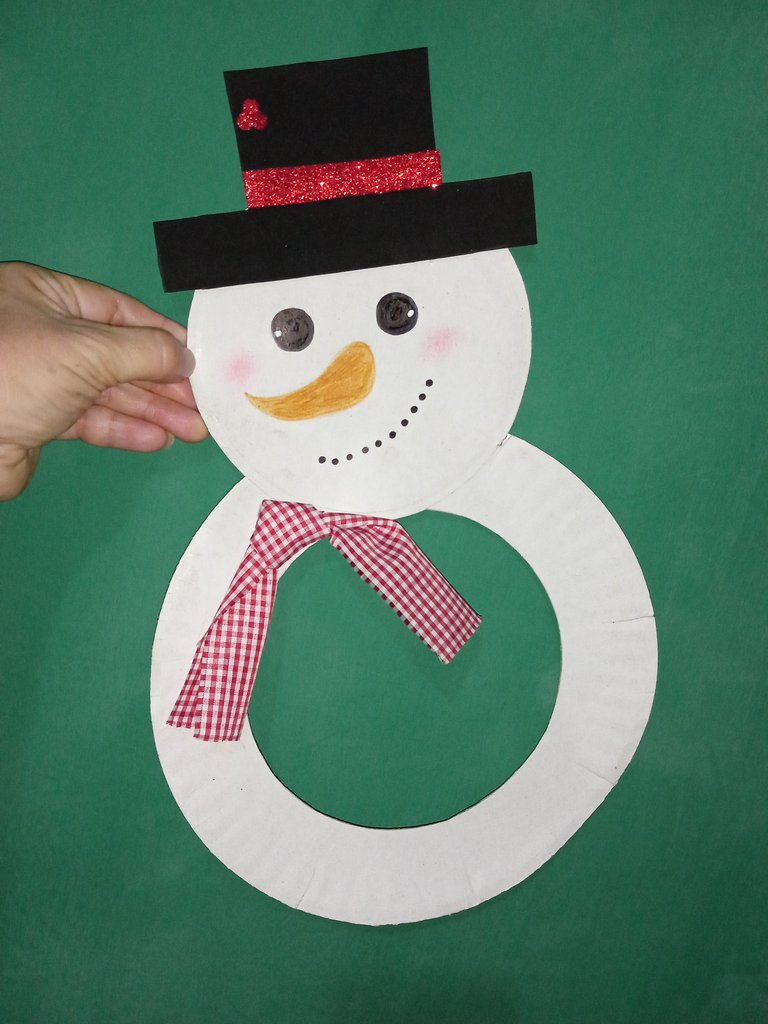
1.En este primer paso vamos a marcar el círculo que tiene el plato en el medio, si no se ve bien, marcamos uno con el lápiz, que quede a unos 4 cm de distancia del borde, recortamos y pegamos el entero encima del hueco, de esta forma tenemos el cuerpo y cabeza de muñeco de nieve.
Procedure
1.In this first step we are going to mark the circle that the plate has in the middle, if it is not visible, we mark one with the pencil, which is about 4 cm away from the edge, we cut it out and glue the whole thing on top of the hole, this way we have the body and head of the snowman.


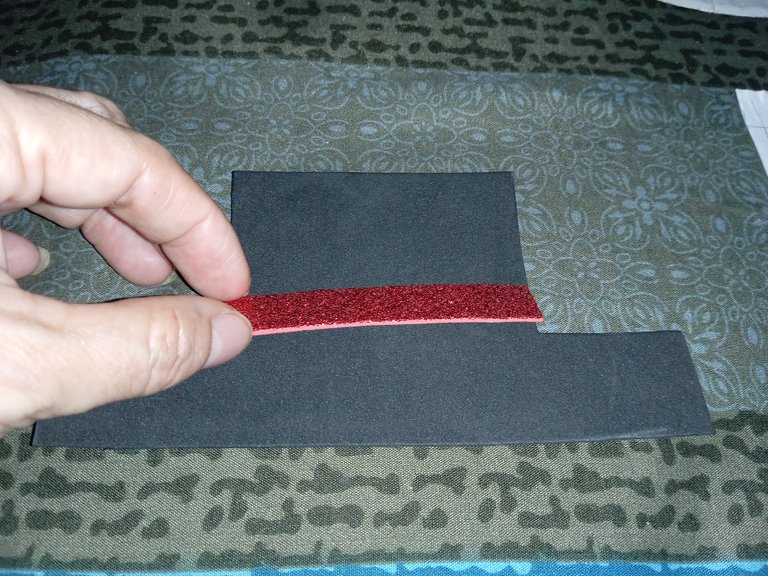
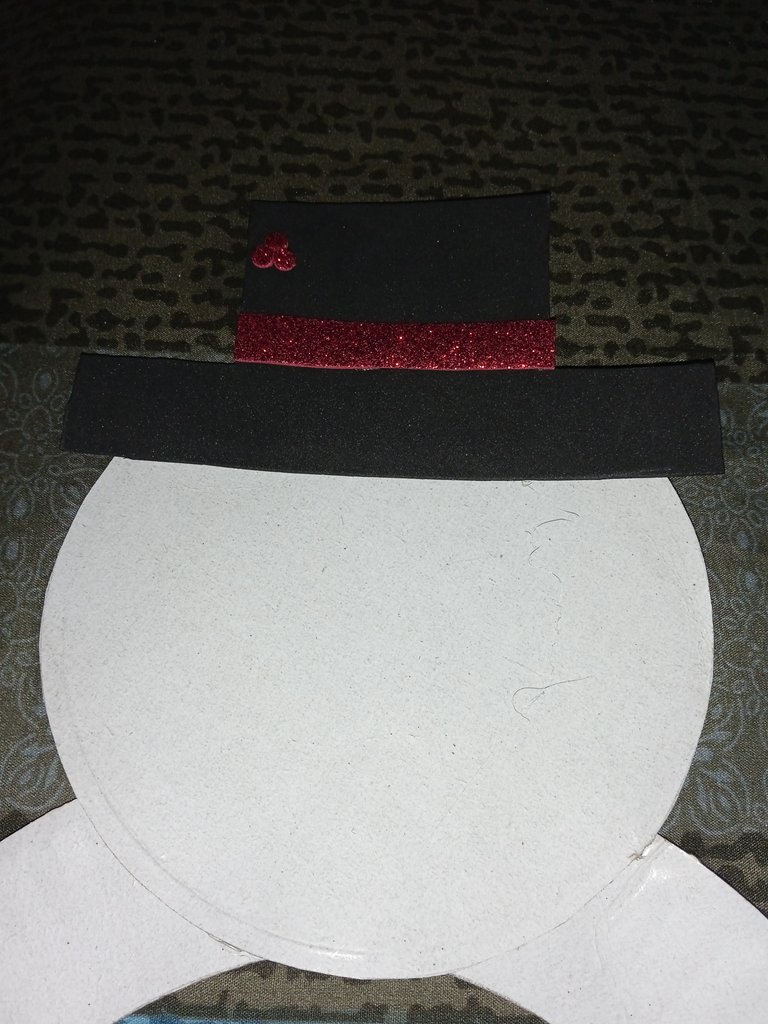
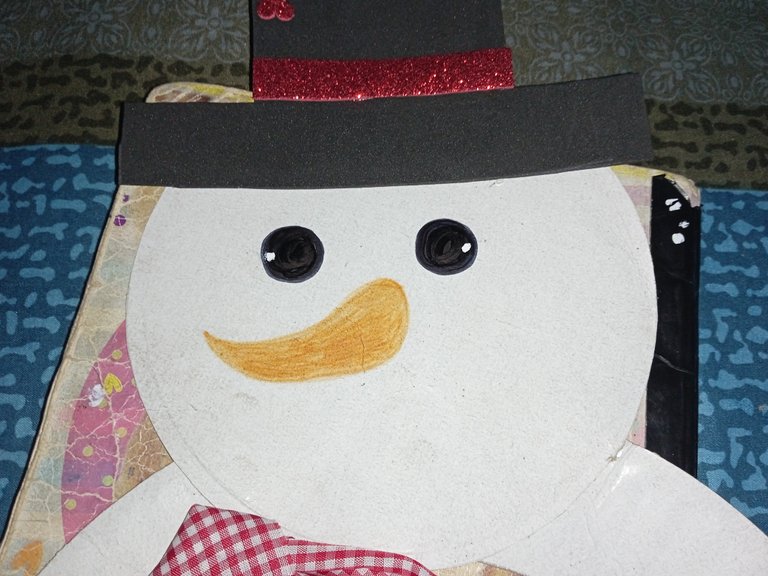
2.Luego vamos a hacer el sombrero , para ello en el foami negro marcamos el sombrero y recortamos, también recortamos una tira roja escarchada y unas bolitas y pegamos en el sombrero, luego pegamos en la cabeza del muñeco de nieve.
2.Then we are going to make the hat, for this on the black foam we mark the hat and cut it out, we also cut out a red frosted strip and some balls and glue them on the hat, then we glue them on the head of the snowman.


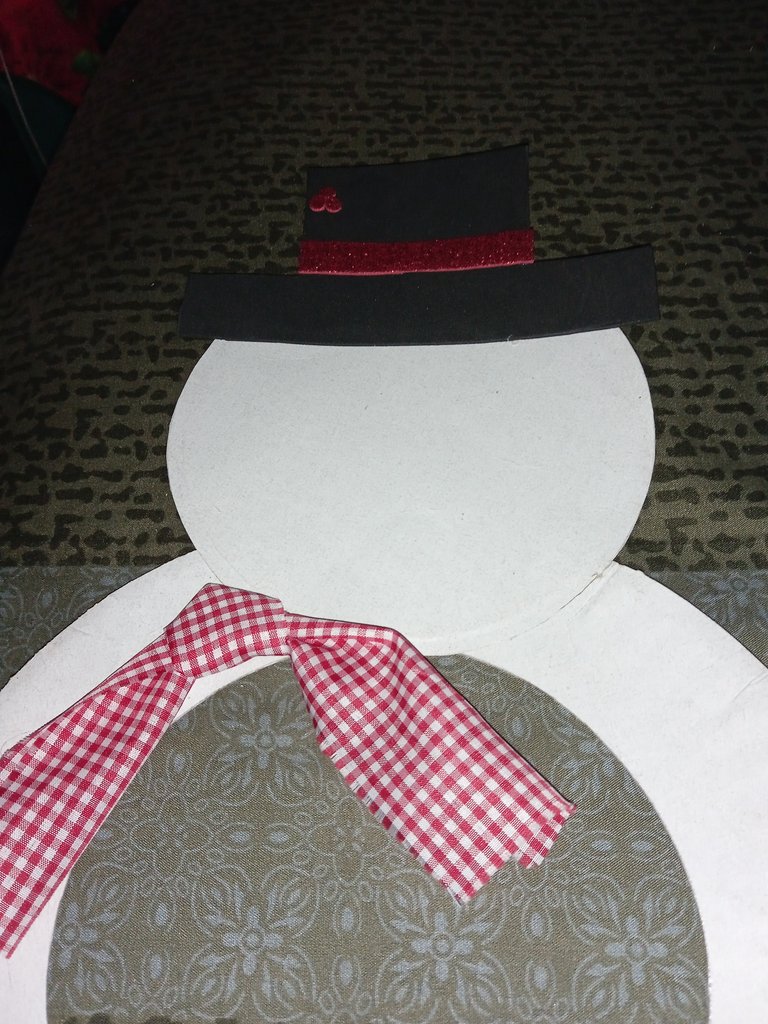
3.Seguidamente hacemos la bufanda, para ello tomamos la tela estampada, doblamos y pegamos en el cuello del muñeco de nieve.
3.Next, we make the scarf. To do this, we take the patterned fabric, fold it, and glue it to the snowman's neck.

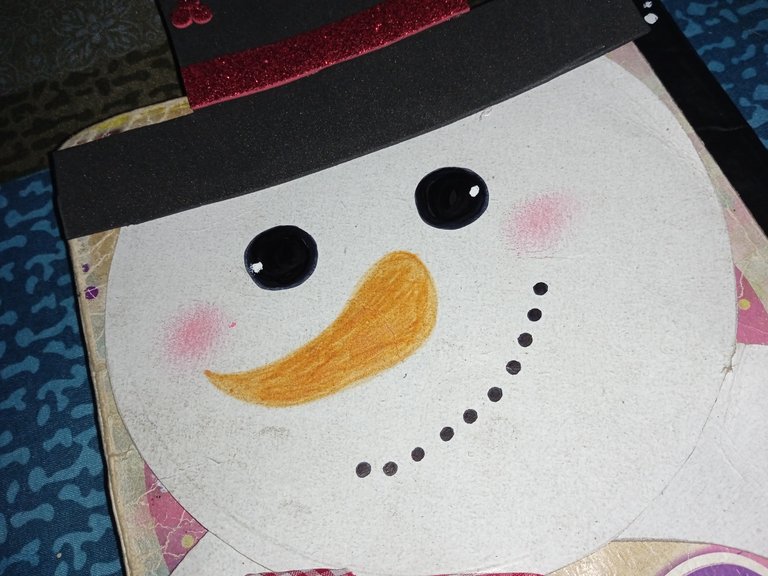
4.Por último, le damos vida a su cara, para ello con el marcador negro hacemos los ojos y marcamos con el corrector un puntito blanco a los lados, hacemos la nariz de color anaranjado y luego hacemos puntitos negros debajo que será la boca, luego para darle un toque de color con el rubor le pintamos unas mejillas sonrojadas y así está listo este lindo proyecto navideño.
4.Finally, we give life to his face. To do this, we make the eyes with the black marker and mark a white dot on the sides with the concealer. We make the nose orange and then make black dots underneath which will be the mouth. Then, to give it a touch of color, we paint some rosy cheeks with blush, and this cute Christmas project is ready.


Feliz Navidad! ☃️❄️
Merry Christmas! ☃️❄️

Hasta aquí mi Proyecto de este día, espero les haya gustado, muchas gracias por el apoyo brindado. Saludos
So Project for this day, I hope you liked it, thank you very much for the support. Greetings
Todas las imágenes son de mi autoria por @mariarodriguez, tomadas especialmente para esta publicación.
All images are my own by @mariarodriguez, taken especially for this publication.

Aww es muy tierno, me encantan los muñecos de nieve, por eso quiero vivir en un sitio con mucha nieve para hacer varios jaja te quedo muy bonito 😘
Wow muy creativo tu diseño.
bENDICIONES
Que buena forma de reutilizar, gracias por compartir ☃️
Que buena técnica, y con materiales reciclado que bueno amiga, te quedó muy bien ese muñeco ☃️