¡Un saludo a todos por acá! Hoy quiero compartirles el tutorial de un hermoso colgante que me da la sensación de magia, pues parece un poder secreto encerrado en una jaulita de cristal. Este colgante es parte de las decoraciones que agregué en mi collar anterior y el tutorial también está disponible en mi blog, así que te invito a verlo y a seguir leyendo este post para que no te pierdas ninguno de los pasos para obtener un nuevo colgante muy creativo y bonito.
Greetings to everyone here! Today I want to share with you the tutorial of a beautiful pendant that gives me the feeling of magic, because it looks like a secret power enclosed in a little crystal cage. This pendant is part of the decorations I added in my previous necklace and the tutorial is also available on my blog, so I invite you to watch it and keep reading this post so you don't miss any of the steps to get a new very creative and beautiful pendant.
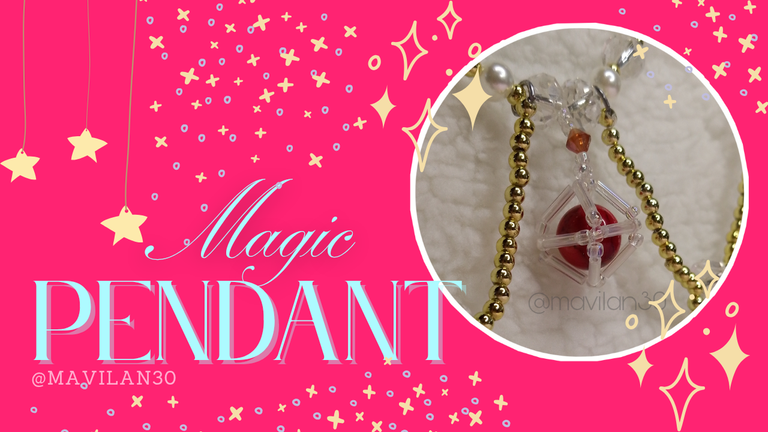
Imagen creada por mí en Canva / Image created by me in Canva
Materiales:
- Nilón
- Canutillos blancos tornasol
- Mostacillas blanco tornasol
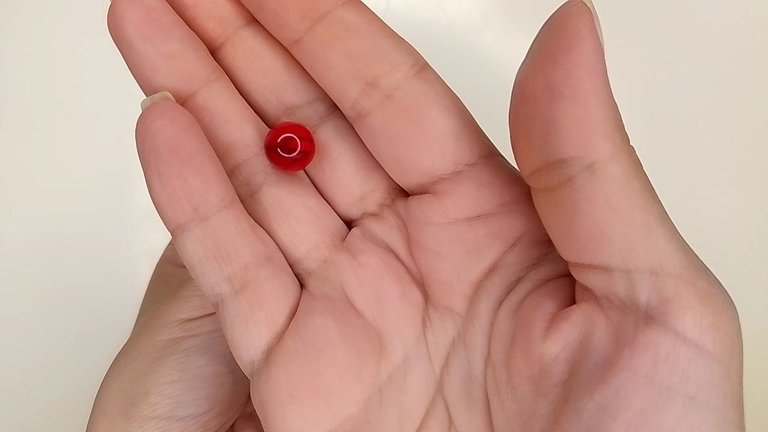
- Cuenta grande roja
- Cristal ámbar tornasol
- Tijeras
Procedimiento:
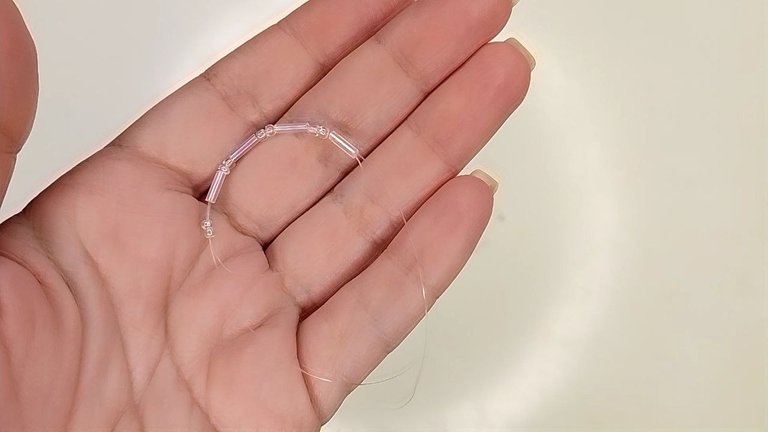
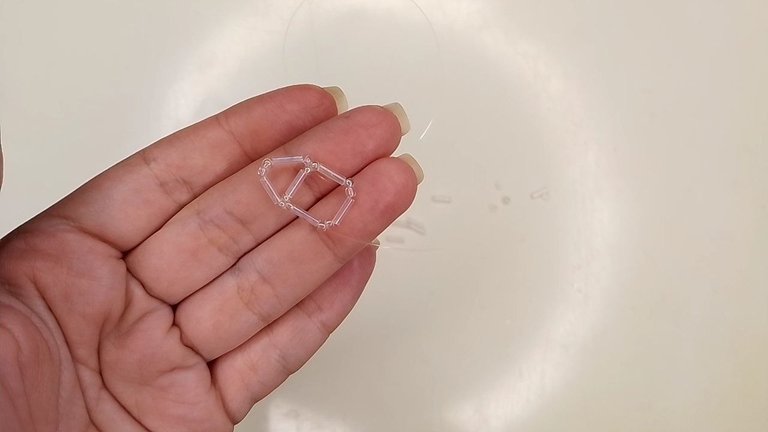
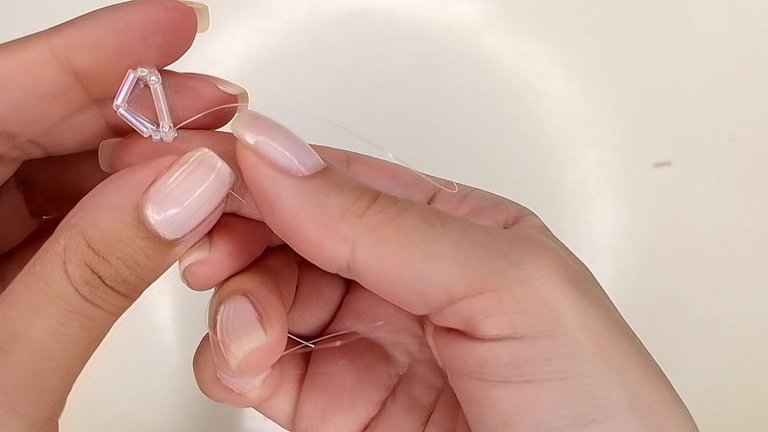
Iniciamos introduciendo el nilón a través del patrón de un canutillo seguido de dos mostacillas y repetimos este patrón hasta haber agregado cuatro canutillos. Con uno de los extremos del nilón pasamos a través de todas las cuentas por segunda vez para aportar rigidez al diseño y tiramos de ambos extremos para que se forme la base de la estructura que viene a ser un cuadrado. He añadido dos mostacillas entre cada canutillo porque requería agrandar el espacio lo suficiente para que entrara mi cuenta central al final del diseño, por lo que es importante que verifiques el tamaño de tu cuadrado base con respecto a la cuenta decorativa central que usarás para poder continuar adelante y no pierdas el trabajo.
Materials:
- Nylon
- Iridescent white beads
- White litmus beads
- Large red bead
- Amber litmus glass
- Scissors
Procedure:
We start by inserting the nylon through the pattern of one bead followed by two beads and repeat this pattern until we have added four beads. With one end of the nylon we pass through all the beads a second time to give rigidity to the design and pull both ends to form the base of the structure which is a square. I have added two beads between each bead because I needed to enlarge the space enough to fit my center bead at the end of the design, so it is important that you check the size of your base square against the center decorative bead you will use so that you can continue on and not lose the work.
 |  |
|---|
Cuadrado base / Base square
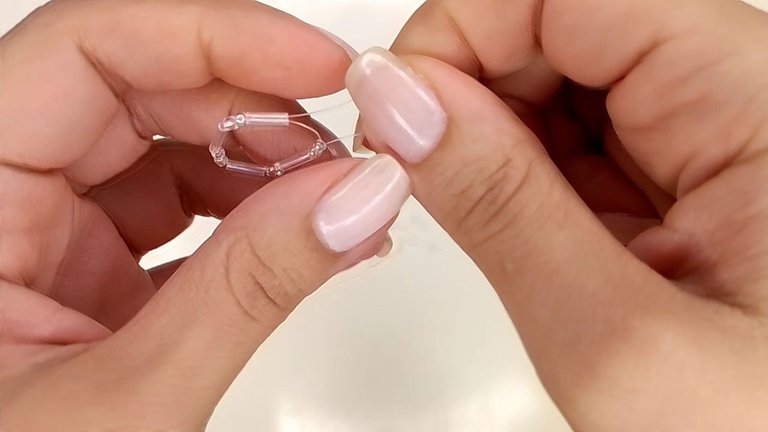
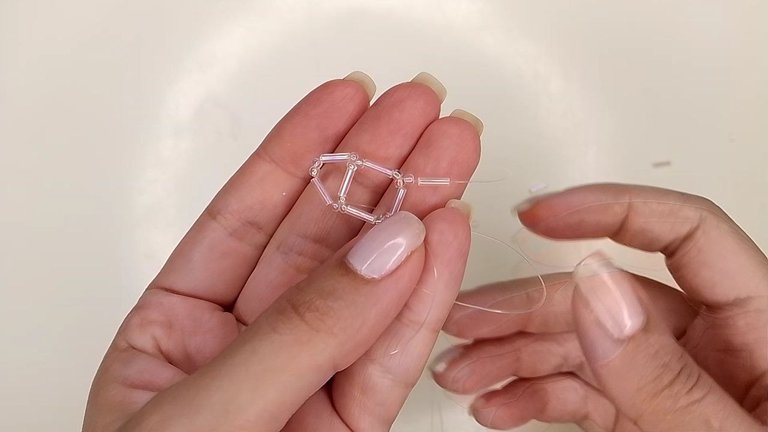
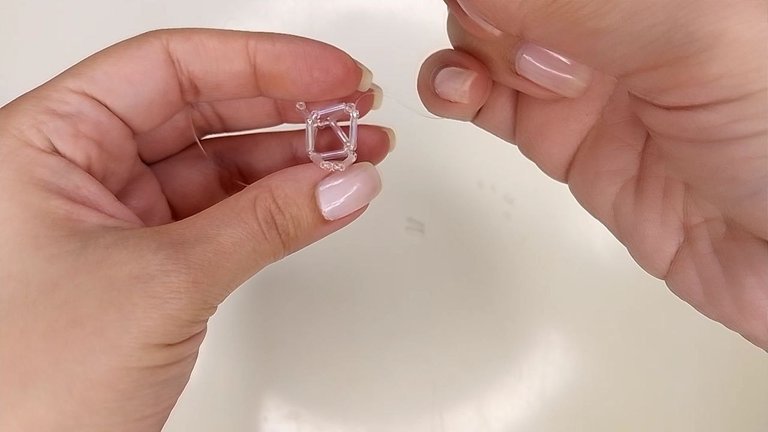
Ahora añadiremos un canutillo, una mostacilla y un canutillo más, en la imagen verán que inicialmente solo coloqué una mostacilla en medio pero luego lo arreglé (risas) y pasarán el nilón a través de la segunda mostacilla inmediata en el cuadrado base, y seguiremos por el canutillo y la siguiente mostacilla, allí, tiramos del nilón y se formará la primera pared triangular de la jaulita.
Now we will add a bead, a bead and one more bead, in the image you will see that initially I only placed a bead in the middle but then I fixed it (laughs) and will pass the nylon through the second immediate bead in the base square, and we will continue through the bead and the next bead, there, we pull the nylon and the first triangular wall of the cage will be formed.
 |  |
|---|
Pared triangular / Triangular wall
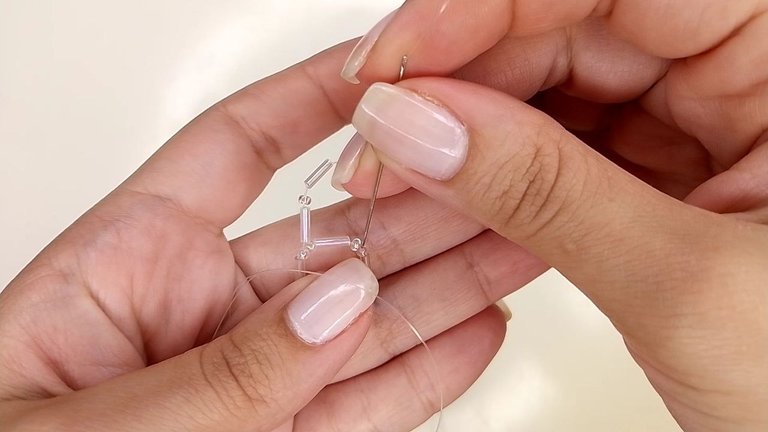
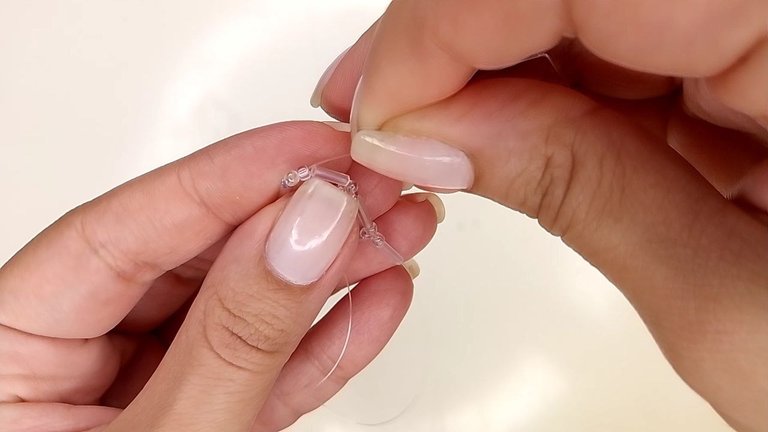
El siguiente movimiento consiste en agregar una mostacilla y un canutillo, nótese que, la salida del nilón en el paso anterior quedó en la cara opuesta a la primera pared triangular. Este extremo del nilón lo pasaremos a través de las dos mostacillas centrales de la pared triangular y acto seguido añadiremos un canutillo y una mostacilla y al tirar del nilón, quedará formada la mitad de nuestra pequeña jaulita tornasol.
The next movement consists of adding a bead and a bead, note that the end of the nylon in the previous step was on the opposite side of the first triangular wall. This end of the nylon we will pass it through the two central beads of the triangular wall and then we will add a bead and a bead and when we pull the nylon, half of our little litmus cage will be formed.
 |  |
|---|
 |  |
|---|
Media jaula / Half cage
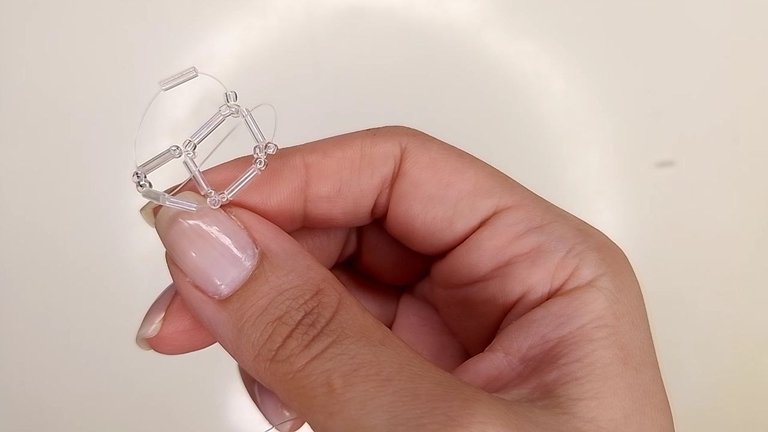
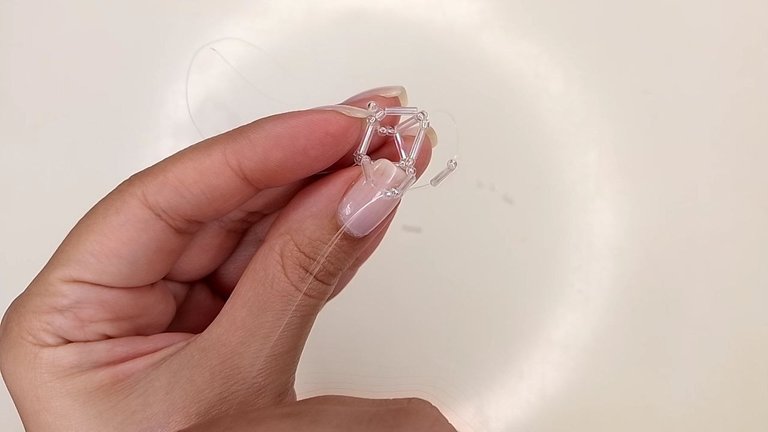
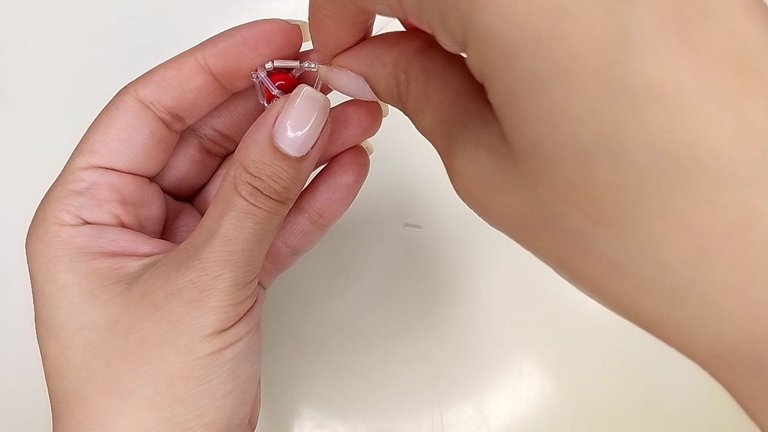
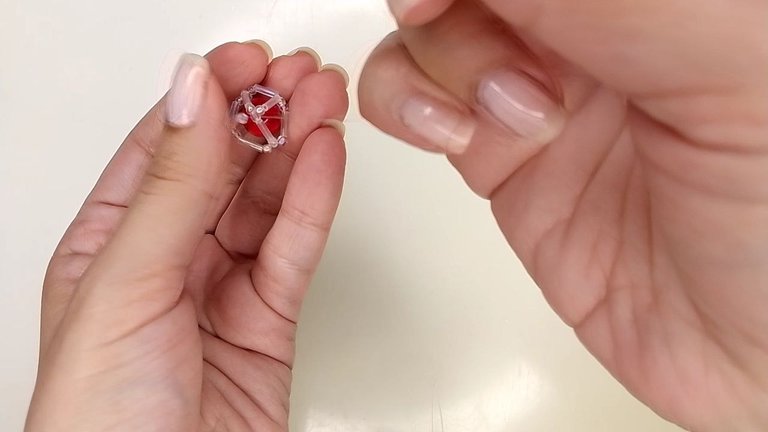
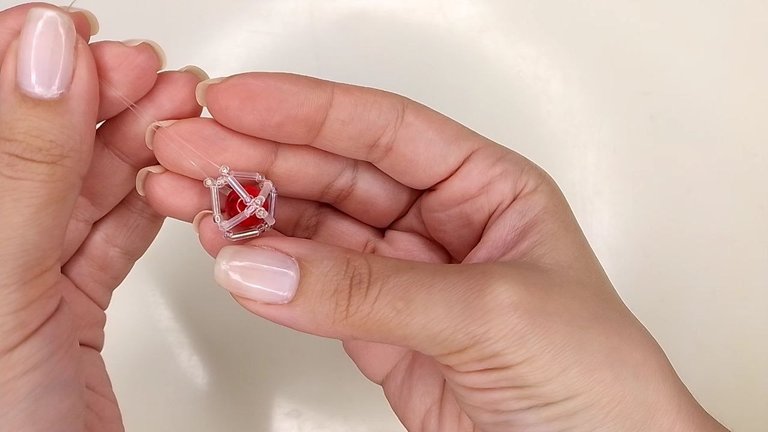
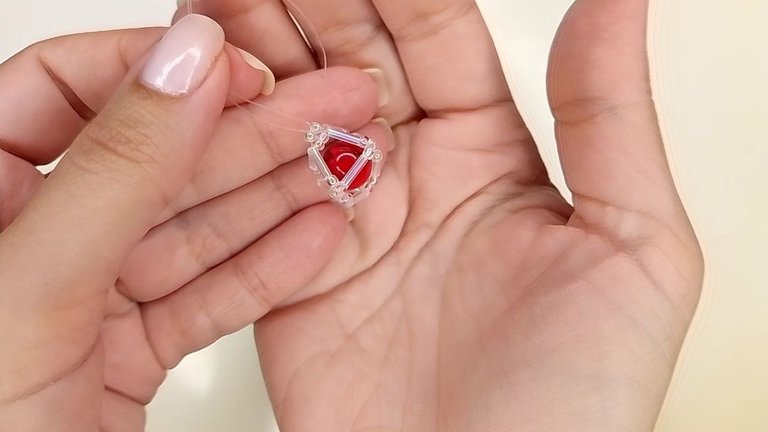
Ahora repetiremos los mismos pasos para la parte de arriba de la jaula, introducimos un canutillo, dos mostacillas y un canutillo más, pasamos a través de la segunda mostacilla siguiente en cuadrado base y seguimos por el canutillo y la mostacilla, tiramos del nilón y agregamos una mostacilla y un canutillo y pasamos el nilón por medio de las dos mostacillas centrales de la pared triangular anterior, tiramos del nilón y antes de cerrar con un canutillo y la última mostacilla, introducimos la cuenta grande central en medio de la estructura y ahora sí, cerramos y anudamos para asegurar.
Now we repeat the same steps for the top of the cage, we introduce a bead, two beads and one more bead, we pass through the second bead next to the base square and continue through the bead and the bead, we pull the nylon and add a bead and a bead and pass the nylon through the two central beads of the previous triangular wall, we pull the nylon and before closing with a bead and the last bead, we introduce the central large bead in the middle of the structure and now we close and knot to secure.
 |  |
|---|
 |  |
|---|
 |  |
|---|
 |  |
|---|
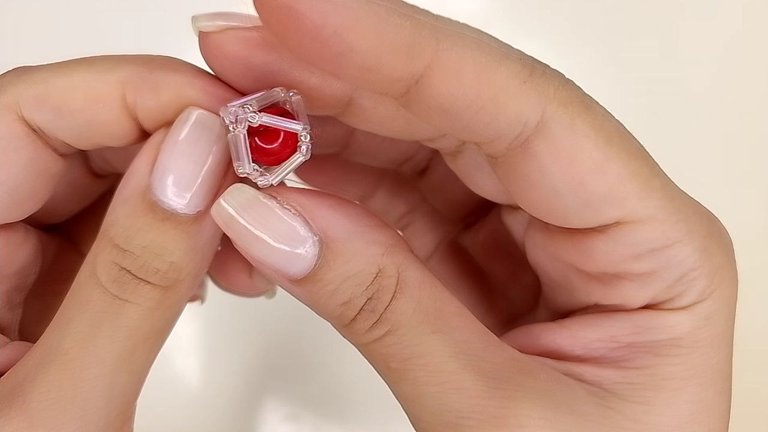
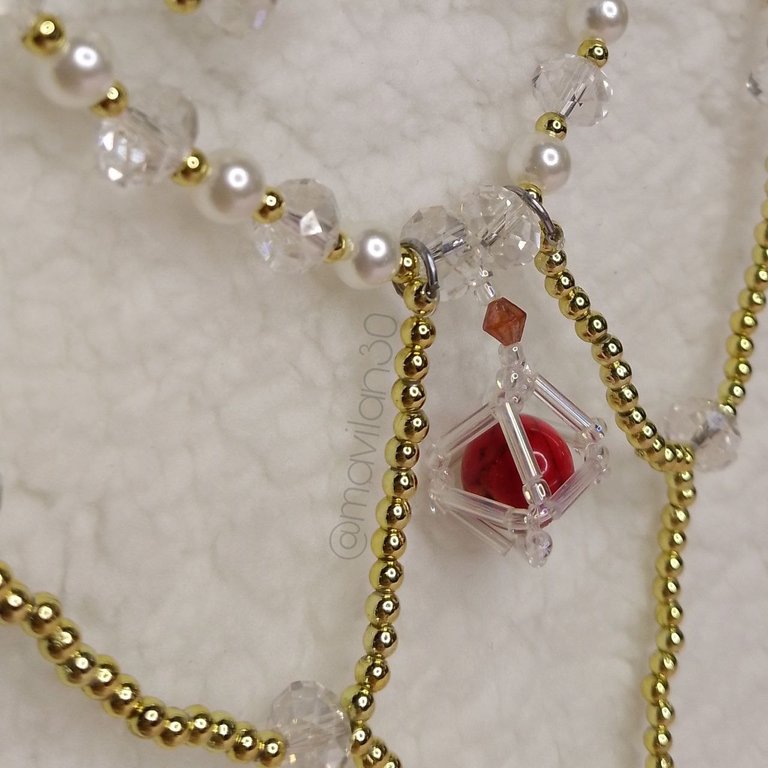
Dije terminado / Finished pendant
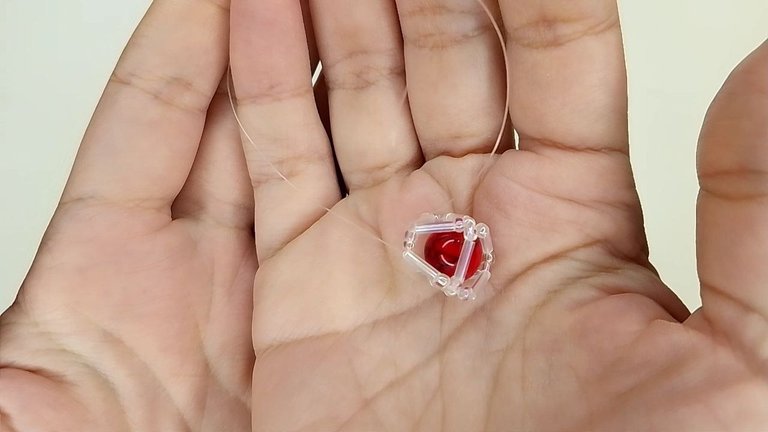
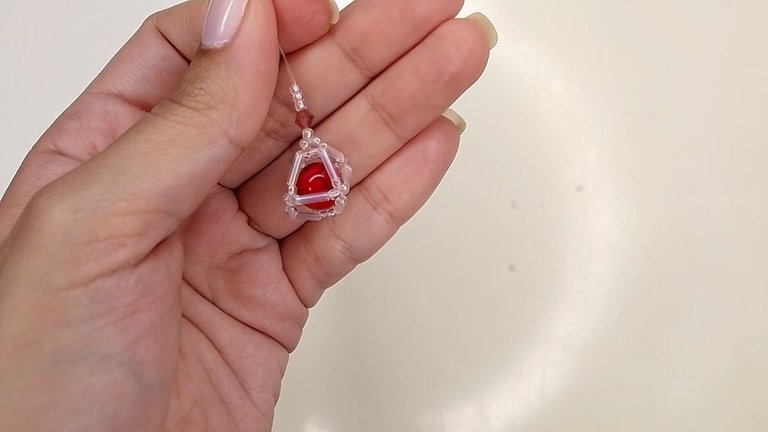
Para alargar un poco el diseño y pueda quedar colgando, en este caso de un collar, pero también sirve para una pulsera, por ejemplo, vamos a agregar una mostacilla en cada extremo del nilón, anudamos y acto seguido, añadimos una mostacilla, un cristal ámbar y tres mostacillas y en mi caso, lo he dejado así porque luego lo amarré directamente al collar donde lo quería lucir, pero en este punto puedes también agregar un arito.
To lengthen the design a little and it can be hanging, in this case of a necklace, but it also works for a bracelet, for example, we will add a bead at each end of the nylon, knot and then add a bead, an amber crystal and three beads and in my case, I have left it like this because then I tied it directly to the necklace where I wanted to wear it, but at this point you can also add an earring.
 |  |
|---|
Alargando el diseño / Extending the design
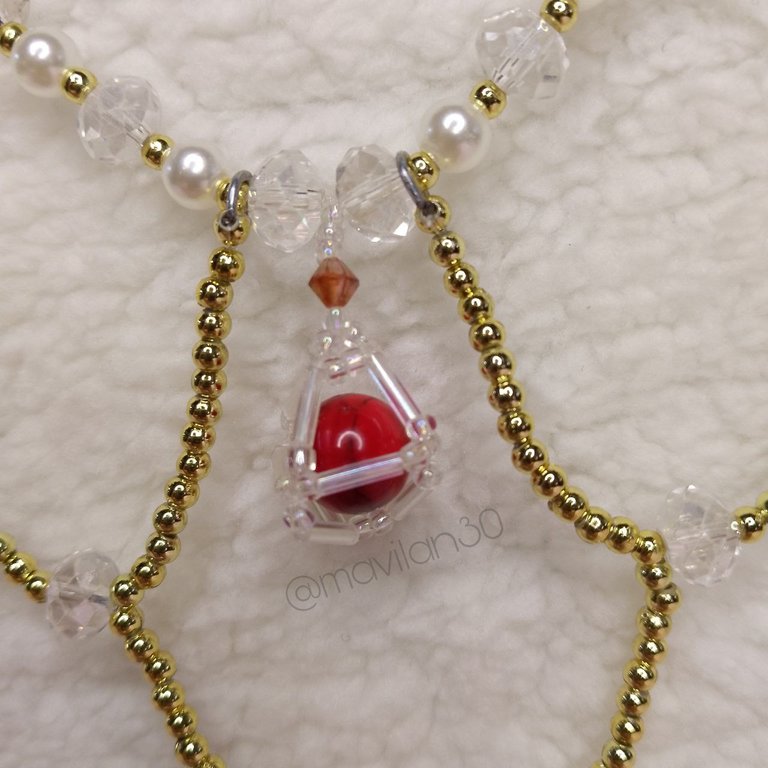
Y este sería el resultado final ya colocado en el collar:
And this would be the final result already placed on the necklace:
 |  |
|---|
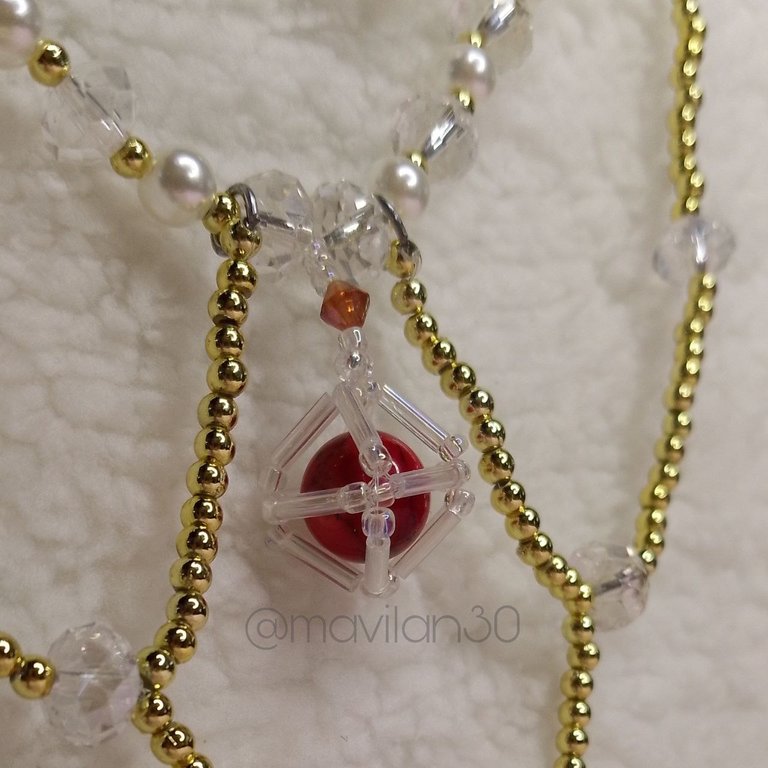
Resultado final / Final result
¡Muchas gracias por leerme!
Thank you so much for reading me!
Fotografías propias, tomadas con mi Tecno Spark 10C.
Traducido al inglés con DeepL.
Own photographs, taken with my Tecno Spark 10C.
Translated to English with DeepL.

Posted Using INLEO
Que elegante se ve y hasta de película de fantasía parece. Un collar de poder.
Muchas gracias mi amor❤️ verdad que sí? Parece que fuese de una elfo o algo así jeje🤭😘
Ayyyyy está demasiado bello Mavi ✨💜 parece salido de un anime 😻 , como si fuera algo que usaría Sakura Card captor
Graciaaaasss💖💖💖 no lo había pensado pero sí, tiene muchas vibes de Sakura Card Captor😍✨
Jajaja me encanta tu imaginación Mavi 🥰 ese colgante está genial para una historia mágica sobre amor.
Jajaja muchas gracias Sarang🤗 Será que le hago una historia de amor?😎✨
No sería mala idea 😍🥰 y la subes por aquí please! 🙏🏻🥰
The pendant is beautiful and looks luxurious.
Thank you so much for your comment💖 I'm glad you liked it🤗
You're welcome dear, keep up the enthusiasm in publishing other interesting works.
Quedó muy bonito, gracias por el tutorial 🤗
Muchas gracias por tu apoyo amiga🤗✨