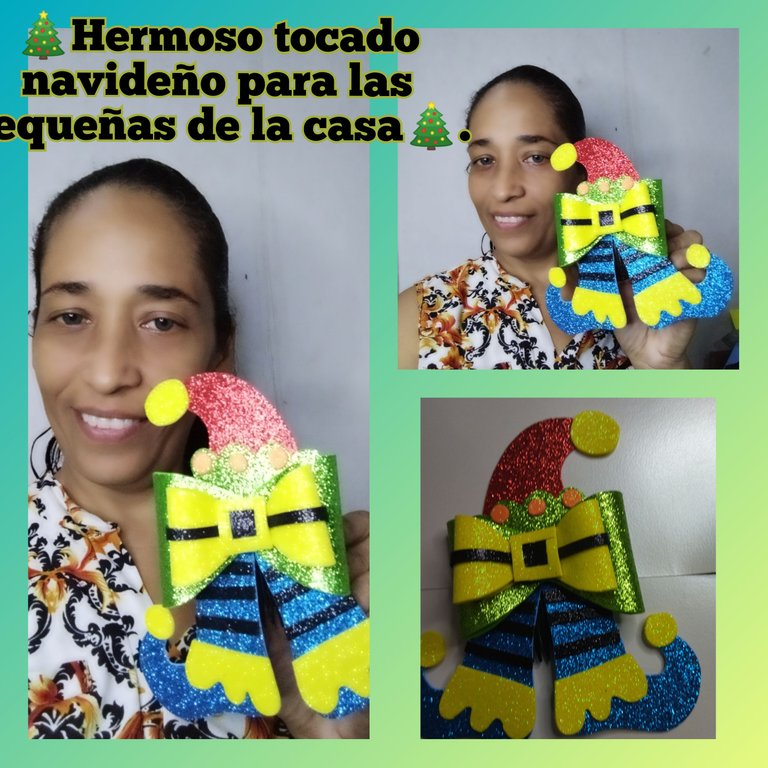

Saludos mis abejitas hermosas y sobre todo talentosas luego de una pequeña pausa por enfermedad regresamos a la plataforma con las energías recargadas por eso, les vengo a compartir un trabajo muy lindo que elabore para las princesas de la casa.
Las fiestas navideñas están cerquita y todos queremos ver lucir a nuestras princesas hermosas, y aunque la situación en Venezuela no está para nada alentadora siempre cómo padres nos ingeniamos para hacer ver hermosas a nuestras niñas, así que por eso mi post del día de hoy va dirigido a enseñarles a las mamis y papis a como elaborar un lindo detalle para el cabello que las harán ver increíble eso sin contar que se verán muy originales, lo mejor de todo es que lo haremos con esos retacitos de foami que nos ha sobrado de otros trabajos realizados anteriormente, así que sin más vamos a comenzar.
Manos a la obra.
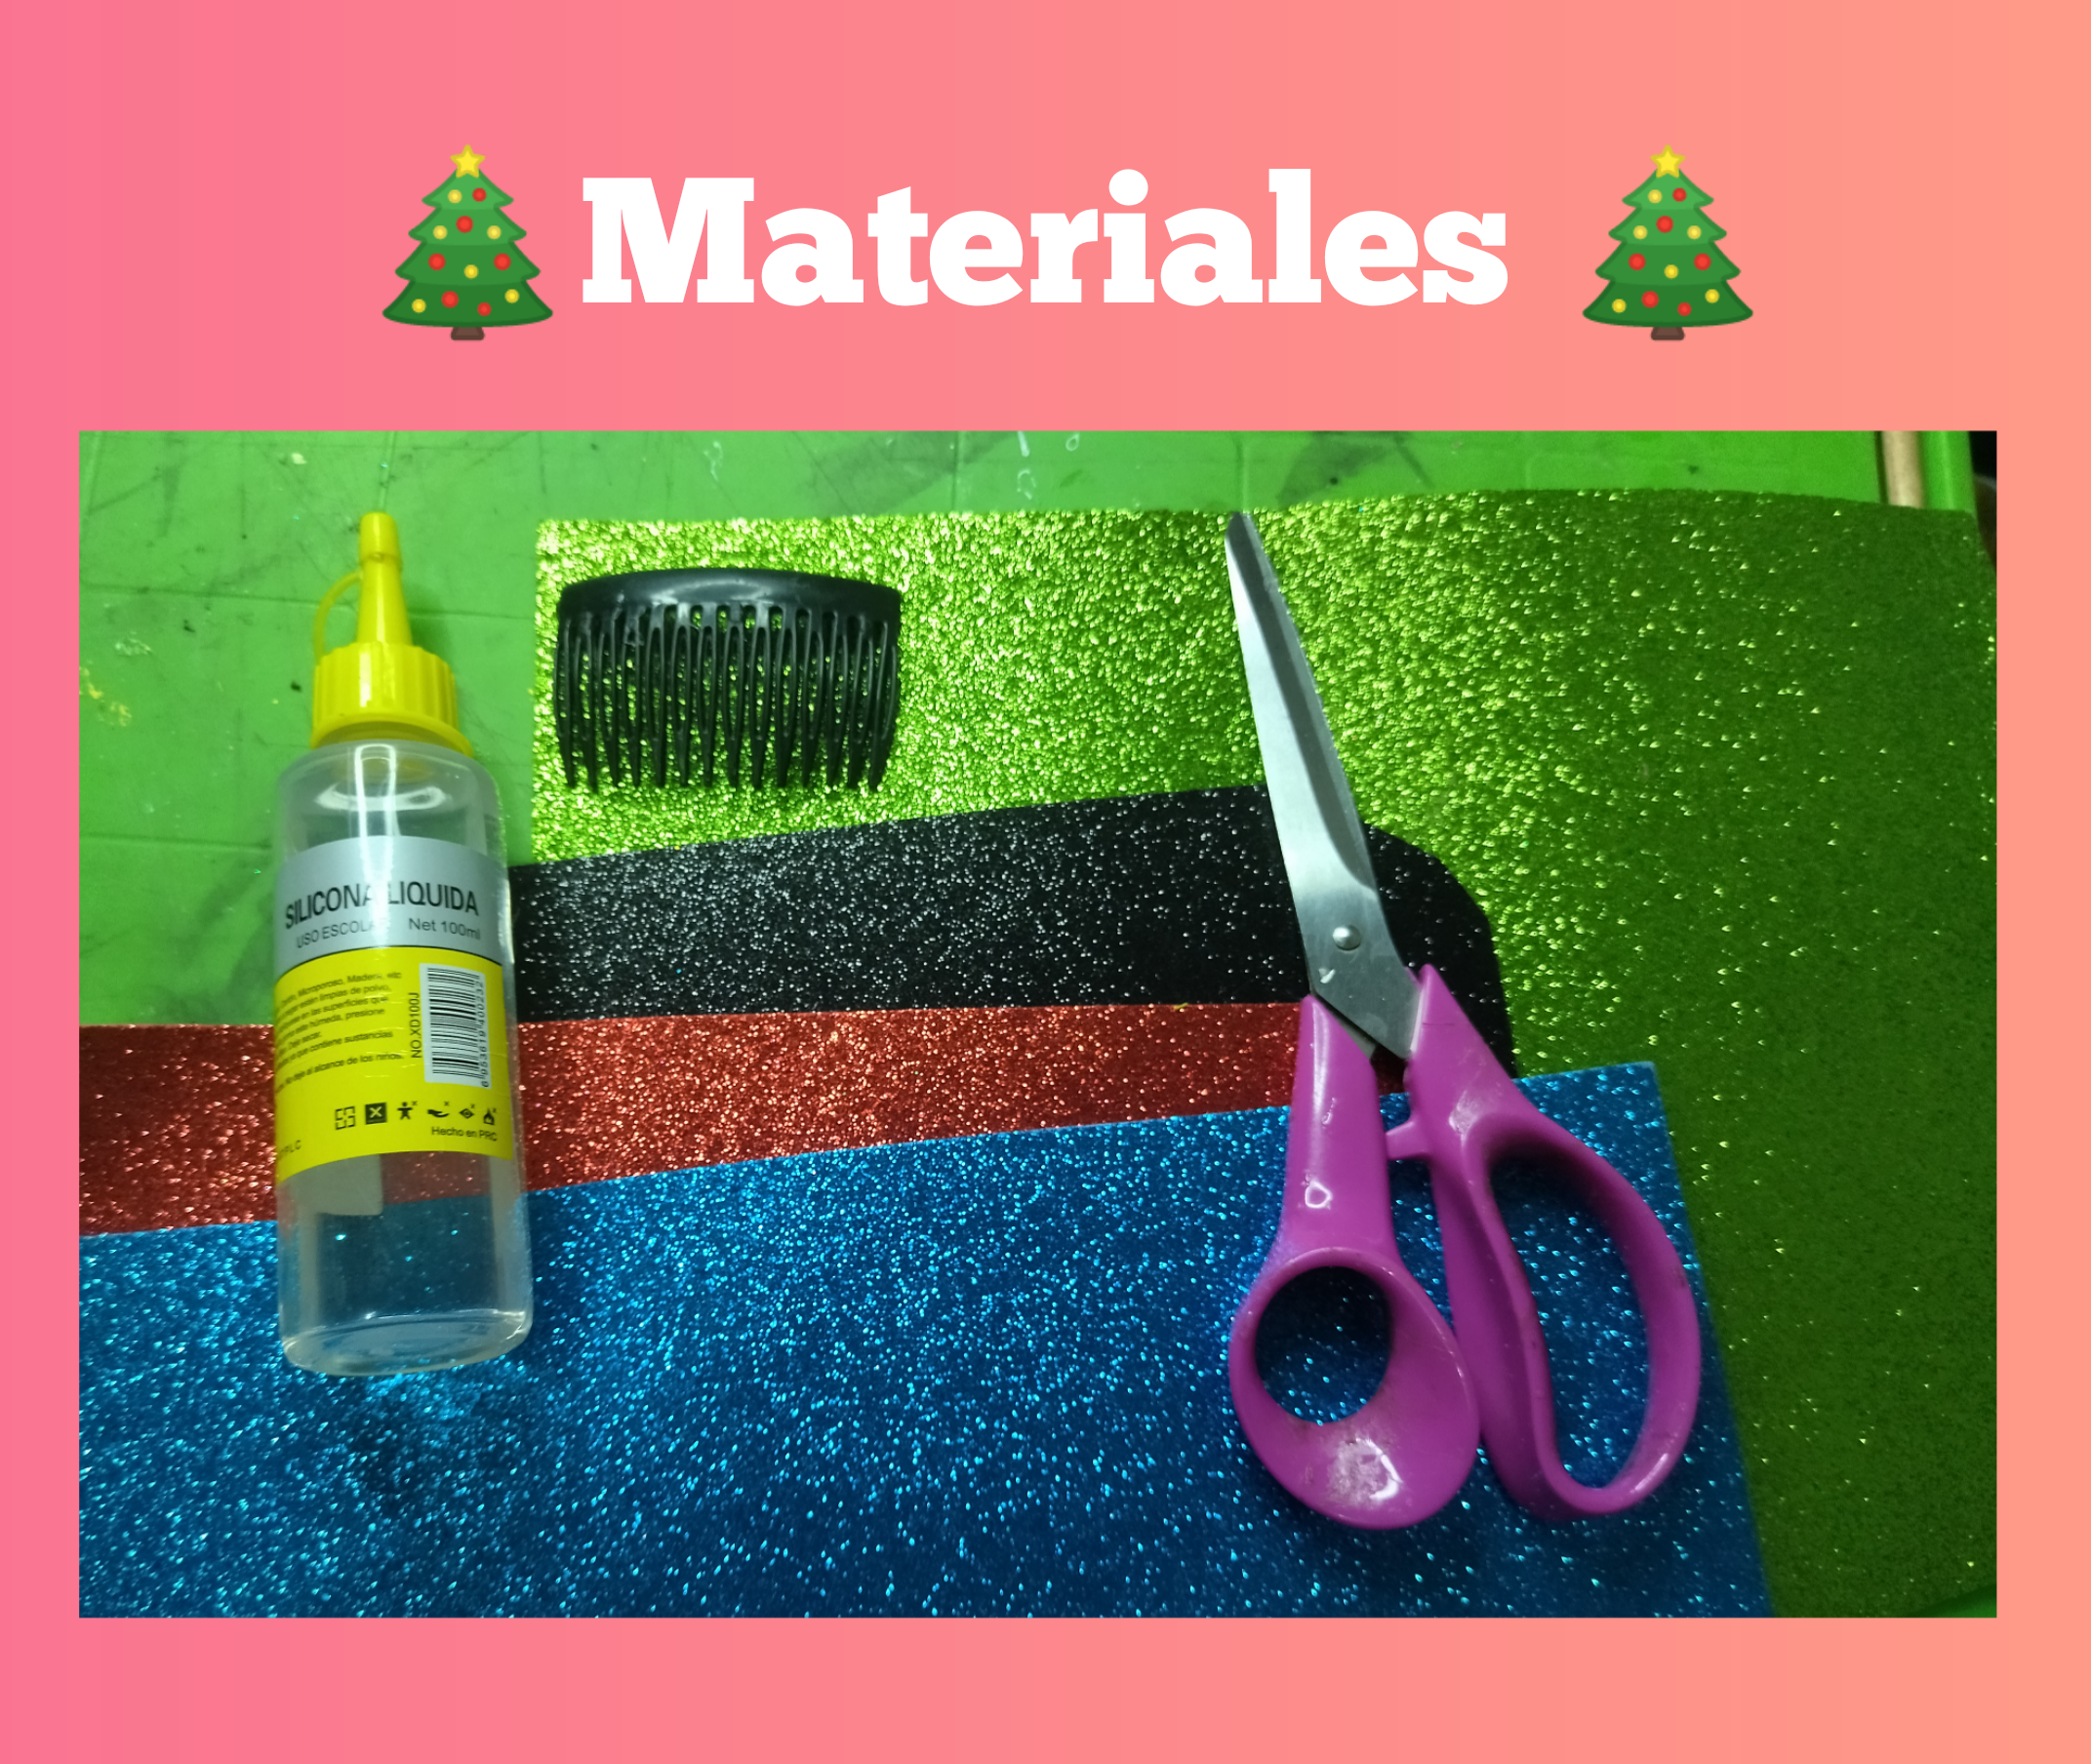
🎄MATERIALES🎄

🎄 Retazos de foami de diferentes colores.
🎄 Silicón líquido.
🎄Una peineta
🎄 Tijera.
🎄 Lápiz.
🎄 Papel.
 🎄 PASO A PASO 🎄
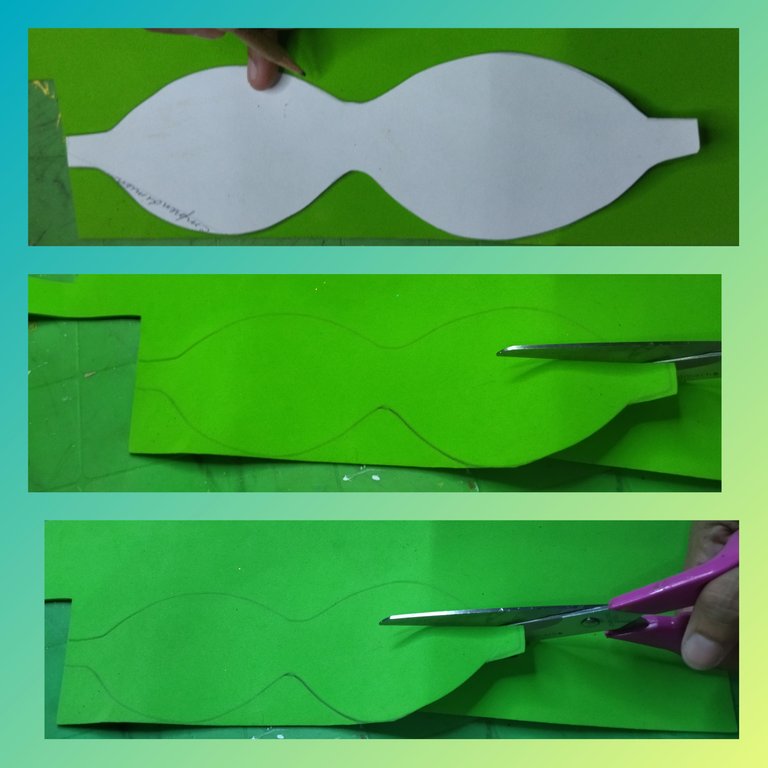
Primero vamos a elaborar nuestro patrón y para eso utilizamos el lápiz y el papel, y recortamos, son dos patrones que sacaremos, debe ser uno más pequeño que el otro.

Luego tome el patrón grande y lo coloque encima del foami verde y dibujamos, al finalizar tome las tijeras y recortamos.
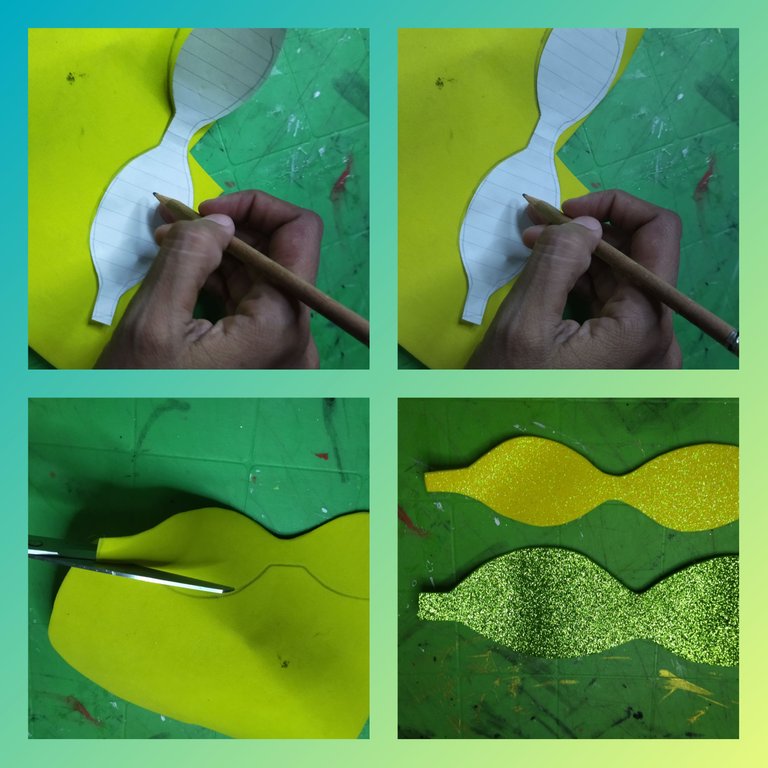
Repetimos la anterior operación pero está vez marcamos en un foami de color diferente, yo lo hice en el foami de color amarillo, y recortamos, para obtener dos piezas.
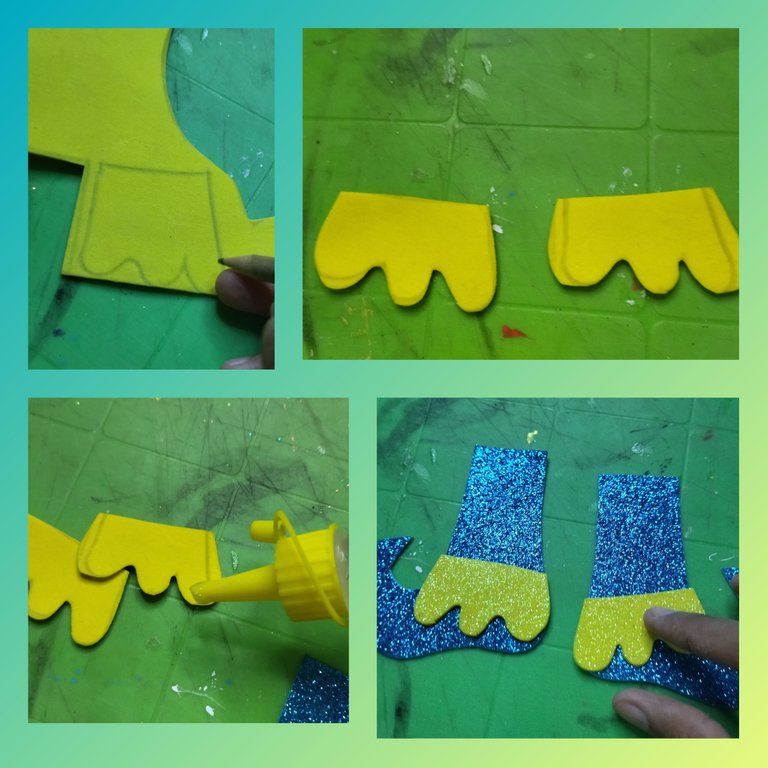
Tome otro trozo de papel y dibuje un pies con su piernita, lo recorte y lo marqué en el foami, aquí usamos otro color diferente a los que ya hemos utilizado, para esto use foami de color azul y recortamos, de esta saque dos piezas.
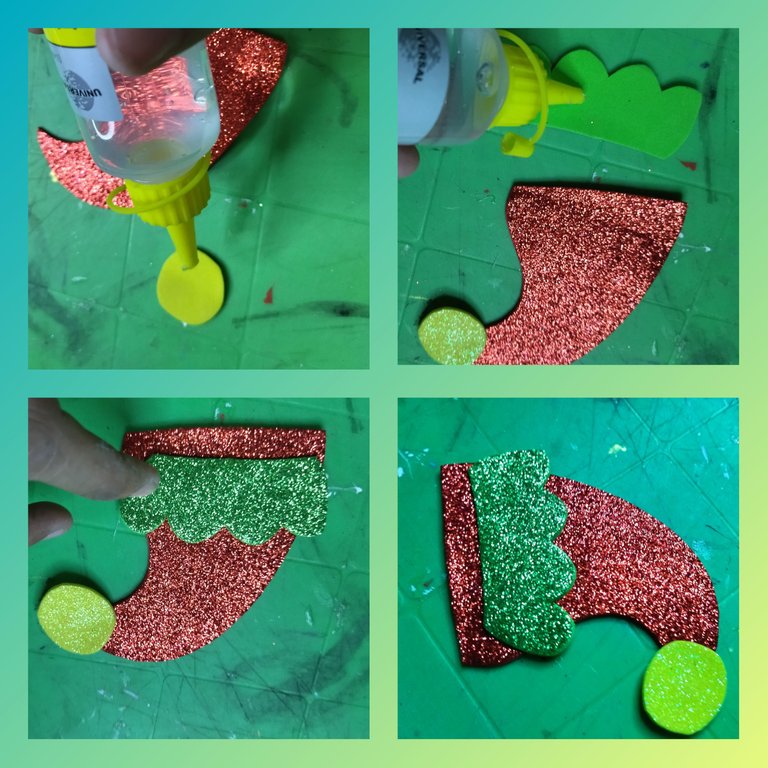
Saque otro patrón de gorrito navideño, y lo marqué enñ el foami de color rojo, yo use ese color porque es el color principal de la navidad.
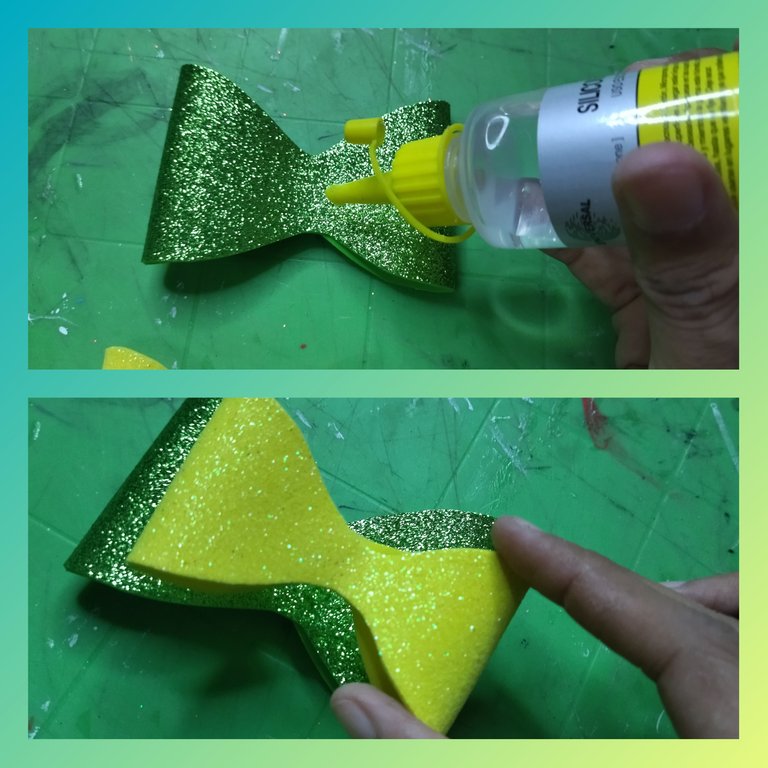
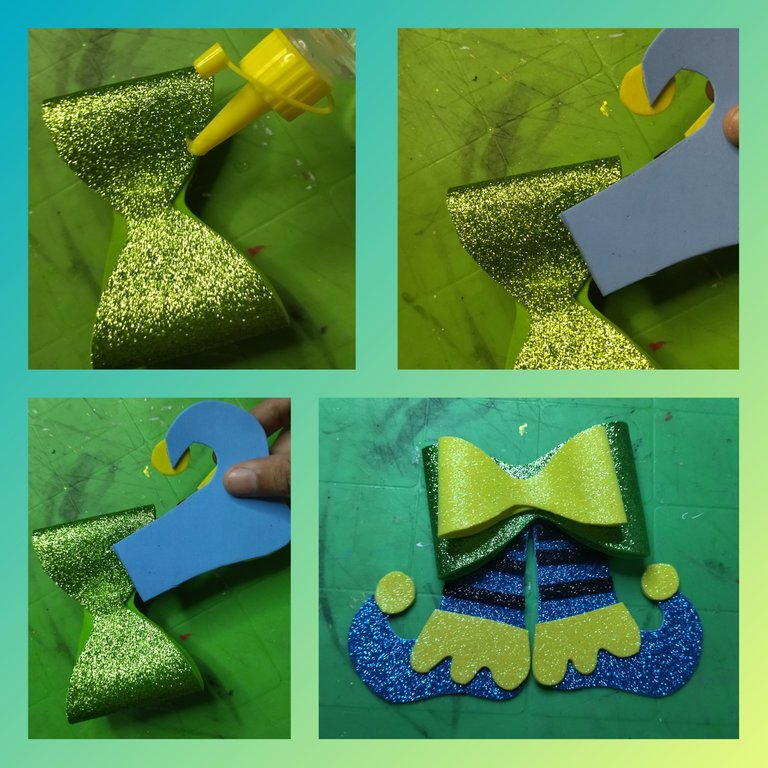
Ahora daremos inicio a formar el lazo, tome la pieza grande de color verde y le aplique un poco de silicón liquido en el centro de la pieza por el lado que no tiene la escarcha, luego tome uno de los extremos y lo pegue al centro, y repetimos lo mismo con la otra punta.
Nos ayudamos con las manos aplicando un poco de presión hasta que seque y fijé, hay quienes usan silicón caliente para trabajar más rápido, pero a mí no me gusta, pero al final es tu elección con que trabajar.
Ahora tomamos la pieza de color amarillo, la más pequeña y repetimos el procedimiento de la pieza verde y dejamos secar.
Cuando ya han secado las dos piezas aplico un poco de silicón liquido en el centro de la pieza verde que es la más grande y le colocamos la pieza amarilla encima, también ejercí un poco de presión con los dedos y dejamos secar hasta que peguen.
Tome un trocito de foami de color amarillo y dibuje y recorte dos piezas que simulan el encaje de las medias que vamos a realizar.
Cuando tengamos las dos piezas, le aplicamos silicón liquido y pegamos en las piernas que sacamos de color azul.
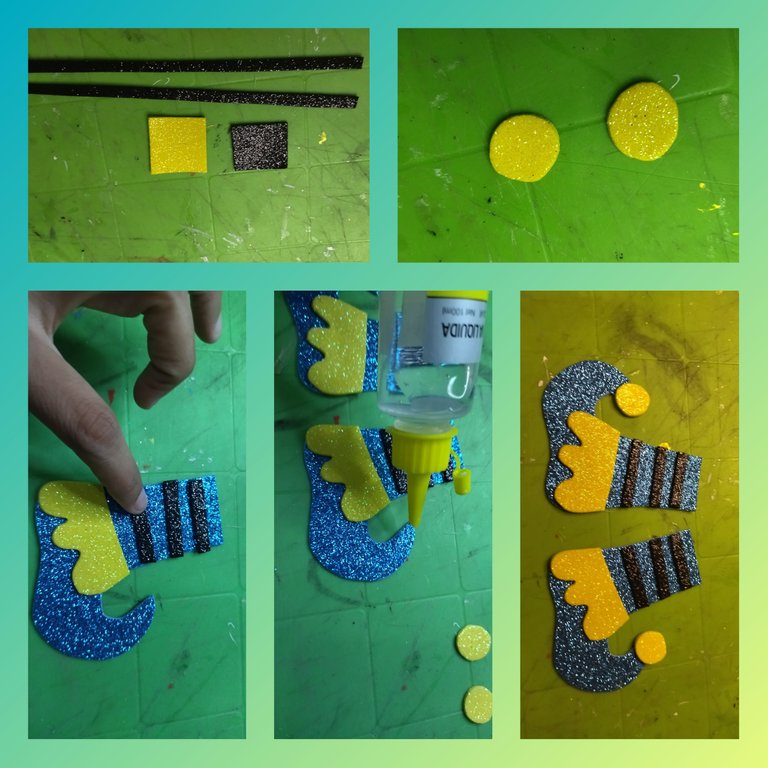
Recorte unas tiras largas de foamide color negro, también recorte dos círculos de foami amarillo y dos cuadritos uno negro más pequeño y uno amarillo un poco más grande.
Los círculos los pegue con el silicón liquido en la punta de los zapatos (puede ver a detalle en la foto) luego vamos a ir pegando las tiras de color negro en las medias.
Tome un retazo de foami verde y recorte el encaje del sombrerito, luego le aplicó silicón y pego al gorrito,deja do un borde de dónde se va a fijar a la peineta, así mismo pegue el círculo en la punta de el gorro.
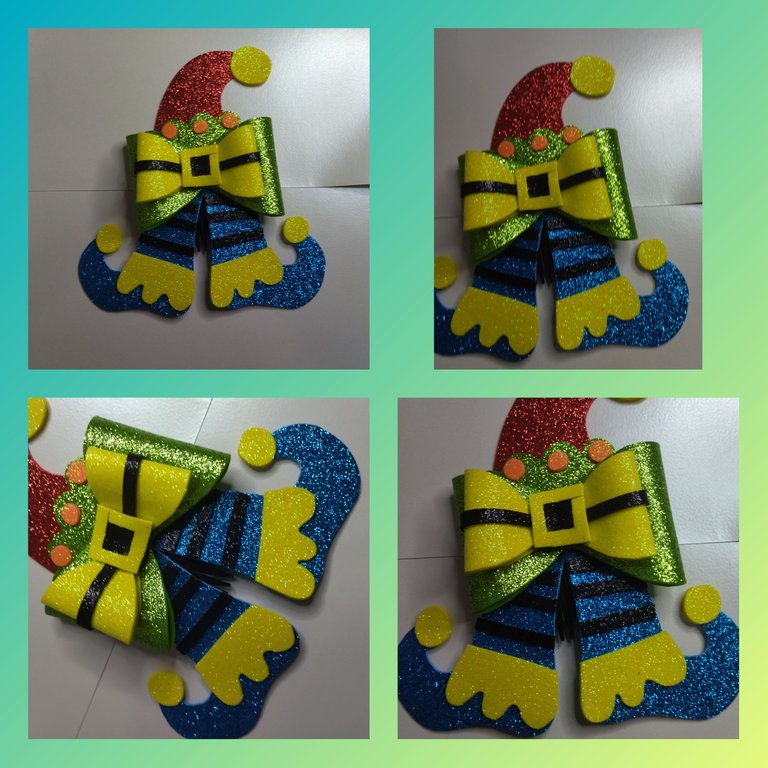
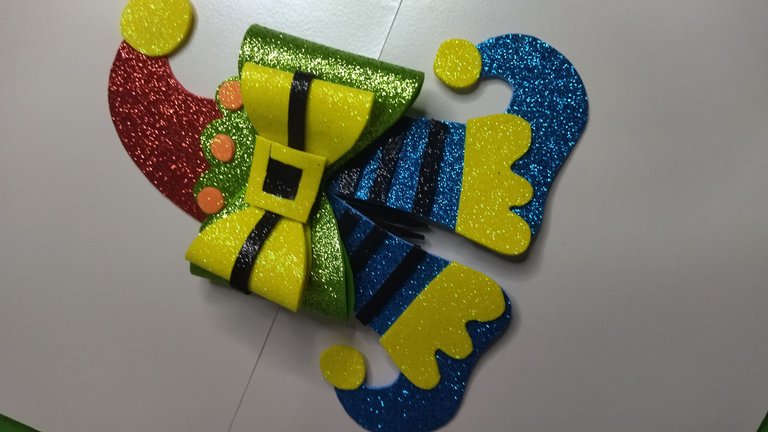
 ACA SE MUESTRAN TODAS LAS PIEZAS LISTAS.

Luego tome el lazo que habíamos formado anteriormente y le aplique un poco de silicón liquido en la parte trasera y pegamos las piernitas que ya hemos elaborado, apretamos con las manos fuertemente y dejamos secar.
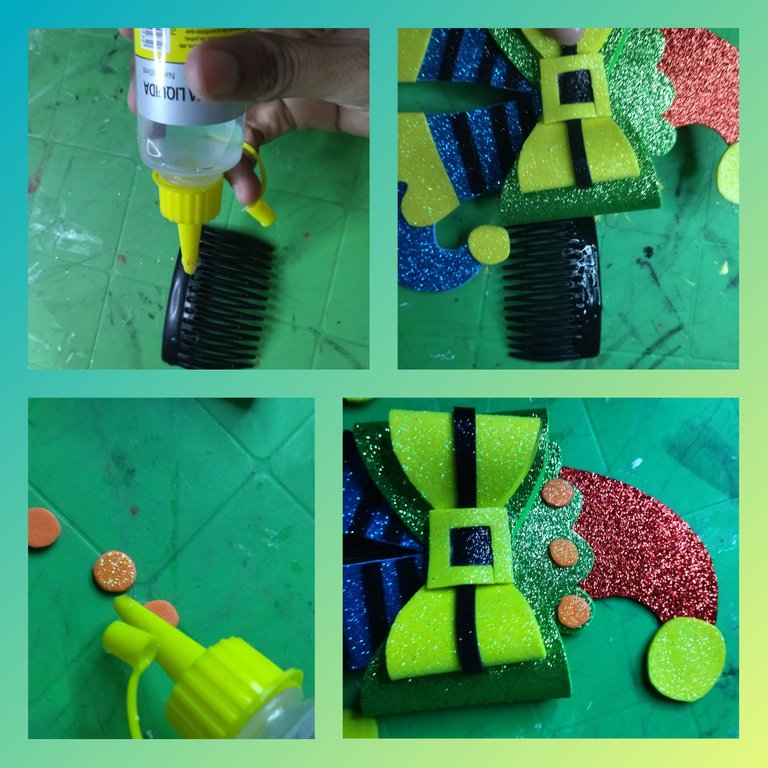
Una vez seca la pieza, tome el gorrito que hicimos y lo pegamos al lazo con silicón liquido, de igual manera que una de las tiras de foami negro por todo el centro de la pieza amarilla, después le pegamos en el centro los dos cuadritos de foami que recortamos, formando una hebilla de correa.
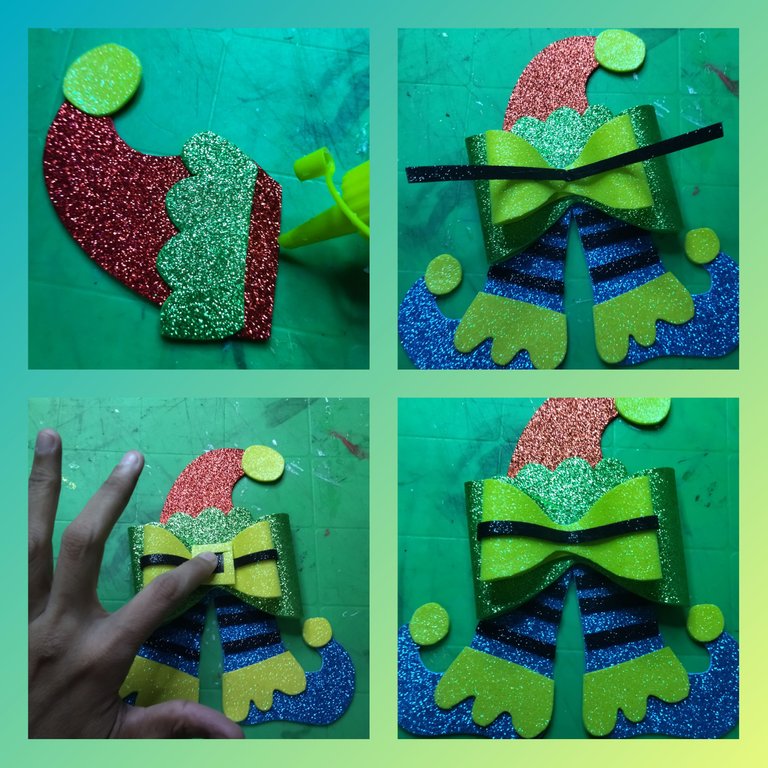
También recorte tres círculos pequeños de foami naranja, y los pegamos en el encaje del gorro, cuando ya la pieza ha secado en su totalidad procedemos a fijarla en la peineta con el silicón liquido, aplicamos suficiente silicón pero cuidando de no ensuciar el foami y pegamos, dejamos reposar y listo hemos concluido.
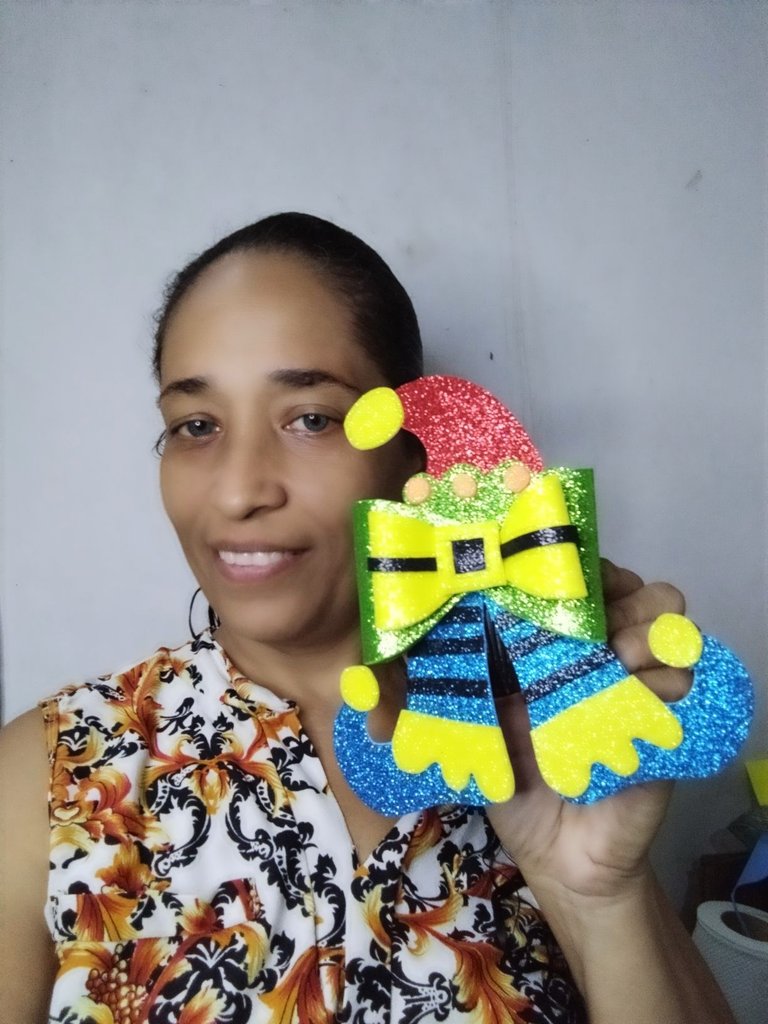
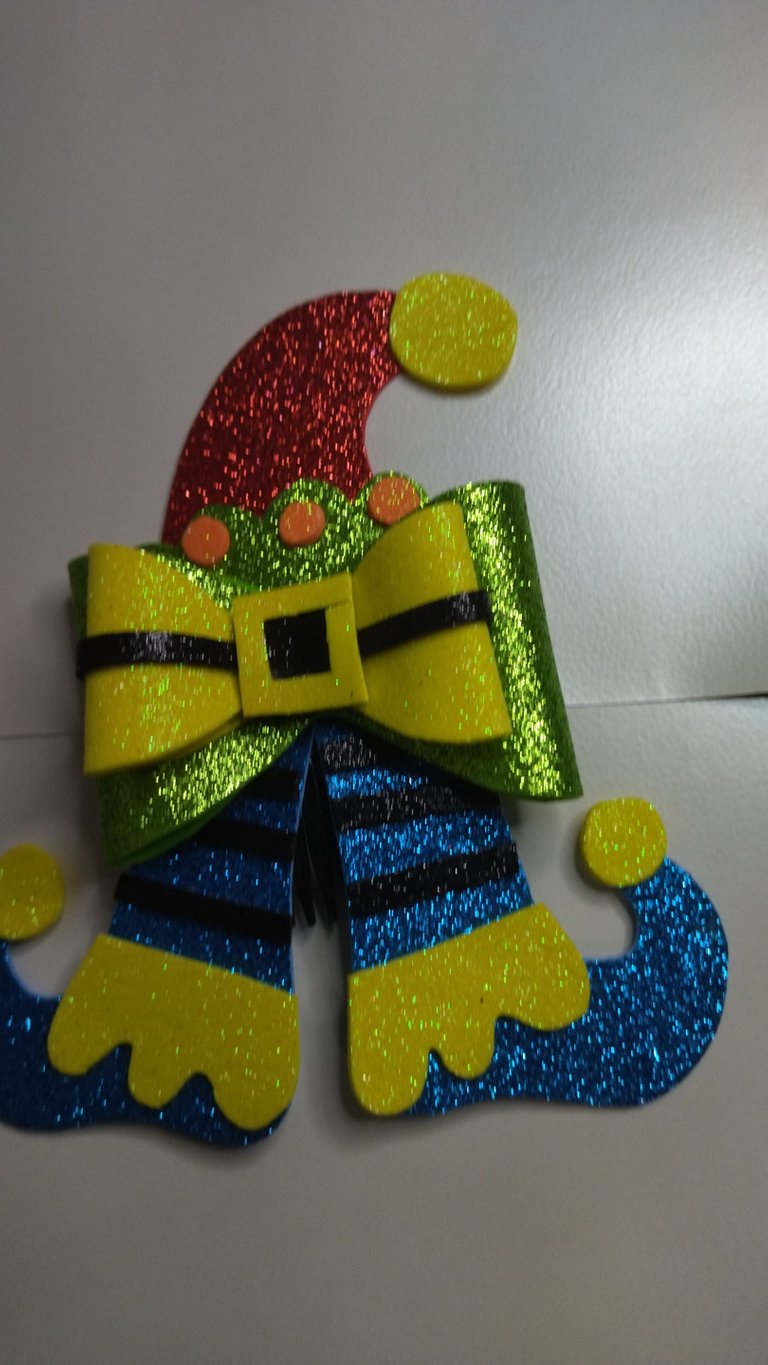
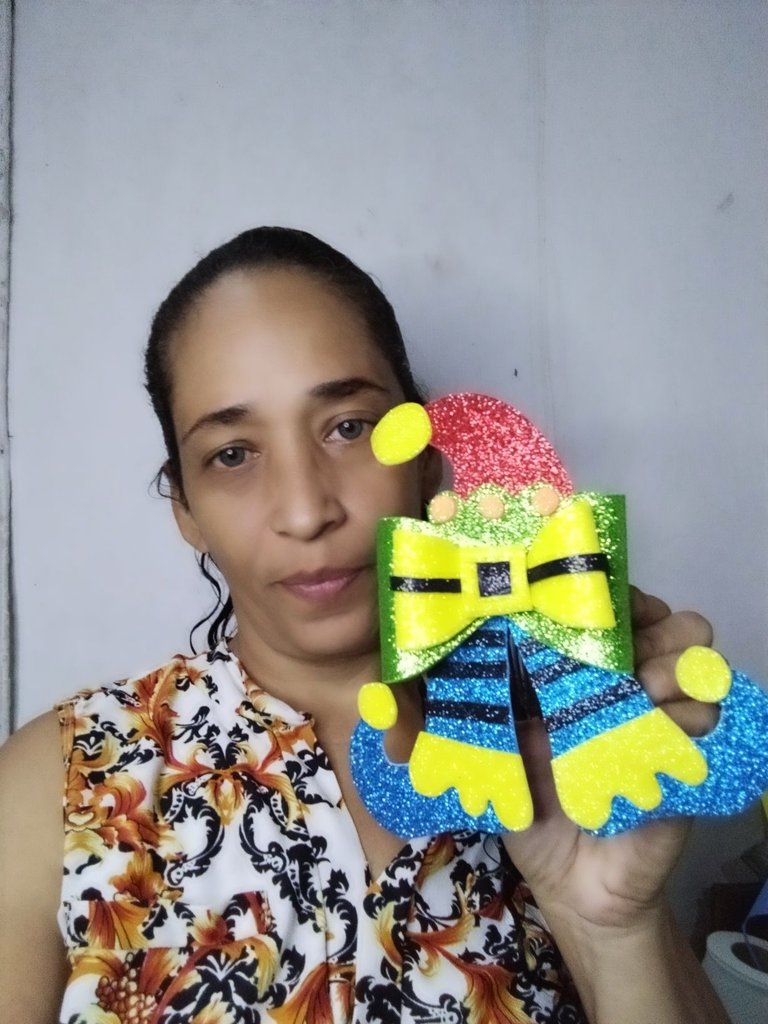
 🎄 RESULTADO FINAL 🎄
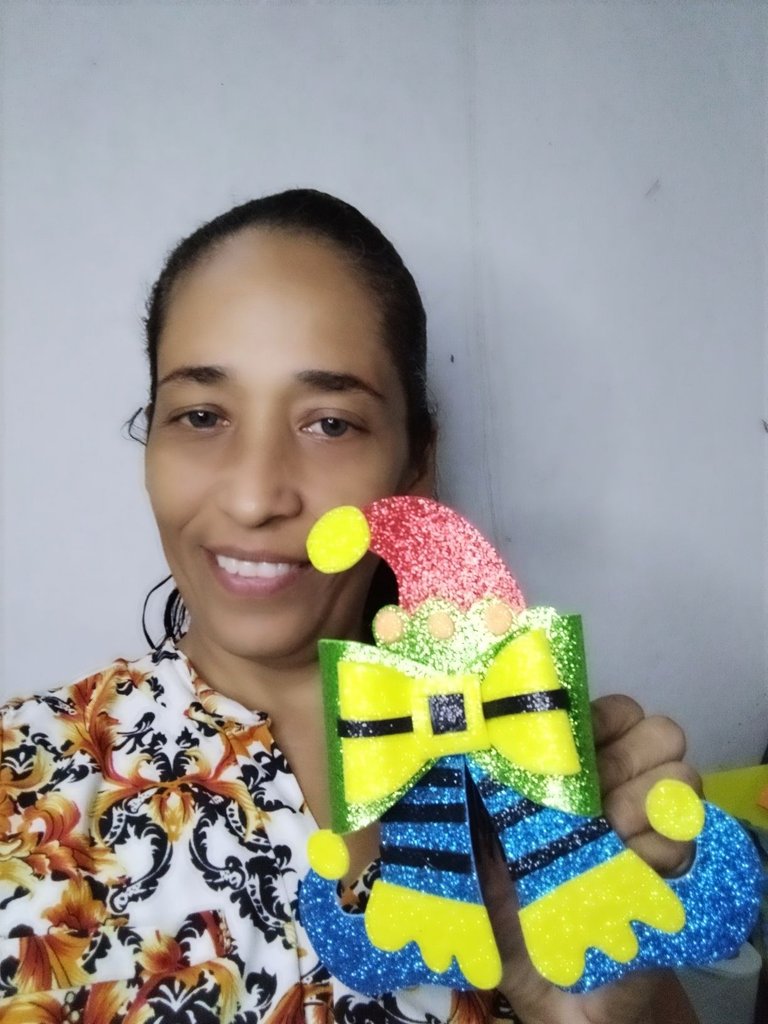
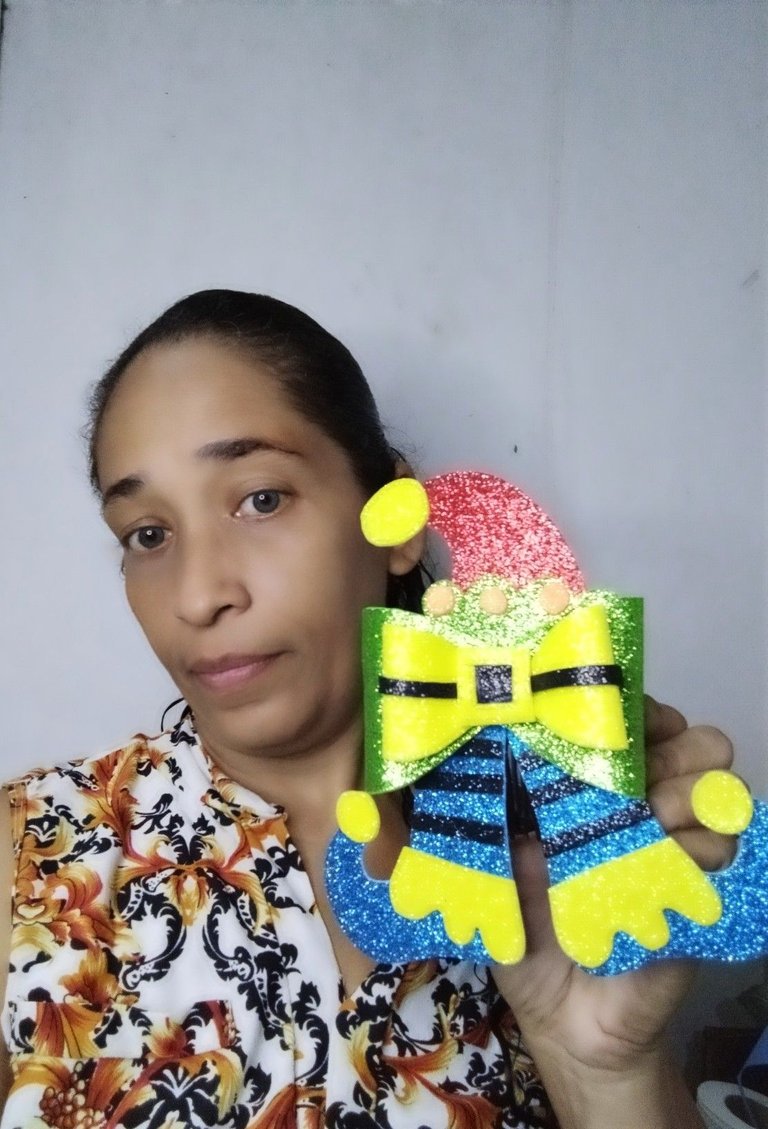
Ven lo fácil que resultó la elaboración de esta increíble pieza para nuestras princesas, pronto les traigo otro modelo, cómo pueden observar es bien fácil y para nada complicado y lo mejor de todo es que podemos hacerla nosotros mismos lo que le da un valor agregado a la pieza, por otro lado también podemos realizarlas y comenzar un nuevo emprendimiento que nos pueda generar algún ingreso adicional.
Por ahora es todo mis creativas abejitas nos vemos en el siguiente post, esperando de verdad de todo corazón que les haya gustado mi contenido de el día de hoy, el cuál es exclusivo para la plataforma.
🎄 CREDITOS 🎄
📷 Todas las fotos fueron tomadas con mi teléfono Xiaomi readmi 9T y son de mi propiedad, y utilice el programa polish para la edición, también utilice el traductor Deepl.
🎄 ENGLISH 🎄
Greetings my beautiful and above all talented bees, after a short break due to illness we return to the platform with recharged energy, so I come to share with you a very nice work that I made for the princesses of the house.
Christmas holidays are near and we all want to see our princesses looking beautiful, and although the situation in Venezuela is not encouraging at all, as parents we always manage to make our girls look beautiful, so that's why my post today is aimed at teaching mums and dads how to make a nice detail for the hair that will make them look amazing that without counting that they will look very original, best of all is that we will do it with those scraps of foami that we have left over from other work done previously, so without further ado let's get started.
Let's get down to work.
🎄MATERIALS🎄
🎄 Foami scraps in different colours
🎄 Liquid silicone
🎄One comb
🎄 Scissors.
🎄 A scissors.
🎄 Pencil.
🎄 Pencil.
🎄 Paper.
🎄 Paper.
🎄 STEP BY STEP 🎄
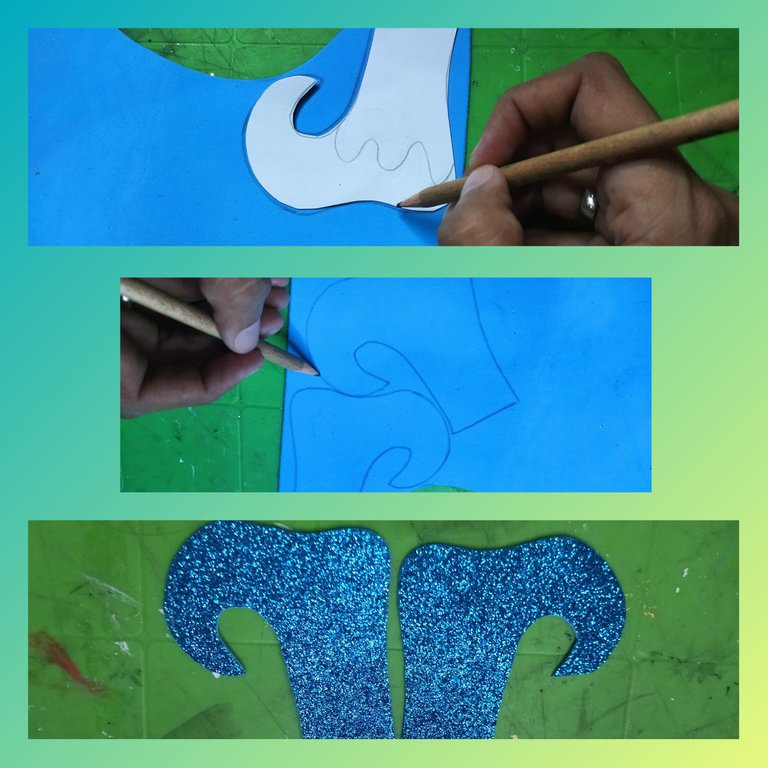
First we are going to elaborate our pattern and for that we use the pencil and the paper, and we cut out, there are two patterns that we will draw, it must be one smaller than the other.
Then take the large pattern and place it on top of the green foami and draw it, then take the scissors and cut it out.
Repeat the previous operation but this time we mark on a different colour foami, I did it on the yellow foami, and cut it out, to get two pieces.
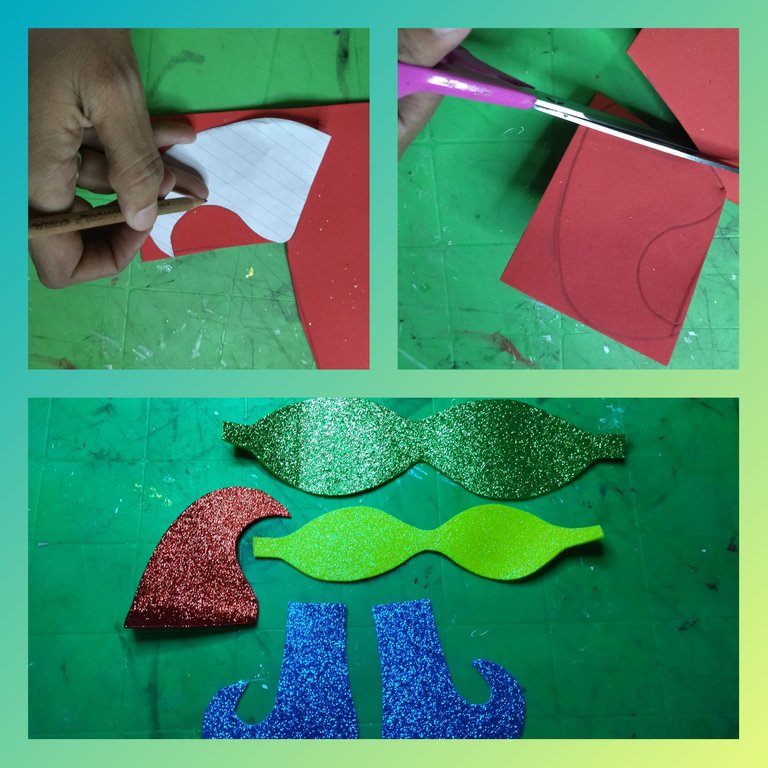
Take another piece of paper and draw a foot with its little leg, cut it out and mark it on the foami, here we use another colour different from the ones we have already used, for this we use blue foami and cut it out, from this we take two pieces.
I drew another Christmas hat pattern, and marked it on the foami in red, I used that colour because it is the main colour of Christmas.
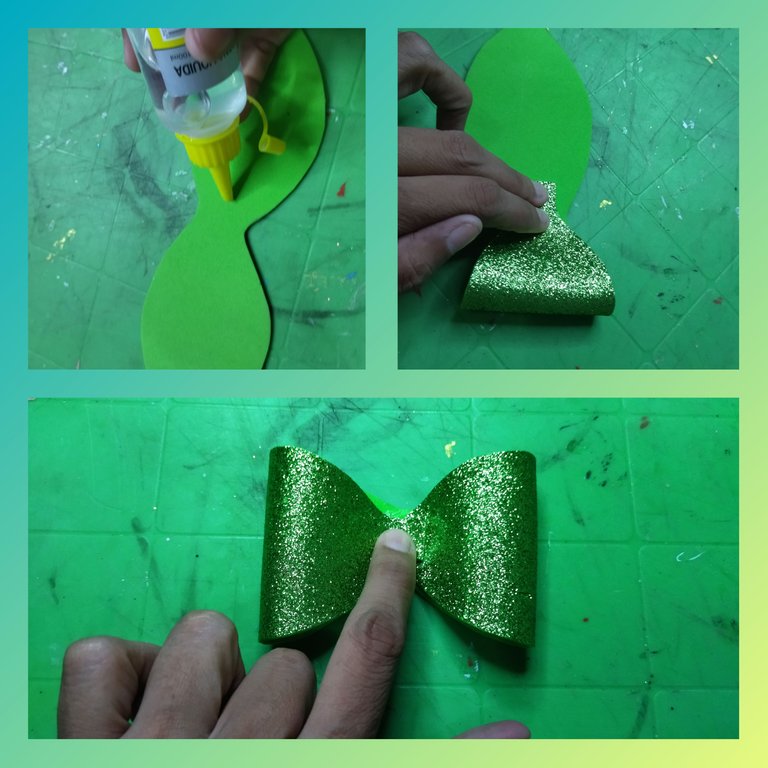
Now we will begin to form the bow, take the large green piece and apply some liquid silicone in the centre of the piece on the side without the frosting, then take one of the ends and glue it to the centre, and repeat the same with the other end.
We help ourselves with our hands applying a little pressure until it dries and fixes, some people use hot silicone to work faster, but I don't like it, but in the end it's your choice what to work with.
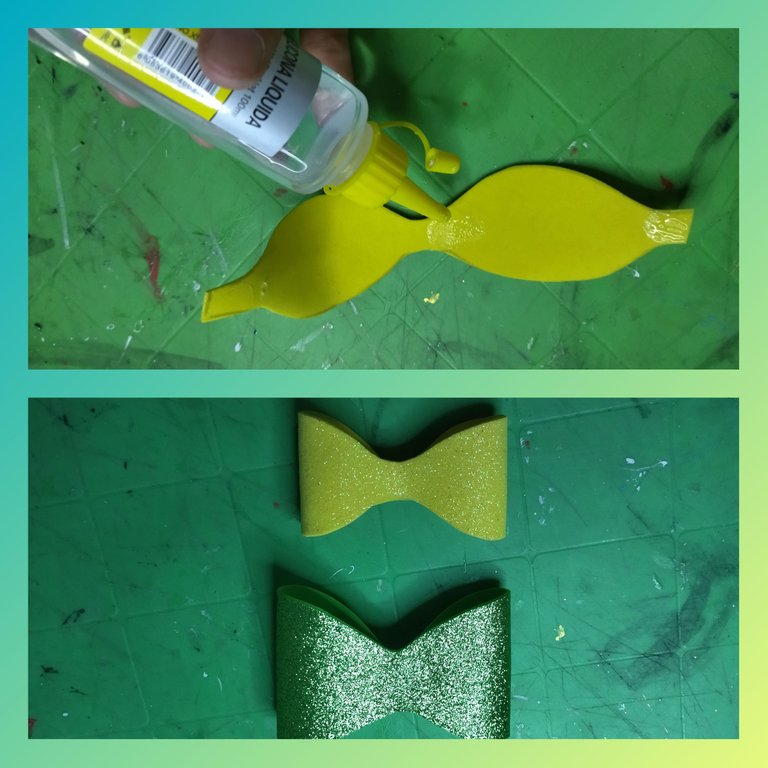
Now we take the yellow piece, the smallest one, and repeat the procedure for the green piece and let it dry
When the two pieces have dried I apply a little liquid silicone in the centre of the green piece which is the larger one and place the yellow piece on top, I also apply a little pressure with my fingers and let it dry until they stick together.
Take a small piece of yellow foami and draw and cut out two pieces that simulate the lace of the stockings that we are going to make.
When we have the two pieces, we apply liquid silicone and stick them on the legs that we drew out in blue.
Cut out some long strips of black foamide, also cut out two circles of yellow foami and two small squares, a smaller black one and a slightly larger yellow one.
I glued the circles with the liquid silicone on the toe of the shoes (you can see in detail in the photo) and then we are going to glue the black strips on the socks.
Take a piece of green foami and cut out the lace of the little hat, then apply silicone and glue it to the hat, leaving a border where it will be attached to the comb, and glue the circle at the tip of the hat.
All the ready-made parts are shown.
Then take the ribbon we had previously formed and apply some liquid silicone on the back and glue the little legs we have already made, press with your hands tightly and let dry.
Once the piece is dry, take the beanie we made and glue it to the bow with liquid silicone, as well as one of the black foami strips around the centre of the yellow piece, then glue the two squares of foami we cut out in the centre, forming a strap buckle.
I also cut out three small circles of orange foami, and glue them on the lace of the hat, when the piece has dried completely we proceed to fix it on the comb with the liquid silicone, apply enough silicone but taking care not to dirty the foami and glue it, let it rest and that's it.
🎄 FINAL RESULT 🎄
See how easy it was to make this incredible piece for our princesses, soon I will bring you another model, as you can see it is very easy and not complicated at all and best of all is that we can do it ourselves which gives added value to the piece, on the other hand we can also make them and start a new venture that can generate us some additional income.
For now that's all my creative little bees, see you in the next post, I really hope you liked today's content, which is exclusive for the platform.
🎄 CREDITS 🎄
📷 All photos were taken with my Xiaomi readmi 9T phone and are my own property, and I used polish for editing, I also used Deepl translator.
Hola @mayifiestas como estas? como siempre hermoso trabajo te felicito, se los haré a mi sobrina estoy trabajando también en unos ganchitos navideños para mi ella ya que es super coqueta y le encantan todos estos detalles pronto los estaré montando, un abrazo 🤗
Muchas gracias por el apoyo 😌 que bueno que te gustó,son hermosos y fáciles de elaborar. Saludos
si se ven super fáciles a mi me encanta trabajar con foami🤗
Yo trabajo muy poco con foami porque me da alergia en las manos pero a mí me encanta realmente es un material fácil de trabajar.
@mayifiestas que malo que te de alergia porque con foami se hacen bellezas yo llevo años trabajando con este material pues como maestra hacemos muchos detalles
~~~ embed:1593003539206668288 twitter metadata:MTQyMjQxMzkxNTI3NTgxMjg2NHx8aHR0cHM6Ly90d2l0dGVyLmNvbS8xNDIyNDEzOTE1Mjc1ODEyODY0L3N0YXR1cy8xNTkzMDAzNTM5MjA2NjY4Mjg4fA== ~~~
The rewards earned on this comment will go directly to the people( @mayifiestas, @mariajcastro28 ) sharing the post on Twitter as long as they are registered with @poshtoken. Sign up at https://hiveposh.com.
Gracias por apoyarme 😍
Está hermoso el adorno ❤️, mucho éxito
Mil gracias amiga que bueno que le gustó, pronto estaré publicando otros modelos.
community & peakd as well as on my Discord Server
comunidad de colmena y Peakd así como en mi servidor de discordiaCongratulations, your post has been upvoted by @dsc-r2cornell, which is a curating account for @R2cornell's Discord Community. We can also be found on our hive Felicitaciones, su publication ha sido votado por @dsc-r2cornell. También puedo ser encontrado en nuestra
Muchas gracias por el apoyo 😘
Muy lindo