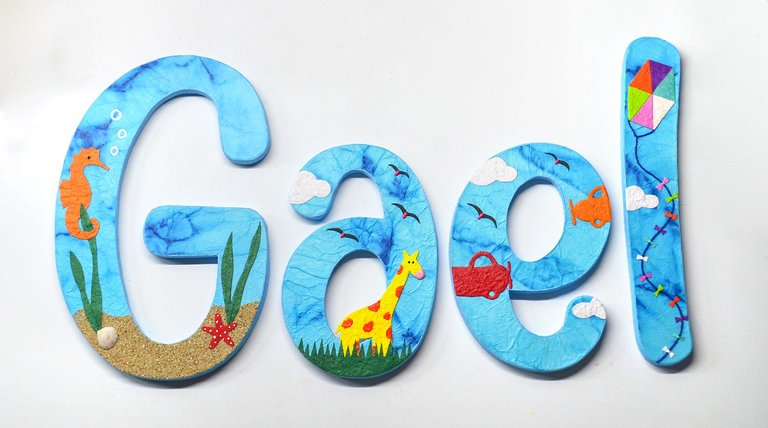
Hola a todos en esta hermosa comunidad llena de ideas creativas.
El proyecto que les traigo hoy lo hice un poco contra reloj. Parece sencillo, pero su proceso completo me llevó varios días.
Lo empecé el sábado para tenerlo listo antes del próximo viernes. Ese día viajaremos para Pinar del Río y lo llevaremos para que adorne la habitación del hijo de un amigo que nació hace solo 1 mes.
El bebé se llama Gael. Sus padres me dieron libertad para decorarlo a mi gusto, solo con la condición de que prevaleciera el color azul.
Estaré utilizando, como tanto me gusta, cartón y papel. Reciclando con creatividad y ternura.
English here
Hello to everyone in this beautiful community full of creative ideas.
The project I bring you today was made against the clock. It looks simple, but the whole process took me several days.
I started it on Saturday to have it ready before next Friday.
That day we will travel to Pinar del Rio and we will take it to decorate the room of a friend's son who was born only 1 month ago.
The baby's name is Gael. His parents gave me the freedom to decorate him as I wish, only on the condition that the color blue prevails.
I will be using, as I like so much, cardboard and paper. Recycling with creativity and tenderness.
Necesitaremos:
- Cartón corrugado grueso que mida 50 x 40 cm o más.
- Pegamento (cola blanca)
- Papel (reutilizado blanco)
- Papel artesanal para tiras y adornos
- Arena y conchita de mar
- Material para forrar el cartón (papel artesanal, papel texturizado, fomi, fieltro, tela u otro) yo utilizaré el reutilizado teñido.
- Moldes
- Lápiz
- Regla
- Cúter(una cuchilla y uno de presición)
- Tijera
- Pintura acrílicas azul claro
- Barniz acrílico
- Pinceles y pinceleta
We will need:
- Thick corrugated cardboard measuring 50 x 40 cm or more.
- Glue (white glue)
- Paper (reused white)
- Handmade paper for strips and ornaments
- Sand and sea shells
- Material to cover the cardboard (handmade paper, textured paper, fomi, felt, fabric or other) I will use the dyed reused one.
- Molds
- Pencil
- Ruler
- Cutter (one blade and one precision cutter)
- Scissors
- Acrylic paints light blue
- Acrylic varnish
- Brushes and paintbrush

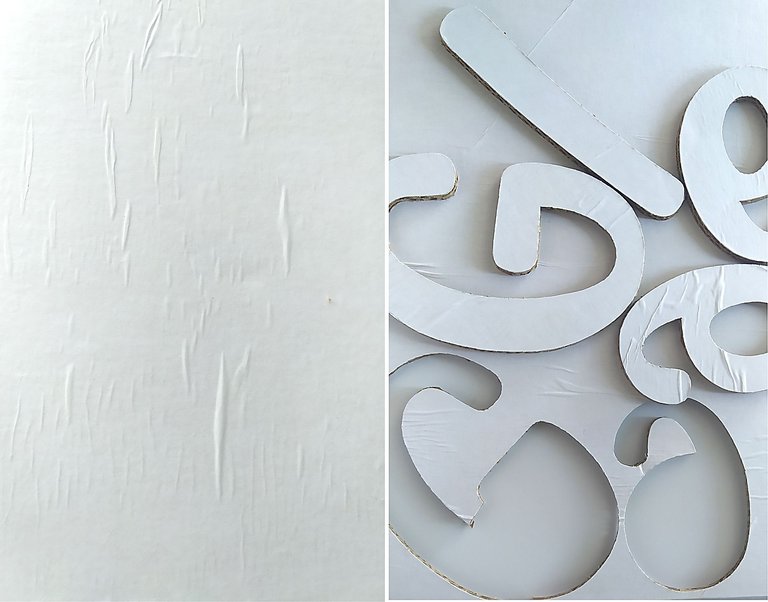
Como siempre empezaremos forrando el cartón por ambas caras con papel reutilizado blanco. Aplicamos una capa de pegamento que será suficiente para que se adhiera el papel. Con nuestros moldes marcamos y calamos las letras.
As always, we start by lining the cardboard on both sides with white reused paper. We apply a layer of glue that will be enough for the paper to adhere. With our molds we mark and openwork the letters.

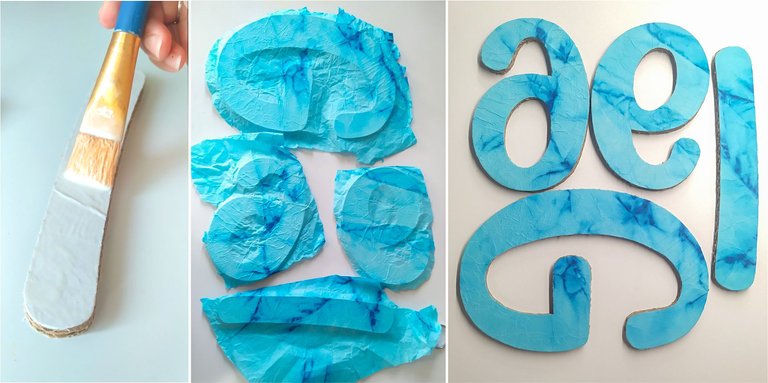
Para forrar las letras utilizaré el papel reutilizado teñido con tintes para ropa. Ya se los mostré en el post anterior. Todas las letras irán forradas de azul. Ponemos una capa de pegamento y colocamos el papel elegido. Esperamos a que se seque y cortamos el sobrante.
To line the letters I will use the reused paper dyed with clothing dyes. I showed them in the previous post. All the letters will be lined with blue. We put a layer of glue and place the selected paper. We wait for it to dry and cut the excess.

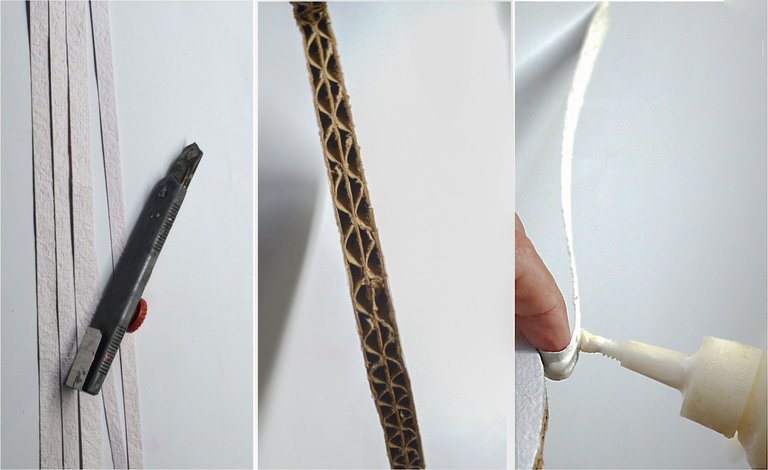
Cubriremos los bordes expuestos del cartón con tiras de papel artesanal previamente cortadas y pintamos con un color azul que combine con el color del papel utilizado en la letra.
We will cover the exposed edges of the cardboard with pre-cut strips of craft paper and paint with a blue color that matches the color of the paper used in the lettering.
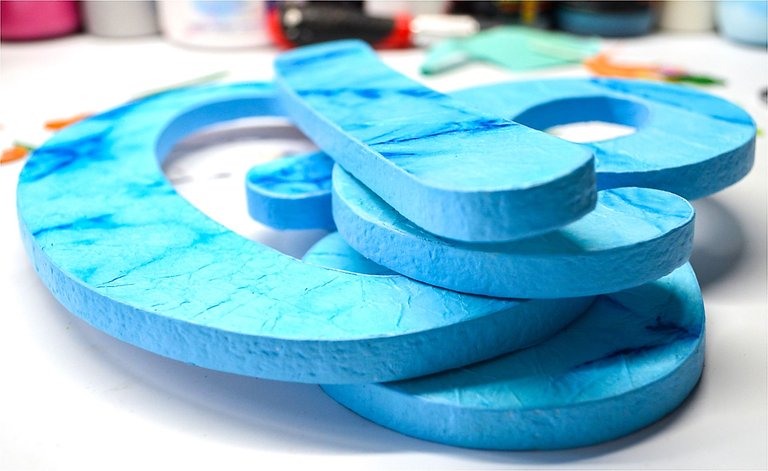

He decidido que cada letra va decorada de una manera diferente. Así que juntaremos todo lo que utilizaremos. Pequeñas figuras recortadas de papel artesanal que pintaremos según el diseño y otros elementos
I have decided that each letter will be decorated in a different way. So we will put together everything we will use. Small figures cut out of craft paper that we will paint according to the design and other elements.
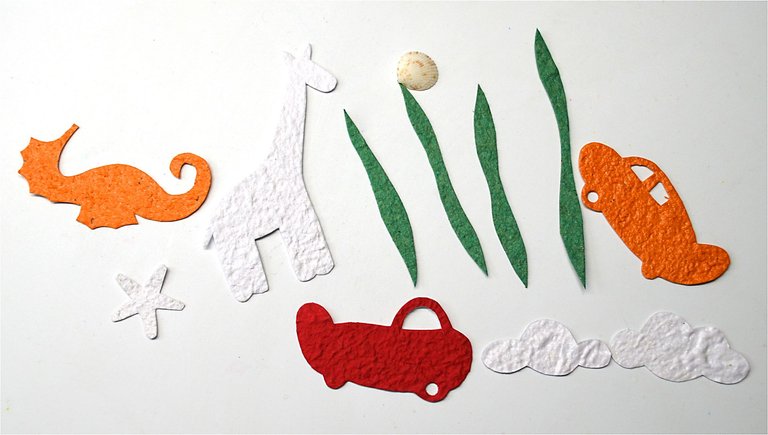

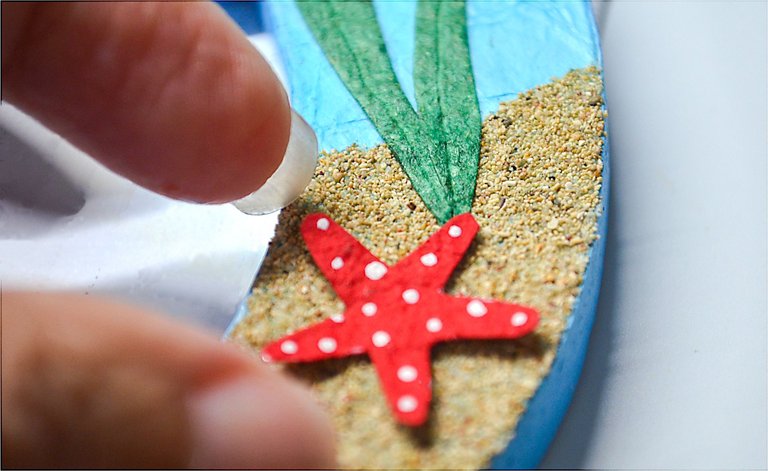
En la letra con motivos marinos echamos una capa de pegamento y esparcimos arena natural sobre él (esta arena es de las playas del este de La Habana). Así vamos una por una, colocando los detalles, hierba, nubes, aviones, caballito de mar, una conchita también natural, un papalote, etc.
On the letter with marine motifs we put a layer of glue and spread natural sand on it (this sand is from the beaches east of Havana). So we go one by one, placing the details, grass, clouds, airplanes, seahorses, a natural shell, a kite, etc.
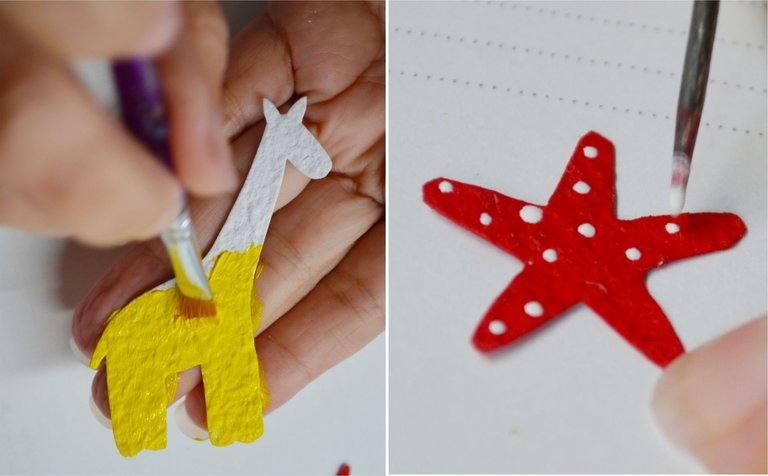
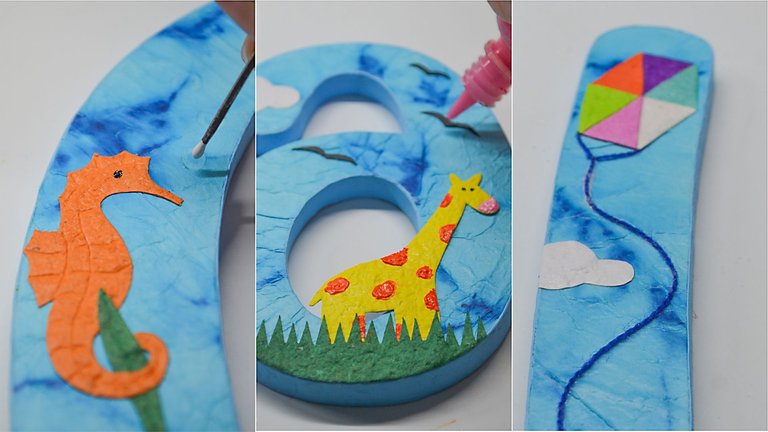

La decoración es la que escojan. Pueden hacer los adornos como yo, pintarlos sobre la letra o simplemente comprar algunos que vienen ya hechos. La elección es de ustedes.
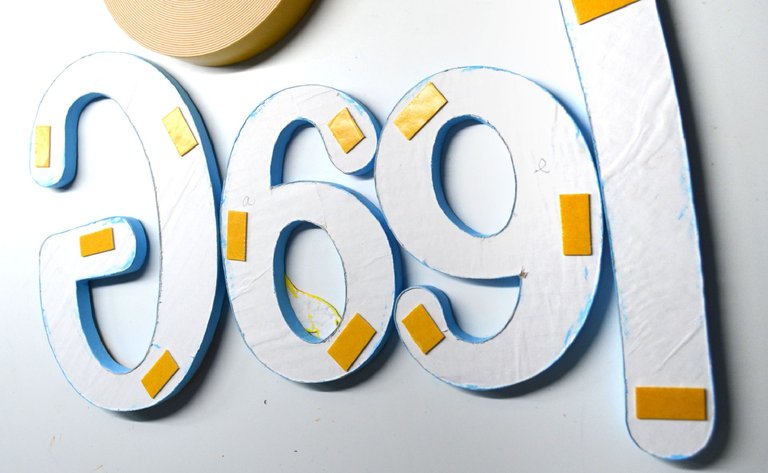
Cuando tengamos todas las letras terminadas damos una capa de barniz transparente para mejor acabado y protección. Por último ponemos en la parte de atrás cinta doble contacto.
The decoration is whatever you choose. You can make the ornaments as I did, paint them on the lettering or just buy some that come ready made. The choice is yours.
When we have all the letters finished we give a coat of clear varnish for better finish and protection. Finally we put double-sided tape on the back.

Listo!!!
Done!!!
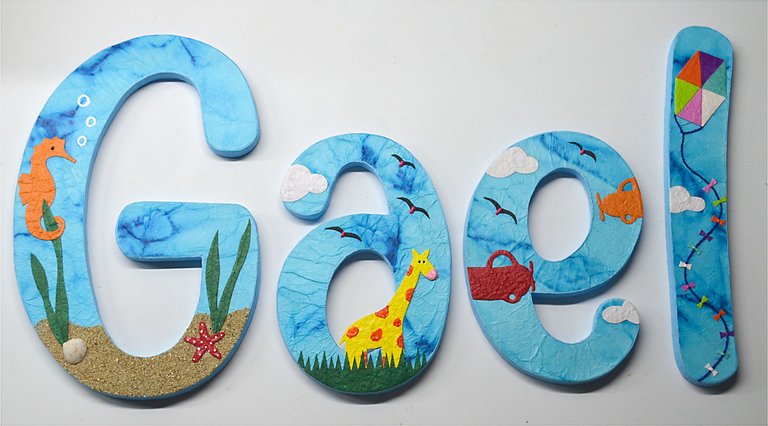

Espero que les guste a ustedes y a los padres de Gael. Mi tutorial es solo una guía de referencia, la selección de los
matetiales y el diseño queda a su libre elección.
Hasta la próxima oportunidad de reciclar!!
I hope you and Gael's parents like it. My tutorial is just a reference guide, the selection of the materials and the
the choice of materials and design is up to you.
Until the next recycling opportunity!

Las imágenes y el texto son propios. Usé DeepL para la traducción porque el español es mi idioma nativo.
The images and text are my own. I used DeepL for the translation because Spanish is my mother tongue..
Love the colour of that blue, but those little details are super extra mega cute 😍
Super extra mega gracias 🤭. I'm glad you liked it. Feliz día.
☀️ Igualmente, feliz sábado 🥂
Qué lindo te quedó el nombre del niño, el nivel de detalles es maravilloso. Los colores son muy vivos. Excelente trabajo. 👏👏👏
Gracias por apreciar los detalles de este proyecto y por los elogios. Me alegra que te haya gustado.🤩 Saludos.
Congratulations @mdrguez! You have completed the following achievement on the Hive blockchain And have been rewarded with New badge(s)
Your next target is to reach 8000 upvotes.
You can view your badges on your board and compare yourself to others in the Ranking
If you no longer want to receive notifications, reply to this comment with the word
STOPCheck out our last posts:
Well done!! 🤭. Thanks.
Wow ,thanks for sharing it ,now I got an idea for my son's coming birthday.😍
That's so nice. I would love for my work to inspire you to make your son's birthday gift.😍 Do it and show it to me!!! Thanks for stopping by. Happy day.
Oh, but we have dived into the sea. Esto es precioso y con tantos detallitos. Me gusta mucho el papalote. 😍📸
Here we dive into the sea, walk through the African grasslands, fly to some destination by plane and then...free as a kite, letting ourselves be carried only by the wind. Está chulo eh? Thanks. Have a nice day. 🌞
This baby Gael, when he looks at his name, will have it all clear. Freedom, above all things.
Sí, está chulo. Qué hambre tengo Amanda.
Jajajajaja....come!!!!
Wowwww esto es una total belleza, te quedo increíble. Ame esta decoración, junto a cada detalle. Mi admiración para ti.
Éxitos mi bella... 💛
!DIY
Muchas gracias por ese Wowwwww. Agradecida de tu admiración y alegre de que te guste este proyecto. Gracias por los buenos deseos. 💚
You can query your personal balance by
@dayadam just sent you a DIY token as a little appreciation for your post dear @mdrguez! Feel free to multiply it by sending someone else !DIY in a comment :) You can do that x times a day depending on your balance so:!DIYSTATSThanks, I will do it for sure.
Que belleza
Gracias 🤭
Congratulations @mdrguez! You received a personal badge!
Wait until the end of Power Up Day to find out the size of your Power-Bee.
May the Hive Power be with you!
You can view your badges on your board and compare yourself to others in the Ranking
Check out our last posts: