
¡Hola, encantadora gente de la comunidad @hivediy!
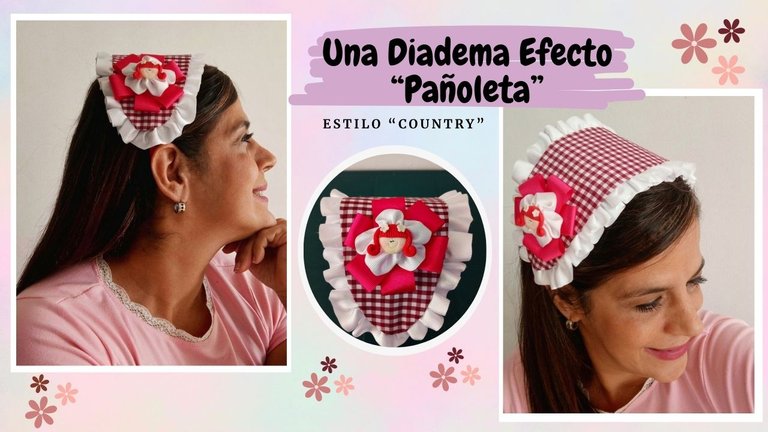
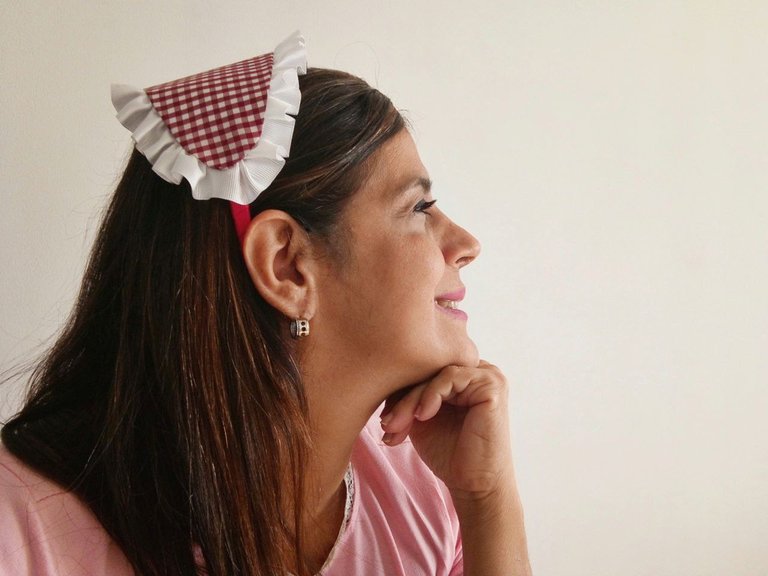
Hoy quiero compartir un tutorial sobre una diadema que hice para mi sobrinita, básicamente parece una pañoleta, me encanta la tela de Vichy con la que está hecha porque le da un toque campestre precioso. Si te gusta ese estilo, te explicaré sobre los materiales a utilizar y los pasos para que tú también puedas hacer una fácilmente.
Usé un corte de tela Vichy de 30 cm x 27 cm, cintas de gross y cartulina, también puedes usar torchón, encaje o cinta bordada para el borde y le dará un aire aún más delicado ¡Sin duda es una gran idea para las princesas de la casa!
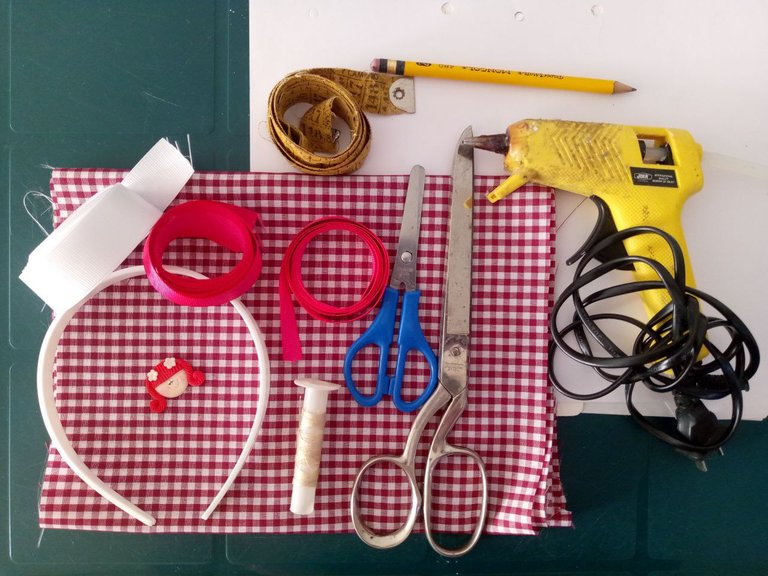
Materiales
Tela de Vichy
Cinta de Gross # 2 color fucsia (1.5 metros)
Cinta de Gross # 5 color blanco (3 metros)
Cinta de Gross # 5 Color Fucsia (1 metro )
Cartulina
Hoja blanca
Pistola y barras de silicón
1 Cintillo o diadema
Hilo y aguja
Tijera de papel y tijera de costura
Cinta métrica o regla
Lápiz
Yesquero
1 aplique de masa flexible
𝐏𝐚𝐬𝐨 𝐚 𝐩𝐚𝐬𝐨
Paso 1
 |  |
|---|
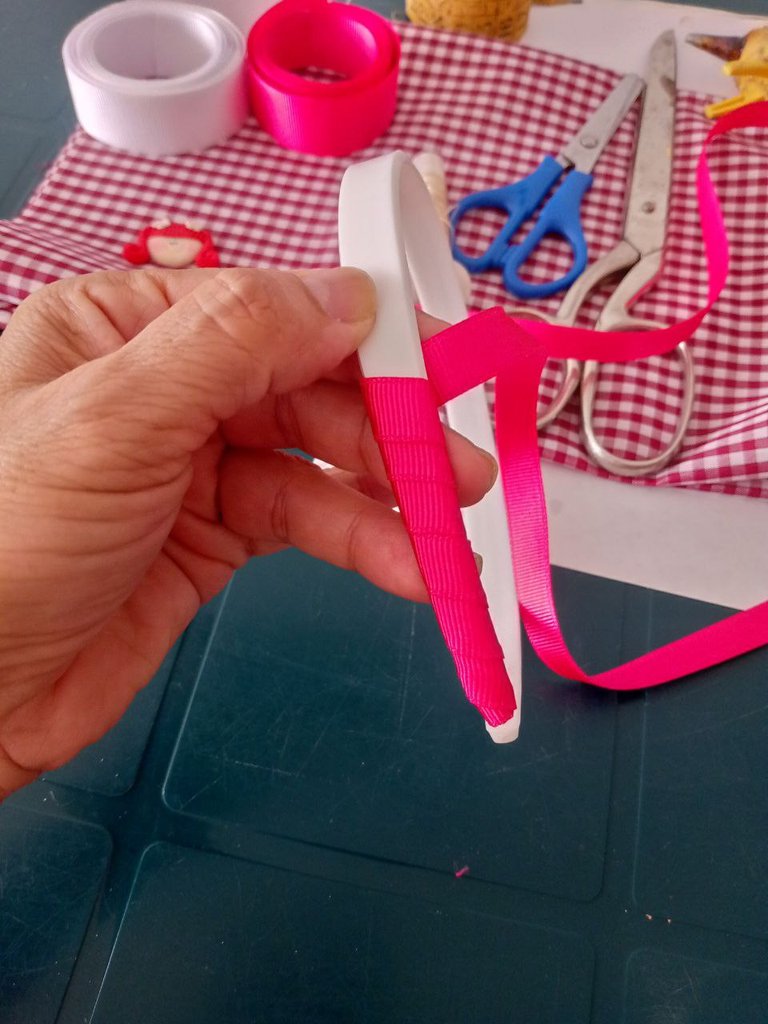
Comencé forrando el cintillo o diadema con la cinta de gross color fucsia N° 🌺 2.
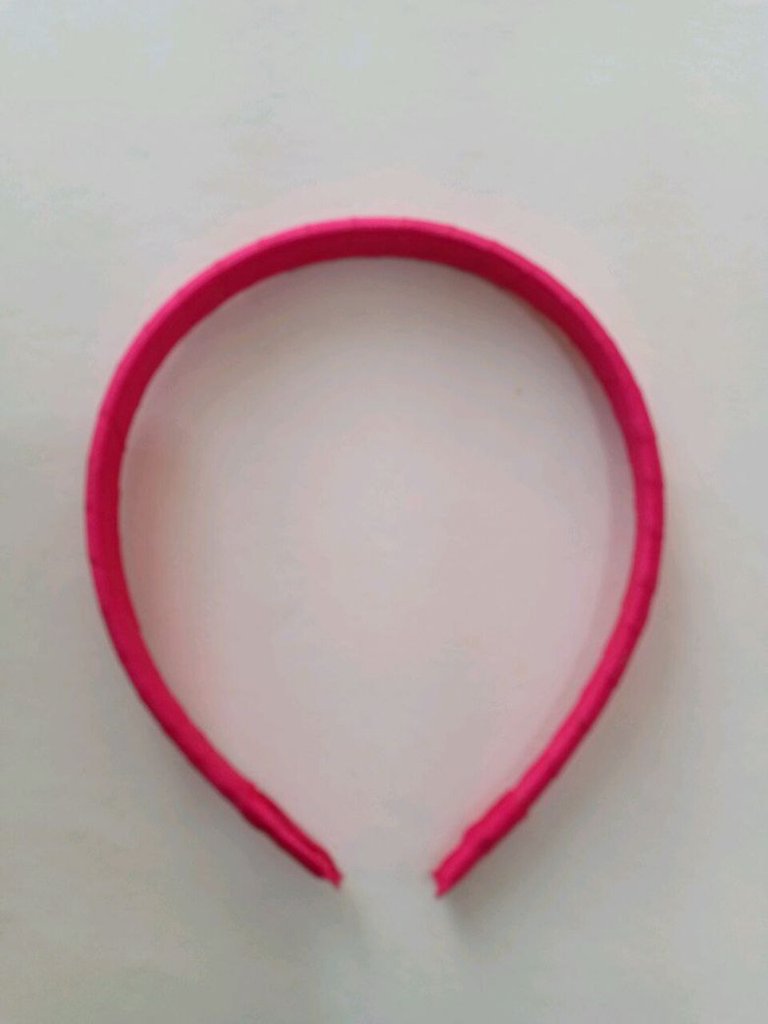
Al finalizar en cada extremo de la diadema pegué con silicón una pieza de cinta N° 5 del mismo color para darle mejor acabado y evitar que se despeguen las puntas.
Paso 2
 |  |  |
|---|
 |  |  |
|---|
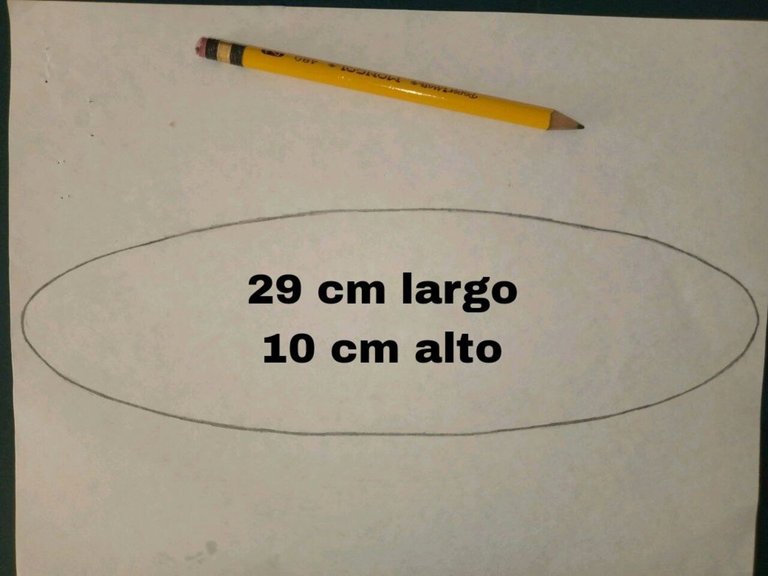
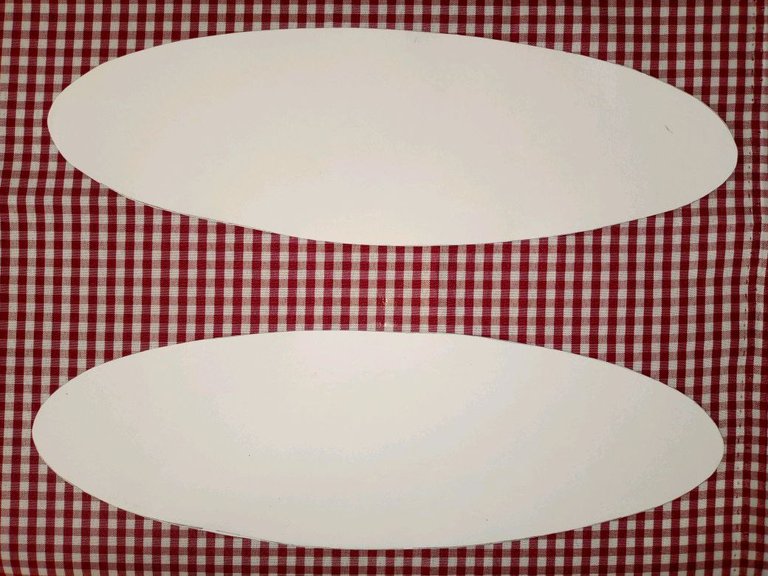
Dibujé 1 óvalo en la hoja blanca para sacar un molde, por lo que primero tomé las medidas en la diadema, el óvalo debe quedar centrado cuando lo fijemos, como la diadema es pequeña lo hice de 29 cm de largo por 10 cm de alto.
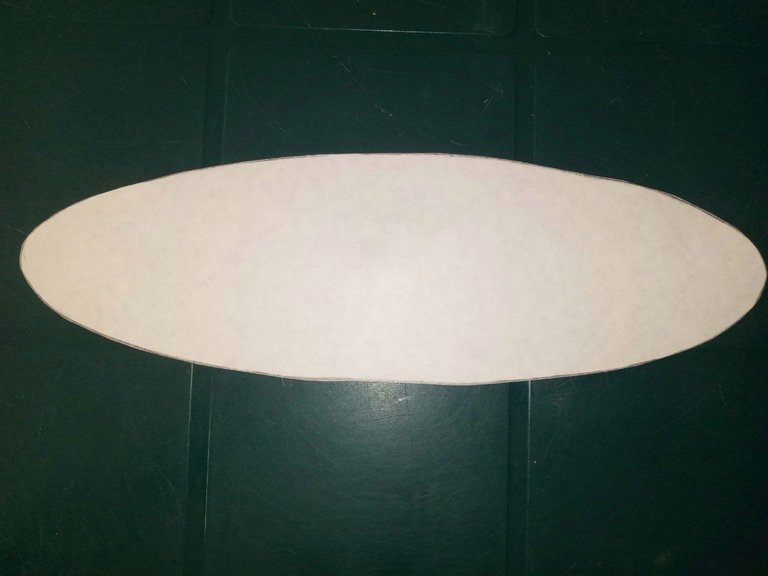
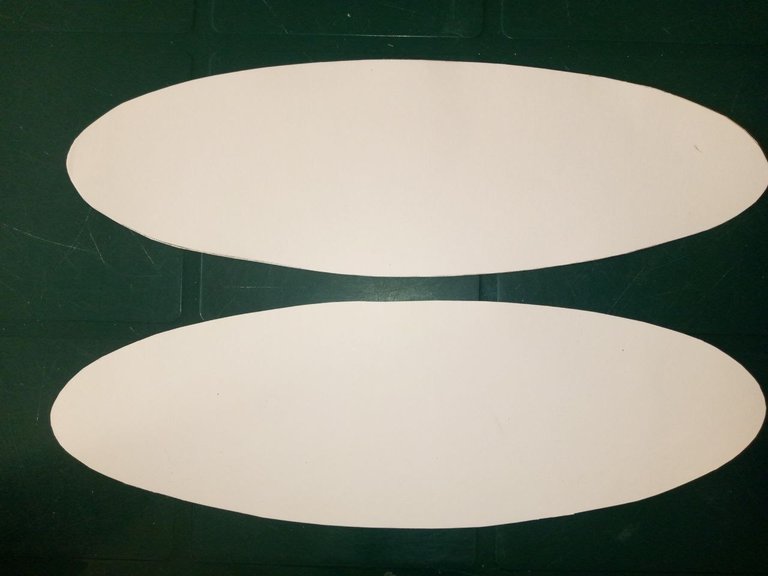
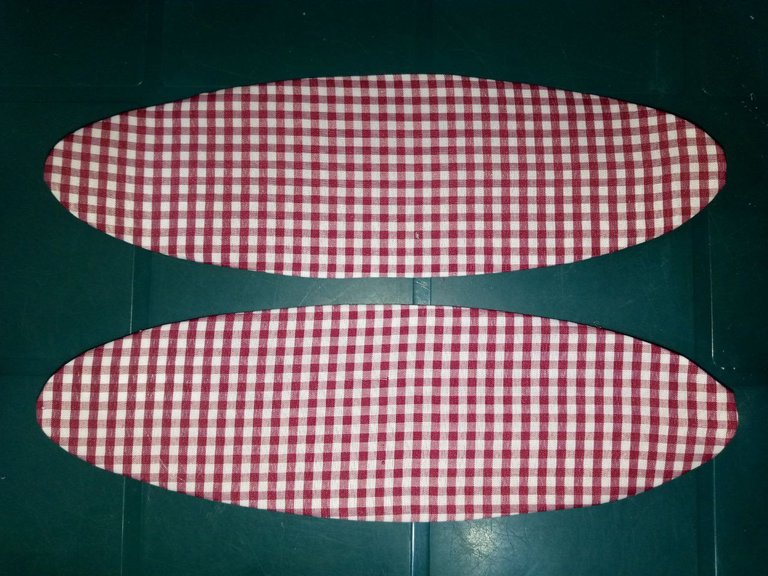
Recorté el molde y sobre la cartulina dibujé dos óvalos que luego puse sobre la tela para cortar los mismos óvalos dejando un margen de 1 c.m para pegarlos
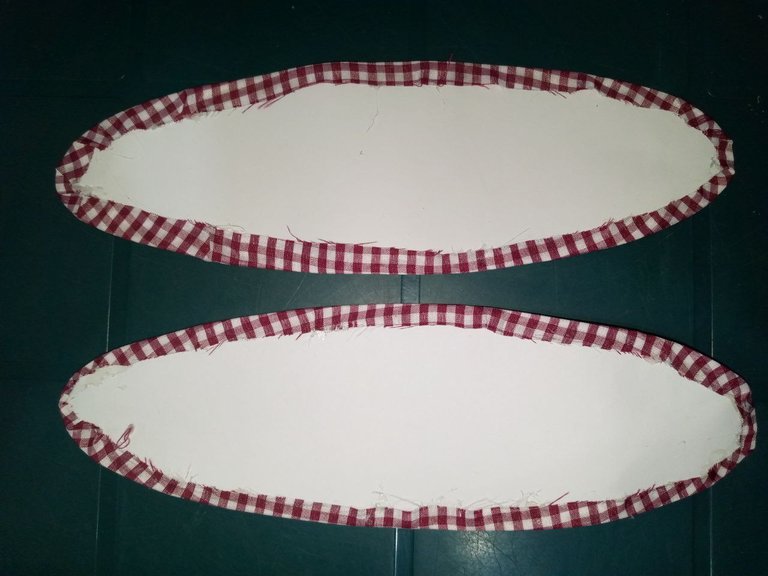
Cubrí cada óvalo con la tela, asegurando los bordes con silicón y estirando bien la tela pero sin forzar (es importante usar silicona solo en los bordes).
Paso 3
 |  |
|---|
 |  |
|---|
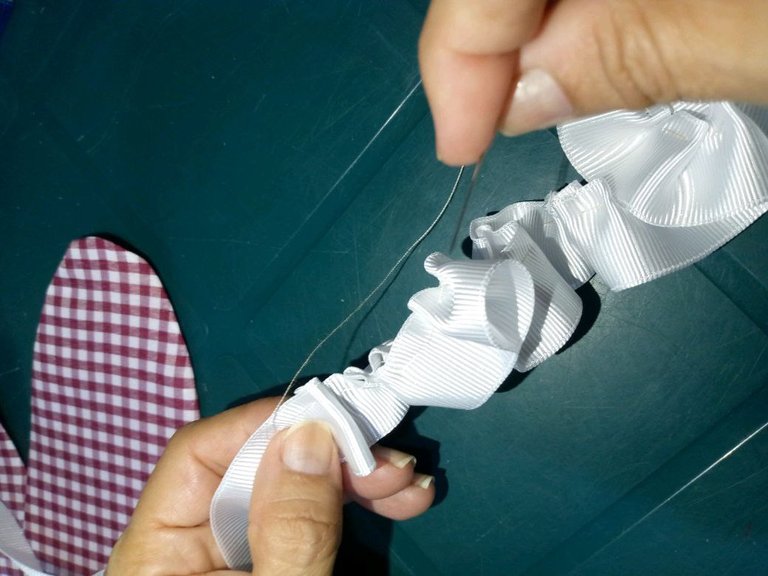
Con aguja e hilo, fruncí la cinta de gross blanca Nº 5. Utilicé 2,70 cm de cinta para el tamaño de este óvalo.
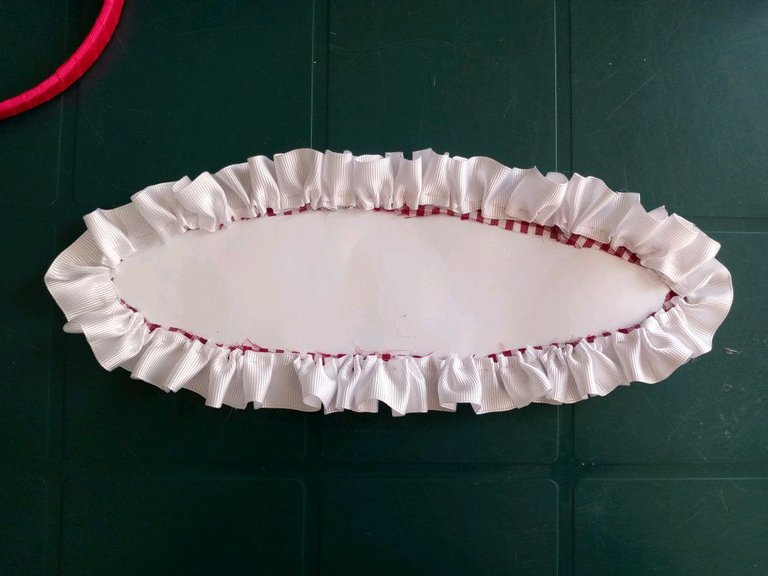
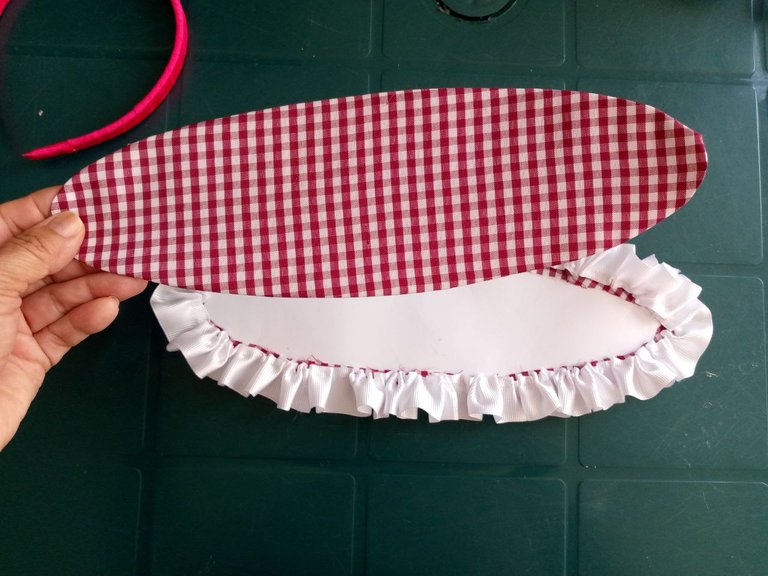
Luego pegué la cinta fruncida alrededor de uno de los óvalos y finalmente coloqué el otro óvalo encima de la parte fruncida. Fijé con silicón por todo el borde de la pieza cuidando de no moverla para que quedaran ambas en la misma posición.
Paso 4
 |  |
|---|
 |  |
|---|
Ahora es el momento de unir la pieza terminada a la diadema. Medimos con una regla y encontramos el centro, aplicamos silicón y colocamos la diadema, se dobla un extremo primero y se pega a la diadema, luego repetir el proceso con el otro extremo.
Paso 5
 |  |  |  |
|---|
 |  |  |  |
|---|
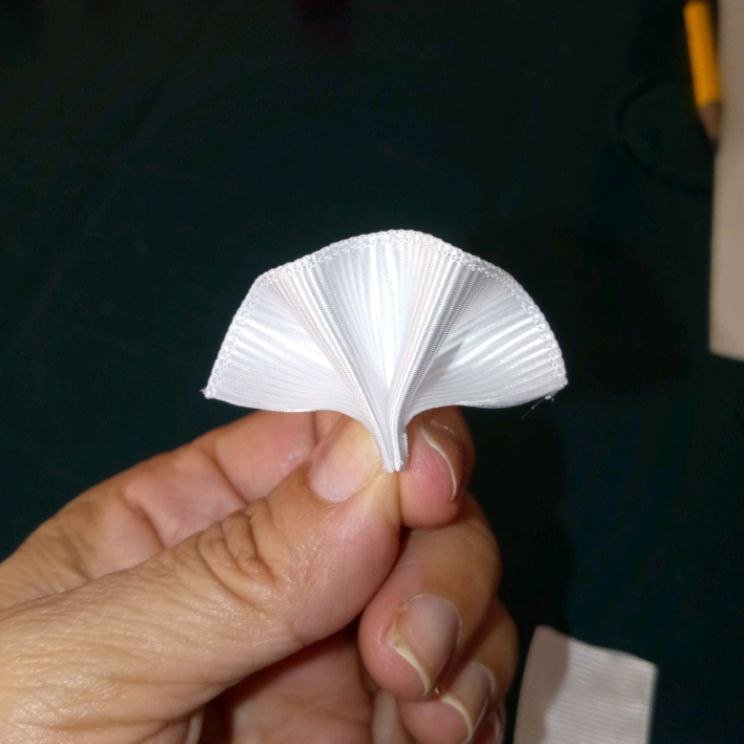
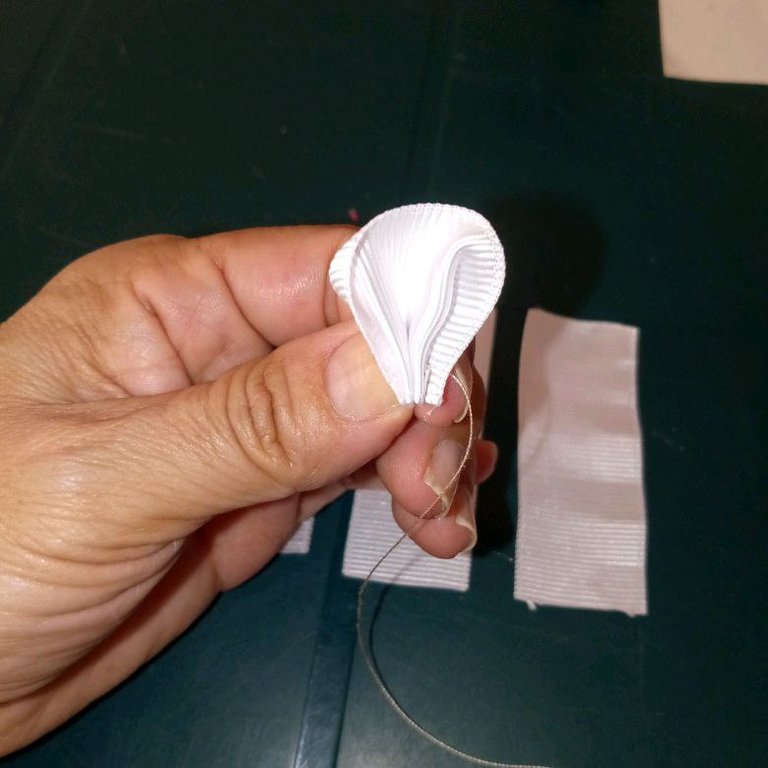
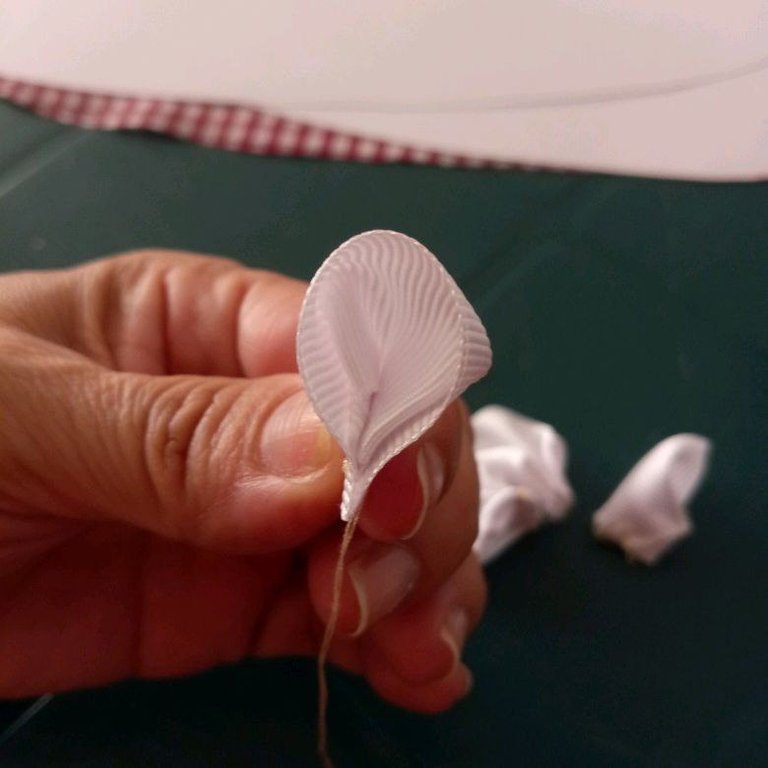
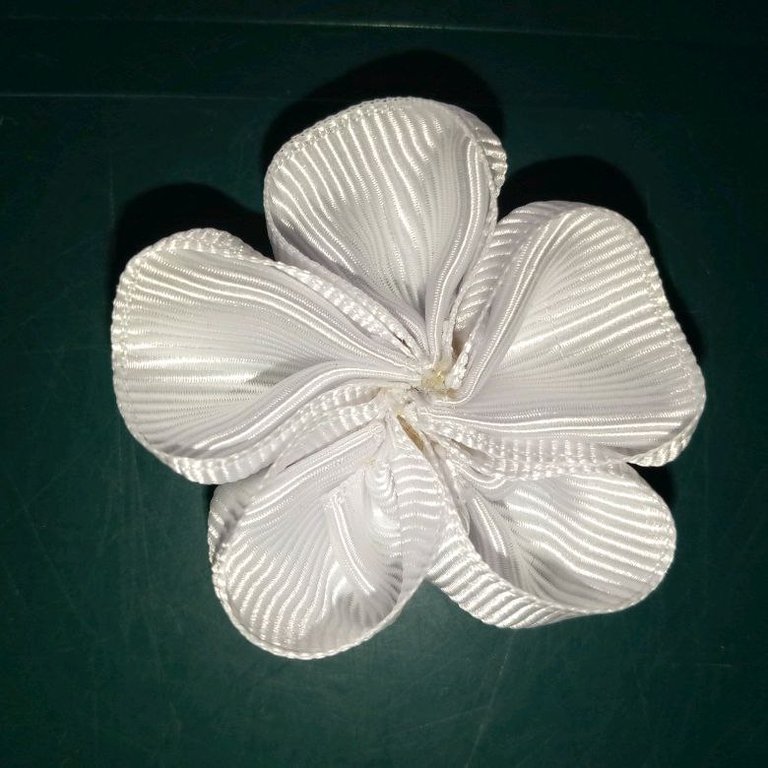
Hagamos el lazo. En este caso, hice una flor de cinco pétalos con cinta de gross blanca Nº 5. Corté cinco trozos de 6 cm cada uno, hice tres pliegues, bajé los extremos y los cosí para formar los pétalos. Repetí el proceso para hacer el resto. Tomé la aguja e hilo y los uní en la base.
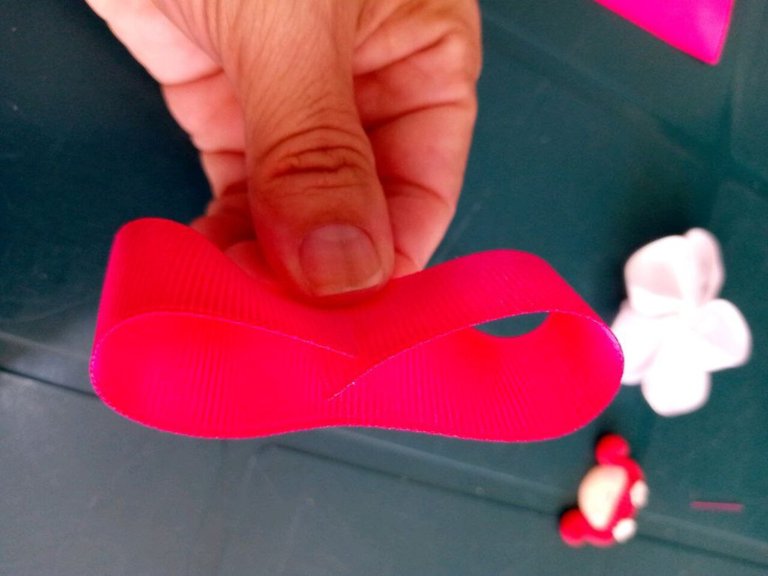
Para la flor fucsia, corté 3 tiras de 16 cm cada una, tomé un extremo y lo llevé al centro, tomé el otro extremo y lo llevé al centro también y cosí, repitiendo el proceso con las 2 tiras restantes. Las pegué una encima de la otra para hacer la forma de una flor y cosí de nuevo. Puedes hacer este paso con silicón, pero yo prefiero hacerlo cosiendo.
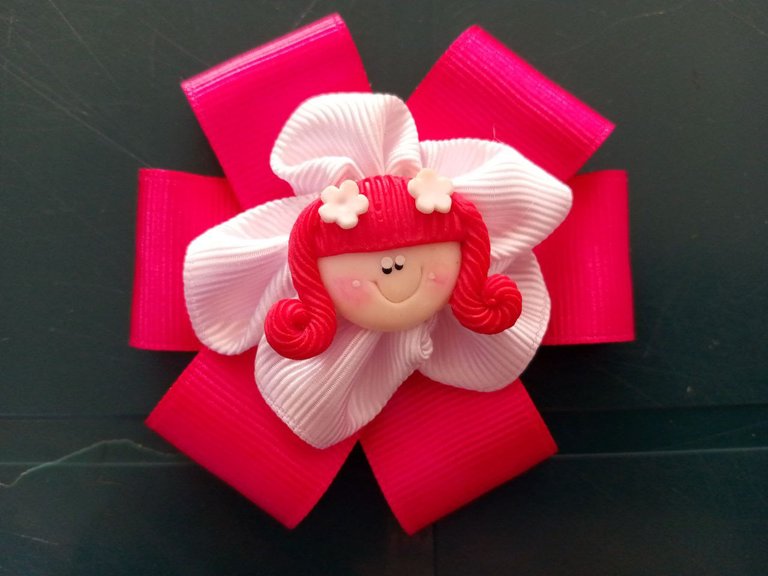
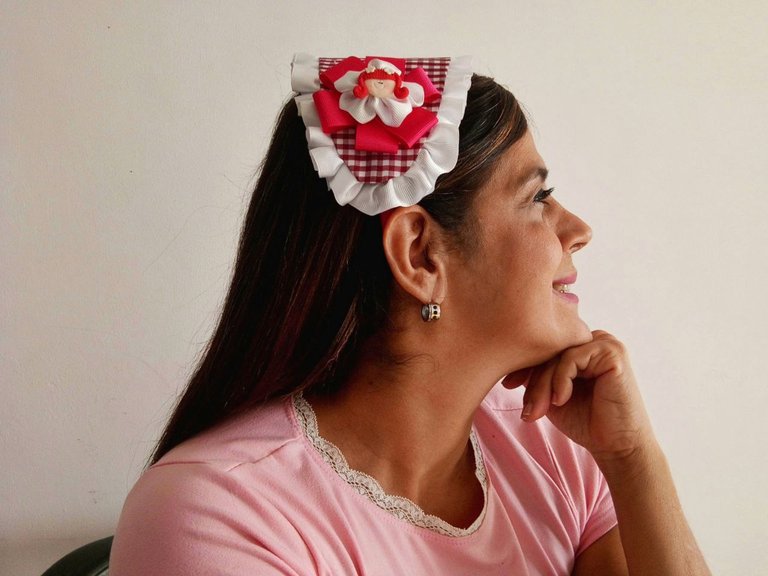
Para hacer el lazo, se coloca la flor fucsia , luego la flor blanca al revés y por último coloqué el aplique de masa flexible. Pegué las partes con el silicón.
Paso 6
 |  |
|---|
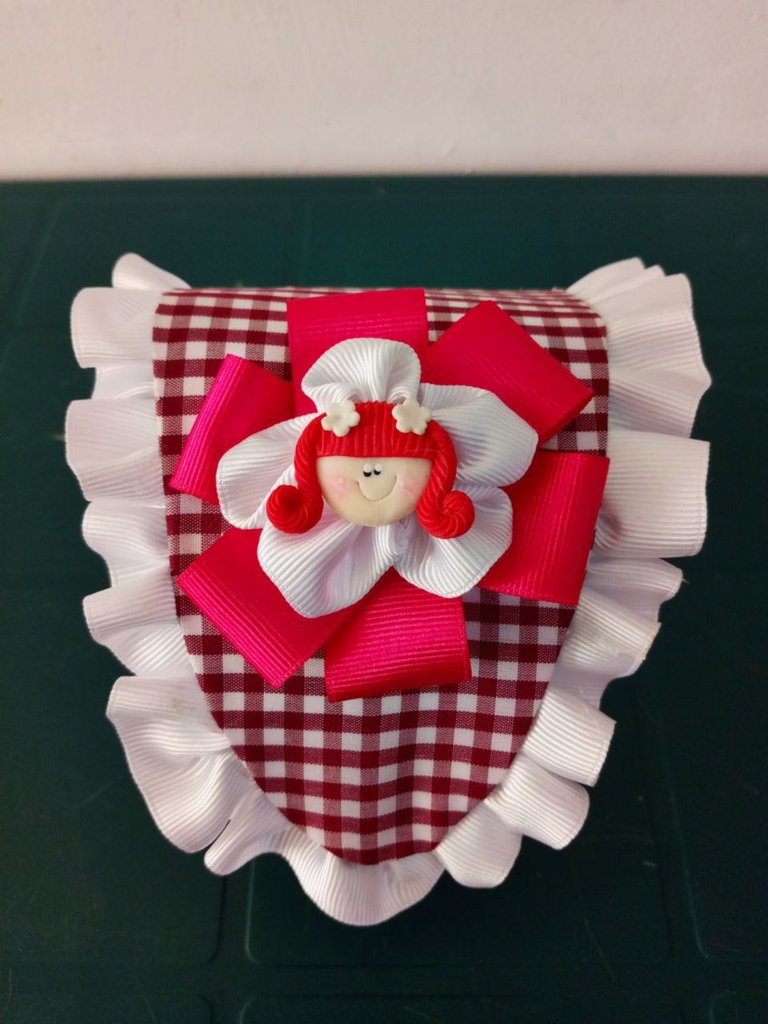
Pegamos el lazo con silicón en un lado de la diadema y acá dejo el resultado final.También pueden hacerla sin lazo para nosotras las más grandes.
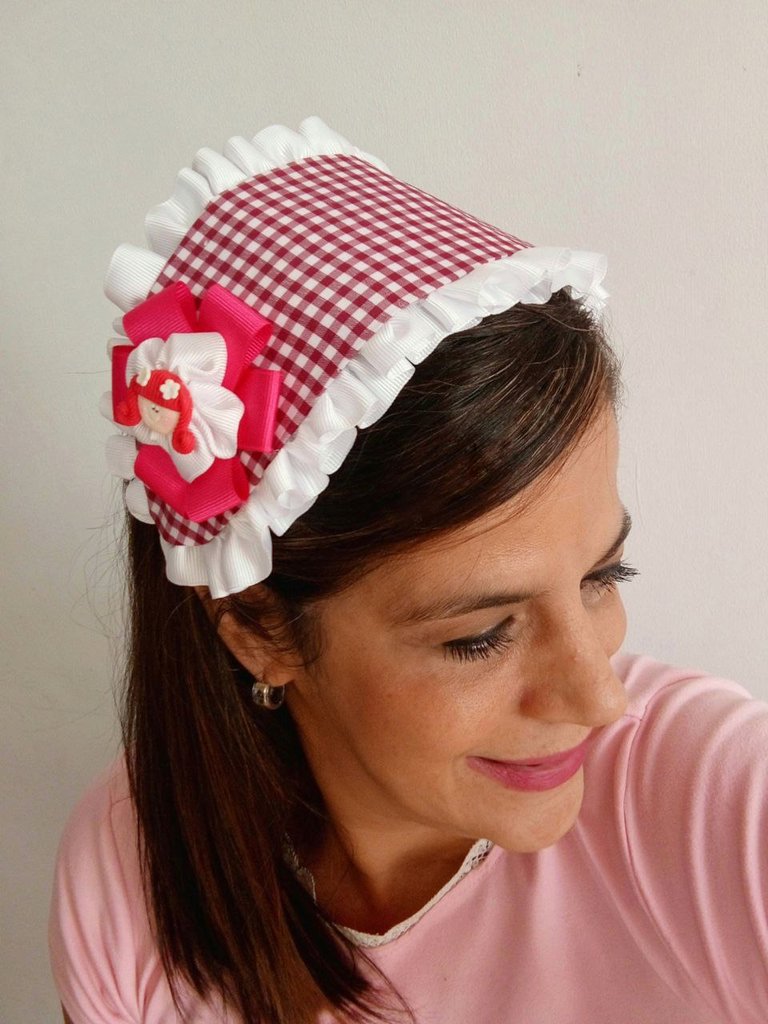
Y así quedó la diadema...
 |  |
|---|
Espero les guste y quieran hacerle este modelo a sus princesas. Es un modelo diferente y aunque lleva cartulina es muy liviano.
Como siempre fue un placer escribir y hacer esta manualidad para ustedes ❤️

Hello, lovely people of the @hivediy community!
Today I want to share a tutorial on a headband that I made for my niece, basically it looks like a scarf, I love the gingham fabric it's made from because it gives it a lovely country feel. If you like that style, I'll explain the materials to use and the steps so you can easily make one too.
I used a 30 cm cut of gingham fabric and grosgrain ribbon, but you can also use linen, lace or embroidered ribbon for the border and it will give it an even more delicate look. It's definitely a great idea for the princesses of the house!
𝐌𝐚𝐭𝐞𝐫𝐢𝐚𝐥s
Vichy fabric
Gross's tape # 2 fuchsia (1.5 metres)
Gross's tape # 5 white (3 metres)
Gross's tape # 5 fuchsia (1 metre)
Cardboard
White sheet
Silicone gun and sticks
1 Headband or hairband
Thread and needle
Paper scissors and sewing scissors
Measuring tape or ruler
Pencil
Match striker
1 flexible dough appliance
Step by Step
Step 1
| |
|---|
I started by lining the headband with the fuchsia grosgrain ribbon N° 2.
When I finished, I used silicone to stick a piece of ribbon No. 5 of the same colour to each end of the headband to give it a better finish and to prevent the ends from coming loose
Step 2
| | |
|---|
 | | |
|---|
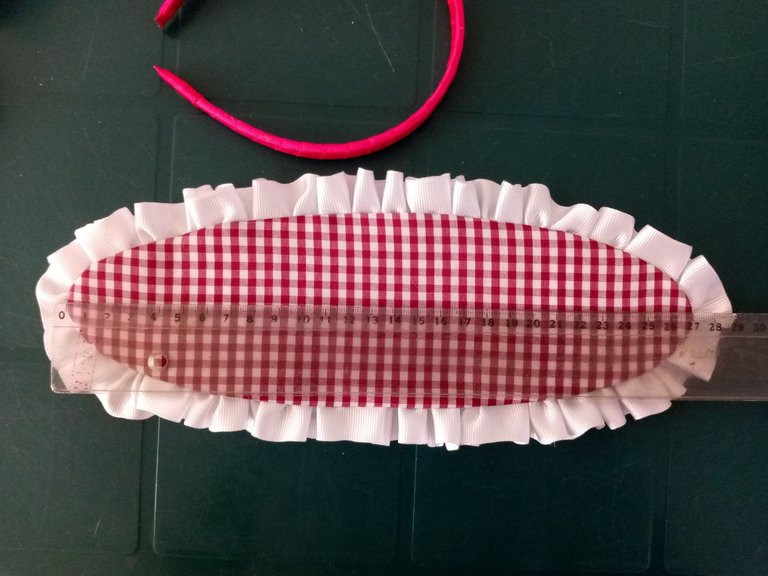
I drew 1 oval on the white sheet of paper to make a mould, so first I took the measurements of the headband, the oval should be centred when we fix it, as the headband is small I made it 29 cm long by 10 cm high.
I cut out the mould and on the card I drew two ovals which I then placed on the fabric to cut out the same ovals leaving a margin of 1 cm to stick them on.
I covered each oval with the fabric, securing the edges with silicone and stretching the fabric well but without forcing (it is important to use silicone only on the edges).
Step 3
| |
|---|
| |
|---|
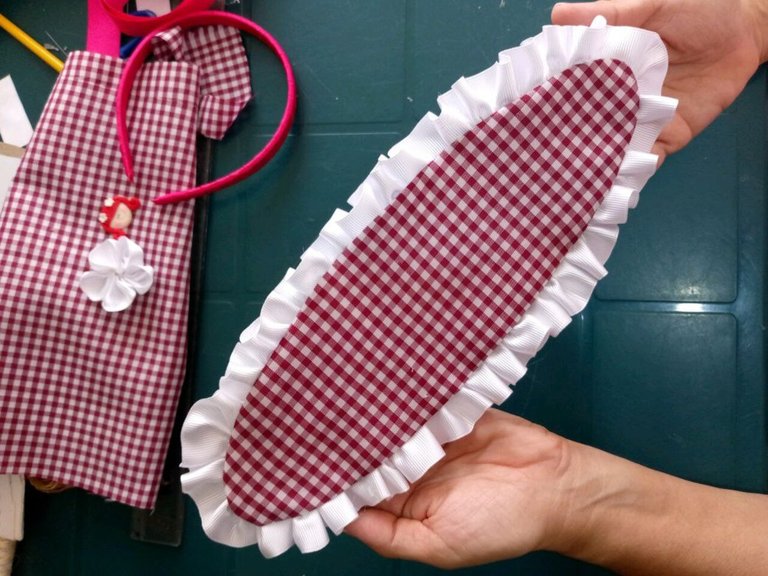
Using a needle and thread, I gathered the white grosgrain ribbon No. 5. I used 2.70 cm of ribbon for the size of this oval.
Then I glued the gathered ribbon around one of the ovals and finally placed the other oval on top of the gathered part. I fixed it with silicone all around the edge of the piece, taking care not to move it so that both would be in the same position.
Step 4
| |
|---|
| |
|---|
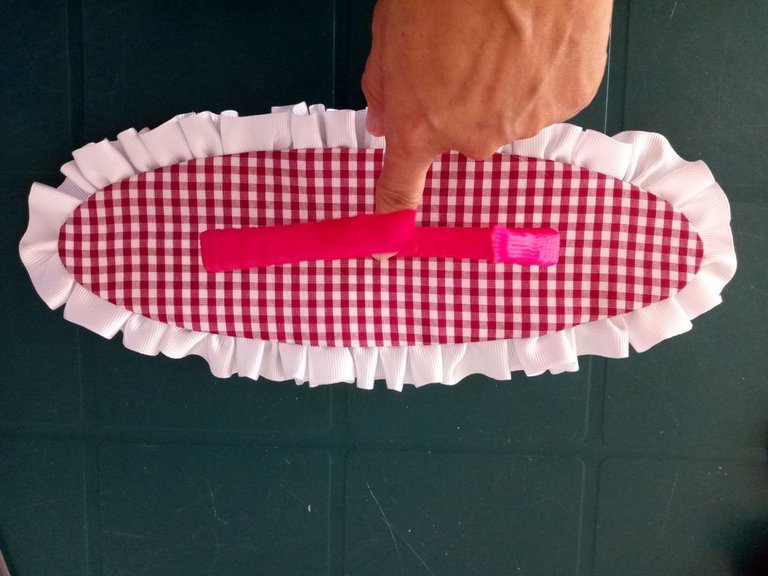
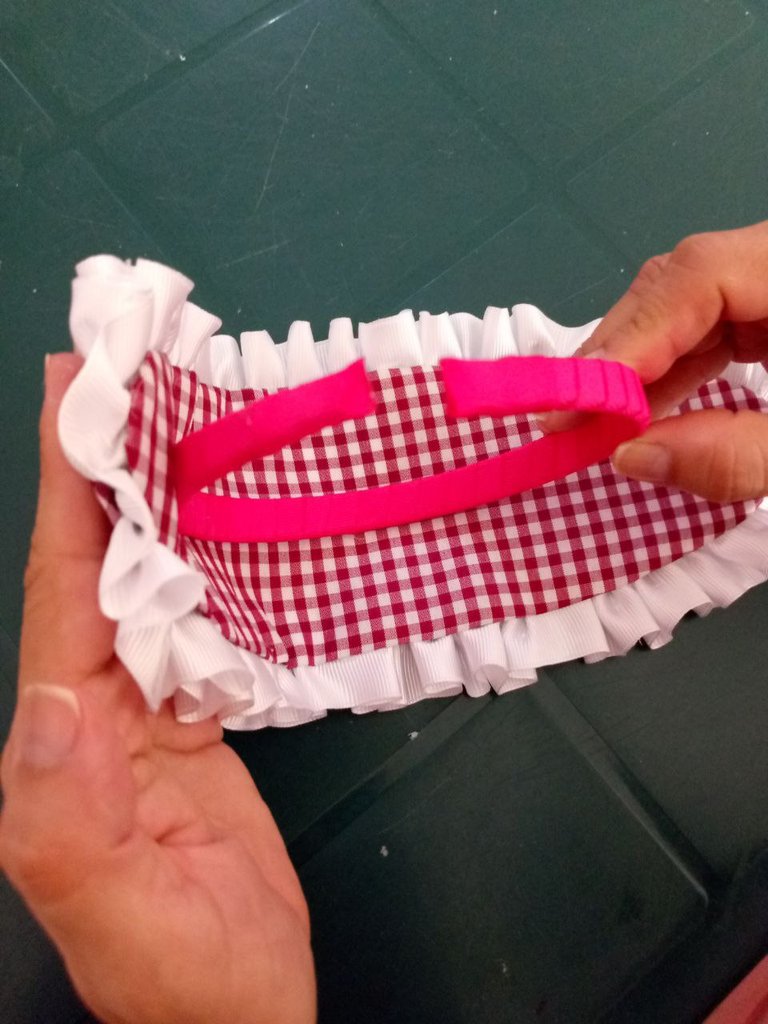
Now it's time to attach the finished piece to the headband. Measure with a ruler and find the centre, apply silicone and place the headband, fold one end first and stick it to the headband, then repeat the process with the other end.
Step 5
| | | |
|---|
| | | |
|---|
Let's make the bow. In this case, I made a five-petal flower with white grosgrain ribbon No. 5. I cut five pieces of 6 cm each, made three folds, brought the ends down and sewed them to form the petals. I repeated the process to make the rest. I took the needle and thread and joined them at the base.
For the fuchsia flower, I cut 3 strips of 16 cm each, took one end and brought it to the centre, took the other end and brought it to the centre too and sewed, repeating the process with the 2 remaining strips. I glued them on top of each other to make the shape of a flower and sewed again. You can do this step with silicone, but I prefer to do it by sewing.
To make the bow, I placed the fuchsia flower, then the white flower upside down and finally I placed the flexible mass appliqué. I glued the parts with the silicone
Step 6
| |
|---|
We stick the bow with silicone on one side of the headband and here is the final result. You can also make it without a bow for us older ones.
And so the diadem remained...
| |
|---|
I hope you like it and want to make this model for your princesses. It's a different model and although it's made of cardboard it's very light.
As always, it was a pleasure writing and making this craft for you ❤️
Fotos hechas por mí - Photos made by me / Portada - Separadores y Banners realizados en Canva- Cover, Dividers y Banners created in Canva / Traducción realizada con www.DeepL.com - Translation made with www.deepl.com

Aquí en Cuba a ese tipo de tela se le llama guinga. Y se usa mucho para hacerle batas a las niñas. Así que esa diadema c9n una bata quedaría espectacular. Gracias
Hola ¡¡¡ que bien que usan esta tela para hacerle batas a las niñas , clarooo que si un set de ambas cosas debe verse increible ❤️ Gracias por decirme, no sabía que también le llamaban Guinga.
Abrazos 🤗
Me encanto esa combinación de lo campestre, con la ternura del lazo y la tela vichy que es muy linda para los accesorios de las niñas.🤗❤️
Siiii yo amo esta tela de vichy es hermosa, nunca pasa de moda ❤️ realmente este estilo es muy coqueto y lo hace lindo el detalle con el lazo.
Graciass ¡¡¡ 🙏
Si amiga, es una tela preciosa, la conozco desde casi toda mi vida, mi mamá la utilizaba mucho para hacer ropa de niñas y me decía como se llamaba.😊💗
Nice 👏
Thanks❤️
Welcome🎉
❤️