Nuevo concurso: Mundo patchwork / New contest: Patchwork world
Materiales:
Telas (retacitos variados).
Tijera.
Hilo.
Aguja .
Pañito (modelo)
Hello everyone in the Hive Diy community.
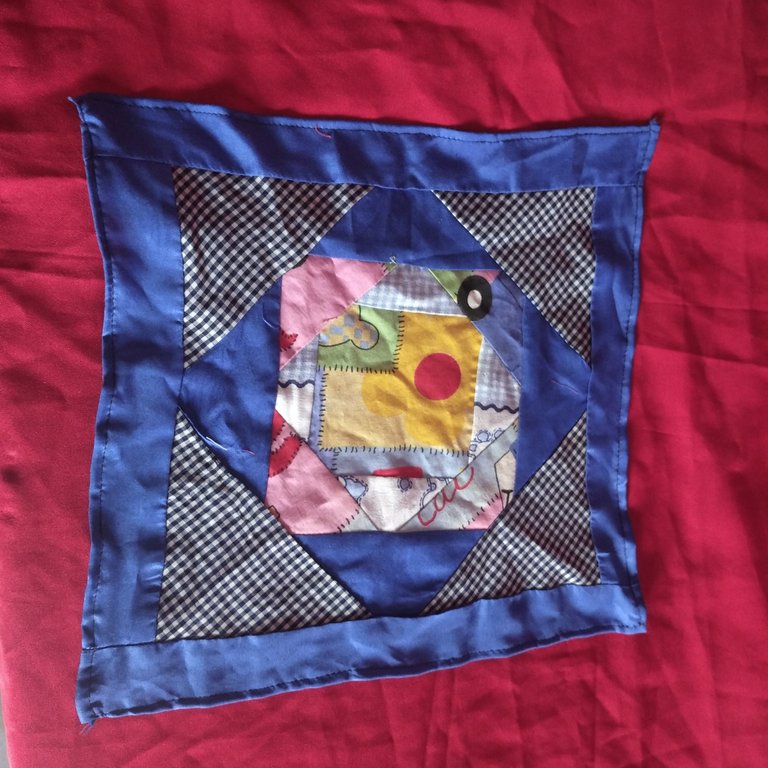
Today I come to participate in the contest with the patchwork technique, because this is a technique that I saw a few days ago and I loved it, I made a doily to practice. That's why when I saw the publication I wanted to take the opportunity to practice a little more.
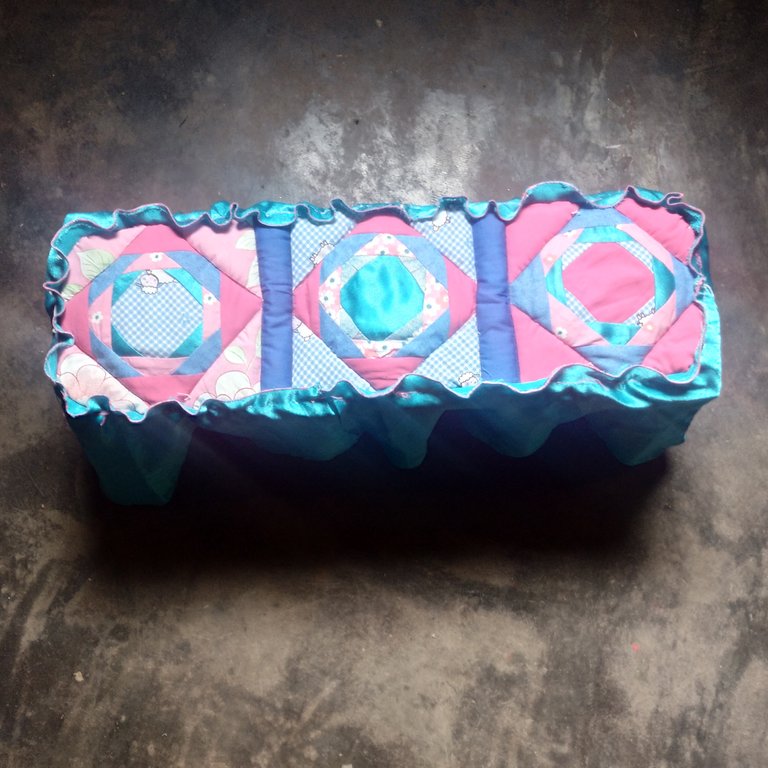
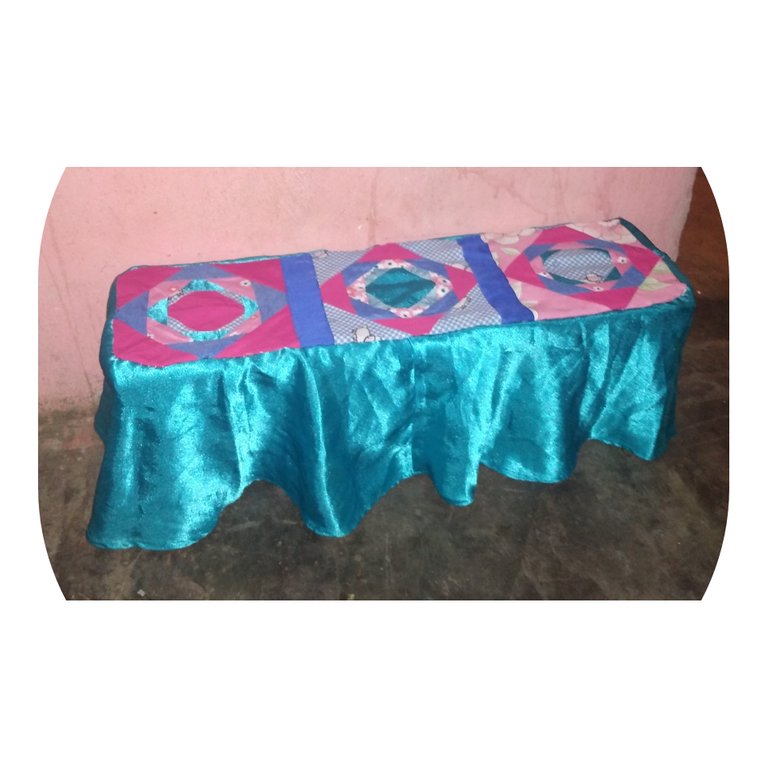
So I took a stool that I made a few days ago for my little granddaughter and I took the measurements to make her a cover, since the baby loves the stool, but when she sits with only the diaper, the diaper sticks to her wood of the bench, because it is not sanded or varnished.
That is why when I saw the contest I liked it a lot, because I saw the perfect opportunity, I practice and at the same time I solve a problem, because it is also a small piece that I can finish quickly and see the result.
Since I aspire, once I learn well, to be able to make a bedspread, among other pieces and at the same time take advantage of all the scraps of fabric that remain.
Well to do this, use different types of fabrics.
Materials:
Fabrics (assorted scraps).
Scissors.
Thread.
Needle .
cloth (model)
Paso 1.
Step 1
Since I had already made a doily before, I was guided by that, so I began to chop the first 6 squares of fabric for the 3 three pieces that I am going to make, combining a patterned and a solid color.
Each of these 6 squares measures 9 cm long by 9 wide.
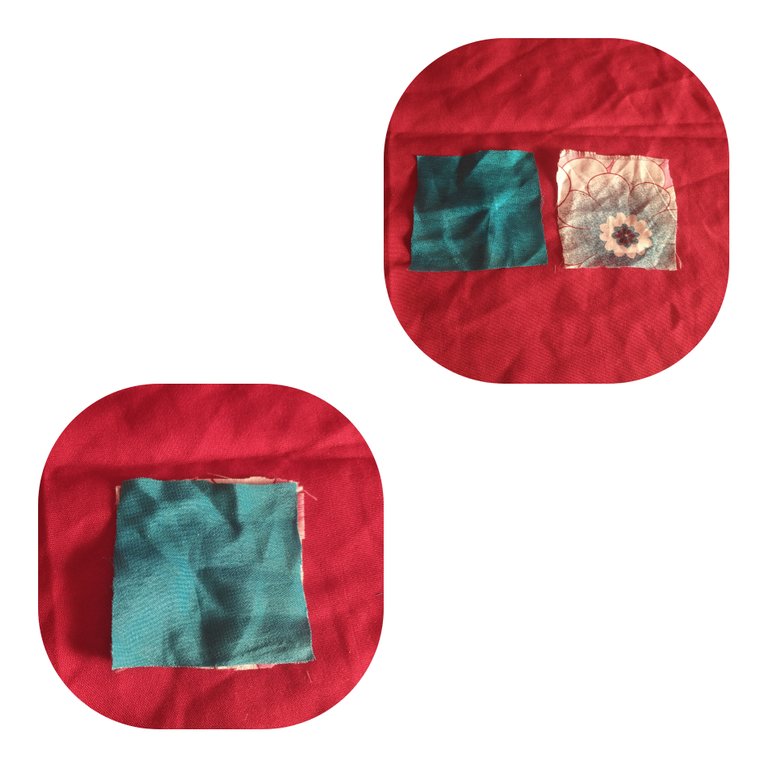
Paso 2
Step 2
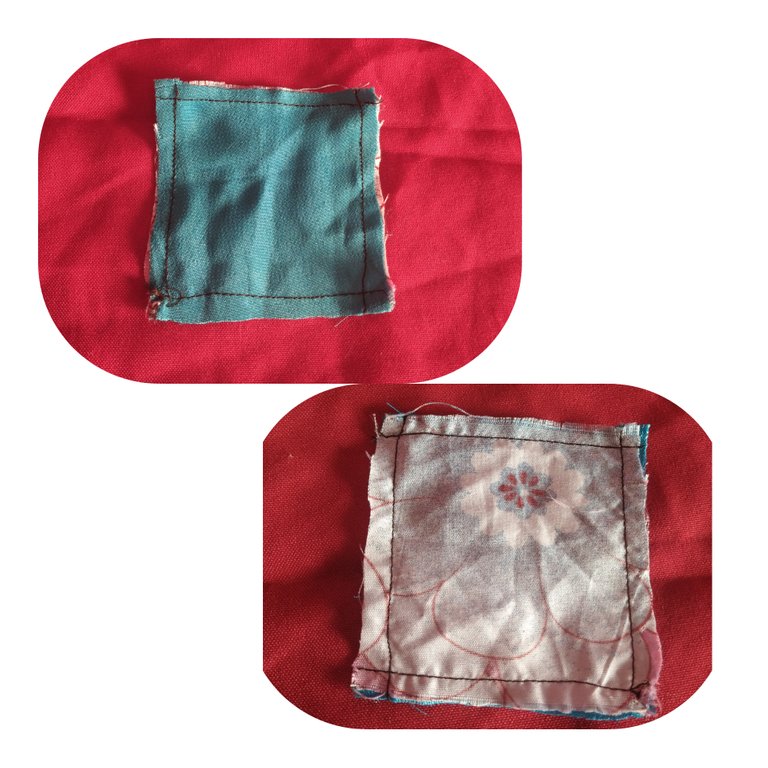
The second step is to place each two squares, face to face and sew them on the wrong side.
.
Paso 3
Step 3
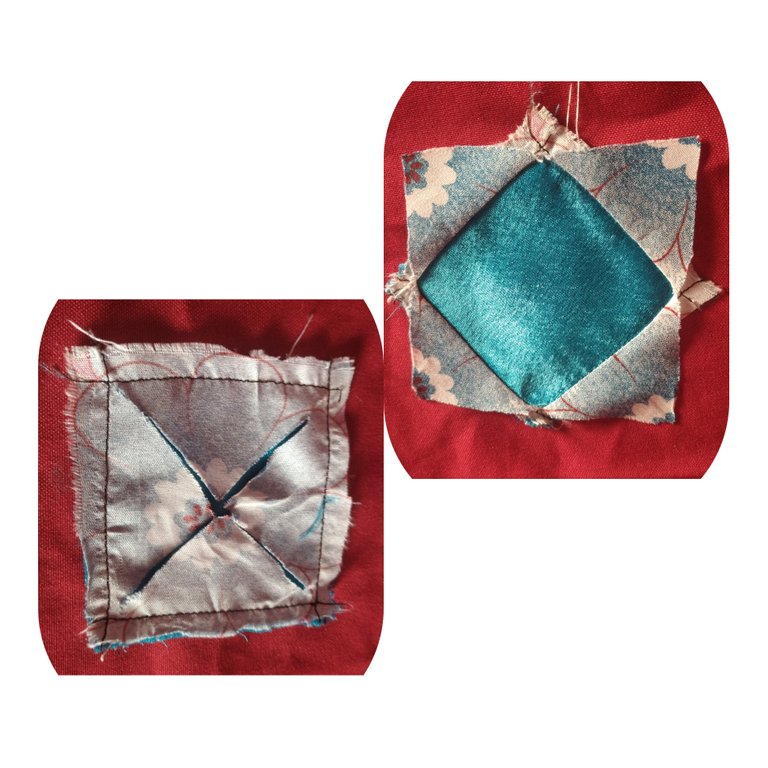
Then cut one of the two pieces joined in X so that it is better understood here I show them to you.
After minced open and iron, to stretch the piece. This is done each time the operation is repeated.
Paso 4
step 4
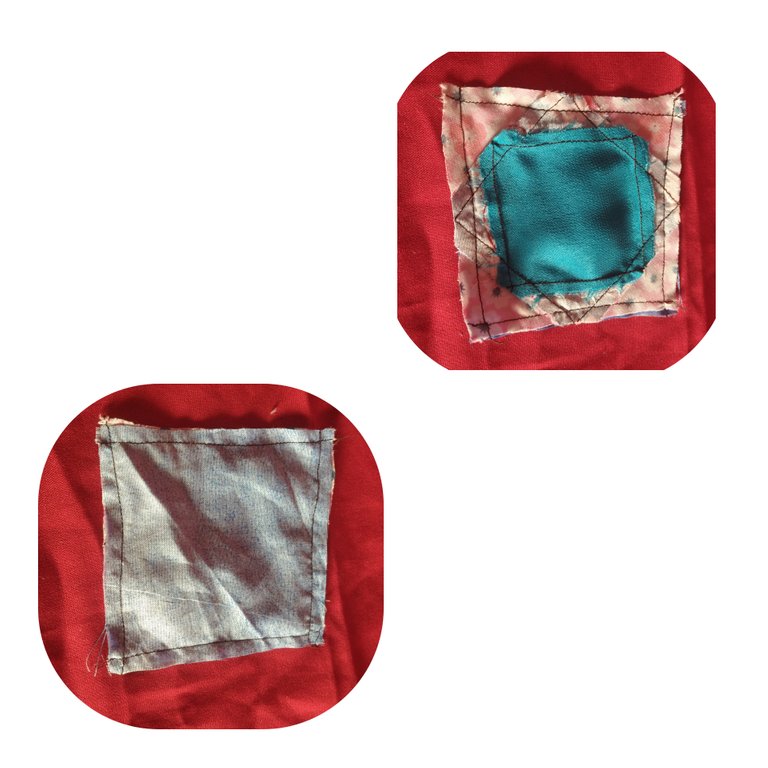
After stretching the piece, the three new pieces that will match them are minced. And the same procedure is followed as at the beginning, they are placed face to face and sewn on the reverse
In this case, the piece that is going to be cut into an X is the new piece.
And it will always be the new piece that is chopped, each time the operation is repeated, until it reaches the desired size.
In my case I repeated it 5 times.
Paso 5
Step 5
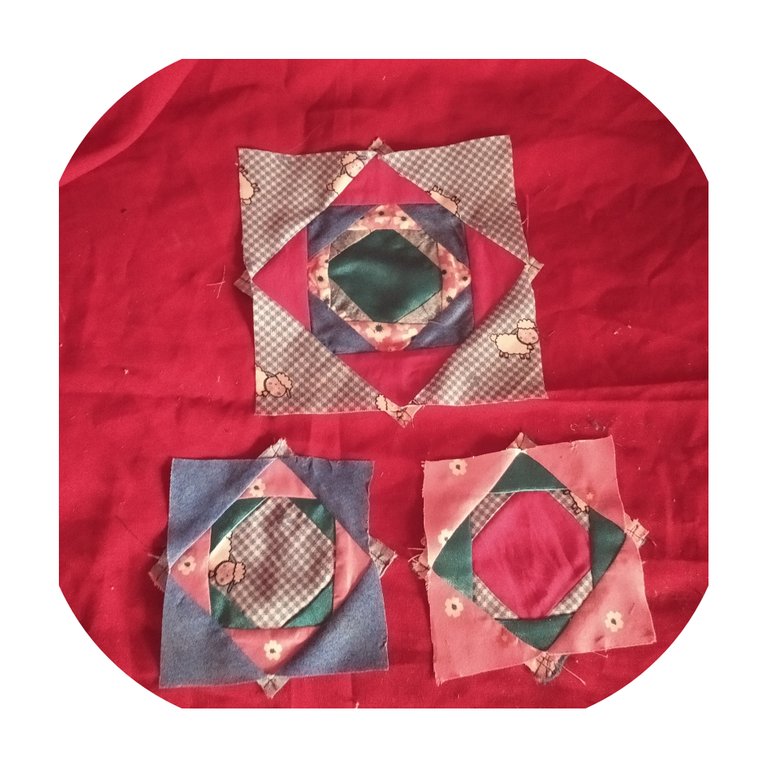
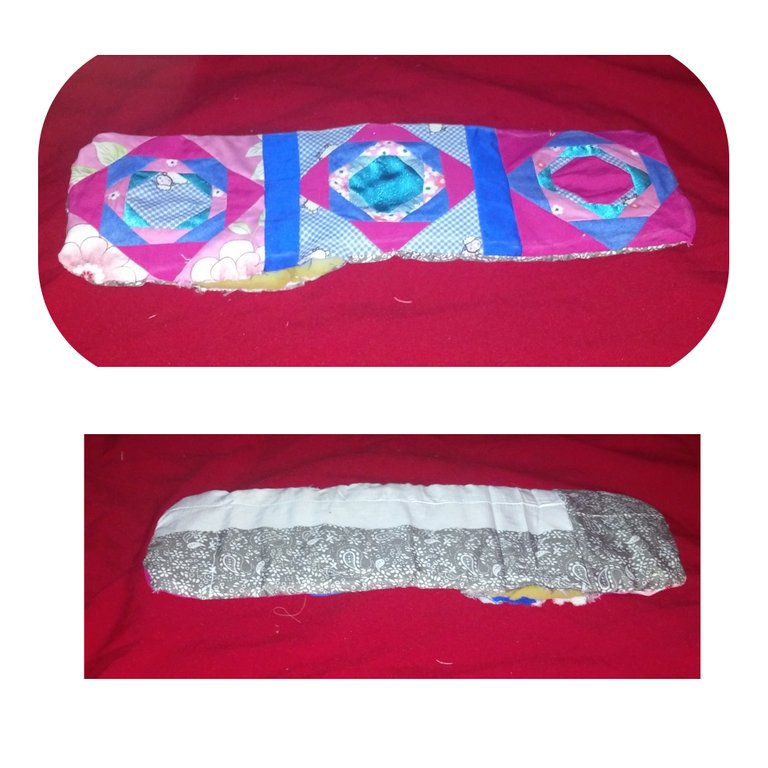
After finishing the three cloths I joined them with a blue scrap. And once the piece the size of the bench was assembled, I glued the faralao on it and measured it, but I didn't like how it looked, I still took pictures of it, so I took it off again and then padded it with foam rubber
Paso 6
step 6
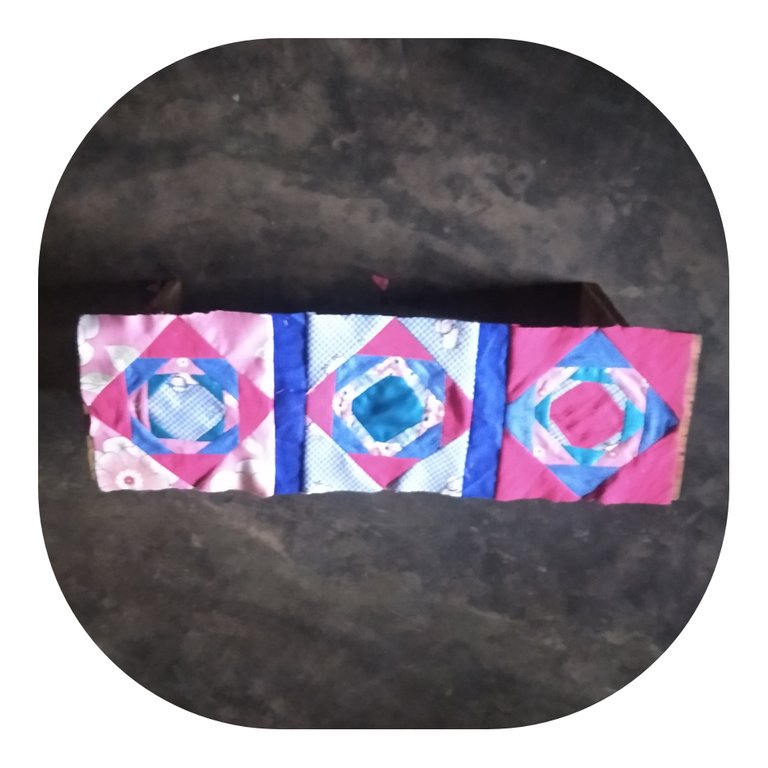
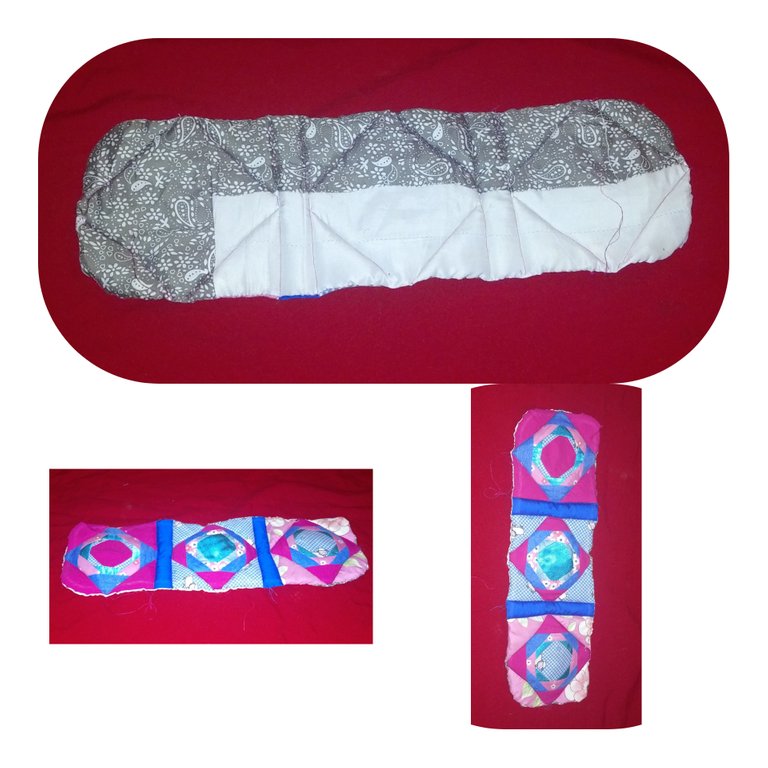
For this I cut another piece with the measurements of the stool, I sewed them and after turning it I put the foam rubber and proceeded to fix it by sewing it by the mark of one of the squares of each piece and by the mark of the scrap that I used to join the three cloths , staying this way.
Paso 7
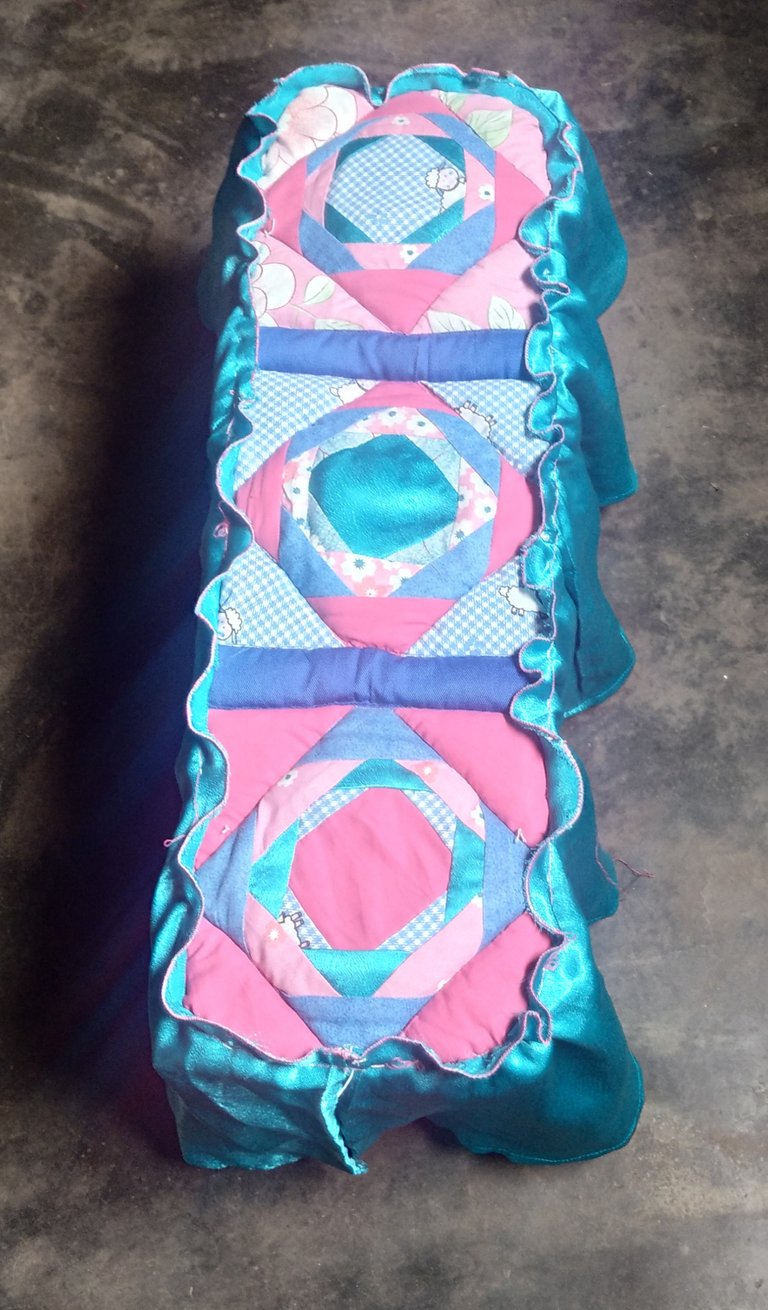
step 7
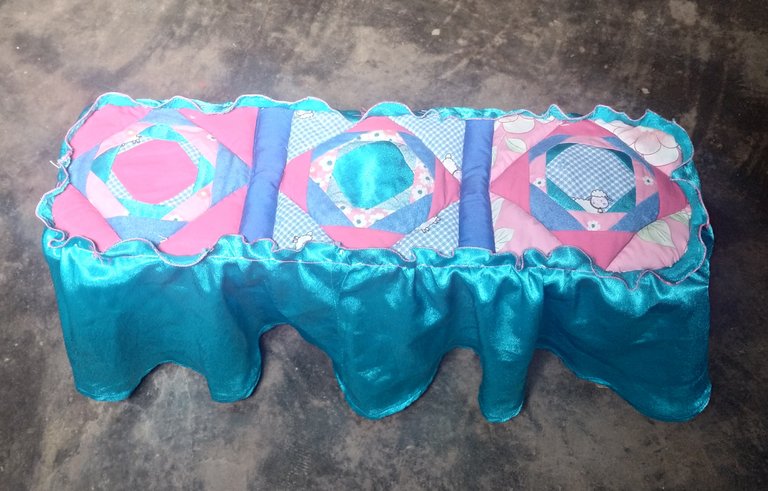
After finishing the quilting, I glued the faralao on it and that is how the finished product was
Gracias por leer mi publicación.
Thank you for reading my publication
Este es contenido original.
This is original content

Que hermoso cobertor amiga me gustó la combinación que realizastes
☺️💫🌹🤗😜😜🐾😻❤️😜🤗🌹☺️🌟🎵🌞🎶✨😘😅😘🎶🌞🌟☺️🧑🍼🐾❤️
Te quedo muy bien realizado, te deseo el mayor de los éxitos en el concurso..
hola @fixie si estoy muy contenta con este trabajo, y muchas gracias por tu buenos deseos ... un abrazo desde Venezuela
Maravillosa idea amiga 💜 @miangel100pre, me encanto el resultado final y los detalles que le colocaste a tu cobertor, fue un excelente trabajo ¡Éxitos y saludos! 😉
Hacer un sobre cama con esta técnica es un trabajo arduo, pero con paciencia se puede lograr.
Muy lindo el resultado de tu proyecto.
hola si la verdad es es mucho trabajo ya empece a hacer uno con detalles en patchwork va a llevar 22 pañitos y siento que por mas que coso no rindo casi nada. pero me fascino como se veía este cobertor que ya quiero hacer uno para mi cama . porque creo que en la foto no se ve tan bonito como se ve en realidad. un abrazo y gracias por comentar
Congratulations @miangel100pre! You have completed the following achievement on the Hive blockchain and have been rewarded with new badge(s):
Your next target is to reach 1750 upvotes.
You can view your badges on your board and compare yourself to others in the Ranking
If you no longer want to receive notifications, reply to this comment with the word
STOPSupport the HiveBuzz project. Vote for our proposal!
Que hermoso trabajo, la combinación de colores y formas de las telas, te quedó espectacular. Felicidades. Suerte en el concurso @miangel100pre ✨💕🌺😘❤️💫
hola muchisimas gracias @dayadam si esto me tiene muy entusiasmada ya estoy haciendo otro ahoara para mi cama, esta tecnica es expectacular te permite aprovechar los pedacitos de tela y convertirlos en obra de arte sencillamente es genial ..bueno gracias por comentar, un saludo desde Venezuela
Qué genialidad!, ese es el cosido que es más difícil de hacer y el que más bello queda, sin duda. Muchas gracias por participar.
Muy creativa amiga, esta técnica es muy hermosa y da rienda suelta a la creatividad e innovación de nuevos diseños, desde que conocí de esta tecnica me encanto de hecho hice un edredón que pase 2 meses en su creación porque lo hice a mano pero el resultado fue genial y hoy a través de tu post se avivó hoy mis ganas de volver a crear usando patchwork. Felicitaciones y éxito en el concurso @miangel100pre.