¡Hola, amigos de Hive! Espero que todos tengan un lindo día
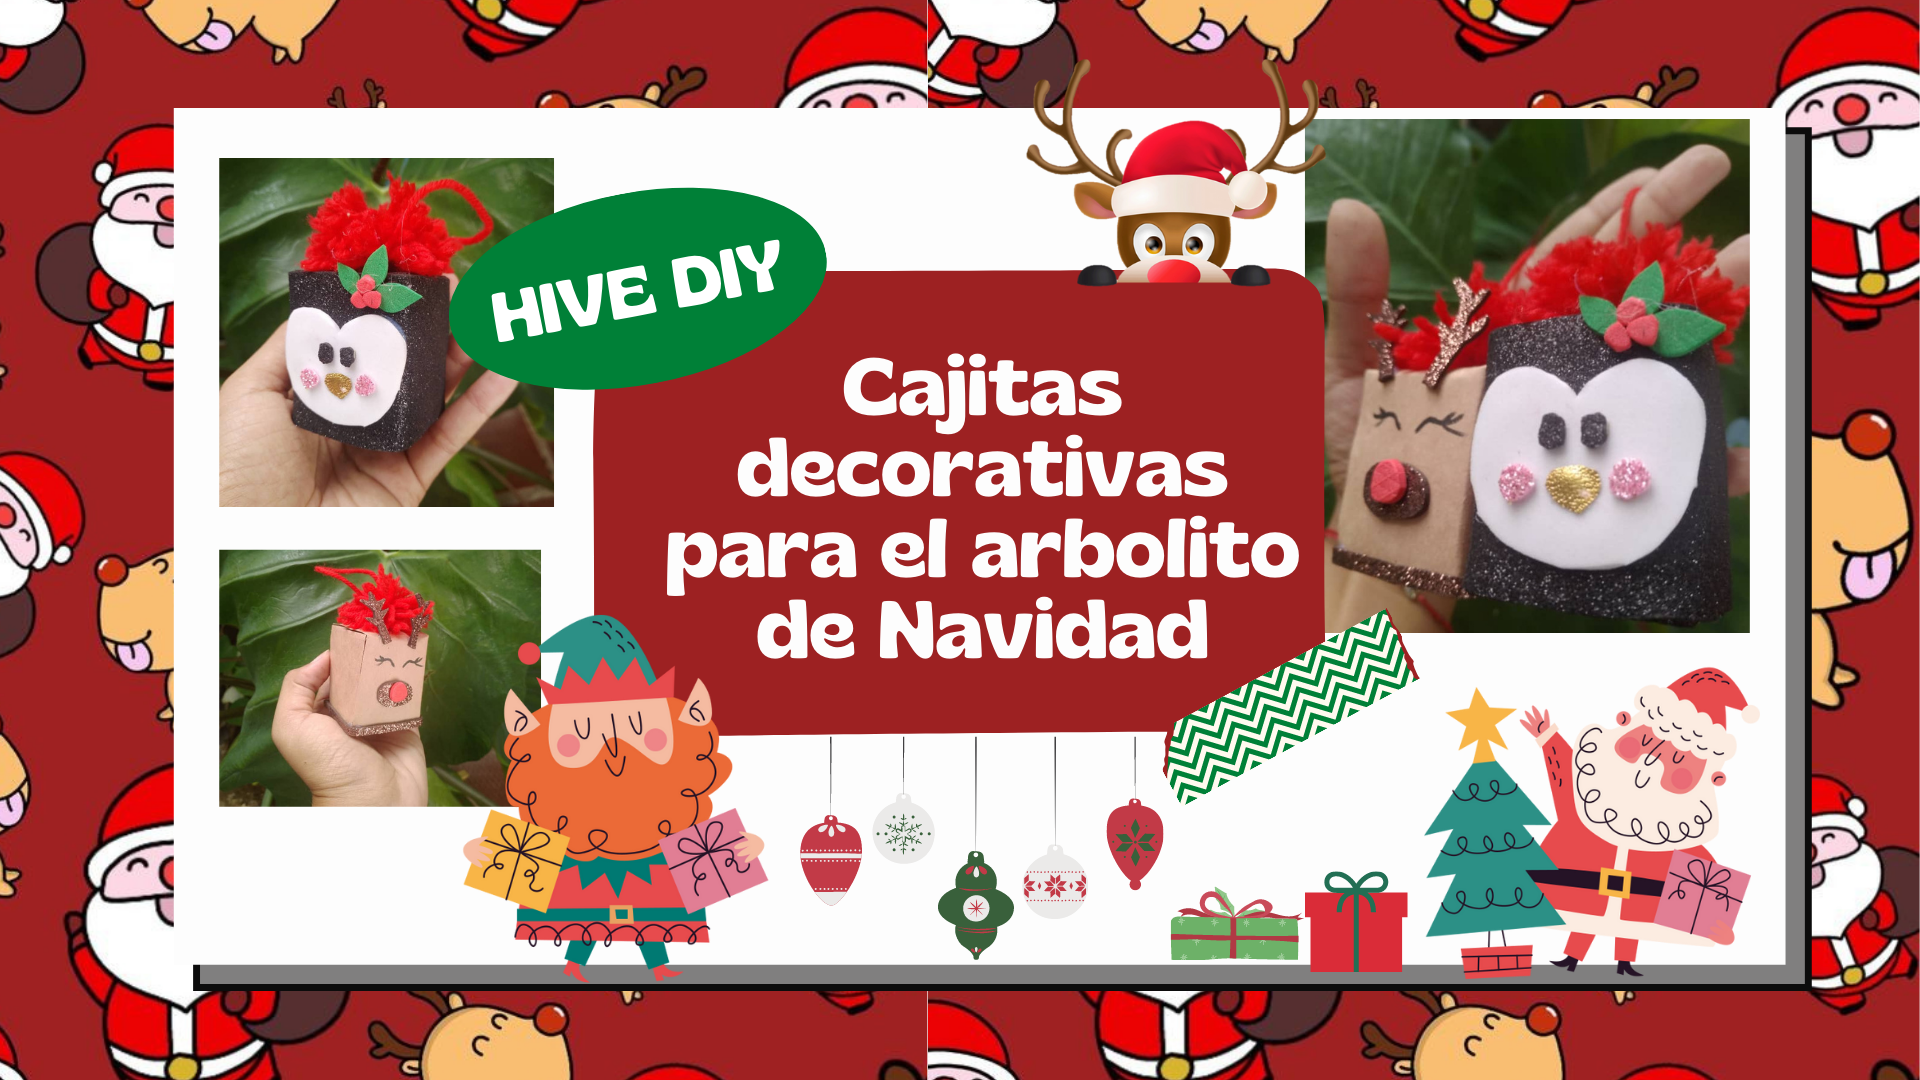
Hello Hive friends! I hope everyone has a nice day.
Con este post empezamos la mejor época del año, la navidad, la favorita de la mayoría; y como se acostumbra, ya empezamos a ver decoraciones por todos lados, empezó la compra de regalo, y como se acostumbra en mi país, a escuchar las maravillosas gaitas. Pero una de las cosas más engorrosas de esta época, es buscar la decoración perfecta para el arbolito de navidad, por eso le traigo esta idea de pequeños adornos súper tiernos para decorar, están hechos con rollos de papel higiénico, así que son fáciles, como económicos. Y esto es lo que necesitaremos para hacer las cajitas.
With this post we begin the best time of the year, Christmas, the favorite of most; And as is customary, we began to see decorations everywhere, the gift shopping began, and as is customary in my country, to listen to the wonderful bagpipes. But one of the most cumbersome things of this time, is looking for the perfect decoration for the Christmas tree, that's why I bring you this idea of super cute little ornaments to decorate, they are made with rolls of toilet paper, so they are easy, like economic. And this is what we will need to make the boxes.


• 2 rollos de papel higiénico
• Una bola de estambre roja
• Láminas de foami
• Pistola de silicón
• Un trozo de cartulina
• Una regla
• 2 rolls of toilet paper
• A ball of red yarn
• Foam sheets
• Silicone gun
• A piece of cardboard
• A rule

1✨
Tomamos uno de los rollos de papel y lo aplastamos con las manos hasta que nos quede plano, lo abrimos nuevamente por el doblez que se hizo anteriormente y lo volvemos a aplanar, de modo que al abrirlo nos quede de este modo.
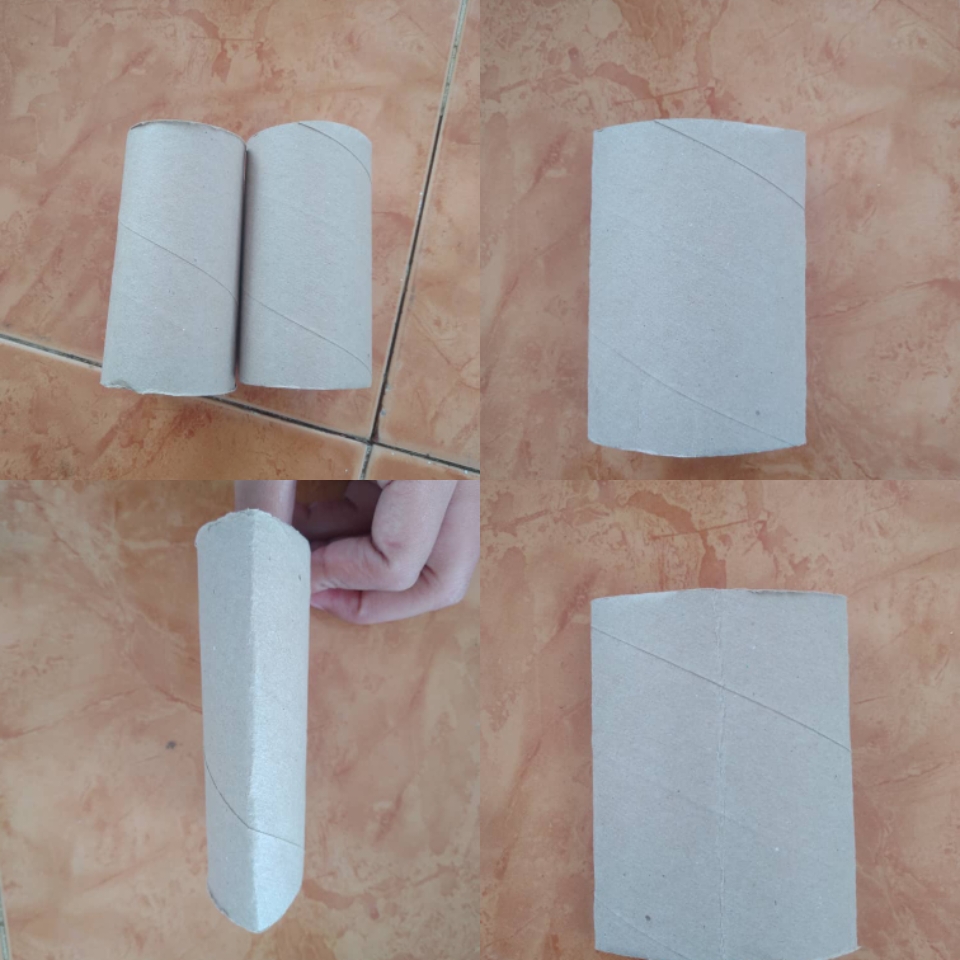
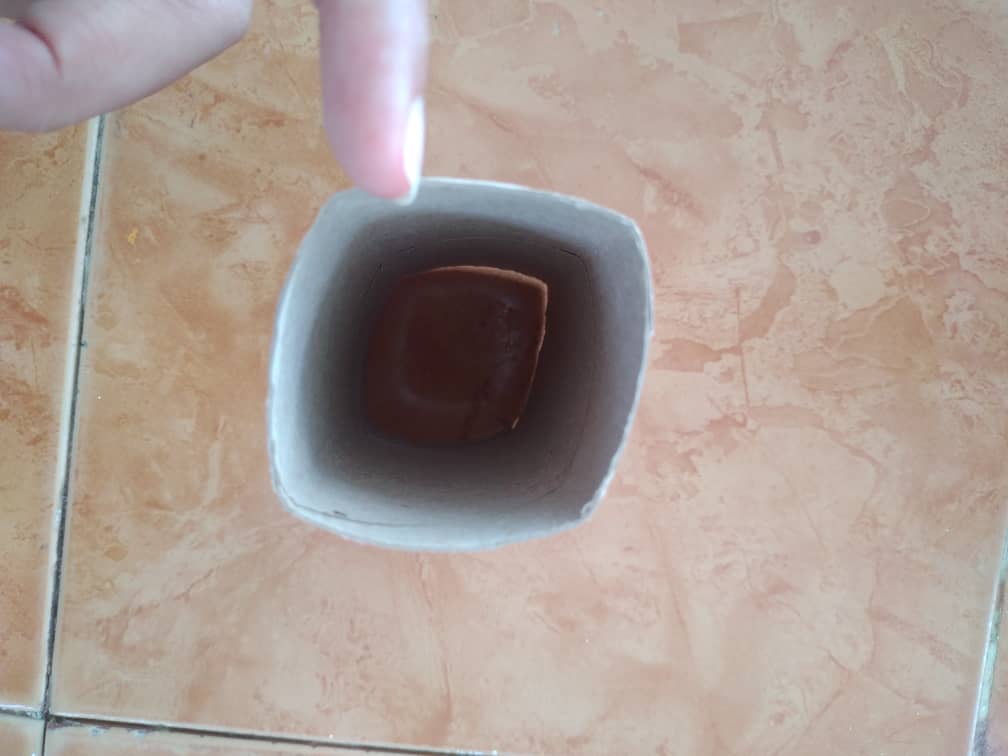
We take one of the paper rolls and crush it with our hands until it is flat, we open it again by the fold that was made previously and we flatten it again, so that when we open it it fits us like this.
2✨
Con la ayuda de una regla marcamos 2,5 cm en ambos extremos y trazamos una línea. Con unas tijeras cortaremos las esquinas del cubo hasta la línea que trazamos previamente, hasta que nos queden unas pestañas que doblaremos hasta el centro.
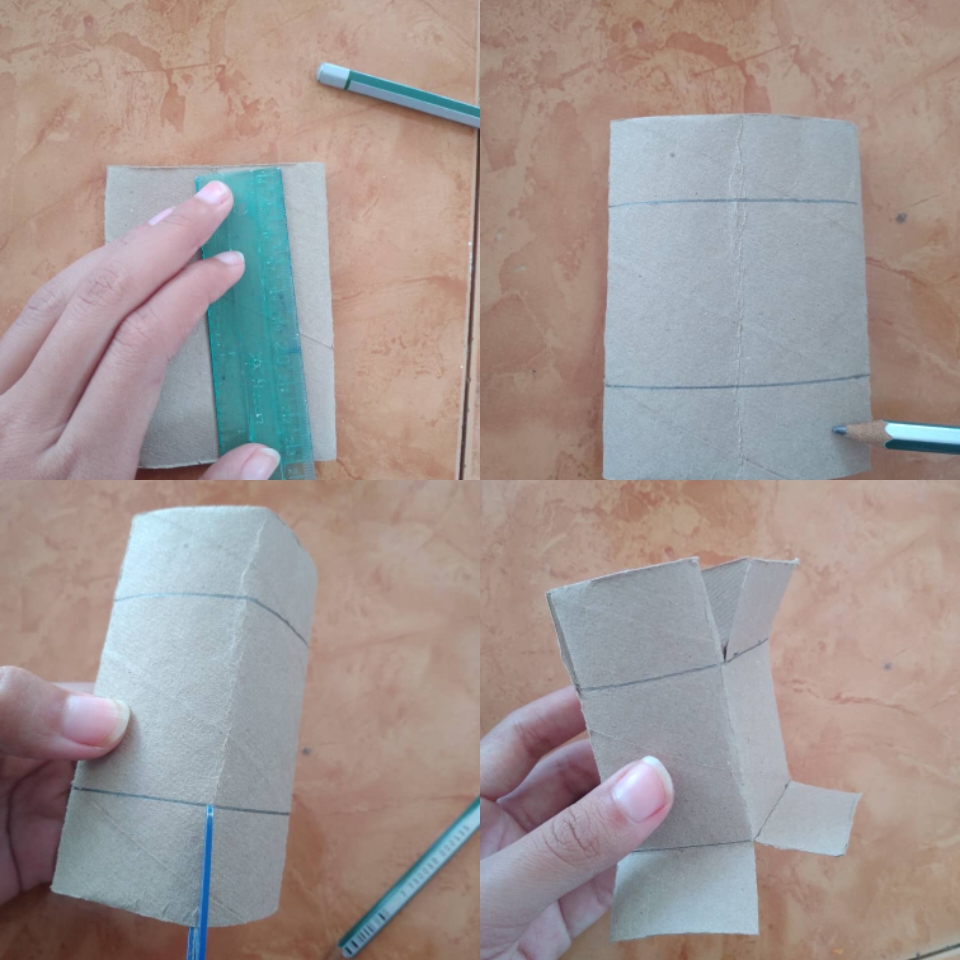
With the help of a ruler we mark 2.5 cm at both ends and draw a line. With scissors we will cut the corners of the cube up to the line that we previously drew, until we have some tabs that we will fold to the center.
3✨
Con la pistola de silicón pegaremos cada una de las pestañas de ambos extremos, hasta que nos quede una pequeña cajita.
Repetimos el mismo procedimiento con el otro rollo de papel
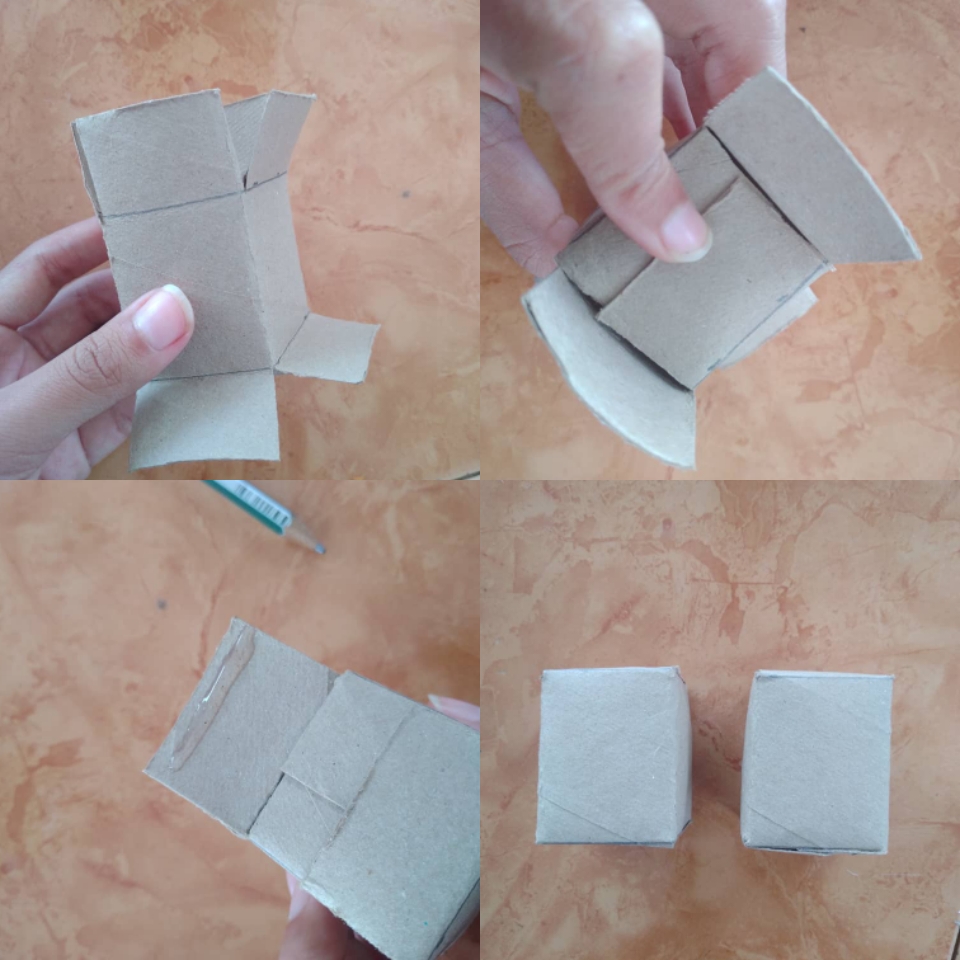
With the glue gun we will glue each of the tabs at both ends, until we have a small box.
We repeat the same procedure with the other roll of paper


Para la cajita de pingüino :
1✨
Con foami negro escarchado, forramos por completo la cajita.
Luego, tomamos un trozo del foami blanco, el cual formara parte del frente de la caja, lo doblamos a la mitad, y cortamos hasta que nos quede así.
En trozos pequeños de foami hacemos lo que será el resto del rostro
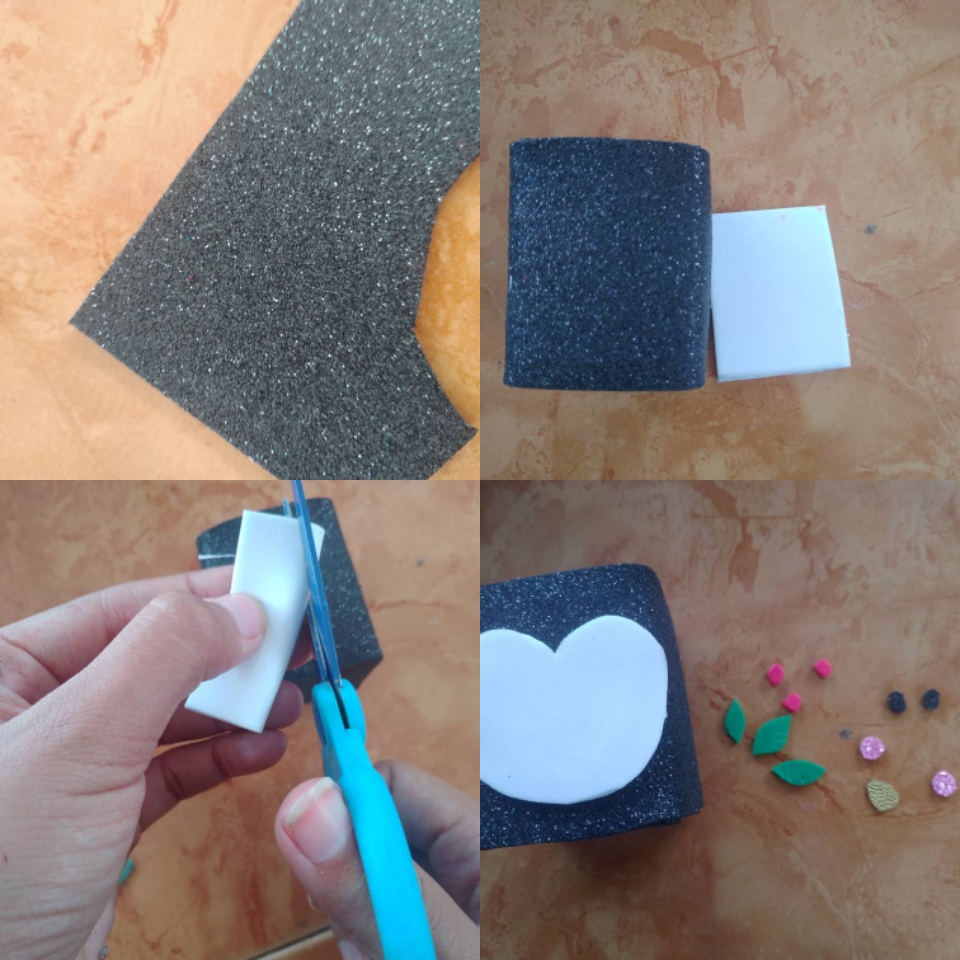
With frosty black foam, we completely line the box.
Next, we take a piece of the white foam, which will be part of the front of the box, fold it in half, and cut it until it looks like this.
In small pieces of foami we make what will be the rest of the face
2✨
Pegamos con cuidado cada pieza en la cajita.
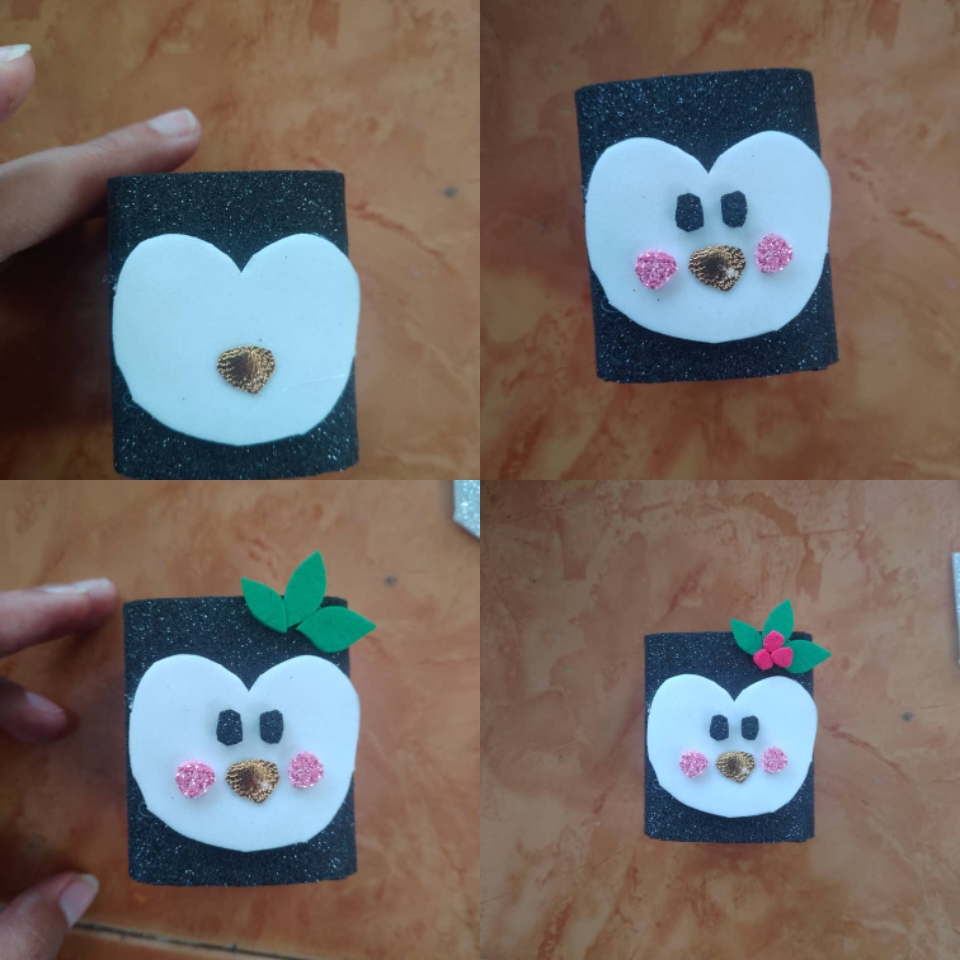
We carefully glue each piece in the box.
3✨
Para decorar la cajita y hacer la parte de donde la colgaremos, haremos primeramente un pequeño pompón de estambre, enrollando entre dos dedos estambre hasta que nos queden varias capas, amarramos bien en el centro una tira de hilo, y cortamos los extremos de esta forma
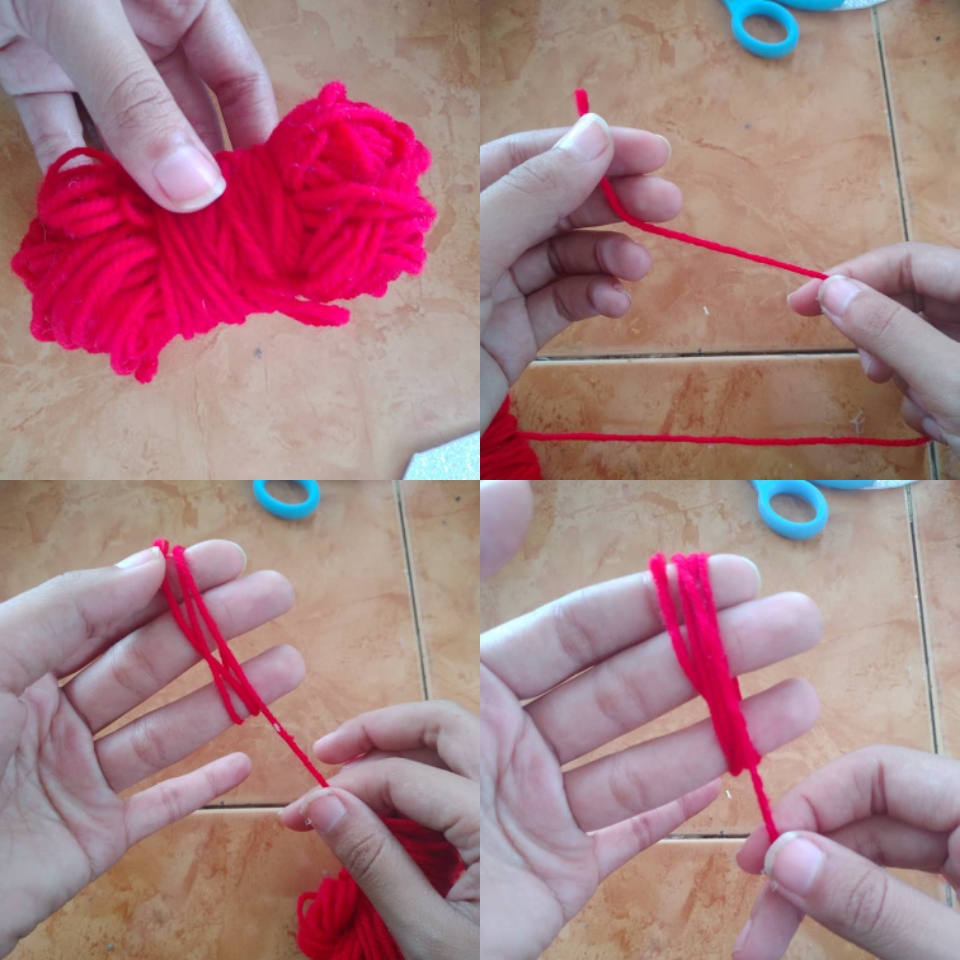
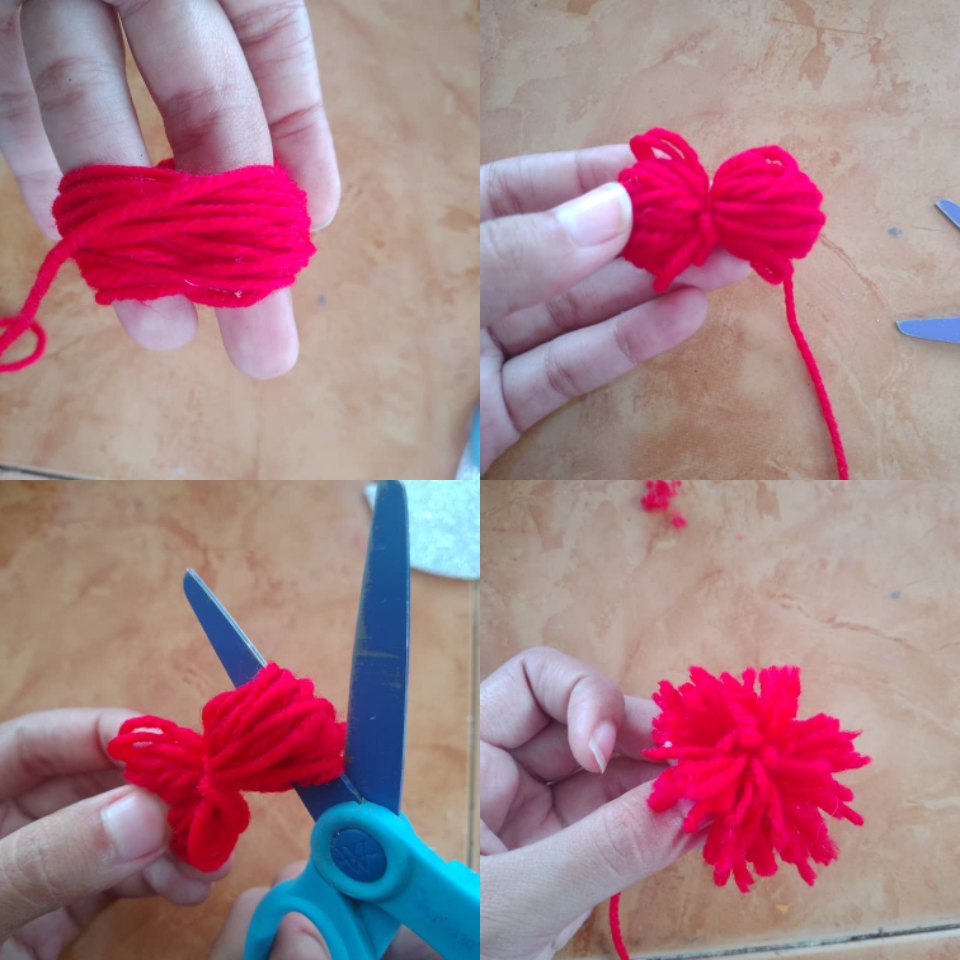
To decorate the box and make the part where we will hang it, first we will make a small yarn pompom, rolling yarn between two fingers until we have several layers, we tie a strip well in the center of thread, and cut the ends in this way
4✨
Por último, cortamos una tira de estambre de unos 8 cm, lo doblamos y hacemos un nudo en la parte inferior, luego lo pegamos con silicón en la parte superior de la caja y encima, colocamos el pompón que hicimos antes.
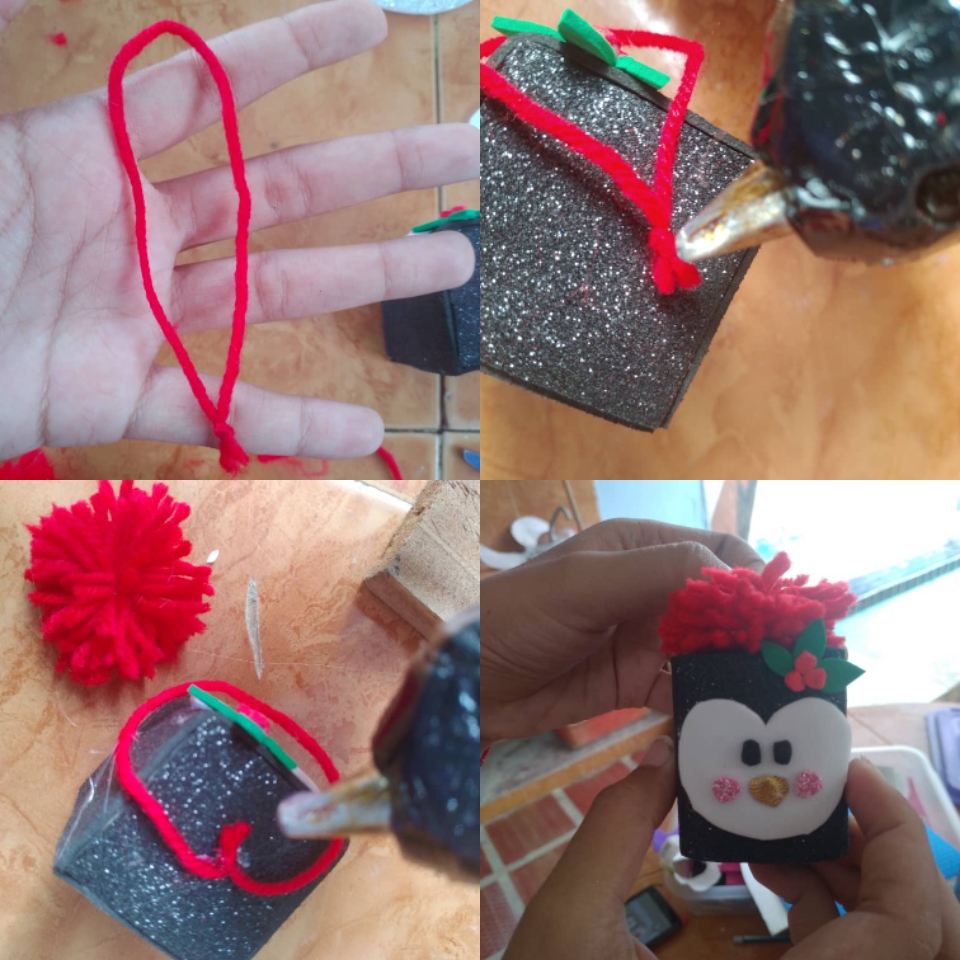
Finally, we cut a strip of yarn of about 8 cm, we fold it and make a knot in the lower part, then we glue it with silicone on the upper part of the box and on top, we place the pompom we made earlier.

.png)
En el caso de Rudolph el Reno:
1✨
Forramos con cartulina la cajita
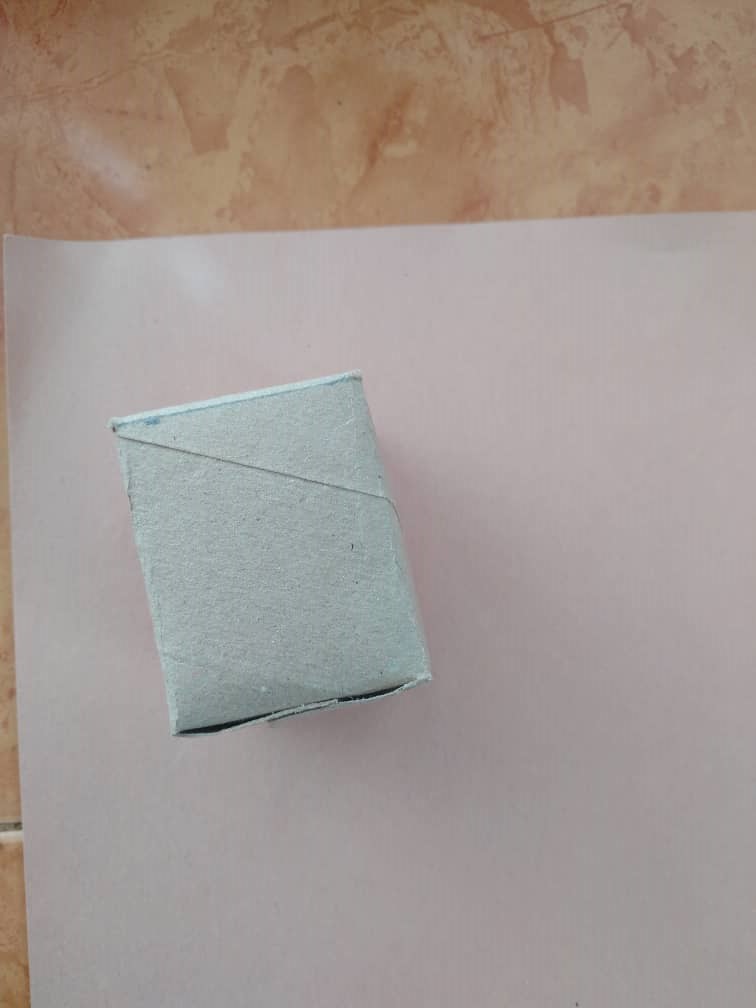
We line the box with cardboard
2✨
Marcamos las piezas que forman el reno (La nariz, las astas, el hocico y una tira de foami para decorar la parte inferior)
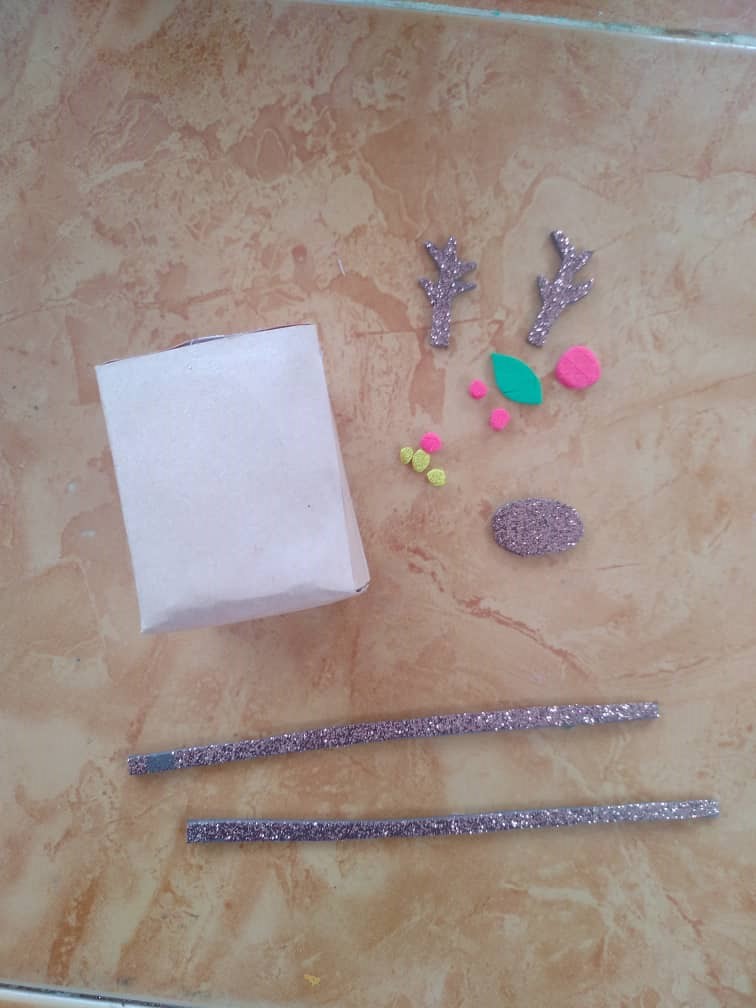
We mark the pieces that make up the reindeer (The nose, the antlers, the muzzle and a strip of foam to decorate the lower part)
3✨
Con cuidado de no quemarnos, pegamos las piezas con cuidado y con un marcador dibujamos los ojos
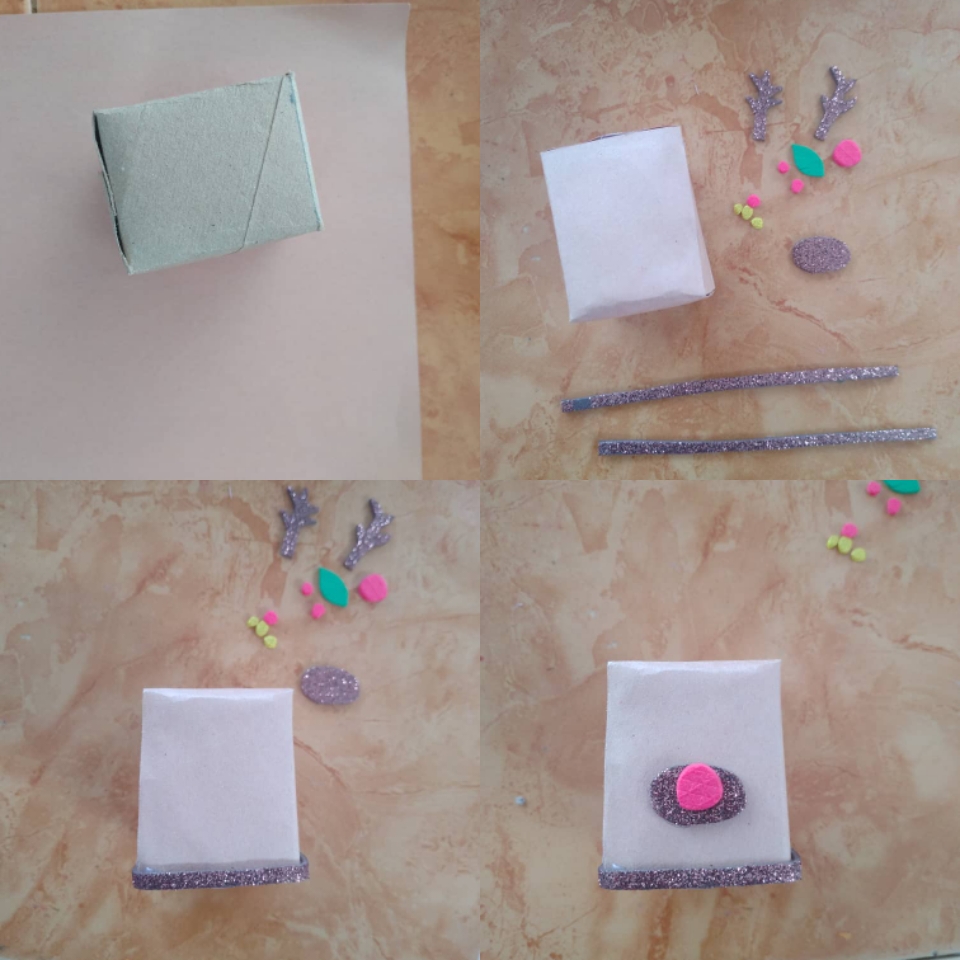
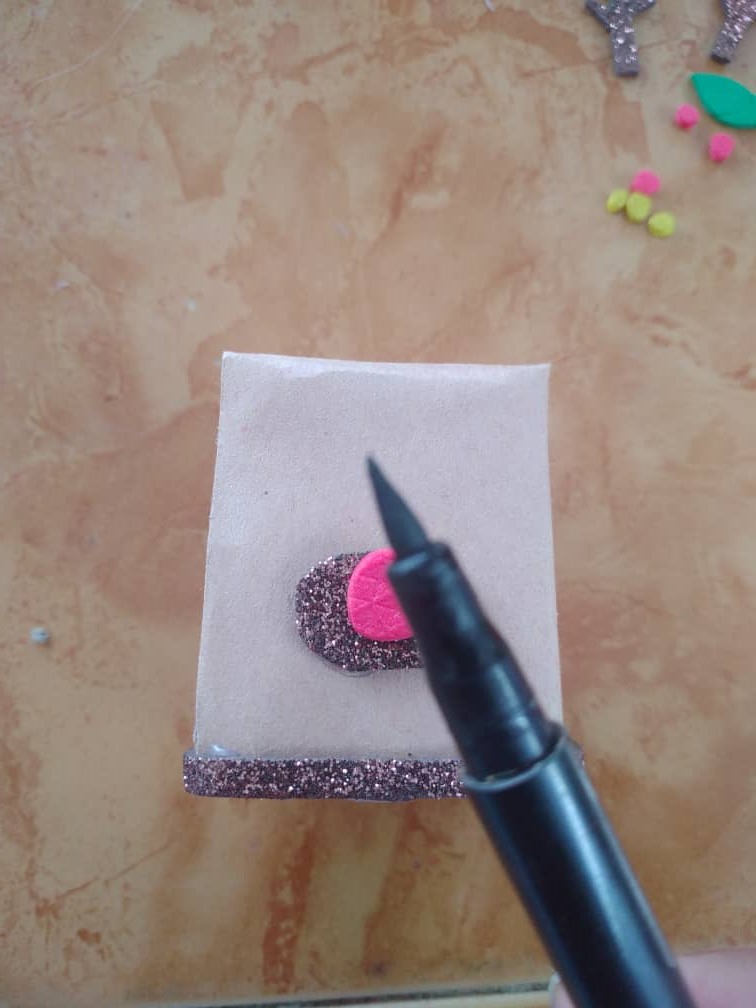
Taking care not to burn ourselves, we glue the pieces carefully and with a marker we draw the eyes
4✨
Y por último, hacemos otro pompón de estambre, solo que este aún más pequeño, hasta que nos quede algo así.

And finally, we make another yarn pompom, only this one even smaller, until we have something like this.
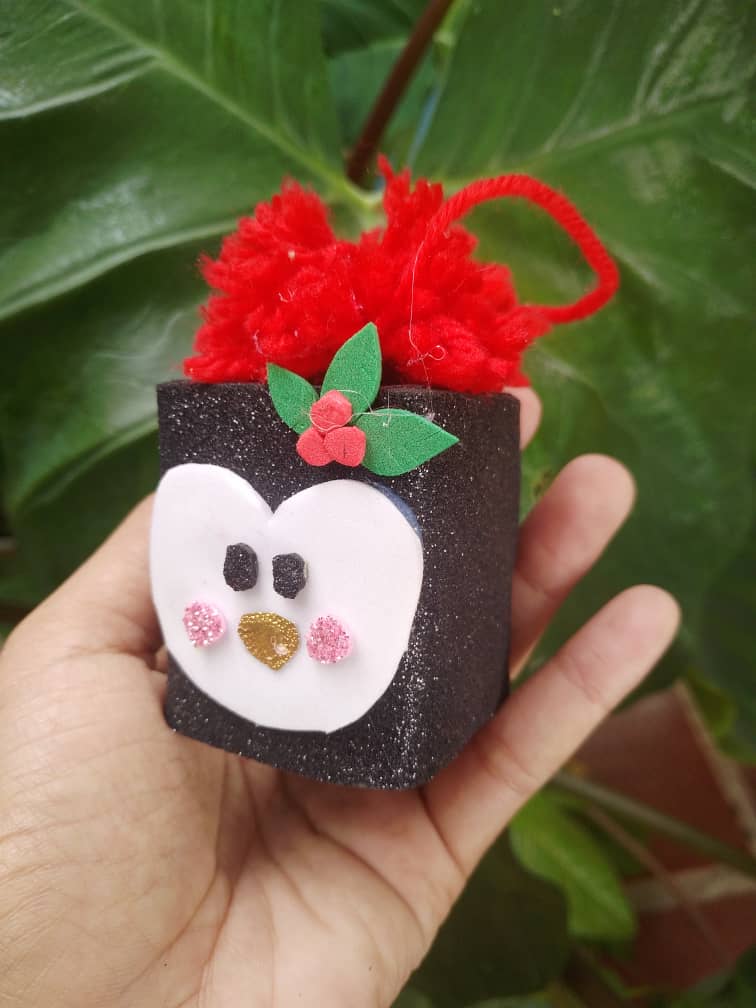
Y listo, así quedaron nuestras pequeñas cajitas decorativas
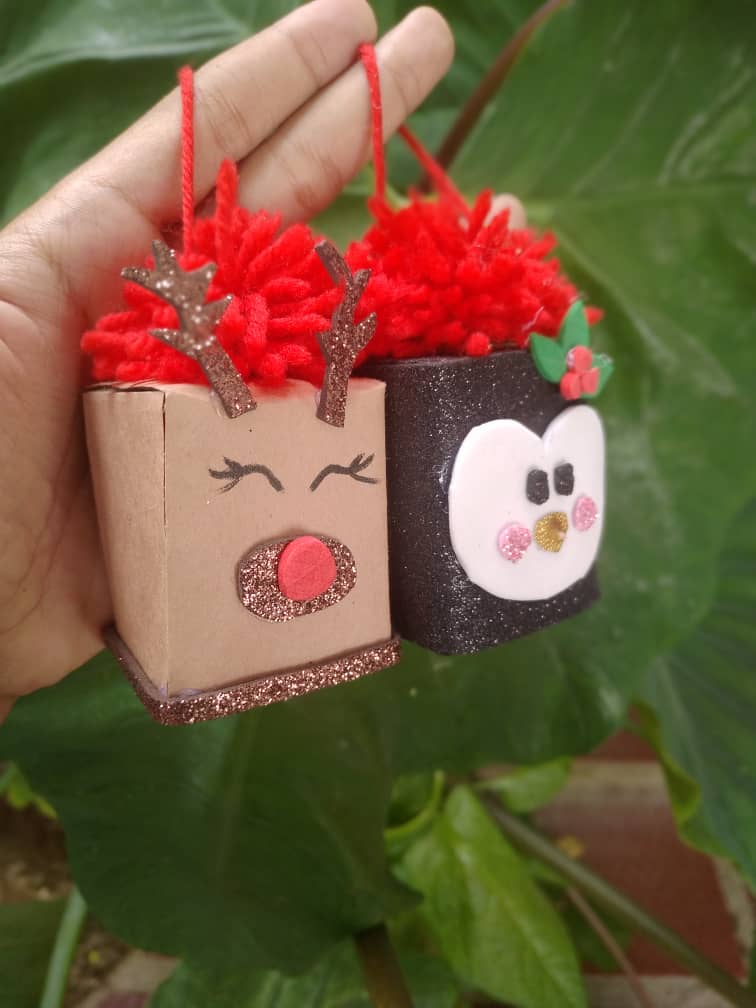
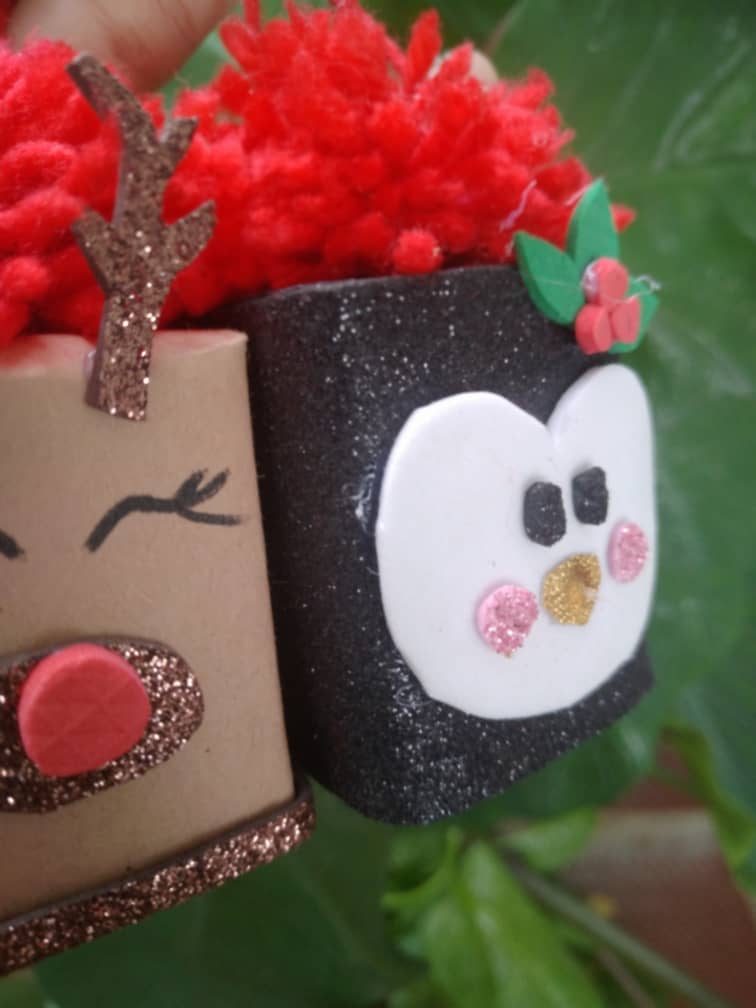
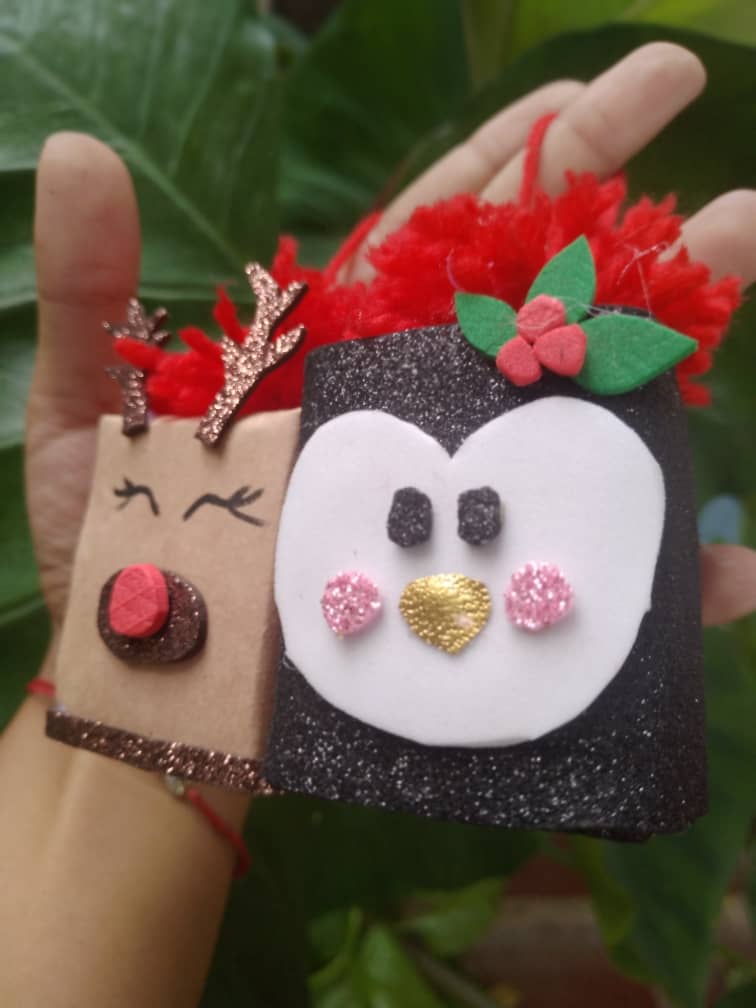
And voila, that's how our little decorative boxes were
Espero que les haya gustado y les sirva como idea en esta hermosa época.
I hope you liked it and it serves as an idea in this beautiful time.
