¡Hola, mis queridos amigos de Hive! Espero que todos tengan un lindo fin de semana.
Hello my dear friends at Hive! I hope everyone has a nice weekend,
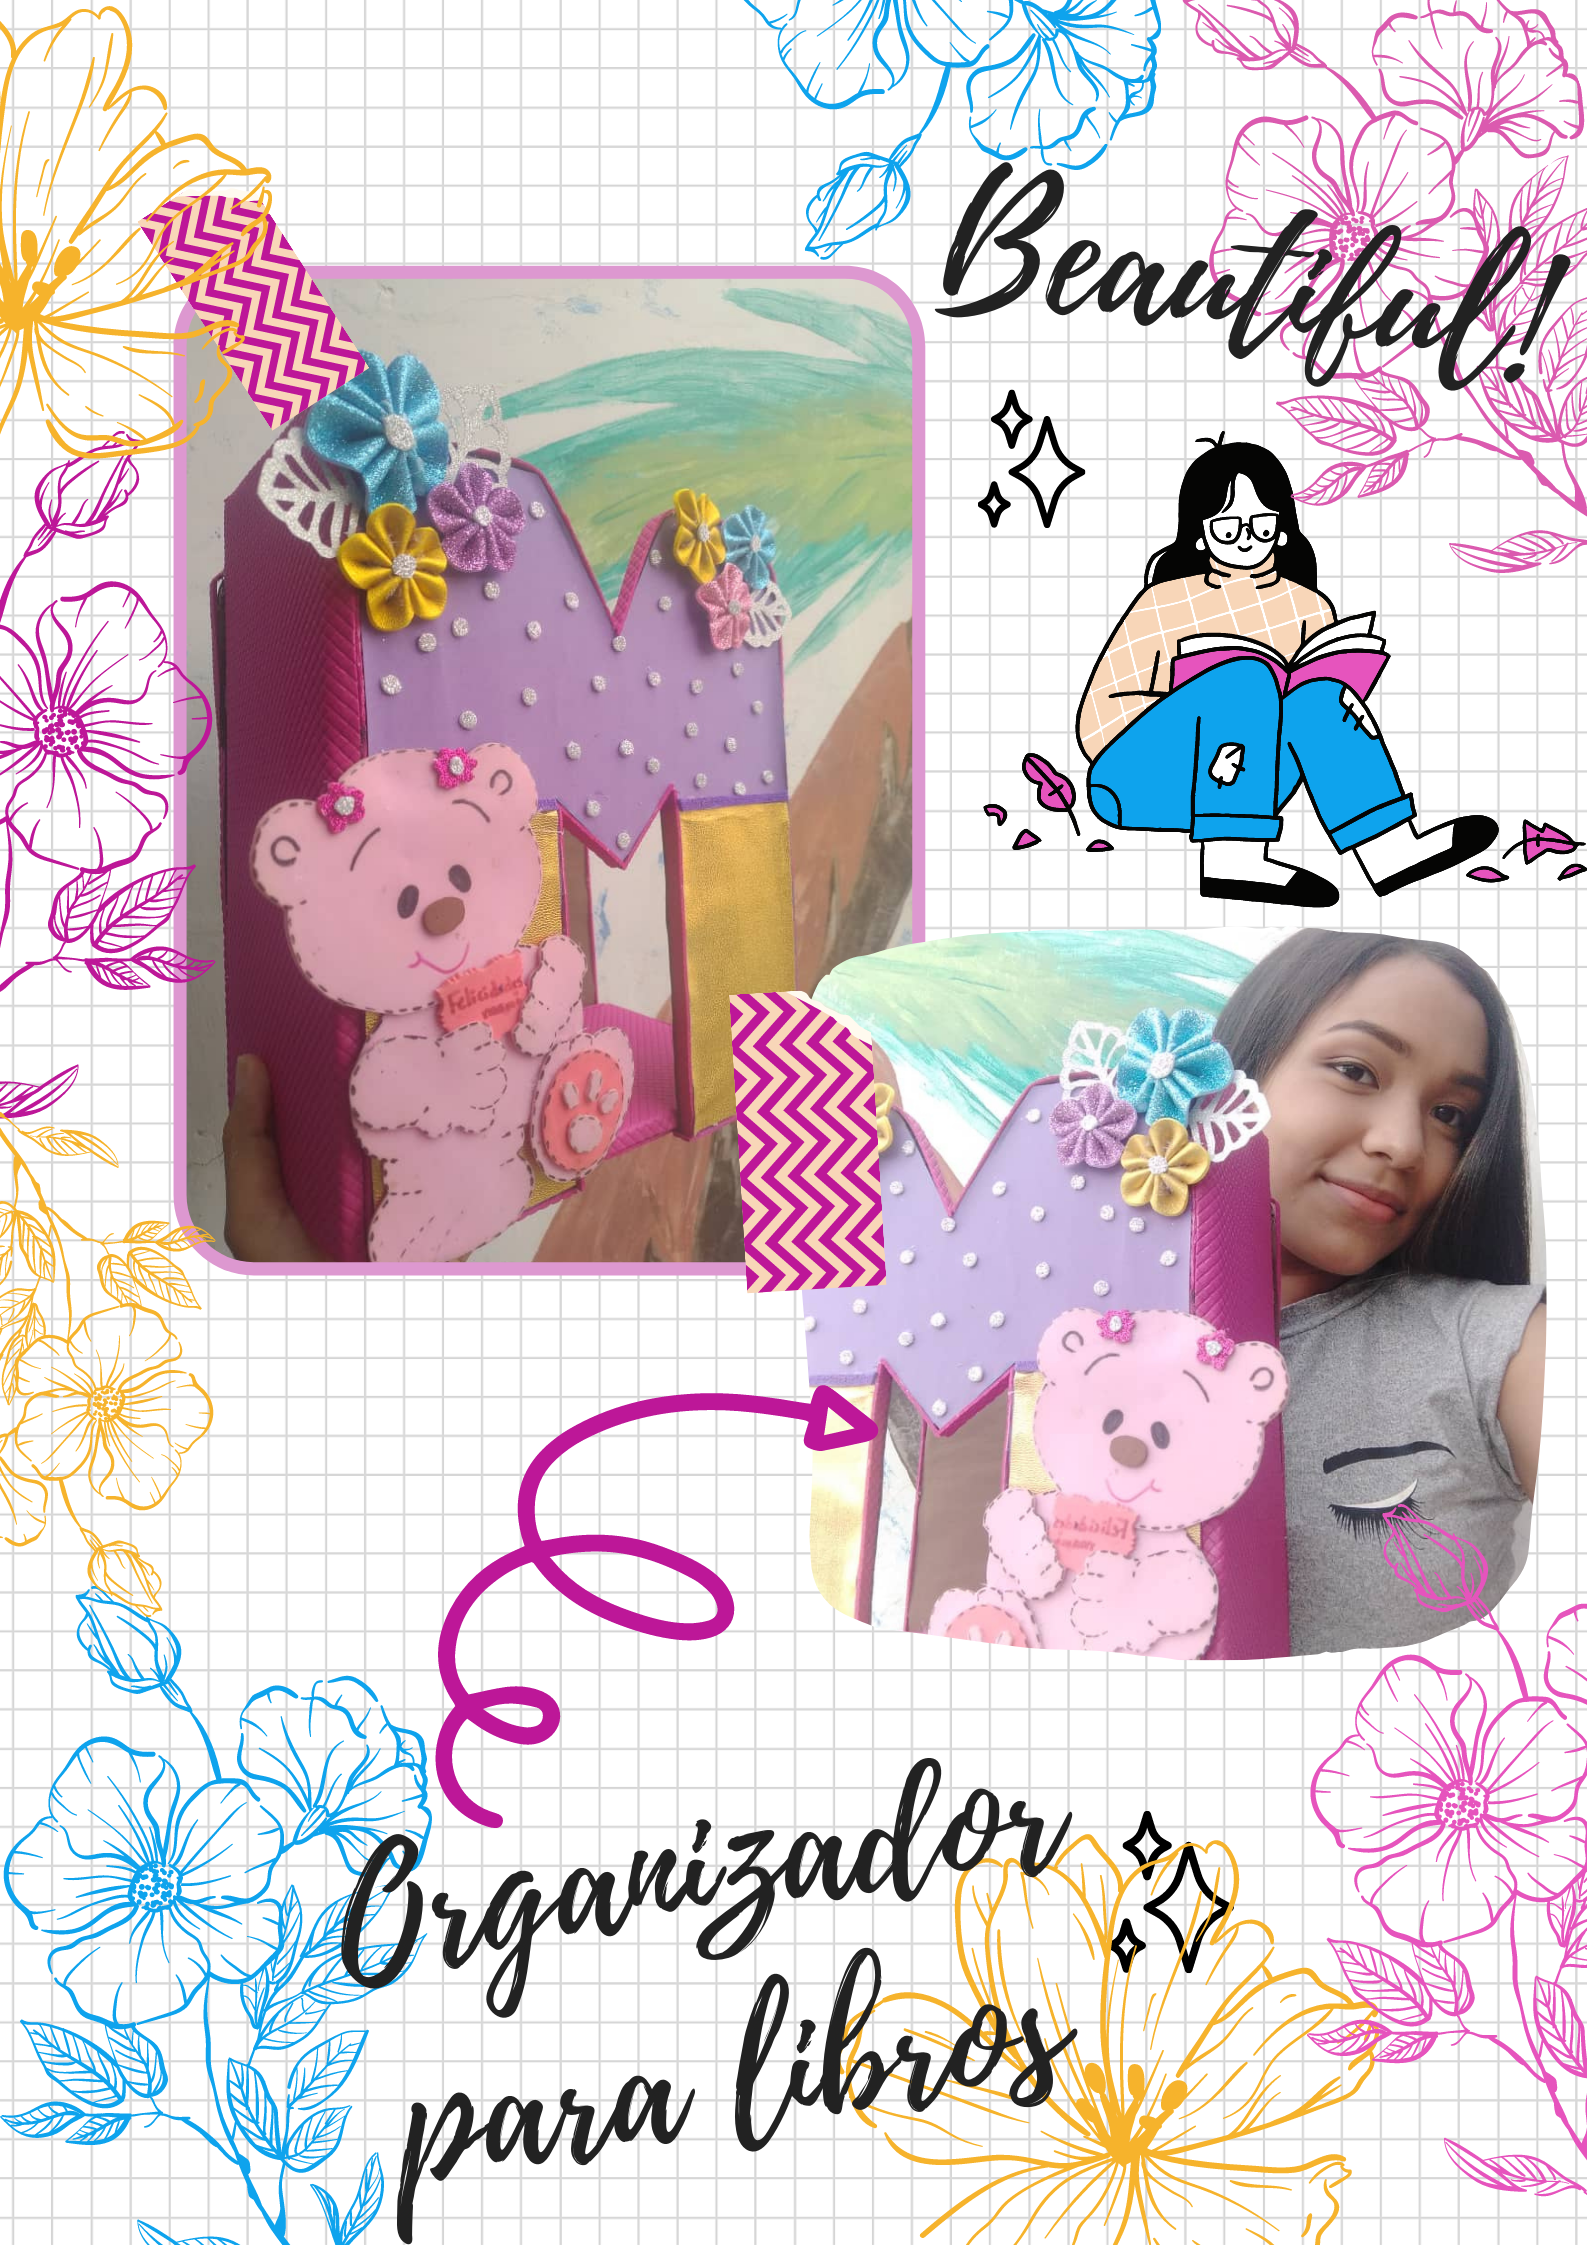
En esta ocasión les vengo a mostrar cómo cree este organizador de libros personalizado. Yo soy una amante de los libros, un poco desorganizada; y desde hace un tiempo no encontraba un lugar perfecto en donde colocar mis libros, ya que mi estante de mi habitación está lleno, por lo cual mis libros entran regados en muchas parte de él. Y hace unos días tuve la idea de hacer algo dónde colocarlos y que no ocupara mucho espacio, debido a eso, llegue a hacer este organizador de letra “M” que tanto me encanta, y como siempre, trate de reutilizar viejas cajas que estaban tiradas, así que es una idea fácil que pueden hacer todos ustedes.
Para este organizador necesitamos
This time I come to show you how to believe is a personalized book organizer. I am a book lover, a bit disorganized, for a while I have not found a perfect place to put my books, since my shelf in my room is full, so my books come scattered in many parts of it. And a few days ago I had the idea of making something where to place them and that would not take up much space, because of that, I got to make this letter “M” organizer that I love so much, and as always, I tried to reuse old boxes that were thrown away. , so it's an easy idea for all of you to do.
For this organizer we need

- Dos cajas grandes de cartón
- 2 pliegos de papel de construcción
- 4 láminas de Foami
- Silicón liquido
- Una pistola de silicón y dos barras del mismo
- Foami escarchado de diferentes colores
- Cuerina dorada para decorara
- Two large cardboard boxes
- 2 sheets of construction paper
- 4 sheets of Foami
- Liquid silicone
- A glue gun and two bars of it
- Frosted foam of different colors
- Golden leather to decorate
1✨
Primero sacamos el molde de lo que será nuestro organizador, marcamos una “M” de 30cm de largo y 25 de ancho. Ya que la tengamos lista, la trazamos en una de las caras de la caja de cartón y recortamos (debemos hacer 4 piezas idénticas). Para los soportes del organizador haremos 4 piezas, las cuales serán dos tiras de 13X25cm (para la base) y dos más de 30x25cm (para el lomo).
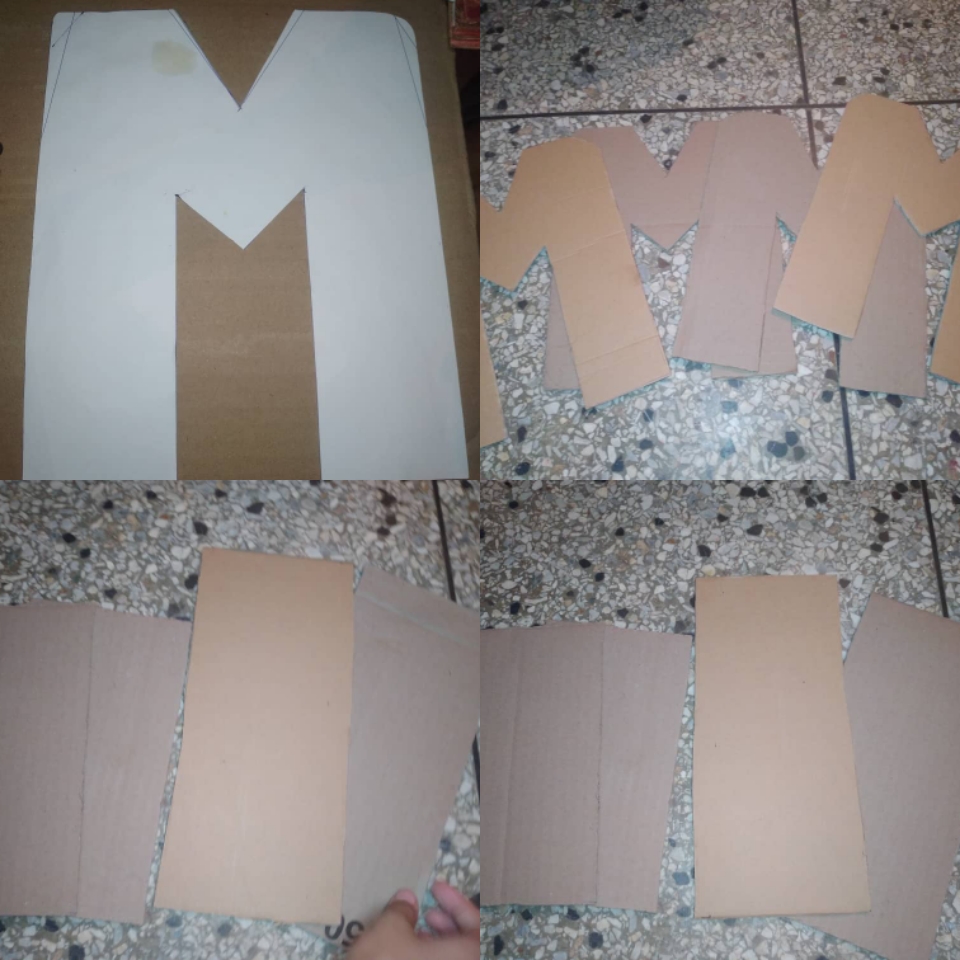
First we take the mold of what will be our organizer, we mark an "M" 30 cm long and 25 wide. Once we have it ready, we trace it on one of the sides of the cardboard box and cut it out (we must make 4 identical pieces). For the organizer supports we will make 4 pieces, which will be two strips of 13X25cm (for the base) and two more than 30x25cm (for the spine).
2✨
Pegamos las piezas con su respectiva pareja con silicón líquido, de modo que estas queden más fuertes. Y así nos deberían quedar 2 “M” del mismo tamaño, una tira para el lomo y la que usaremos para la base.
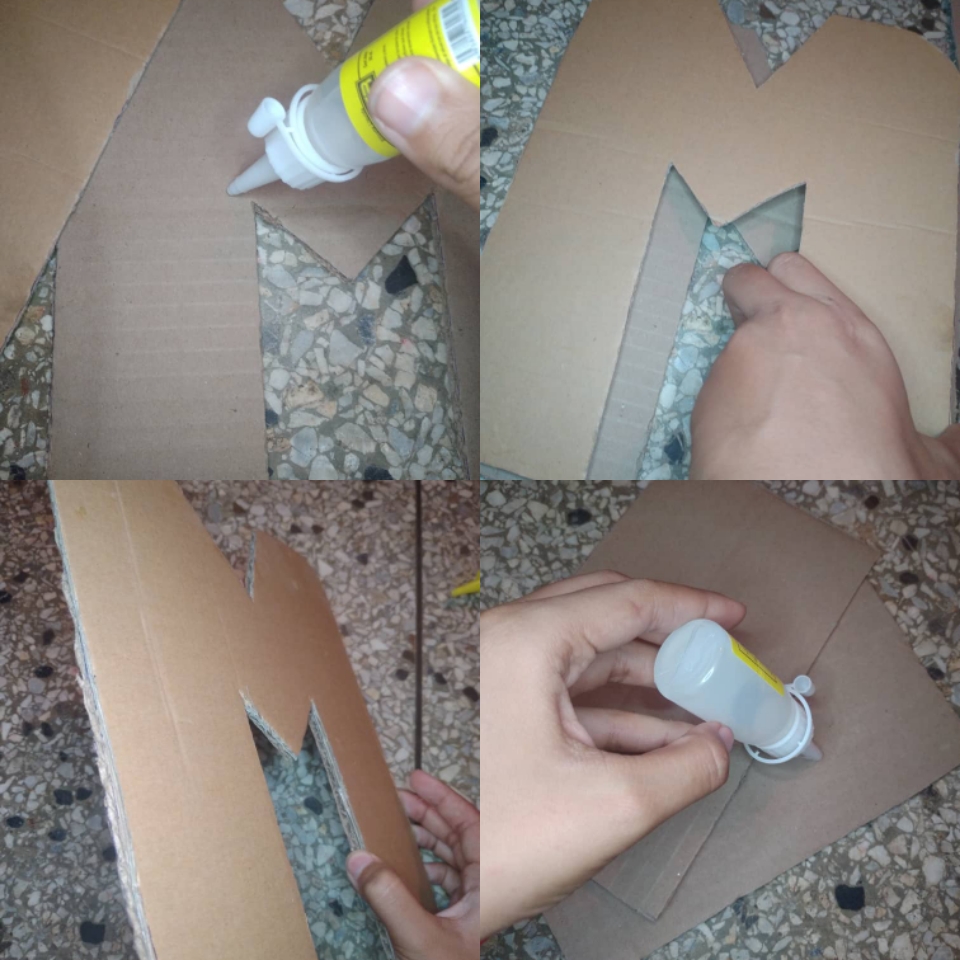
We glue the pieces with their respective pair with liquid silicone, so that they are stronger. And so we should have 2 "M" of the same size, a strip for the spine and the one we will use for the base.
3✨
En uno de los pliegos de papel de construcción marcamos la silueta de las “m” por ambos lados, recortamos y forramos las dos piezas, pegando todo muy bien con silicón. Realizamos el mismo procedimiento con las tiras, pero en este caso usaremos láminas de Foami para hacer las cuatro piezas para forrar cada lado de las tiras. Hasta que todas nos queden de este modo.
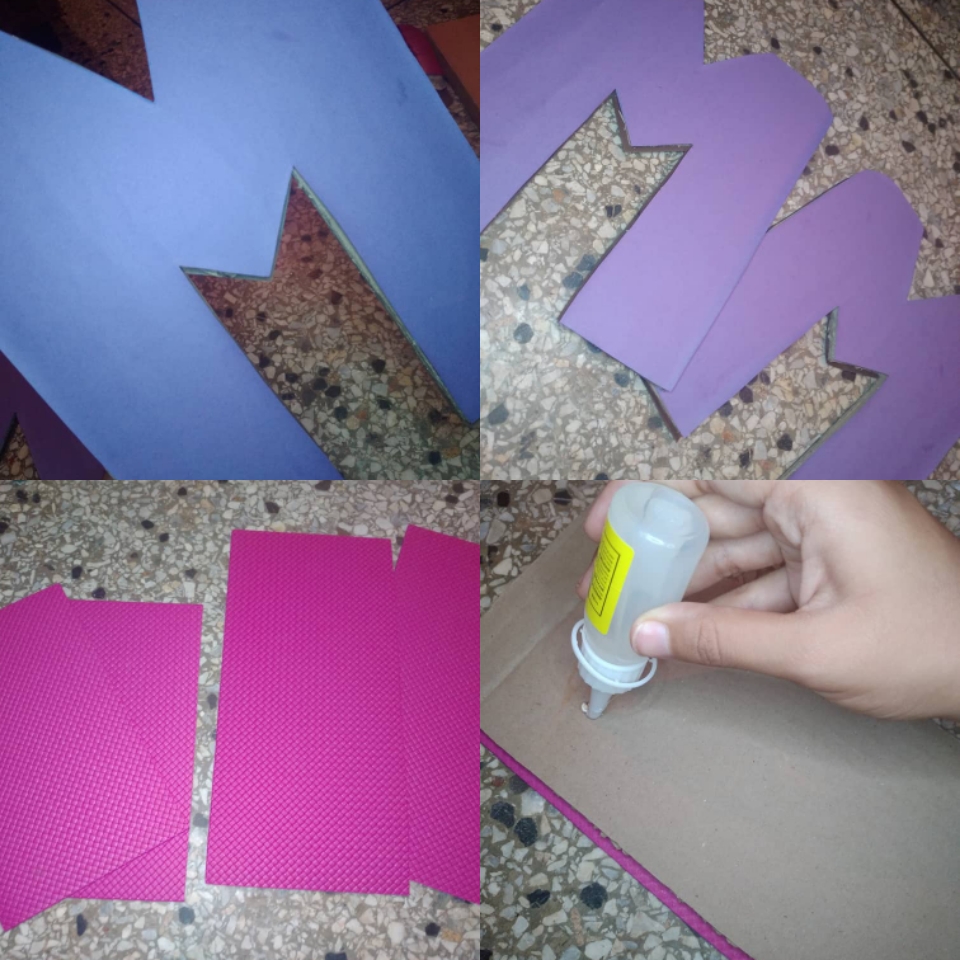
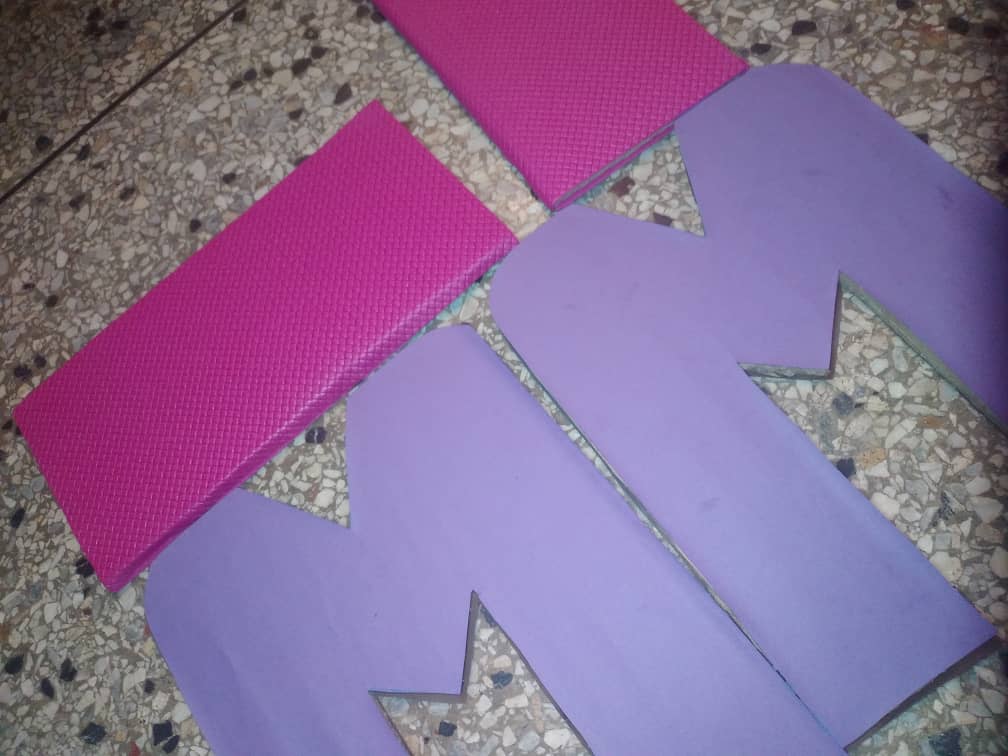
On one of the sheets of construction paper we mark the silhouette of the "m" on both sides, cut and line the two pieces, gluing everything very well with silicone. We carry out the same procedure with the strips, but in this case we will use Foami sheets to make the four pieces to line each side of the strips. Until we all look like this.
4✨
Con cuidado de no quemarnos, pegamos toda la estructura con silicón caliente, y con Foami, cortamos largas tiras de 1cm de ancho, para pegar en los bordes de todo el organizador.
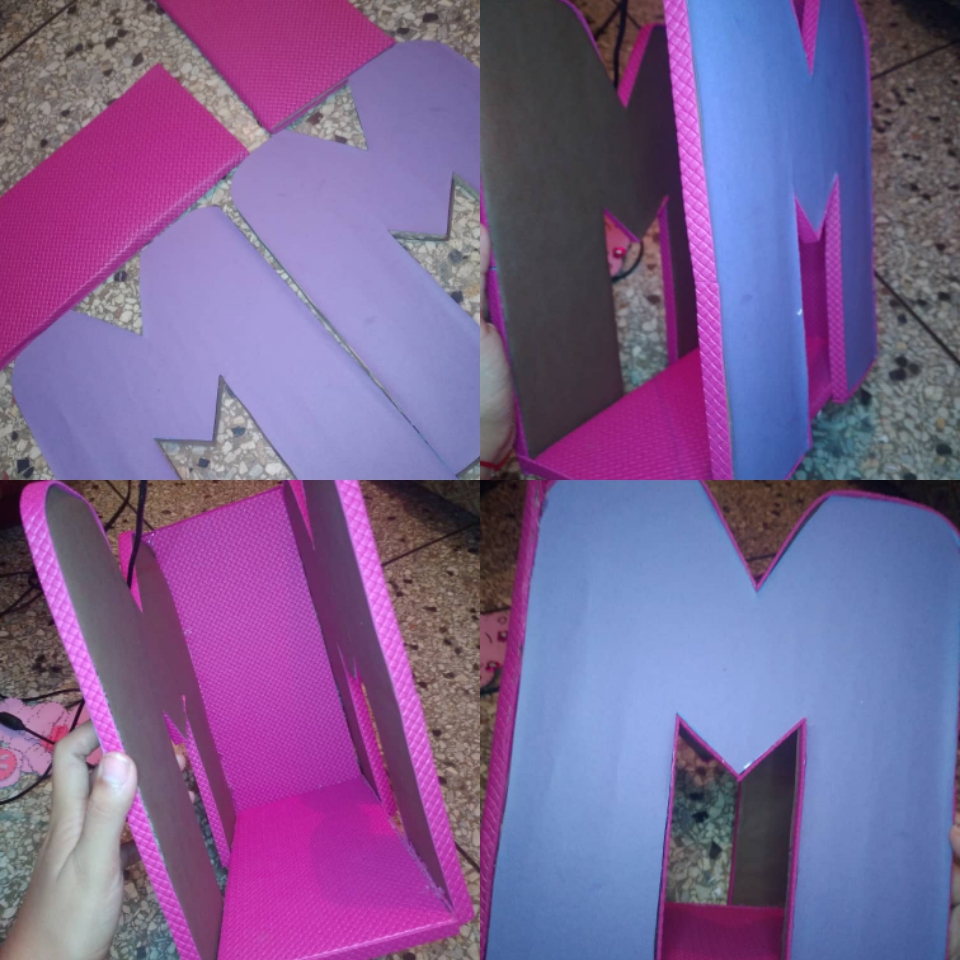
Taking care not to burn ourselves, we glued the entire structure with hot silicone, and with Foami, we cut long strips of 1cm wide, to stick on the edges of the entire organizer.
5✨
Creamos las decoraciones que más nos gusten para nuestro organizador. En mi caso hice un lindo osito rosa, con un modelo de flores de Foami que aprendí hace un tiempo, y con la cuerina, corte dos tiras, para pegar en la parte inferior de la “M”.
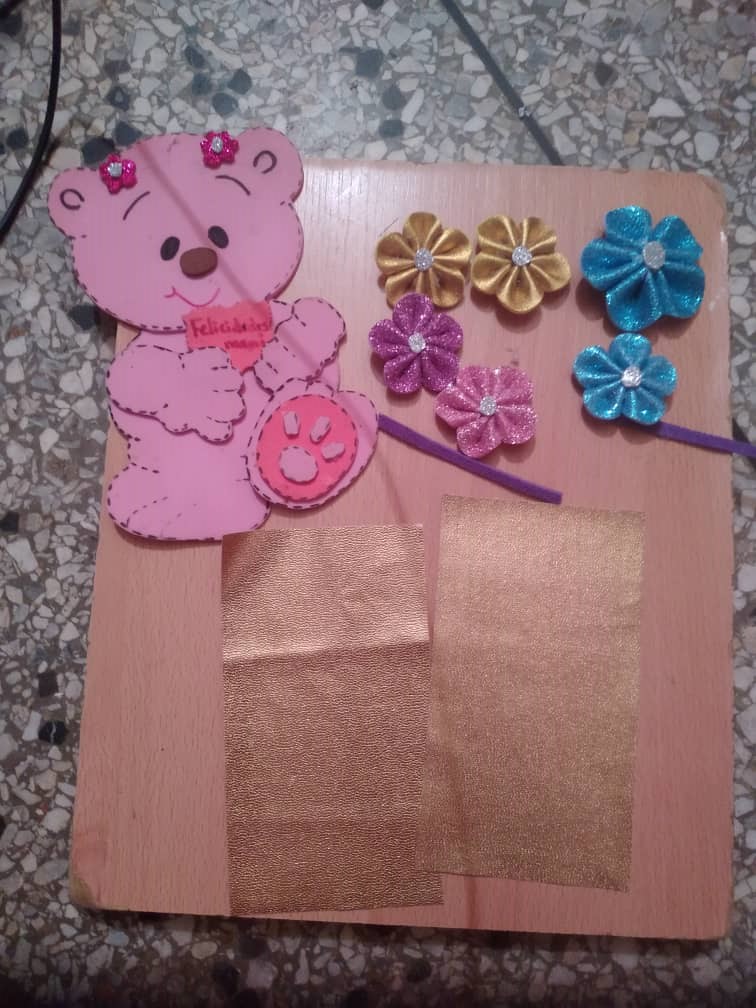
We create the decorations that we like the most for our organizer. In my case, I made a cute pink bear, with a Foami flower pattern that I learned a while ago, and with the leather, cut two strips, to stick on the bottom of the "M".
6✨
Por último, solo nos queda pegar las piezas decorativas en el lugar que más nos guste. Dándole el toque final de nuestra preferencia.
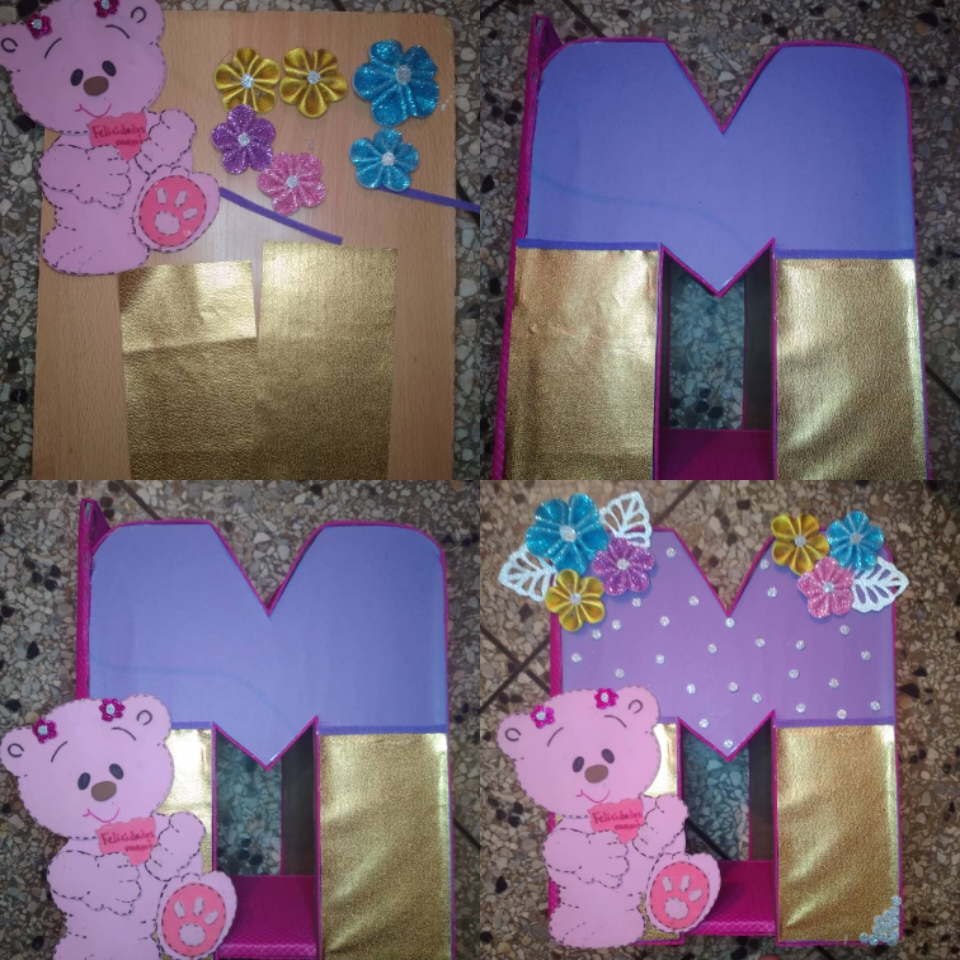
Finally, we only have to paste the decorative pieces in the place that we like the most. Giving it the final touch of our preference.
¡Y listo! Así quedo nuestro organizador de libros personalizado
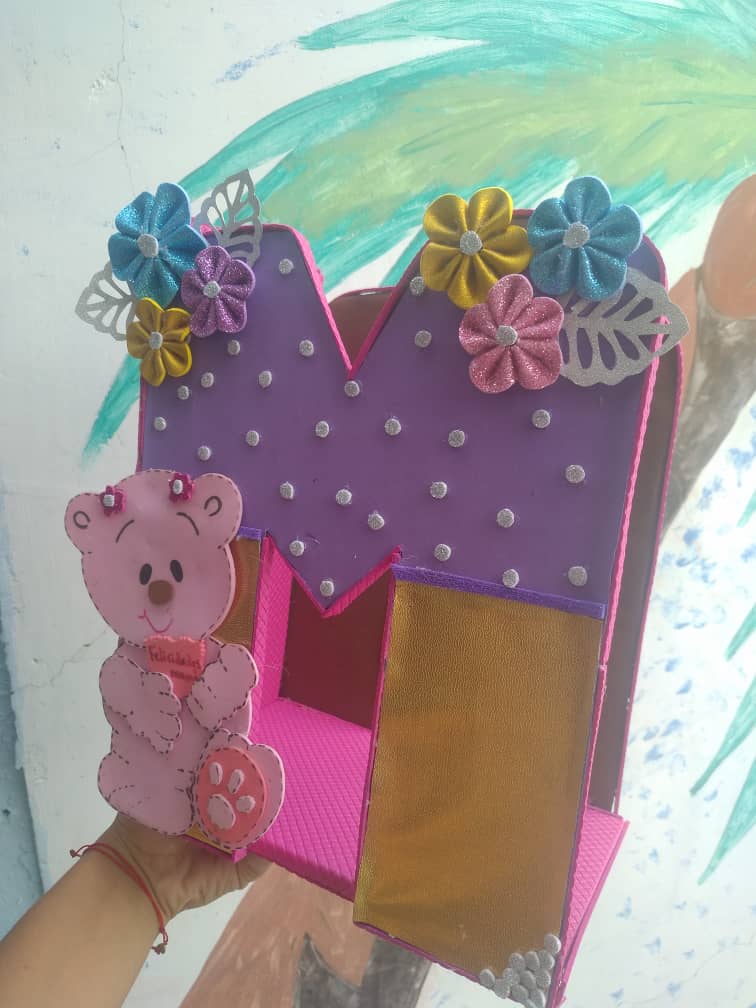
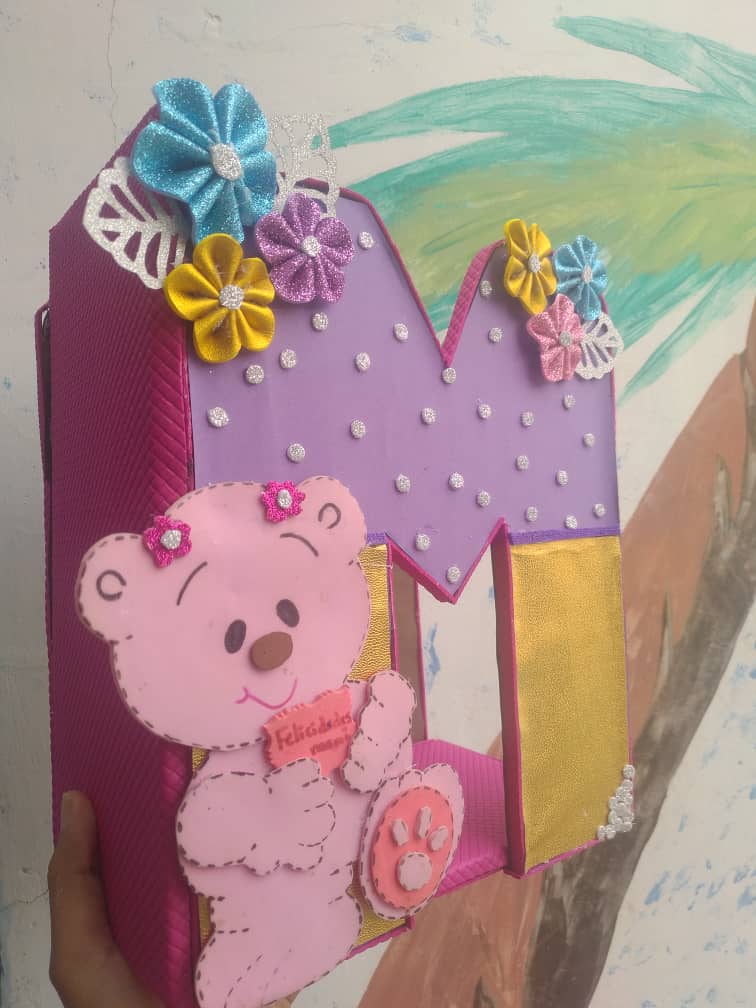
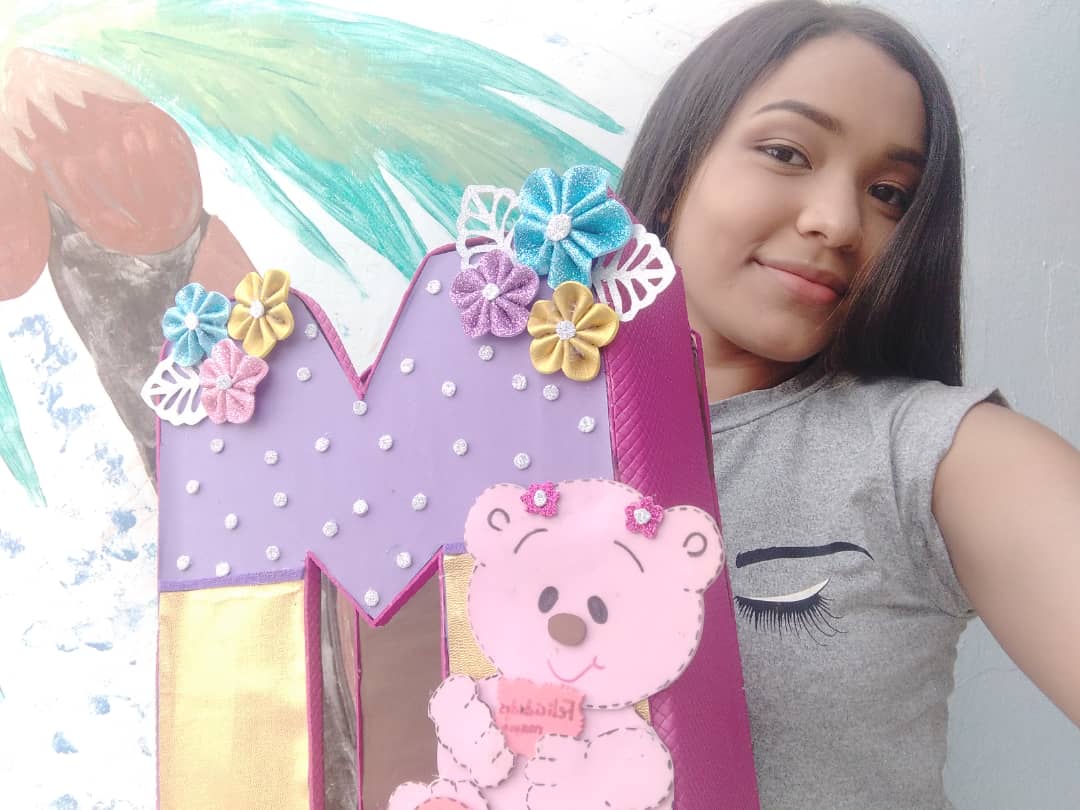
And voila! This is our personalized book organizer
Es una idea muy fácil de realizar. Muy práctico ya que ocupa poco espacio, y tan lindo que todos querrán tener uno
It is a very easy idea to do. Very practical since it takes up little space, and so cute that everyone will want to have one
Espero que le haya gustado tanto como a mí, y que se animen a hacer uno en su casa.
I hope you liked it as much as I did, and that you are encouraged to make one at home.
Hola, hermoso proyecto me gustó mucho ese organizador de libros. Excelente el paso a paso. Saludos.
Gracias por el apoyo! me alegra mucho que te haya gustado
Congratulations @michell02! You have completed the following achievement on the Hive blockchain and have been rewarded with new badge(s) :
Your next payout target is 250 HP.
The unit is Hive Power equivalent because your rewards can be split into HP and HBD
You can view your badges on your board and compare yourself to others in the Ranking
If you no longer want to receive notifications, reply to this comment with the word
STOPTo support your work, I also upvoted your post!
Check out the last post from @hivebuzz:
Support the HiveBuzz project. Vote for our proposal!