¡Hola, amigos de Hive! Espero que todos hayan tenido una muy linda de semana.
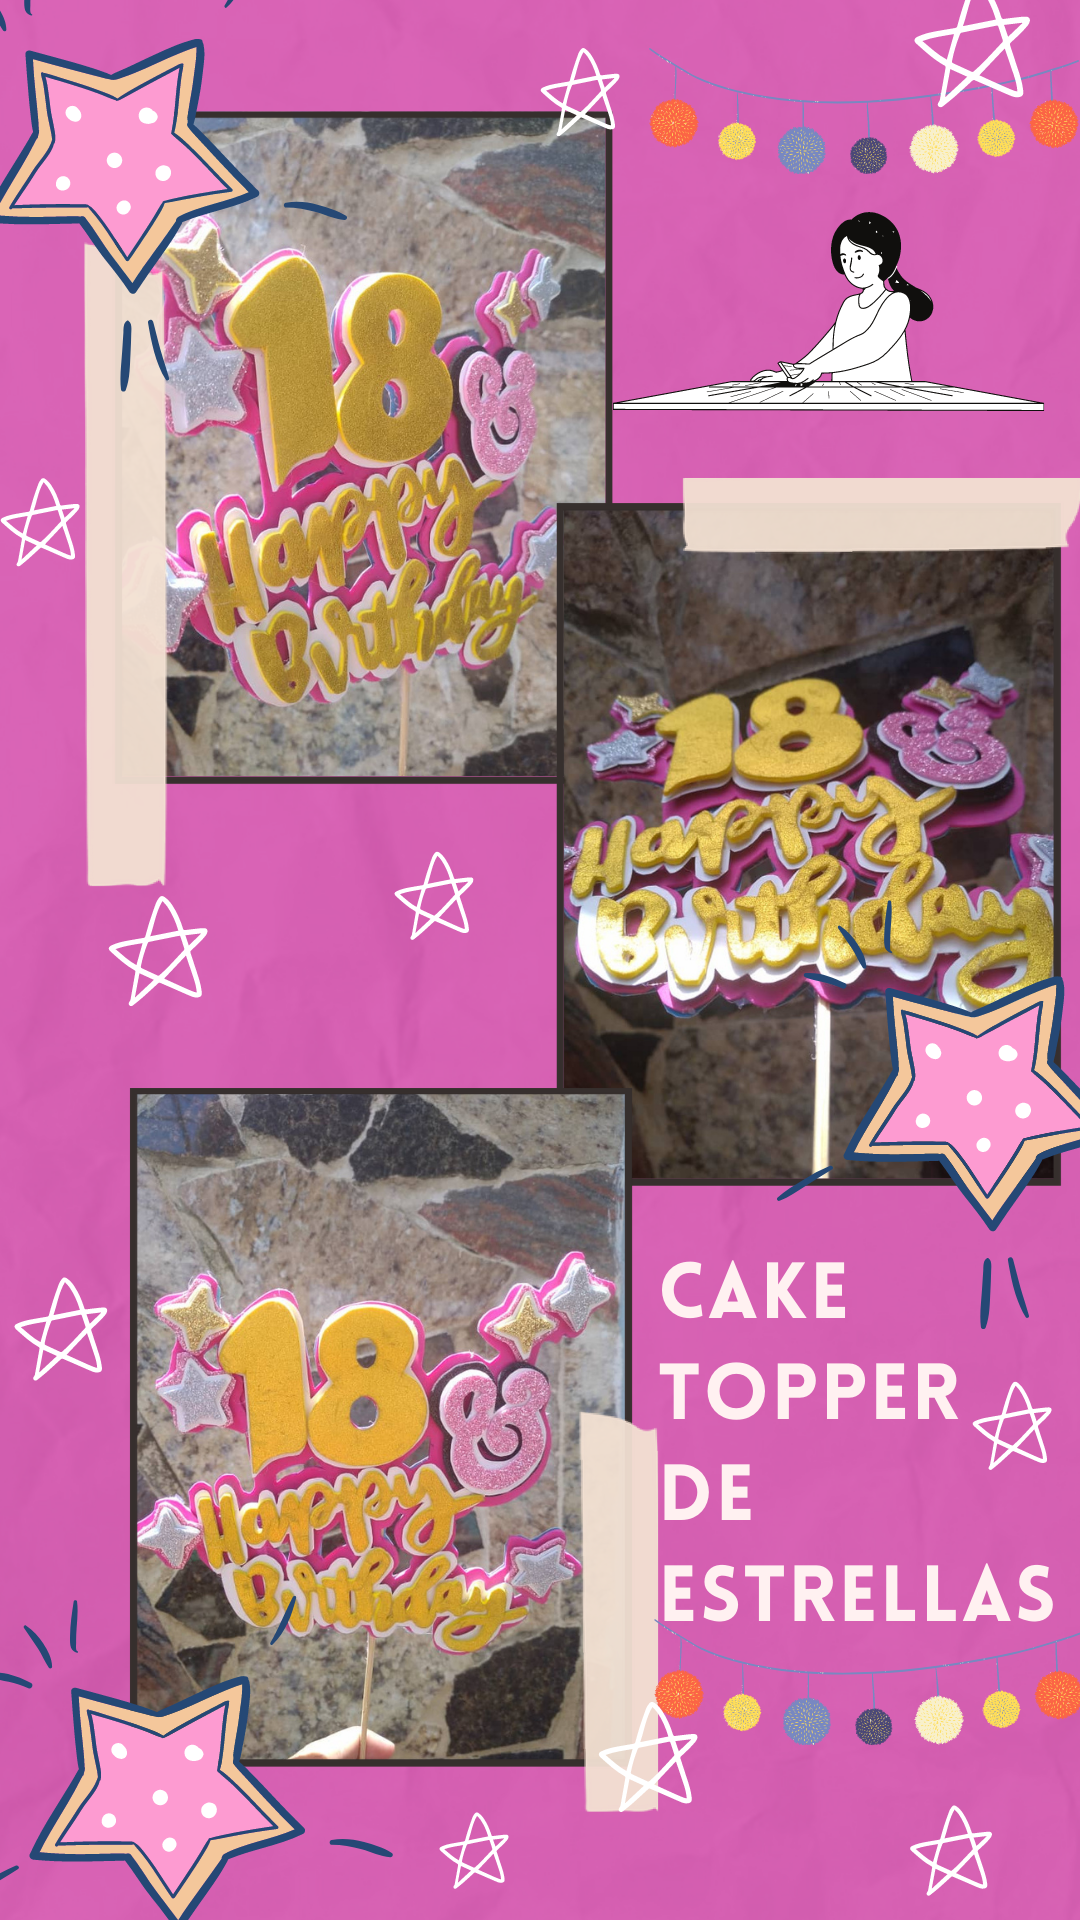
Hello Hive friends! I hope everyone had a very nice week.
Hace un tiempo comente en uno de mis post, que de mis pasatiempos favoritos las manualidades es uno de los que más resalta, es de las cosas que de verdad amo hacer, y aunque no soy una experta, día a día trato de mejorar un poco más y aprender cosas nuevas. Este fin de semana cumplió años una gran amiga y decidí
hacerle un lindo cake topper para regalárselo; tuve muchas indecisiones cuando lo comencé, y no termino siendo para nada como lo imagine en un principio, pero el resultado me gustó muchísimo, y a mi amiga igual, y creo que es lo más importante.
Hoy les mostrare como realice este cake topper de estrella, espero que les guste tanto como a mí, y les sirva como guía para realizar los suyos.
Some time ago I commented in one of my post, that of my favorite hobbies, crafts is one of the ones that stands out the most, it is one of the things that I really love to do, and although I am not an expert, day by day I try to improve a little more and learn new things. This weekend a great friend had a birthday and I decided to make her a nice cake topper to give her; I had a lot of indecisions when I started it, and it did not end up being at all as I imagined it at first, but I liked the result very much, and my friend the same, and I think it is the most important thing.
Today I will show you how to make this star cake topper, I hope you like it as much as I do, and it will serve as a guide to make yours.

- Foami del color que desees
- Cartulina blanca
- Silicón liquido
- Unas tijeras
- Una hojilla, bisturi o exacto (utilicen lo que se les haga mucho más fácil su trabajo)
- Un palillo de altura
💜💜💜💜💜💜
- Foami of the color you want
- White cardboard
- Liquid silicone
- Scissors
- A blade, scalpel or exact (use whatever makes your job much easier)
- A tall toothpick
✨Paso a paso - Step by Step✨
1✨
En una hoja dibuje las partes necesarias para el diseño del topper que deseo hacer, yo todo lo hice a mano y con un lápiz, solo para hacer un molde y de esa forma guiarme a la hora de sacar las pieza.
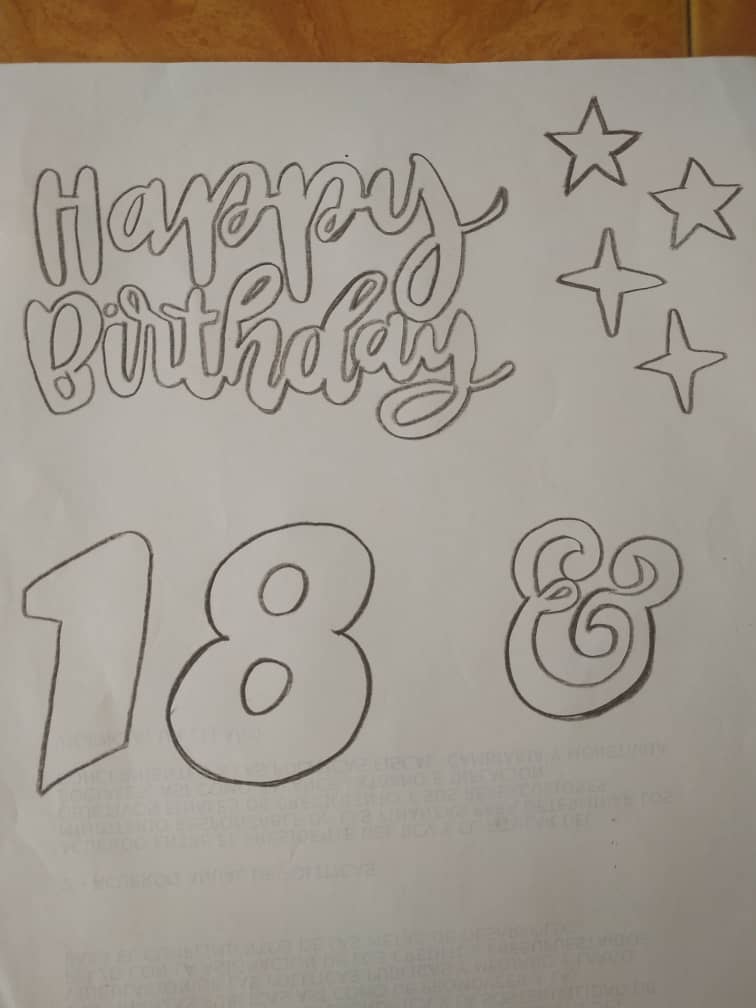
On a sheet I draw the necessary parts for the design of the topper that I want to make, I did everything by hand and with a pencil, just to make a mold and thus guide me when removing the pieces.
2✨
Ya que tengamos nuestro molde, recortamos todo con mucho cuidado, luego trazamos el dibujo en el foami para sacar una de las partes. Con mucho cuidado cortamos los bordes y con la ayuda de una hojilla sacamos el centro de las letras, (cosa que con la tijera se nos complicaría mucho más.)
Hacemos lo mismo con el resto del escrito y el numero 18
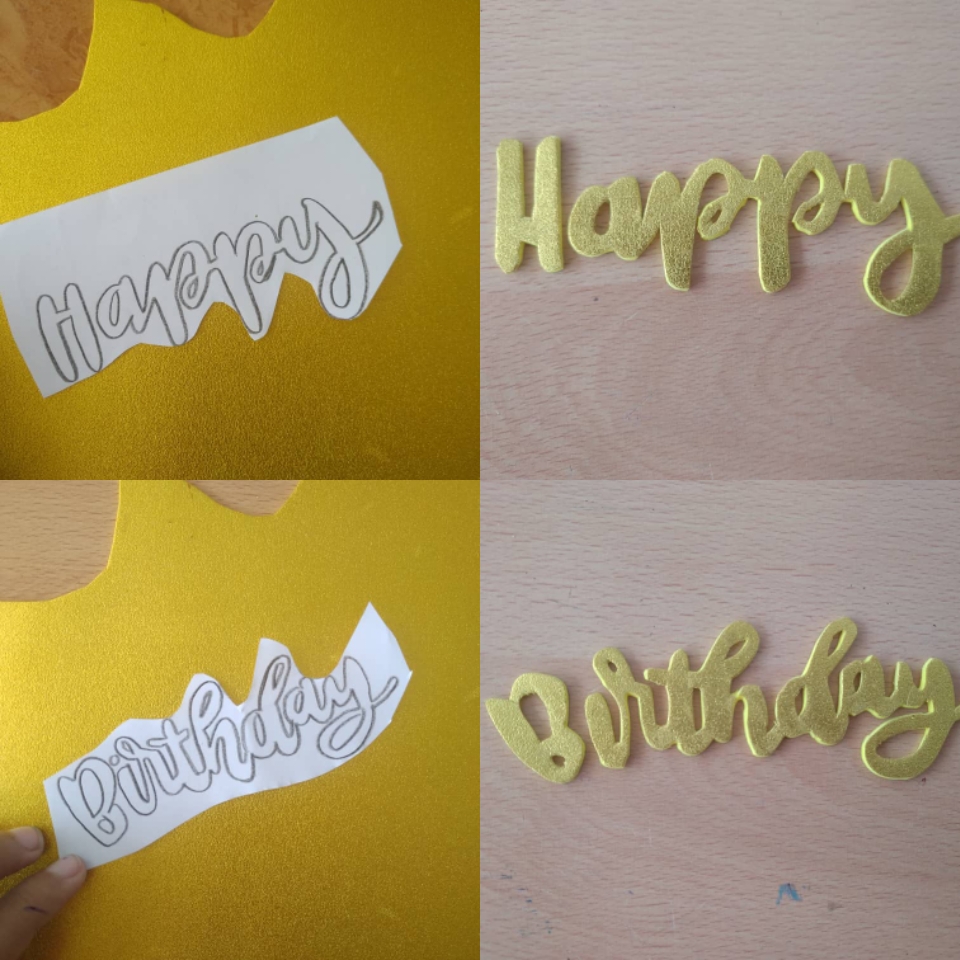
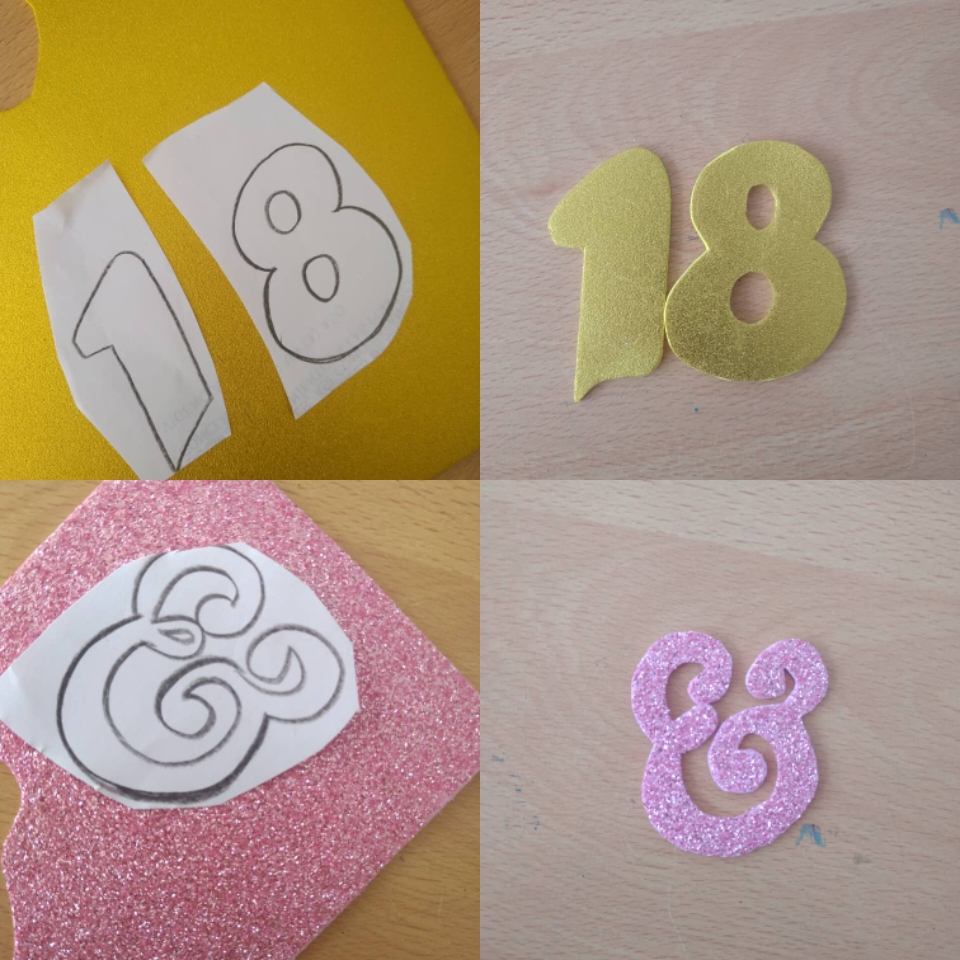
Once we have our mold, we cut everything very carefully, then we trace the drawing on the foami to remove one of the parts. With great care we cut the edges and with the help of a blade we remove the center of the letters, (which with the scissors would be much more complicated.)
We do the same with the rest of the writing and the number 18
3✨
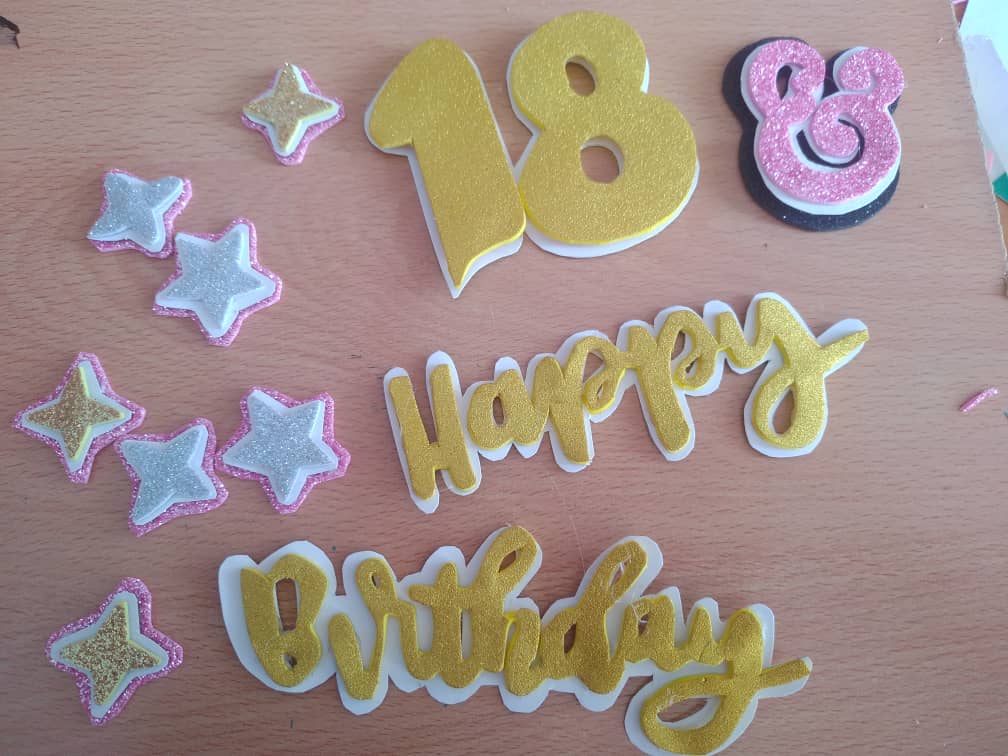
Ya que hayamos recortado todo, le haremos un fondo blanco, de modo que nuestras letras resalten mucho más. Colocamos uno de los escritos en la cartulina blanca, y con lápiz trazamos toda la silueta dejando un espacio de un milímetro, para que sobresalga un borde blanco. Recortamos todo hasta que nos quede de esta forma, haciendo el mismo procedimiento con todas las partes del topper
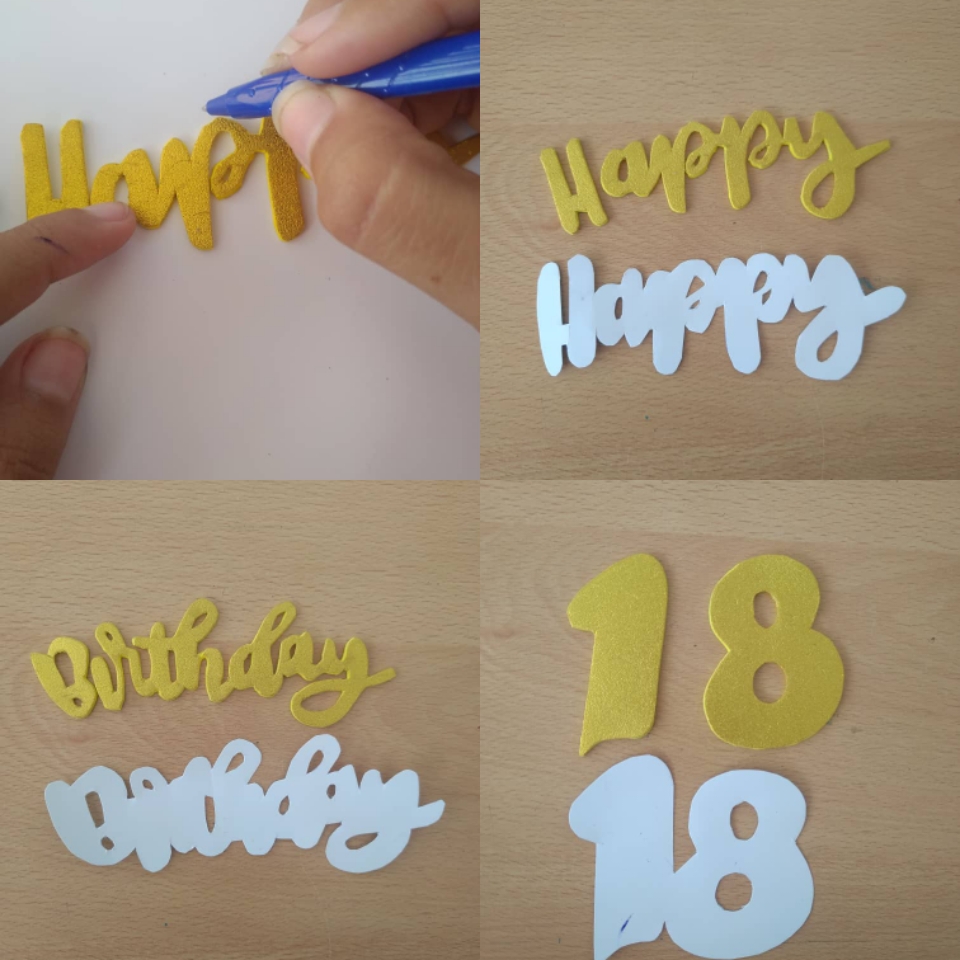
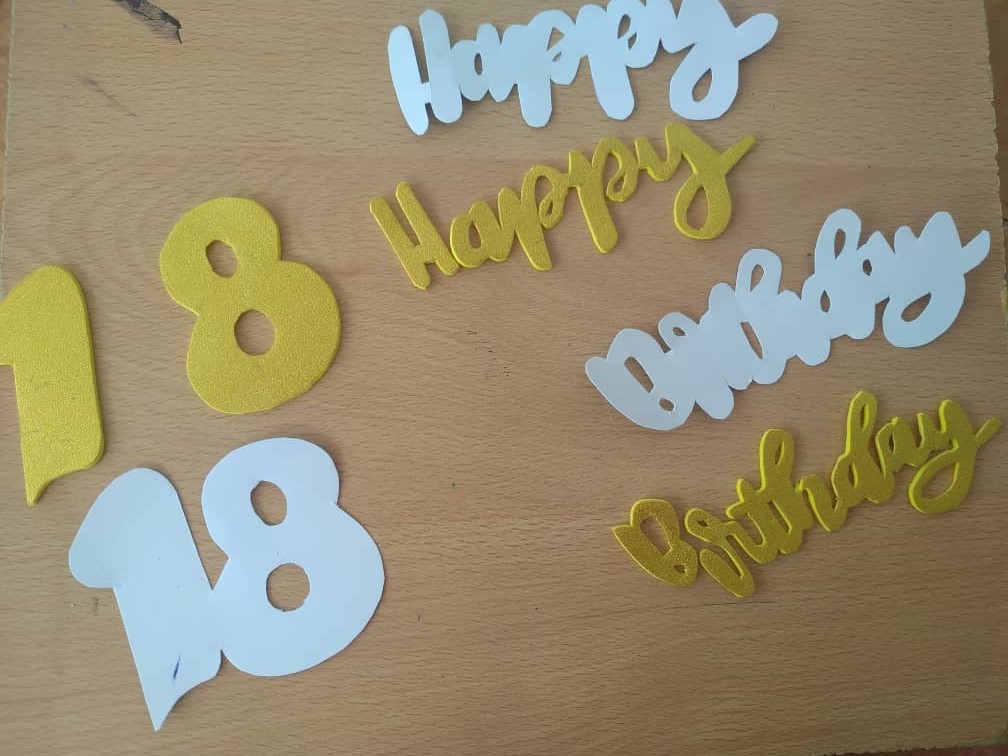
Once we have cut everything out, we will make it a white background, so that our letters stand out much more. We place one of the writings on the white cardboard, and with a pencil we trace the entire silhouette leaving a space of one millimeter, so that a white edge stands out. We cut everything until it is this way, doing the same procedure with all the parts of the topper
4✨
Con silicón, pegamos lo que será el “happy birthday”, unimos las letras en dorado con su fondo blanco y dejamos que se seque.
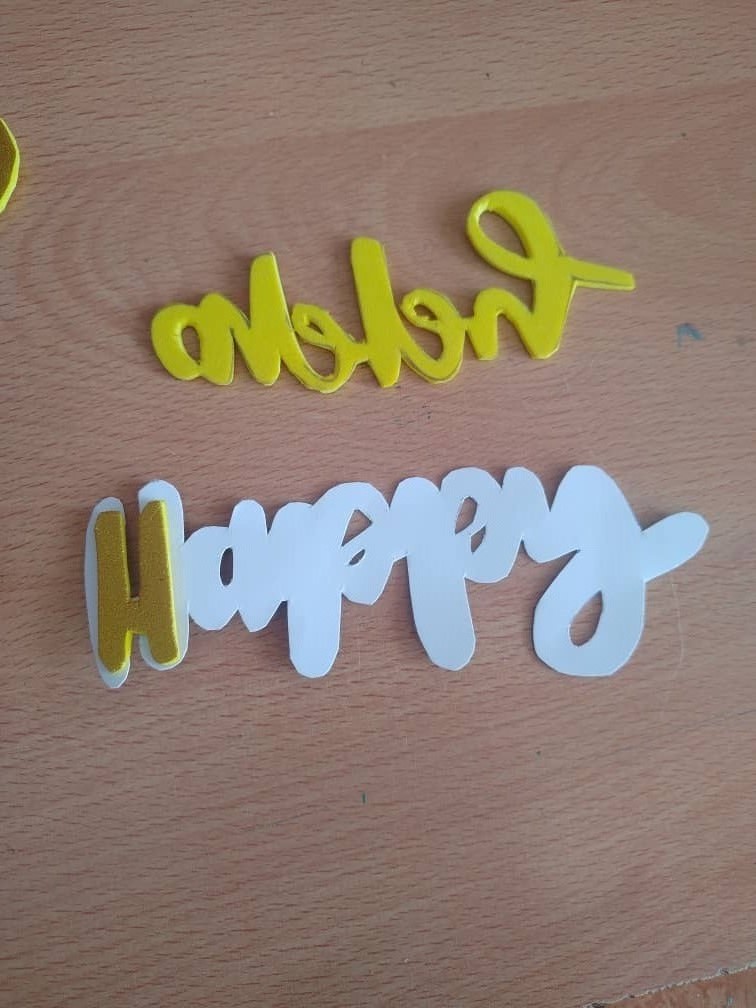
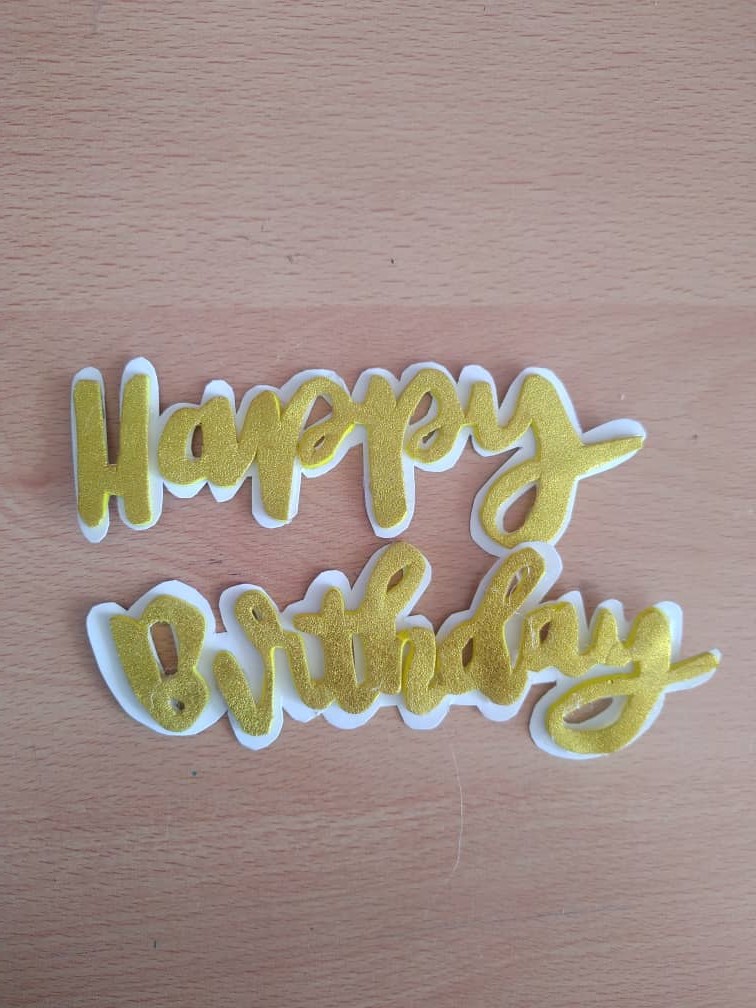
With silicone, we glue what will be the "happy birthday", we join the letters in gold with its white background and let it dry.
Y al 18 le daremos un relieve, cortamos pequeños cuadros de foami, pegamos uno a uno en la capa blanca del fondo, y ya que estén firmes, unimos el 18 con los cuadros quedando de esta forma.
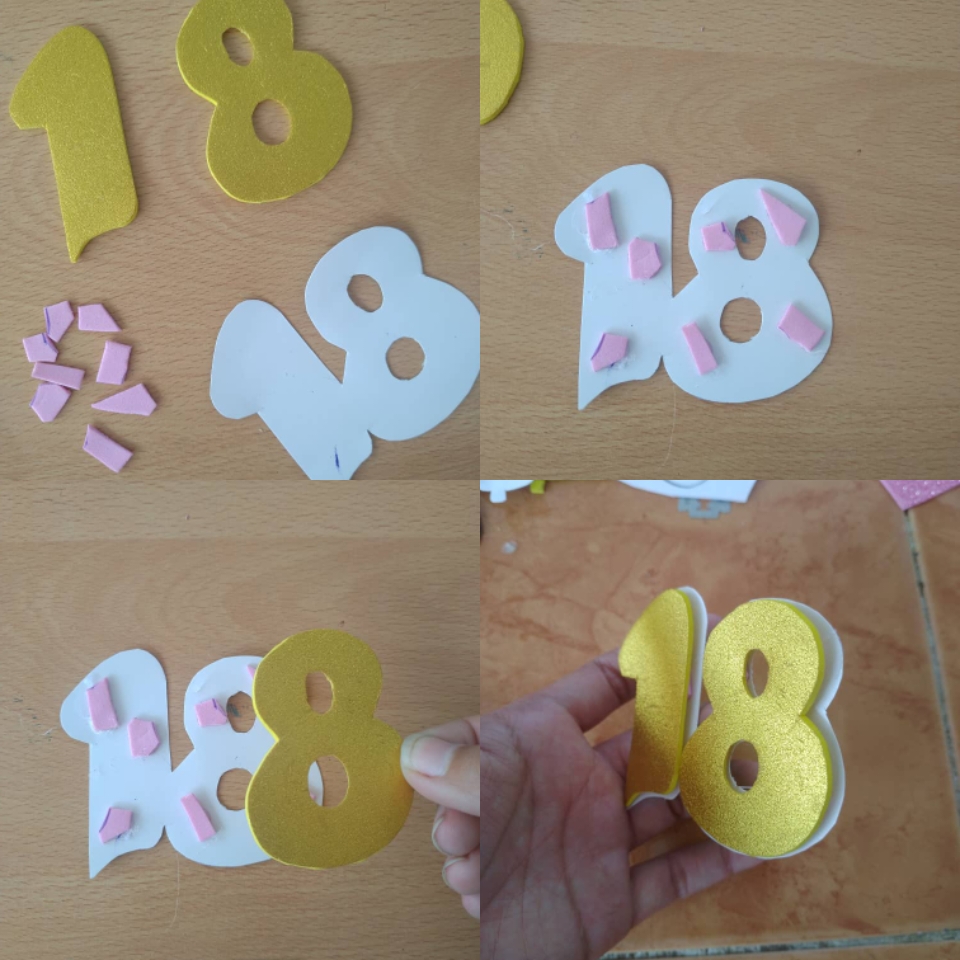
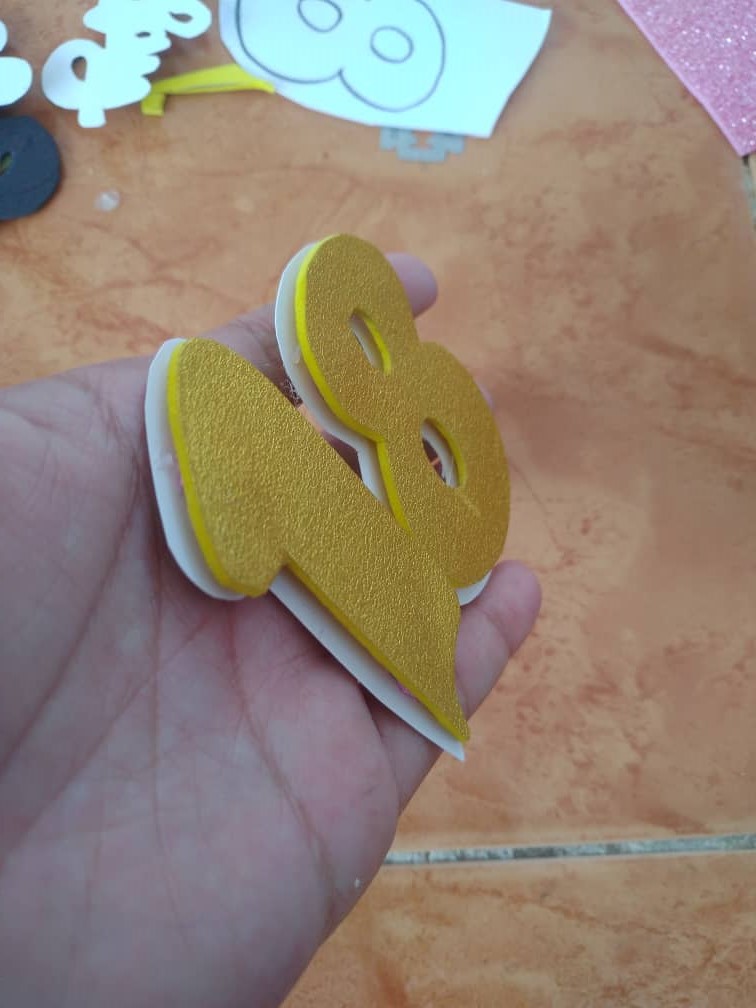
And to 18 we will give a relief, we cut small squares of foam, we glue one by one on the white layer of the background, and once they are firm, we join the 18 with the squares, remaining in this way.
5✨
En el caso de la letra E (que es la inicial de mi amiga) le haremos 3 capas, es decir, la letra en rosa escarchado, el fondo blanco y por ultimo un fondo negro. Recortamos todo muy bien, dejando de igual forma un milímetro aproximadamente en cada capa para que sobresalga el borde. Con el silicón pegamos las primeras 2 capas y con la última, hacemos el mismo procedimiento que con el 18, pegando cuadrados de foami para que queden levemente despegadas las dos piezas.
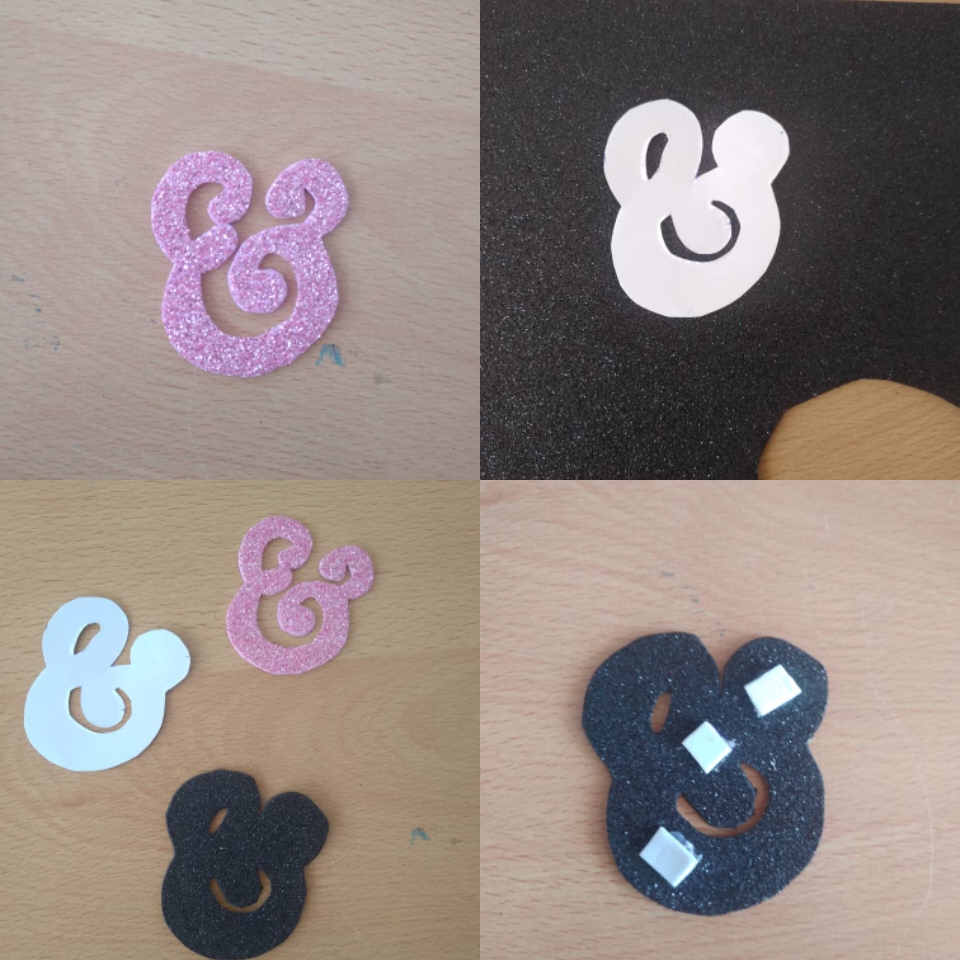
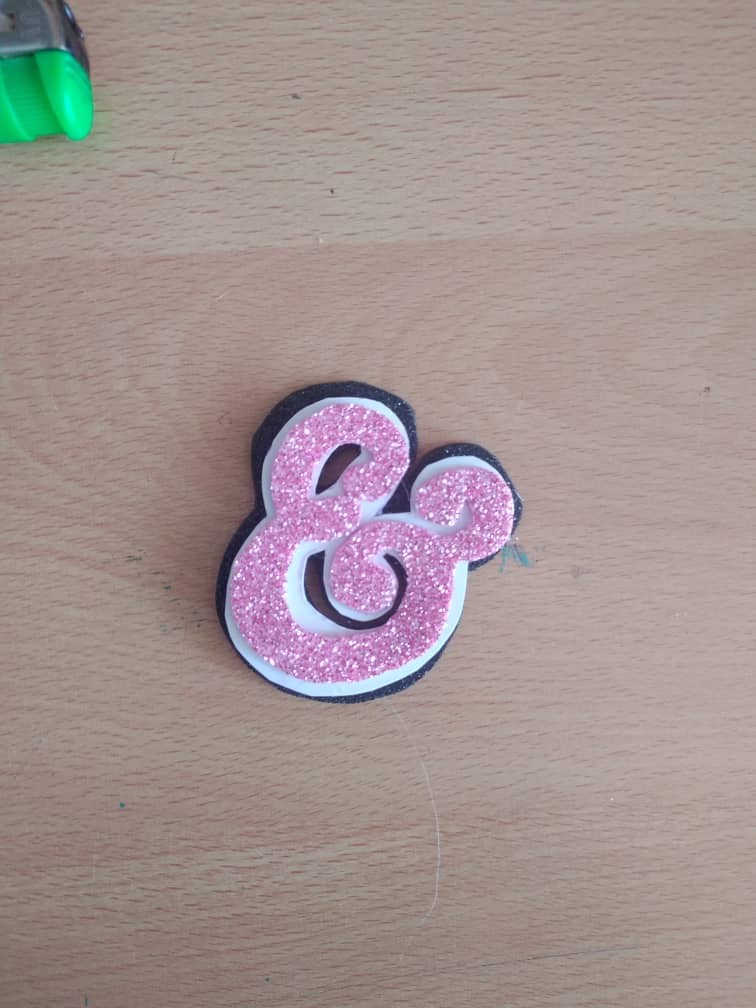
In the case of the letter E (which is my friend's initial) we will make it 3 capable, that is, the letter in frosty pink, the white background and finally a black background. We cut everything very well, leaving approximately one millimeter in each layer in the same way so that the edge protrudes. With the silicone we glue the first 2 layers and with the last one, we do the same procedure as with 18, gluing squares of foam so that the two pieces are slightly detached.
6✨
Sacamos unas estrellitas para decorar nuestro topper, que es la temática de la fiesta en cuestión.
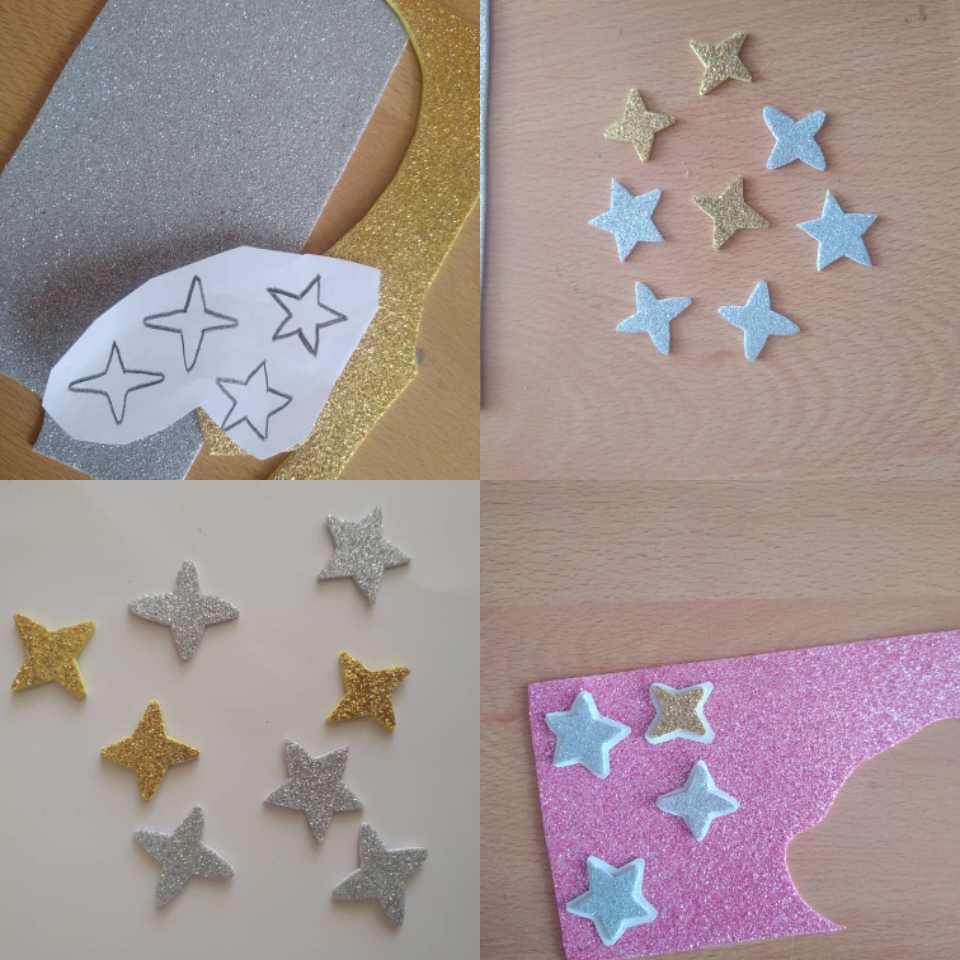
We take out a stars to decorate our topper, which is the theme of the party in question.
7✨
Ya que tengamos todas las piezas listas, necesitamos hacer el fondo para nuestro topper. Acomodamos todas las partes en un foami fucsia, del mimo modo en que queremos que quede el resultado final; y con un lápiz trazamos la forma, dejando aproximadamente un milímetro del borde. Ya que tengamos la forma, recortamos con cuidado y sacamos el centro con la ayuda de una hojilla
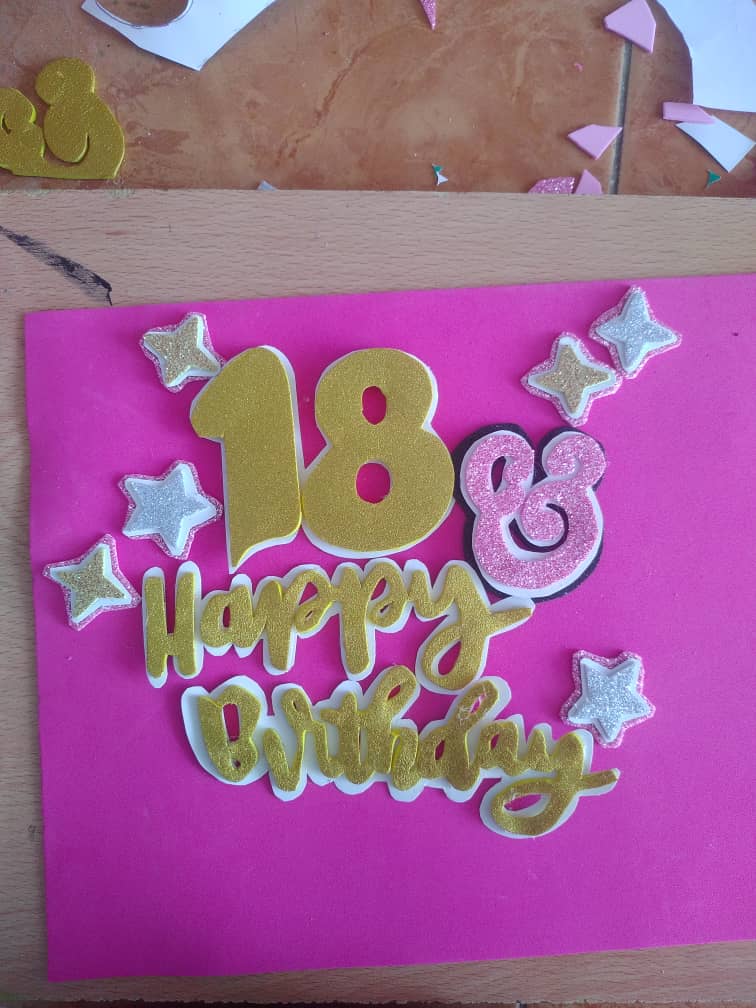
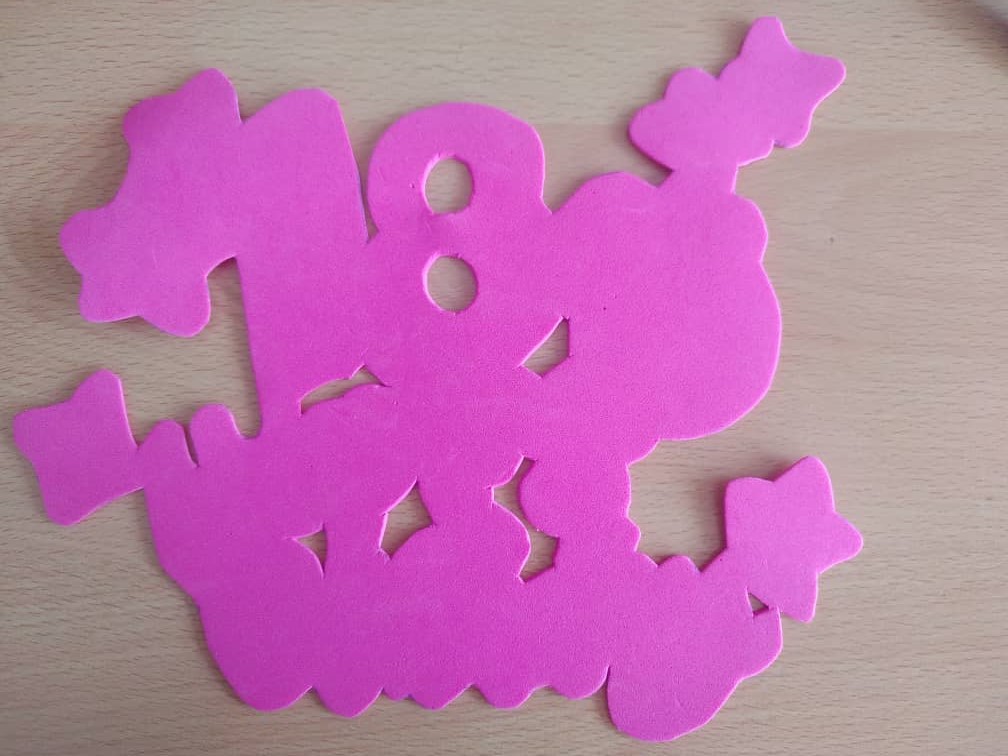
Since we have all the pieces ready, we need to make the background for our topper. We arrange all the parts in a fuchsia foami, in the same way we want the final result to be; and with a pencil we trace the shape, leaving approximately one millimeter from the edge. Once we have the shape, we carefully cut out and remove the center with the help of a blade.
8✨
Pegamos todas las piezas del mismo modo en que lo ordenamos anteriormente, dejando un trozo de foami entre capas para darle más vista. Y por último, tomamos un palillo de altura y lo pegamos con silicón en la parte trasera del topper
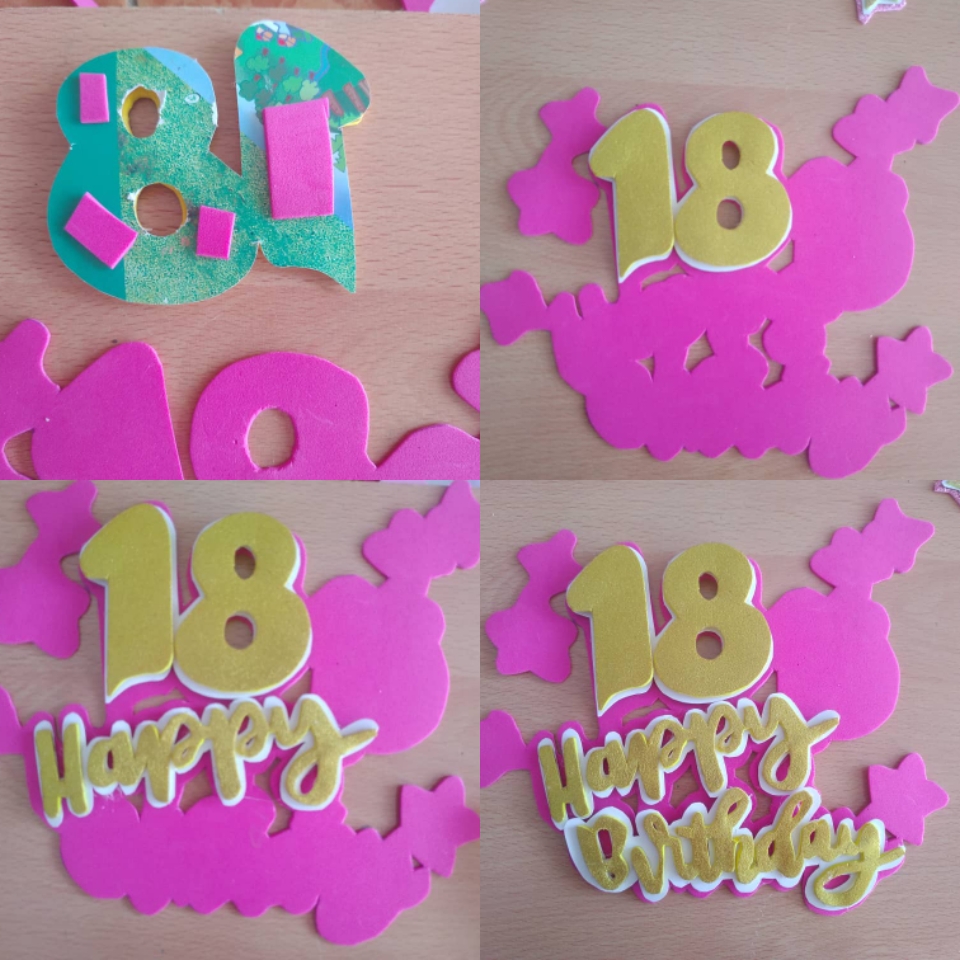
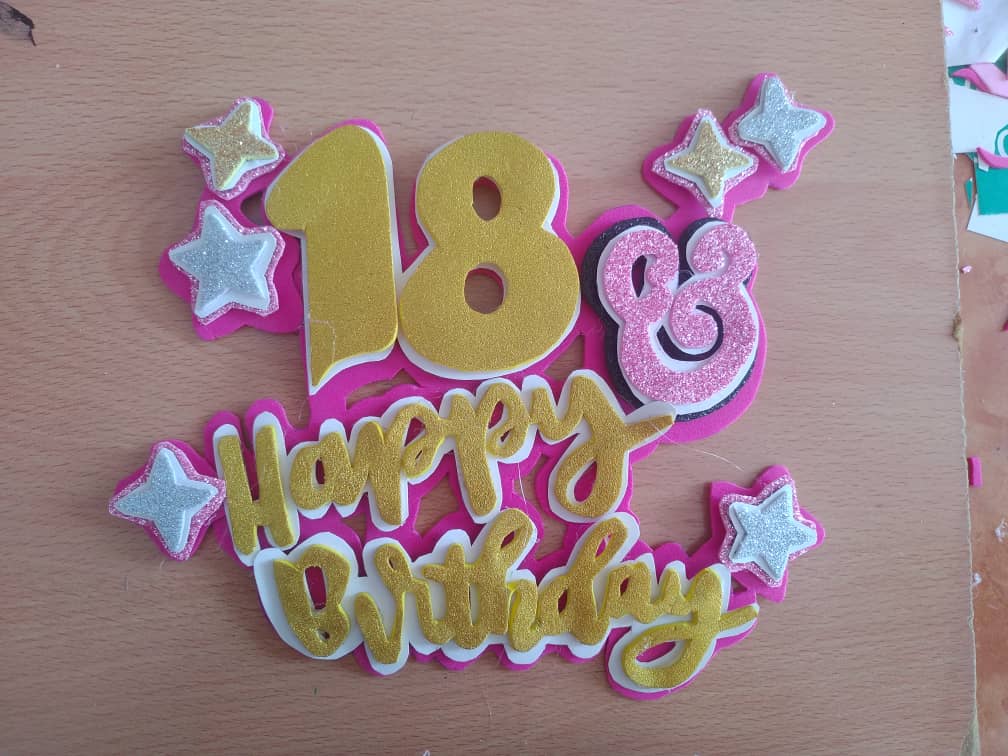
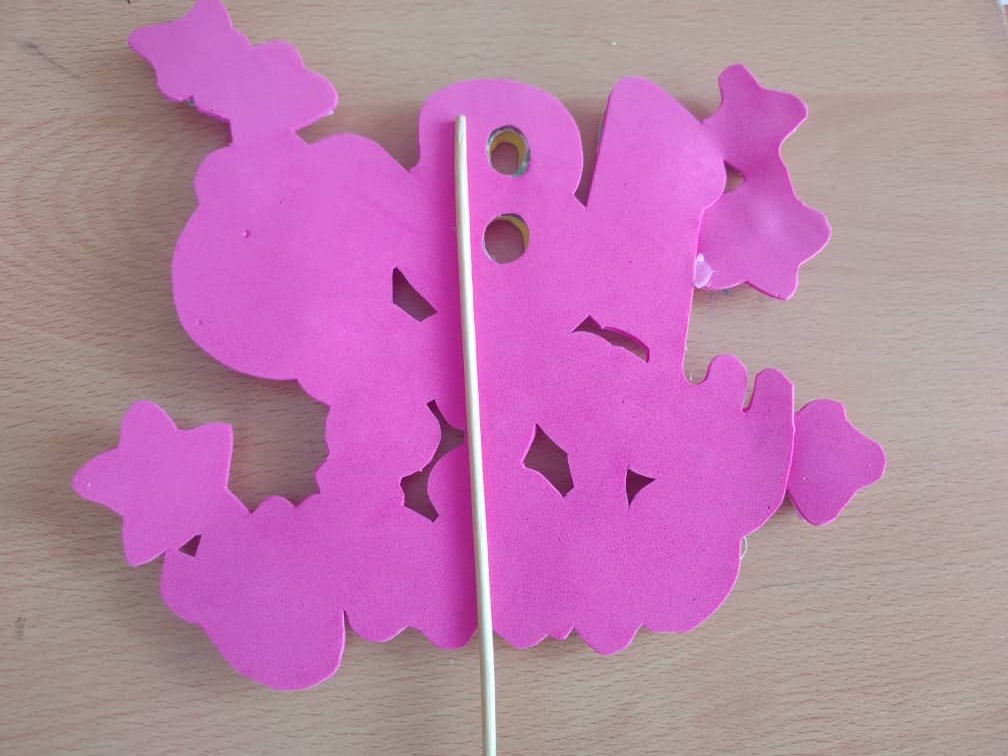
We glue all the pieces in the same way we ordered it previously, leaving a piece of foam between layers to give it more view. And finally, we take a height toothpick and glue it with silicone on the back of the topper
¡Y listo, así quedo nuestro topper con estrellas!
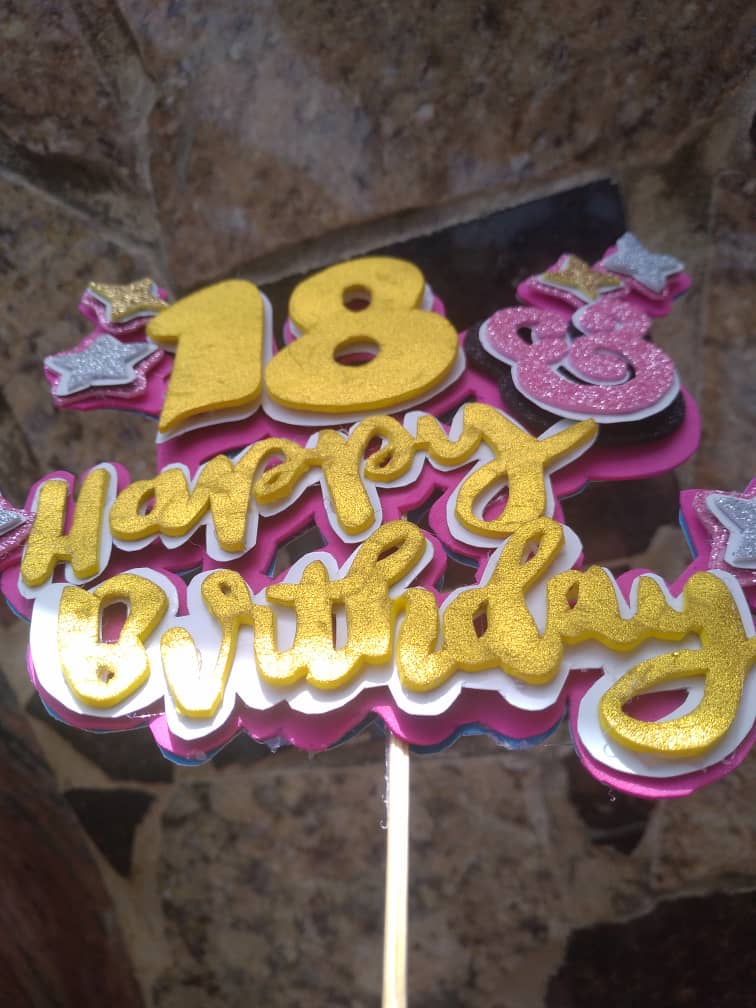
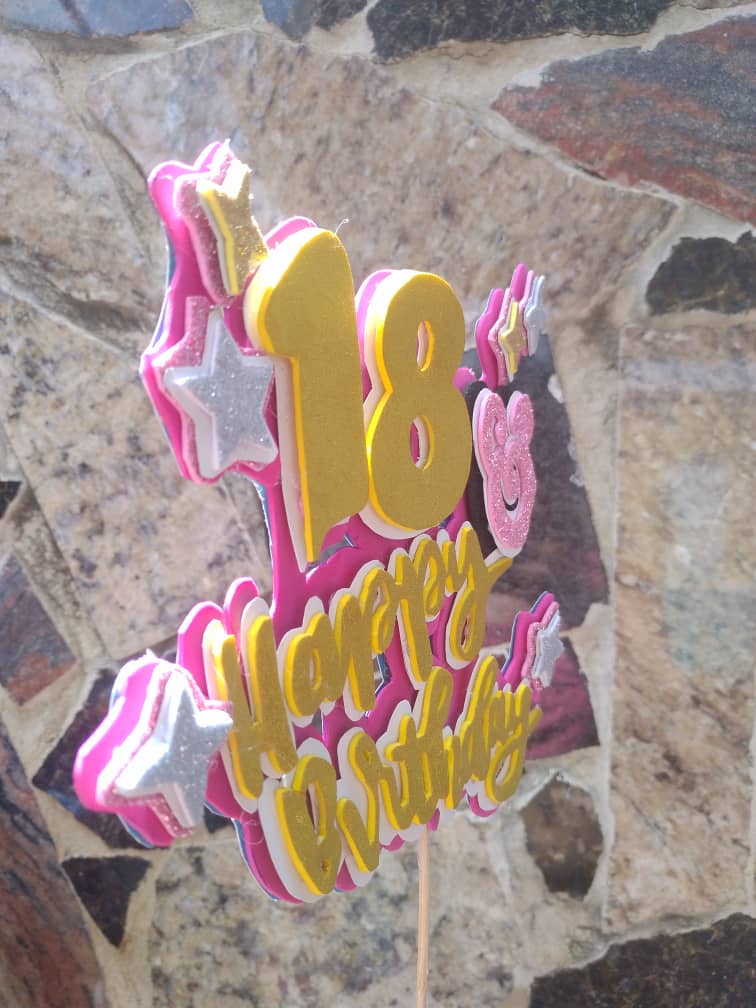
Este es un diseño muy simple como hermoso. Es una idea muy fácil, y para las personas que no desean hacer algo tan elaborado para su cumpleaños, es perfecto ya que no es algo que lleve mucho material, así que en cuestión de dinero, no sale muy costoso.
And voila, this is our topper with stars!
This is a very simple as well as beautiful design. It is a very easy idea, and for people who do not want to do something so elaborate for their birthday, it is perfect since it is not something that takes a lot of material, so in a matter of money, it is not very expensive.
Congratulations @michell02! You have completed the following achievement on the Hive blockchain and have been rewarded with new badge(s) :
Your next payout target is 50 HP.
The unit is Hive Power equivalent because your rewards can be split into HP and HBD
You can view your badges on your board and compare yourself to others in the Ranking
If you no longer want to receive notifications, reply to this comment with the word
STOPTo support your work, I also upvoted your post!
Check out the last post from @hivebuzz:
Thank you for sharing this amazing post on HIVE!
Your content got selected by our fellow curator @stevenson7 & you just received a little thank you via an upvote from our non-profit curation initiative!
You will be featured in one of our recurring curation compilations and on our pinterest boards! Both are aiming to offer you a stage to widen your audience within and outside of the DIY scene of hive.
Join the official DIYHub community on HIVE and show us more of your amazing work and feel free to connect with us and other DIYers via our discord server: https://discord.gg/mY5uCfQ !
If you want to support our goal to motivate other DIY/art/music/homesteading/... creators just delegate to us and earn 100% of your curation rewards!
Stay creative & hive on!