Hola, colonias digitales que conforman el universo de Hive. Reciban un fuerte abrazo.
Hoy les traigo Una Taza de café: un toque diferente en tu Cocina.
Hello, digital colonies that make up the Hive universe. Receive a big hug.
I hope you're doing well from the other side of the screen.
Today I bring you A Cup of Coffee: a different touch in your kitchen.

¿Quién dijo que la decoración bonita y original tiene que ser costosa o complicada? En el siguiente proyecto, les invito a transformar materiales reciclados en una linda taza decorativa que llenará su cocina de estilo y calidez. Con este diseño sencillo pero encantador les demostrare cómo la creatividad puede convertir lo simple en algo extraordinario. Además, al ser un proyecto en el cual el 80% de los materiales son reciclados, nos recordara que un pequeño gesto también puede hacer la diferencia. ¡Acompáñenme a descubrir cómo darle vida a esta idea y llenar su espacio de encanto hecho a mano!
Comencemos con el paso a paso.
Comencemos con el paso a paso.
Who said that beautiful and original decoration has to be expensive or complicated? In the following project, I invite you to transform recycled materials into a beautiful decorative mug that will fill your kitchen with style and warmth. With this simple but charming design I will show you how creativity can turn the simple into something extraordinary. In addition, being a project in which 80% of the materials are recycled, it will remind us that a small gesture can also make a difference. Join me to discover how to bring this idea to life and fill your space with handmade charm!
Let's start with the step by step.
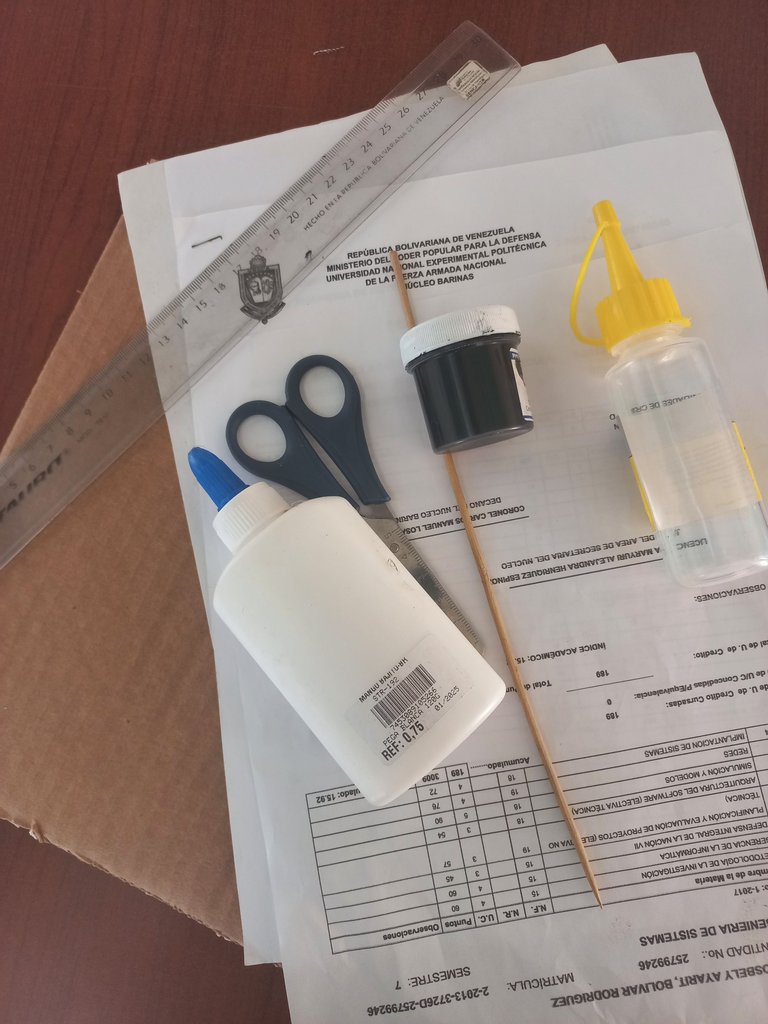
Materiales
1. Regla
2. Pintura al frio (Negra).
3. Silicon Liquido
4. Tijera
5. Hojas de Papel (reciclaje).
6. Trozo de Cartón.
7. Pega Escolar
8. Palito de Brocheta.
9. Plantilla de Diseño.
10. Café Molido
11. Marcador Negro
12. Creyón de Cera Negro.


1. Regla
2. Pintura al frio (Negra).
3. Silicon Liquido
4. Tijera
5. Hojas de Papel (reciclaje).
6. Trozo de Cartón.
7. Pega Escolar
8. Palito de Brocheta.
9. Plantilla de Diseño.
10. Café Molido
11. Marcador Negro
12. Creyón de Cera Negro.
Materials
1. Rule.
2. Cold paint (Black).
3. Liquid Silicon.
4. Scissors.
5. Sheets of paper (recycled).
6. Piece of cardboard.
7. School glue.
8. Skewer stick.
9. Design Template.
10. Ground Coffee.
11. Black Marker
12. Black Wax Crayon.
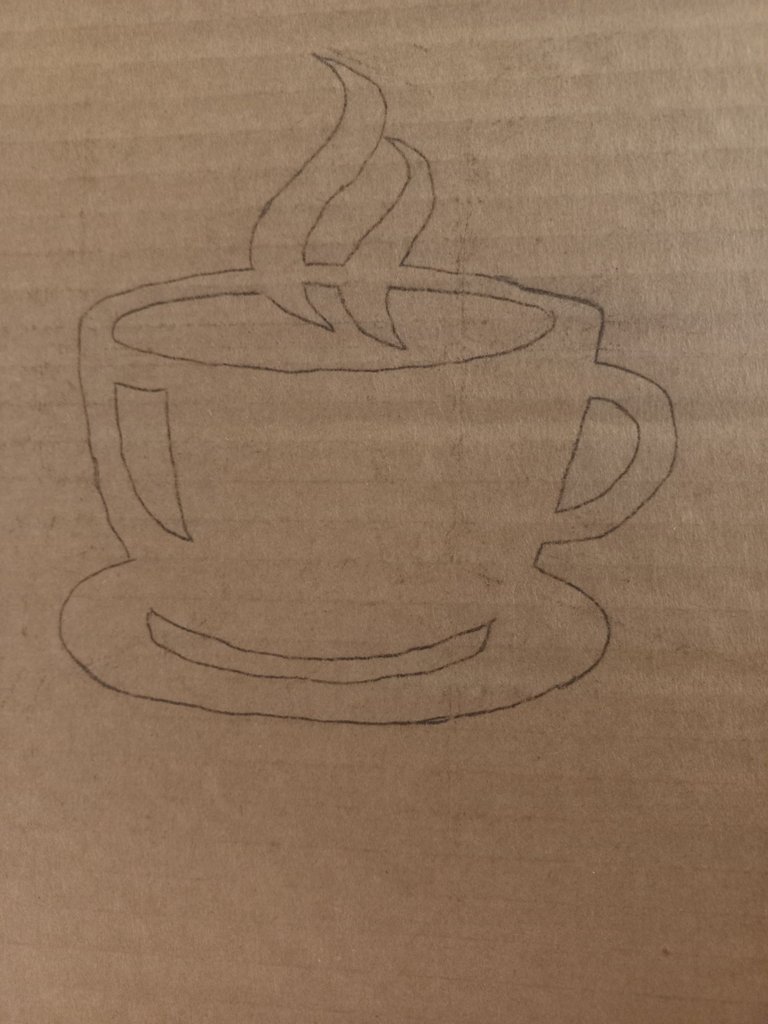
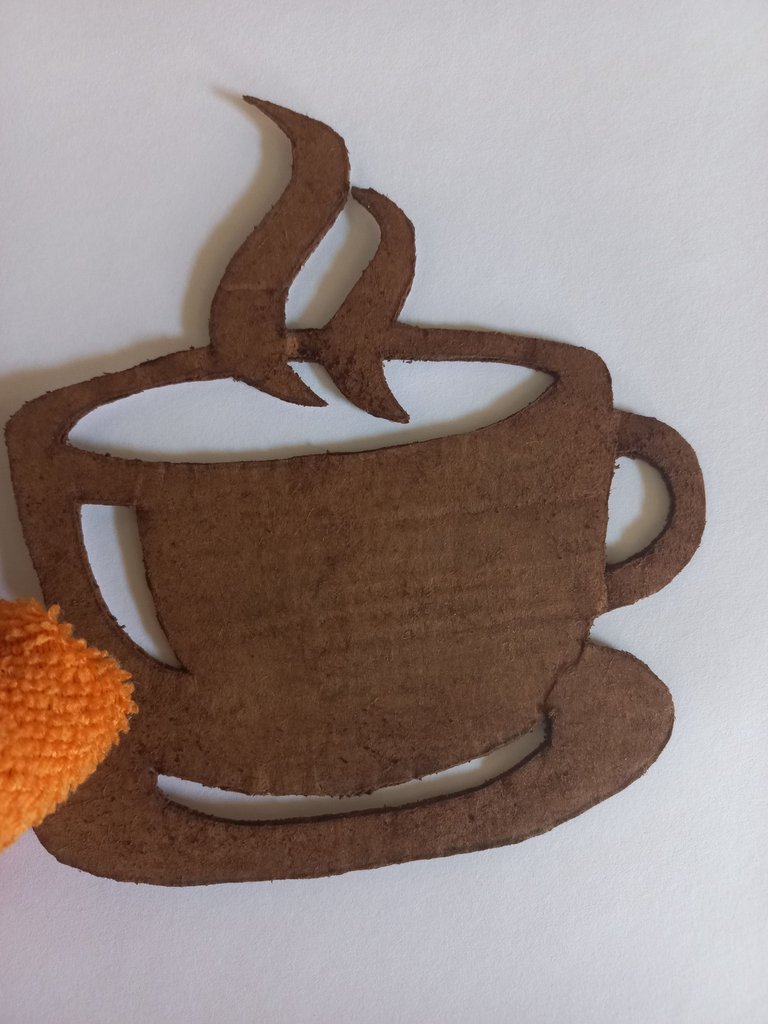
Comenzaremos transfiriendo el diseño al cartón, asegurándonos de que esté bien definido y con todos los detalles necesarios. Luego, con cuidado y precisión, retiramos las partes internas del diseño. Este paso es clave, ya que, al limpiar esas áreas internas, logramos dar profundidad y esa dimensión especial. Tómense su tiempo aquí, ya que debe quedar bien preciso.
We will start by transferring the design to the cardboard, making sure it is well defined and with all the necessary details. Then, with care and precision, we remove the internal parts of the design. This step is key, since, by cleaning those internal areas, we manage to give depth and that special dimension. Take your time here, as it must be very precise.
 |  |
|---|
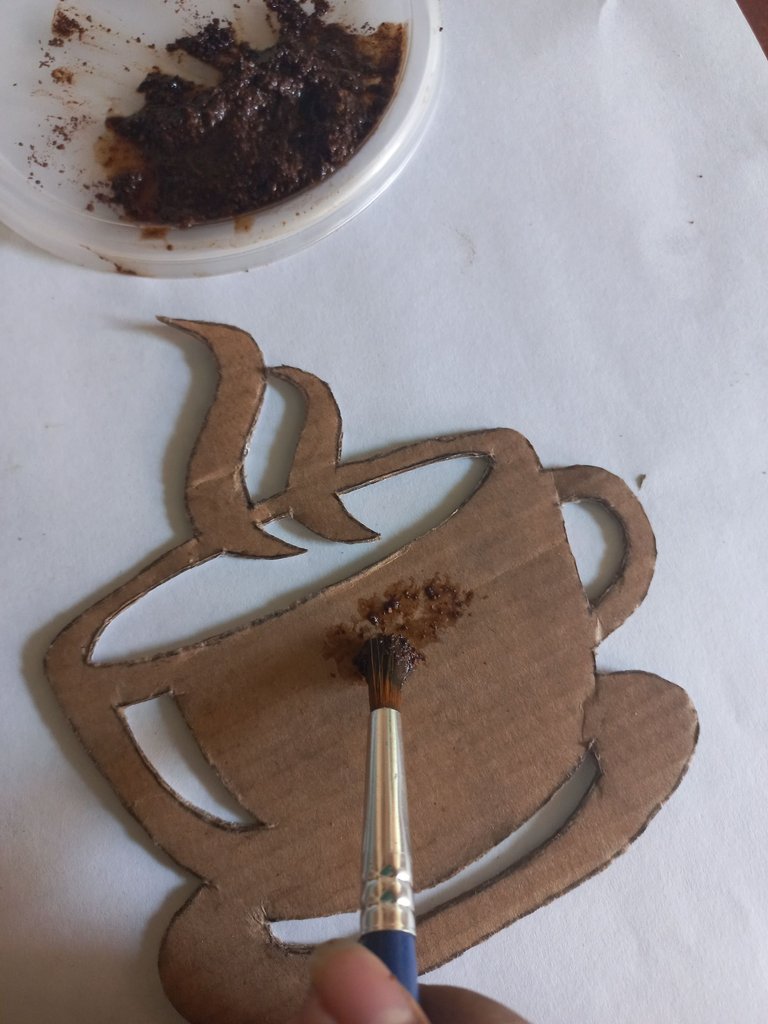
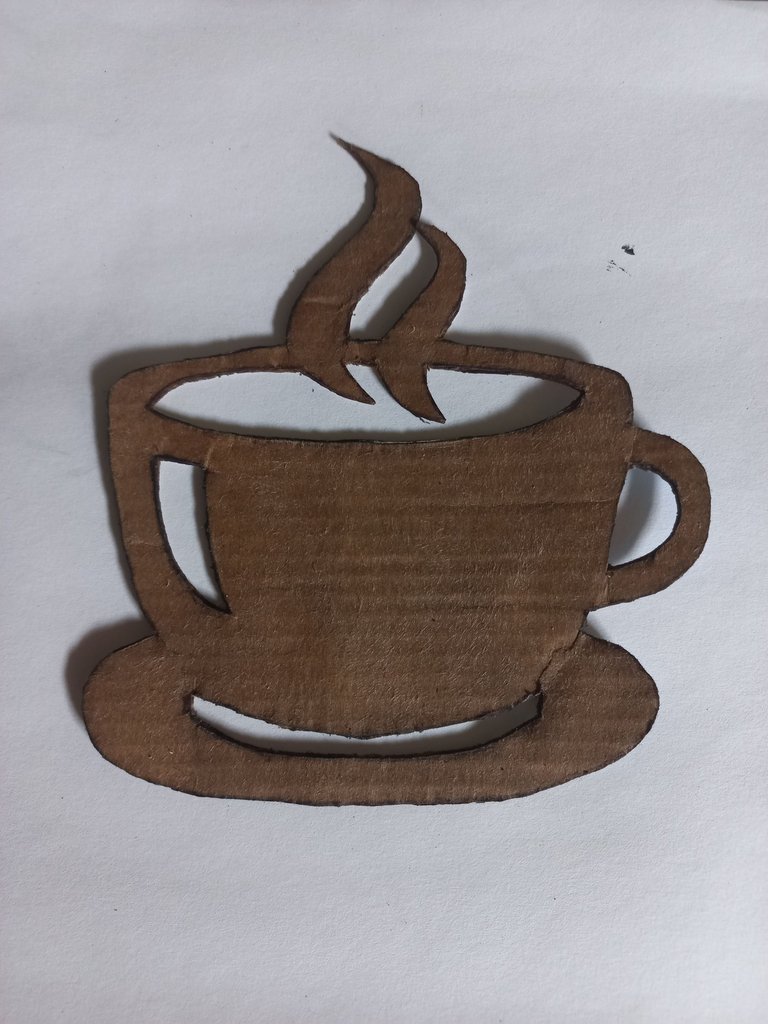
Ahora, vamos a darle ese toque especial utilizando café molido. Agrega unas cuantas gotas de agua al café hasta obtener una mezcla líquida. Con un pincel, aplica esta mezcla por toda la superficie del diseño, asegúrense de cubrir cada rincón. Luego, déjalo secar completamente. Una vez que esté bien seco, tomen un pañito seco y pásenlo con cuidado por toda la superficie para eliminar cualquier residuo. Este acabado le dará un aspecto cálido y natural.
Now, let's give it that special touch using ground coffee. Add a few drops of water to the coffee until you get a liquid mixture. With a brush, apply this mixture all over the surface of the design, making sure to cover every nook and cranny. Then, let it dry completely. Once it is completely dry, take a dry cloth and wipe it carefully over the entire surface to remove any residue. This finish will give it a warm, natural look.
 |  |
|---|
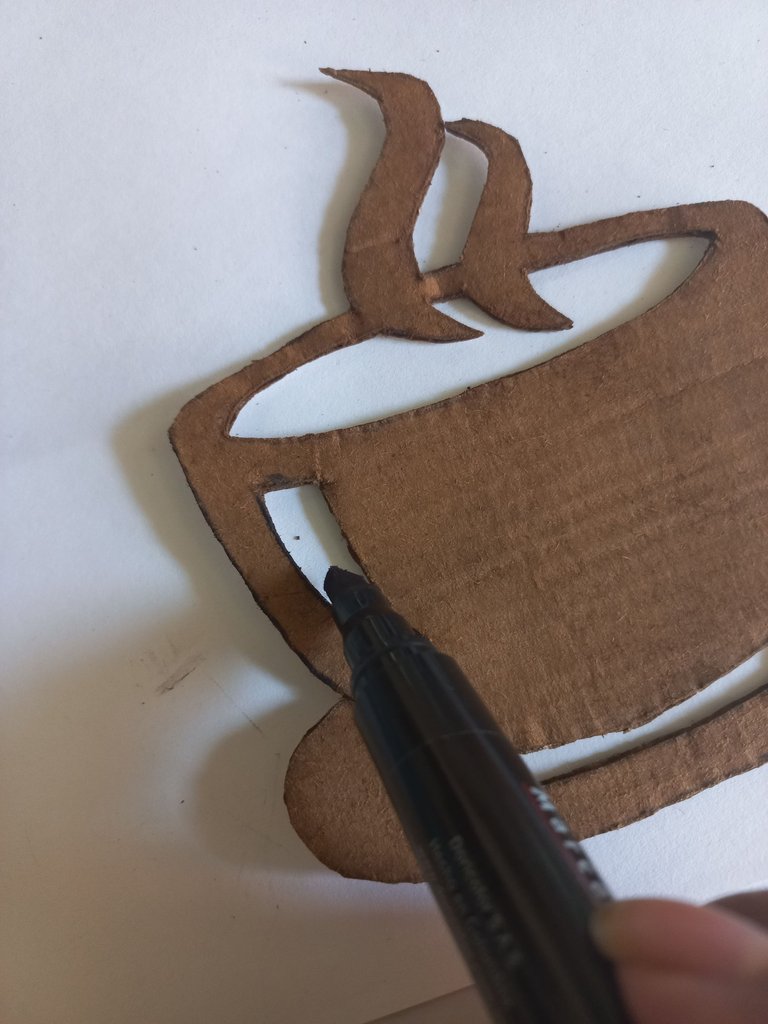
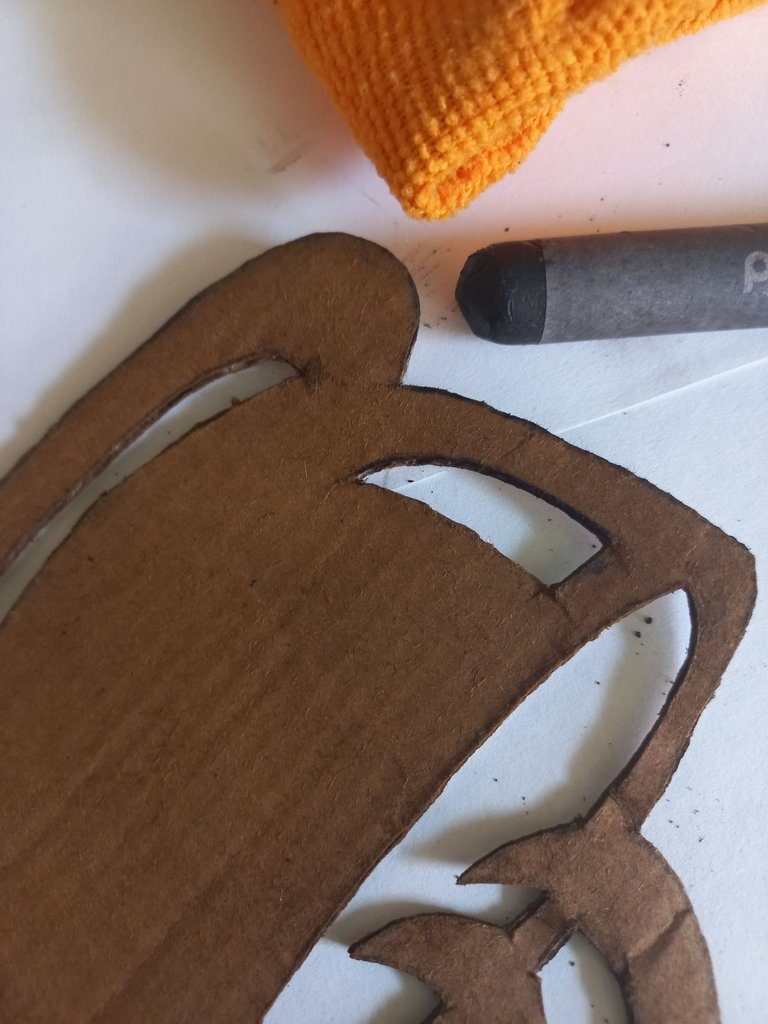
Seguimos añadiendo detalles a nuestra pieza principal. En esta ocasión utilizaremos el marcador negro para resaltar el contorno, tanto exterior como interior, con mucho cuidado y precisión. Una vez hecho esto, tomaremos el creyón de cera y lo pasaremos suavemente sobre el mismo contorno. Después, con un paño seco, difuminaremos el creyón cuidadosamente, procurando no manchar el resto de la pieza. Este proceso le dará un efecto ahumado a las líneas del diseño, añadiendo profundidad. Y lista nuestra primera pieza.
We continue adding details to our main piece. This time we will use the black marker to highlight the outline, both inside and outside, with great care and precision. Once this is done, we will take the wax crayon and pass it gently over the same outline. Then, with a dry cloth, we will carefully blend the crayon, taking care not to stain the rest of the piece. This process will give a smoky effect to the lines of the design, adding depth. And our first piece is ready.
 |  |  |
|---|
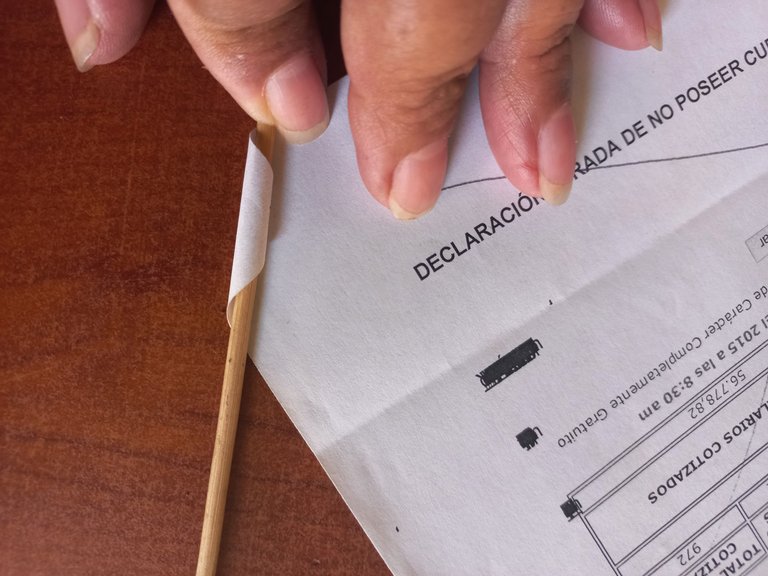
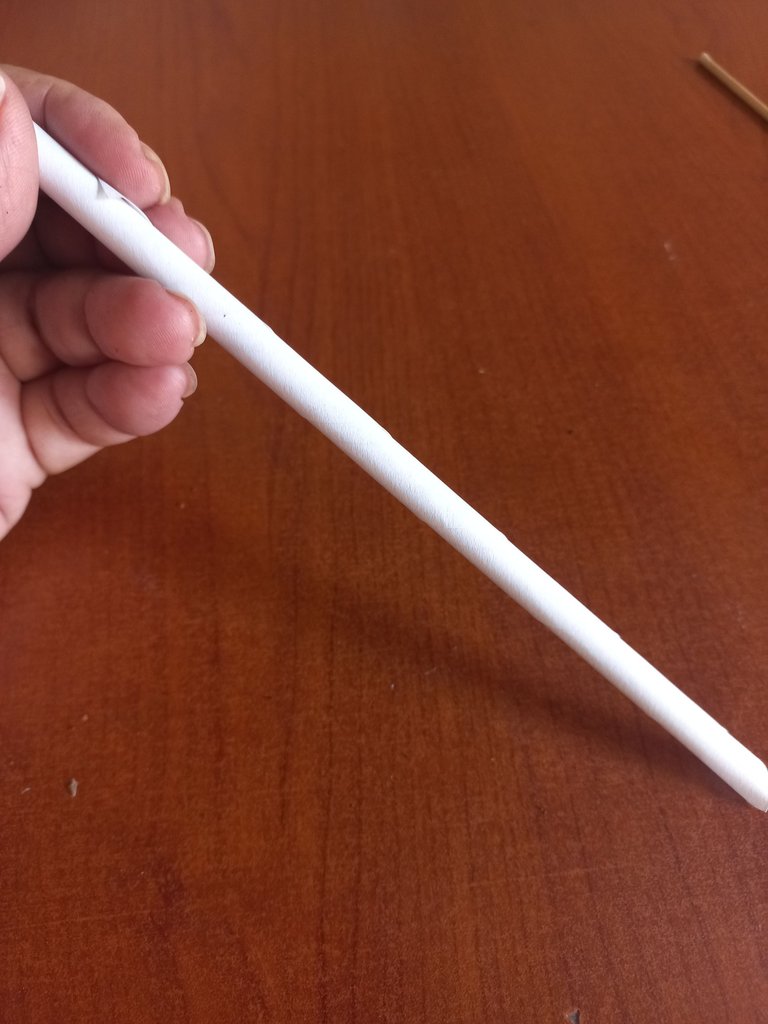
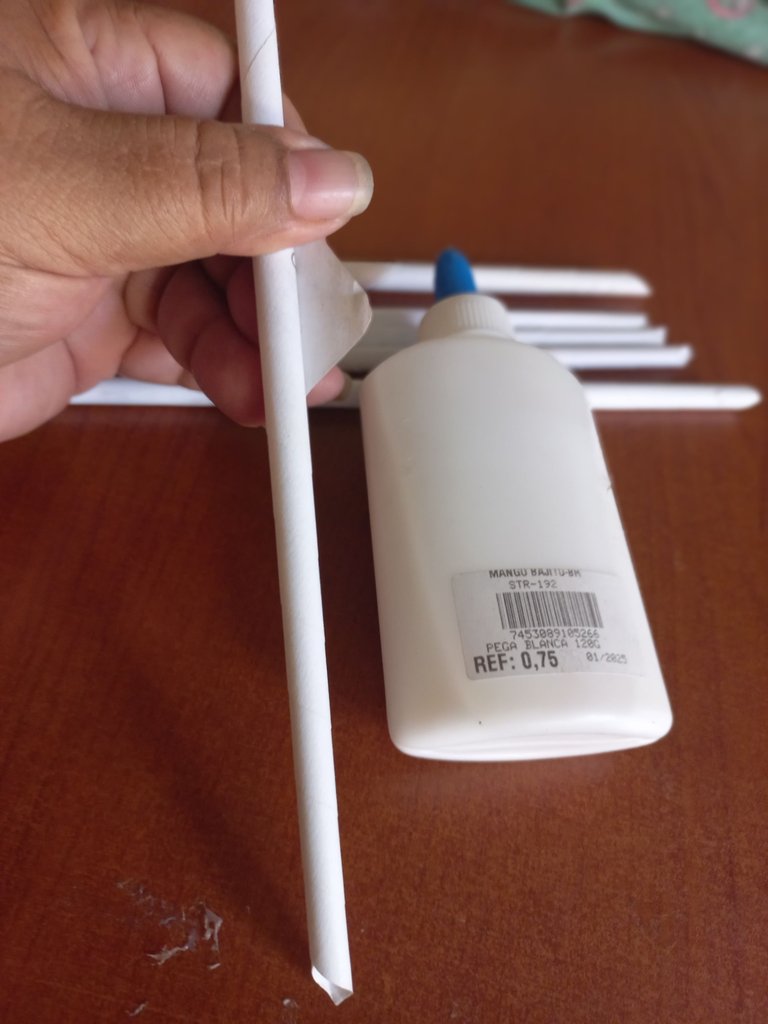
Es hora de añadir el marco que dará estructura a nuestro diseño. Para ello, tomamos una de las hojas de papel y, con la ayuda del palito de brocheta, lo posicionaremos en una de las esquinas. Luego, comenzaremos a enrollar cuidadosamente, asegurándonos de que quede bien apretado hasta formar un tubo firme. Sellamos el extremo con un toque de pegamento para mantenerlo en su lugar. Repetimos este paso hasta obtener 6 tubos en total, que serán los que formen el marco de nuestra creación. Recuerden mantener cada tubo uniforme para un buen acabado.
Now it's time to add the frame that will give structure to our design. To do this, we take one of the sheets of paper and, with the help of the skewer stick, we will position it in one of the corners. Then, we will start to roll it carefully, making sure that it is tight until it forms a firm tube. Seal the end with a dab of glue to keep it in place. We repeat this step until we have 6 tubes in total, which will form the frame of our creation. Remember to keep each tube uniform for a good finish.
 |  |  |
|---|
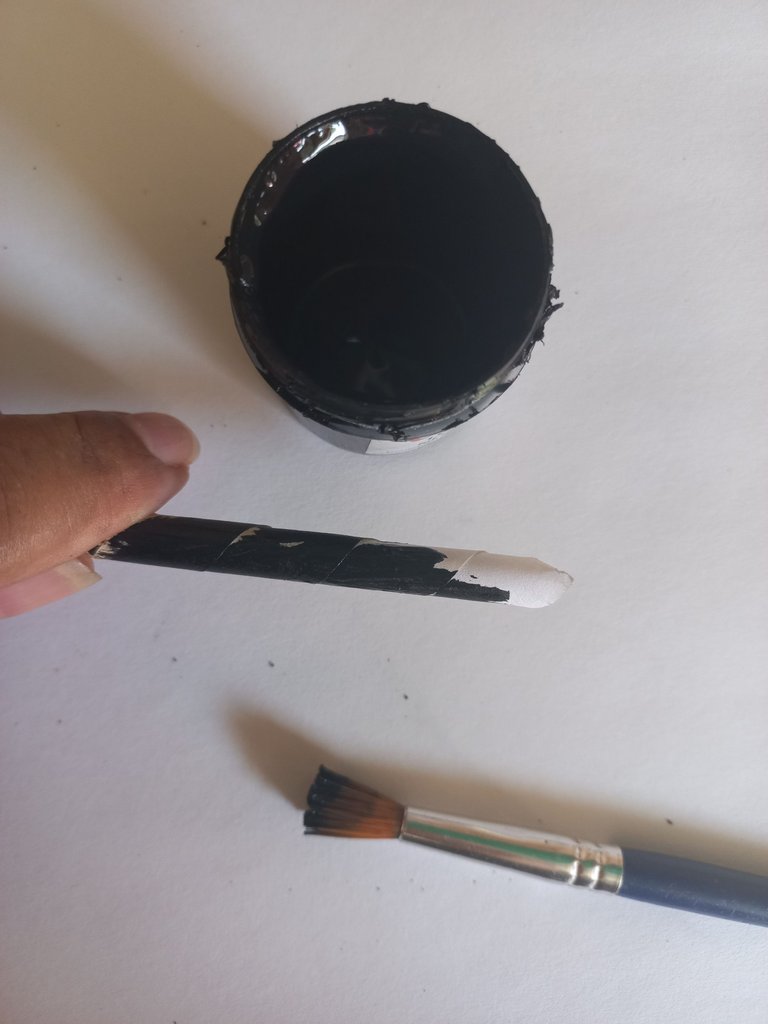
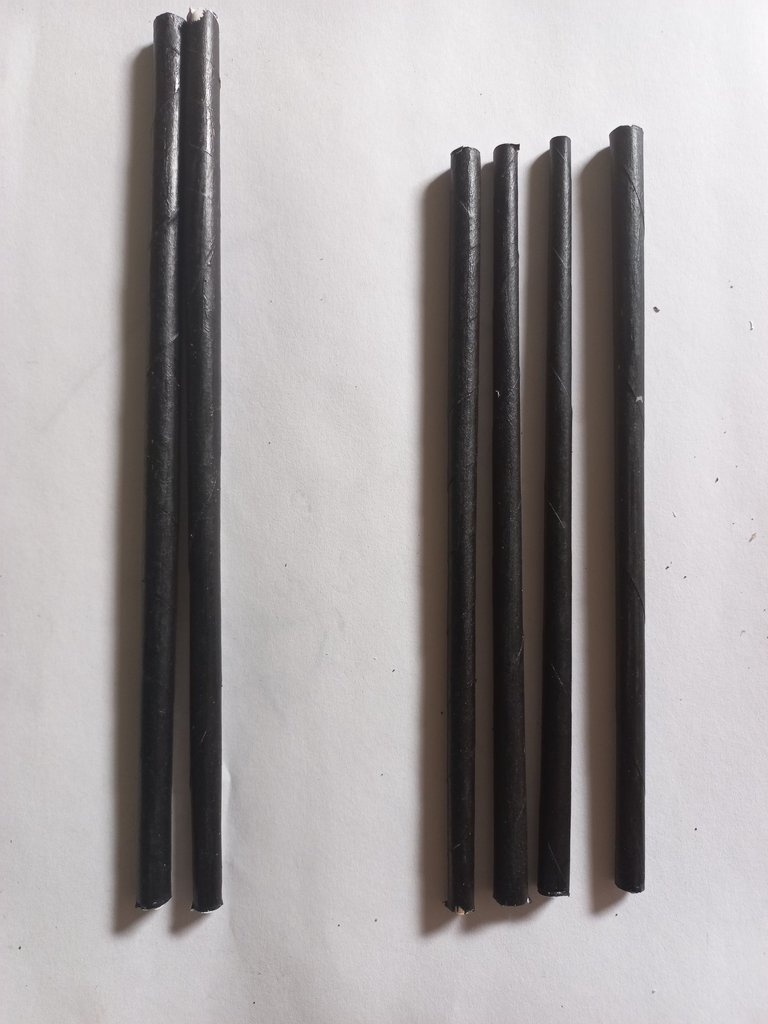
Continuamos con nuestro marco decorativo. Primero, pintamos todos los tubos en negro, asegurándonos de cubrirlos completamente. Dejaremos que se sequen por completo antes de pasar al siguiente paso.
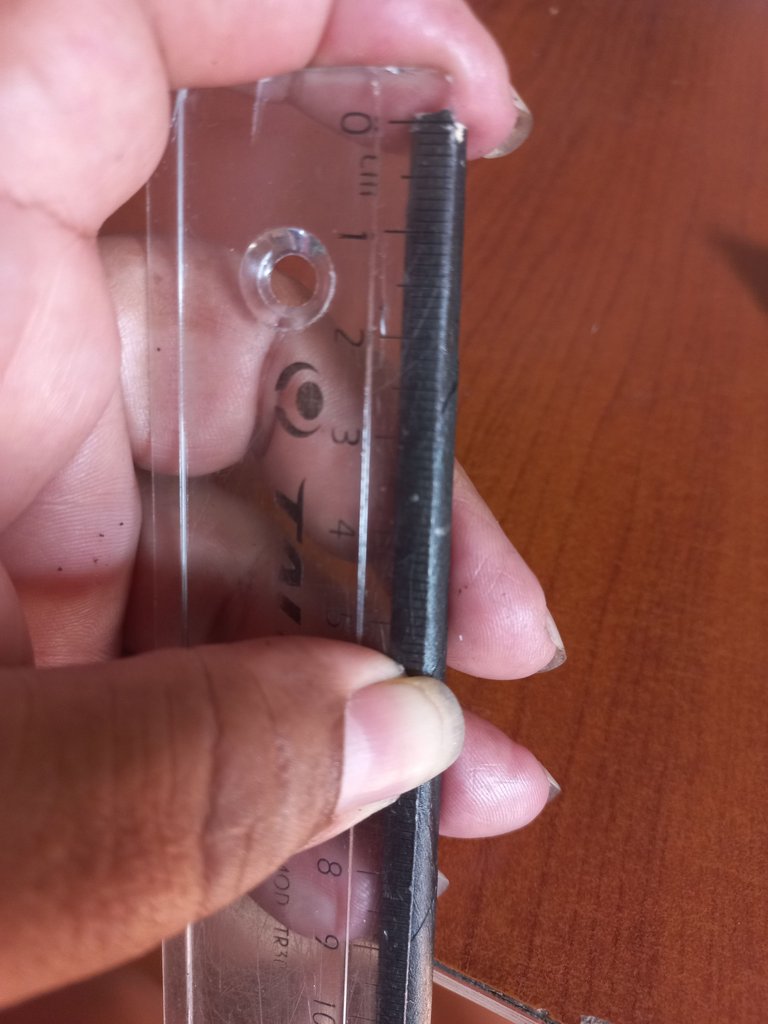
Una vez secos, cortamos los tubos de la siguiente manera: dos de ellos tendrán 22 centímetros de largo, mientras que los cuatro restantes medirán 18 centímetros de largo cada uno. Tomamos los dos tubos de 22 centímetros y marcamos 4 centímetros desde la punta hacia el centro en ambos extremos. Esta marca serán la guía para colocar los tubos horizontales del marco de manera precisa y equilibrada. ¡Este detalle será clave para que la estructura del marco quede muy bien!
Una vez secos, cortamos los tubos de la siguiente manera: dos de ellos tendrán 22 centímetros de largo, mientras que los cuatro restantes medirán 18 centímetros de largo cada uno. Tomamos los dos tubos de 22 centímetros y marcamos 4 centímetros desde la punta hacia el centro en ambos extremos. Esta marca serán la guía para colocar los tubos horizontales del marco de manera precisa y equilibrada. ¡Este detalle será clave para que la estructura del marco quede muy bien!
We continue with our decorative frame. First, we paint all the tubes black, making sure to cover them completely. We will let them dry completely before moving on to the next step.
Once dry, we cut the tubes as follows: two of them will be 22 centimeters long, while the remaining four will be 18 centimeters long each. We take the two 22-centimeter tubes and mark 4 centimeters from the tip to the center at both ends. This mark will be the guide to place the horizontal tubes of the frame in a precise and balanced way. This detail will be key to make the frame structure look great!
 |  |  |
|---|
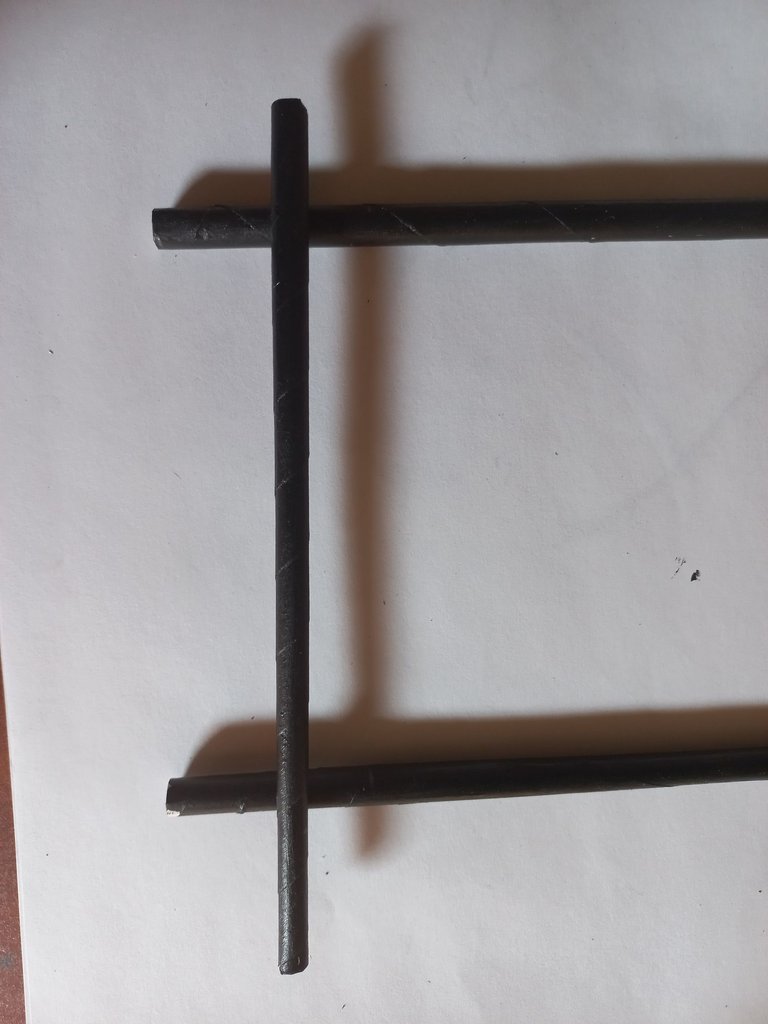
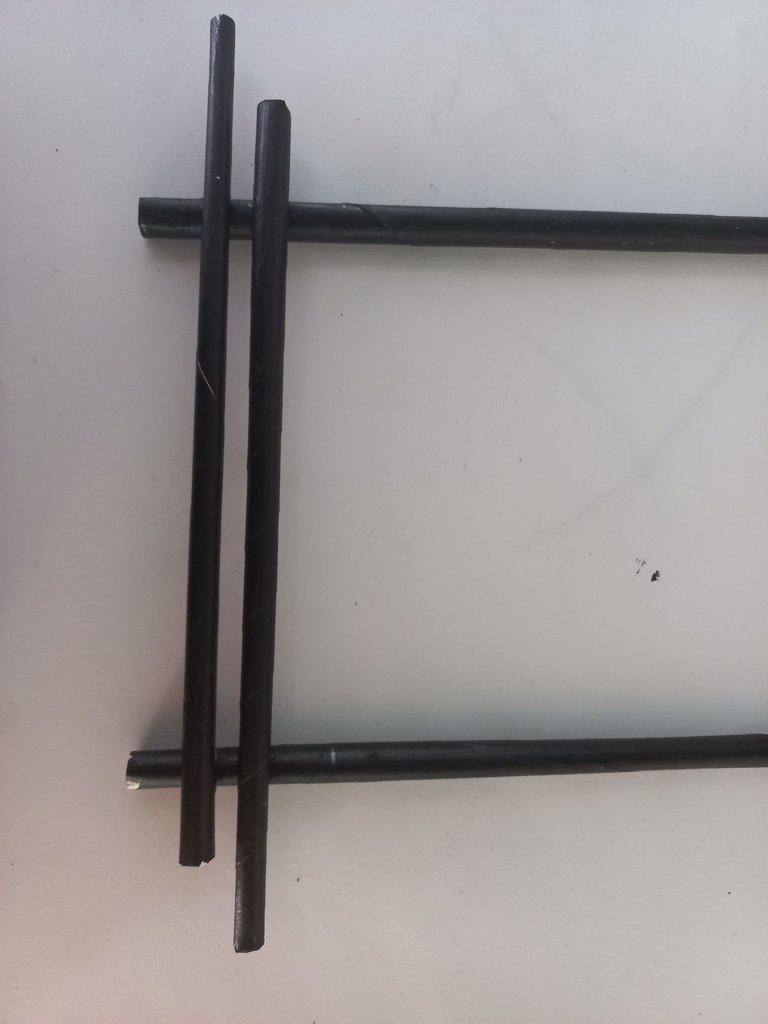
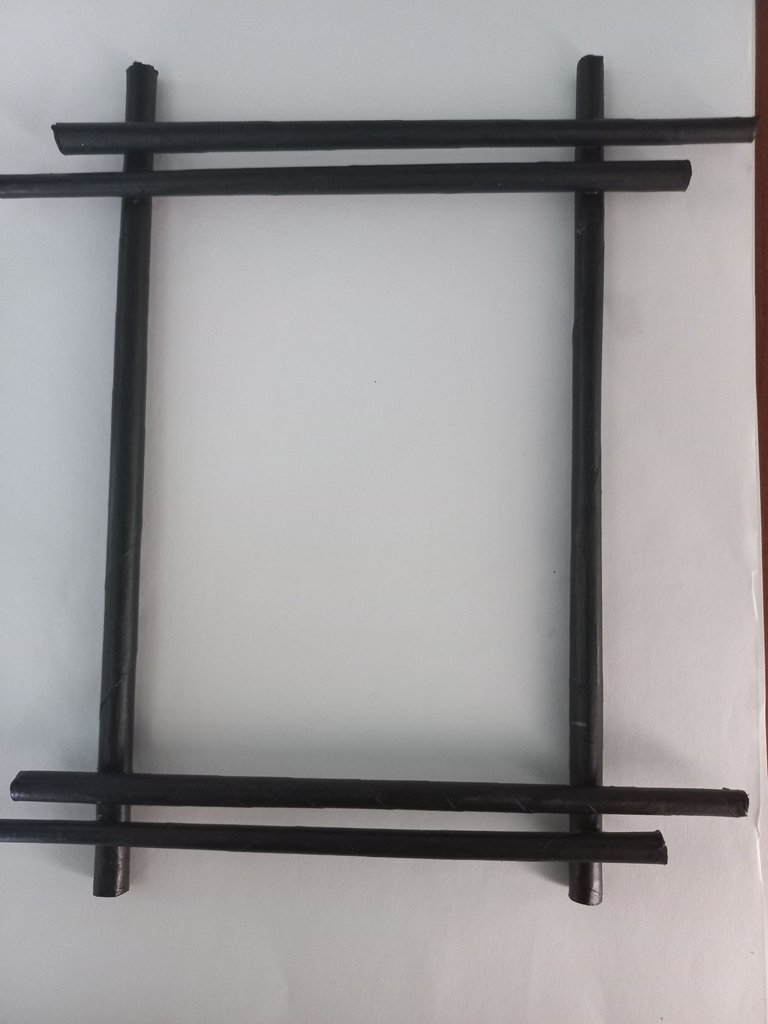
Es el momento de unir todas las piezas del marco, para ello tomamos los tubos de 22 centímetros y lo separamos a la distancia que corresponda al ancho del diseño principal (en mi caso 11,5 centímetros para que la taza encaje perfectamente entre ellos).
Para colocar los tubos horizontales, utilizaremos las marcas guía que hicimos anteriormente. Pega el primer tubo horizontal en un extremo del tubo vertical, asegurándote de que sobresalga 4 centímetros de un lado. Colocaremos el segundo tubo con una separación de 0,5 centímetros del primero, también dejando que sobresalga 4 centímetros de un lado, pero esta vez hacia el lado contrario. Repetiremos este procedimiento en el otro extremo para completar la estructura. Finalmente, revisamos si hay alguna imperfección y la corregimos con pintura para un acabado impecable.
Para colocar los tubos horizontales, utilizaremos las marcas guía que hicimos anteriormente. Pega el primer tubo horizontal en un extremo del tubo vertical, asegurándote de que sobresalga 4 centímetros de un lado. Colocaremos el segundo tubo con una separación de 0,5 centímetros del primero, también dejando que sobresalga 4 centímetros de un lado, pero esta vez hacia el lado contrario. Repetiremos este procedimiento en el otro extremo para completar la estructura. Finalmente, revisamos si hay alguna imperfección y la corregimos con pintura para un acabado impecable.
It is time to join all the pieces of the frame, for this we take the 22 centimeter tubes and separate them at the distance that corresponds to the width of the main design (in my case 11.5 centimeters so that the cup fits perfectly between them).
To place the horizontal tubes, we will use the guide marks we made earlier. Glue the first horizontal tube to one end of the vertical tube, making sure that it protrudes 4 centimeters from one side. Place the second tube 0.5 centimeters away from the first one, also leaving 4 centimeters protruding from one side, but this time to the opposite side. Repeat this procedure at the other end to complete the structure. Finally, we check for any imperfections and correct them with paint for an impeccable finish.
 |  |  |
|---|
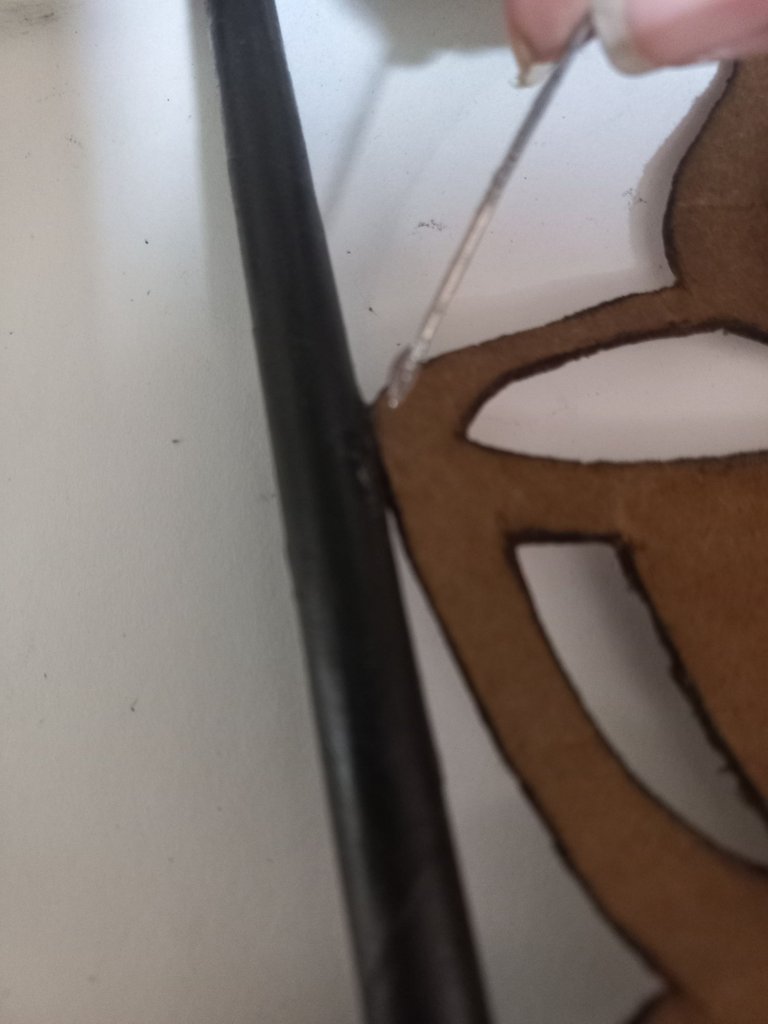
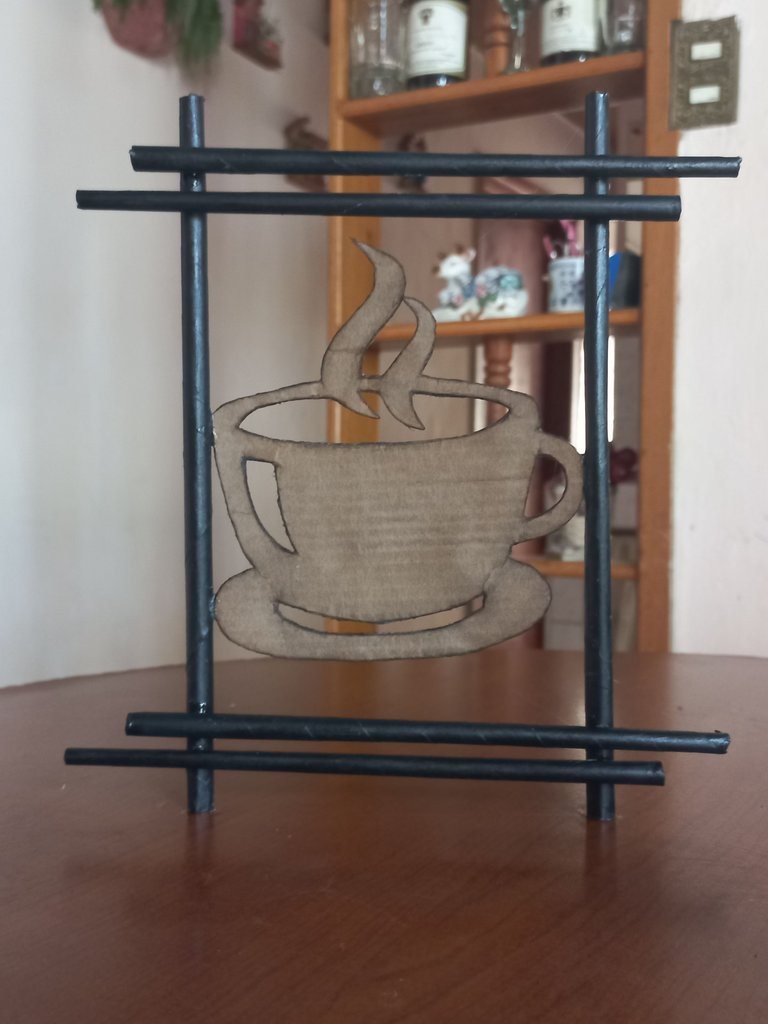
Llegamos al paso clave. Para fijar la taza al marco, aplicaremos silicón líquido con mucho cuidado. Nos ayudaremos de un objeto delgado, como un palillo o una aguja, de esta manera nos aseguramos que el silicón se aplique con precisión en las áreas que harán contacto directo con el marco. Es importante asegurarse de no excederse con el silicón. Este paso es crucial para garantizar que la taza quede perfectamente adherida al marco y a su vez quede limpio. No te apresures tómate tu tiempo aquí.
Now we come to the key step. To attach the mug to the frame, we will apply liquid silicone very carefully. We will use a thin object, such as a toothpick or a needle, to ensure that the silicone is applied precisely in the areas that will make direct contact with the frame. It is important to make sure not to overdo it with the silicone. This step is crucial to ensure that the mug is perfectly adhered to the frame and is also clean. Don't rush, take your time here.
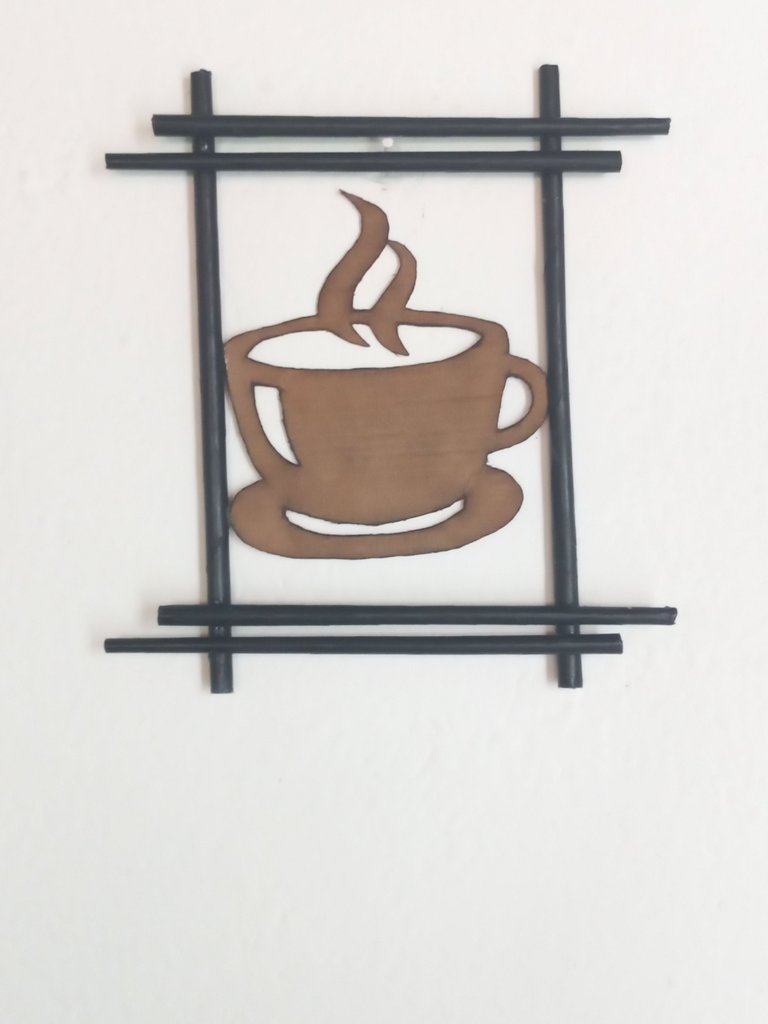
Y listo, han transformado materiales simples en una pieza decorativa. ¡Espero que disfruten viendo cómo llenan de vida y encanto ese rincón especial!
And that's it, you have transformed simple materials into a decorative piece, and I hope you enjoy watching how you fill that special corner with life and charm!
 |  |
|---|
Foto de mi autoría / Photo by me
Traducción: DeepL Translate / Translation: DeepL Translate
Traducción: DeepL Translate / Translation: DeepL Translate
Lo que buscas resaltar es cierto, la creatividad puede permitir que estás cosas sencillas se conviertan en algo genial
!discovery 25
This post was shared and voted inside the discord by the curators team of discovery-it
Join our Community and follow our Curation Trail
Discovery-it is also a Witness, vote for us here
Delegate to us for passive income. Check our 80% fee-back Program
que hermoso y facil de hacer, me gustó
Congratulations @mily0202! You have completed the following achievement on the Hive blockchain And have been rewarded with New badge(s)
Your next target is to reach 2250 upvotes.
You can view your badges on your board and compare yourself to others in the Ranking
If you no longer want to receive notifications, reply to this comment with the word
STOPQue hermosa decoracion! Despieran las ganas de tomar cafe!😍
Hermoso. Felicidades.
La verdad es que es un proyecto amoroso con el ambiente, cuando utilizas mayormente materiales reciclados, ese toque que le diste con el café fue bien original. Me gustó mucho como quedó. 🤗🤗🤗
Pero que belleza has creado!! Me encantó cada detalle, ni parece que utilizaste materiales reciclados.
Muy bonito trabajo!!