
✨☘️✨☘️✨☘️✨☘️✨☘️✨☘️✨☘️✨
Hola artesanos y comunidad DIY ! Cómo están ? Cómo pasan los primeros días de noviembre? .Un nuevo mes llega en un abrir cerrar de ojos tenemos a noviembre aquí, y como cada inicio de mes ,toca decorar nuevamente una página de ✨ mi bullet journal✨ , que es la forma en la que me organizo cada mes para planificar todas esas cositas que tengo que hacer ,cumplir o comprar ,aparte que me gusta como ejercicio creativo crear todos estos collages para decorar cada mes.
Entonces manos a la obra le dejo los pasos que hice con fotos.
Materiales
☘️Hojas blancas a la mitad
☘️Papeles decorativos
☘️ boligrafos de colores
☘️Resaltadores de colores
☘️ Marcador negro punta fina
☘️pega blanca escolar
☘️ Pintura dorada
☘️ Dibujos o stickers decorativos
** Manos a la obra **
English Version
✨☘️✨☘️✨☘️✨☘️✨☘️✨☘️✨☘️✨
Hello artisans and DIY community! How are you? How are you spending the first days of November? A new month arrives in the blink of an eye, November is here, and like every beginning of the month, it's time to decorate a page of ✨ my bullet journal✨ again, which is the way I organize myself every beginning of the month to plan all those little things that I have to do, fulfill or buy, apart from the fact that I like to create all these collages as a creative exercise to decorate each month.
So let's get to work, I'll leave you the steps I took with photos.
Materials
☘️White sheets cut into half
☘️Decorative papers
☘️Colored pens
☘️Colored highlighters
☘️Fine-tip black marker
☘️White school glue
☘️Gold paint
☘️Decorative drawings or stickers
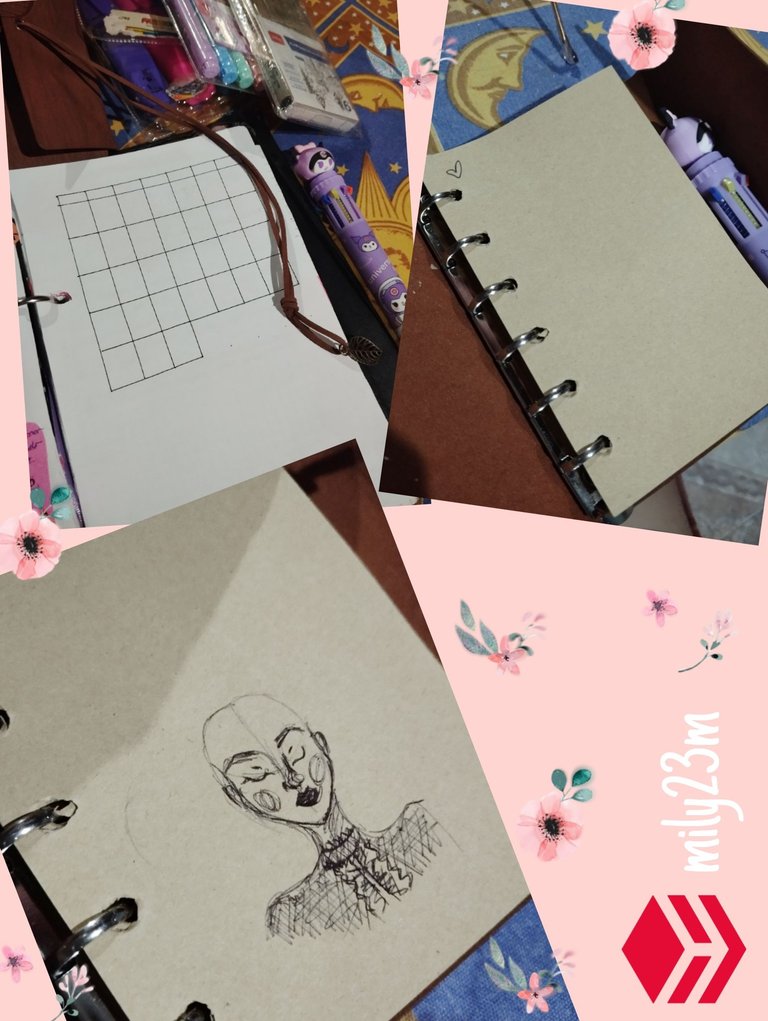
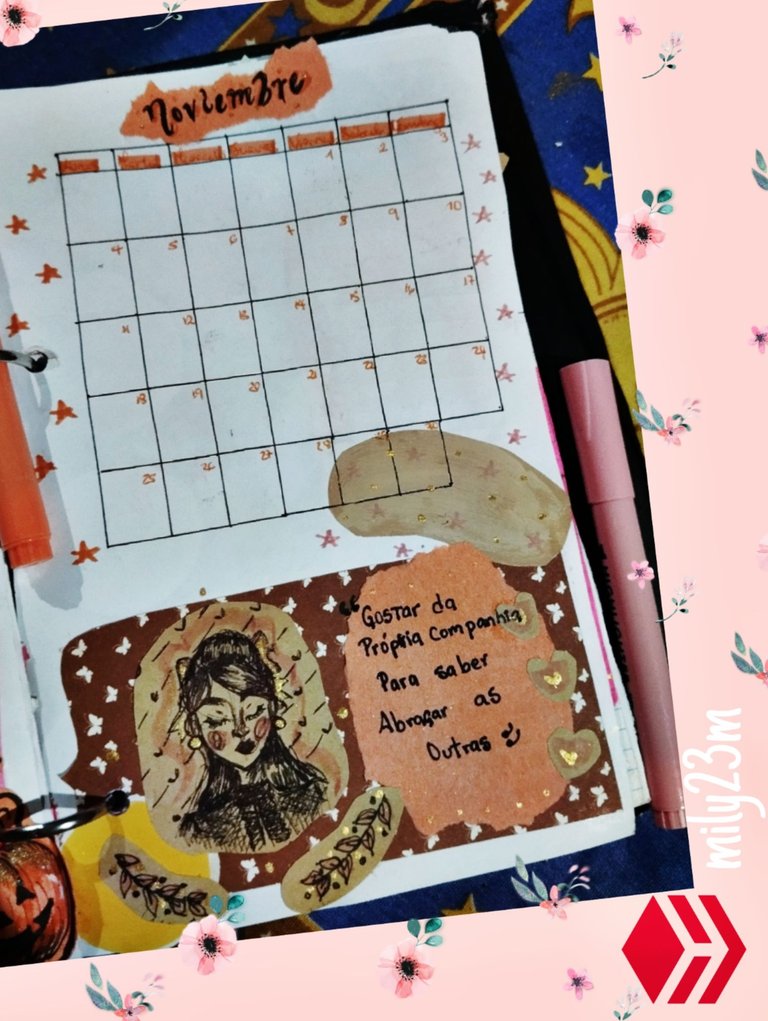
#1Empezamos con la hoja del bullet sea tu cuaderno o agenda,en mi caso es este tipo anillado que hice yo misma y quedó con hojas de tamaño de la mitad de una hoja ja ,con sus agujeros ponchados para poder meterla en el gancho y haciendo el calendario vista mensual con una casilla para cada día del mes , con 7 casillas representando cada día de la semana, las casillitas de 2 cmx 1,5cm de ancho, haciendo 5 filas para representar cada semana.tambien usé una hojita de color beige de mi otra agendita, usandola para hacer algunos dibujitos para poder decorar la página. Empecé haciendo un boceto con boligrafo negro fino para hacer una muñeca.
English Version
#1We start with the bullet sheet, be it your notebook or diary, in my case it is this ringed type that I made myself and ended up with sheets the size of half a sheet, with their holes punched to be able to put it in the hook and making the monthly view calendar with a box for each day of the month, with 7 boxes representing each day of the week, the boxes measuring 2 cm x 1.5 cm wide, making 5 rows to represent each week. I also used a beige sheet of paper from my other diary, using it to make some drawings to decorate the page. I started by making a sketch with a fine black pen to make a doll.
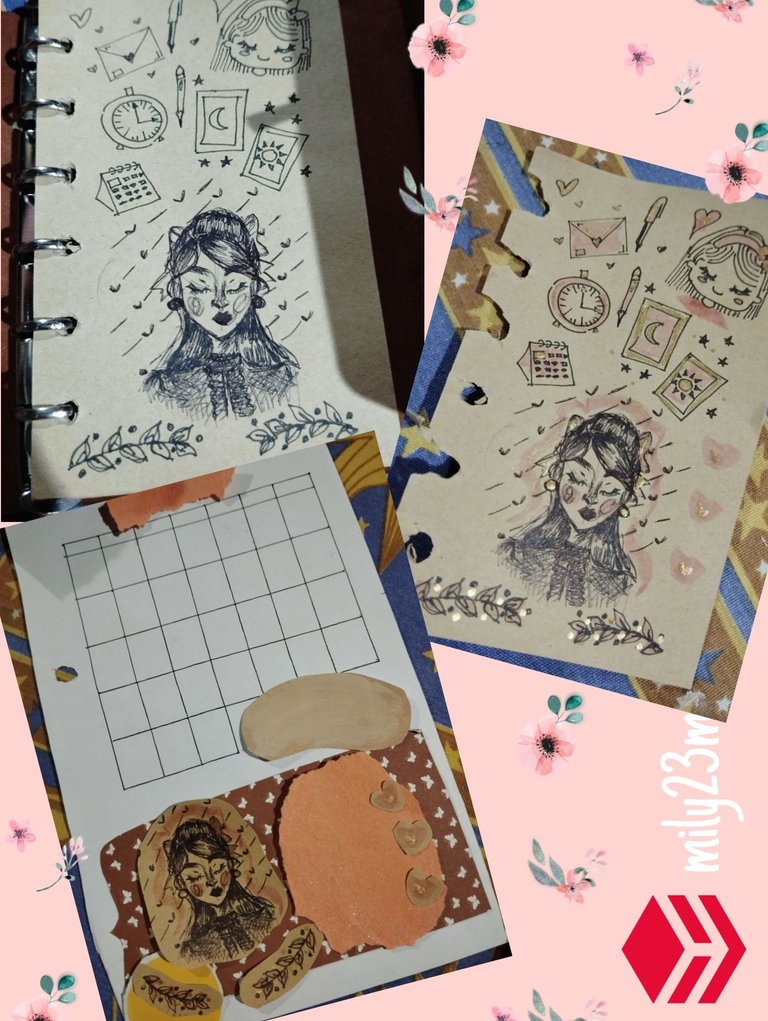
#2 Para los dibujitos que queria hacer eran una chica que se viera un poco vintage, con es aspecto amarillento de las hojas de la agenda, la hice con un look medio oscuro pero con 🎀 y con un fondo de corazoncitos, y terminé con marcador negro punta fina , también hice algunos dibujitos tipos doodles de un reloj, calendario, algunos boligrafo y lápiz , una cartita, cartas de tarot de luna y sol, una muñequita y otras cositas .Luego de tener los dibujos use un resaltador rosa pastel para darle algo de color ,y le dí algunos toques de pintura dorada para darle un toque bonito, recorté la silueta de cada figura, y en conjunto con los papeles decorativos y algunos retazos de papeles de colores ,con algunos stickers que habia hecho empece en decorar el collage que haria , este mes dado que es noviembre quise unas vibras de otoño (aunque aqui en Venezuela solo vemos verano 🫢) , entonces usé colores parecido como el marrón en varias tonalidades , beige ,naranja y un toque de amarillo,organice los recorte en la cartulina de fondo para tener una referencia de como quedaría.
English Version
#2 For the drawings I wanted to make were a girl who looked a little vintage, with the yellowish look of the pages of the agenda, I made it with a medium dark look but with 🎀 and with a background of little hearts, and finished with a fine-tipped black marker, I also made some doodle-type drawings of a clock, calendar, some pen and pencil, a little card, tarot cards of the moon and sun, a little doll and other things. After having the drawings I used a pastel pink highlighter to give it some color, and I gave it some touches of gold paint to give it a nice touch, I cut out the silhouette of each figure, and together with the decorative papers and some scraps of colored paper, with some stickers that I had made I started to decorate the collage that I would make, this month since it is November I wanted some fall vibes (although here in Venezuela we only see summer 🫢), so I used similar colors like brown in various shades, beige, orange and a touch of yellow, I arranged the cutouts on the background cardboard to have a reference of how it would look.
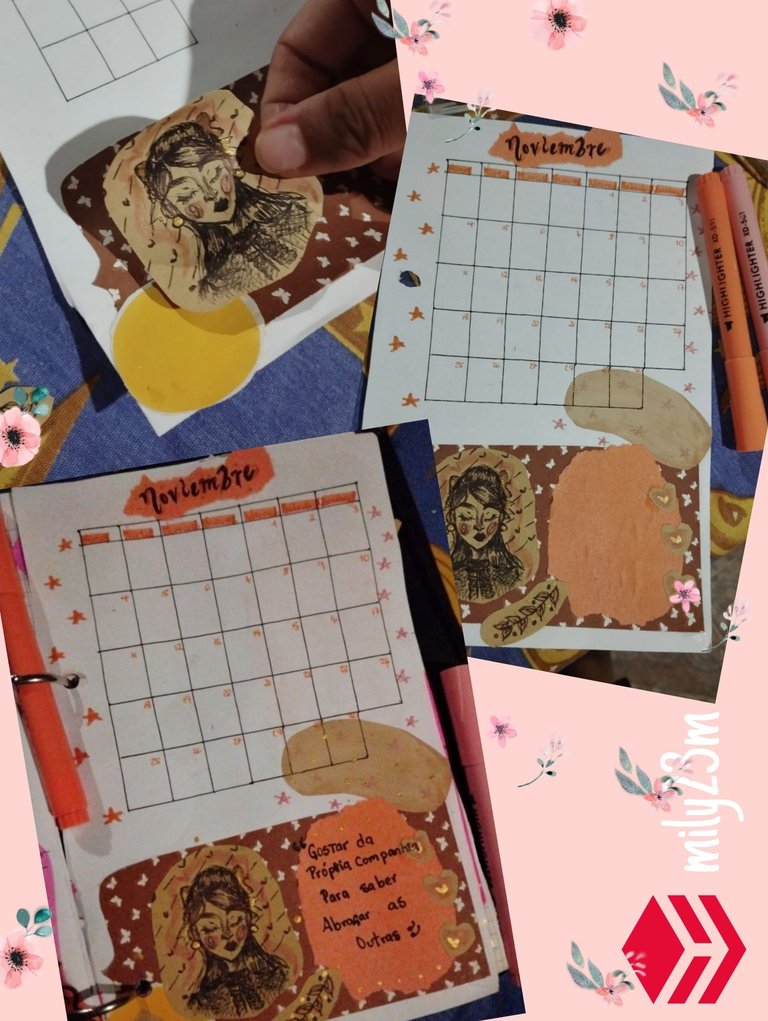
#3 Luego pegué los recortes con pega blanca escolar, en el recorté naranja puse el título del mes en marcador negro punta fina, termine de agregar unas casillas mas para terminar los días que faltaban y quedaron intercalado con uno de los recortes beige, para completar los dias los puse en boligrafo naranja al igual que los días de la semana,decore los márgenes de la pagina con resaltadores naranja y rosado pastel, en el espacio naranja 🧡 puse la frase del mes ,que como los últimos meses la vengo haciendo en portugués, y es una frase para darme animos y motivar me durante el mes , "Gostar da própria companiha para Abraçar as outras ", que significa saber que te guste tu propia compañía para abrazar las otras, que se remonta un poco a saber estar en paz con nosotros mismos y disfrutar de nuestra propia compañía antes que la de los demás,algo que a veces no nos damos cuenta es que terminamos conociendo más de los demás que de nosotros mismos.
English Version
#3 Then I glued the clippings with white school glue, on the orange clipping I put the title of the month in fine-tip black marker, I finished adding a few more boxes to finish the missing days and they were interspersed with one of the beige clippings, to complete the days I put them in orange pen like the days of the week, I decorated the margins of the page with orange and pastel pink highlighters, in the orange space 🧡 I put the phrase of the month, which like the last few months I have been doing in Portuguese, and it is a phrase to encourage and motivate me during the month, "Gostar da própria companiha para Abraçar as outras", which means knowing that you like your own company to embrace others, which goes back a bit to knowing how to be at peace with ourselves and enjoy our own company before that of others, something that sometimes we do not realize is that we end up knowing more about others than ourselves.
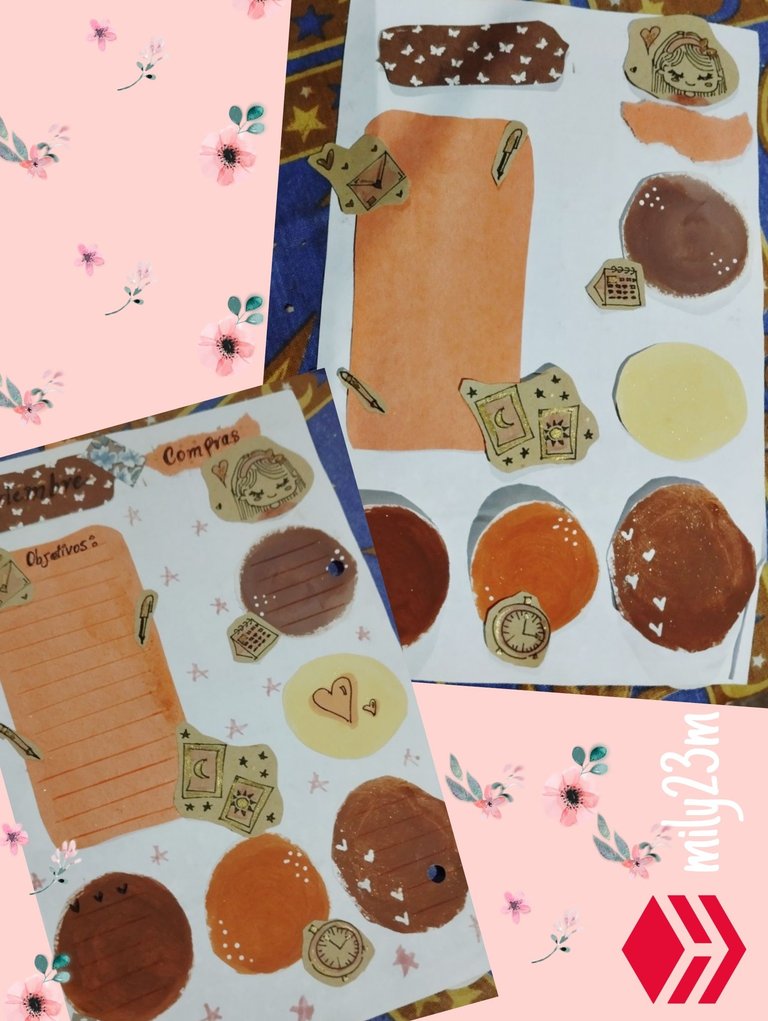
#4 Por último para decorar la parte de atrás de la hoja ,le puse varias secciones para decorar , corté un rectángulo para agregar unas líneas y poner los objetivos o cosas que hacer por el mes, también agregué los stickers de pintura en varias tonalidades de marrón , amarillo y naranja . Corté algunos pedazos de papeles decorativos para agregar los títulos de las secciones , para terminar de decorar agregué los últimos dibujos que había recortado , poniéndolo de formas estrategicas para llenar el espacio y decorar el espacio de los stickers ,para que la hoja no se viera tan vacia también agregue unas estrellitas con resaltador a modo de fondo , terminé de agregar los títulos con marcador negro y algunas lineas en los apartados y listo ! Ya quedaría así el diseño , me gustó la combinación de colores , a mi me gritan a algo vintage en conjunto con la muñeca y las florecitas, espero que les gustara el diseño 💜☺️✨ muchas gracias por leer mi post.
✨Fotos tomadas por mí en mi equipo Redmi note 12 editadas en Pics art y gif realizado en app creador de GIFs texto traducido en Google traductor.✨
English Version
#4 Finally to decorate the back of the sheet, I put several sections to decorate, I cut a rectangle to add some lines and put the goals or things to do for the month, I also added the paint stickers in various shades of brown, yellow and orange. I cut some pieces of decorative papers to add the titles of the sections, to finish decorating I added the last drawings that I had cut out, putting them in strategic ways to fill the space and decorate the space of the stickers, so that the sheet did not look so empty I also added some stars with a highlighter as a background, I finished adding the titles with a black marker and some lines in the sections and that's it! The design would look like this, I liked the color combination, they scream to me something vintage together with the doll and the flowers, I hope you liked the design 💜☺️✨ thank you very much for reading my post.
✨Photos taken by me on my Redmi note 12 device edited in Pics art and gif made in GIF creator app text translated in Google translator.✨
Qué hermoso y creativo @mily23m realmente es inspirador
Muchas gracias @yennysferm71 y hivediy por todo el apoyo 💜☺️✨
Me encanta esto!!! Me han pedido mucho retome el Scrapbook y journal pero esto es cosa de inspirarse y estar con la mente muy quieta y organizada, me traíste lindos recuerdos respecto a esto, me gusta mucho tu estilo
Muchas gracias por la lindas palabras @equipodelta oye deberías retomar tus proyectos de scrapbook tan lindos que hacias ✨ uno pasa por muchos bloqueos creativos pero luego se toma un tiempito para hacerlo y se distrae y relaja tanto 💜☺️
The decoration on your journal looks great. Writing in such a beautiful journal would be such a delight. Great work.
*Thank you so much for your support @diyhub ☺️💜✨ , having a journal has kept me motivated
Congratulations @mily23m! You have completed the following achievement on the Hive blockchain And have been rewarded with New badge(s)
Your next target is to reach 10000 upvotes.
You can view your badges on your board and compare yourself to others in the Ranking
If you no longer want to receive notifications, reply to this comment with the word
STOPCheck out our last posts: