
✨🌸✨🌸✨🌸✨🌸✨🌸✨🌸✨🌸✨🌸✨🌸
Hola amigos artesanos y amantes de las manualidades ,💖 como están ? ,cómo pasan estos días ? . Hoy les comparto una nueva manualidad ideal para innovar las formas en las que hacen sus Toppers de foami para adornar la torta de cumpleaños o el pastel (como se diga en tu país) , y es que me tocaba hacer este Topper de cumpleaños para seguir con la temática de decoración que estoy haciendo , de Rosas fucsias ,y no quería hacer un Topper que se viera como el típico con el palito de altura en el medio ,y las letras de feliz cumpleaños, y para hacer muchos detalles en un espacio tan pequeño , usualmente los mejores resultados se consiguen con un plotter que yo la verdad no tengo ,
Pero buscando otras ideas para soporte 💡 se me prendió la luz de la imaginación ,y se me vino a la mente un arco tipo como enrredadera con rosas subiendo tipo rosal ,pero no se me ocurria como hacer esa forma sin alambre dulce sino con las cosas que ya tenía , hasta que ví una barrita de silicón transparente y fue el material idea para esta manualidad, aquí les dejo el paso a paso con fotos de como hice esta decoración para un cumpleaños.

🌸 Foami escarchado blanco ,rosado, fucsia ,verde, dorado
🌸 Foami negro
🌸Barras de silicona transparente y pistola.
🌸Papel
🌸Palitos de altura
🌸Perlas decorativos
🌸Pintura dorada
🌸Tijeras
Manos a la obra
English Version
Hello friends, artisans and craft lovers, how are you? How are you spending these days? Today I share with you a new craft ideal to innovate the ways in which you make your foam Toppers to decorate the birthday cake or the cake (as it is said in your country), and it is that I had to make this birthday Topper to continue with the decoration theme that I am doing, of fuchsia roses, and I did not want to make a Topper that looked like the typical one with the tall stick in the middle, and the letters of happy birthday, and to make many details in such a small space, usually the best results are achieved with a plotter that I really do not have,
But looking for other ideas for support 💡 the light of my imagination came on, and an arch like a vine with roses climbing like a rose bush came to mind, but I could not think of how to make that shape without sweet wire but with the things that I already had, until I saw a transparent silicone bar and it was the ideal material for this craft, here I leave you the step by step with photos of how I made this decoration for a birthday.

🌸 Frosted foam in white, pink, fuchsia, green, and gold
🌸 Black foam
🌸 Transparent silicone bars and gun.
🌸 Paper
🌸 Tall sticks
🌸 Decorative pearls
🌸 Gold paint
🌸 Scissors
Let's get to work

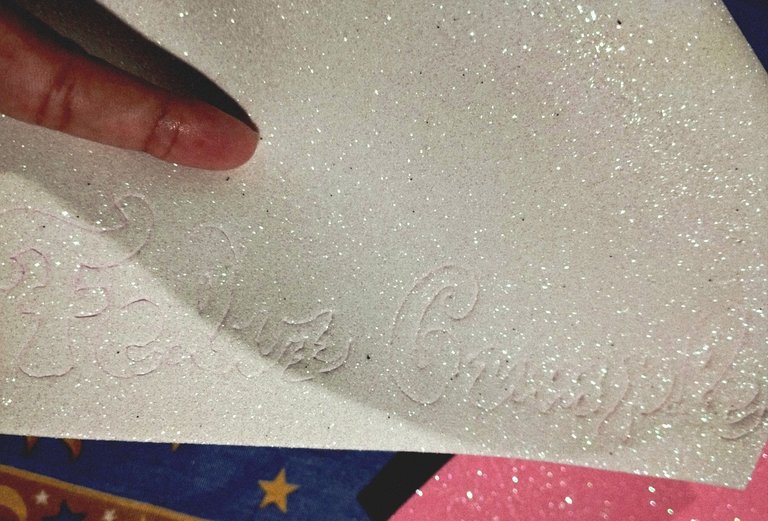 | 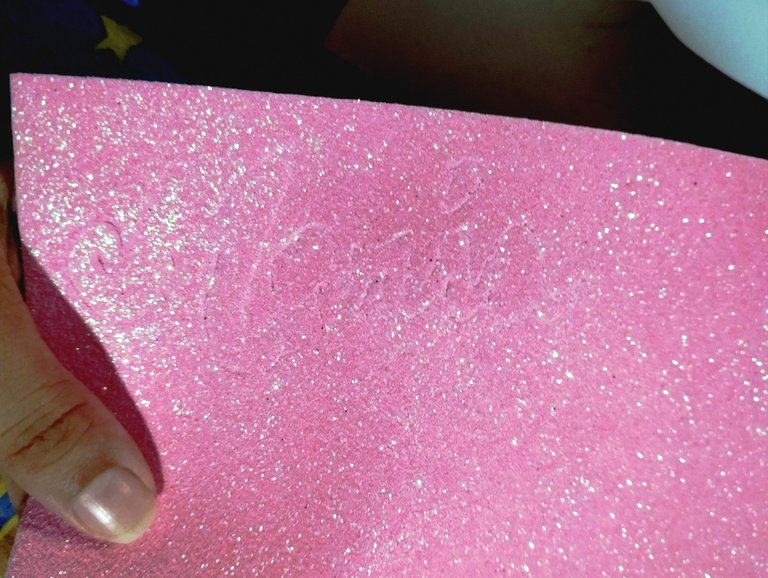 |  |
#1 Para iniciar empecé haciendo mis letras de feliz cumpleaños en el foami escarchado , con un boligrafo marqué el felíz cumpleaños en el blanco ,y el nombre de la persona en el rosado, sí abren las fotos se puede ver un poco mejor lo marcado, trato de no marcarlo con bolígrafo negro ni marcador para no manchar el contorno de las letras, si no con un boligrafo que ya no tenga tinta para hacer solo la presión, luego procedí a cortar cada palabra.
English Version
#1 To start, I began by making my happy birthday letters on the frosted foam, with a pen I marked happy birthday in white, and the person's name in pink, if you open the photos you can see what was marked a little better, I try not to mark it with a black pen or marker so as not to stain the outline of the letters, but with a pen that no longer has ink to make just the pressure, then I proceeded to cut out each word.
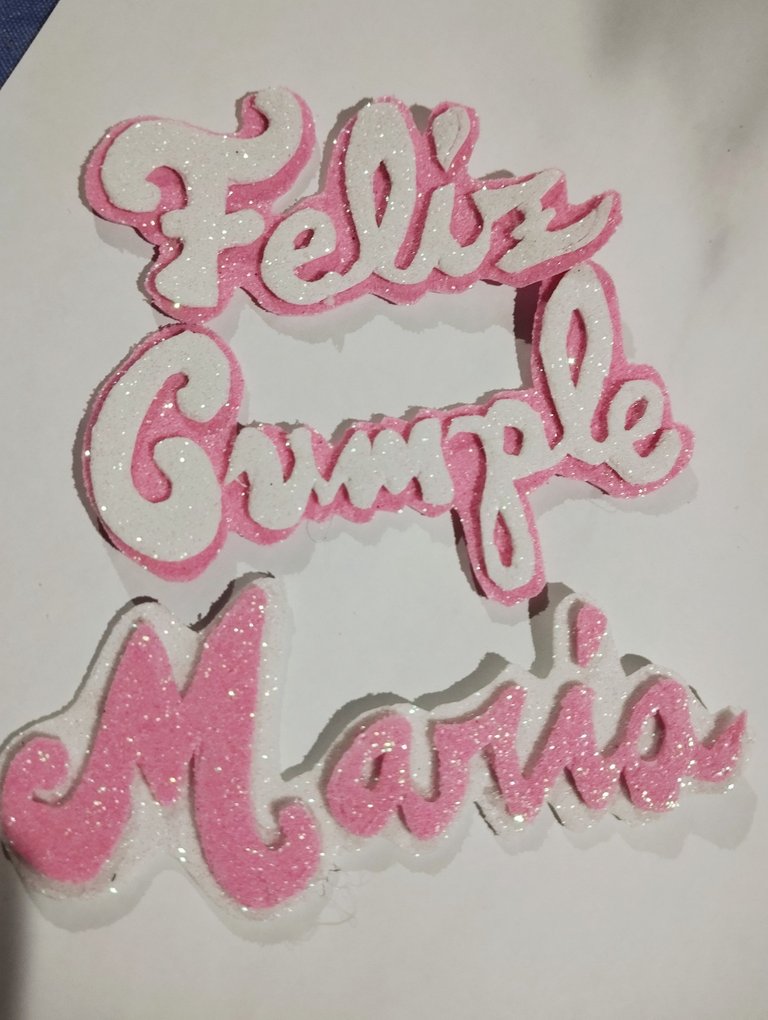 | 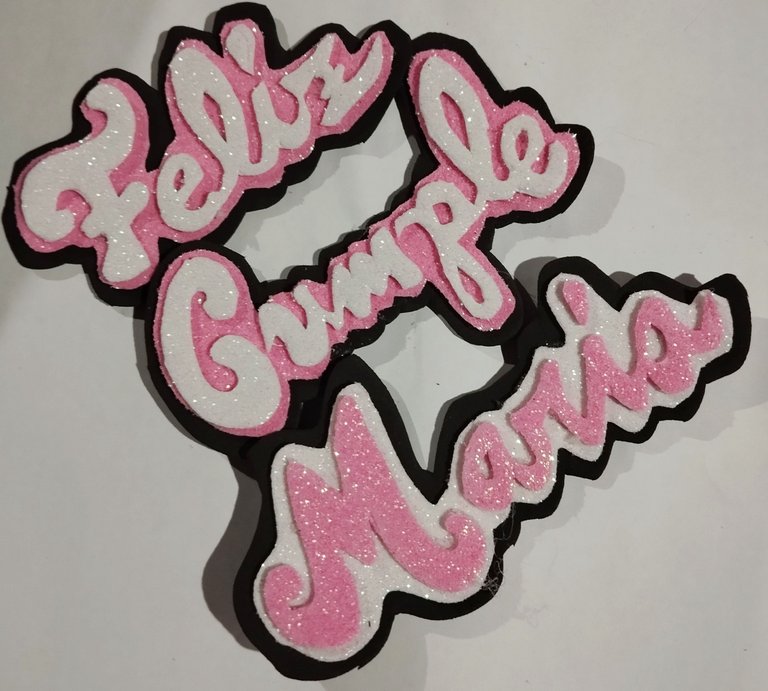 |
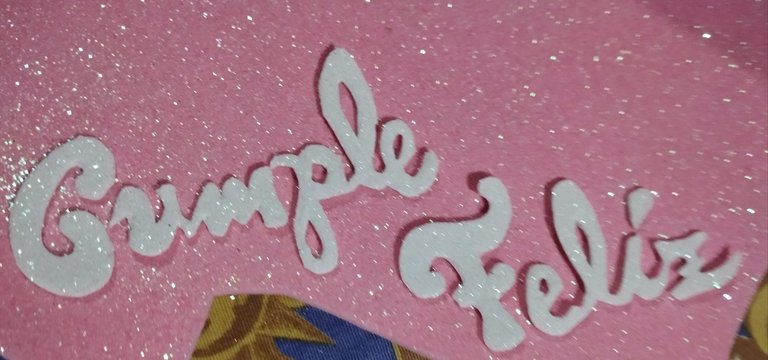
#2 Ya recortado las palabras ,el Feliz cumpleaños lo pegué en un foami rosado escarchado para que fuera el fondo y luego recorté dejando un poquito de contorno, de igual forma al nombre María
lo pegué en un fondo de foami blanco escarchado y recorté dejando un poquito de contorno también, ya luego de tener estás palabras con doble contorno pegué a un foami negro mucho más grueso para darle estabilidad a las palabras y también le dejé un pequeño contorno alrrededor para que resaltaran mucho más.
English Version
**#2 Once I had cut out the words, I glued Happy Birthday onto a pink frosted foam to be the background and then cut it out leaving a little bit of an outline. Likewise, with the name Maria, I glued it onto a white frosted foam background and cut it out leaving a little bit of an outline as well. After having these words with a double outline, I glued them onto a much thicker black foam to give the words stability and I also left a small outline around them so they would stand out more. **
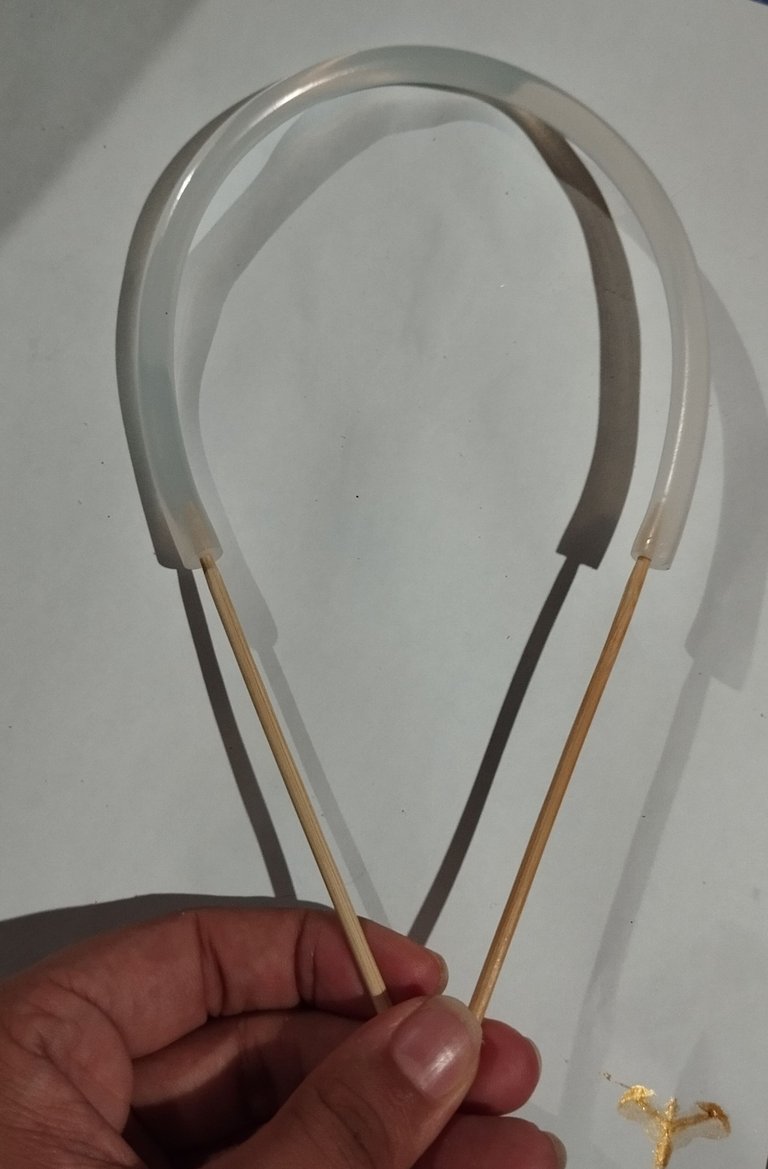 | 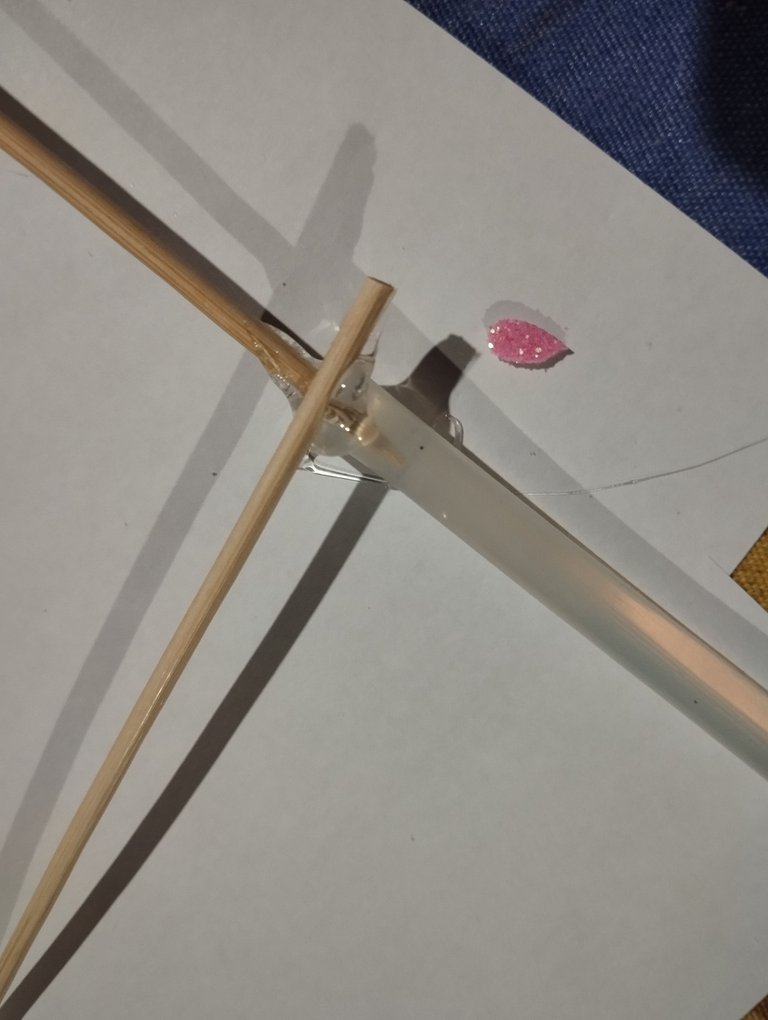 | 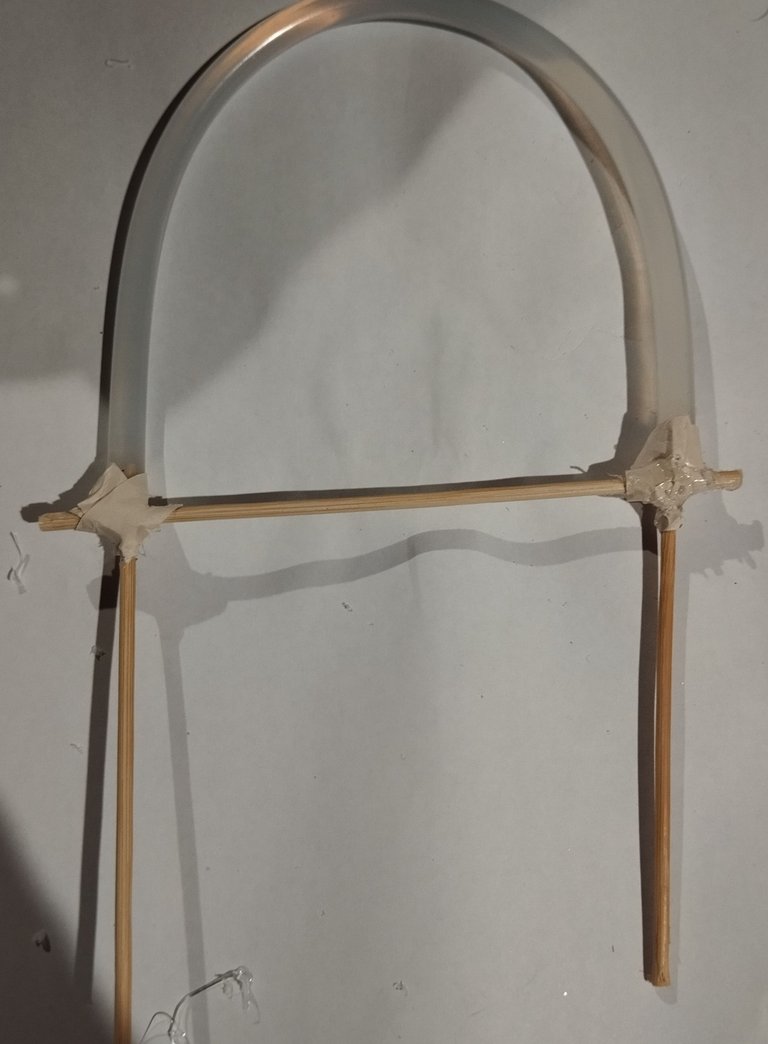 |
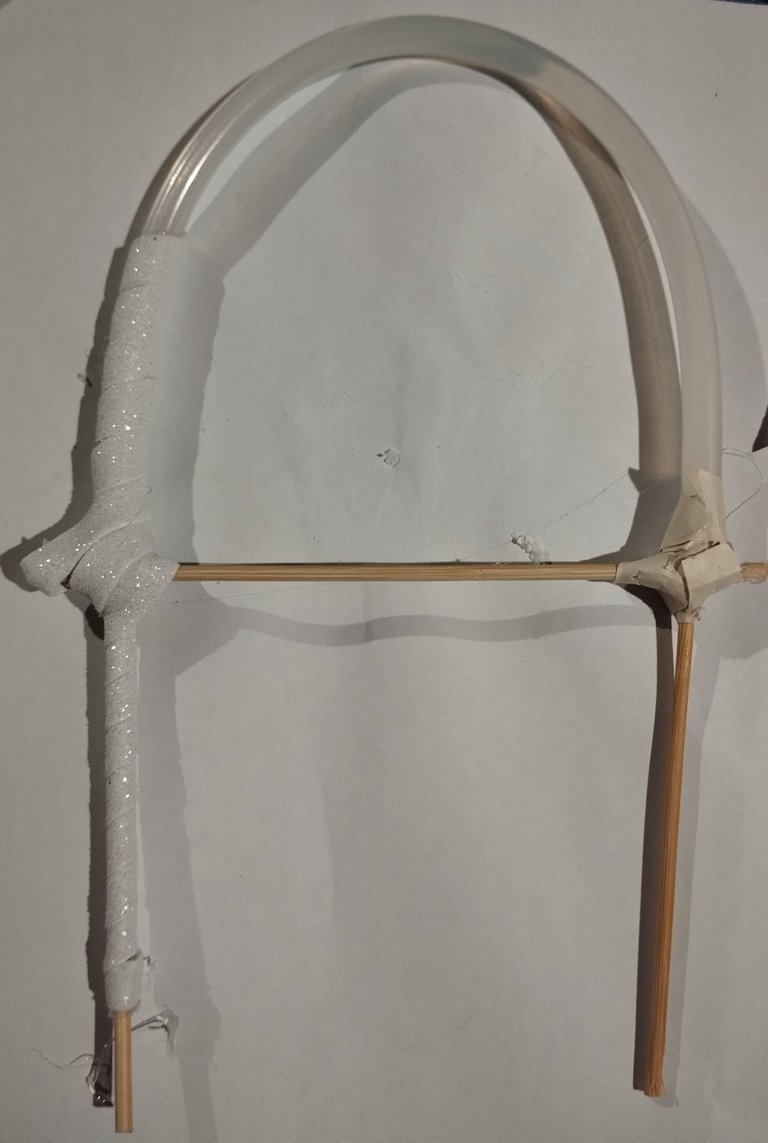
#3 Para poder hacer esta especie de arco ,como sí fuera una reja o enredadera con rosas necesitaba hacer una estructura en forma de U invertida, y sin alambre dulce lo que tenía a la mano era las mismas barras de silicon, así que tome una e hice la forma , corté unos pedacitos de un palito de altura y probé clavando este con la parte afilada a un extremo de la barra de silicón, introduciendo bien para que quedara fijo, luego recorté otro pedacito de palito de altura del mismo tamaño que el anterior e hice lo mismo ,lo introduje con fuerza enrroscando la parte afilada hasta que esté estuviera bien unido al otro extremo de la barra de silicón, quedara como una tira larga , para mantener la forma de arco , con otro pedazo de palito de altura lo puse horizontalmente atravesando la figura y quedando sus extremos al mismo nivel que las uniones de los palitos de madera de los lados con el silicón, y corté el excedente de palito de altura que sobresalía ,como se ve en la foto, aquí con una pistola de silicón caliente apliqué suficiente silicón para fijar está unión y lo sostuve un rato mientras se secaba, luego pase a fijar el otro lado con más silicón caliente. Para evitar que se desarmarse la estructura ,corté tiras largas de papel reciclado ,y con más silicón pegué en las uniones tratando de sellar estás uniones y que quede mucho más fija la estructura .
English Version
**#3 In order to make this kind of arch, as if it were a fence or a climbing plant with roses, I needed to make an inverted U-shaped structure, and without sweet wire what I had on hand were the same silicone bars, so I took one and made the shape, I cut some pieces of a tall stick and tried nailing this one with the sharp part to one end of the silicone bar, inserting it well so that it would be fixed, then I cut another piece of tall stick the same size as the previous one and did the same, I inserted it tightly twisting the sharp part until it was well attached to the other end of the silicone bar, it would be like a long strip, to maintain the arch shape, with another piece of tall stick I put it horizontally across the figure and leaving its ends at the same level as the joints of the wooden sticks on the sides with the silicone, and I cut off the excess of tall stick that was sticking out, as seen in In the photo, here I applied enough silicone to fix this joint with a hot glue gun and held it for a while while it dried, then I moved on to fix the other side with more hot silicone. To prevent the structure from falling apart, I cut long strips of recycled paper, and with more silicone I glued them to the joints trying to seal these joints and make the structure much more secure. **

 | 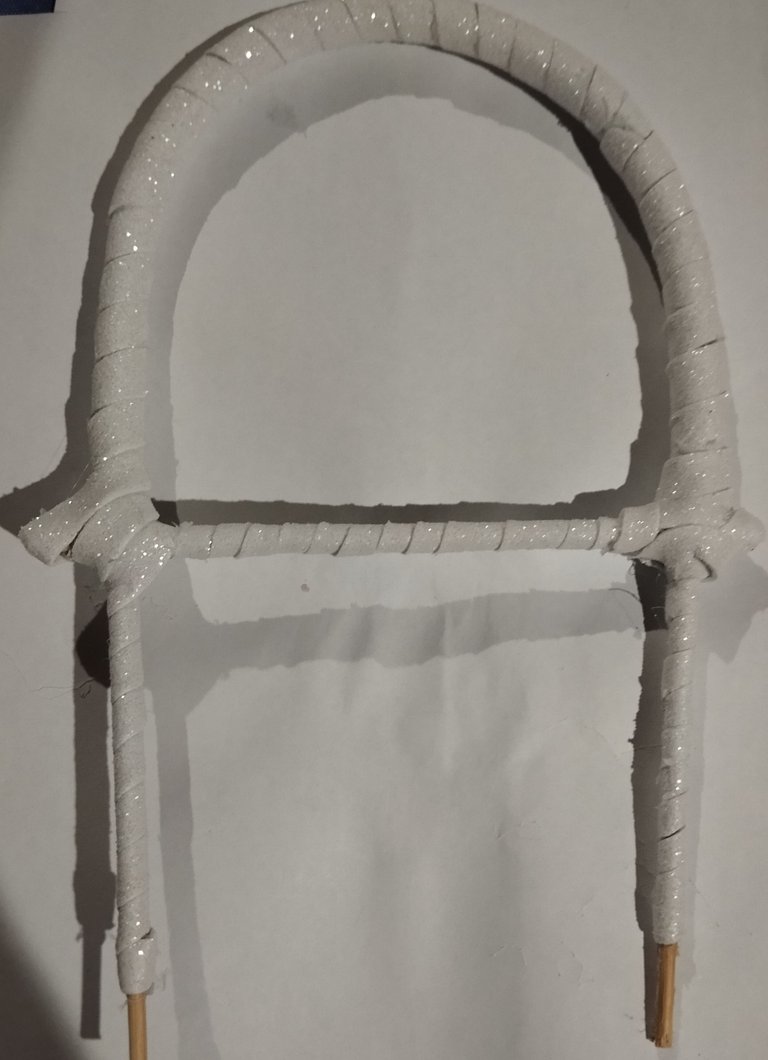 | 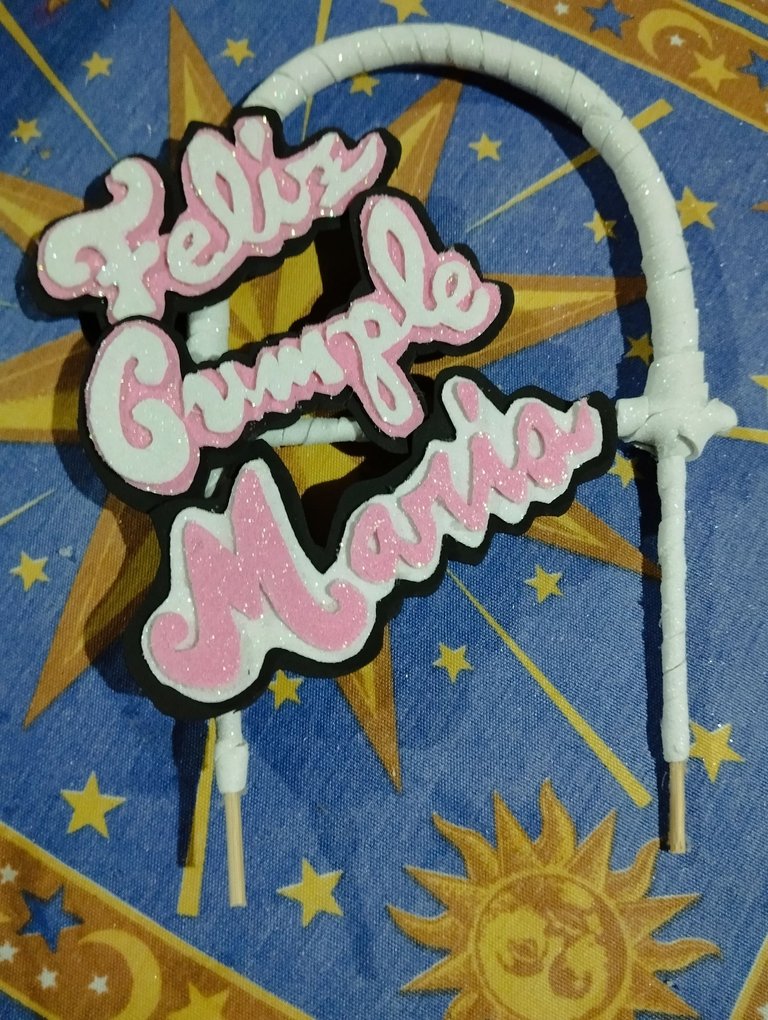 |
#4 Ya con la estructura del arco hecha, corté una tira larga de foami blanco escarchado ,y forre dando vueltas todo el arco, forrando también el palito que lo atraviesa ,luego ubiqué como quería pegar las palabras, y para que quedara mejor el diseño las puse de manera diagonal y aprovechando el palito del medio para que se aguantaran la palabra cumpleaños y María.
English Version
#4 With the arch structure already done, I cut a long strip of frosted white foam, and I covered the entire arch in circles, also covering the stick that runs through it,Then I located how I wanted to stick the words, and so that the design would look better I put them diagonally and used the stick in the middle to hold the word birthday and Maria.
 |  |  |
 |  |  |
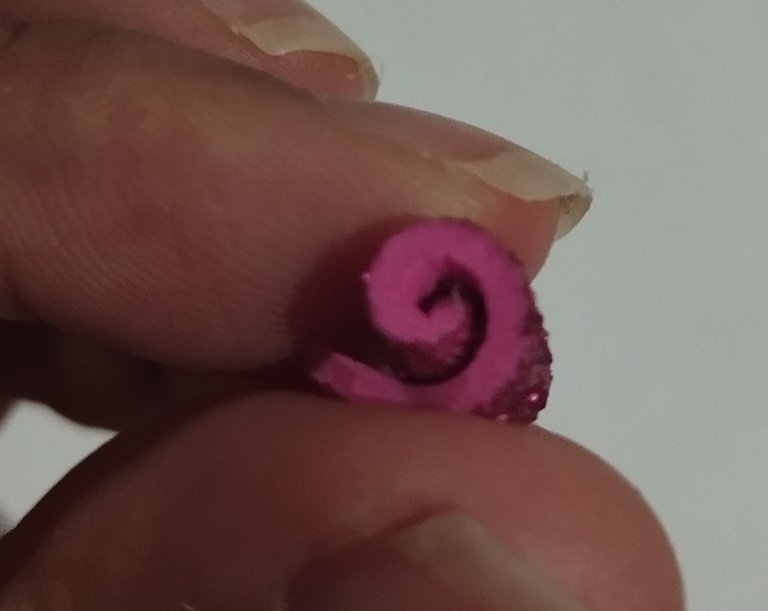 | 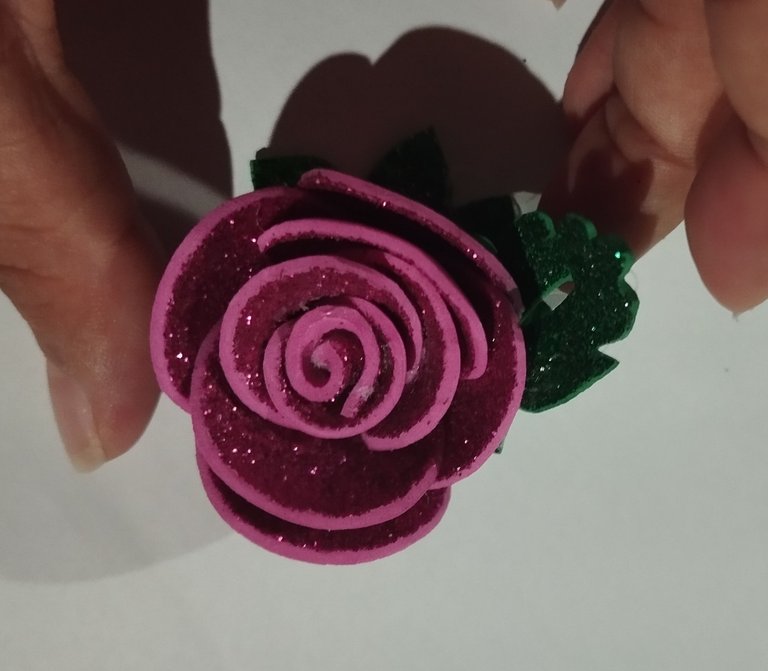 |
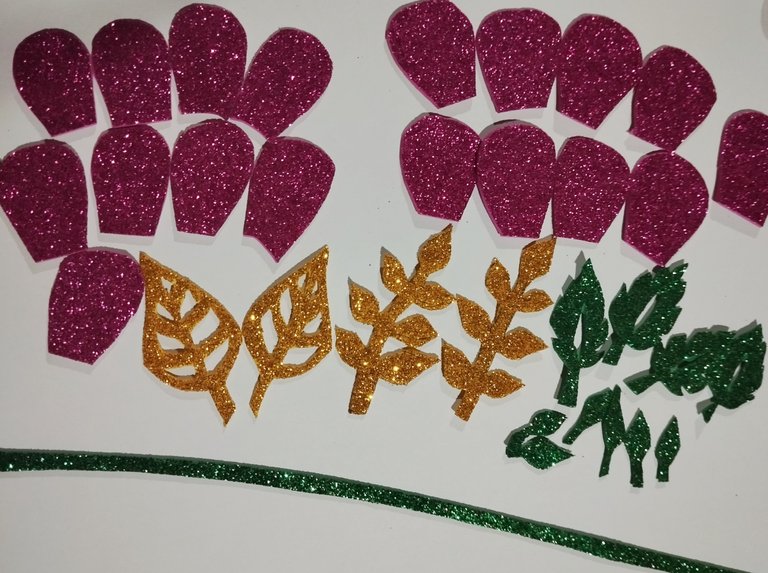
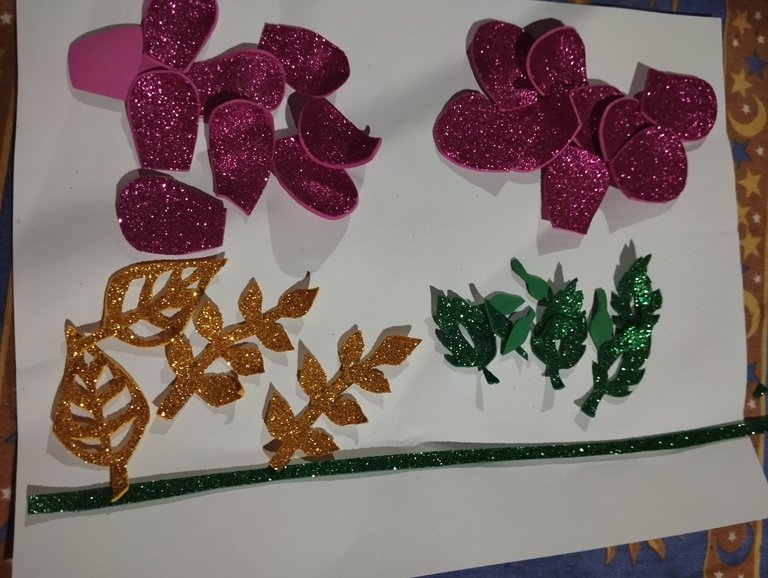
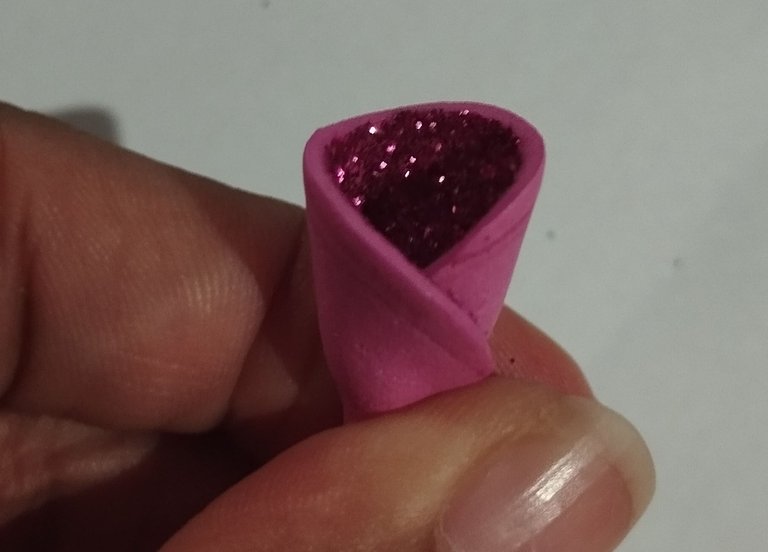
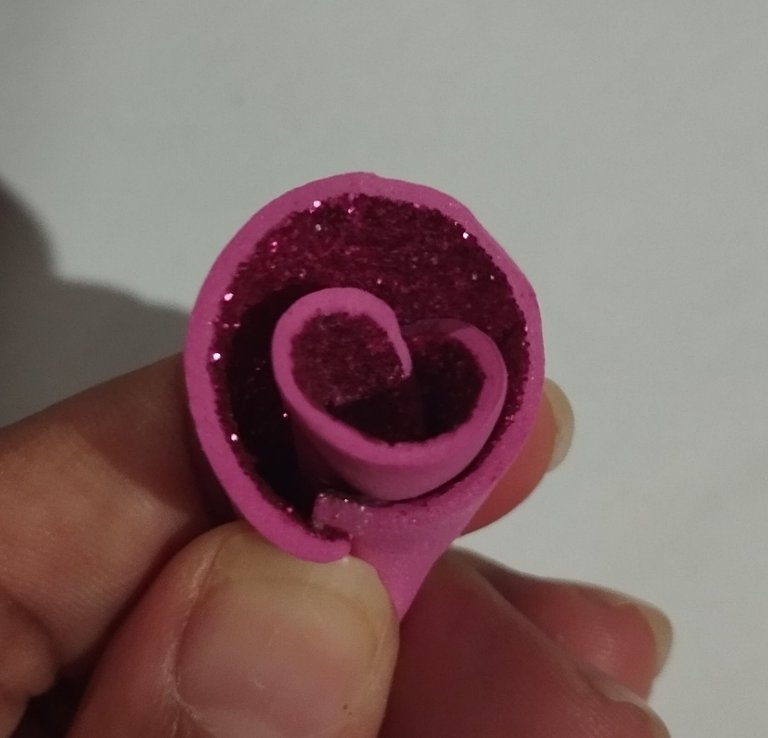
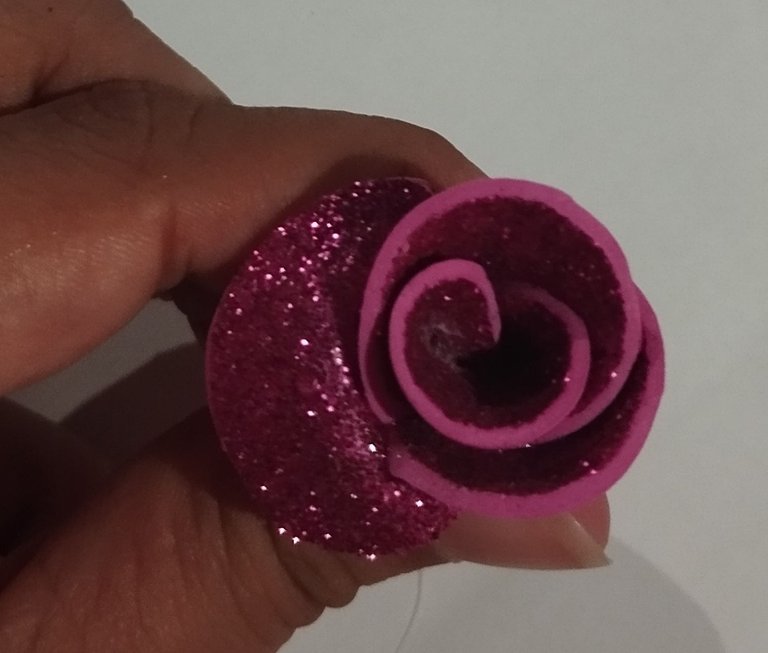
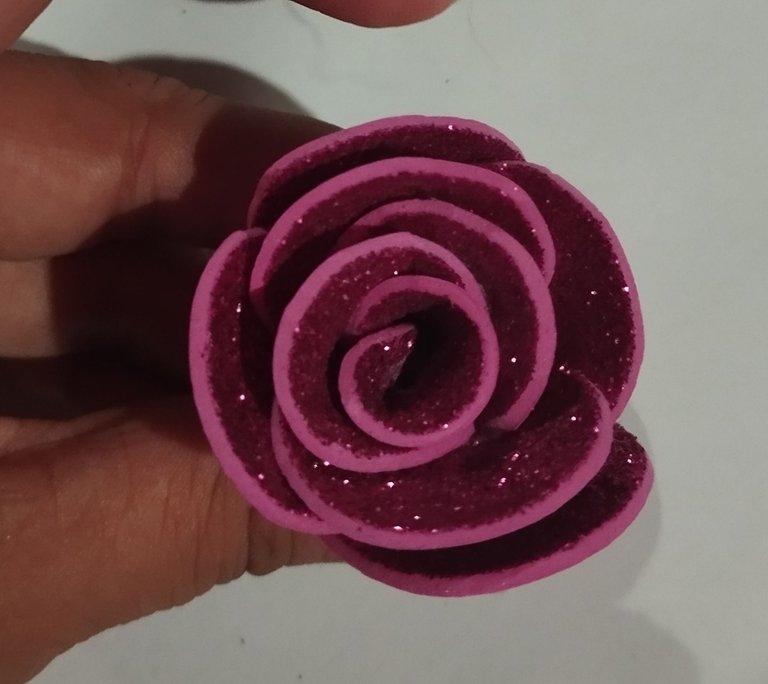
#5 Para hace las flores corté 9 petalitos en foami fucsia escarchado, también corté hojitas verdes escahcados, una tira larga de verde para la enrredadera, y hojitas mas pequeñas para pegar en la tira y algunos especie de arabescos para agregar detalles, con foami dorado hice dos hojas grandes y dos tipo ramilletes de hojas, ,luego con la plancha los termoforme para darles movimientos. Para hacer la flor primero tome un petelito y lo envolví en sí mismo para hacer el capullo, luego tome el segundo pétalo y lo fui envolviendo , así el tercero y lo pegué de frente al que ya había pegado , y la idea es pegarlo en forma de cruz ➕ imaginando que los extremos son los pétalos envolviendo el centro , son nueve petalitos , como quedaba un espacio en el medio de la flor, corté un pedacito pequeño de foami y lo envolví haciendo haciendo un espiral ,y este lo pegué en el centro de la flor para que se viera la forma de la rosa más tupida,cuando terminé agregué una perlita en el centro de la flor pero lo pueden dejar así, aquí como yo hice pétalos largos ,la flor me salió mucho más tridimensional así que tome lo en cuenta ya que irá pegado a la base del Topper ,por sí no les gusta que sobre salga tanto.(Los pétalos fueron de aproximadamente 2,3 de largo x 2 CM de ancho).
English Version
#5 To make the flowers I cut 9 petals out of frosted fuchsia foam, I also cut frosted green leaves, a long strip of green for the vine, and smaller leaves to glue on the strip and some kind of arabesques to add details, with gold foam I made two large leaves and two kind of bouquets of leaves, then with the iron I thermoformed them to give them movement. To make the flower first I took a small petal and wrapped it around itself to make the bud, then I took the second petal and wrapped it, so did the third and glued it in front of the one I had already glued, and the idea is to glue it in the shape of a cross ➕ imagining that the ends are the petals wrapping around the center, there are nine little petals, as there was space in the middle of the flower, I cut a small piece of foam and wrapped it making a spiral, and I glued this in the center of the flower so that the shape of the rose would look fuller, when I finished I added a pearl in the center of the flower but you can leave it like that, here since I made long petals, the flower came out much more three-dimensional so take that into account since it will be glued to the base of the Topper, in case you don't like it to stick out so much.(The petals were approximately 2.3 long x 2 CM wide) **
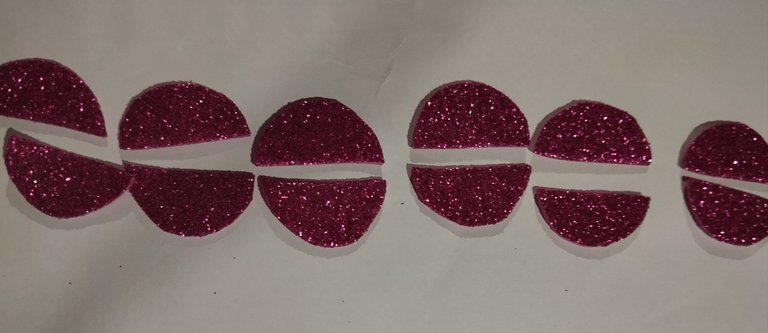 | 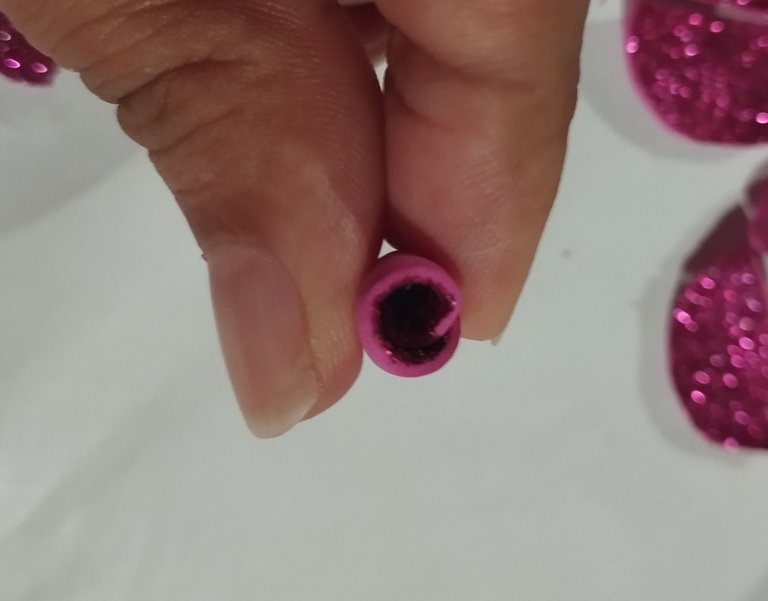 | 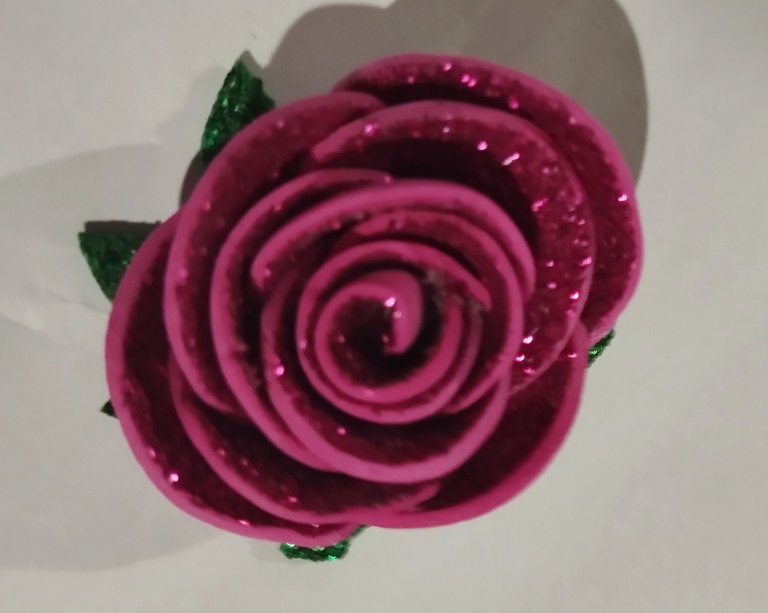 |
#6 Para hacer otro modelo de rosita , se pueden hacer no haciendo forma de pétalos , síno haciendo 6 círculos pequeños y cortandolos a la mitad ,estos están del tamaño de un moneda pequeña , así quedaran 12 semicírculos que serán los pétalos, también los termoformé un poco, para que se encogieran , y luego tomé un semi círculo ,lo enrrollé dentro de sí para hacer el capullo, y seguí pegando los círculos envolviendo el capullo al igual que la flor anterior,pegue una hojita y una base verde en forma de flor con picos para la base de la rosa.
English Version
**#6 To make another rose model, you can make them not by making petal shapes, but by making 6 small circles and cutting them in half, these are the size of a small coin, so there will be 12 semicircles that will be the petals, I also thermoformed them a little, so that they would shrink, and then I took a semi circle, rolled it inside itself to make the bud, and continued gluing the circles wrapping the bud like the previous flower, I glued a small leaf and a green base in the shape of a flower with spikes for the base of the rose. **
 |  |  |
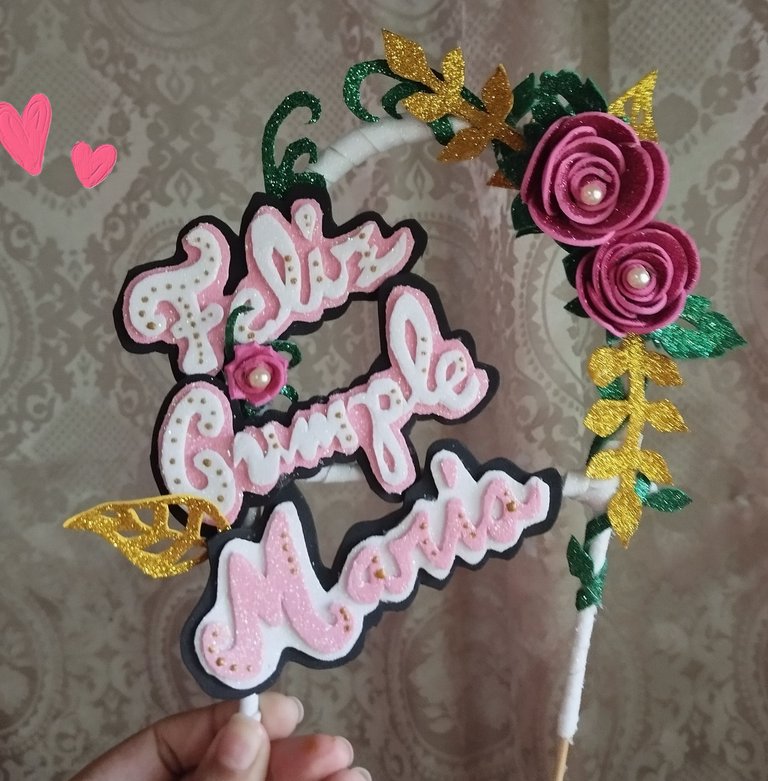 | 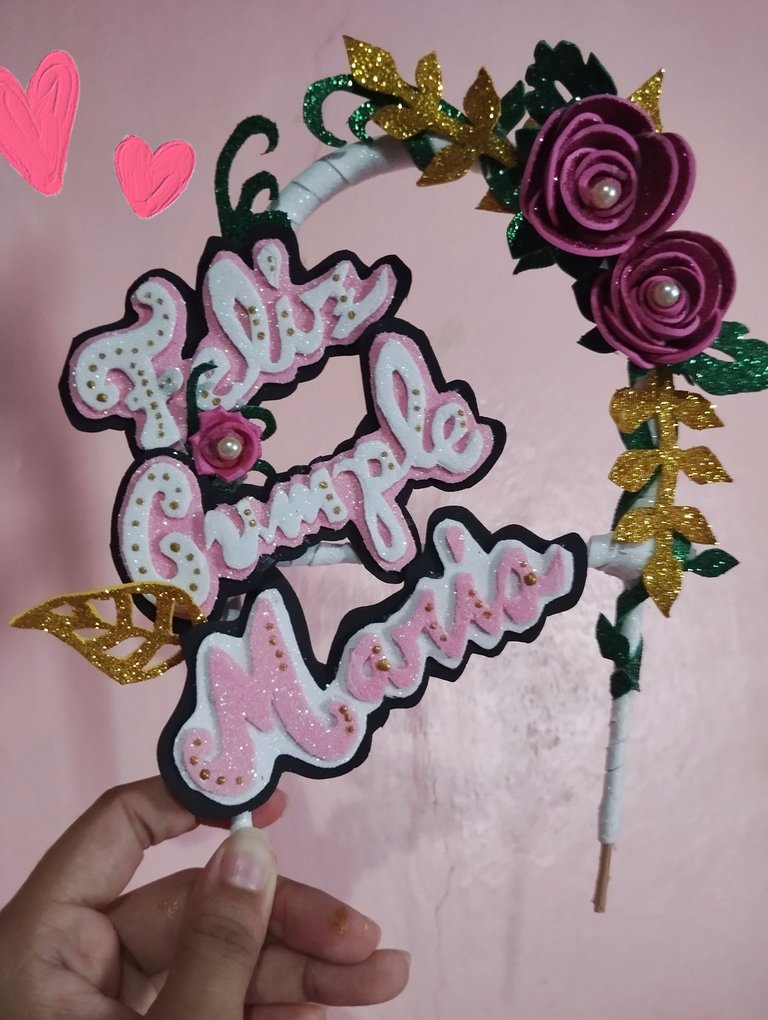 | 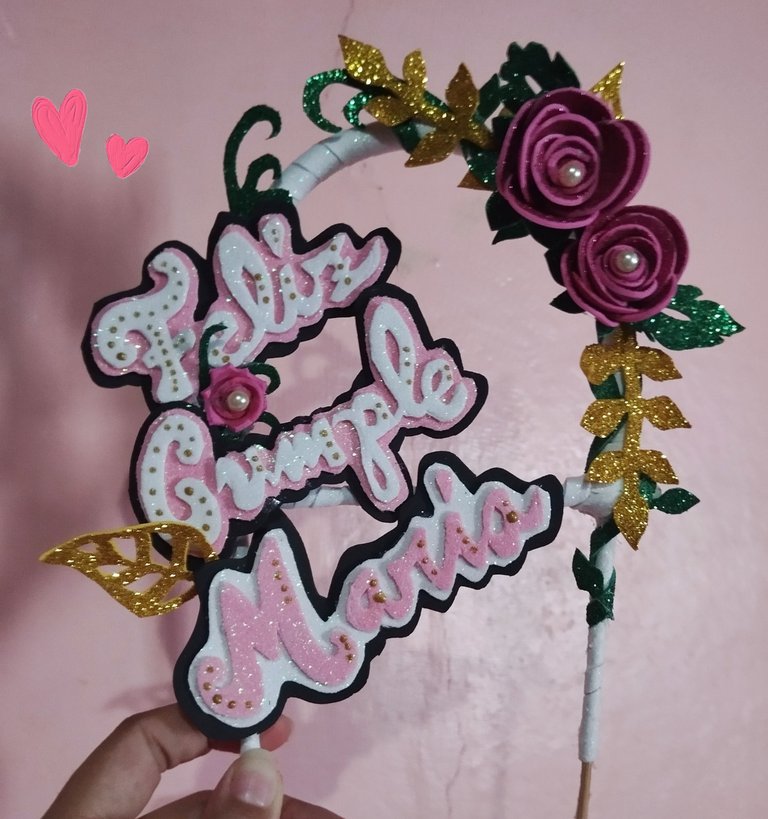 |
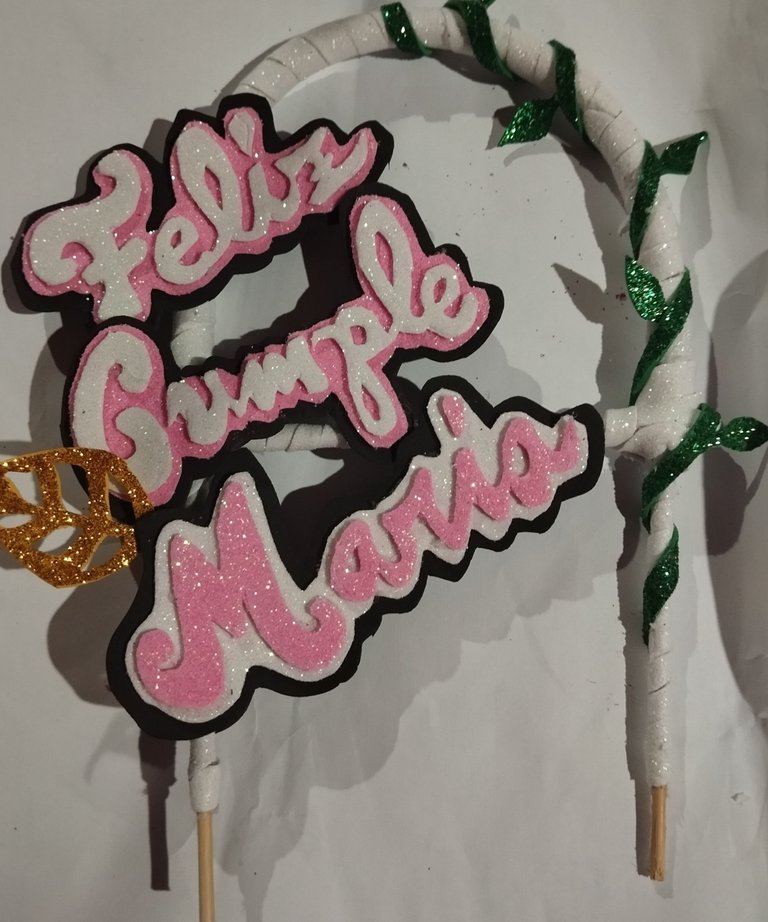
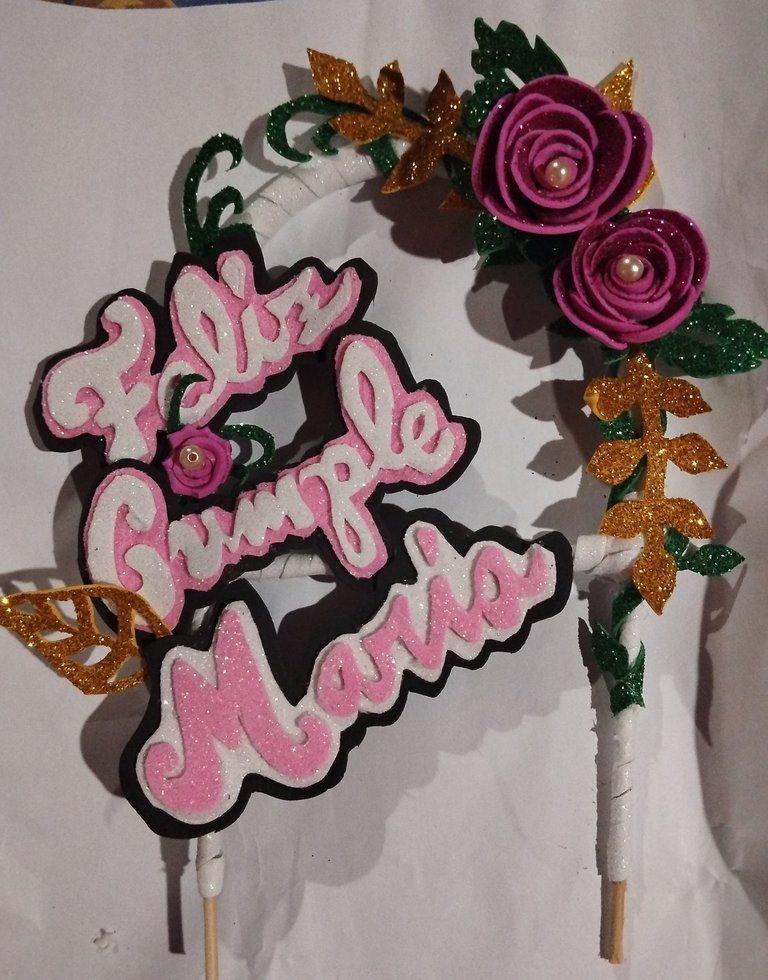
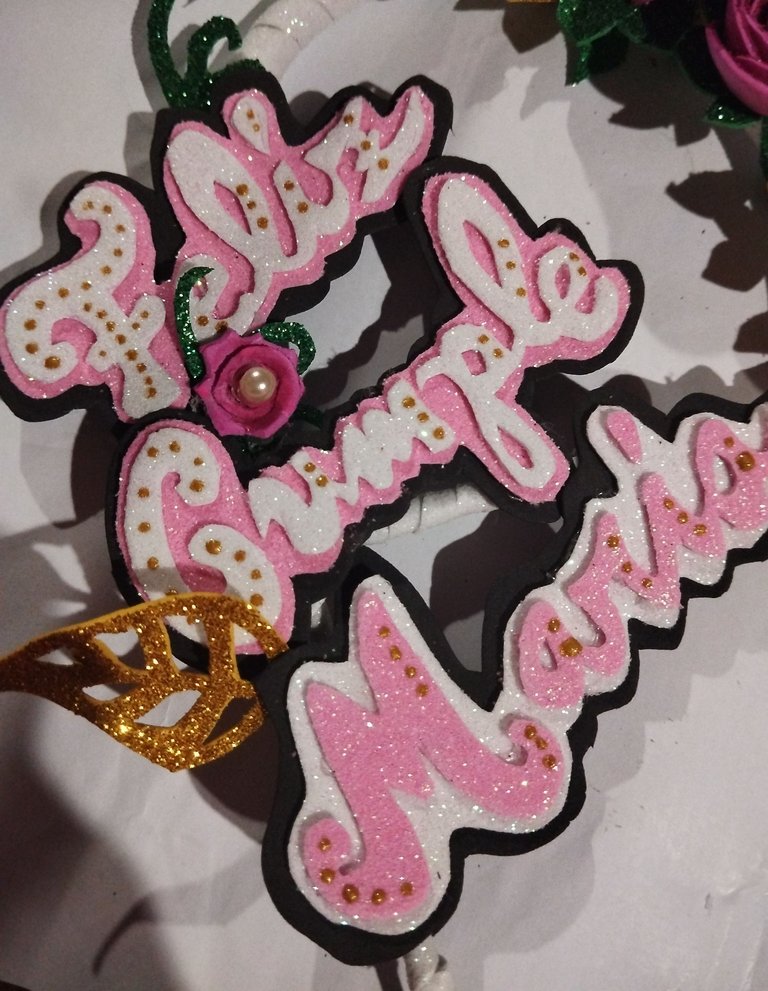
#7 Para decorar el arco enrrollé la tira larga de foami verde escarchado alrededor de la estructura,pero solo en la parte superior derecha y bajando, mientras forraba el arco, pegué pequeñas hojitas verdes para que se viera como sí fuera una enrredadera. Luego ubiqué como quería las flores la idea era que quedarán en la parte de la enrredadera , pegué lo arabescos verdes que imitan el follaje al extremo de la palabra feliz, y al extremo de la enrredadera ,encima pegué el ramillete dorado, la flor más grande y que sobresale más, y la mediana a su lado, con la hojita dorada sobresaliendo por la parte de atrás , y el otro ramillete dorado bajando por la enrredadera . Para que no quedara solo el espacio que hacía entra las palabras feliz y cumple , tapé el espacio haciendo una rosita enrrollando una tira
de foami escarchado fucsia y haciendo un espiral , y le puse en el medio una perlita para combinar con las otras dos rosas, también entre la palabra cumple y María puse la otra hojita dorada para que se viera diagonal a la hojita dorada de la parte de atrás de las rosas. Para terminar el diseño de las letras con un palito de dientes y pintura dorada le hice unos puntitos para complementar el diseño y que resaltara más, y esté es el resultado!.
✨💖 ME ENCANTÓ, no se me había ocurrido hacerlo de esta forma , por qué creo que está estructura hará que se vea mucho más vistoso en la torta ,ideal sí tiene una torta de varios niveles ,y que aparte tiene como más estabilidad, y aunque no se destaca tanto la enrredadera porque queda debajo de los otros elementos ,cuando la detallas bien se ven esos pequeños detalles como las hojitas ,y eso es algo que a mí me gusta mucho, poner pequeños detallitos intrincados que cuando se acercan los puedes notar ,ustedes que opinan ? Habían visto lo de usar una barra de silicón para hacer estructuras? , ya quiero intentar a ver sí se puede hacer otras formas de estructura.
Muchas gracias por leerme ! 🤭💜✨ Espero que les haya gustado el post!
Fotos tomadas por mí en mi equipo Redmi note 12 editadas en Pics art y gif realizado en app creador de GIFs texto traducido en Google traductor.
English Version
**#7 To decorate the arch I rolled the long strip of frosted green foam around the structure, but only on the top right side and going down, while I was covering the arch, I glued small green leaves so it would look like a vine. Then I placed the flowers as I wanted the idea was that they would be on the part of the vine, I glued the green arabesques that imitate the foliage at the end of the word happy, and at the end of the vine, on top I glued the golden bouquet, the largest flower that stands out the most, and the medium one next to it, with the golden leaf sticking out from the back, and the other golden bouquet going down the vine. So that there wasn't just a space between the words happy and birthday, I covered the space by making a rose by rolling a strip of
fuchsia frosted foam and making a spiral, and I put a pearl in the middle to match the other two roses. I also put the other gold leaf between the word birthday and Maria so that it looked diagonal to the gold leaf on the back of the roses. To finish the design of the letters with a toothpick and gold paint I made some dots to complement the design and make it stand out more, and this is the result! **
✨💖 I LOVED IT, it hadn't occurred to me to do it this way, because I think this structure will make it look much more attractive on the cake, ideal if you have a multi-level cake, and that also has more stability, and although the vine doesn't stand out as much because it is under the other elements, when you detail it well you can see those little details like the leaves, and that is something that I really like, putting small intricate details that when you get close you can notice them, what do you think? Have you seen using a silicone bar to make structures? I already want to try to see if other forms of structure can be made.
Thank you very much for reading me! 🤭💜✨ I hope you liked the post!
Photos taken by me on my Redmi note 12 device edited in Pics art and gif made in the GIF creator app, text translated in Google translator.


This is so cute, everything about it screams perfection! Excellent job friend thanks for sharing this creative work of yours with us.
Thank you very much DIY hub, I'm glad you liked the project, and for the support 💜☺️✨
Me encanto el detalle de las flores, esta hermoso y con colores realmente divinos 😍 la lamparita de la creatividad cuando se enciende, no hay nada que pueda apagarla jeje que bueno que pudiste hacerlo con los materiales que tenias a tu alcance 😊
Jejej muchas gracias buhito ✨💜 totalmente cierto cuando pica el bichito de la creatividad uno busca soluciones y empezá a escarbar entre las cosas que uno tiene por allí para poder terminar esos proyectos jejejeje ,como no se cómo lo haré pero lo haré
Mira que creativo, un Topper diferente, y muy llamativo, la idea de hacer las letras en foami resaltando con un lapicero no la sabía, muy buena, lo tendré en cuenta, gracias x estos tips, saludos.
Muchas gracias ikigai ! La idea es hacerlo con boligrafos de colores parecidos si quieres que se marquen ese contorno, sí no con alguno sin tinta para evitar que se manche y solo lo marque lo que te ayude al contorno, es para que puedas visualizar las letras y cortarlo más fácil
Precioso ese topper, a mi me cuesta mucho hacer letras en foami, por ello al ver las tuyas y corridas, wow de verdad te luciste.
Amiga muchas gracias , también me cuestan algo , pero creo que lo que se me hace más fácil es tener una tijera que sea muy filosa , y que tal vez las letras hacerlas mas pequeñas , no se porque pero como que me salen con mas facilidad que las letras grandes
Muy lindo el topper, los colores del foami realza la manualidad y con materiales fáciles de conseguir.
Muchas gracias Mariale , me alegro que te gustará, está combinación de colores fucsias ,rosados, blancos ,y dorados son preciosos 💜✨ e ideales para una señora
Milyyyy te quedó precioso😍 me encantó como resolviste lo del arco✨ y del resto, todo está excelente, me encantaron esas flores tan lindas también🥰
Muchas gracias mavi 💖☺️ jejeje quería intentar algo diferente en las estructuras y por suerte funcionó jeje
Te felicito 🎉 muy bonito tu Topper todos los modelos están genial, saludos y bendiciones 🙏
Muchas gracias ☺️💜 , igualmente bendiciones
Congratulations @mily23m! You have completed the following achievement on the Hive blockchain And have been rewarded with New badge(s)
Your next target is to reach 900 upvotes.
You can view your badges on your board and compare yourself to others in the Ranking
If you no longer want to receive notifications, reply to this comment with the word
STOP