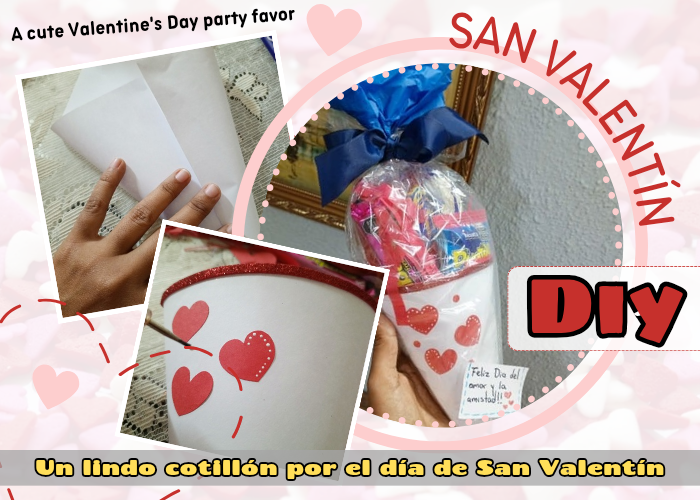
🇪🇸Spanish🇪🇸
Muchos celebramos el día de San Valentín ❤️ en casa 🏡 con la familia, con los seres queridos e incluso haciendo manualidades📏✂️. En ésta oportunidad realicé un cotillón para el intercambio de regalos en el compartir de la escuelita a la cual asiste mi hija Dariana.
Era algo sencillo, sin embargo me gusta siempre hacer bonitos detalles, y éste no fue la excepción. Quédense conmigo y les muestro el paso a paso 📝...
Materiales📝
🔅Cartulina sencilla color blanca tipo carta.
🔅Papel celofán c/n.
🔅Golosinas.
🔅Papel de seda color rojo.
🔅Regla.
🔅Retazos de foami.
🔅Tijera.
🔅Papel seda color azul.
🔅Cinta gross 1.5 cm color azul.
🔅Pega blanca y en barra.
🔅Pintura acrílica blanca.
Procedimiento⛓️💥
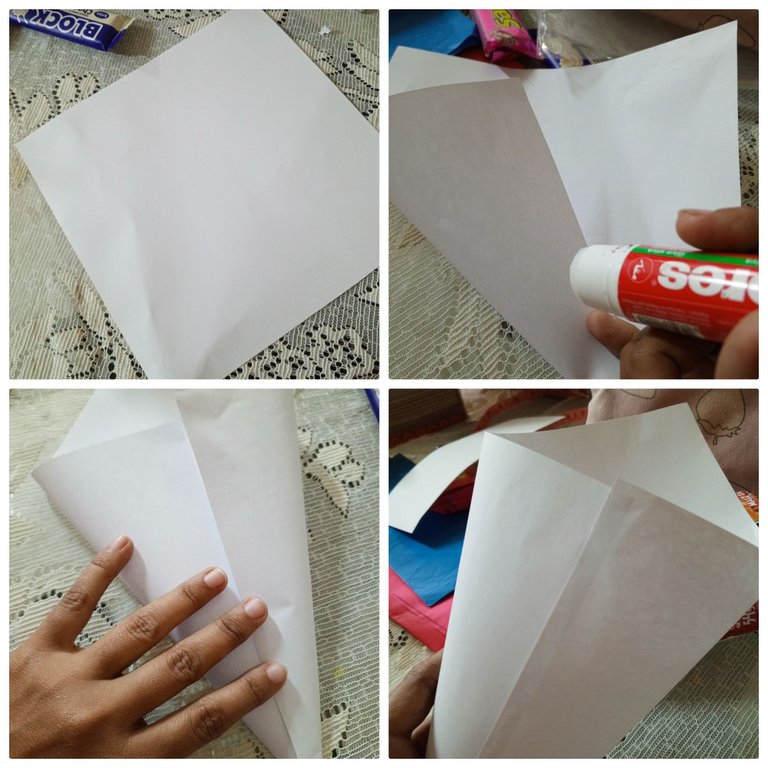
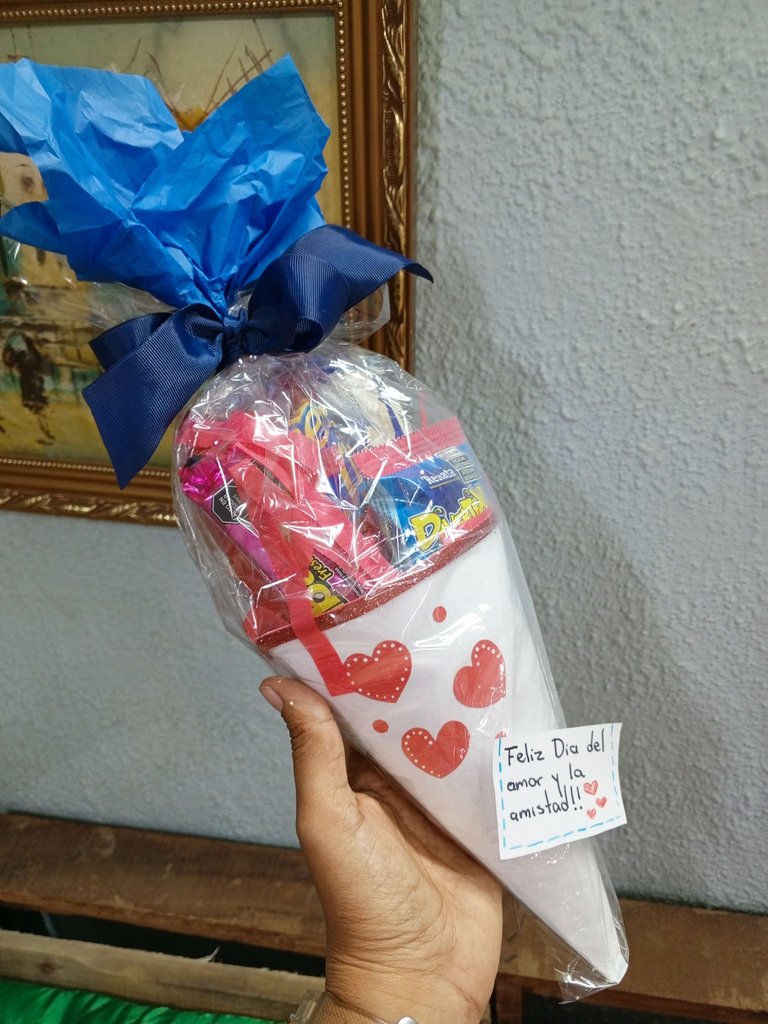
Para comenzar vamos a formar la base de un cono con la cartulina tipo carta sencilla en color blanco con medidas de 20 cm por 20cm, utilizando pega blanca o en barra. El sobrante de la cartulina al momento de formar el cono lo podemos recortar con una tijera ✂️.
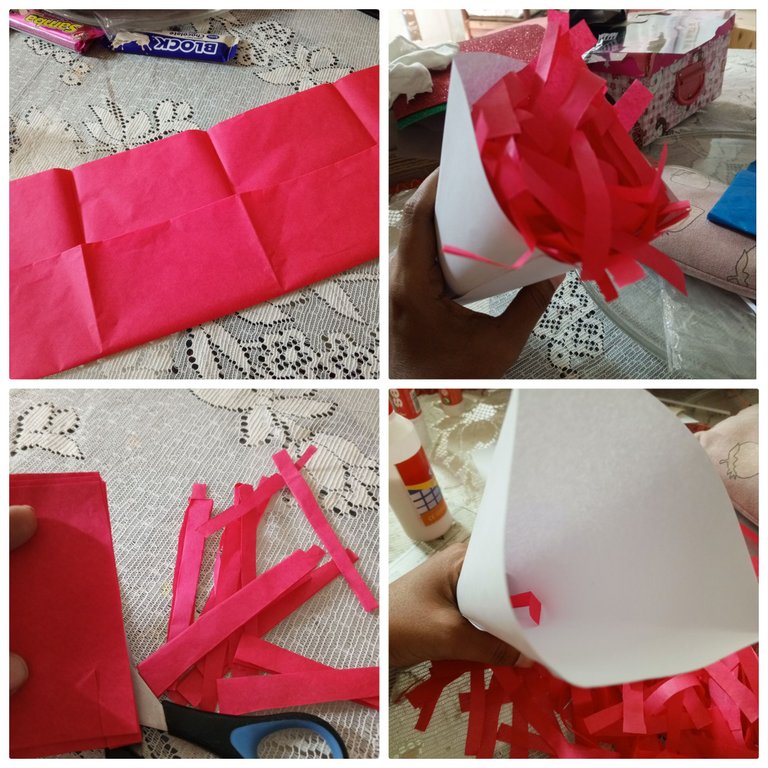
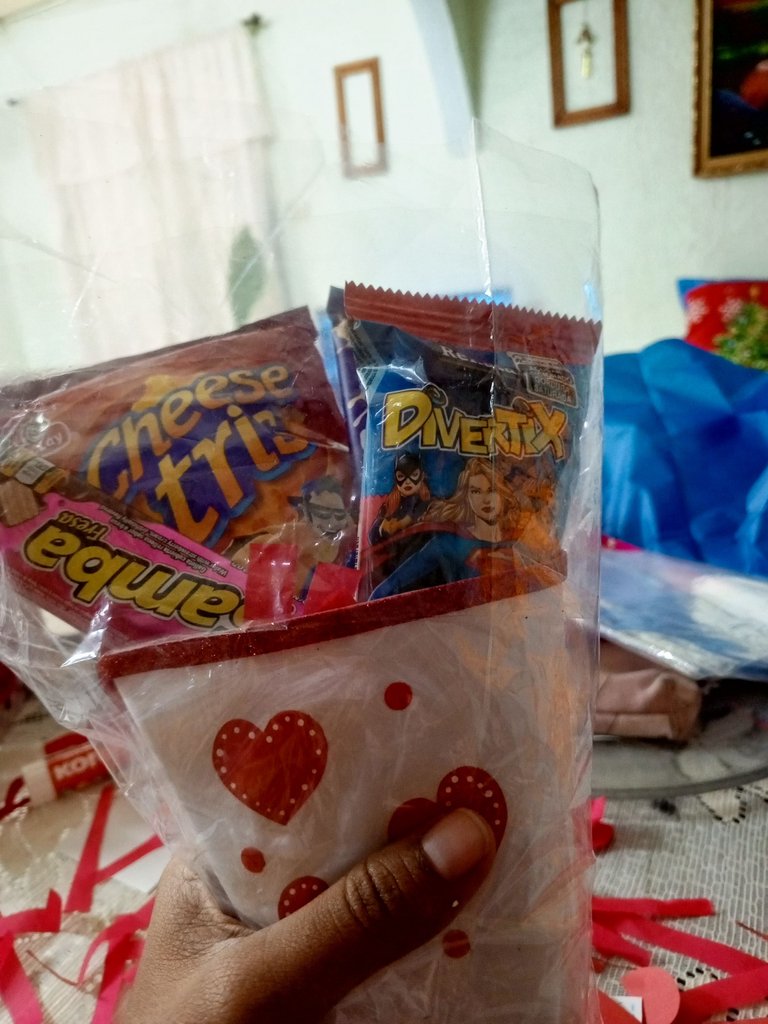
Lo siguiente es formar el papelillo de color rojo ❤️ que servirá de base para los dulces dentro del cono, también se pueden asegurar las golosinas con palillos de bambú, pero me pareció más facil para los niños sacarlos del cono de está manera, solo colocándolos sobre el papelillo. Para cortar el papel seda solo doblamos el pliego en 4 partes y cortamos en tiras con la tijera.
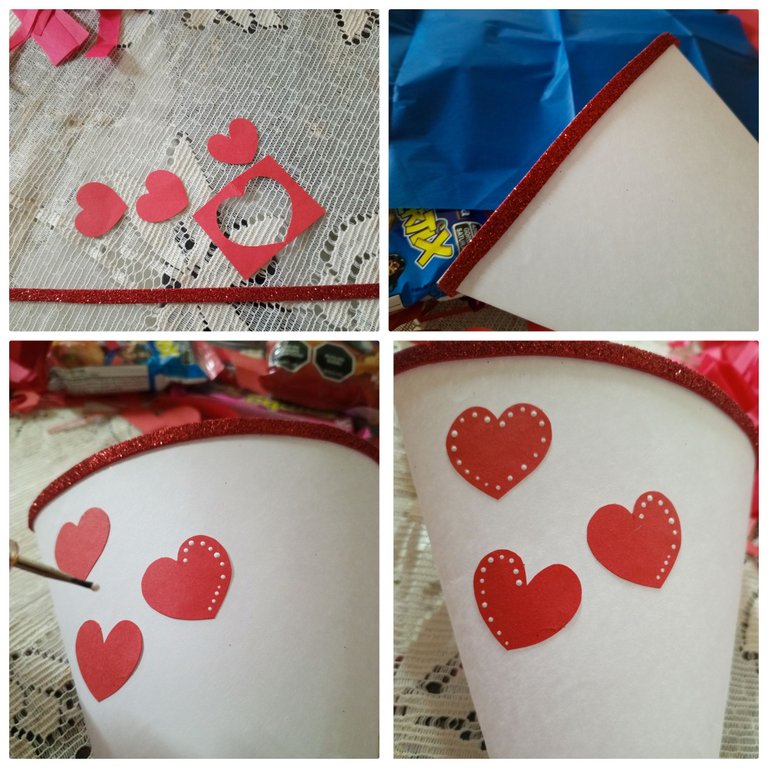
Para darle un toque más San Valentín ❤️ al cono de dulces, recorte unos corazones en cartulina sencilla en color rojo. Luego les di un toque de luz haciendo puntos con ayuda de un puntero para dibujar uñas y con pintura acrílica blanca. Para asegurarlos al cono les agregué pegamento en barra. También le agregué un borde en foami rojo brillante de 1/2 cm en la parte superior del cono, lo hace ver más lindo.
En éste punto, vamos a incluir todos los dulces dentro del cono y tomaremos una cantidad de papel celofán que permita cubrir más allá del cono con los dulces.
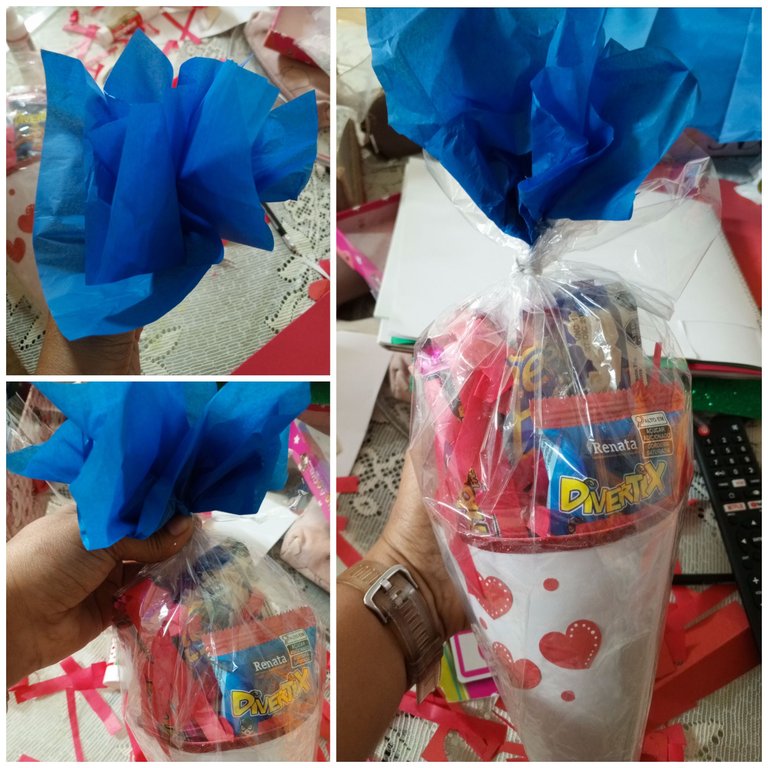
Ahora vamos a utilizar medio pliego del papel de seda azul 💙 para hacer un arruchado que lo colocaremos en la parte superior del cono encima de los dulces, y dejando hacia el exterior del papel celofán. La idea es que lo sujetemos con cualquier cuerda que lo mantenga en su lugar y al mismo tiempo cerrar el cono con los dulces.
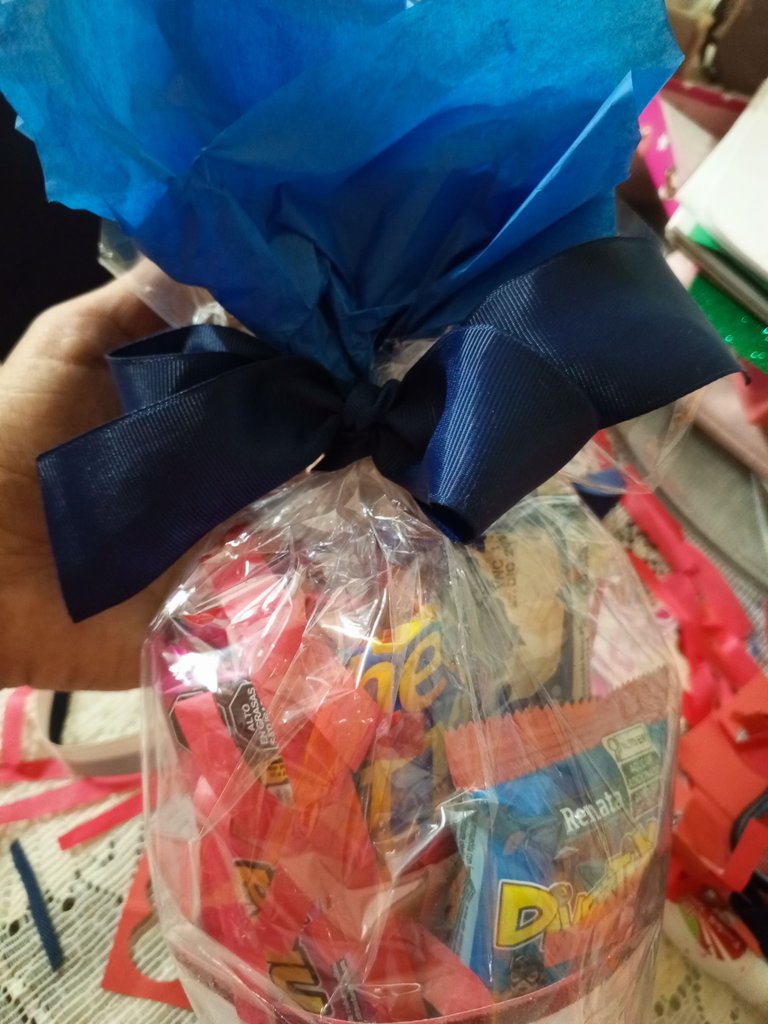
En éste paso vamos a realizar un moño en cinta gross de color azul 💙 para decorar el cierre del cotillón.
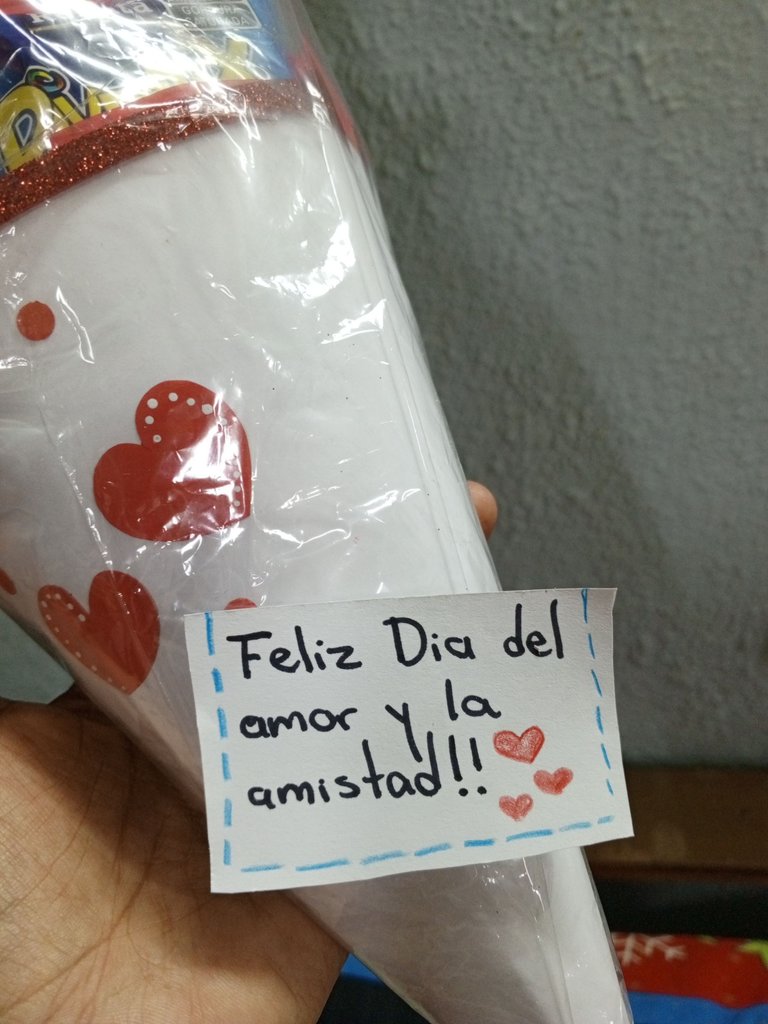
Para terminar con éste cotillón mi hija Dariana realizó una tarjeta sencilla por el día del amor y la amistad sin identificar, porque los papelitos del intercambio de regalos se harían y entregarían en el momento de la actividad.
Fue un bonito trabajo, incluso lo podría realizar para regalar a otros niños de la familia o amigos. Por otra parte, éste cotillón lo realicé con materiales que tenía en casa🏡, incluso reciclados ♻️, a ecepción de las golosinas🍡 .
Para hacer de estos detalles más personalizados, siempre hace falta creatividad. Éste cotillón no sabía si lo recibiría una niña o un niño, así que le incluí los colores rojo ❤️ y azul 💙 para hacerlo más unisex.
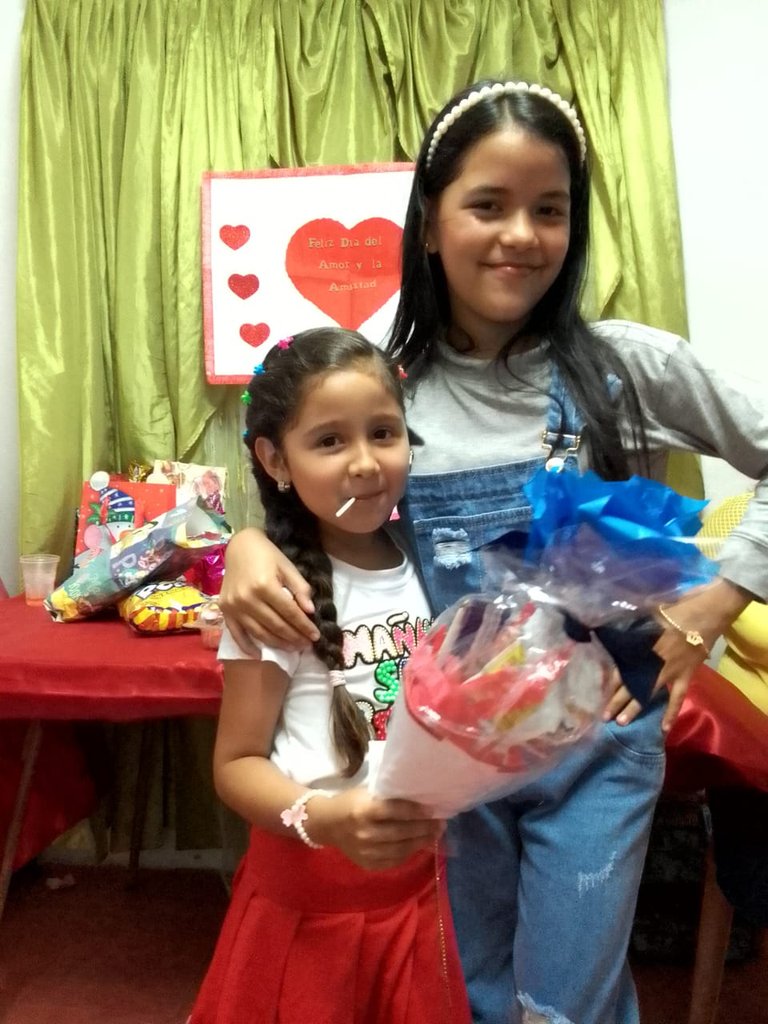
Finalmente en el compartir a mi hija le tocó una niña, y feliz recibió el cotillón de dulces hecho con mucho cariño, que realmente es lo que importa de estos detalles, y es lo que le enseño cada día a mi princesa 🫂.
Es todo por éste post tutorial. Gracias a todos los que han llegado hasta aquí 📝☝️♻️❤️💙🫂✂️...
🇺🇸 English🇺🇸
Many of us celebrate Valentine's Day ❤️ at home 🏡 with family, with loved ones and even doing crafts📏✂️. On this occasion I made a party favor for the gift exchange at the school where my daughter Dariana attends.
It was something simple, however I always like to make nice details, and this was no exception. Stay with me and I'll show you the step by step 📝...
Materials📝
🔅Simple white cardstock, letter size.
🔅Cellophane paper as needed.
🔅Candy.
🔅Red tissue paper.
🔅Ruler.
🔅Scraps of foam.
🔅Scissors.
🔅Blue tissue paper.
🔅1.5 cm blue gross tape.
🔅White glue stick.
🔅White acrylic paint.
Process⛓️💥
To begin, we are going to form the base of a cone with the simple white cardstock measuring 20 cm by 20 cm, using white glue or a glue stick. The excess cardboard when forming the cone can be cut with scissors ✂️.
The next step is to form the red cone ❤️ that will serve as a base for the candy inside the cone. You can also secure the candy with bamboo sticks, but I found it easier for the kids to take them out of the cone this way, just by placing them on the cone. To cut the tissue paper, just fold the sheet into 4 parts and cut into strips with scissors.
To give the candy cone a more Valentine's touch ❤️, I cut out some hearts from plain red cardstock. Then I gave them a touch of light by making dots with the help of a nail art pen and white acrylic paint. To secure them to the cone, I added glue stick. I also added a 1/2 cm bright red foam border on the top of the cone, it makes it look prettier.
At this point, we are going to include all the candy inside the cone and we will take an amount of cellophane paper that allows us to cover beyond the cone with the sweets.
Now we are going to use half a sheet of blue tissue paper 💙 to make a ruffle that we will place on the top of the cone on top of the candy, and leaving it on the outside of the cellophane paper. The idea is to hold it with any string that keeps it in place and at the same time close the cone with the candy.
In this step we are going to make a bow in blue gross ribbon 💙 to decorate the end of the party favors.
To finish with this party my daughter Dariana made a simple card for Valentine's Day without identifying herself, because the little papers for the exchange of gifts would be made and delivered at the time of the activity.
It was a nice job, I could even make it to give to other children in the family or friends. On the other hand, I made this party favor with materials I had at home🏡, even recycled ones ♻️, except for the candy🍡.
To make these details more personalized, creativity is always required. I didn't know if this party favor would be for a girl or a boy, so I included the colors red ❤️ and blue 💙 to make it more unisex.
Finally, when sharing, my daughter got a girl, and she happily received the candy party favor made with a lot of love, which is really what matters about these details, and it is what I teach my princess every day 🫂.
That's all for this tutorial post. Thanks to everyone who has made it this far 📝☝️♻️❤️💙🫂✂️...
Creditos - Credits
Traductor English translator
Stickers realizado en Bitmoji | Stickers made in Bitmoji.
Fotografias capturadas con mi teléfono Tecno Spark 10 pro | Photos captured with my Tecno Spark 10 pro phone.

Te quedó bonito amiga, una buena idea eso de incluir los dos colores❤️
Gracias amiga, así es, al final le servía a los niños o niñas.
Está sencilla pero está muy bonita la idea del cotillón que nos dejas, un bonito detalle para esta San Valentín, o para cualquier ocasión especial.
!discovery 30
Gracias linda, así es, fue bastante sencillo, pero quedó bonito, y la niña que lo recibió encantada. Y totalmente, puede funcionar para cualquier ocasión 🤗
This post was shared and voted inside the discord by the curators team of discovery-it
Join our Community and follow our Curation Trail
Discovery-it is also a Witness, vote for us here
Delegate to us for passive income. Check our 80% fee-back Program
¿ᴺᵉᶜᵉˢᶦᵗᵃˢ ᴴᴮᴰ? ᵀᵉ ˡᵒ ᵖʳᵉˢᵗᵃᵐᵒˢ ᶜᵒⁿ