Saludos mis creativos, estoy nuevamente con ustedes para compartir, mostrar y enseñarles cómo realizar unas preciosas lazadas para niñas. Comenzó el mes de abril y con el la inspiración, la imaginación y mucha creatividad en los trabajos manuales.
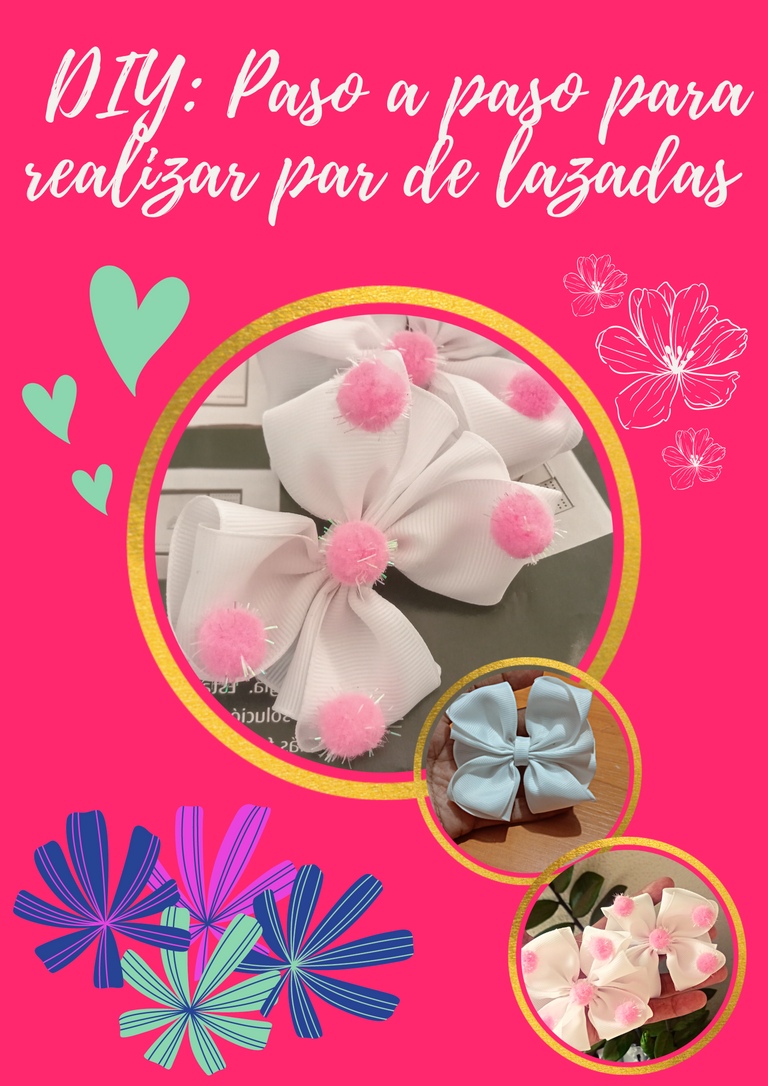
Cada trabajo que realizo siempre tiene su encanto, su atractivo, su curiosidad; no es un lazo más, un cintillo más o cualquier otra actividad que involucre la creatividad en mis manos. Es primera vez que realizó éste diseño, y formará parte de mi blog en Hive, y que además seran obsequiadas como regalo de cumpleaños. La princesita festejada cumplirá 2 añitos y tiene un bonito cabello para colocar estás delicadas, elegantes y divertidas lazadas. Les muestro como hacerlas...
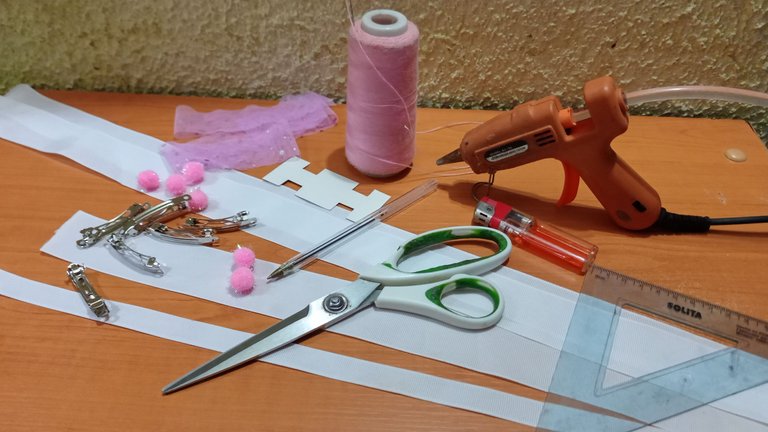
Materiales
Materiales
1. Cinta gross de 4 cm de ancho.
2. Cinta gross de 1.5 cm de ancho.
3. Pistola de silicón caliente.
4. Pinzas tipo frances.
5. Pompones.
6. Tijeras.
7. Encendedor.
8. Cinta métrica para costura.
9. Hilo y aguja.
Paso I
Paso I
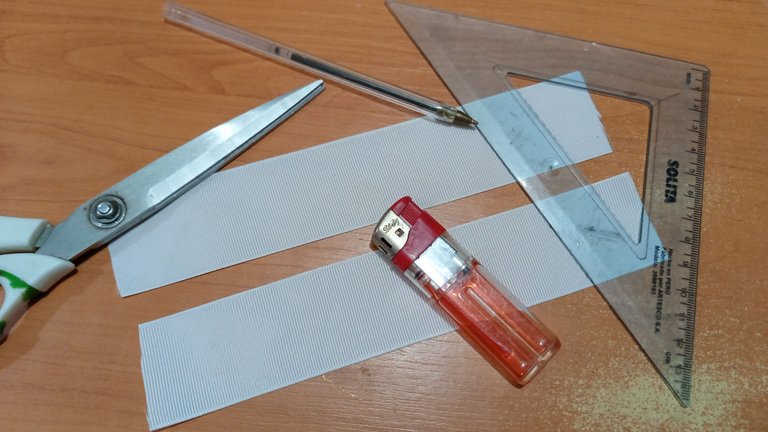
Realizar los cortes para trabajar cada lazada, para éste proceso medimos con la cinta métrica de costura 4 tiras de 30 cm cada una, desde la cinta gross de 4 cm que puede ser del color de su preferencia. Cada lazada llevará 2 tiras, las mismas sellamos en sus extremos con un encendedor.
Paso II
Paso II
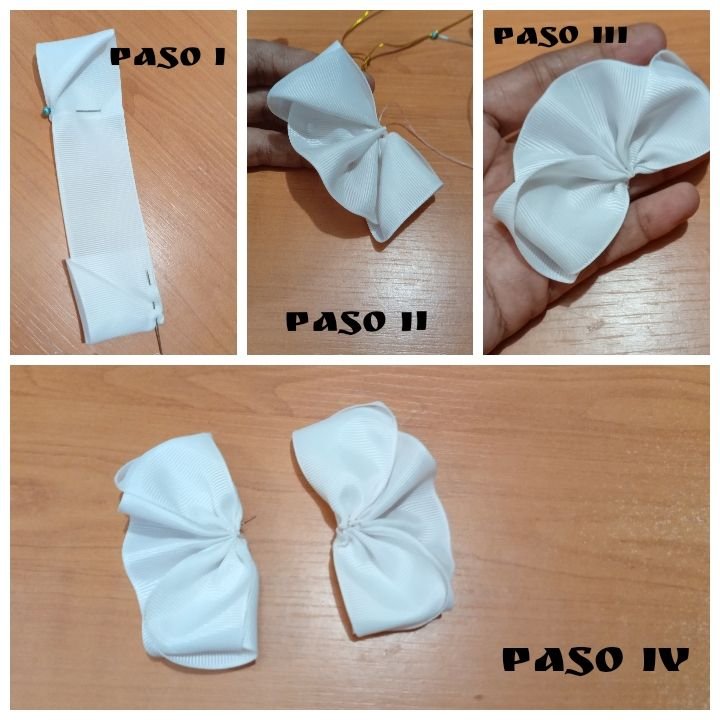
Comenzamos a darle forma a nuestro trabajo, lo primero que haremos es tomar una de las cintas de 30 cm por uno de los extremos y doblamos a nuestra derecha, se formará un pequeño triángulo, y debemos dejar un sobrante de 4cm. Lo siguiente será tomar ese primer triángulo y doblarlo hacia arriba y se formará un nuevo triángulo, el final para éste procedimiento será tomar el extremo sobrante de 4 cm y llevarla a la parte posterior del triángulo, para sujetar colocamos un alfiler. Éste procedimiento es igual para cada extremo de la cinta, las imágenes guiarán cada paso.

Paso III
Paso III
Ya tenemos los dos extremos listos y uno de ellos sujetado con un alfiler, para asegurar el trabajo pasamos costura con hilo y aguja, y luego fruncimos (arruchamos la cinta), y se forman unas ondas muy pequeñitas. Ahora realizamos éste mismo procedimiento para la otra parte de nuestra lazadas.
Paso IV
Paso IV
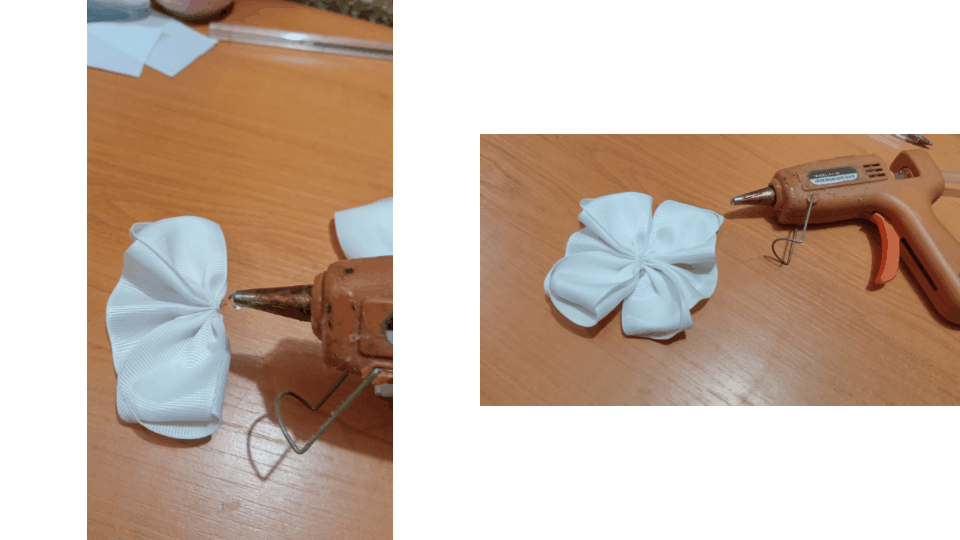
Al tener las dos partes listas, pegamos con la pistola de silicón, y podemos asegurar con aguja e hilo. Éste mismo proceso lo haremos para la otra lazada ya que estamos realizando un par de pinzas.
Paso V
Paso V
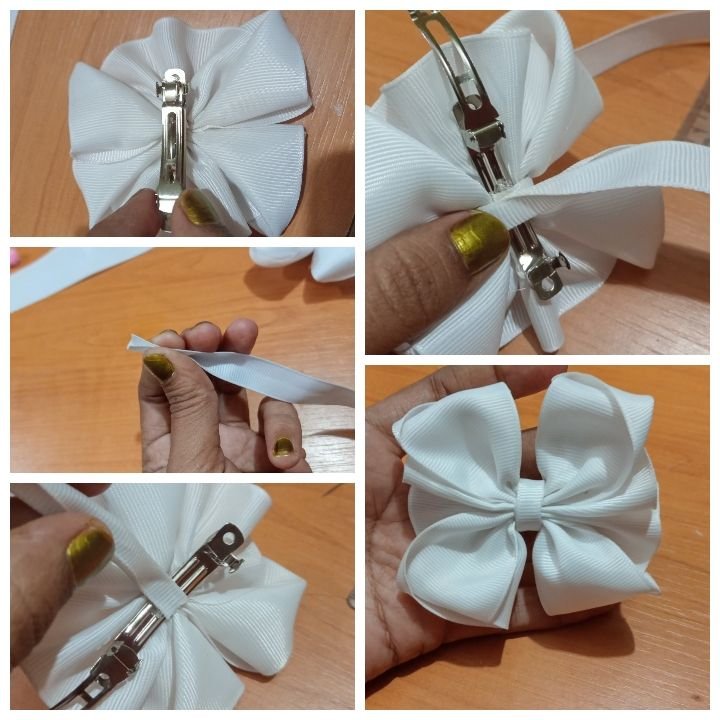
Ya tenemos las dos partes unidas, vamos a colocar con silicón la pinza francesa en la parte posterior de nuestra lazada, al secar vamos a pegar la cinta gross de 1.5 cm doblada a la mitad en la parte posterior del lazo, exactamente en el centro de la pinza, podemos dar hasta dos vueltas para asegurar el trabajo y cubrir detalles.
Paso VI
Paso VI
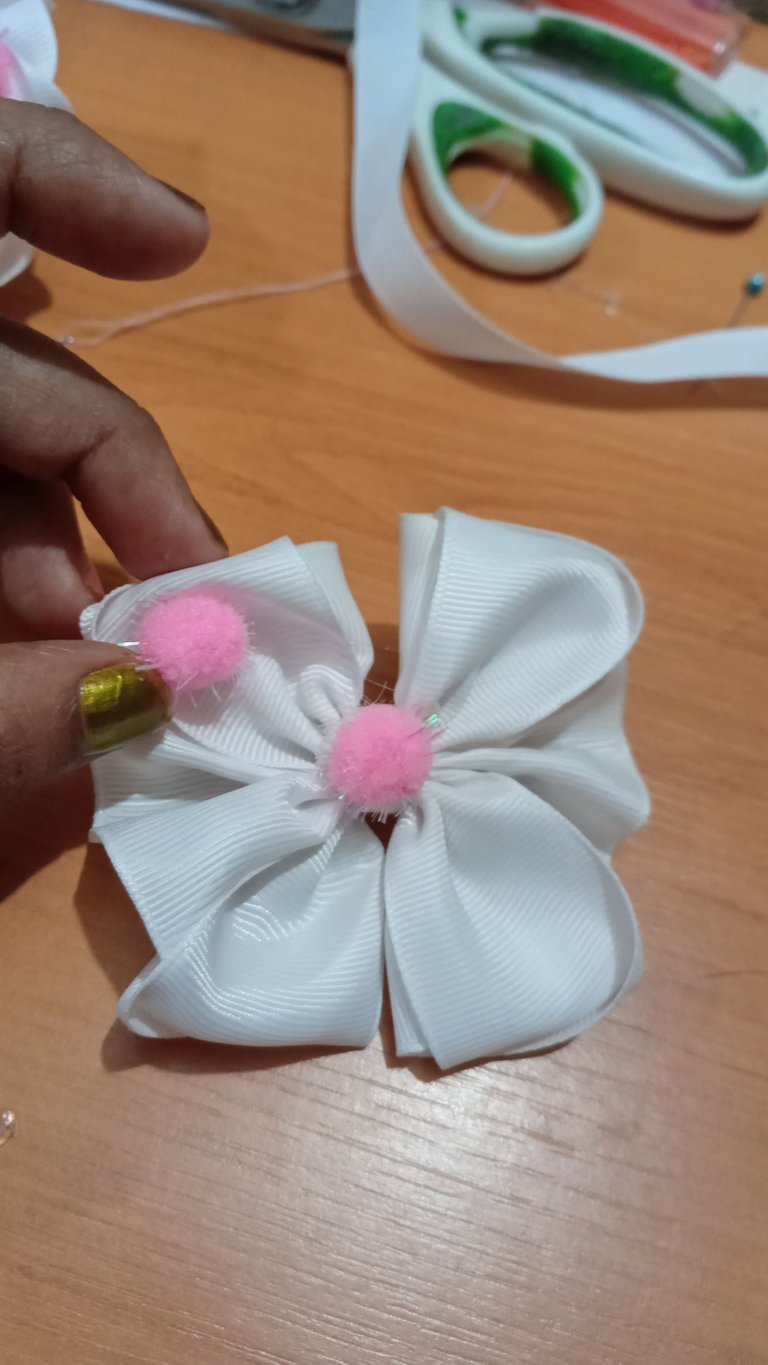
Ya tenemos el centro perfectamente cubierto, y queremos colocarles un detallito adicional, para ello utilizaré unos pompones rosados con espigas brillantes, lo que dará un color tierno, elegancia y diversión a nuestras lazadas.
Resultado final
Resultado final
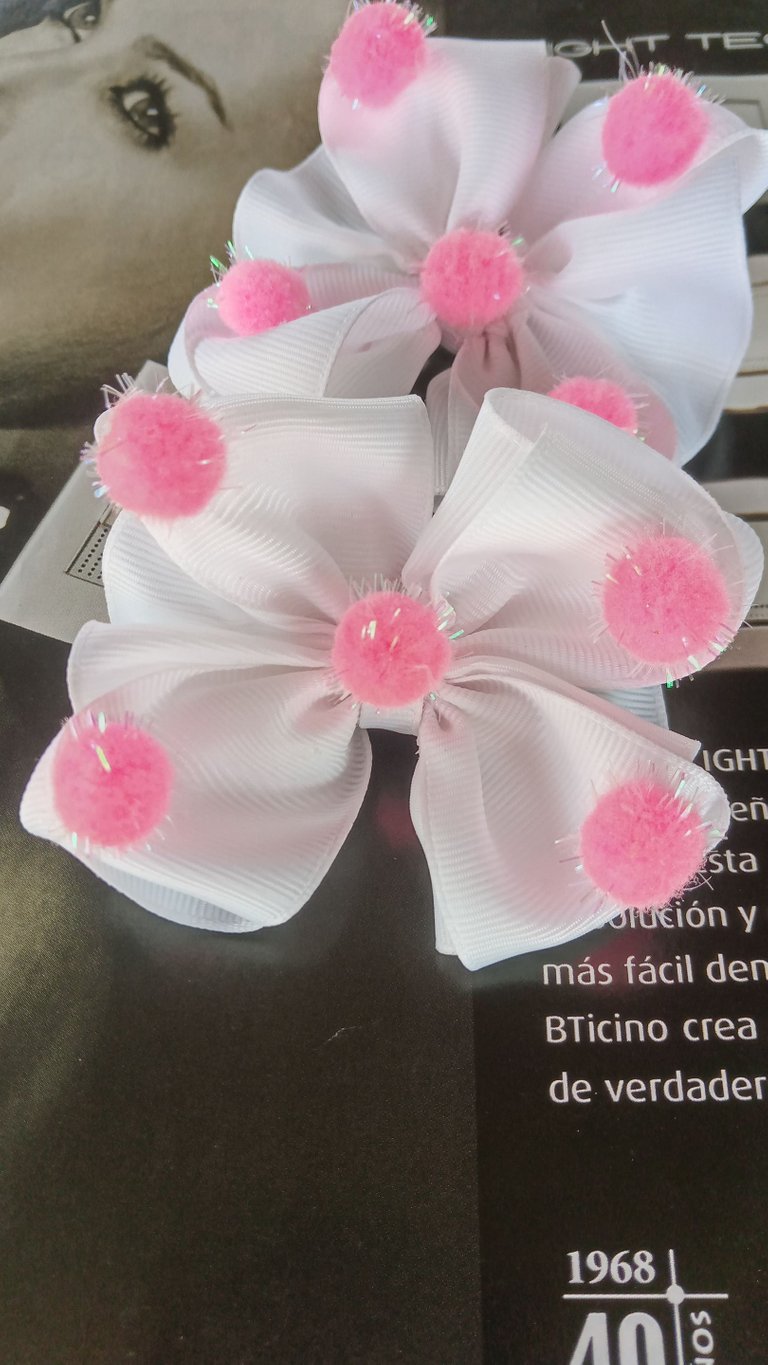
Listo éste lindo obsequio, que con pocos materiales podemos realizar, es una lazadas diferente, coqueta, atractiva, y seguramente la festejada estará feliz con su regalo de cumpleaños.
Gracias a todos los que pasaron por aquí, y seguramente alguna mami, tía, o abuela creativa se atreve a realizar estás manualidades, por lo que espero que éste tutorial sea de provecho.
Hasta pronto amigos de DIY.
Greetings my creatives, I'm with you again to share, show and teach you how to make beautiful bows for girls. The month of April began and with it the inspiration, imagination and a lot of creativity in manual work.

Each job I do always has its charm, its appeal, its curiosity; it is not one more bow, one more headband or any other activity that involves creativity in my hands. It is the first time that I made this design, and it will be part of my blog on Hive, and it will also be given as a birthday present. The little princess celebrated will be 2 years old and has beautiful hair to wear these delicate, elegant and fun bows. I show you how to make them...
Materials
Materials
1. Gross ribbon 4 cm wide.
2. Gross ribbon 1.5 cm wide.
3. Hot glue gun.
4. French type tweezers.
5. Pompoms.
6. Scissors.
7. Lighter.
8. Tape measure for sewing.
9. Needle and thread.

Step I
Step I
Make the cuts to work each loop, for this process we measure with the sewing tape measure 4 strips of 30 cm each, from the gross tape of 4 cm that can be of color of your choice. Each loop will have 2 strips, we seal them at their ends with a lighter.

Step II
Step II
We begin to shape our work, the first thing we will do is take one of the 30 cm strips by one of the ends and fold to our right, a small triangle will be formed , and we must leave a surplus of 4cm. The next thing will be to take that first triangle and fold it up and a new triangle will be formed, the end for this procedure will be to take the remaining 4 cm end and take it to the back of the triangle, to hold it we place a pin. This procedure is the same for each end of the tape, the images will guide each step.

Step III
Step III
We already have the two ends ready and one of them fastened with a pin, to secure the work we sew with a needle and thread, and then we gather (curl up the ribbon), and They form very small waves. Now we do this same procedure for the other part of our loops.

Step IV
Step IV
When we have the two parts ready, we glue with the glue gun, and we can secure with a needle and thread. We will do this same process for the other loop since we are making a pair of tweezers.

Step V
Step V
We already have the two parts together, we are going to place the French clamp on the back of our loop with silicone, when it dries we are going to glue the 1.5 cm gross ribbon folded to the half on the back of the bow, exactly in the center of the clip, we can make up to two turns to ensure the work and cover details.

Step VI
Step VI
We already have the center perfectly covered, and we want to add an additional detail, for this I will use some pink pompoms with bright spikes, which will give a tender color, elegance and fun to our bows .

End result
End result

Thanks to everyone who passed by here, and surely some creative mommy, aunt, or grandmother dares to make these crafts, so I hope this tutorial is useful.
See you soon friends of DIY.

Que lindo trabajo, muy bien explicado tu paso a paso. Felicitaciones!
Gracias bella amiga @yusma21 . Saludos.
Congratulations @natica83! You have completed the following achievement on the Hive blockchain and have been rewarded with new badge(s):
Your next target is to reach 400 upvotes.
You can view your badges on your board and compare yourself to others in the Ranking
If you no longer want to receive notifications, reply to this comment with the word
STOPCheck out the last post from @hivebuzz:
Support the HiveBuzz project. Vote for our proposal!
Muy lindo esos lazos para las princesas de la casa. Bendiciones amiga
Gracias bella. Están muy hermosos y coquetos. Gracias por la visita. Saludos @zullyarte
Qué bonitas quedaron!!! Yo soy malísima para las manualidades 😂😂
Disfruto mucho de ver a gente talentosa haciendo cosas tan lindas con pocos recursos a mano
Lindos lazos para niñas