Making a paper giraffe!
Click here to English Version.
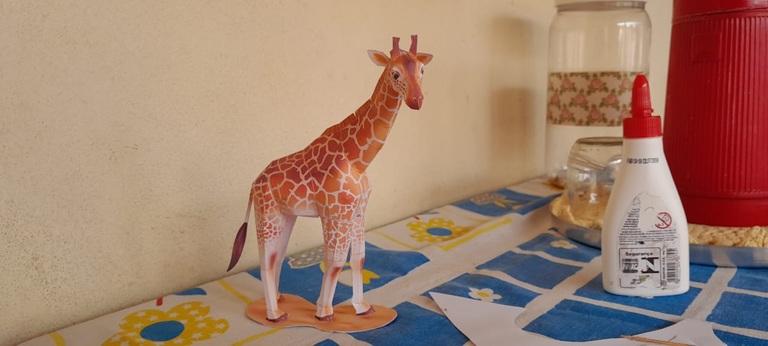
Um grandioso olá a todos e um feliz domingo! Hoje estou aqui para apresentar duas coisas: uma ideia para quando estiverem no tédio e um site incrível! Espero que gostem.
Eu estava em um sábado super tedioso e estava querendo fazer algo mas não sabia exatamente o quê. Rolando o feed no Instagram, encontrei um vídeo de uma moça fazendo uma capivarinha suuuuper fofa; Abri os comentários e encontrei o site com os moldes de animais, alguns personagens e até automóveis.
Em Creative Park Canon há diversas opções de arte em papel para você montar. É um site simples e fácil de usar. Todos os modelos estão disponíveis para download grátis e cada um é bem feito, as instruções são de fácil entendimento e tem um documento explicando o passo a passo de tudo e bem detalhado.
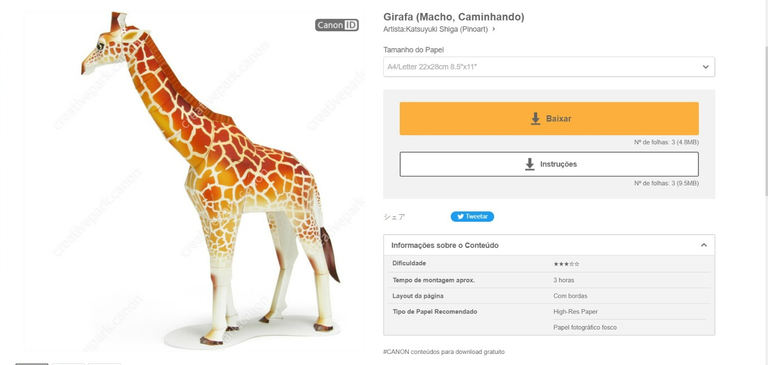
Abrindo o site, indo na sessão "Animais realistas" e deslizando um pouco a tela, encontramos a girafa e ela já vem com um tamanho de papel definido, basta clicar em baixar e depois imprimir as páginas. Caso queira, você pode imprimir as instruções também, mas não é necessário, basta baixar e abri em uma nova guia.
Após imprimir, corte as peças aos poucos. Corte a cabeça, os chifres e as orelhas primeiro. Faça todas as marcações conforme é mostrado com cada traço, e cole as partes que precisam ser coladas (as orelhas na sua parte contrária, a curva da cabeça que é marcado pela bolinha verde).
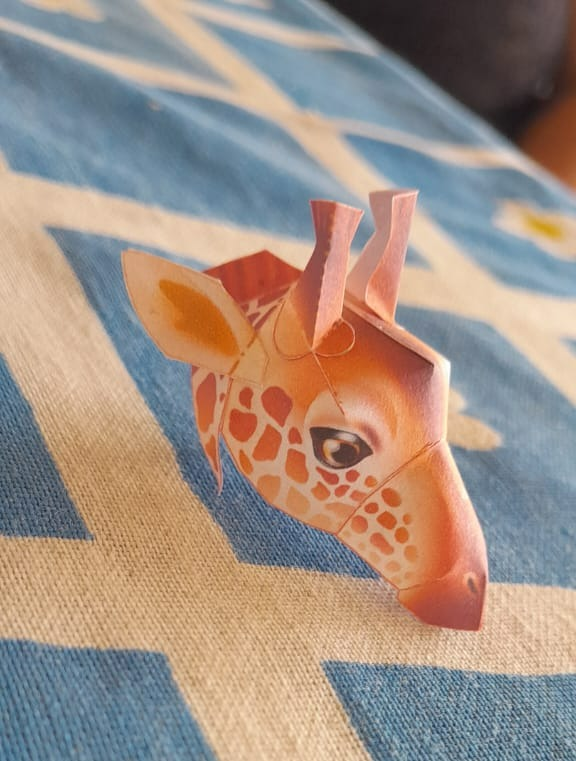
Seguindo as instruções corretamente você vai obter uma linda cabeça de girafa! Confesso que tive dificuldades com os chifres e as orelhas, mas isso foi porque eu não estava olhando as instruções e tentando fazer tudo sozinha, então SIGAM AS INSTRUÇÕES!! Lembrando que elas estão disponíveis no site também.
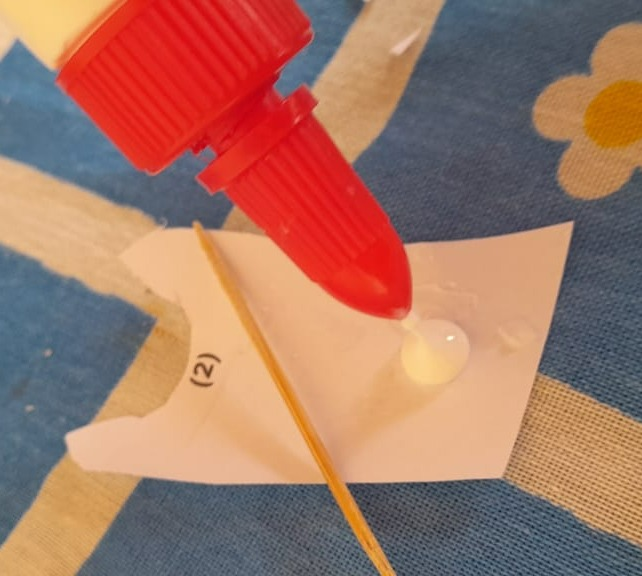
Eu indico que ponham a cola eu um pedacinho de papel e não apliquem diretamente no local onde precisa, isso porque a cola sempre sai mais que o necessário. Use pouca cola por que isso vai fazer com que seque mais rápido e vai agilizar seu processo de montagem. Segure as peças que está colando até ter certeza de que colaram.
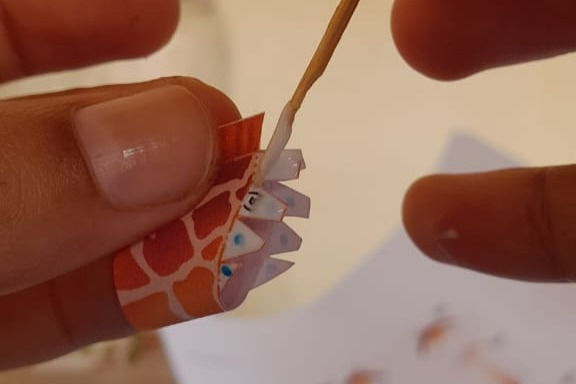
Para aplicar a cola eu usei um palito de dentes, assim ficava mais fácil ainda controlar a quantidade de cola nas pequenas partes.
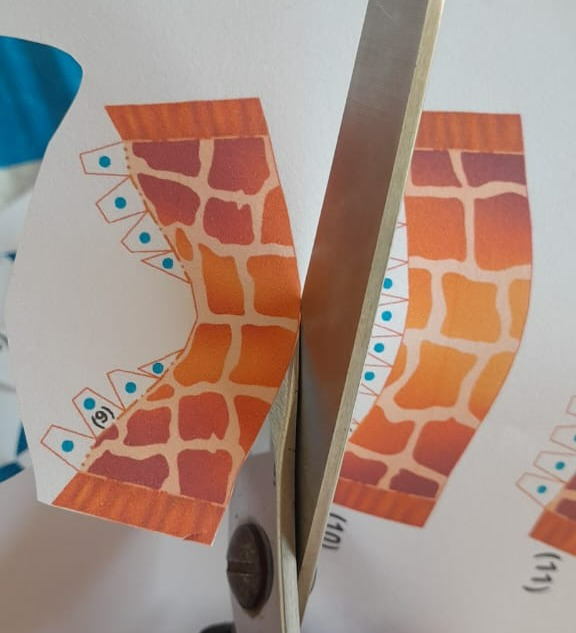
Uma das instruções diz para cortar por dentro da margem para que não fique marcações, mas eu acho fofo as marcações então tentei deixar todas elas 😁.
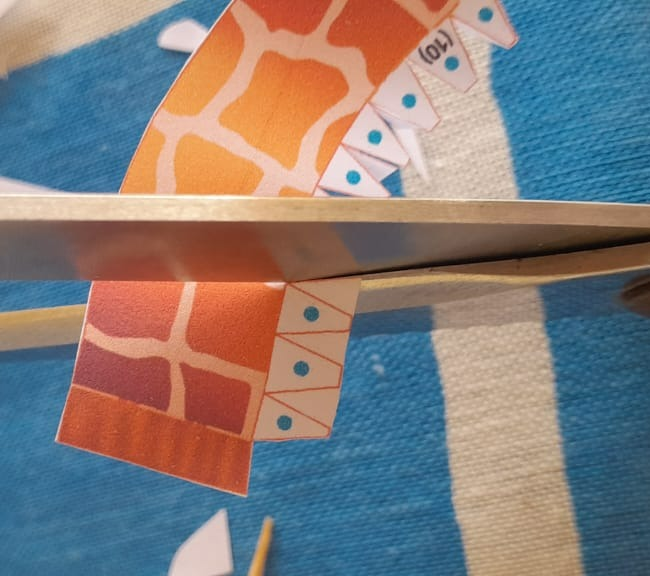
E nas partes com vários triângulos, como na imagem acima, eu cortava em uma espécie de círculo primeiro e depois voltava cortando os triângulos, acho mais fácil fazer assim e acho que também diminui as chances de errar.
Não fiquem preocupados como eu, tudo vai se encaixar perfeitamente, todas as peças estão nas três páginas a serem impressas, não de desesperem!
E, relembrando, corte as peças conforme for montando, para que não perca nenhuma e nem se confunda.
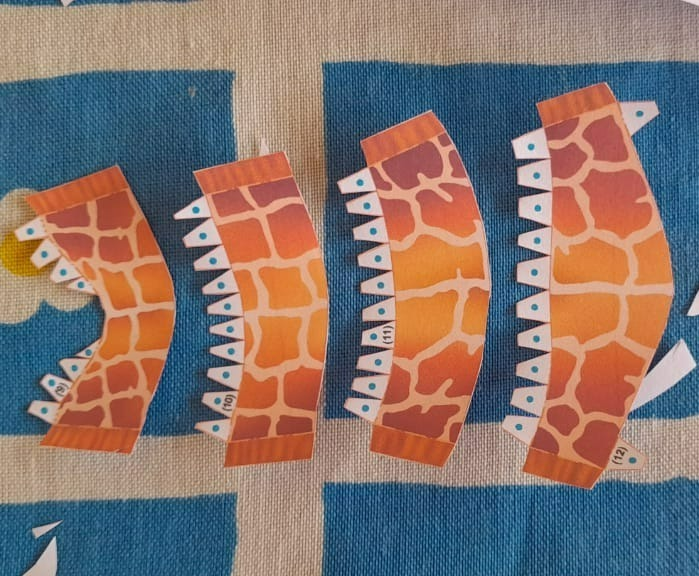
coloque-as na ordem correta e não se distraia e tudo correrá bem, não se preocupem mesmo. Um detalhe que achei fofo é que o pescoço de nossa girafa é torto para um lado, não é erro, ela apenas está olhando para o lado.
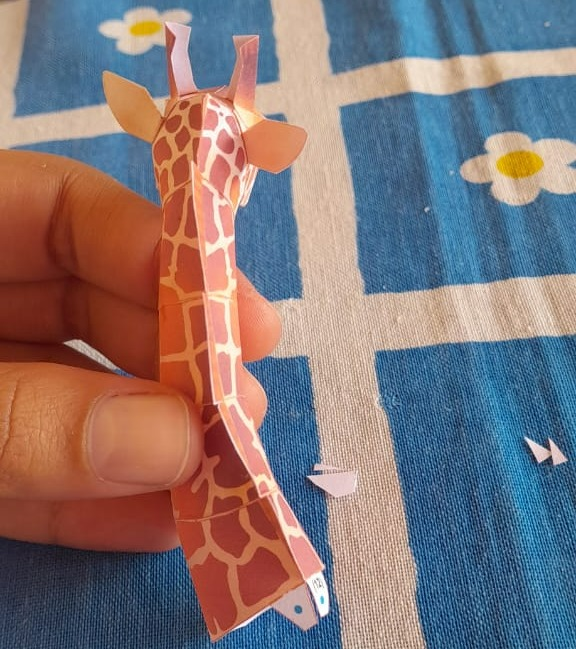
Outro detalhe, nossa girafa não é toda fechada, nela ficarão alguns espaços que farão com que ela se pareça mais ainda com a real e fique mais 3D.
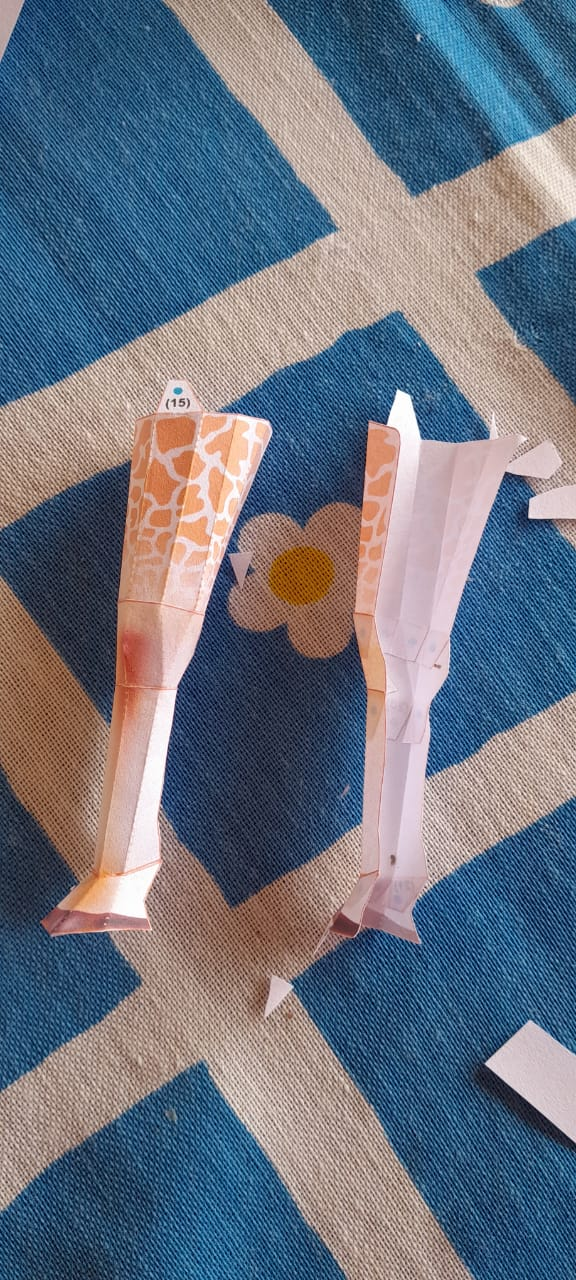
Cada detalhe foi bem planejado, se obedecer cada curva das pernas elas ficarão assim. Os cascos são pequenos e dão um trabalhinho para montar, mas juro que tudo vai valer a pena no final.
Esse tipo de artesanato trabalha bastante coordenação motora e paciência. É ótimo para sair do tédio e de brinde você ganha uma linda decoração feita por você!
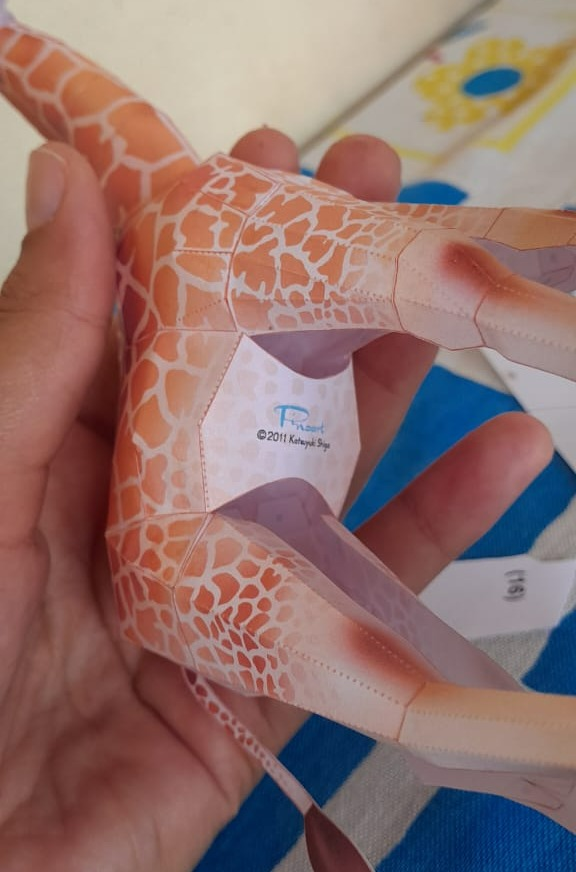
Na barriga da nossa girafa tem a marca d´água de quem fez, não tente apagar ela, seja justo e dê os créditos ao trabalho da pessoa que criou essa obra de arte.
Espero que façam ao menos um dos modelos disponíveis no site e se divirtam fazendo (está aí uma boa ideia de date...). Um ótimo fim de fim de semana, beijos e até a próxima!
Making a paper giraffe!
English version

A big hello to all and a happy Sunday! Today I'm here to present two things: an idea for when you're bored and an awesome website! Hope you like it.
I was on a super boring Saturday and I wanted to do something but I didn't know exactly what. Scrolling through the Instagram feed, I found a video of a girl making a suuuuper cute capybara; I opened the comments and found the site with animal molds, some characters and even automobiles.
At Creative Park Canon there are several paper art options for you to assemble. It is a simple and easy to use website. All models are available for free download and each one is well made, the instructions are easy to understand and there is a document explaining everything step by step and very detailed.

Opening the site, going to the "Realistic animals" section and sliding the screen a little, we find the giraffe and it already comes with a defined paper size, just click on download and then print the pages. If you want, you can print the instructions too, but it's not necessary, just download and open in a new tab.
After printing, cut the pieces little by little. Cut off the head, horns and ears first. Make all the markings as shown with each line, and glue the parts that need to be glued (the ears on the opposite side, the curve of the head that is marked by the little green dot).

By following the instructions correctly you will get a beautiful giraffe head! I confess that I had difficulties with the horns and ears, but that was because I wasn't looking at the instructions and trying to do everything myself, so FOLLOW THE INSTRUCTIONS!! Remembering that they are available on the website too.

I advise you to put the glue on a piece of paper and not apply it directly to the place where you need it, because the glue always comes out more than necessary. Use little glue as this will make it dry faster and will speed up your assembly process. Hold the pieces you are gluing until you are sure they stick.

To apply the glue I used a toothpick, so it was even easier to control the amount of glue on the small parts.

One of the instructions says to cut inside the margin so there are no marks, but I think the marks are cute so I tried to leave them all 😁.
And in the parts with several triangles, as in the image above, I would cut it in a kind of circle first and then go back and cut the triangles, I find it easier to do it this way and I think it also reduces the chances of making a mistake.

Don't be as worried as I am, everything will fall into place perfectly, all the pieces are on the three pages to be printed, don't despair!
And, remembering, cut the pieces as you assemble them, so that you don't lose any or get confused.

put them in the correct order and don't get distracted and everything will be fine, don't worry at all. One detail that I found cute is that our giraffe's neck is crooked to one side, it's not a mistake, she's just looking to the side.

Another detail, our giraffe is not completely closed, it will have some spaces that will make it look even more like the real thing and become more 3D.
Every detail was well planned, if you obey every curve of the legs they will stay like this. The hulls are small and take a little work to put together, but I promise it will all be worth it in the end.

This type of craft works a lot of motor coordination and patience. It's great to get out of boredom and as a gift you get a beautiful decoration made by you!

Our giraffe's belly has the watermark of whoever made it, don't try to erase it, be fair and credit the work of the person who created this work of art.
I hope you make at least one of the models available on the site and have fun doing it (here's a good date idea...). Have a great weekend, kisses and until next time!
Obrigado por promover a comunidade Hive-BR em suas postagens.
Vamos seguir fortalecendo a Hive
Parabéns, seu post foi selecionado pelo projeto Brazilian Power, cuja meta é incentivar a criação de mais conteúdo de qualidade, conectando a comunidade brasileira e melhorando as recompensas, seja bem-vinda 🤗
Yay! 🤗
Your content has been boosted with Ecency Points
Use Ecency daily to boost your growth on platform!
Support Ecency
Vote for new Proposal
Delegate HP and earn more, by @underlock.
Congratulations @npc.novamente! You have completed the following achievement on the Hive blockchain And have been rewarded with New badge(s)
Your next target is to reach 400 upvotes.
You can view your badges on your board and compare yourself to others in the Ranking
If you no longer want to receive notifications, reply to this comment with the word
STOPCheck out our last posts:
Support the HiveBuzz project. Vote for our proposal!
Essa girafa ficou muito linda!!! 😍
Muito obrigada!!!😊
I haven't done such thing since I was a little kid, but I remember how fun it was back then. Maybe I should give it a try now as your giraffe looks great :)
You could really try, it would be like reliving that part of childhood! And, if you don't like the giraffe very much, you can go to the website and choose another model from those there.😊
Thank you for sharing this post on HIVE!
Your content got selected by our fellow curator ashikstd & you just received a little thank you upvote from us for your great work! Your post will be featured in one of our recurring compilations which are aiming to offer you a stage to widen your audience within the DIY scene of Hive. Stay creative & HIVE ON!
Please vote for our hive witness <3
The rewards earned on this comment will go directly to the people sharing the post on Twitter as long as they are registered with @poshtoken. Sign up at https://hiveposh.com.
Eu já te disse várias vezes que suas criações ficam muito boas e essa girafa não é excessão, ficou incrível! Você deveria voltar à fazer mais desenhos e outros tipos de arte e publicar na Hive, essa rede precisa de conteúdo criativo como o seu.
Ei, notei que você usou Threads em fevereiro. A interface do usuário funciona melhor agora, talvez você queira tentar novamente!