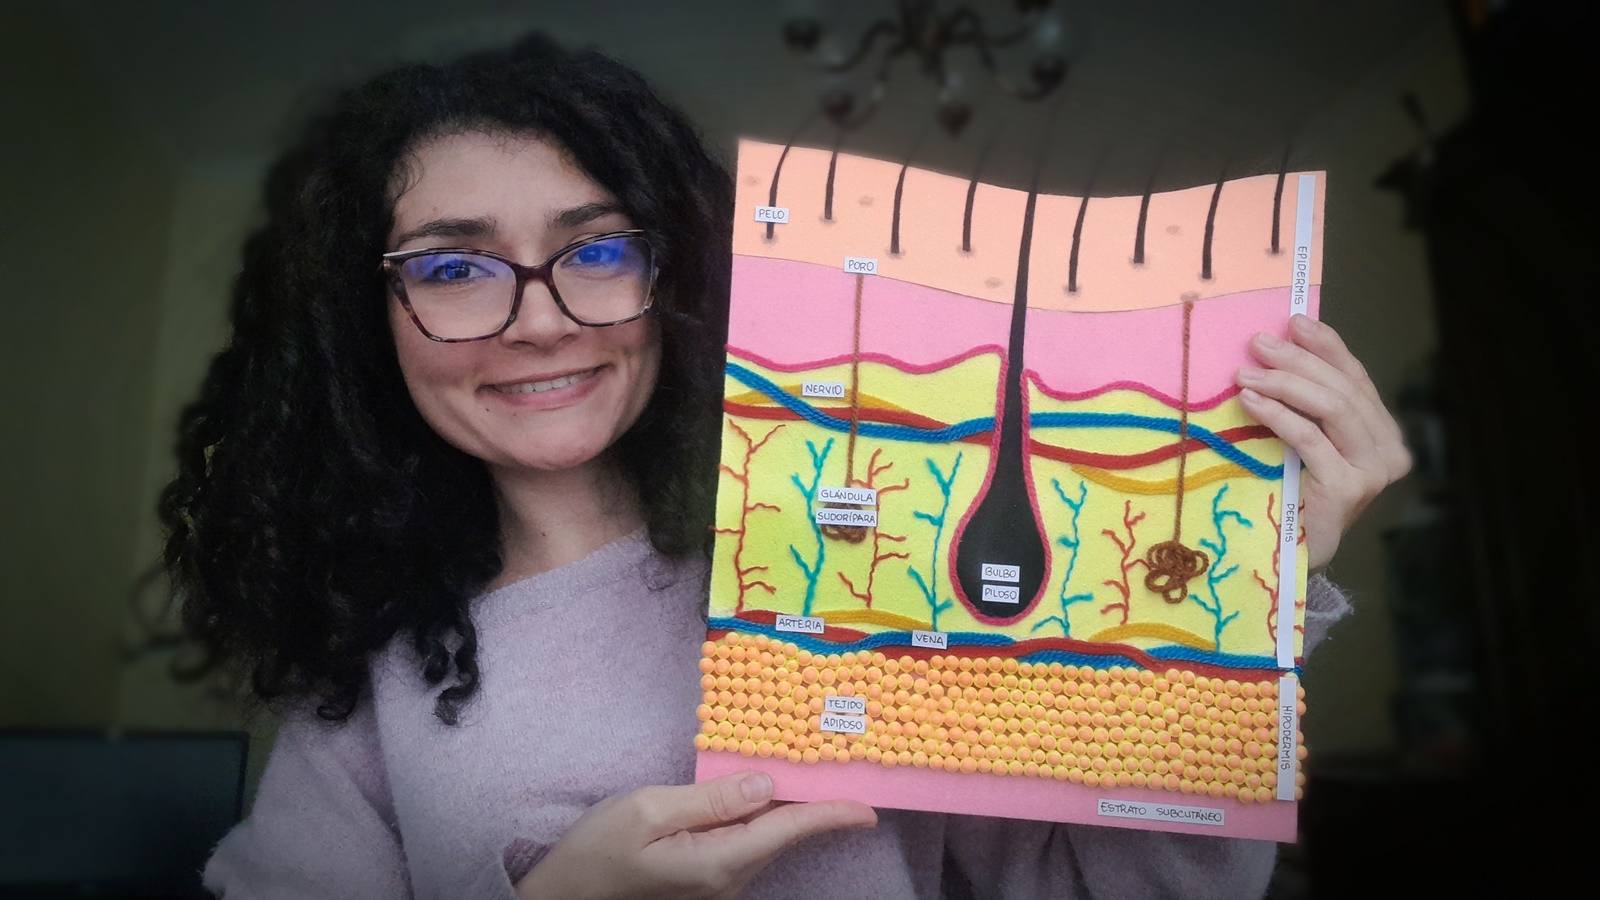
¡Muy buenos días a todos! 😊 Hoy les quiero compartir este tutorial sobre cómo realizar una maqueta de la anatomía de la piel humana. Le hice el favor a una amiga de crear este proyecto para ella y acá les enseñaré el paso a paso.
Good morning everyone! 😊 Today I want to share this tutorial on how to make a model of the anatomy of human skin. I did a friend the favor of creating this project for her and here I will show you step by step.


Así que para crear esta maqueta, necesitaremos los siguientes materiales...
-Láminas de fieltro de colores
-Tijeras
-Regla
-Silicón líquido
-Estambre/lana de colores
-Marcador
-Bolitas de anime/telgopor/porespán
-Lámina de madera para la base de la maqueta
-Papel
So to create this model, we will need the following materials...
-Colored felt sheets
-Scissors
-Ruler
-Liquid silicone
-Colored yarn/wool
-Marker
-Anime/styrofoam/porespán balls
-Wooden sheet for the base of the model
-Paper

Paso 1: tomar láminas de fieltro rosa y blanco para crear formas de las capas de la piel. Como no venía una lámina amarilla, pinté la blanca de color amarillo.
Step 1: Take sheets of pink and white felt to create shapes from the skin layers. Since a yellow sheet did not come, I painted the white one yellow.

La primera franja de fieltro representa la piel que vemos, así que esa franja blanca la pinté de color carne.
The first strip of felt represents the skin we see, so I painted that white strip flesh-colored.

Paso 2: Pegar las láminas de fieltro en la lámina de madera para que tenga soporte y estabilidad.
Step 2: Glue the felt sheets to the wooden sheet for support and stability.

Paso 3: Pegar las bolitas de telgopor en la última franja de fieltro. Al finalizar, pintar de color naranja.
Step 3: Glue the Styrofoam balls to the last strip of felt. When finished, paint orange.

Paso 4: Con la lámina de fieltro negra, crear la forma de un vello (muy grande) y otros más pequeños. En este momento, me di cuenta que no me gustaba el color amarillo que se veía. Así que creé otro tono de amarillo y lo volví a pintar. Luego, con estambre de colores, crear venas y arterias. Pegar con silicón líquido.
Step 4: With the black felt sheet, create the shape of a hair (very large) and other smaller ones. At this point, I realized that I didn't like the yellow color that looked. So I created another shade of yellow and painted it again. Then, with colored yarn, create veins and arteries. Paste with liquid silicone.

Paso 5: Con estambre, crear el resto de venas, arterias y nervios. Pegar los vellos más pequeños, pegar sobre la franja color carne. Pintar los poros de la piel debajo de cada vello. Luego de tener cada parte bien pegada con silicón líquido, crear las etiquetas de papel con los nombres de cada parte.
Step 5: Using yarn, create the rest of the veins, arteries and nerves. Glue the smaller hairs, glue on the flesh-colored stripe. Paint the pores of the skin under each hair. After having each part well glued with liquid silicone, create paper labels with the names of each part.

Acá ya podemos apreciar el resultado final de la maqueta de anatomía de la piel humana y aprender sobre los nombres de cada parte que la conforman.
Here we can see the final result of the human skin anatomy model and learn about the names of each part that makes it up.


Espero les haya gustado este tutorial 😄 ¡Nos vemos pronto, Hivers!
I hope you liked this tutorial 😄 See you soon, Hivers!
Well, this project can be great to teach children and it can be great tools to teach while play. 😊
Thanks for sharing
Yes, that's a great way to learn :)
incredibly beautiful 👍💥
Thank you so much :)
You're welcome, keep up the good work friends.
Te felicito amiga @ojosdecanela por tu espectacular trabajo.
Aaaww muchísimas gracias :)