FULL ENGLISH VERSION

Greetings, Artisans and Artists of this beautiful #HiveDIY Community. Yesterday, I couldn't share this with you due to circumstances beyond my control, but that doesn't imply that I can't do it today, right? So, I bring you a #SpecialEdition post that I wanted to do since a few days ago for being something different and, of course, from my favorite anime series in these last years: #KimetsuNoYaiba.
I recently came across a super interesting video tutorial from a new YouTuber who works incredibly well. This time, he drew sneak peeks of the main characters of Demon Slayer: Tanjiro, Zenitsu, and Inosuke. Because it's different and I loved it, I wanted to try it. Join me to see the steps.

𝐒𝐭𝐞𝐩-𝐛𝐲-𝐒𝐭𝐞𝐩
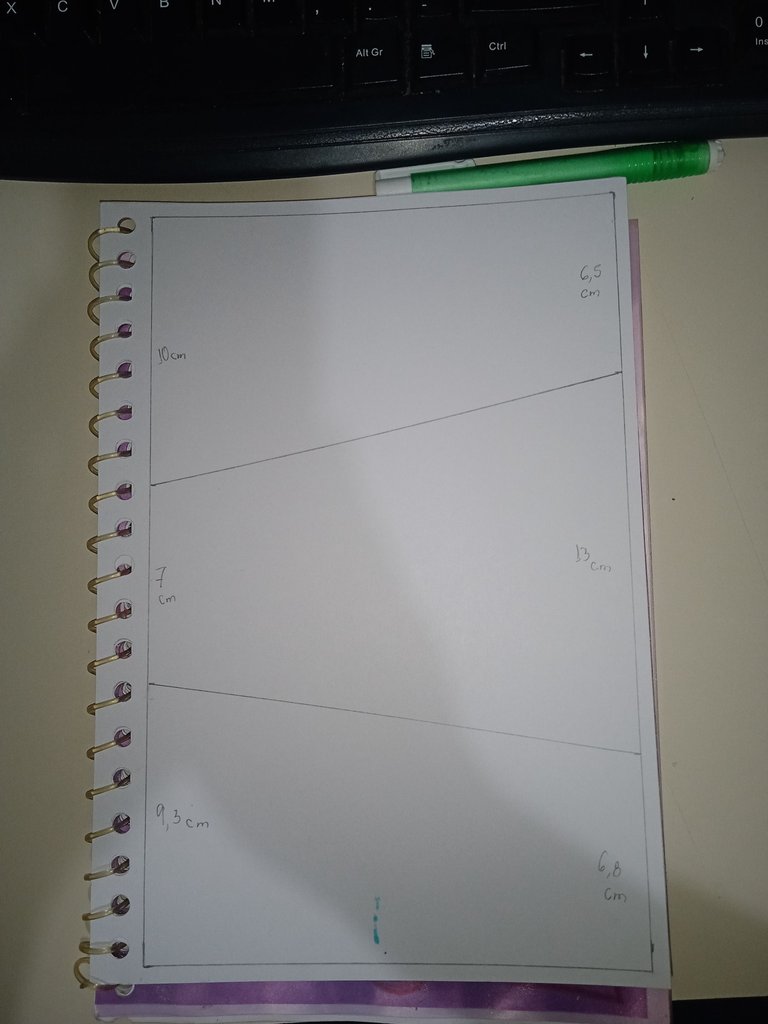
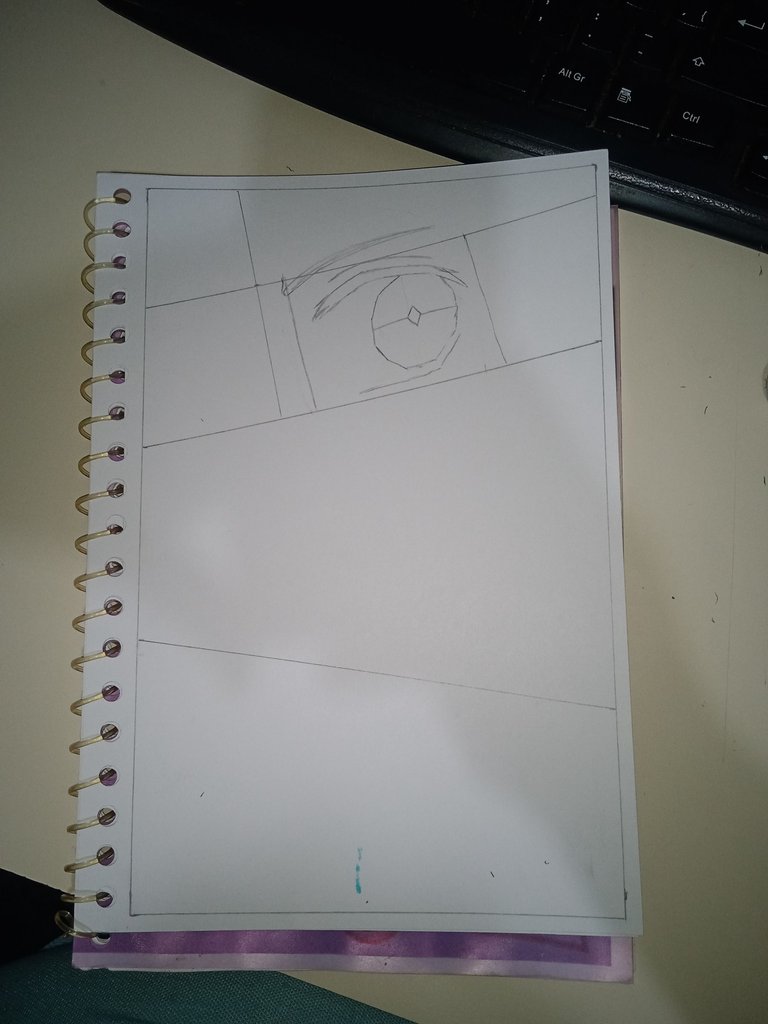
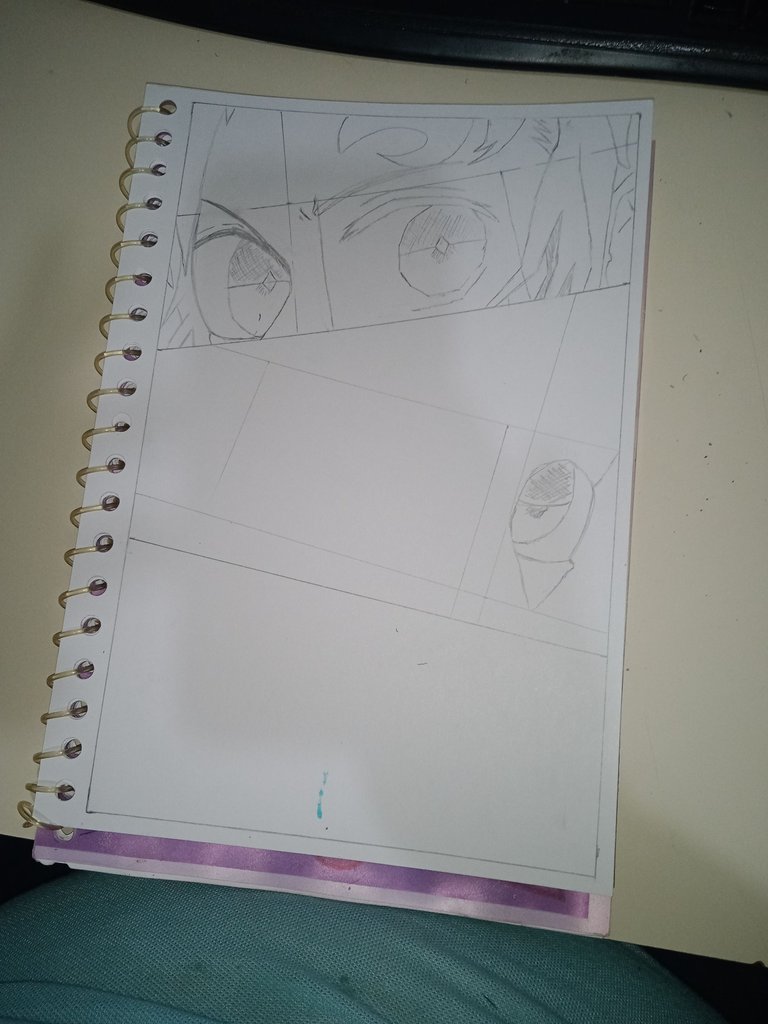
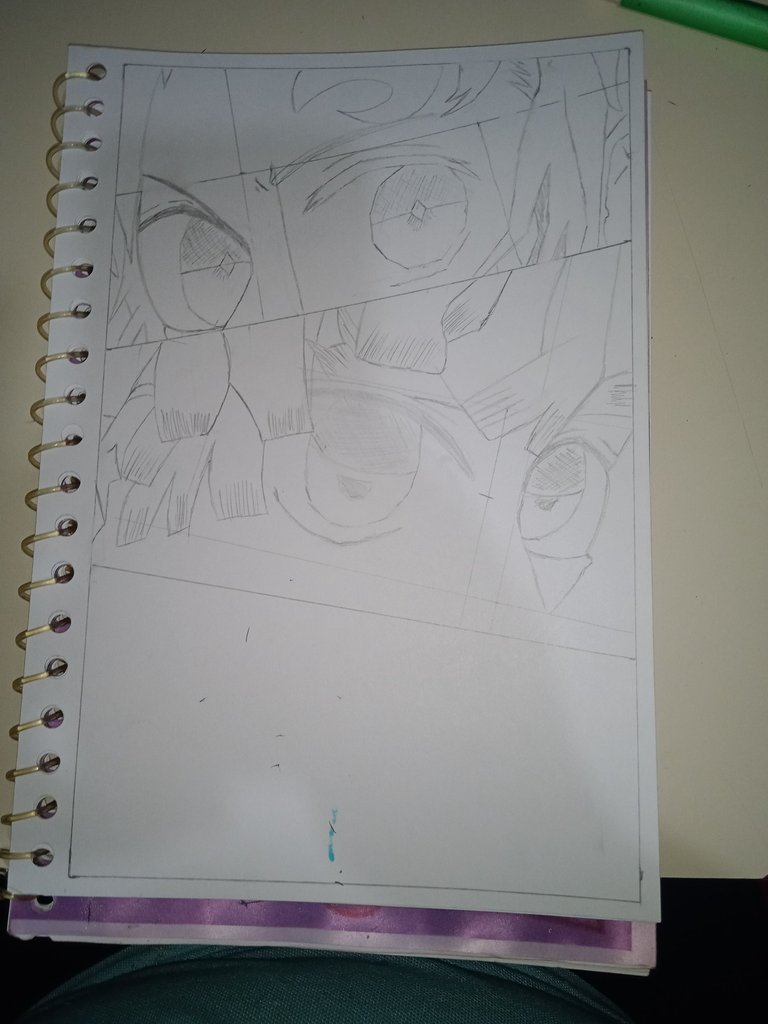
The first thing I did was outline a rectangular margin and divide it into three parts with diagonal lines using different measures. The sheet I used is an opaline one, so the measurements are not exact like those in the video tutorial, but I still used them as close as possible.
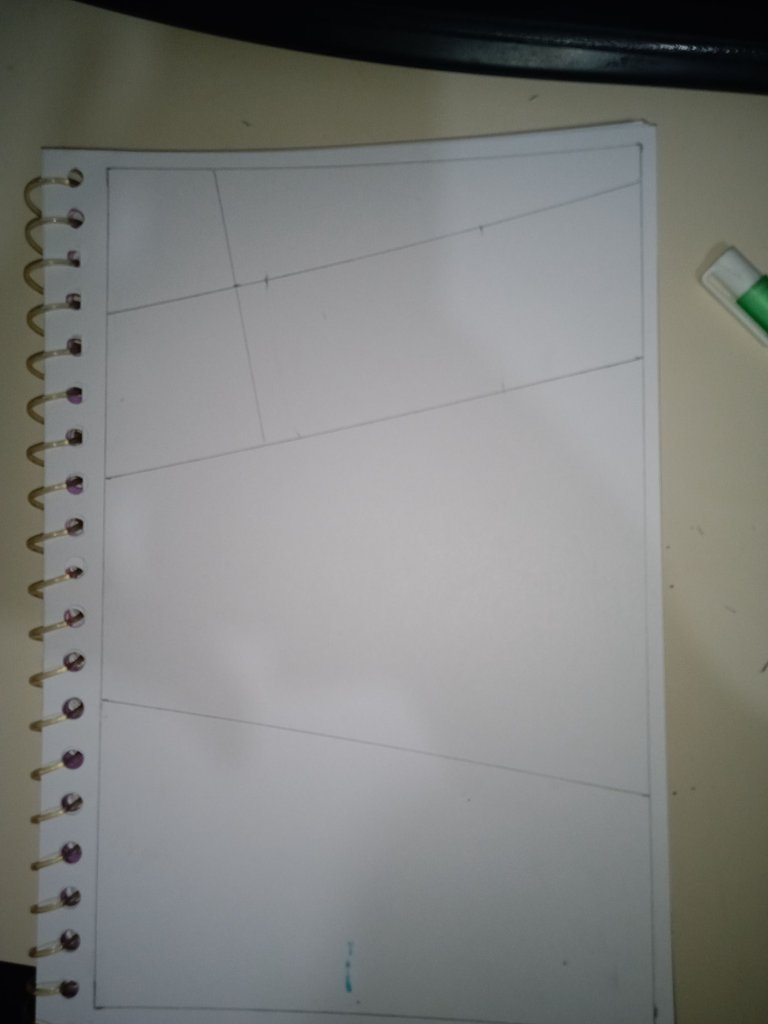
For the first line, I started by drawing some inclined and parallel guidelines, which I used as initial separation. The first place will go to Tanjiro. I was really scared because this drawing technique is different from the one I usually use with circles. I wanted to get it right.
 |  |
 |  |
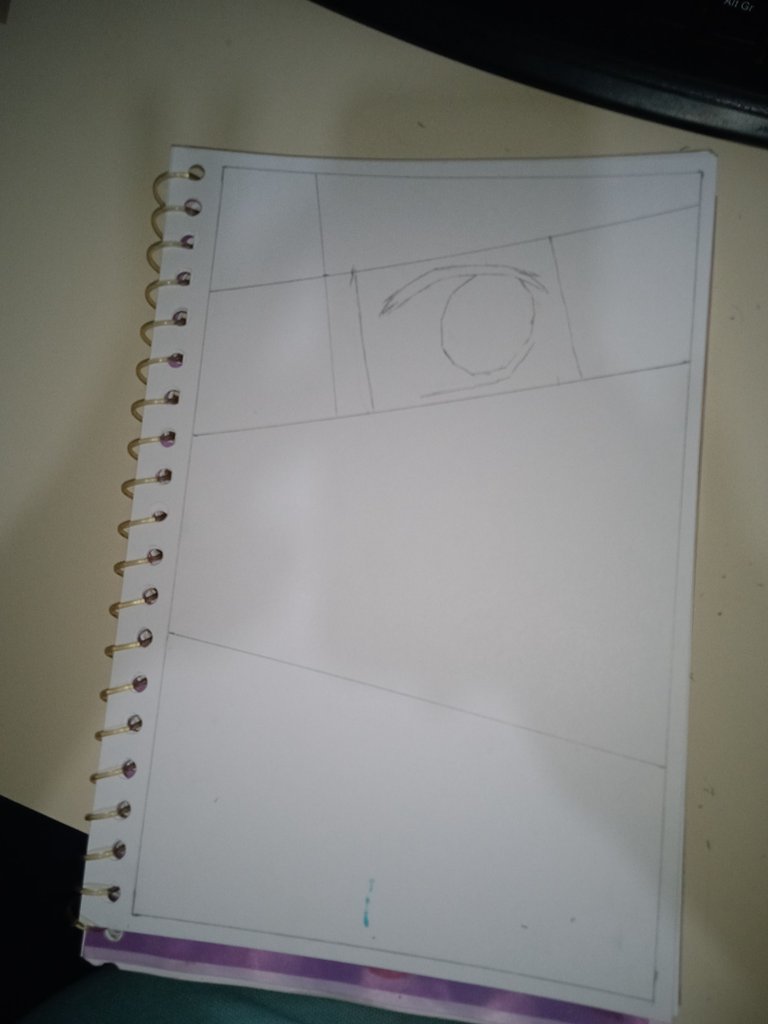
Once the guidelines were drawn in the first line, I drew another one of approximately 7 cm, locating the left eye of Tanjiro. As you can see in the first photo, I drew his eyelashes and pupils.
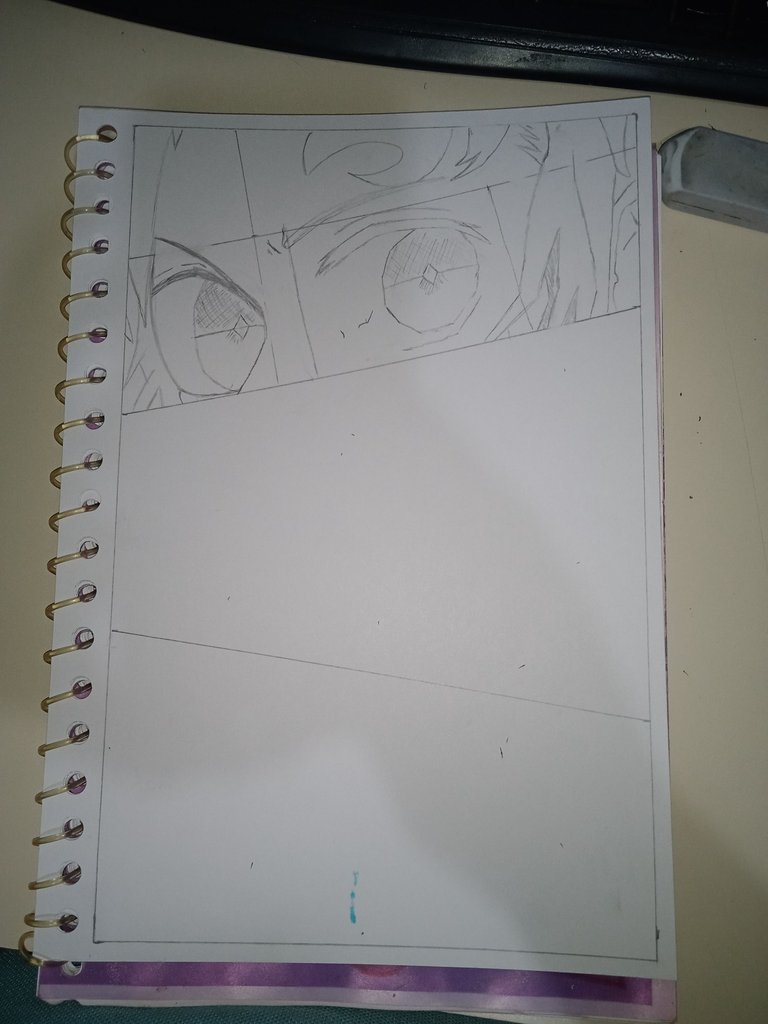
Then I did the eyelid detail at the top of her eye and added her very thin eyebrow.
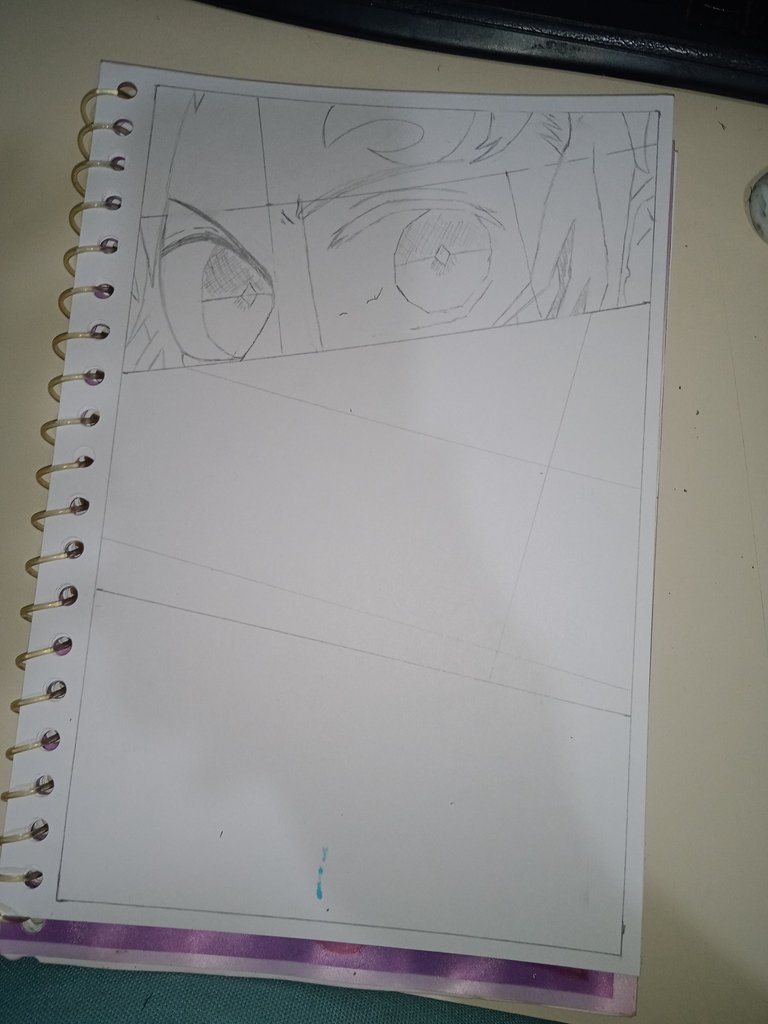
Then, I started to draw her right eye. It was the most difficult part because I couldn't see it as symmetrical 🤣 but there it was.
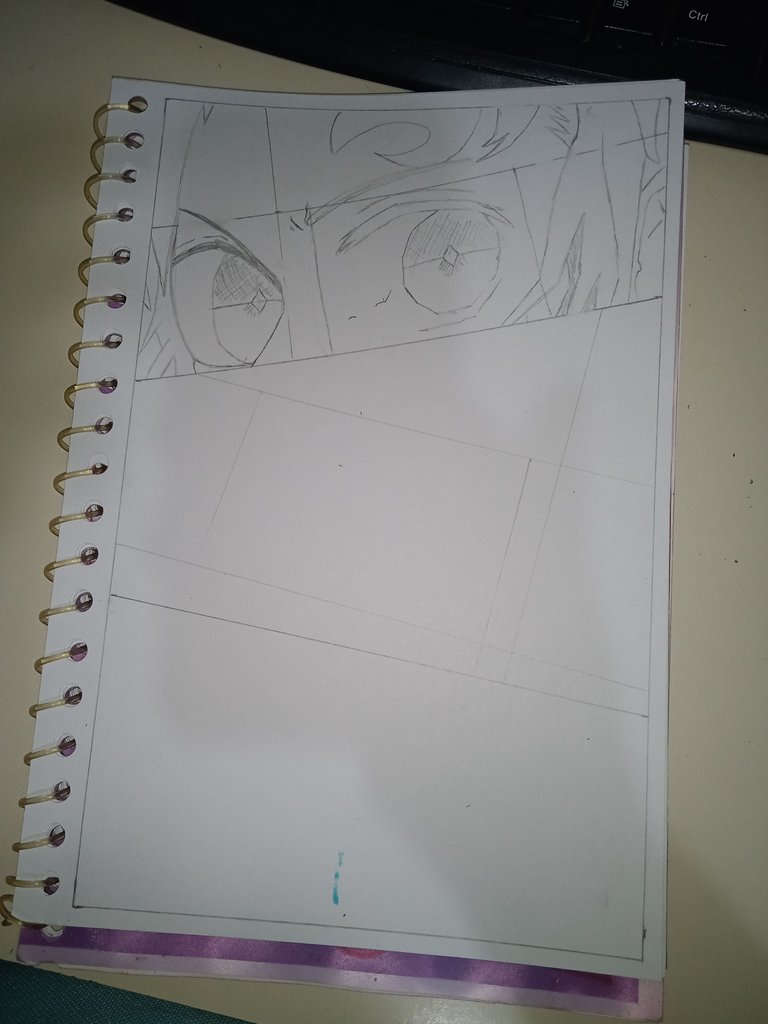
After that, I only added part of her scar, her locks of hair, and part of her left ear.
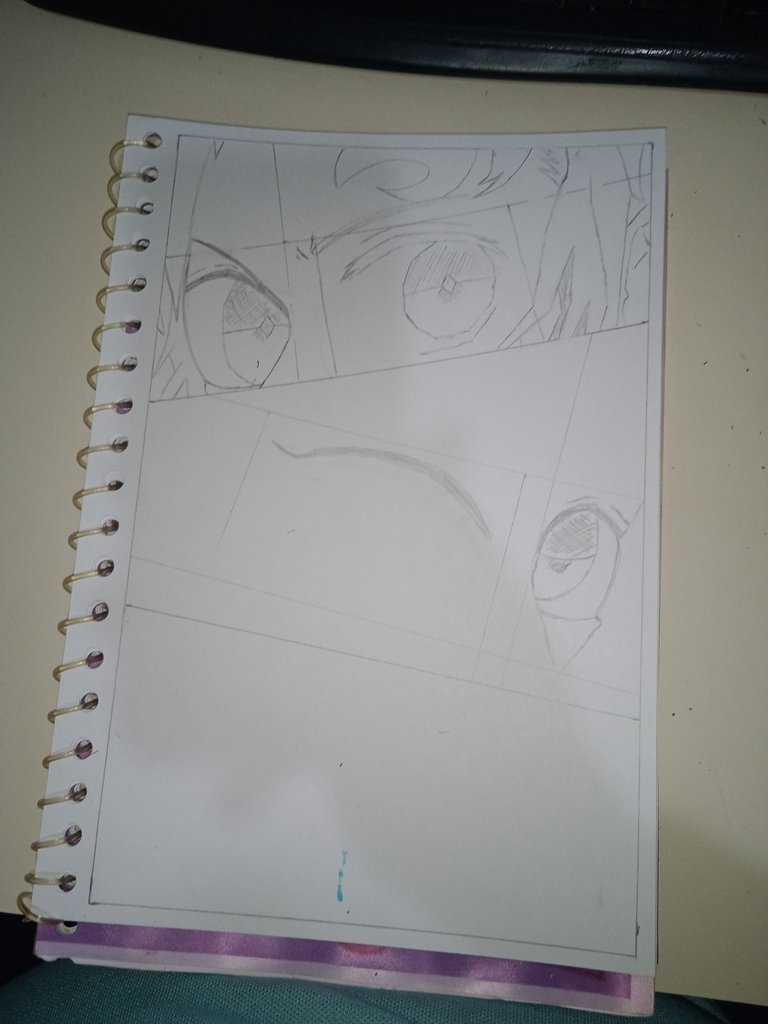
Now it's the turn of Zenitsu, just like the previous character, I again made more guide lines parallel to the main separation.
 |  |
 |  |
 |  |
 |  |
As for Tanjiro, I drew a rectangle a bit bigger than the one I used above since the space for Zenitsu is the biggest of the 3.
I started by drawing his left eye, also unsure that it would be uneven, but I trusted the process and what I was doing with a lot of patience and concentration.
Then I did his stylized eyelashes and unique eye with his unique style. I liked this part very much.
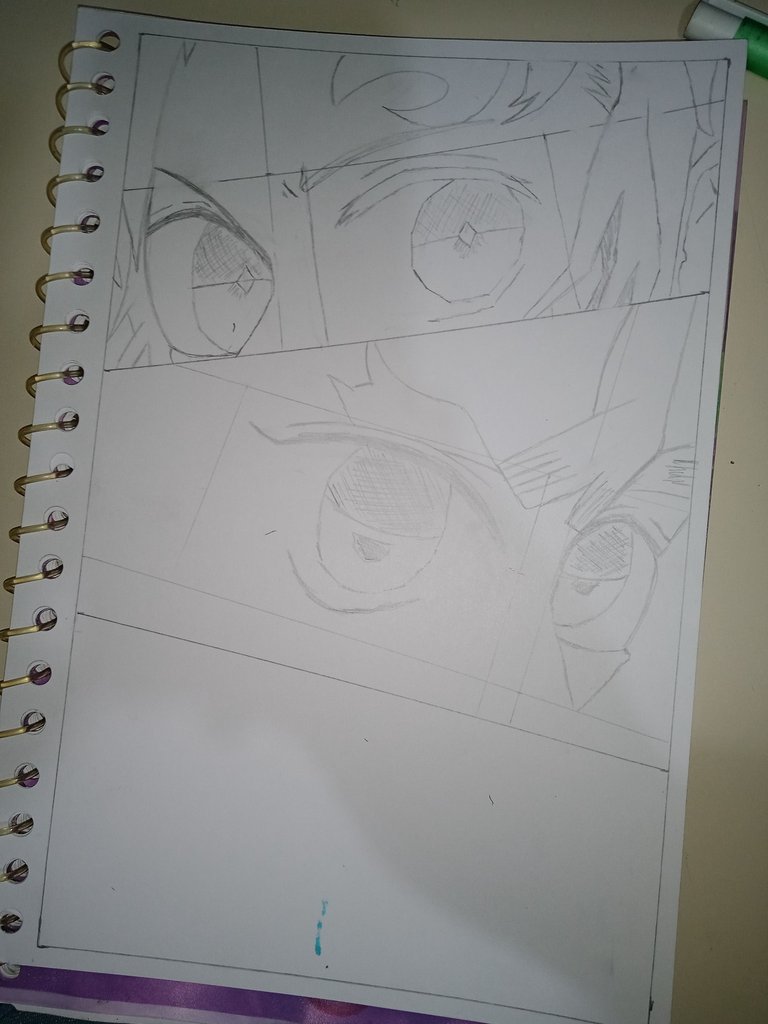
Then, I started adding the hair strands, first on the right and then on the left, going over the top.
Now, finishing, you can see how I'm adding more strands of Zenitsu's characteristic hair, to finally add those details at the end of each strand that are like shadows.

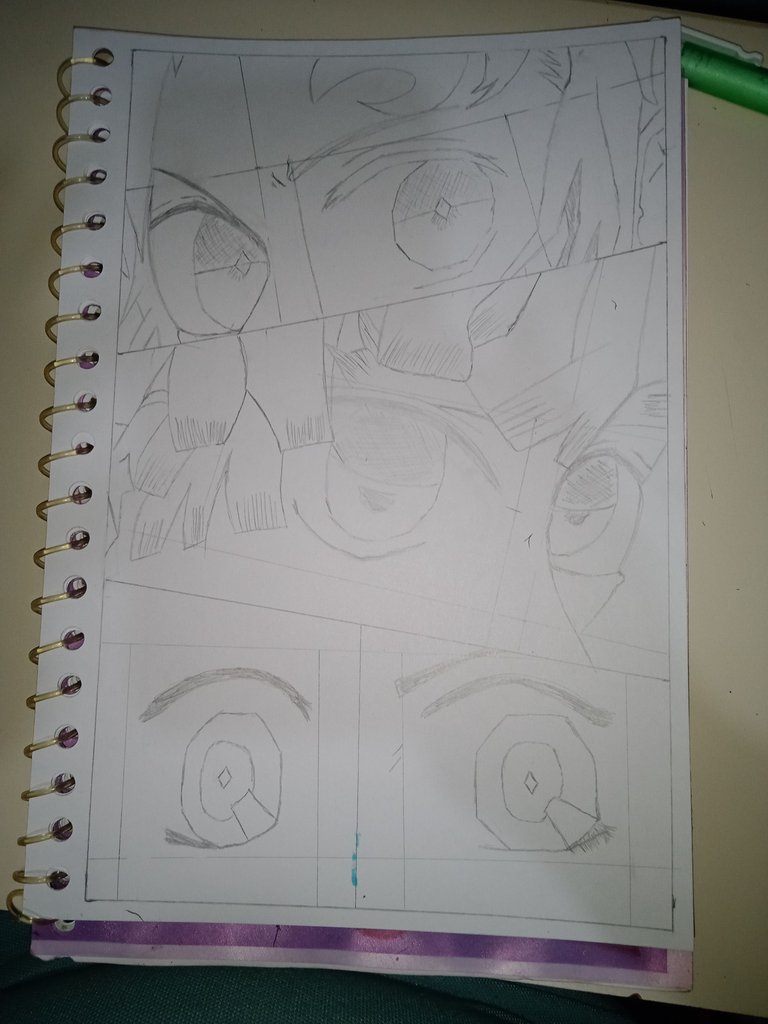
Last but not least, it's Inosuke's turn, just like the previous ones, and taking into account the suggestions of the video tutorial, it was his turn to detail his front look, to give him that special touch.
 |  |
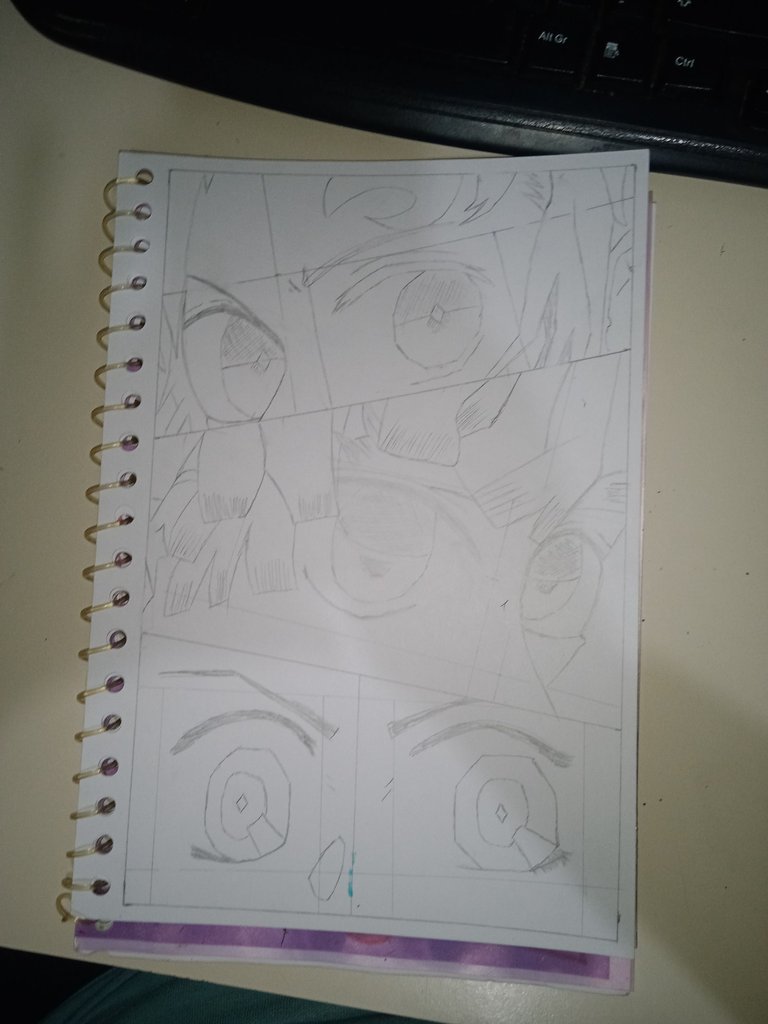 |  |
Incredibly, this third part was the easiest for me to sketch. I started by drawing the left eye completely, from her eyelashes to her eyebrow.
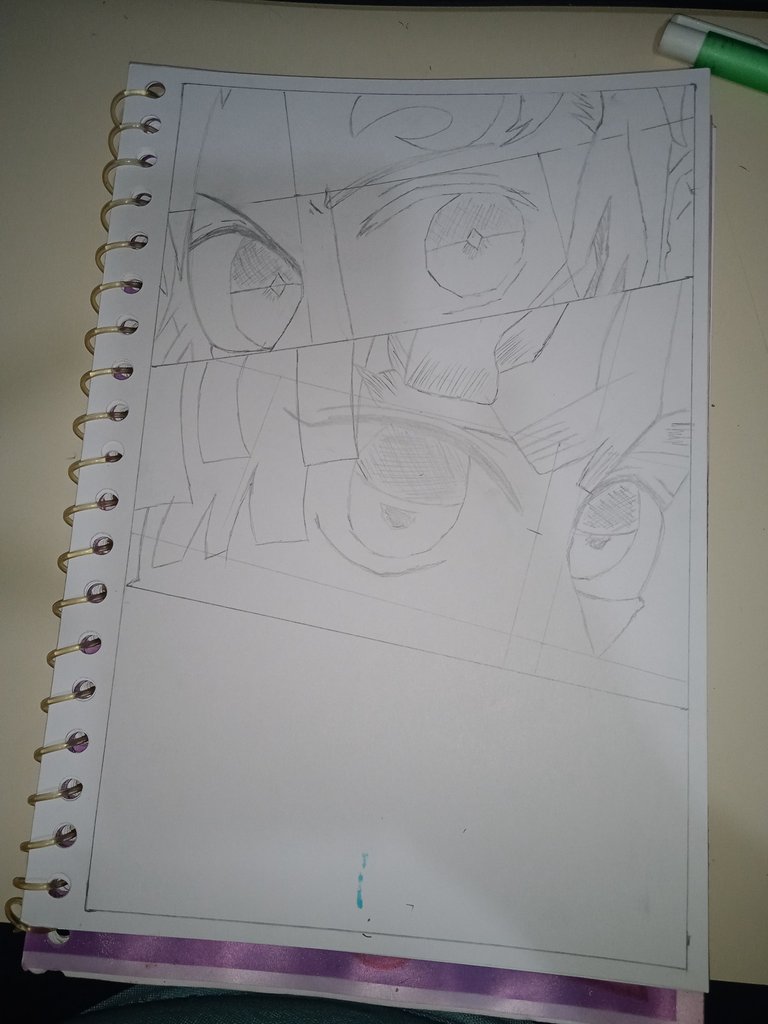
Then I did the same with the right one, adding her eyebrow and the shadow of her nose.
To finish, all that was left to do was to add some of her hair strands. This was the part that was a little complicated for me since I had to erase certain parts of the eyebrows and eyelashes.
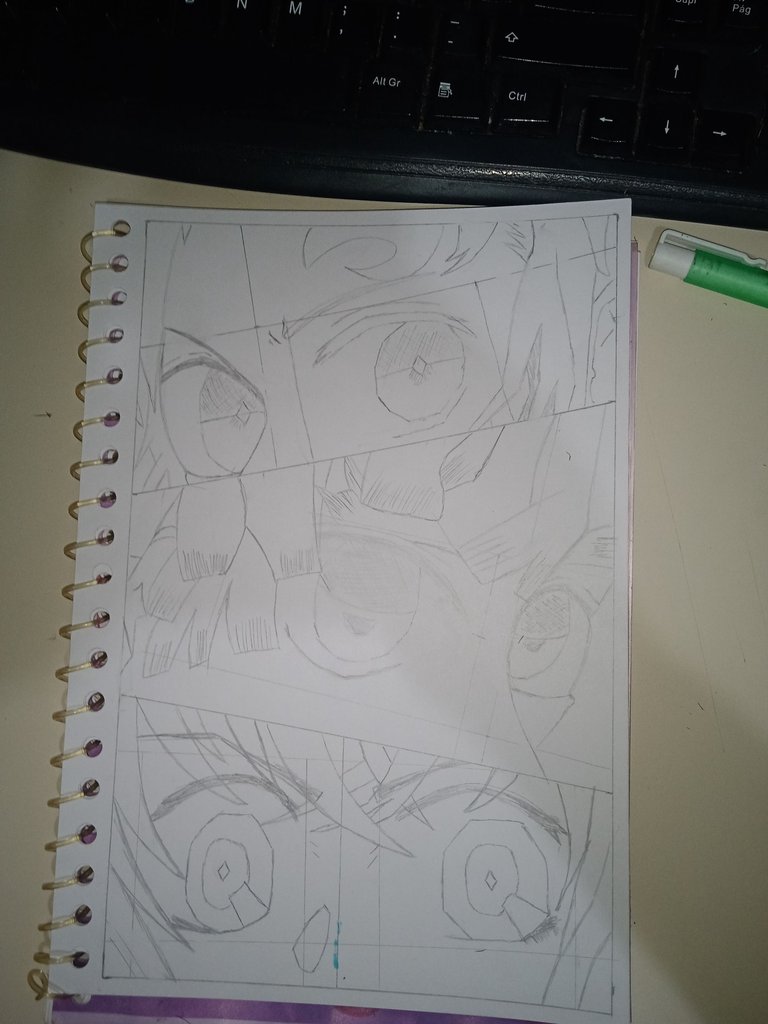
Now that the drawing is ready to outline and draw, here is the process summarized in photos, and then I will show you the final result.
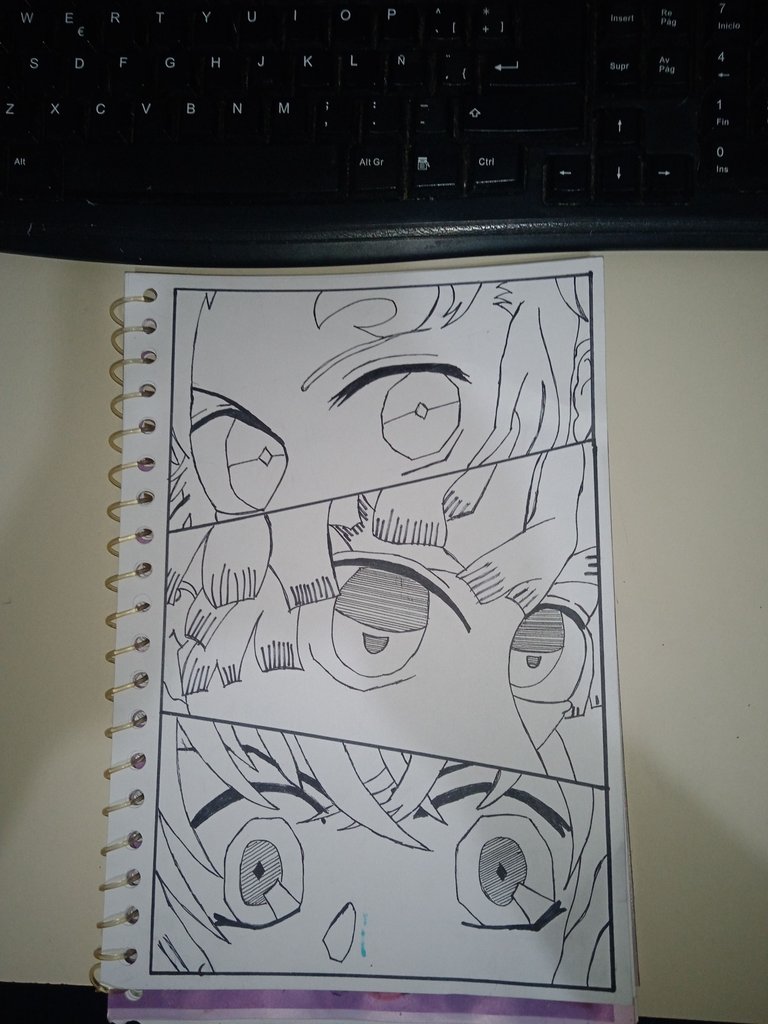 |  |
 |  |
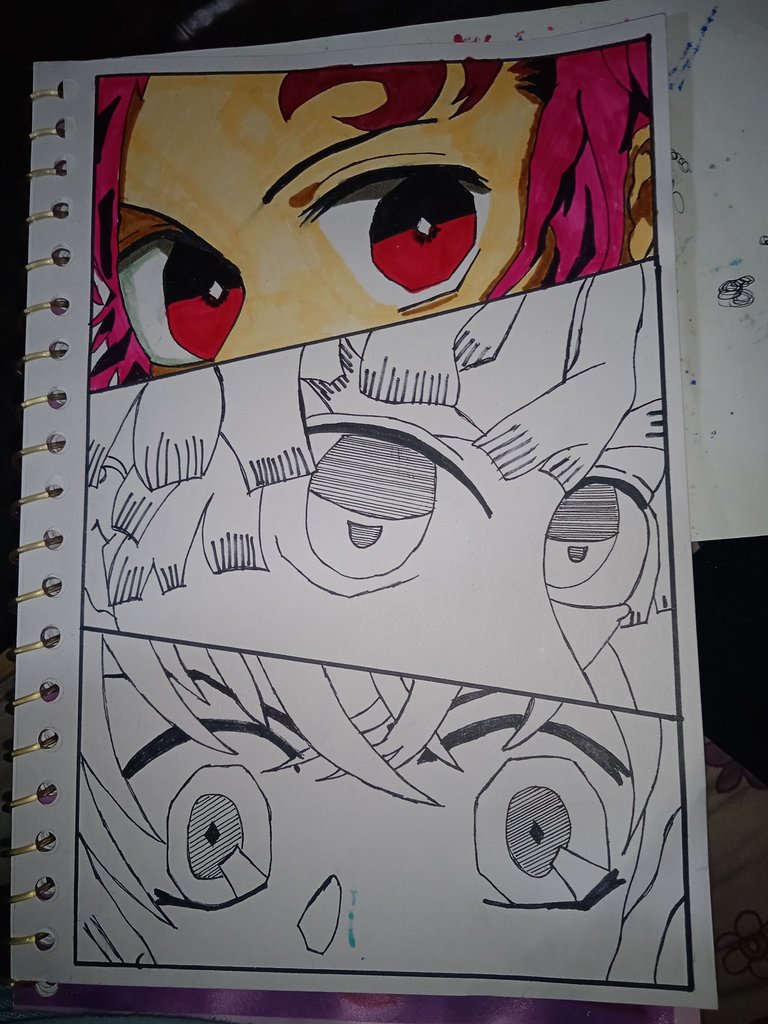
The truth is that this coloring couple was complicated for me, more than drawing it, because what do you think? The markers are starting to fail me. I've used them so much that they are running out of ink, and it's hard for me to get them to color properly. Especially the black and the skin color, adding now the yellow.
Also, in the middle of the coloring process, the power went out, there was a power surge, and I had to turn everything off to avoid damaging my appliances. I had to wait about 2 hours for everything to normalize before I could continue.
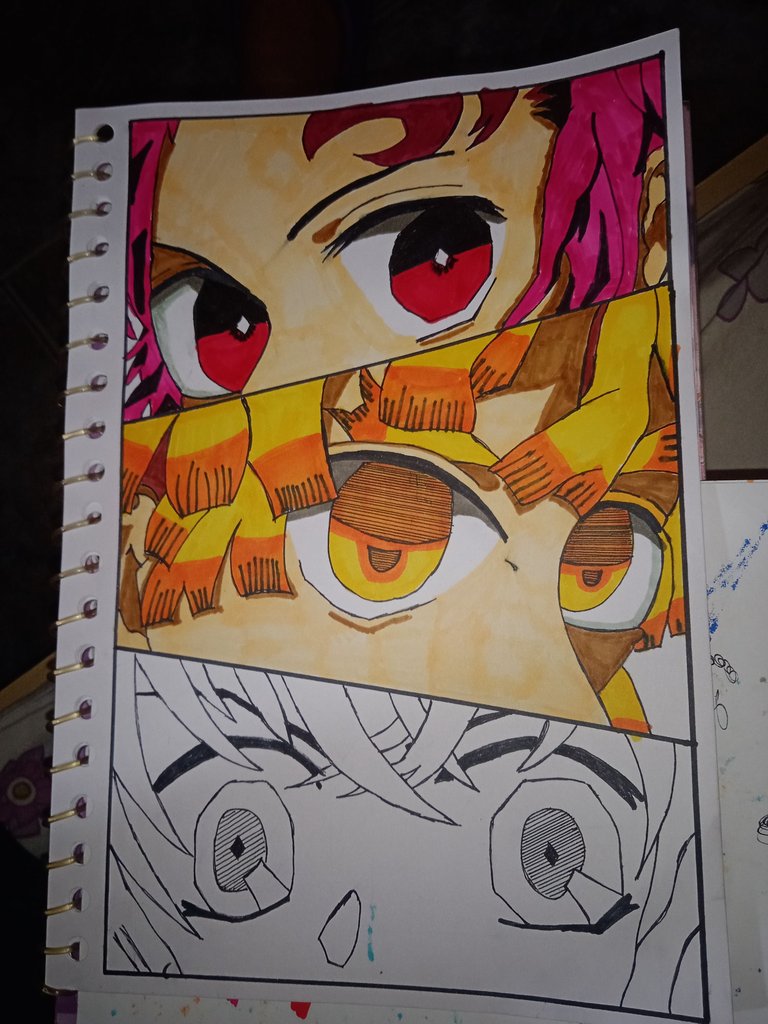
On the other hand, the excessive heat plus my mother's critical comments, alluding that I waste my time while doing this kind of work, especially for HIVE, all added up, but in the end, I managed to finish this work of art.
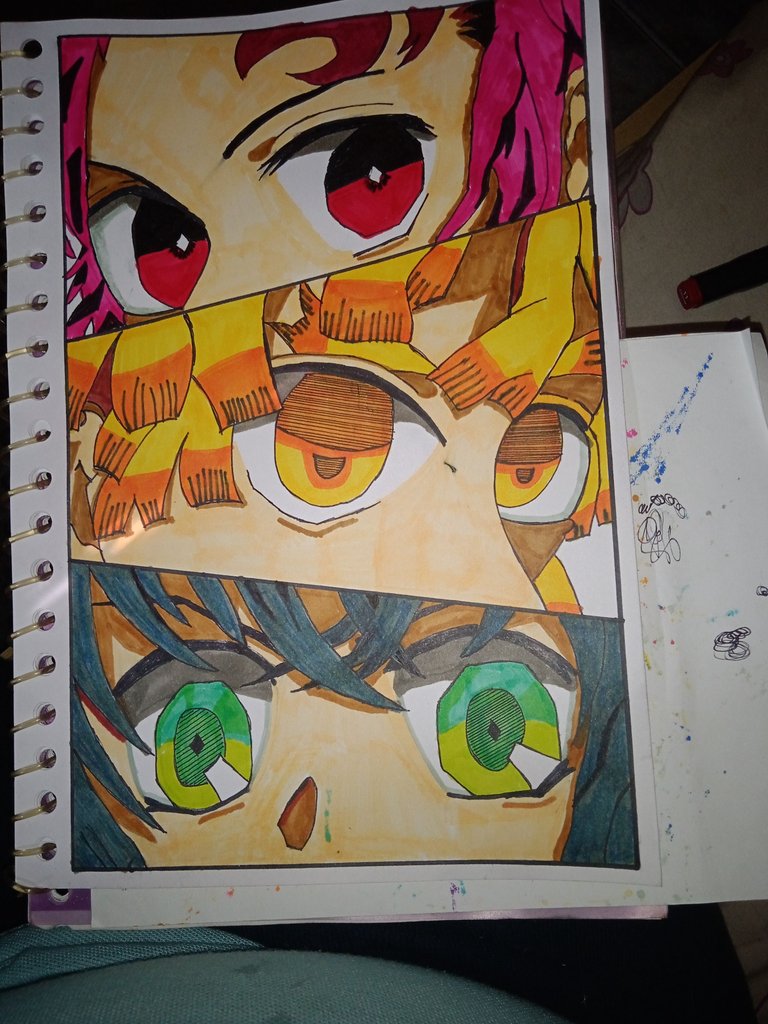
𝐅𝐢𝐧𝐚𝐥 𝐑𝐞𝐬𝐮𝐥𝐭
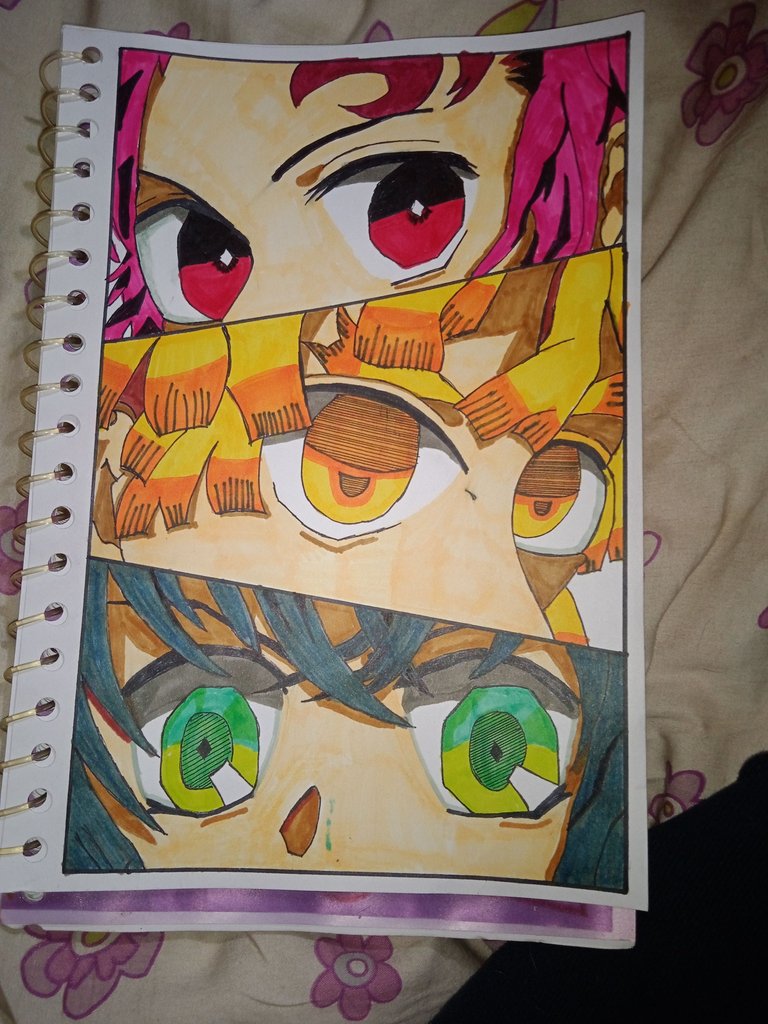
Despite all the pain, here is the result, and for my first time, I loved the way it turned out, especially the process. Especially the process, which helped me to relax and focus my mind on something productive and leave aside the negative. What do you think? Did you like it? Let me know your opinions in the comments! I'll be happy to read them! See you next time! 💚
At the end of the post, you can see the Complete Video Tutorial from which I was guided to make this drawing. click on HERE to go there
Español
Saludos Artesanos y Artistas de esta linda Comunidad #HiveDIY. Ayer no pude compartir con ustedes por circunstancias ajenas a mi voluntad, pero eso no implica que no pueda hacerlo hoy, ¿cierto? Así que les traigo un post #EdicionEspecial que quería hacer desde hace algunos días por ser algo diferente y por supuesto de mi serie de animé favorita en estos últimos años: #KimetsuNoYaiba.
Y es que hace poco me topé con un video tutorial super interesante de un nuevo YouTuber que trabaja increíblemente. En esta ocasión dibujó las miradas furtivas de los protagonistas de Demon Slayer, Tanjiro, Zenitsu e Inosuke. Por ser algo diferente y que me encantó, quise intentarlo, acompáñenme a ver el paso a paso.
𝐏𝐚𝐬𝐨 𝐚 𝐏𝐚𝐬𝐨
Lo primero que hice fue delinear un margen rectangular y dividirlo en 3 partes con líneas diagonales usando diferentes medidas. La hoja que yo usé es una opalina, por lo que las medidas no serían exactas a las del video tutorial pero aun así las usé lo más parecidas posibles.
Para el primer renglón, inicié dibujando unas líneas guías inclinadas y paralelas las que usé de separación inicial. El primer puesto será para Tanjiro. La verdad es que estaba muy asustada porque esta técnica de dibujo es diferente a la que suelo usar con los círculos, de verdad quería que me saliera bien.
| |
| |
Una vez dibujadas las líneas guías en el primer renglón, tracé otra de 7 cm aproximadamente, ubicando el ojo izquierdo de Tanjiro. Como pueden ver, en la primera foto dibujé sus pestañas y su pupila.
Luego le hice el detalle del párpado en la parte superior del ojo y agregué su ceja muy delgada.
Después empecé a dibujar su ojo derecho, fue el más difícil porque por más que sea no lo veía simétrico 🤣 pero allí quedó.
Ya después sólo le agregué parte de su cicatriz y sus mechones de cabello, y parte de su oreja izquierda.
Ahora le toca el turno a Zenitsu, al igual que el personaje anterior, hice nuevamente más líneas guías paralelas a las de la separación principal.
| |
| |
| |
| |
Al igual que para Tanjiro, tracé un rectángulo un poco más grande que el que usé arriba, ya que el espacio para Zenitsu es el más grande de los 3.
Empecé dibujando su ojo izquierdo, insegura también de que quedara disparejo, pero confié en el proceso y en lo que hacía con mucha paciencia y concentración.
Luego le hice su pestaña estilizada y su ojo inigualable con ese estilo único de él, esta parte me gustó bastante.
Luego empecé a agregarle los mechones de cabello, primero a la derecha y luego a la izquierda, pasando por la parte superior.
Ya finalizando pueden ver cómo voy agregando más mechones de su cabello característico de Zenitsu, para finalmente agregarle esos detalles al final de cada mechón que son como unas sombras.
Por último, pero no menos importante, le toca el turno a Inosuke, al igual que los anteriores y tomando en cuenta las sugerencias del video tutorial, a él le tocó detallar su mirada de frente, para darle ese toque especial.
| |
| |
Increíblemente, esta tercera parte fue la que se me hizo más sencilla de esbozar. Empecé dibujando el ojo izquierdo todo completo, desde sus pestañas hasta su ceja.
Luego hice lo mismo con el derecho, agregando luego su ceja y la sombra de su nariz.
Ya para finalizar, sólo quedaba agregar algunos de sus mechones de cabello. Esta fue la parte en la que se me complicó un poco ya que debía estar borrando ciertas partes de las cejas y pestañas.
Ahora sí, el dibujo está listo para delinearlo y dibujarlo, a continuación les presento el proceso resumido en fotos para luego mostrarles el resultado final.
| |
| |
La verdad que esta parde de coloreado se me hizo complicada, más que dibujarla, ya que ¿qué creen? los marcadores me están empezando a fallar. Al parecer los he usado tanto que se están quedando sin tinta y me cuesta que coloreen debidamente. Sobre todo el negro y el color piel, sumando ahora el amarillo.
Además, en pleno proceso de coloreado me falló la luz, hubo una subida de tensión y tuve que apagar todo para que no se me dañaran los electrodomésticos. Tuve que esperar como 2 horas a que se normalizara todo para poder continuar.
Por otro lado, el calor excesivo más los comentarios críticos de mi madre, aludiendo que pierdo el tiempo mientras hago este tipo de trabajos, especialmente para HIVE, todo se sumó pero al final logré terminar esta obra de arte.
𝐑𝐞𝐬𝐮𝐥𝐭𝐚𝐝𝐨 𝐅𝐢𝐧𝐚𝐥
A pesar de los pesares, aquí les dejo el resultado que para ser la primera vez a mí me encantó cómo quedó. Sobre todo el proceso, que me ayudó a relajarme y a enfocar la mente en algo productivo y dejar de lado lo negativo. ¿A ustedes qué les pareció? ¿Les gustó? Déjenme saber en los comentarios sus opiniones! con gusto las voy a leer! Hasta la próxima! 💚
𝐕𝐢𝐝𝐞𝐨 𝐓𝐮𝐭𝐨𝐫𝐢𝐚𝐥 𝐆𝐮í𝐚

| 𝐄𝐥𝐞𝐦𝐞𝐧𝐭𝐨𝐬 (𝐄𝐥𝐞𝐦𝐞𝐧𝐭𝐬) | 𝐇𝐞𝐫𝐫𝐚𝐦𝐢𝐞𝐧𝐭𝐚𝐬 (𝐓𝐨𝐨𝐥𝐬) |
|---|---|
| Las Fotos Utilizadas a lo largo del Post son de mi galería (Photos used throughout the post are from my gallery) | Cámara del Teléfono Redmi Note 9A (Redmi Note 9A Phone Camera) |
| Contenido y Texto Original de mi Autoría (Content and Original Text of my Authorship) | DeepL |
| CANVA | |
| Grammarly |
Posted Using INLEO
Se quedó muy chévere el dibujo, veo que eres bastante fanática de los animes. Buen trabajo...
!discovery 30
Un abrazo!
This post was shared and voted inside the discord by the curators team of discovery-it
Join our Community and follow our Curation Trail
Discovery-it is also a Witness, vote for us here
Delegate to us for passive income. Check our 80% fee-back Program
Aunque a blanco y negro se ven geniales, cuando se colorean ciertamente el dibujo gana mucha más vida. Tu arte es un ejemplo de lo que digo.
Very nice fanart, as an anime fan you knew how to recreate the idea you had of these characters very well.Thank you for sharing your step by step with all of us.
selected by @dayadam
Wow this looks amazing.