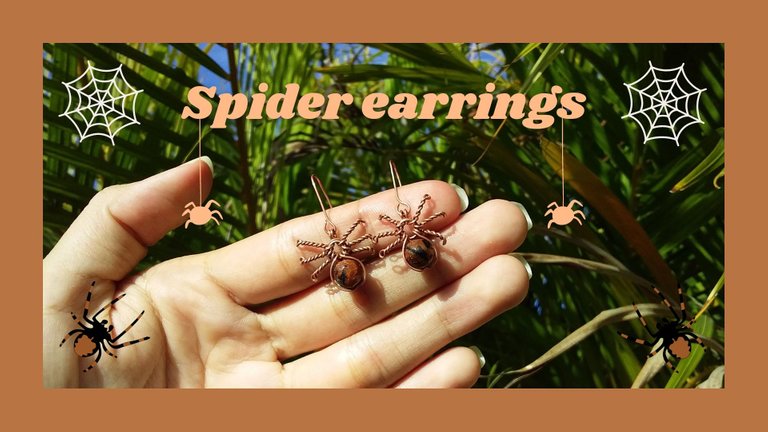
Bienvenidos | Welcome
Holaaa, gente bonita de la colmena, espero que se encuentren de maravilla. El día de hoy traigo para ustedes un tutorial para aprender a hacer unos hermosos aretes de araña, un accesorio realmente único y que llama muchísimo la atención 🕷 🕸 espero que les guste mucho.
Sin más nada que decir, comencemos.
Helloo, beautiful people of the hive, I hope you are feeling wonderful. Today I bring for you a tutorial to learn how to make some beautiful spiders earrings, a really unique and eye catching accessory 🕷 🕸 I hope you like it very much.
With nothing more to say, let's get started.
Materiales | Materials:
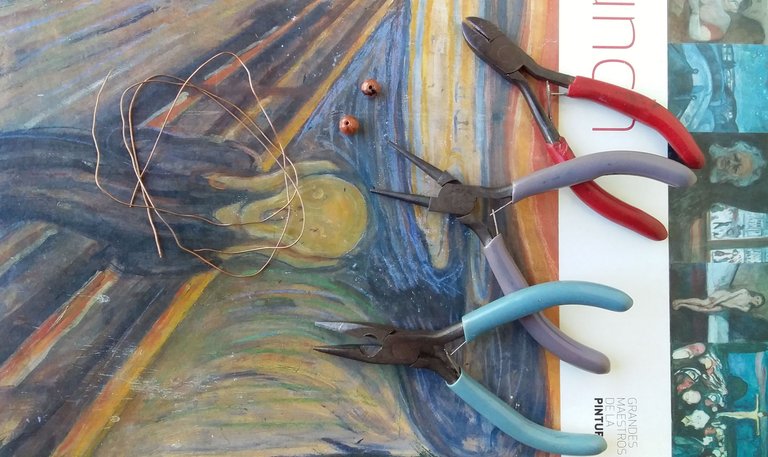
| Alambre de bisutería | 2 Cuentas | Pinzas |
|---|
| Jewelry wire | 2 beads | Pliers |
|---|
🕷Proceso | Process🕷
Paso 1 | Step 1
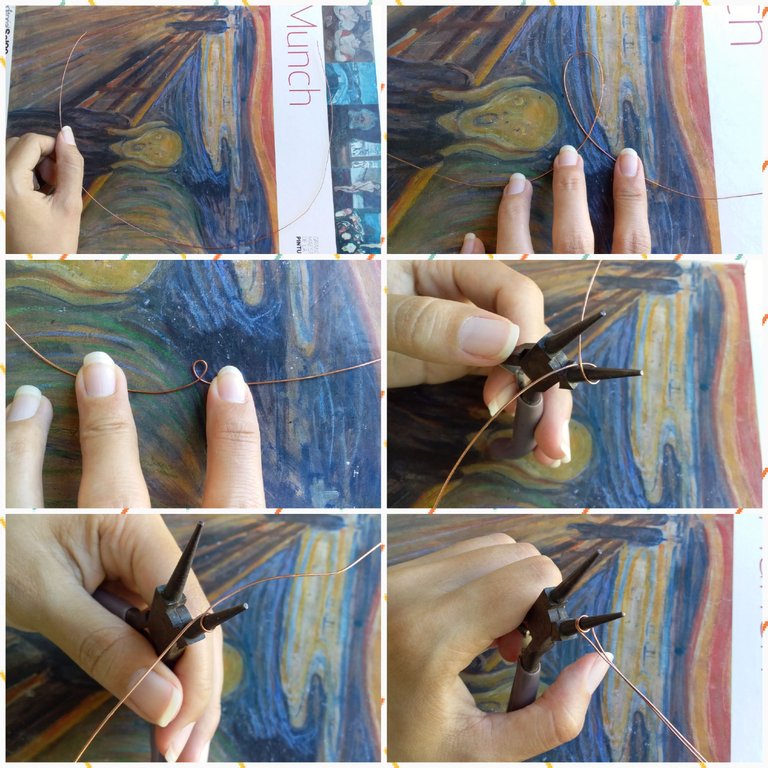
Lo primero que haremos será tomar nuestro alambre y llevar cada extremo hacia el lado contrario, hasta formar una argolla en el medio. Luego, meteremos la argolla en unas pinzas punta redonda y doblaremos el resto del alambre hacia abajo.
The first thing we will do is to take our wire and bring each end to the opposite side, until we form a ring in the middle. Then, we will put the ring in a pair of tweezers with a round tip and bend the rest of the wire down.
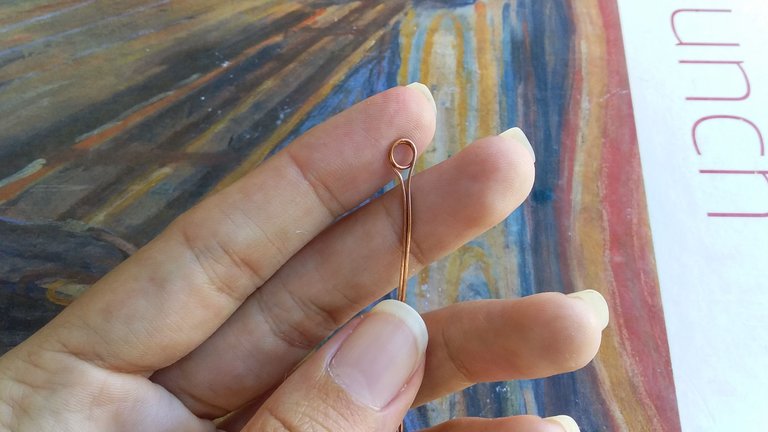
Y deberá verse de esta manera.
And it should look like this.
Paso 2 | Step 2
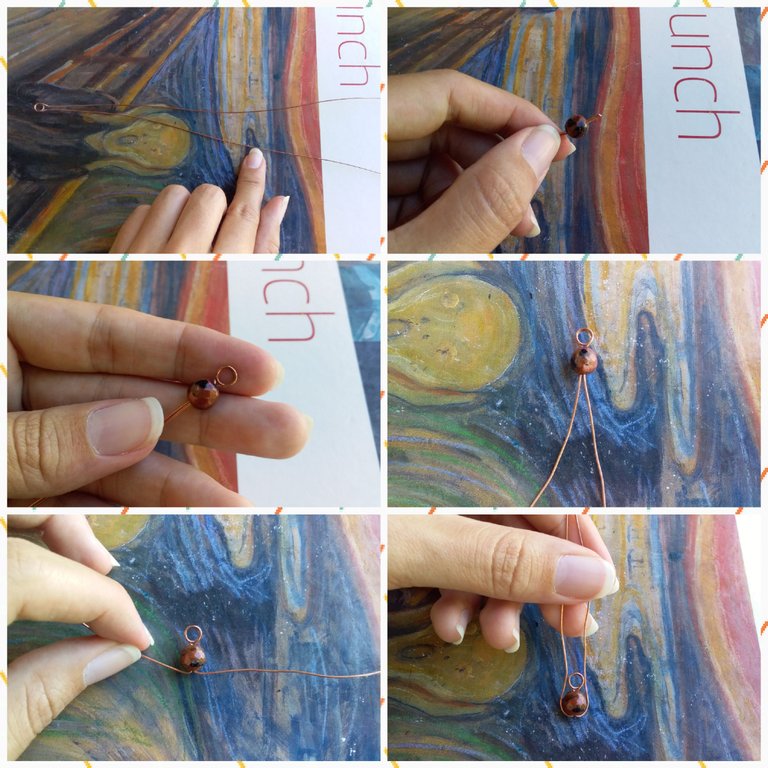
Ahora, pasaremos una cuenta por la pieza de alambre. Luego, separaremos cada lado y doblaremos hacia arriba.
Now, we will pass a bead through the piece of wire. Then, we will separate each side and bend upwards.
Paso 3 | Step 3
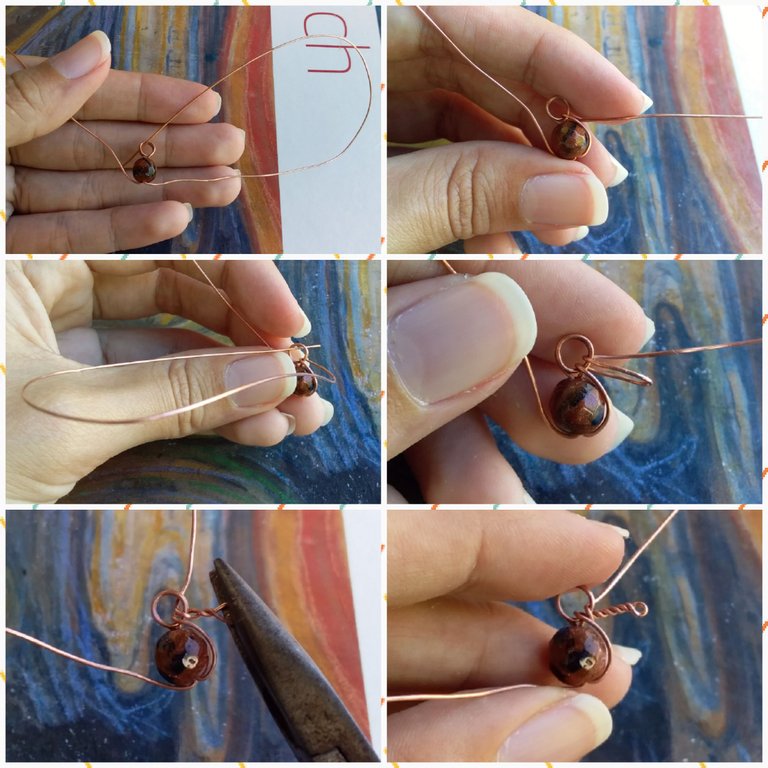
Pasaremos uno de los alambres por el aro y así terminaremos de rodear la cuenta. Después, pasaremos nuevamente, pero esta vez será para formar nuestra primera patita. Con una pinza plana la enroscaremos hacia abajo y listo.
We will pass one of the wires through the ring and thus finish surrounding the bead. Then, we will pass it again, but this time it will be to form our first leg. With a flat pliers we will screw it down and that's it.
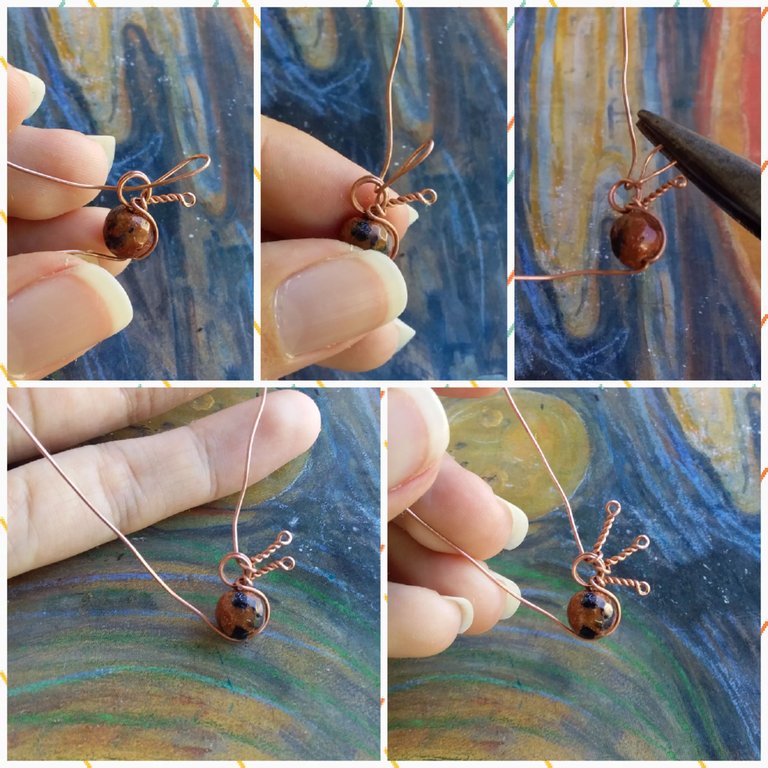
Repetiremos este proceso hasta tener tres patitas de un lado.
Repeat this process until you have three legs on one side.
Luego, seguiremos con el otro.
Then, we will continue with the other one.
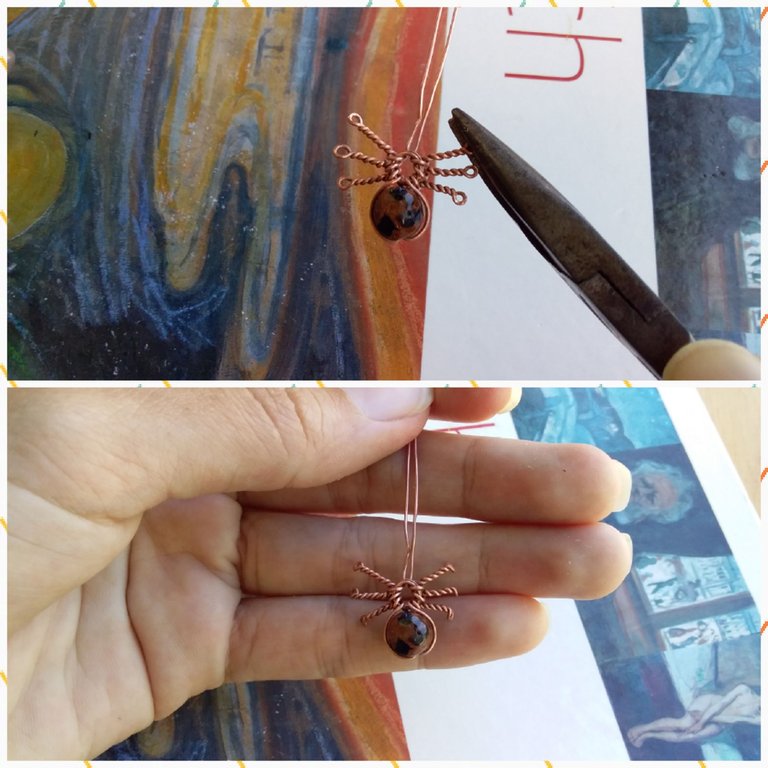
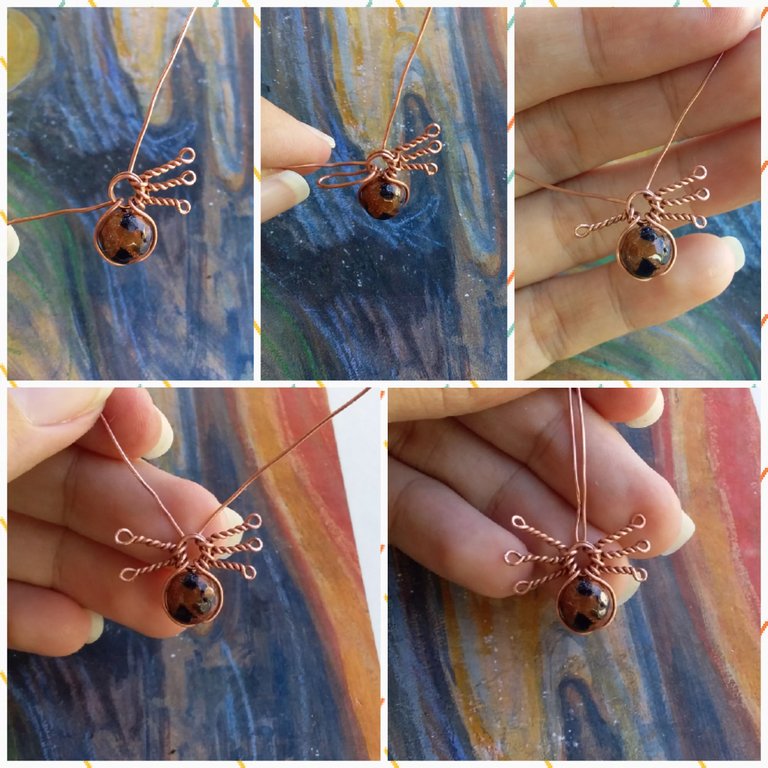
Doblaremos las puntas de las patitas hacia abajo con ayuda de unas pinzas.
We will fold the tips of the legs down with the help of tweezers.
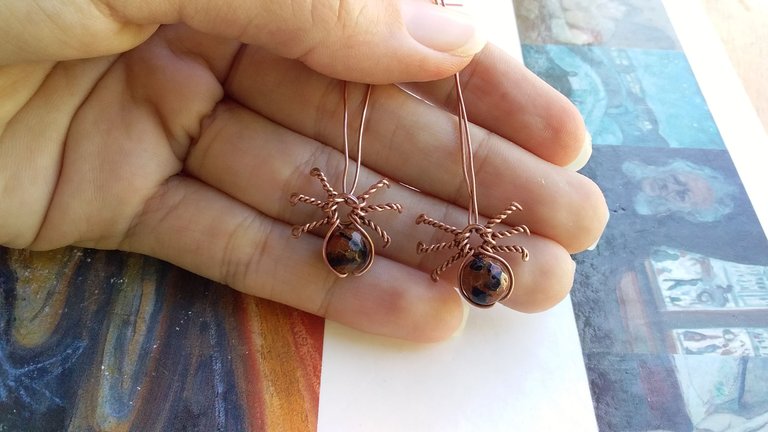
Y ya tendremos nuestras arañitas.
And we will have our cute spiders.
Paso 4 | Step 4
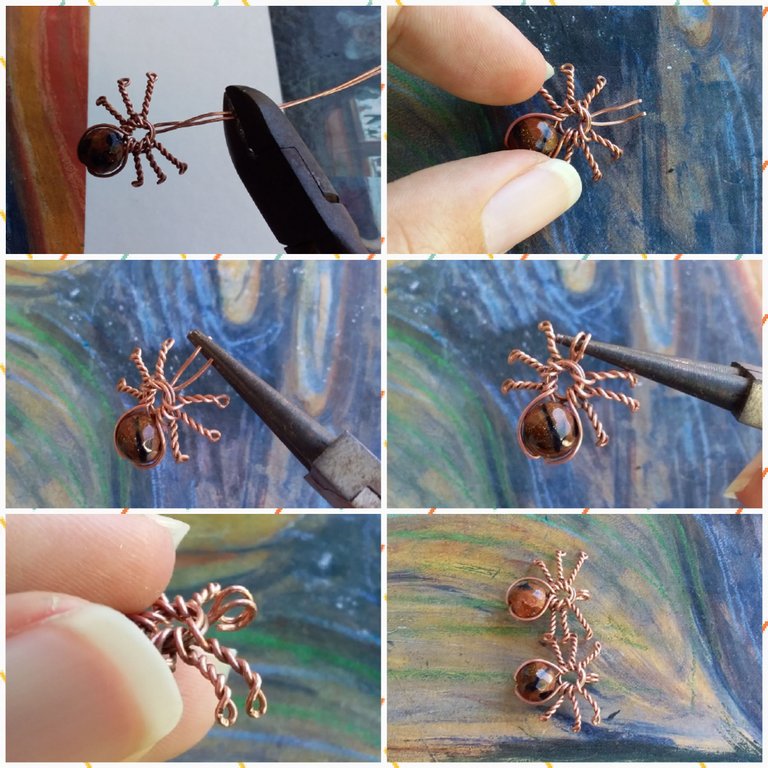
Cortaremos los excesos de alambre y con unas pinzas punta redonda, haremos unas argollas en ambas arañas.
We will cut the excess wire and with round nose pliers, we will make rings on both spiders.
Paso 5 | Step 5
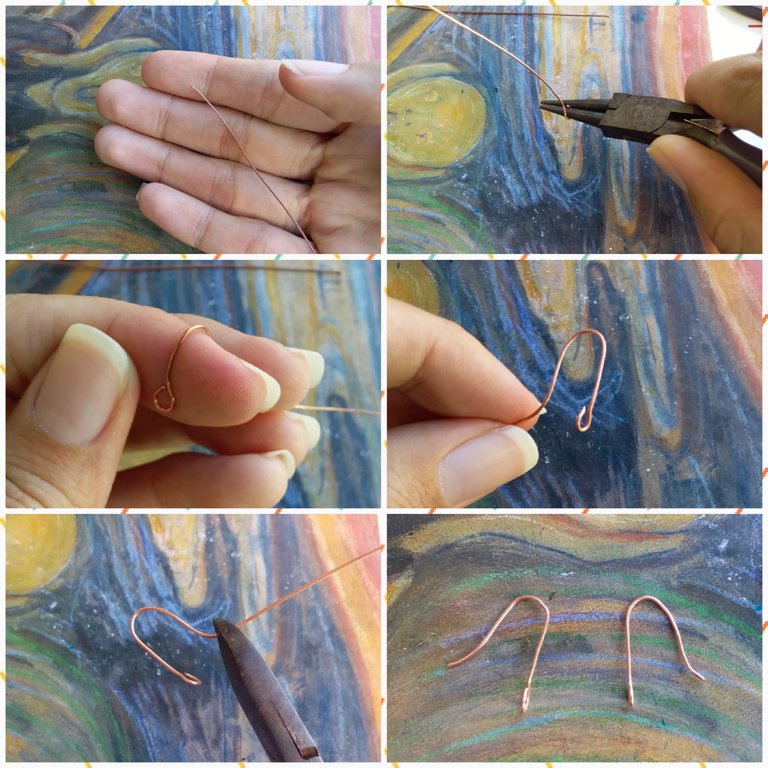
Con el alambre que sobró haremos unos anzuelos. Primero , con la pinza punta redonda, haremos un aro pequeño en uno de los extremos, luego con ayuda de nuestro dedo, doblaremos hacia atrás y por último, cortaremos.
With the leftover wire we will make some hooks. First, with the round nose pliers, we will make a small ring at one of the ends, then with the help of our finger, we will bend backwards and finally, we will cut.
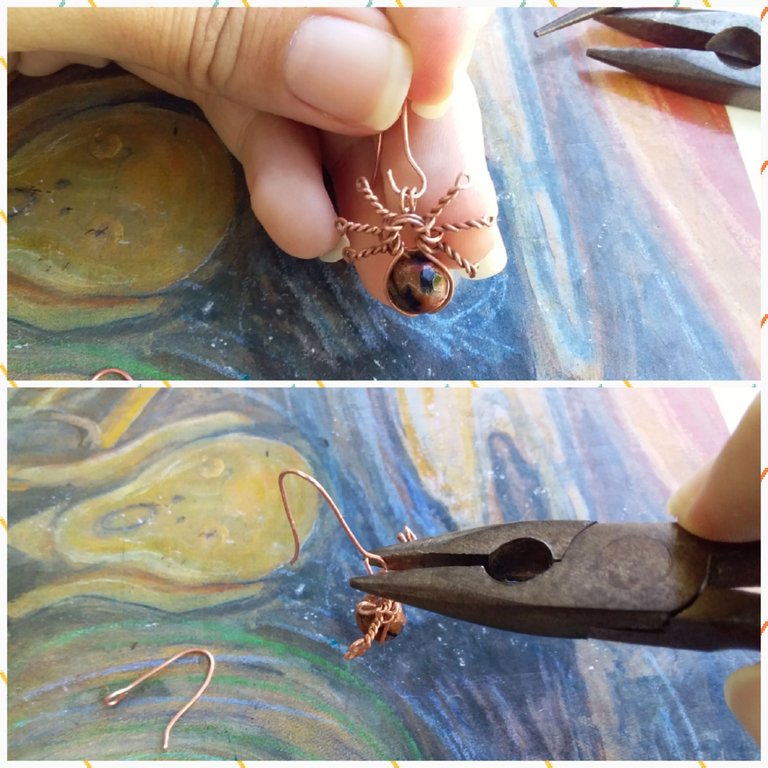
Uniremos nuestros anzuelos a las arañitas y listo.
We will attach our hooks to the spiders and that's it.
🕸Resultado | Result🕸
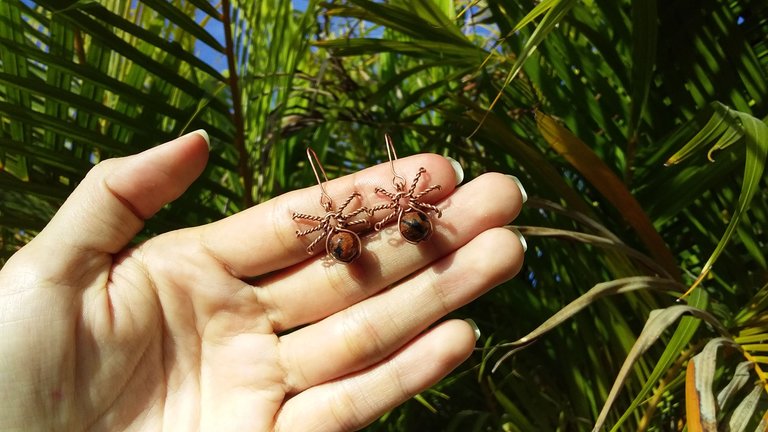
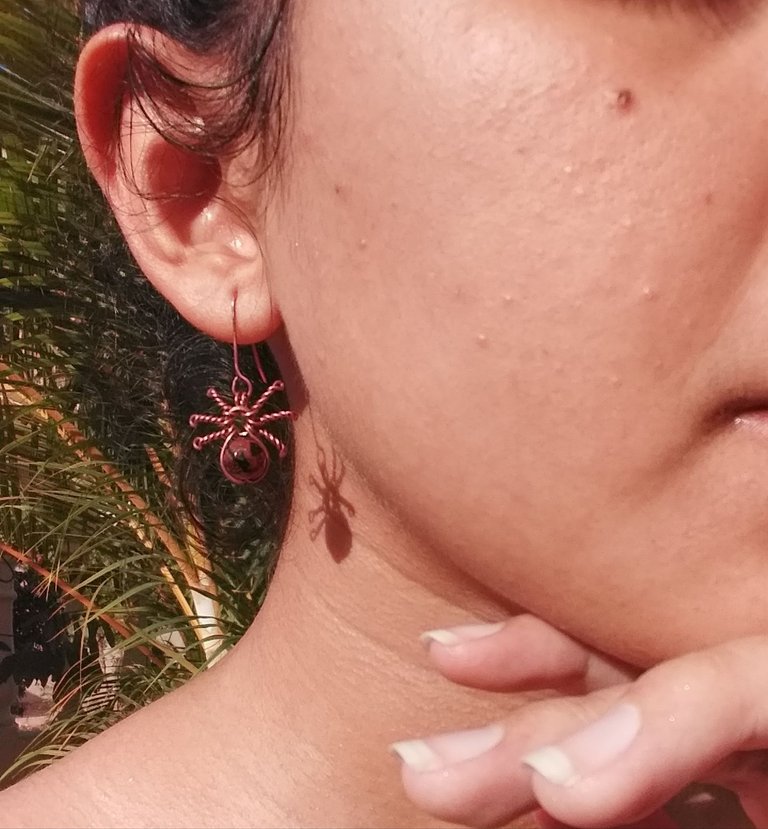
Y este es el resultado de nuestros lindos aretes de arañitas, espero que les haya gustado.
Muchas gracias por leerme!
And this is the result of our cute little spider earrings, I hope you liked them.
Thank you very much for reading me!

Wao que originales, te quedaron muy bien.
Congratulations @paugomez! You have completed the following achievement on the Hive blockchain and have been rewarded with new badge(s):
Your next target is to reach 50 posts.
Your next target is to reach 100 comments.
You can view your badges on your board and compare yourself to others in the Ranking
If you no longer want to receive notifications, reply to this comment with the word
STOPTo support your work, I also upvoted your post!
Support the HiveBuzz project. Vote for our proposal!