Un cordial saludo queridos amigos de HIVE DIY, primero que nada les pido perdón por estar tan desaparecida de nuestra querida comunidad, solo que han pasado muchos cosas estos años que ha sido difícil lidiar pero todo lo estamos dejando en manos de Dios todo poderoso, amigos espero y se encuentren bien con salud y prosperidad ojalá este año sea mejor para todos y que dios nos brinde mucha paz, bueno amigos a lo que vine fue a mostrarle cómo haces un lindo y creativo santa esta muy fácil de hacer para adornar nuestras casas y darle ese toque navideño que tanto nos gusta espero y lo puedan poner en práctica en sus casas y que les guste tanto como a mi sin mas nada que decir les invito a ver el paso a paso
A warm greeting dear friends of HIVE DIY, first of all I apologize for being so missing from our dear community, just that many things have happened these years that has been difficult to deal with but we are leaving everything in the hands of God almighty, friends I hope you are well with health and prosperity hopefully this year will be better for everyone and that God gives us much peace, well friends what I came was to show you how to make a nice and creative santa this very easy I hope you can put it into practice in your homes and that you like it as much as I do without anything else to say I invite you to see the step by step
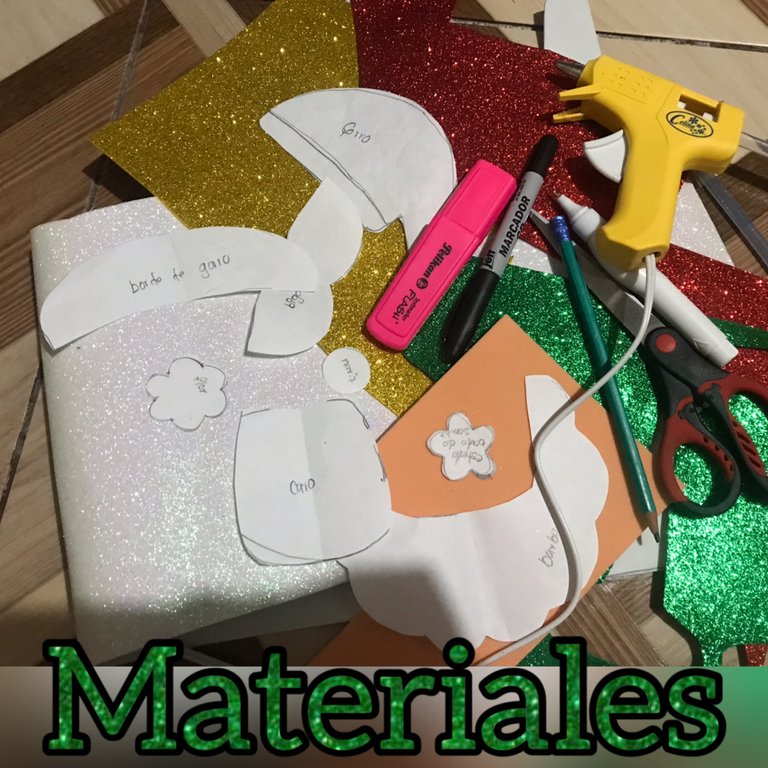
MATERIALES
• foami escarchado rojo, amarillo, verde y blanco
• foami de color carne
• tijera
• lápiz
• pistola de silicon
• patrones del santa
• marcador negro
• resaltador fucsia
• corrector
MATERIALS
- red, yellow, green and white frosted foams
- flesh-colored foami
- scissors
- pencil
- silicone gun
- santa patterns
- black marker
- fuchsia highlighter
- concealer
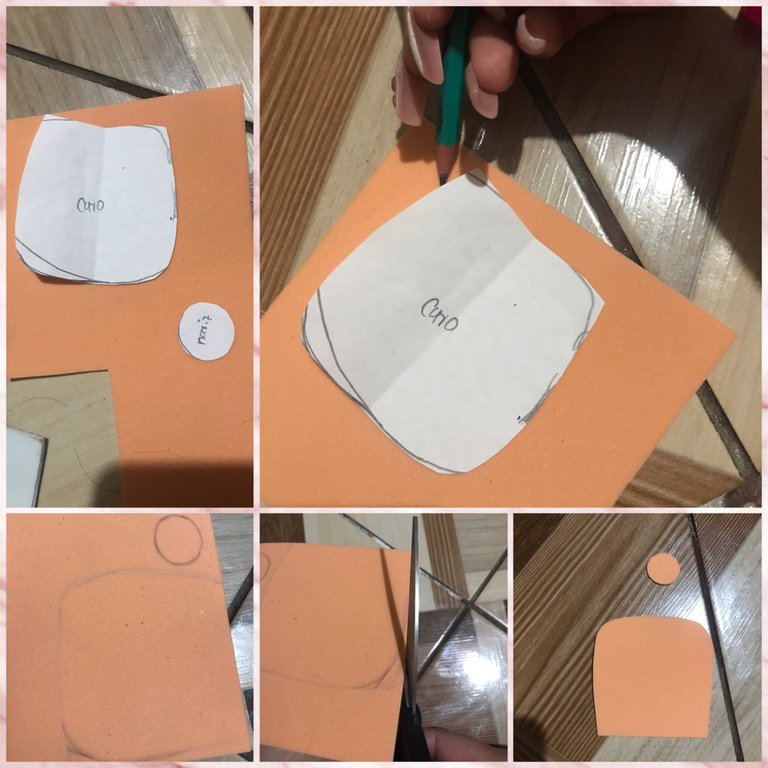
Primero marcamos y recortamos en el foami de color carne la cara del santa
First we mark and cut out the face of the Santa on the flesh-colored foami
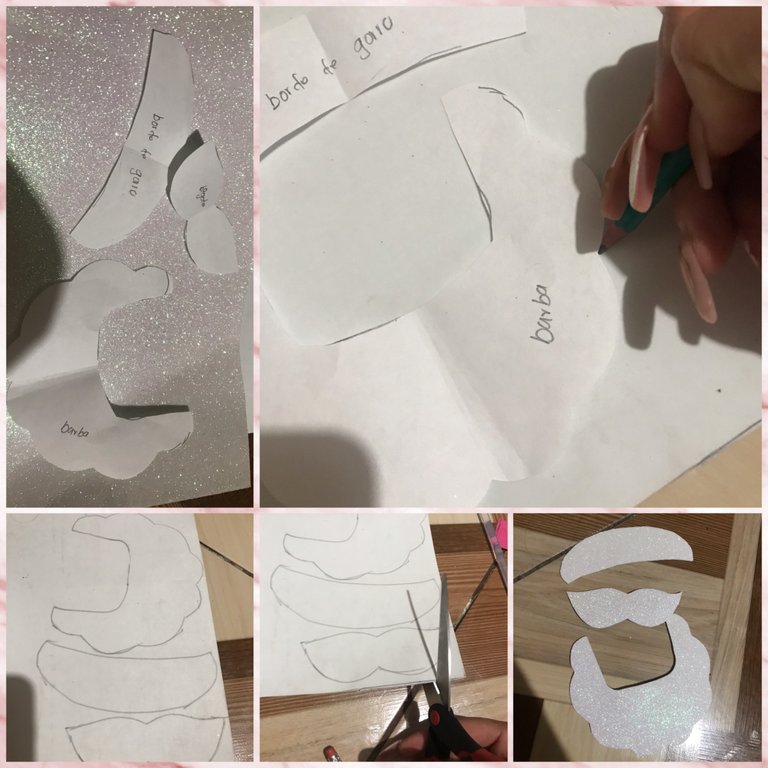
Marcamos y recortamos en el foami de color blanco la barba, el bigote y el borde del sombrero del santa
We mark and cut out the beard, the moustache and the edge of the Santa's hat on the white foami
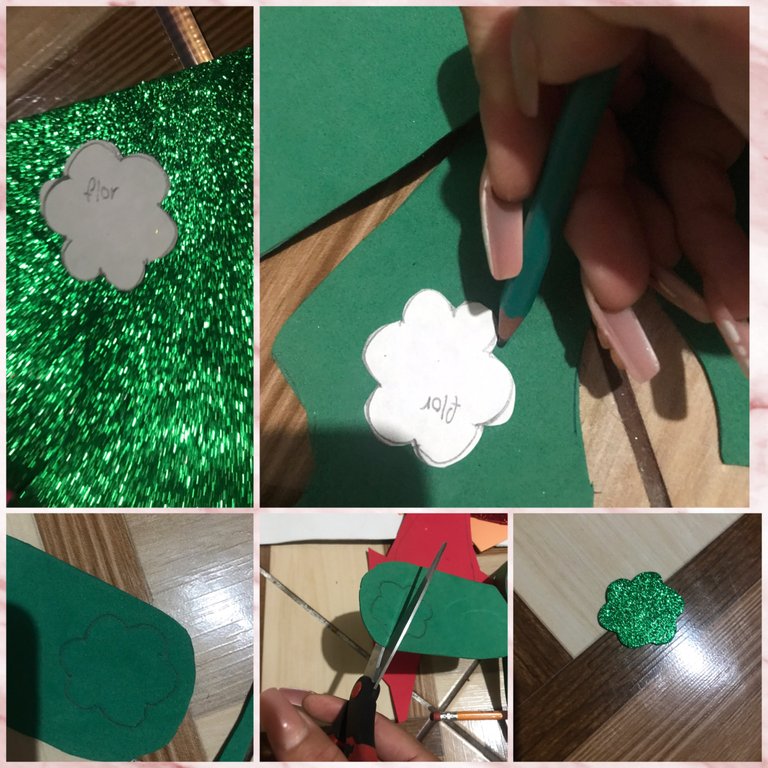
Marcamos y recortamos en en el foami de color verde la flor del gorro del santa
We mark and cut out on the green foami the flower of the Santa's hat
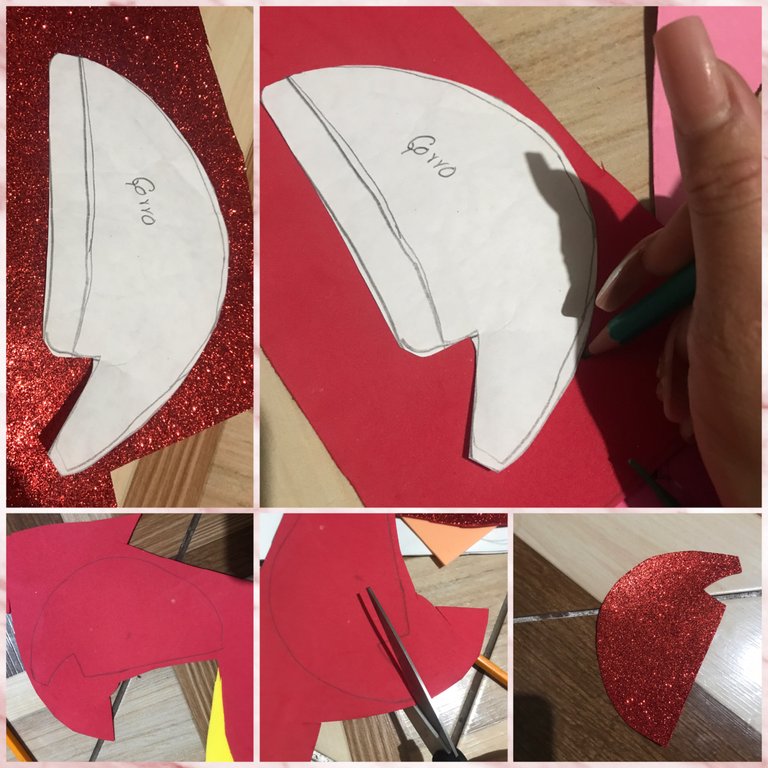
Marcamos y recortamos en el foami escarchado rojo el gorro del santa
We mark and cut out the Santa's hat on the red frosted foami
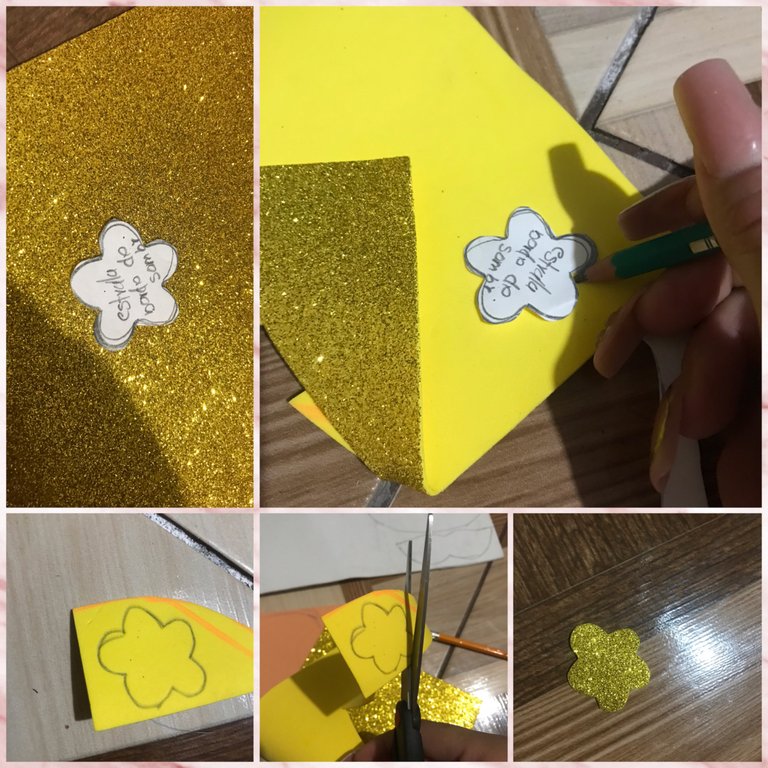
Marcamos y recortamos en el foami escarchado amarillo la estrella que va en el borde del sombrero del santa
We mark and cut out on the yellow frosted foami the star that goes on the edge of the santa's hat
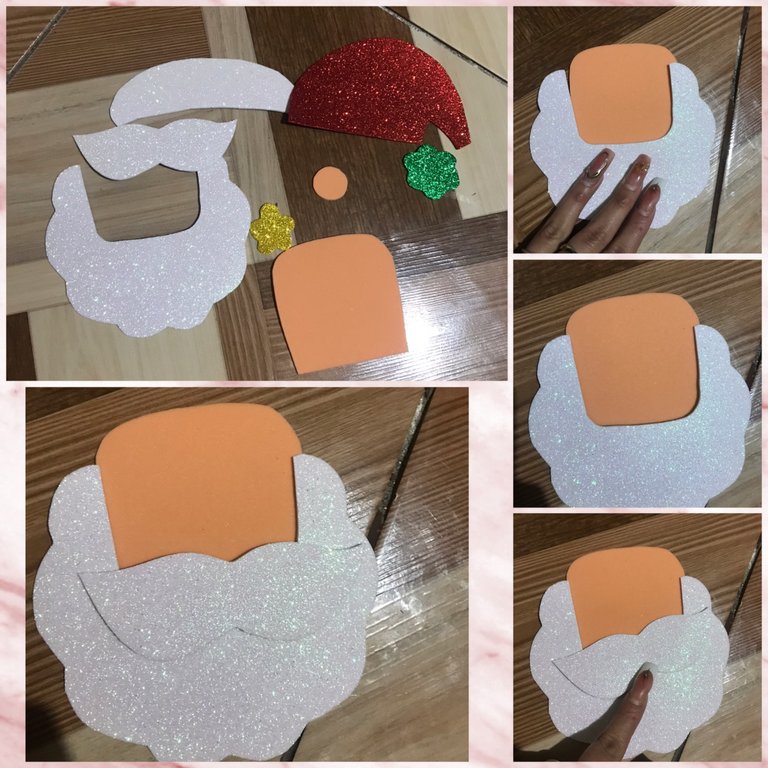
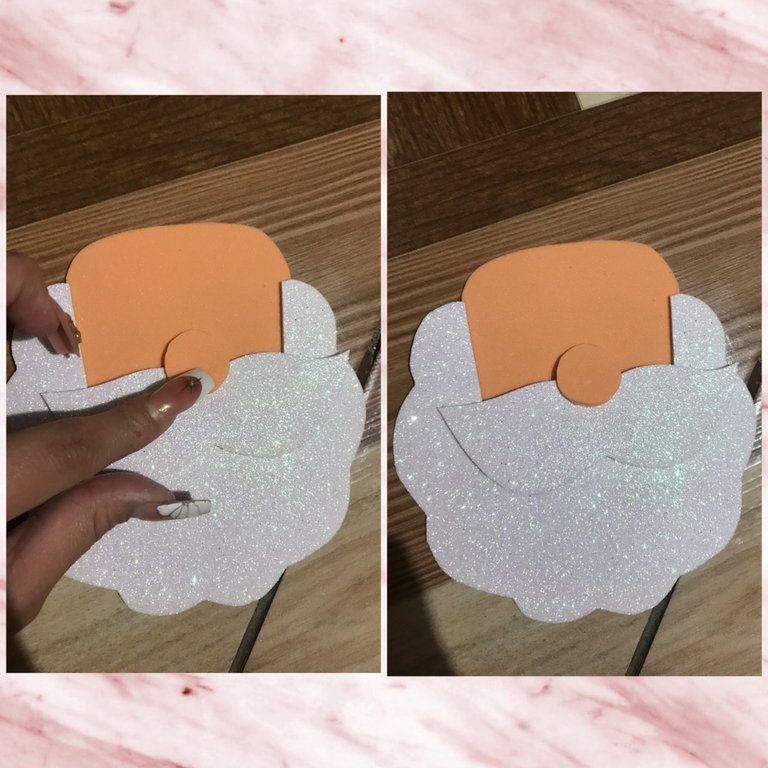
Ya que estén bien cortadas las piezas del santa empezaremos a pegar, primero pegaremos la barba de la cara y después que esté bien pegada pegaremos el bigote del santa
Once the pieces of the Santa are well cut, we will start gluing, first we will glue the beard of the face and after it is well glued we will glue the moustache of the Santa
Para terminar con la cara del santa pegaremos la nariz en el medio del bigote del santa y luego empezaremos a armar el sombrero del santa
To finish with the Santa's face we will glue the nose in the middle of the Santa's mustache and then we will start assembling the Santa's hat
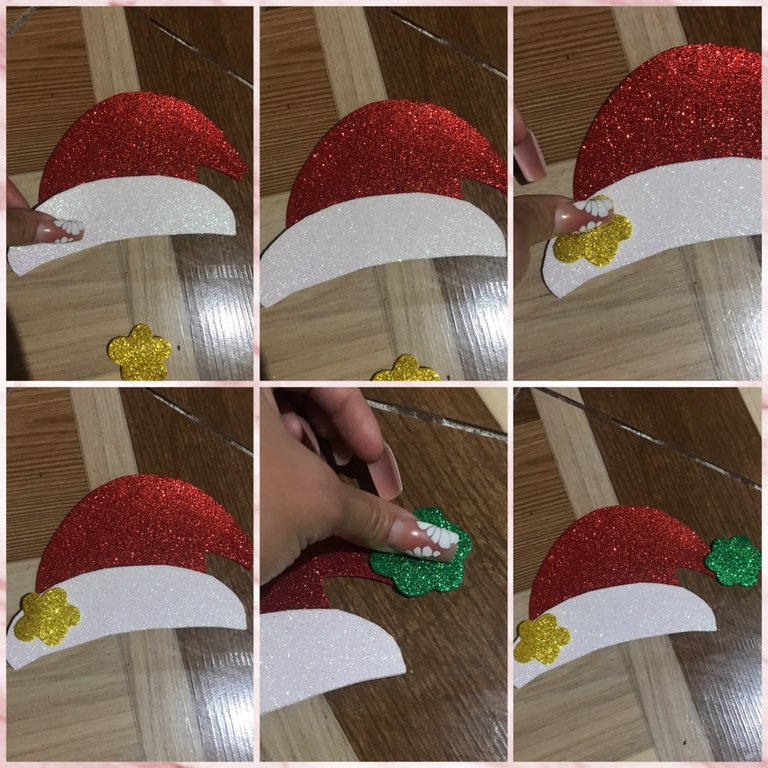
Ahora si queridos amigos empezaremos a armar el sombrero del santa primero pegaremos la tira blanca al gorro para que sea el borde del gorro y después pegaremos la estrella en una esquina del borde del gorro y para casi terminar con el gorro le pegaremos la flor antes echa en el foami escarchado verde en la punta del gorro
Now, dear friends, we will begin to assemble the Santa's hat, first we will glue the white strip to the hat to make it the edge of the hat and then we will glue the star in a corner of the edge of the hat and to almost finish with the hat we will glue the flower previously made in the green frosted foami on the tip of the hat
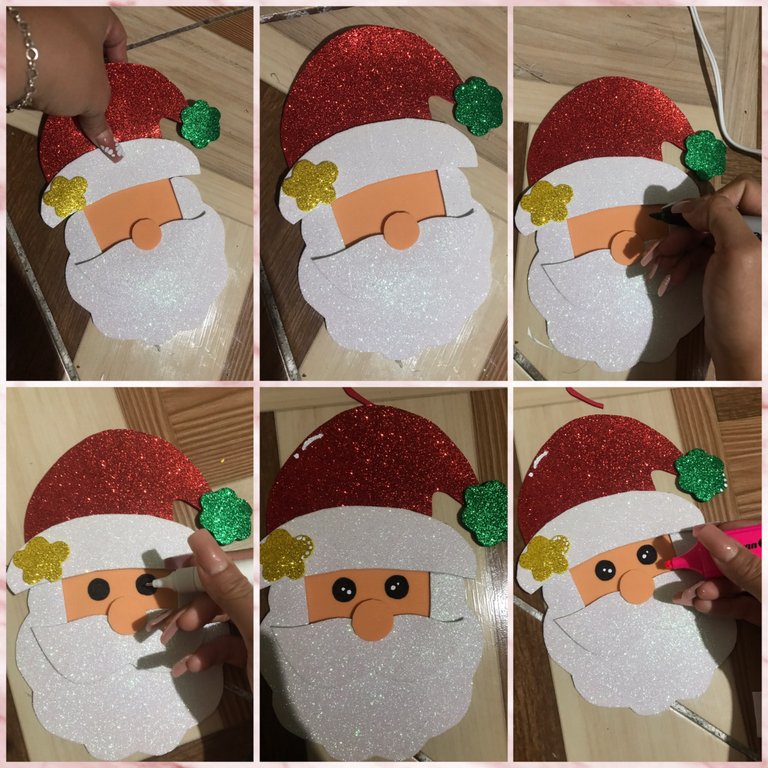
Ya que tenemos armadas las dos partes del santa la vamos a pegar para que se termine de armar nuestro hermoso y creativo santa, bueno después que estén bien pegadas las
dos partes con el marcador negro aremos los ojos del santa, con el corrector le aremos unos puntitos blancos en los ojos al santa y también le pondremos puntos a la estrella que está en el borde del sombrero, la que también está en la punta del sombrero y A el sombrero, luego con el resaltador fucsia aremos las mejillas y le pasaremos al borde de la nariz del santa, luego le podemos dar nuestro toque especial para que quede único e inigualable
Once we have assembled the two parts of the santa we are going to glue it to finish assembling our beautiful and creative santa, well after the two parts are well glued with the black marker we are going to make the eyes of the santa.
with the black marker we will make the eyes of the santa, with the corrector we will make some white dots in the eyes of the santa and also we will put dots to the star that is in the edge of the hat, the one that is also in the tip of the hat and A the hat, then with the fuchsia highlighter we will make the cheeks and we will pass to the edge of the nose of the santa, then we can give our special touch to make it unique and incomparable
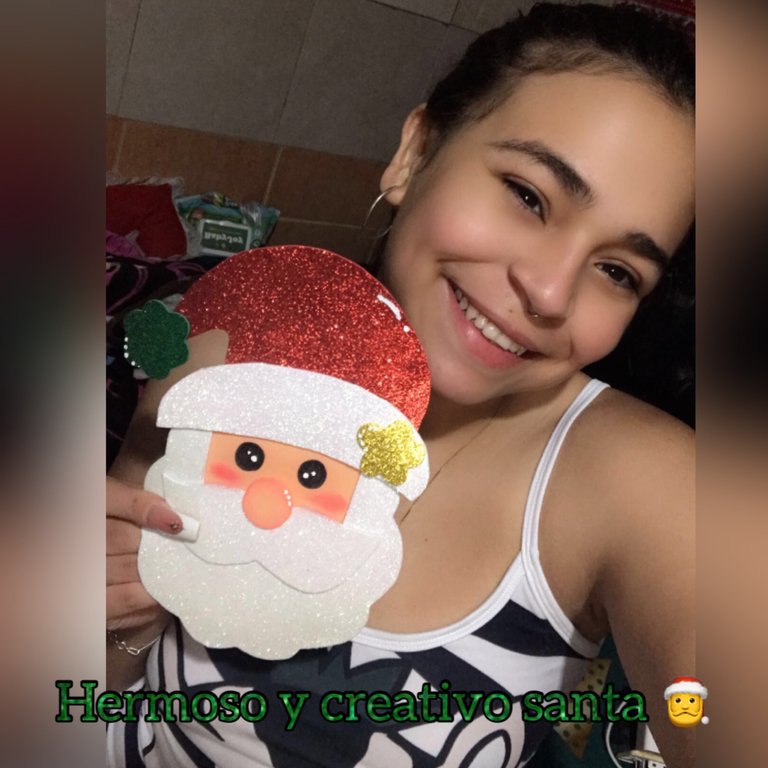
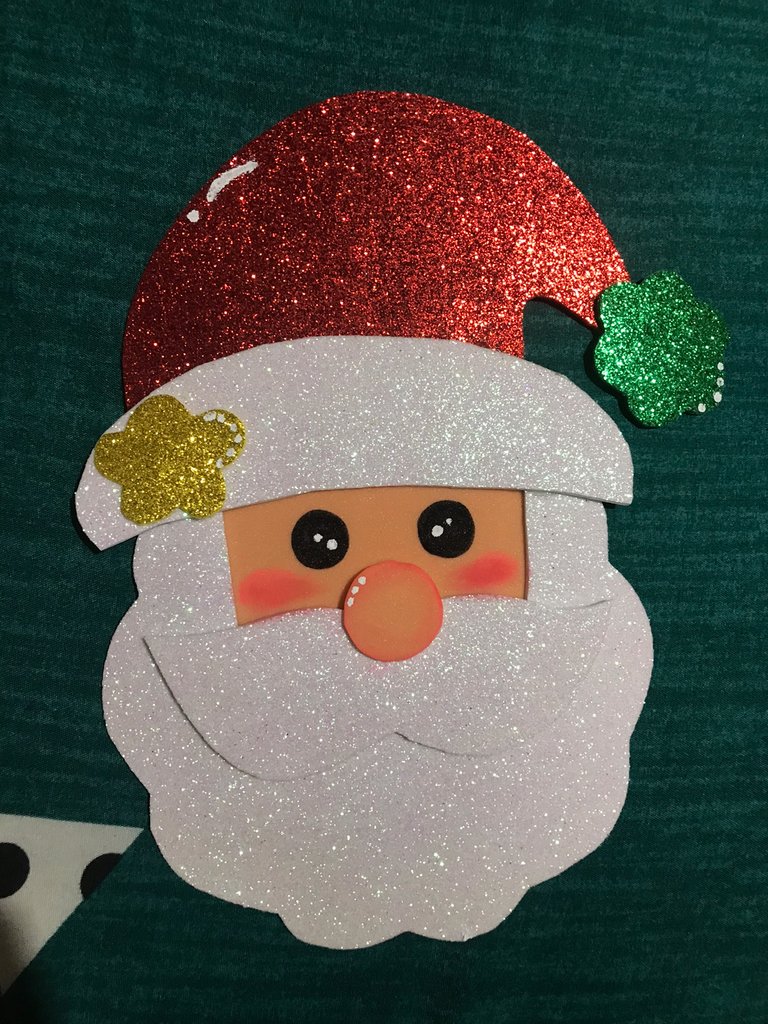
AHORA LES MOSTRARÉ EL RESULTADO FINAL
I WILL NOW SHOW YOU THE FINAL RESULT
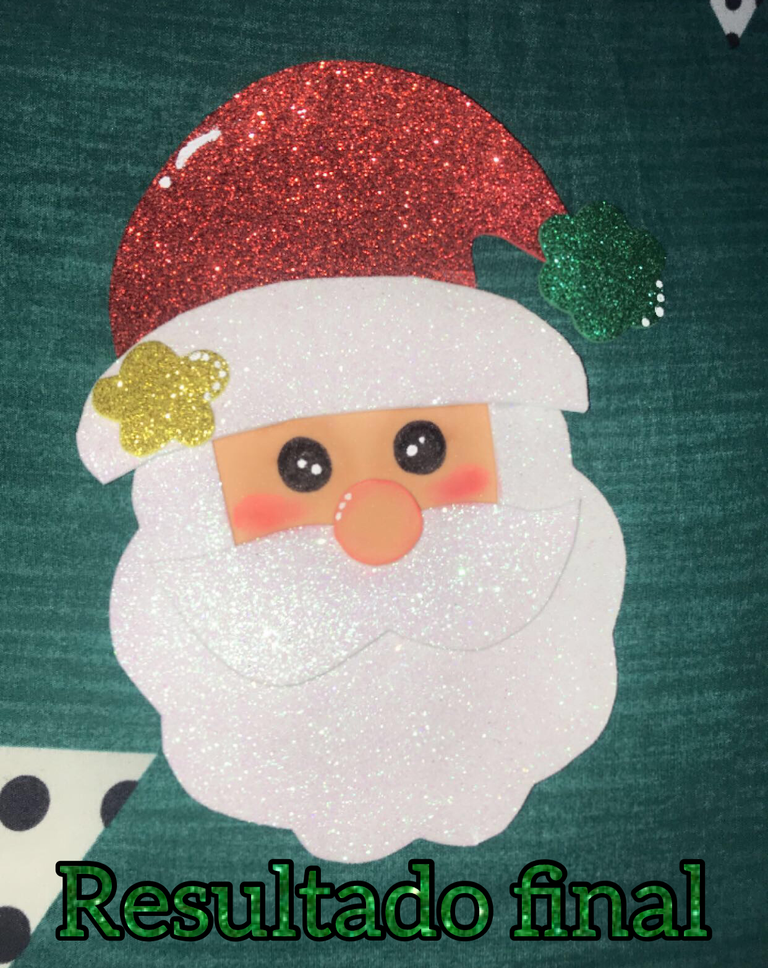
ESPERO Y LES HALLA GUSTADO MI TRABAJO QUERIDOS AMIGOS SABEN QUE TODO LO HAGO COM AMOR, QUE DIOS LOS BENDIGA SIEMPRE, HASTA LA PRÓXIMA OPORTUNIDAD BESITOS Y BRAZOS FUERTES
I HOPE YOU LIKE MY WORK DEAR FRIENDS, YOU KNOW THAT I DO EVERYTHING WITH LOVE, MAY GOD BLESS YOU ALWAYS, UNTIL THE NEXT OPPORTUNITY, KISSES AND STRONG ARMS
How I love this time of year where everyone gets so creative and brings these beautiful things to the community. I really wish you the best and there is nothing you can't overcome, if you can make these incredible and neat crafts you can do anything.
The brighter the better, there is no doubt.
Muy lindo tu Santa ☺️