
Hola saludos, hoy voy a mostrar un trabajo que estoy haciendo como pasatiempo, pero que deja la utilidad que nos puede brindar el hacerlo bien y con pasión, hablo de coser, si bien es cierto por mis distintas tareas diarias no me he dedicado a perfeccionar mi trabajo en la costura, también es verdad que me gusta hacerlo porque además de obtener prendas de vestir y otras cosas, también me ayuda a liberar presión.
Ahora mismo termine de hacer un sombrero tipo cubeta, balde o australiano, es de muy buen gusto y acentúa las diferentes personalidades de acuerdo a su color, definitivamente una belleza poco usual pero cautivadores.
Aqui dejo en primer lugar los materiales usados para su confección:
4 hojas tamaño oficio o papel Bond
1 lápiz
1 regla
1 compas
1 tijeras
1 pantalón de jeans viejo
1/2 metro de tela negra
1 rollo de hilo negro
Ya con estos materiales comenzamos en primer plano con el modelado o creación a escalas del patrón que usaremos aquí dejo las fotos y el link para su uso.
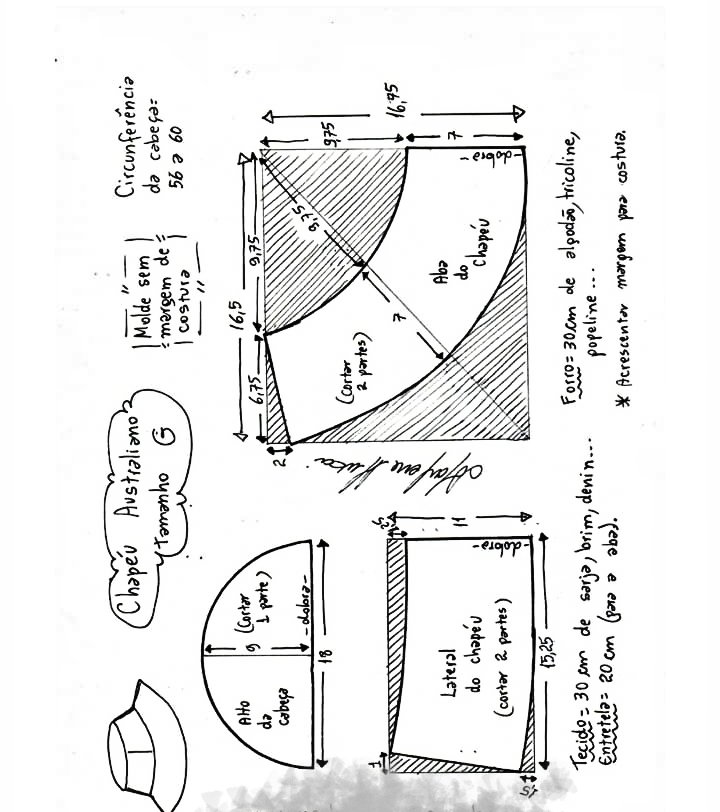
patrón
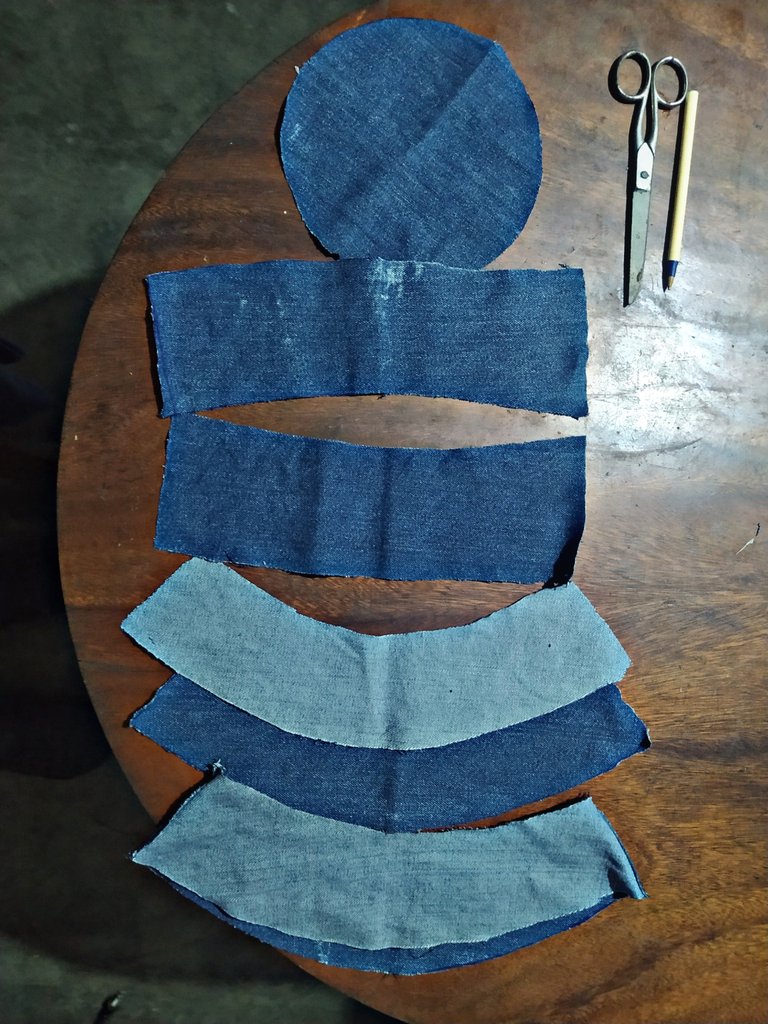
Una vez listo el patrón debemos cortar la tela de jeans y la del forro interno fijando en patrón en ellas y al calco para que quede lo más justo o parecido posible.
El número de piezas son los siguientes:
Alas de sombrero 4 piezas o 2 pares en jeans
Cuerpo o copa 2 piezas o 1 par en jeans igual en tela negra
Tapa 1 pieza en jeans y 1 en tela negra
1 lista de tela negra de 3,5 centímetros de ancho por 35 centímetros de largo
(Coloco tela negra porque es la que tengo yo igualmente con el jeans, se puede utilizar cualquier otro tipo según el gusto)
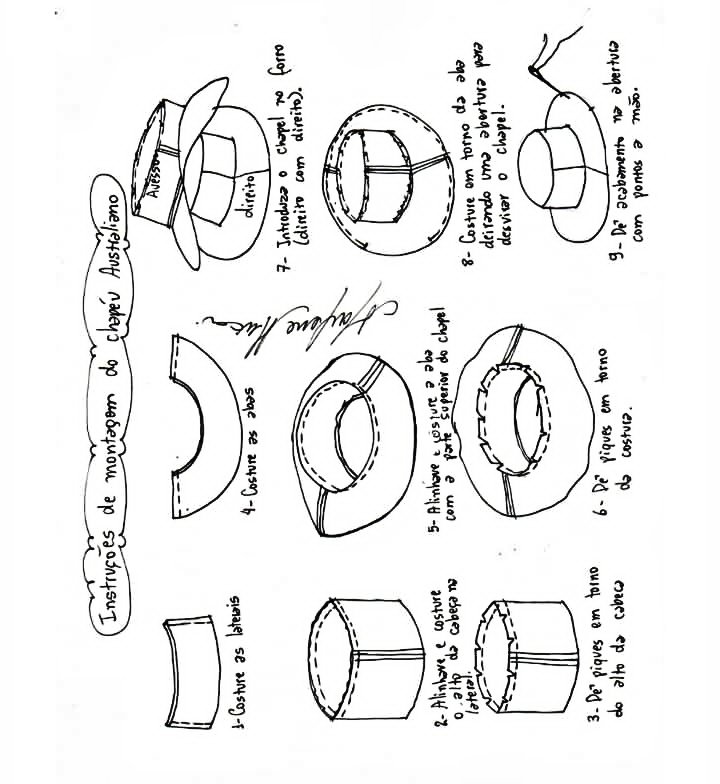
Una vez que tenemos todo cortado procedemos a armar nuestro sombrero de la siguiente manera)
1- Unimos las tapas de las alas por el revés de la tela así (igual los dos pares)
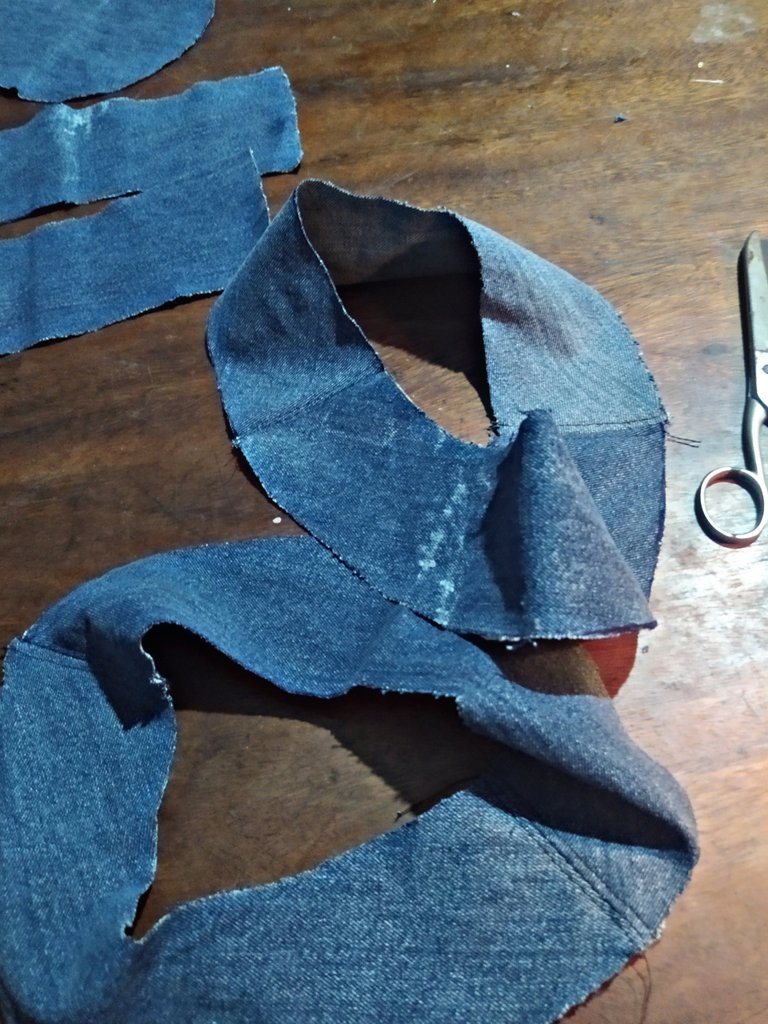
2- Se unen las dos piezas que se obtienen del paso anterior de la manera siguiente.
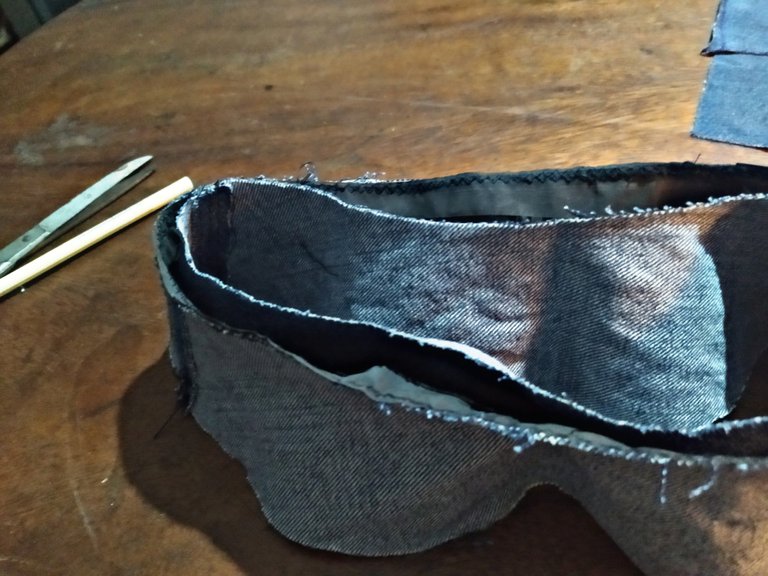
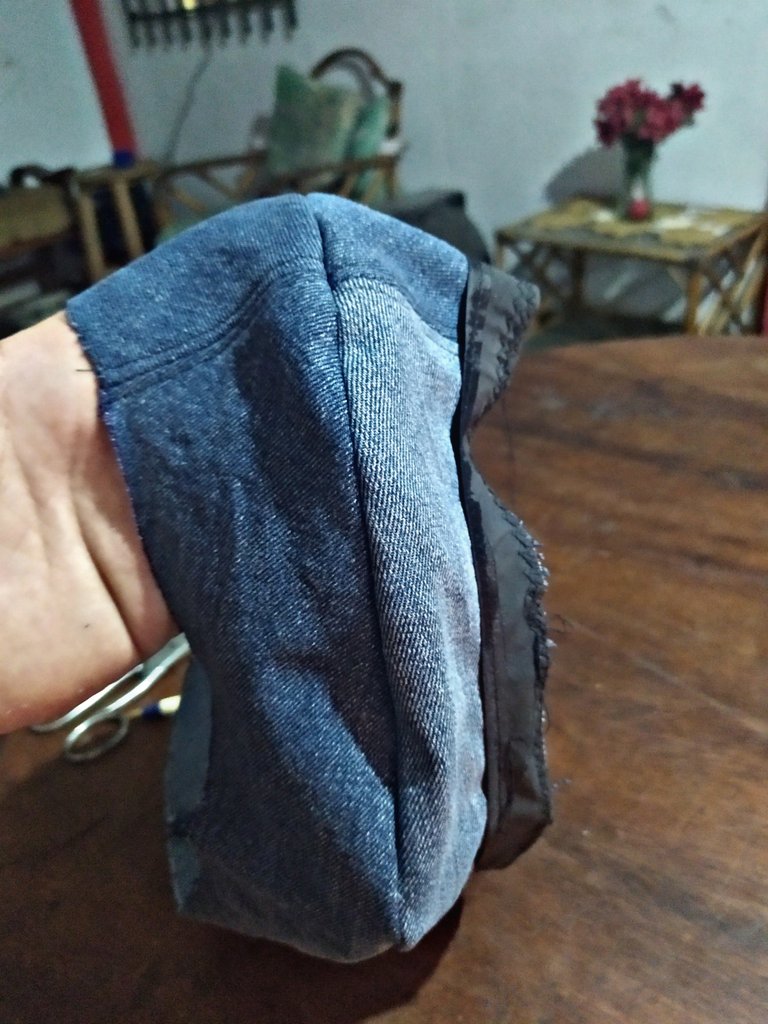
3- Se voltea las piezas que unimos y procedemos a coser varias líneas.
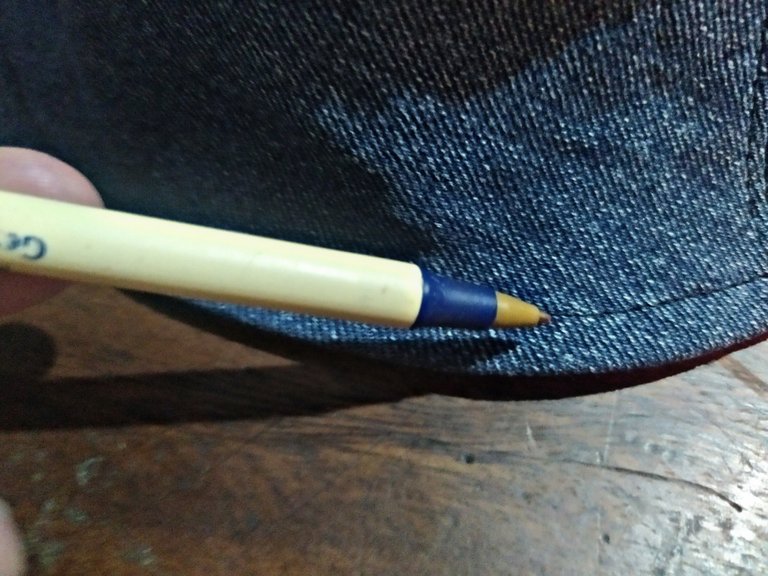
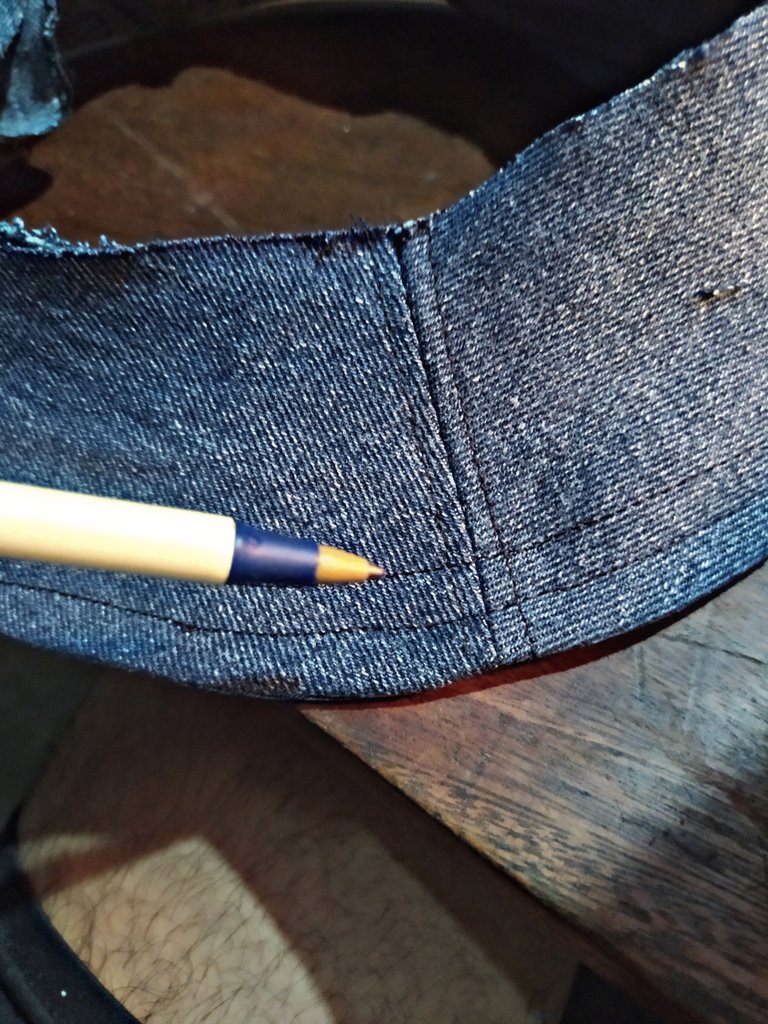
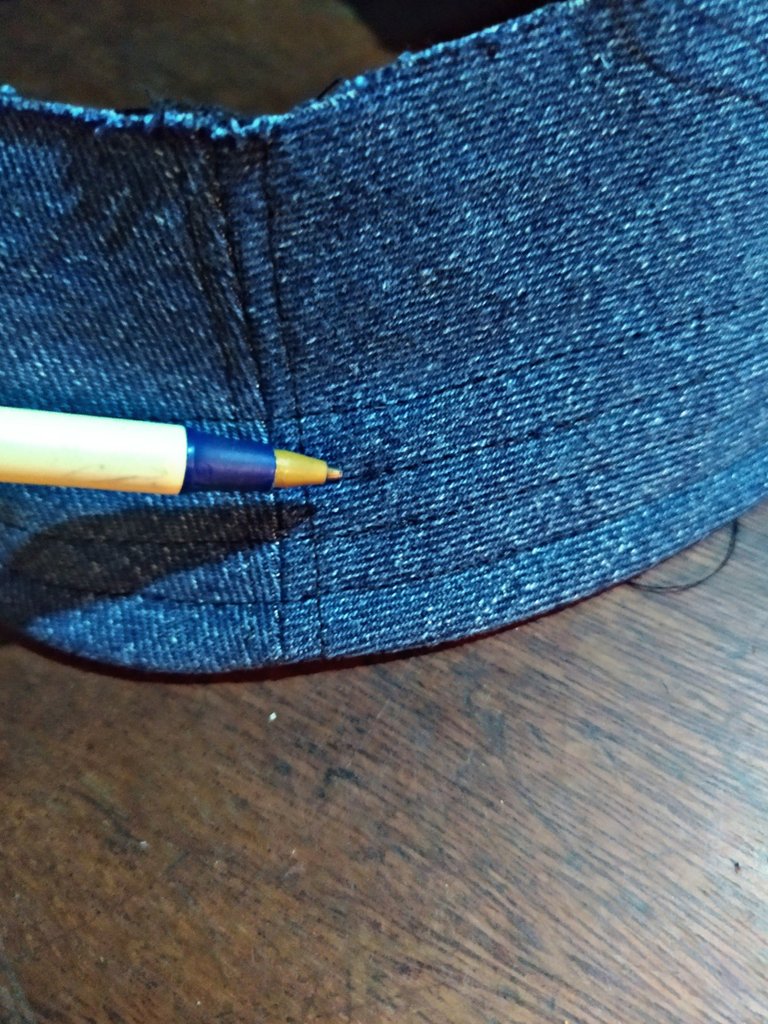
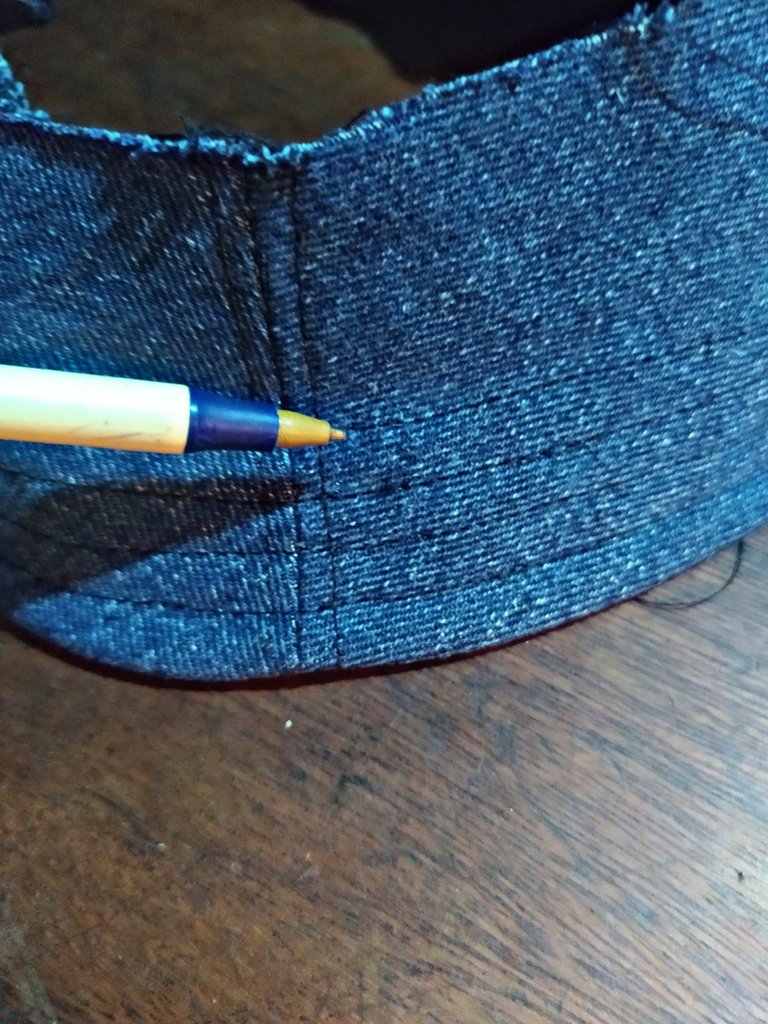
4- unimos las piezas de la copa, pueden hacer las dos telas al momento, osea ir uniendo también la tela negra de manera que al terminar la pieza principal tengamos listo el forro.
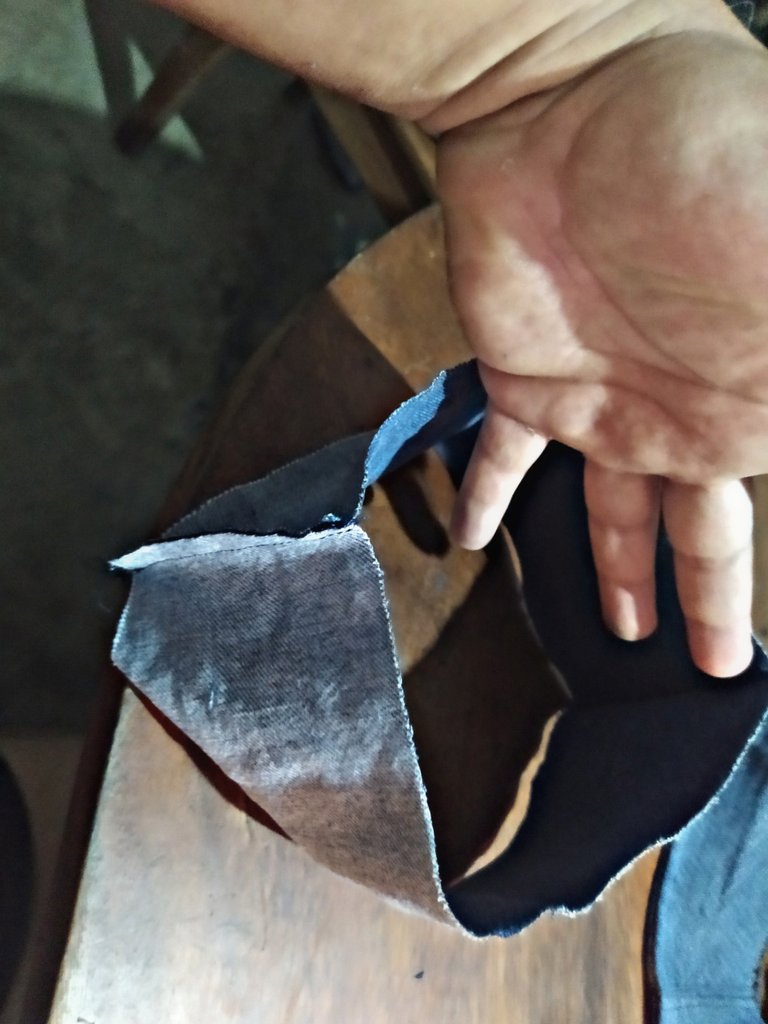
5- Una vez listo el paso anterior procedemos a coserla copa con la tapa del sombrero.
(No olvidemos el biselado o la doble costura como muestra de un remate de calidad o adorno)
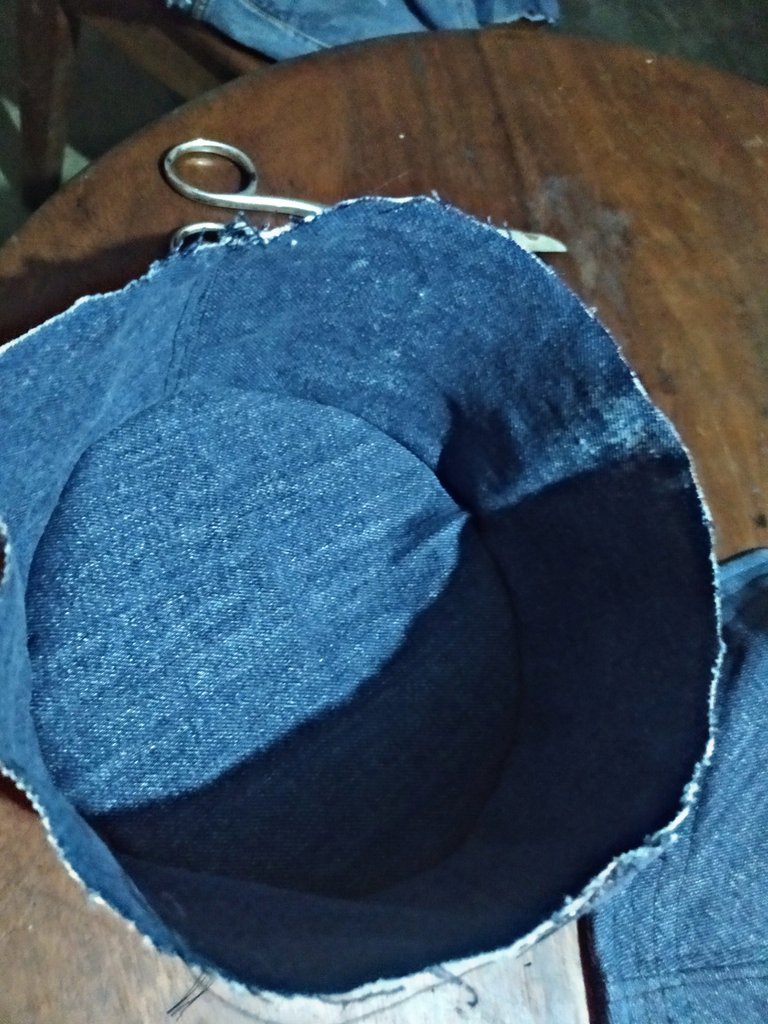
6- continuamos, listo estos pasos fundamentales cosemos la lista negra al borde interno del ala del sombrero para que quede como tapa costura así:

7- luego pegamos la copa del ala y vamos finalizando
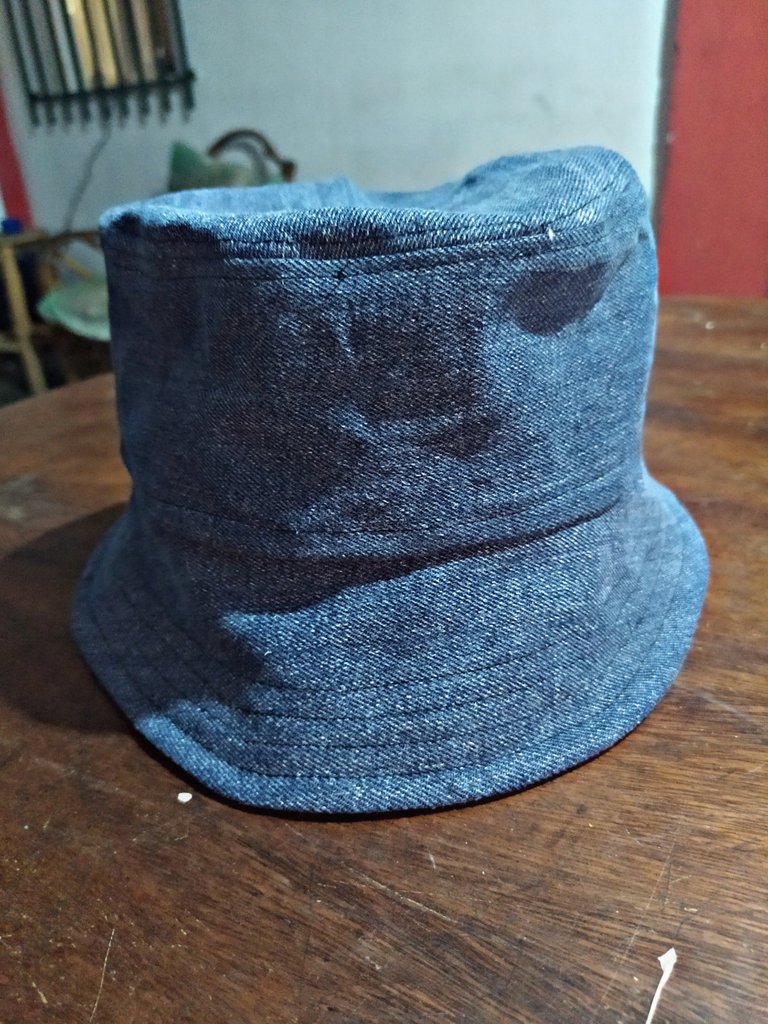
8- por último cosemos el forro interior a la parte baja interior de la lista negra que colocamos al ala.
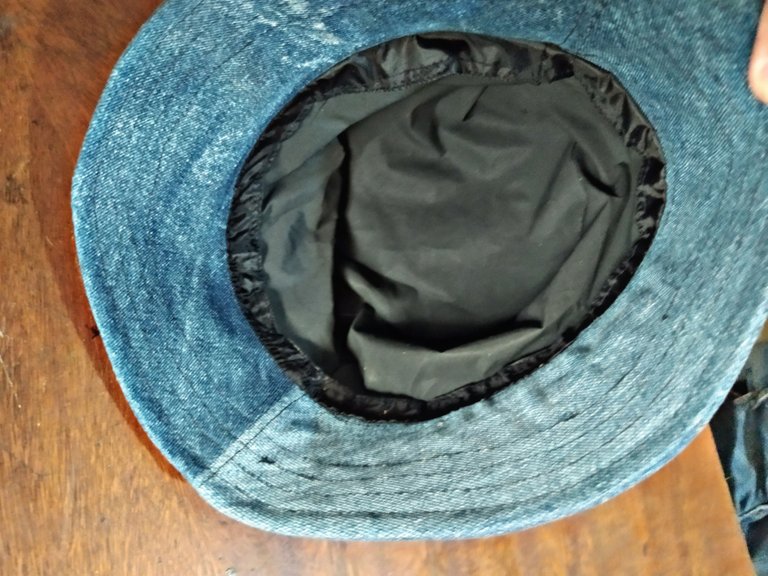
¡Y Voila!!!

¡Espero les guste este trabajo! Voy a continuar realizando algunos trabajos de costura y trataré de mejorar mi forma explicativa de manera pedagógica para facilitar los procesos.
¡Agradezco su lectura y ojalá puedan hacer este sombre, si es así por favor compartan fotos y me etiquetan!

Hello greetings, today I am going to show a work that I am doing as a hobby, but that leaves the utility that can give us to do it well and with passion, I am talking about sewing, although it is true for my various daily tasks I have not dedicated myself to perfect my work in sewing, it is also true that I like to do it because besides getting clothes and other things, it also helps me to release pressure.
Right now I just finished making a bucket, bucket or Australian type hat, it is very tasteful and accentuates the different personalities according to their color, definitely an unusual beauty but captivating.
Here I leave first of all the materials used for its confection:
4 sheets of legal size or Bond paper
1 pencil
1 ruler
1 compass
1 scissors
1 pair of old jeans
1/2 meter of black cloth
1 roll of black thread
Already with these materials we begin in the foreground with the modeling or creation to scale of the pattern that we will use here I leave the photos and the link for its use.

pattern

Once the pattern is ready, we must cut the jeans fabric and the inner lining fabric, fixing the pattern on them and on the tracing so that it is as close as possible.
The number of pieces are as follows:
Hat wings 4 pieces or 2 pairs in jeans.
Body or cup 2 pieces or 1 pair in jeans, same in black fabric.
Cap 1 piece in jeans and 1 in black cloth
1 list of black fabric 3.5 centimeters wide by 35 centimeters long.
(I put black fabric because it is the one I have with the jeans, you can use any other type according to taste)
Once we have everything cut we proceed to assemble our hat in the following way).

1- We join the brim caps by the back of the fabric like this (the same for the two pairs)

2- Join the two pieces obtained from the previous step as follows.


3- Turn over the pieces that we joined and proceed to sew several lines.


4- join the pieces of the cup, you can make the two fabrics at the same time, that is, join also the black fabric so that when we finish the main piece we have the lining ready.

5- Once the previous step is ready we proceed to sew the cup with the cap of the hat.
(Do not forget the beveling or double stitching as a sign of a quality finish or ornament).

6- we continue, ready these fundamental steps we sew the black list to the inner edge of the brim of the hat so that it looks like a top stitch like this:

7- then we glue the brim cup and we are finishing the final touches

8- finally we sew the inner lining to the lower inner part of the black list that we put to the wing.

And Voila!!!

I hope you like this work! I will continue to do some sewing work and I will try to improve my explanatory form in a pedagogical way to facilitate the processes.
I appreciate your reading and hopefully you can make this shade, if so please share photos and tag me!

Texto y trabajo realizado por rafa1272 imagen de patrón y ensamble tomadas de Pinterest, fotos del trabajo paso a paso tomadas con redmi note 8 todas editadas en Picsart.
Text and work done by rafa1272 pattern and assembly image taken from Pinterest, step by step work photos taken with redmi note 8 all edited in Picsart.
translated by DeepL
Congratulations @rafa1272! You have completed the following achievement on the Hive blockchain and have been rewarded with new badge(s):
Your next target is to reach 200 replies.
You can view your badges on your board and compare yourself to others in the Ranking
If you no longer want to receive notifications, reply to this comment with the word
STOPCheck out the last post from @hivebuzz:
Support the HiveBuzz project. Vote for our proposal!
Gracias por promocionar tu excelente contenido en nuestro servidor de Discord, te invitamos a darle un vistazo allí a nuestro canal de #tweeter para que te enteres cómo ganar tokens
!PIZZA
!LUV
!PGM
BUY AND STAKE THE PGM TO SEND TOKENS!
Discord
Support the curation account @ pgm-curator with a delegation 10 HP - 50 HP - 100 HP - 500 HP - 1000 HP
Get potential votes from @ pgm-curator by paying in PGM, here is a guide
I'm a bot, if you want a hand ask @ zottone444
(5/10) gave you LUV. H-E tools | discord | community | <>< daily
@celf.support
PIZZA Holders sent $PIZZA tips in this post's comments:
(5/10) @celf.support tipped @rafa1272 (x1)
Join us in Discord!
¡hivebits
!luv
(1/1) gave you LUV. H-E tools | discord | community | <>< daily
@healjoal
! hivebits