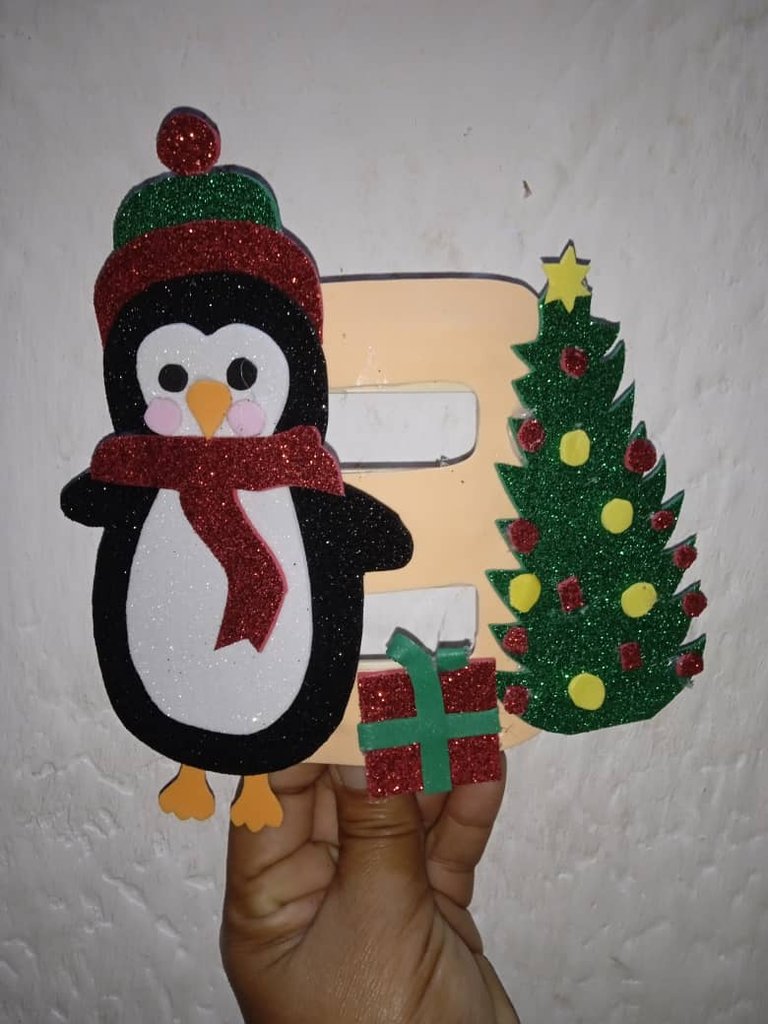
Buenas noches amigos , Dios les bendiga, espero que se encuentren bien, saludables y felices, hoy les quiero compartir mi primer interruptor navideño , perfecto para estás épocas decembrinas utilicé tres diseños en uno pingüino, arbolito y obsequio, los invito a aprender junto conmigo
Good evening friends, God bless you, I hope you are well, healthy and happy, today I want to share my first Christmas switch, perfect for this holiday season, I used three designs in one penguin, tree and gift, I invite you to learn along with me.
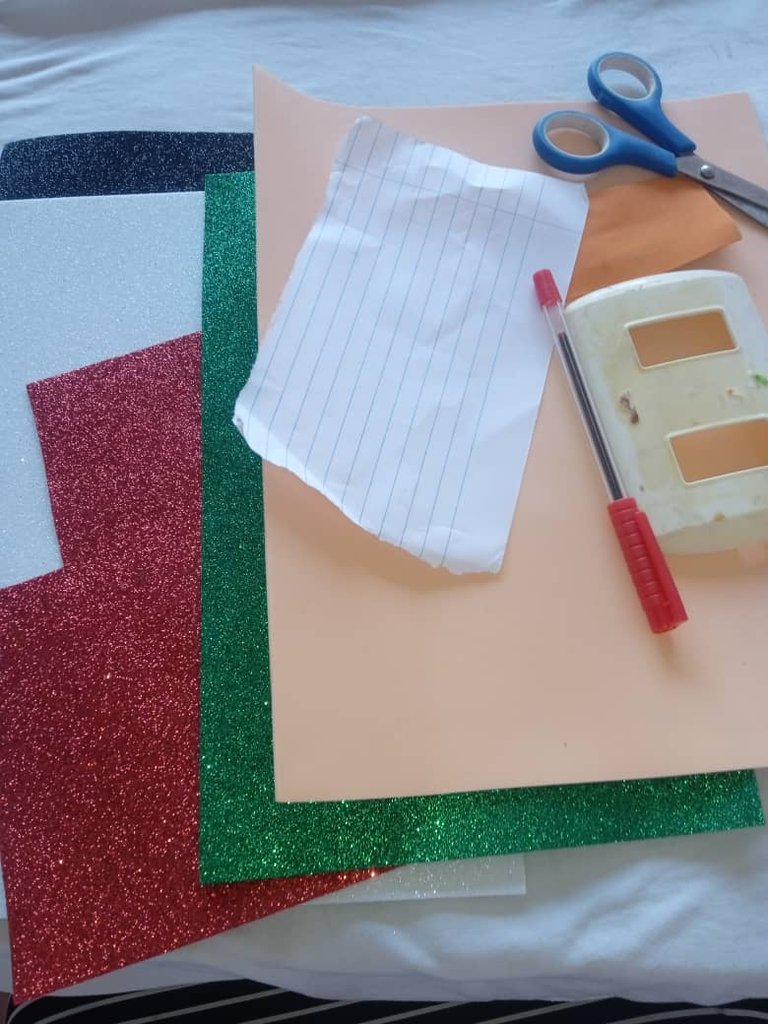
Materiales para decorar un interruptor:
-Foamis
-Tapa de interruptor
-Tijera
-Silicon
-Papel para crear patrón
Materials to decorate a switch:
-Foamis
-Switch cover
-Scissors
-Silicon
-Paper to create a pattern
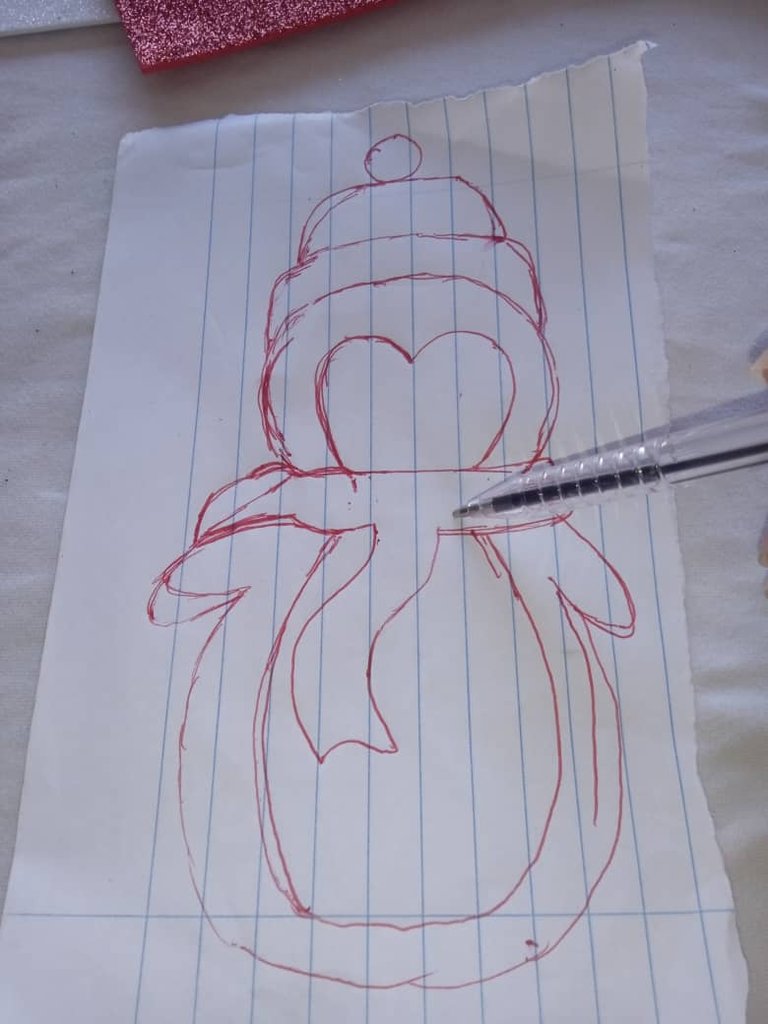
Pasos para realizar la decoración a nuestro interruptor:
Comenzamos realizando los patrones , dibujé primeramente el pingüino con todos sus accesorios para el frío
Steps to make the decoration to our switch:
We begin by making the patterns , I first drew the penguin with all its accessories for the cold .
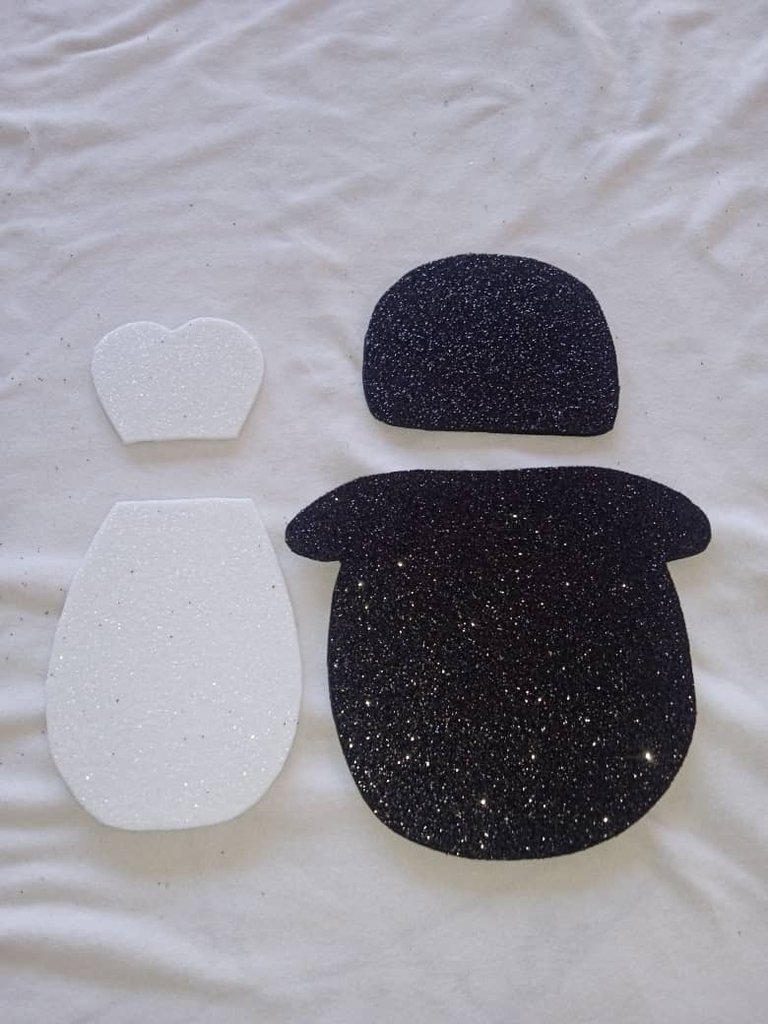
Comenzaremos marcando para formar nuestro pingüino por piezas , marcaremos su cuerpo primeramente , luego continuamos con su rostro y demás accesorios
We will start marking to form our penguin by pieces, we will mark his body first, then we continue with his face and other accessories.
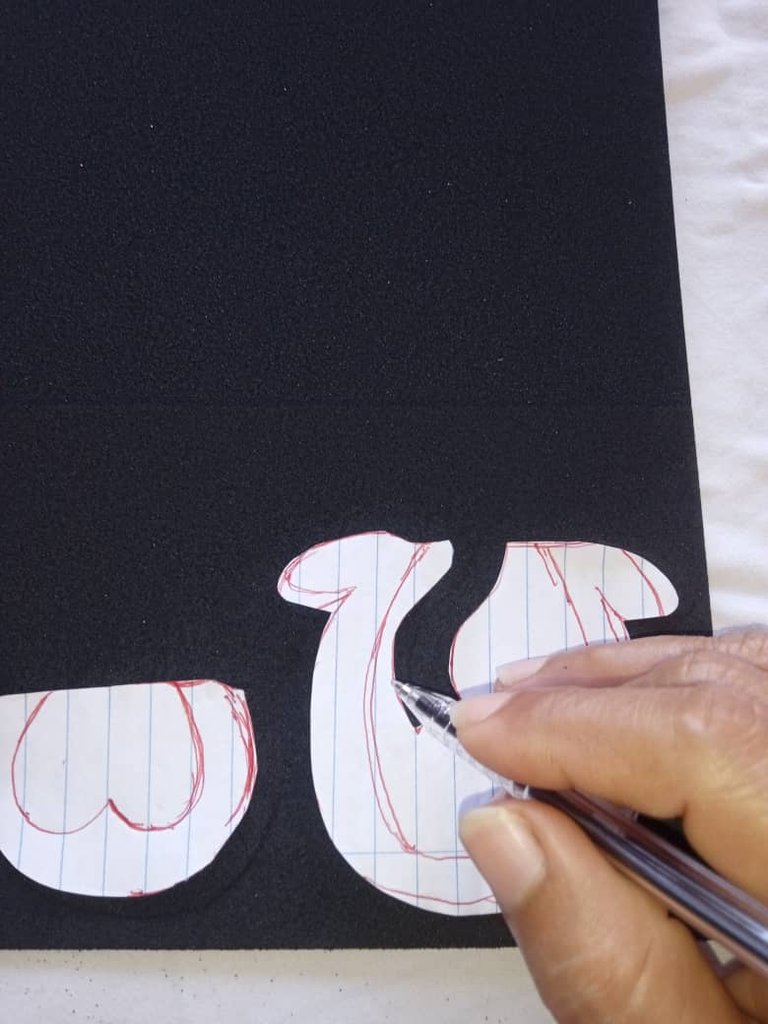
Una vez que tengamos nuestras piezas marcadas , vamos a proceder recortando su cuerpo, parte blanca con negro y por último las piezas para formar su rostro, pico ,ojos y patas
Once we have our pieces marked, we will proceed by cutting out his body, white part with black and finally the pieces to form his face, beak, eyes and legs.
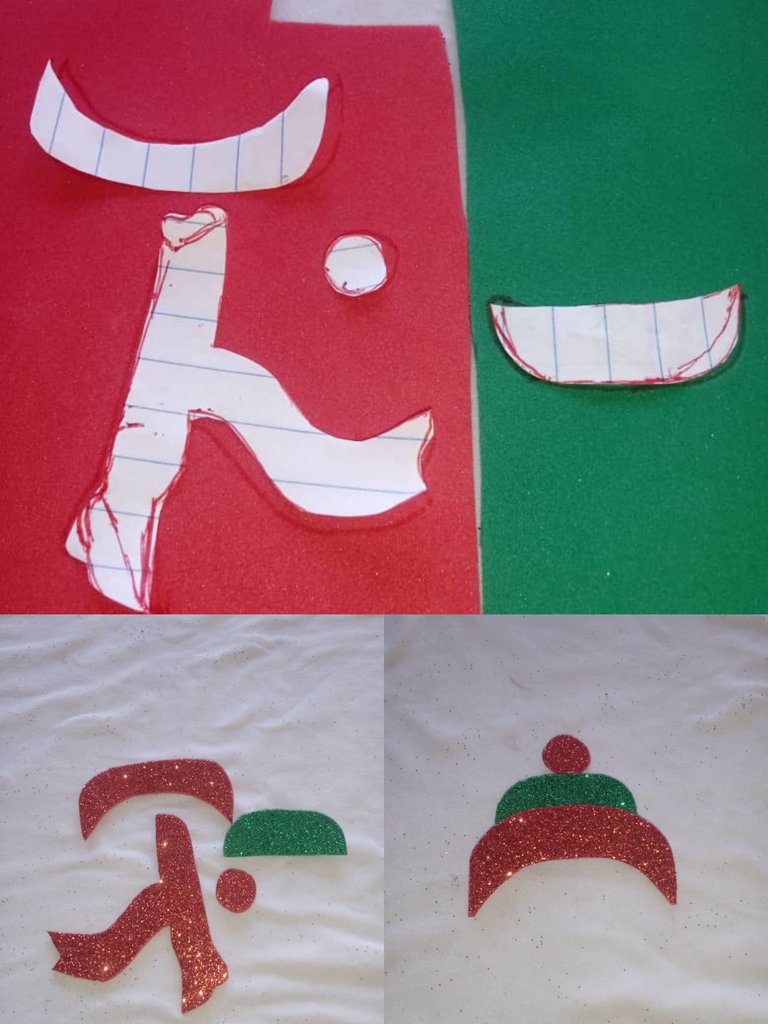
Seguidamente vamos a proceder tomando nuestra piezas de patrón (bufanda,gorrito )y comenzaremos marcando en los foamis de nuestra preferencia, seguidamente vamos a continuar recortando los , luego vamos a proceder pegando el gorrito , la parte roja abajo ,el verde en el centro y el rojo arriba
Then we will proceed taking our pattern pieces (scarf, hat) and start marking on the foamis of our preference, then we will continue cutting them, then we will proceed by gluing the hat, the red part at the bottom, the green in the center and the red on the top.
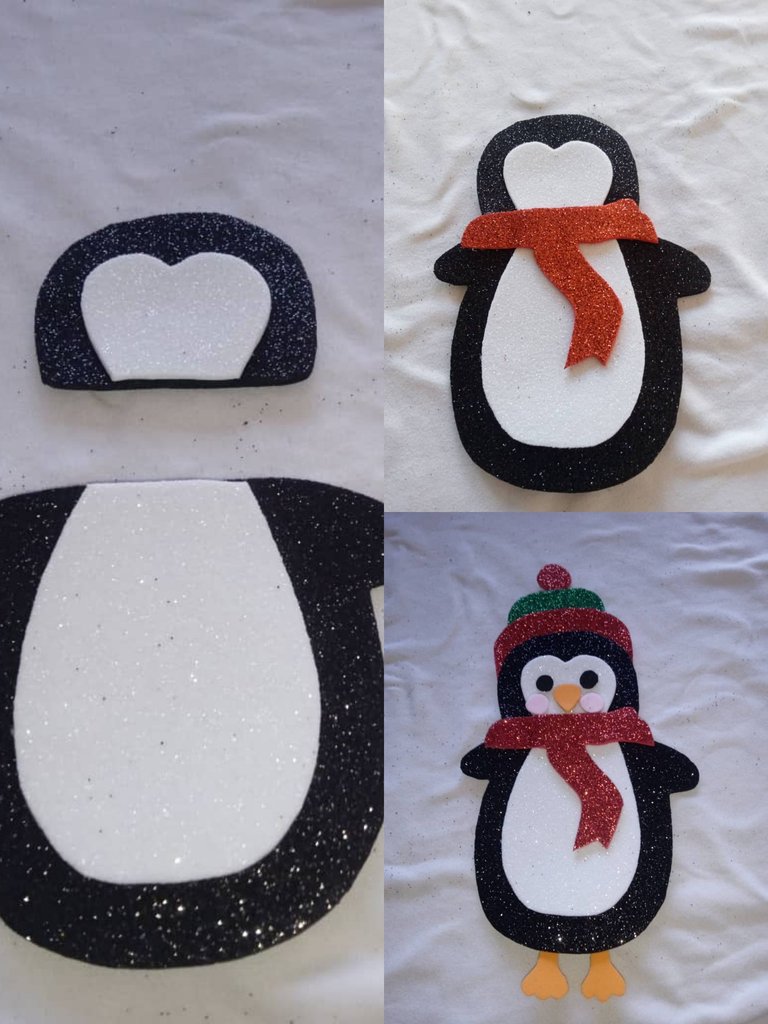
A continuación iniciaremos pegando y formando nuestro pingüino, iniciaremos pegando su piel blanca al centro de su cuerpo negro , luego continuaremos pegando el cuerpo a la cabeza y la bufanda en el centro, seguidamente pegaremos su gorrito navideño, su rostro sonrojado y sus patas semi separadas
Next we will start gluing and forming our penguin, we will start by gluing his white skin to the center of his black body, then we will continue by gluing the body to the head and the scarf in the center, then we will glue his Christmas hat, his blushing face and his legs semi separated.
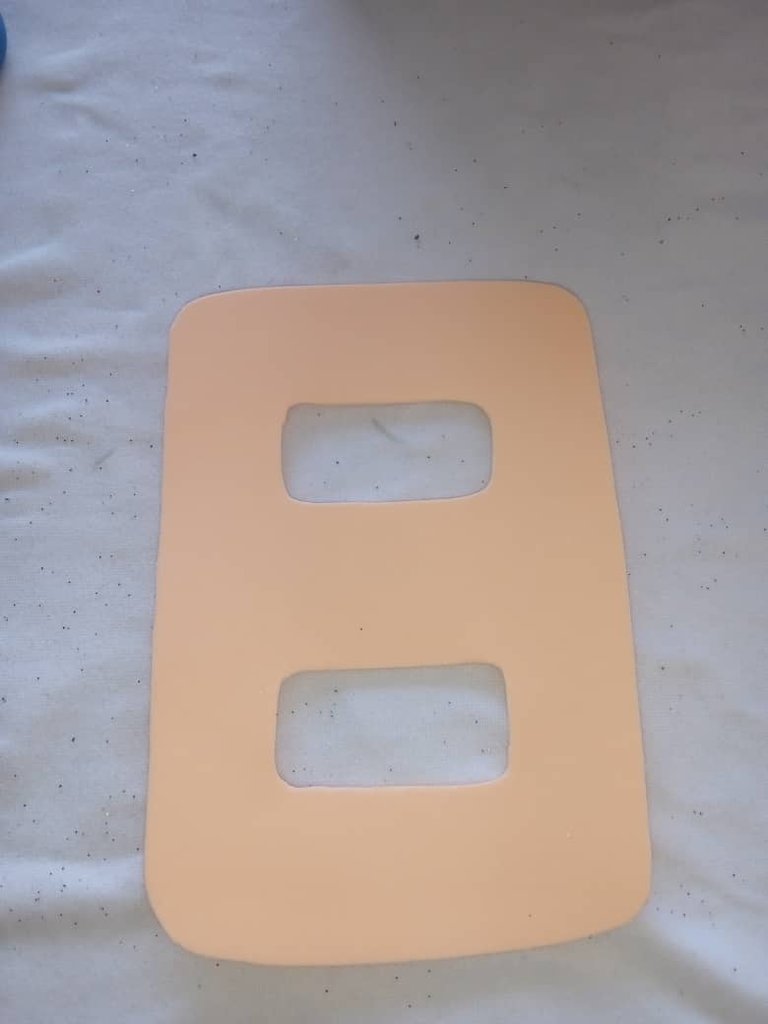
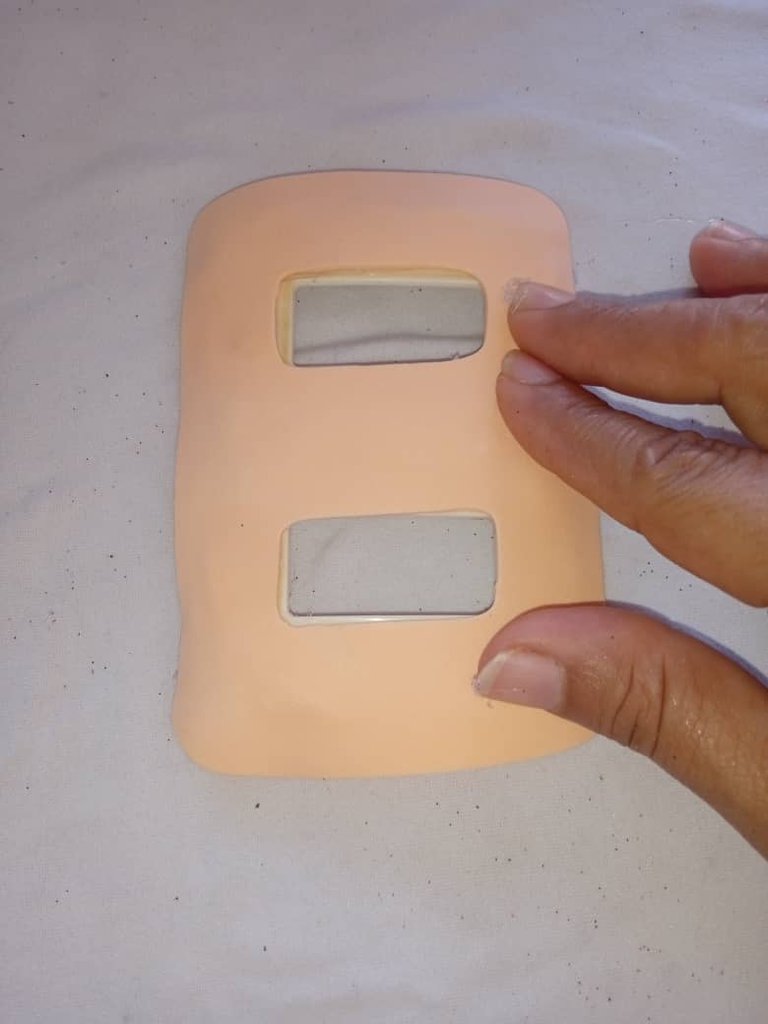
En este siguiente paso vamos a proceder recortando la pieza para decorar el interruptor, para esto utilicé color piel , lo recorté incluyendo las piezas donde irán ubicadas el prende y apaga
In this next step we will proceed by cutting out the piece to decorate the switch, for this I used skin color, I cut it out including the pieces where the on and off switch will be located.
Luego continuaremos cubriendo nuestro interruptor con la pieza de foamis que recortamos en el paso anterior
Then we will continue covering our switch with the foamis piece that we cut in the previous step.
Seguidamente continúe recortando un arbolito navideño y un obsequio, estos los continúe pegando en nuestro interruptor al lado contrario donde irá ubicado el pingüino
Then I continued cutting out a Christmas tree and a gift, these I continued gluing on our switch on the opposite side where the penguin will be located.
De esta manera realicé mi decoración al interruptor con temática navideña, espero les guste ,hasta la próxima amigos
In this way I made my Christmas themed switch decoration, I hope you like it, see you next time friends.

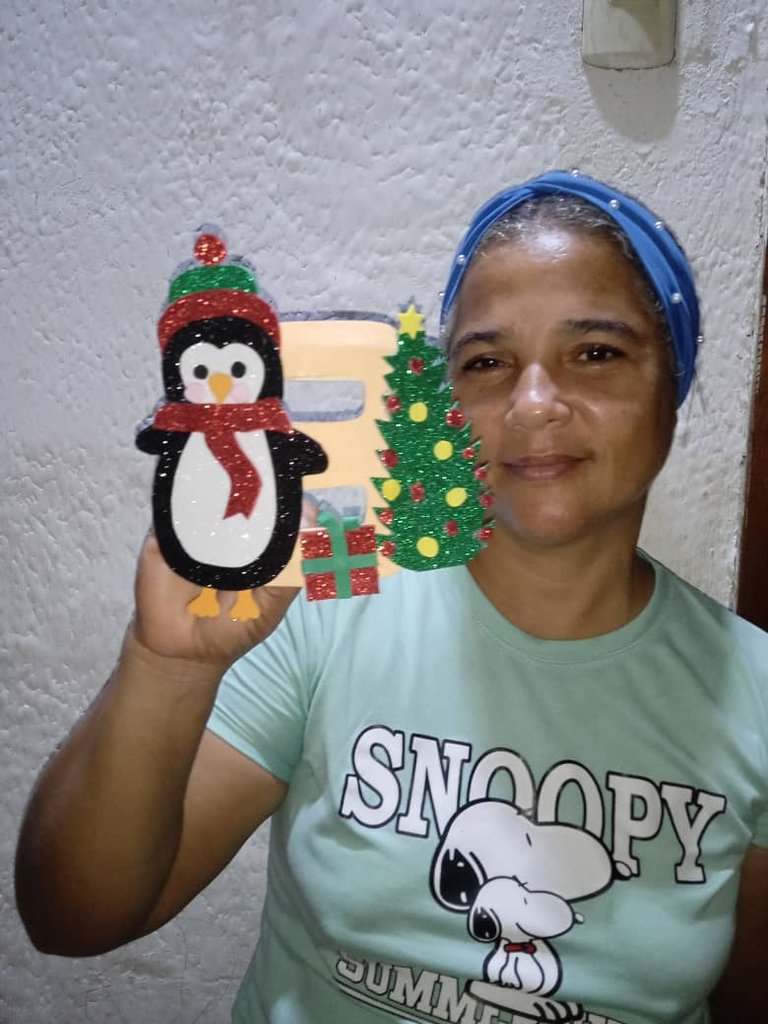
Mi primer interruptor navideño | My first Christmas switch
This is beautiful and very creative 🤩
You're did very great 😃
Qué lindo! Es adorable, lo muestras muy fácil de hacer.
Aprovecho para dejarte la actualización de nuestras reglas en la comunida,d para que la tomes en cuenta en tus siguientes publicaciones.
https://peakd.com/hive-130560/@hive-130560/actualizacion-de-nuestras-reglas-en-la-comunidad-updating-our-community-rules-espeng
Wow this is so creative and unique, you did an awesome job friend.