Hola buen día amigos , Dios les bendiga a todos los lectores y presentes de esta comunidad , mis felicitaciones a todos los participantes de este concurso , han quedado bellas sus manualidades , también felicito a los administradores y moderadores de esta comunidad incluyendo al amigo @gaboamc2392 por esta bella iniciativa , es mi primera vez armando una cajita , no fue fácil pero tampoco difícil , lo que más me gusta es el conocimiento que obtuve mediante el proceso ,hoy quiero formar para de este concurso "Plantillas y moldes para cajas de obsequios "con este post , invito a participar a la amiga @angeles , que nos comparta sus conocimientos
Hello good morning friends, God bless all readers and present in this community, my congratulations to all participants of this contest, have been beautiful crafts, I also congratulate the administrators and moderators of this community including the friend @gaboamc2392 for this beautiful initiative, This is my first time making a box, it was not easy but not difficult, what I like most is the knowledge I gained through the process, today I want to be part of this contest "Templates and molds for gift boxes" with this post, I invite my friend @angeles to participate and share her knowledge with us.
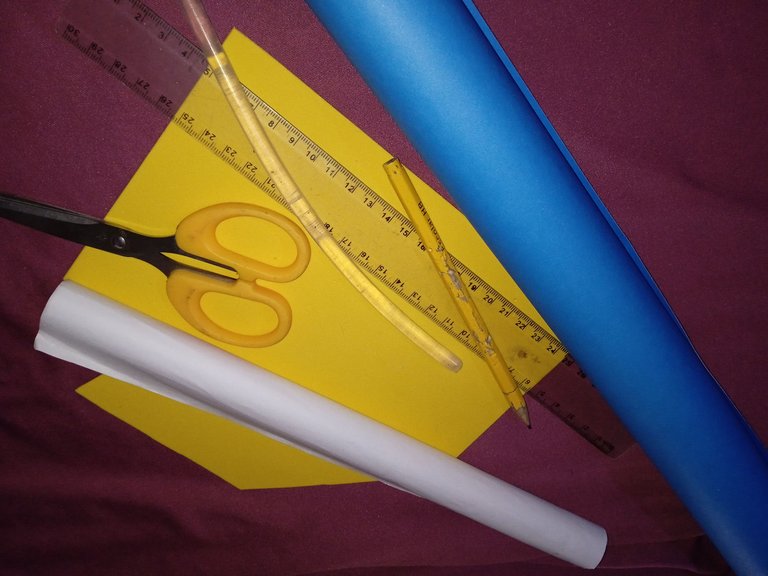
Materiales para elaborar nuestra caja :
Cartulina (azul )
Papel boom (para el molde )
Regla geométrica
Tijera
Silicón
Foamis
Lápiz
Materials to make our box :
Cardboard (blue)
Boom paper (for the mold)
Geometric ruler
Scissors
Silicone
Foamis
Pencil
Pasos a seguir :
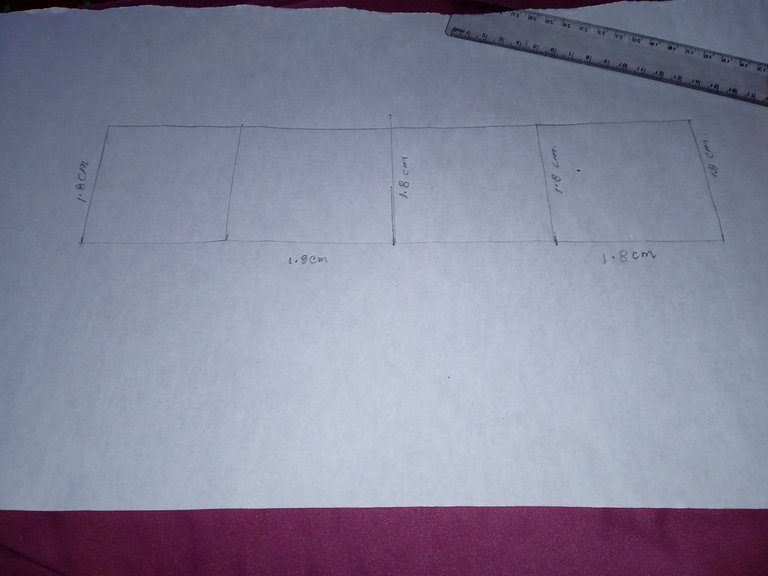
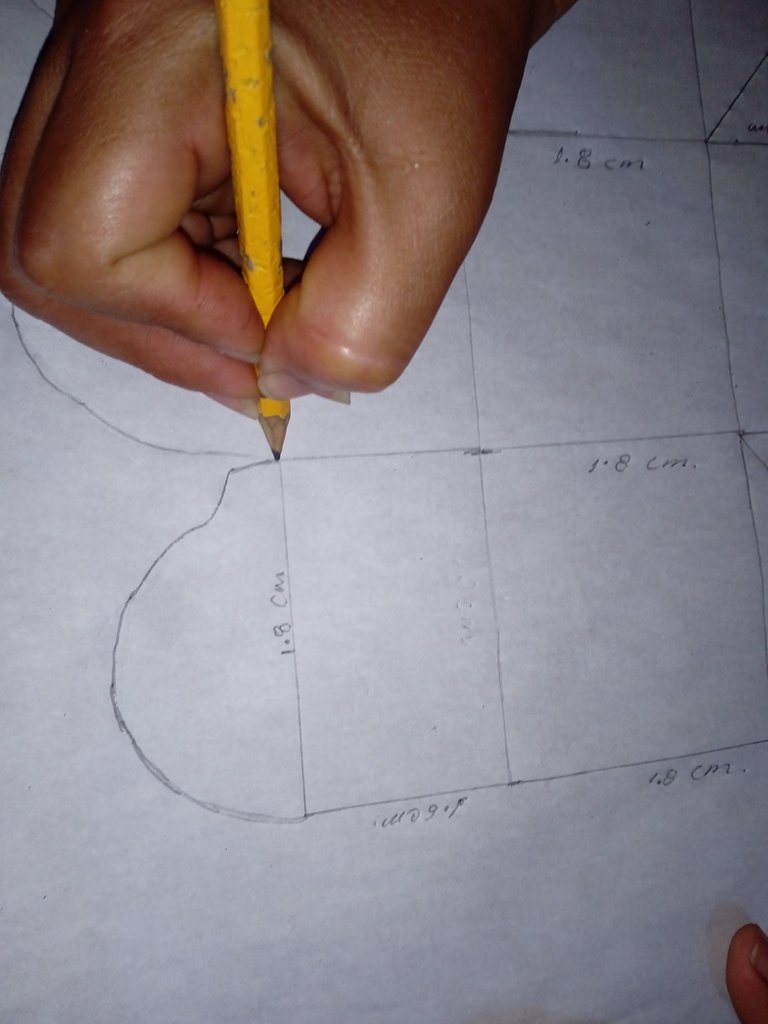
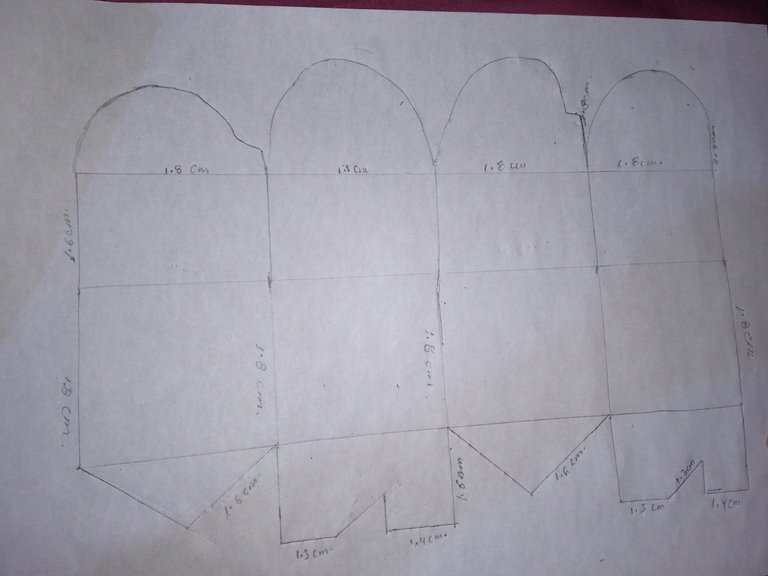
Vamos a iniciar nuestra manualidad ,realizando nuestra plantilla para realizar más adelante la caja , iniciamos dibujando en el papel boom cuatro cuadros ,ambos cuadros pegados ,uno al lado del otro ,con una altura de 1 x 8 centímetros , y una anchura de 1 x 8 centímetros ,los cuatros cuadros lo realizamos de la misma medida
Steps to follow:
Let's start our craft, making our template to make later the box, we start drawing on the paper boom four pictures, both pictures glued, side by side, with a height of 1 x 8 centimeters, and a width of 1 x 8 centimeters, the four pictures we made the same size.
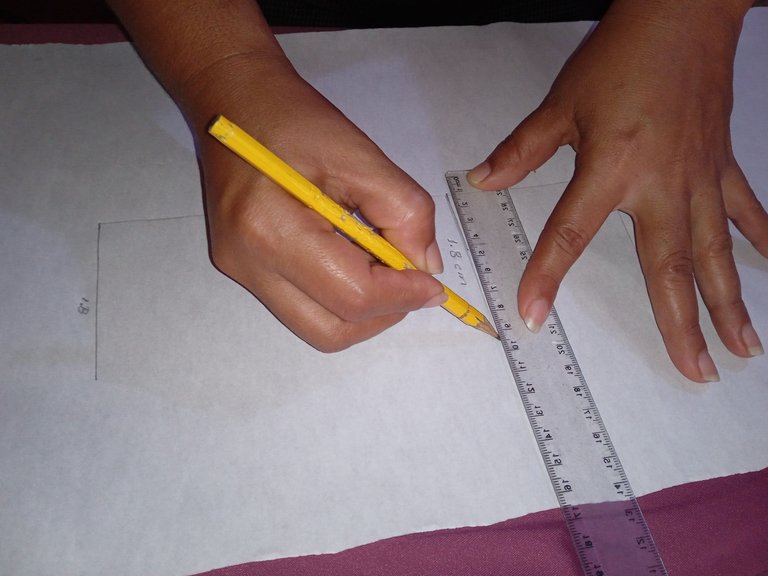
Continue dibujando en el primer cuadro un triangulo ,en la parte de abajo , las dos rayas del triángulo son de 1 x 6 centímetros , luego en el cuadro siguiente dibuje un cuadro más con un doblaje en el centro en forma de zigzag , en la primera esquina tiene una anchura de 1 x 3 centímetros y al otro lado 1 x 4 centímetros con una altura de 1 x 6 centímetros de altura , en el siguiente cuadro realice otro triángulo con la misma medida del primero , y en el cuadro final realice la misma medida que el según cuadro
Continue drawing in the first square a triangle, at the bottom, the two lines of the triangle are 1 x 6 centimeters, then in the next square draw one more square with a zigzag fold in the center, in the first corner has a width of 1 x 3 centimeters and on the other side 1 x 4 centimeters with a height of 1 x 6 centimeters high, in the next square draw another triangle with the same measure of the first, and in the final square draw the same measure as in the next square.

En los cuadros de arriba realice unas curvas tipo círculos ,un poco altas , para luego armar y cerrar las cajas con mucha facilidad , realice cuatro semi círculos como un sube y baja
In the boxes above, make some caves like circles, a little high, to then assemble and close the boxes very easily, make four half circles like a seesaw.
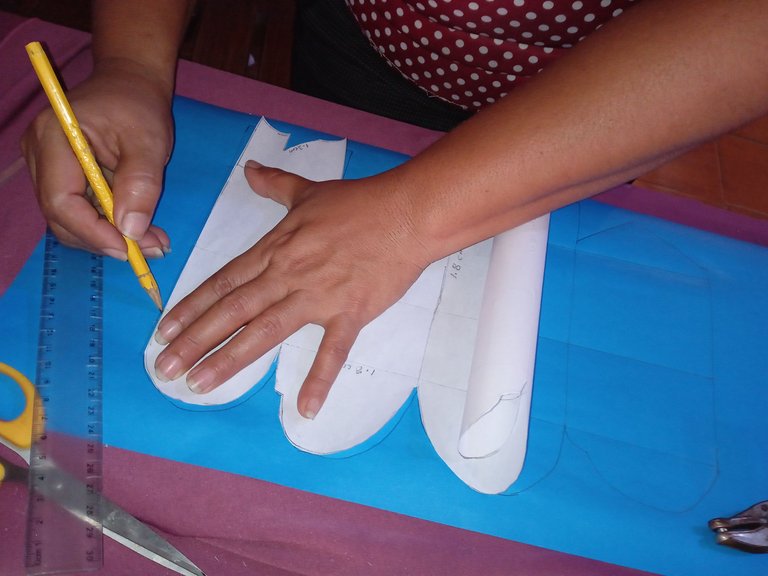
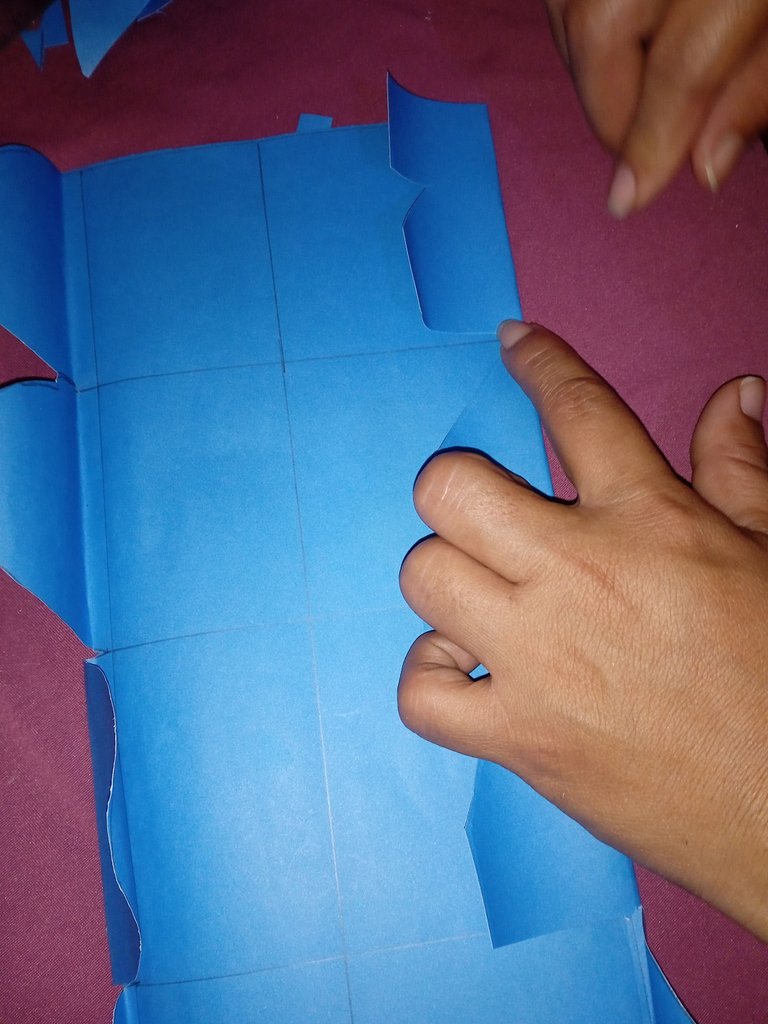
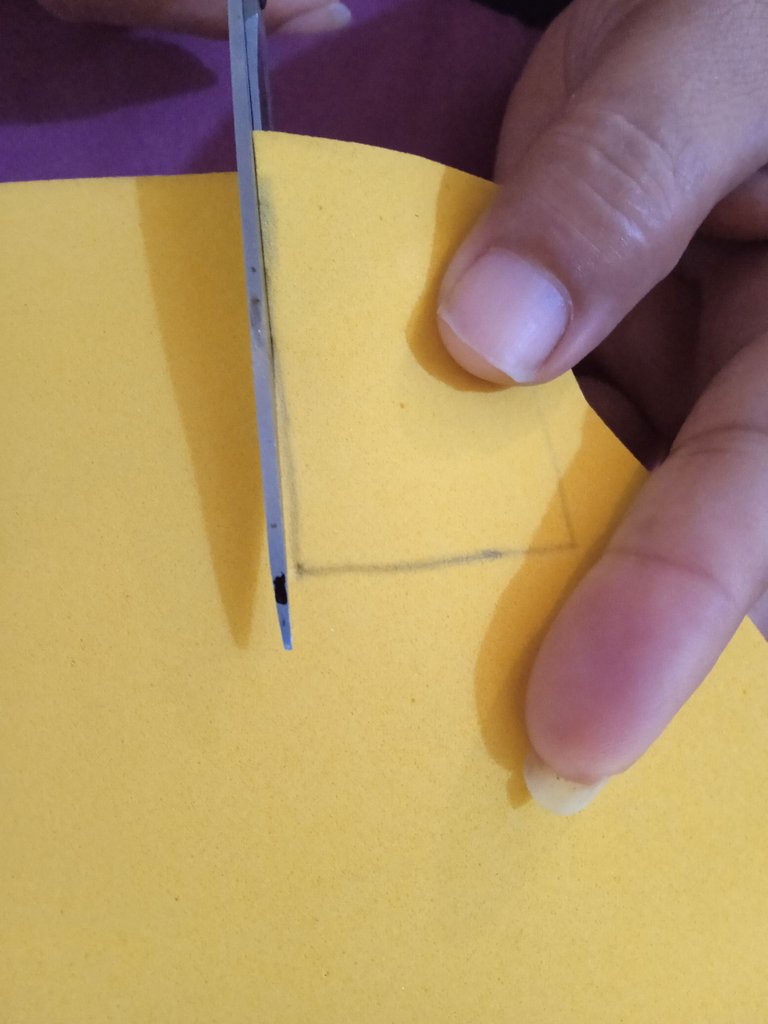
En este paso que a continuación realizaremos , vamos a recortar la plantilla que dibujamos con nuestro lápiz , luego la marcamos en la cartulina que vamos a utilizar para realizar nuestra caja
In this next step, we will cut out the template that we drew with our pencil, then we mark it on the cardboard that we will use to make our box.
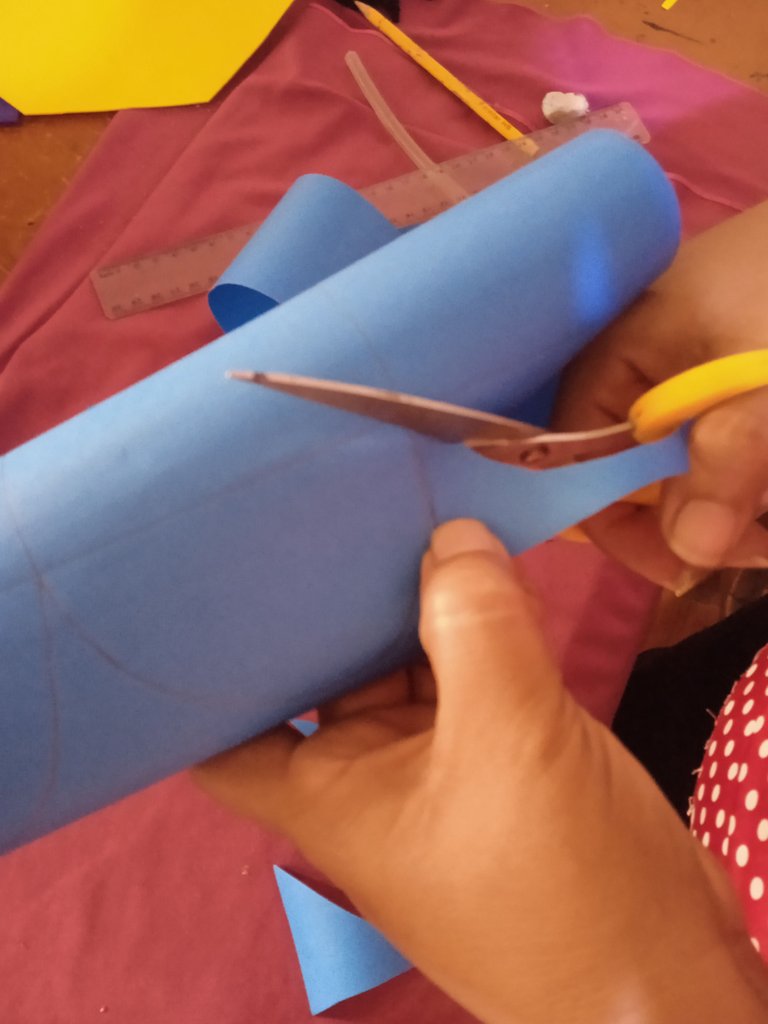
Continuaremos recortando la horma de la caja que dibujamos en la cartulina
We will continue cutting out the shape of the box we drew on the cardboard.
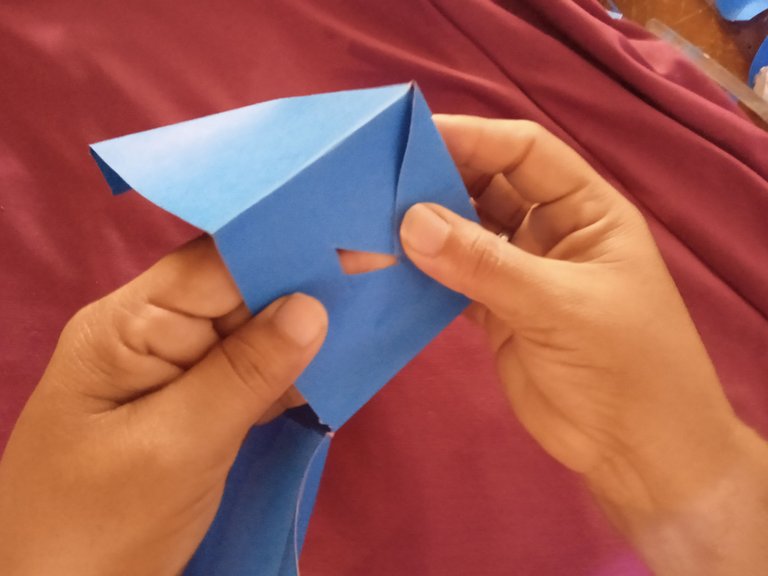
Continuamos doblando la cartulina por las marcas que hicimos con nuestro lápiz , y así poder armar nuestra caja de obsequio
We continue folding the cardboard along the marks we made with our pencil, in order to assemble our gift box.
Continuamos pegando la parte de abajo ,así nuestro obsequio no se salga ,pegamos las piezas de abajo punta con punta
We continue gluing the bottom part, so that our gift does not come off, we glue the bottom pieces end to end.
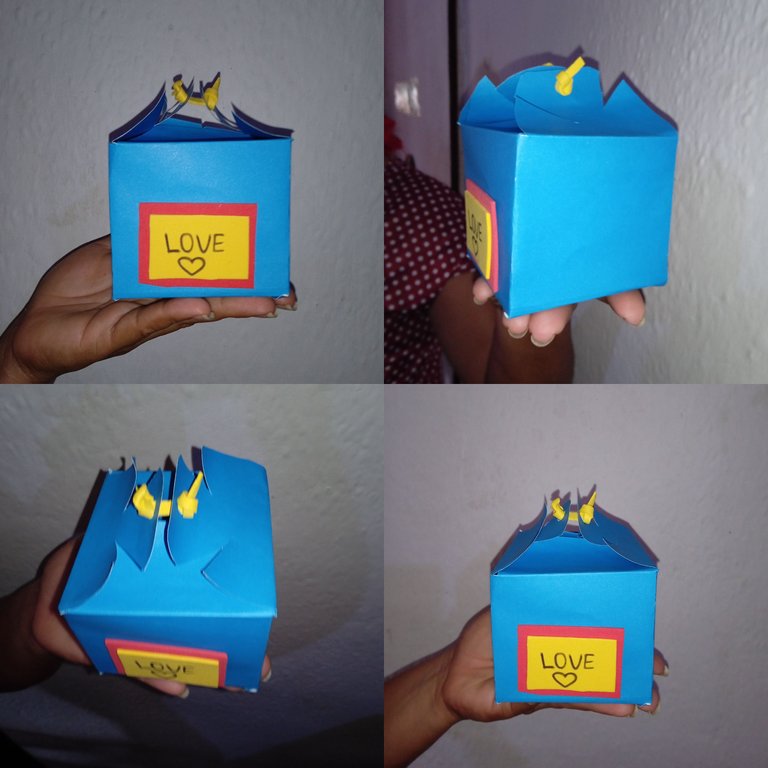
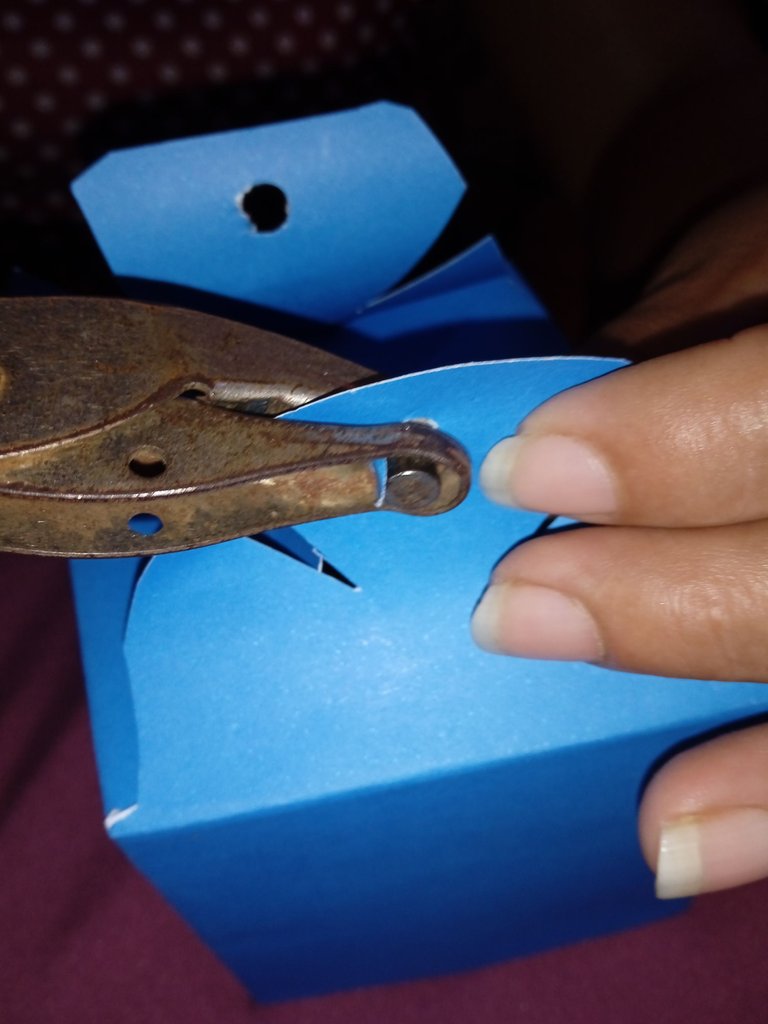
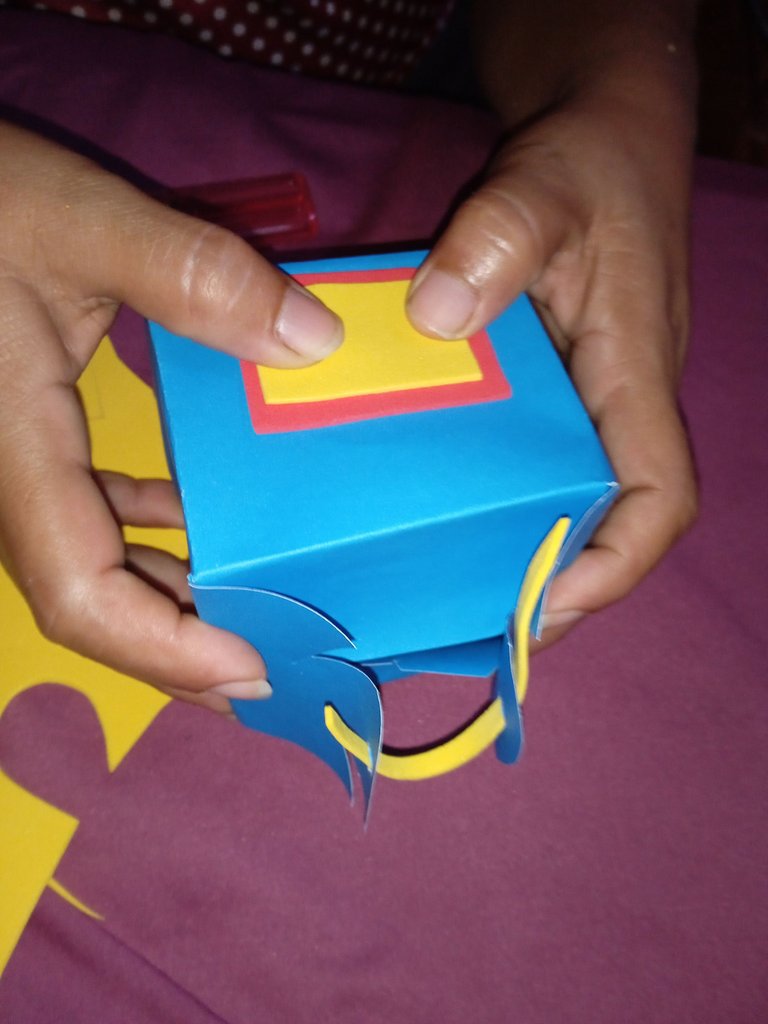
Luego que nuestra caja se encuentre ya armada , continuamos abriendo unos agujeros en la parte de arriba para pasar una cuerda y poder abrir y cerrar nuestra caja de obsequio
After our box is already assembled, we continue opening some holes in the top to pass a rope and to be able to open and close our gift box.
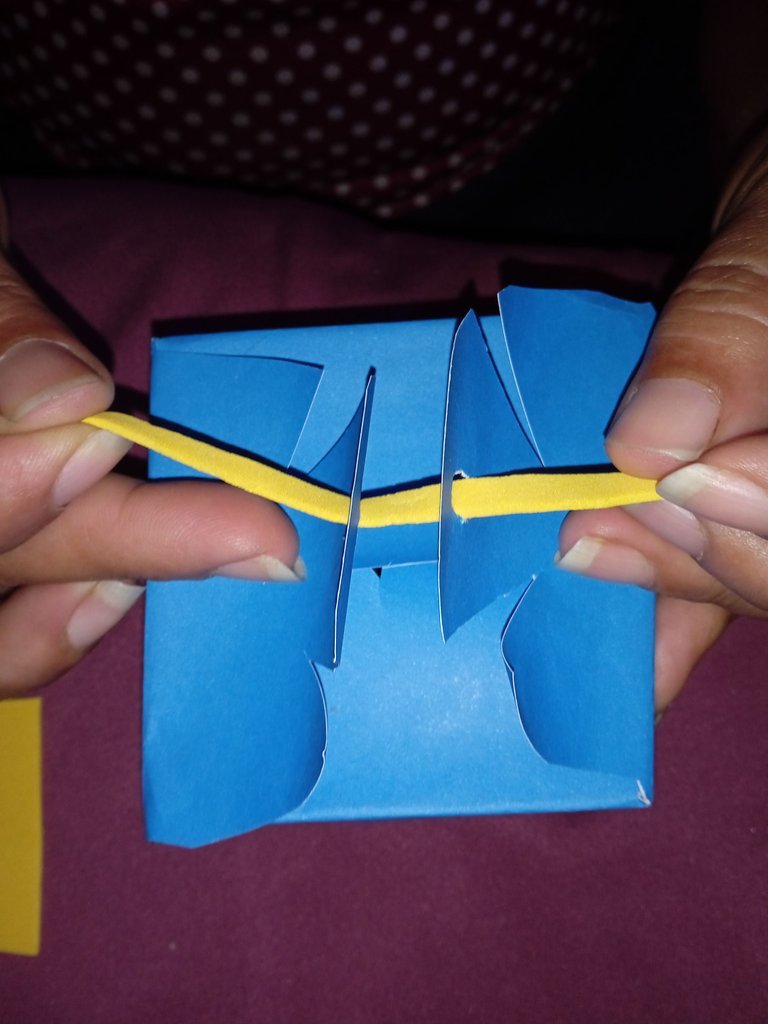
Continuamos amarrando nuestra caja con la pequeña cuerda , la introducimos por el pequeño agujero y así podemos abrir y cerrar cómodamente
We continue tying our box with the small rope, we introduce it through the small hole and this way we can open and close it comfortably.
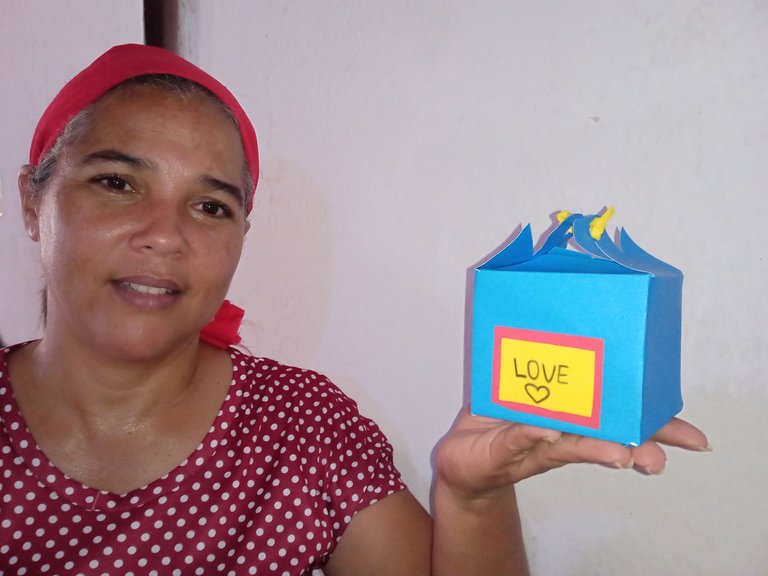
Recortamos un cuadrito y pegamos en todo el centro de la caja de obsequio en el escribí la palabra amor en inglés
We cut out a small square and glued it all over the center of the gift box, on which I wrote the word love in English
Feliz tarde amigos , este fue mi post de participación , espero sea de su agrado , suerte para todos y bendiciones en este concurso
Happy afternoon friends, this was my participation post, I hope you like it, good luck to all and blessings in this contest.
Congratulations @rameuris! You have completed the following achievement on the Hive blockchain and have been rewarded with new badge(s):
Your next target is to reach 100 comments.
You can view your badges on your board and compare yourself to others in the Ranking
If you no longer want to receive notifications, reply to this comment with the word
STOPTo support your work, I also upvoted your post!
Check out the last post from @hivebuzz:
Support the HiveBuzz project. Vote for our proposal!
Hola amiga, muy linda esta cajita de regalo, me gusto mucho. Exitos y feliz dia.
Muy bello tu trabajo y fácil de realizar.