Desde que puedo recordar me han encantado los programas de decoración, remodelaciones, bricolaje, etc., y es por eso que en mi blog se encuentran con proyectos que involucran la transformación no solo de espacios, sino de algún mueble que tenga en casa, y hoy les comparto uno que me gustó mucho, un cambio de look a un pequeño banco de pino.
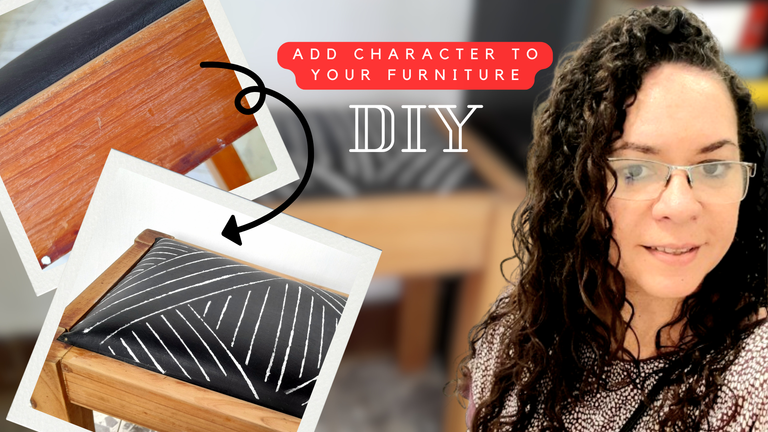
Este banquito formaba parte de una peinadora o cómoda que teníamos en casa una de mis hermanas y yo cuando compartíamos habitación de adolescentes, y como ven es de pino, pero tenía una capa de barniz que para la época estoy segura que era lo que estaba en tendencia, pero que ahorita no se usa, sino que se mantiene la madera al natural, por lo que quise darle un cambio para usarlo en otro pequeño proyecto que fue idea de mi hija Miranda, quien comparte conmigo el gusto por los programas de diseño interior.
Ella desde hace tiempo quería un recibidor (ve demasiado los programas de hermanos a la obra 🤣), pero la verdad que no tenemos mucho espacio para eso, pero mientras pintábamos la sala y comedor decidimos desarmar ya la casita de nuestro conejito Brownie quien murió hace unos meses y eso me dejó el espacio ideal para un mini recibidor, que es lo primero que ves al abrir la puerta de casa, y este banquito sería una pieza importante, así que vamos con este sencillo tutorial.
Materiales
Banco de pino
Lija
Pintura al frío blanca
Hilo pabilo o estambre
Hojas de papel recicladas
Cinta adhesiva
Paso a paso
Lo primero que necesitaba hacer eta quitar ese color naranja que toma el pino con el barniz para dejar ver su lindo tono al natural, así que con una lija, y ayuda de mi hijo Matías nos pusimos manos a la obra para liberar la madera del barniz y aunque fue un proceso fastidioso porque no teníamos una lija lo suficientemente gruesa, el olor del pino a medida que lijábamos lo compensaba, así que estuvimos lijando hasta que tuvimos un bonito color mate.
Y una vez estuvo listo, solo limpiamos muy bien con un pañito húmedo, y el primer paso estaba listo.
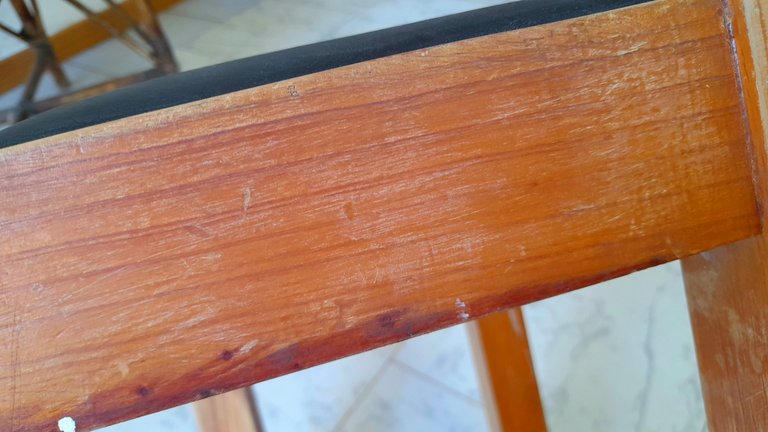
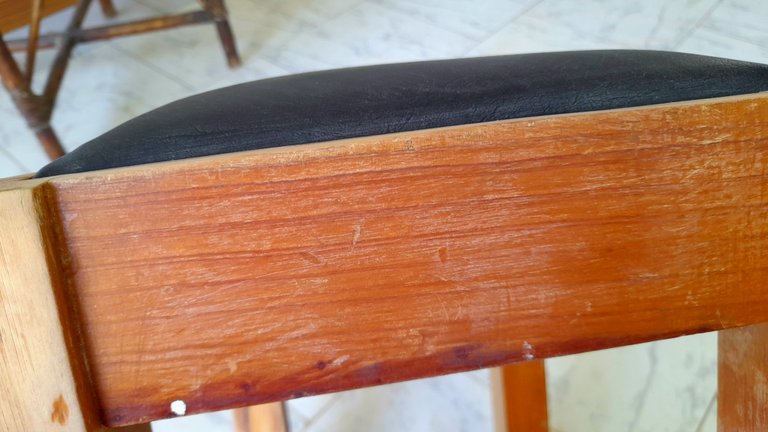
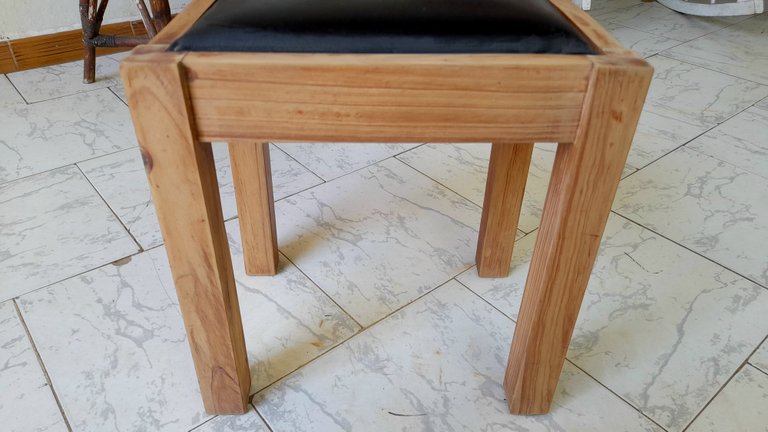
Lo otro que quería hacer era darle un poquito de carácter, y como no quería retapizarlo porque no tenía en casa el material, decidí darle un cambio a la cuerina con algunos detalles en blanco, ya que los cambios de colores que estamos haciendo en casa incluyen blanco, gris y negro, así que me pareció genial darle ese toque de color para unificar todo el ambiente.
Para eso estuve pensando mucho en qué diseño usar que no fuesen flores ni hojitas, porque la verdad nunca me han gustado, así que estaba entre puntos de diferentes tamaños o líneas en diferentes direcciones y las ganadoras fueron las líneas, las que me dieron algo de trabajo, pero al final quedaron justo como yo quería.
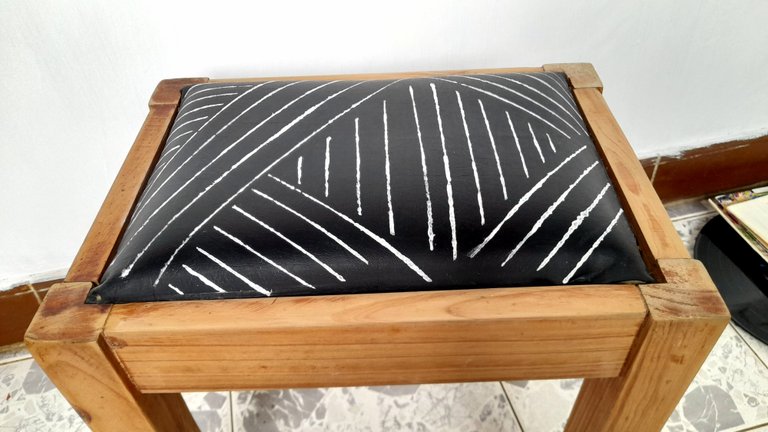
Y para este resultado probé de varias maneras: primero probé haciendo las líneas blancas con un pincel muy finito, pero no me gustó para nada como se veía, así que con un pañito húmedo lo retiré, después recordé una técnica que vi hace un tiempo en la que se usaba un cordón bañado en pintura para hacer líneas en una maceta y eso hice.
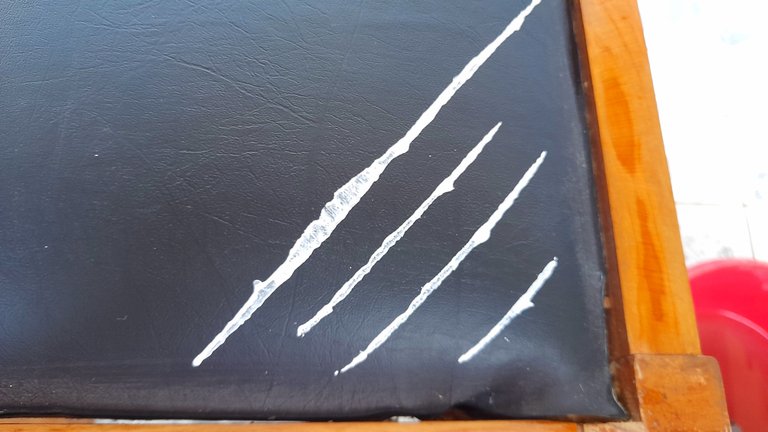
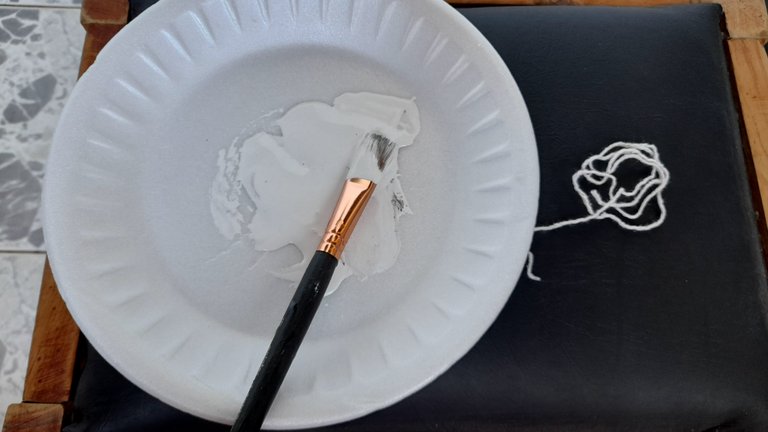
Solo recorté una tira de hilo pabilo (también pueden usar estambre para unas líneas un poco más gruesas), la mojé con la pintura blanca, la tensé con mis manos y presioné sobre la cuerina en el lugar donde quería la línea, y listo, tenía unas líneas bastante prolijas, pero recuerden que yo las quería en diferentes direcciones y cuando traté de cambiar la orientación de la línea todo se volvió un desastre así que lo volví a quitar 🤣
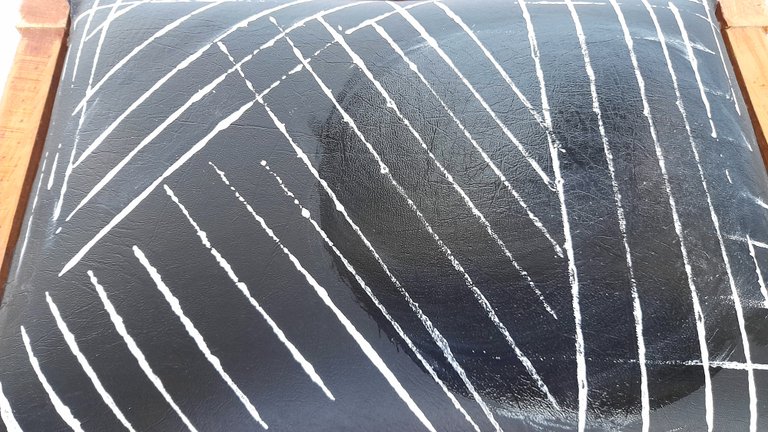
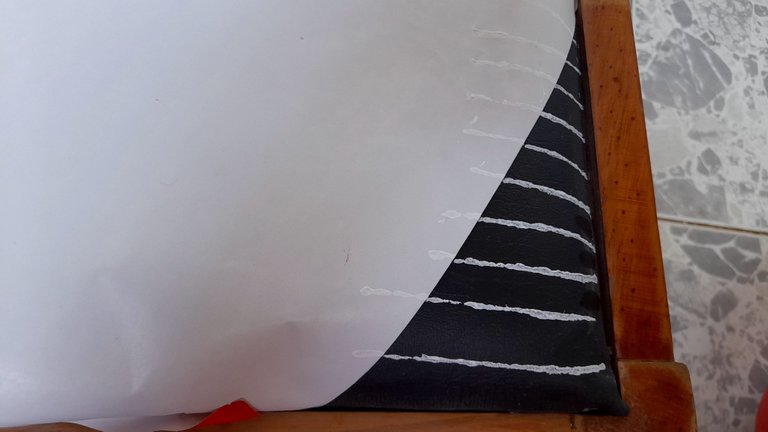
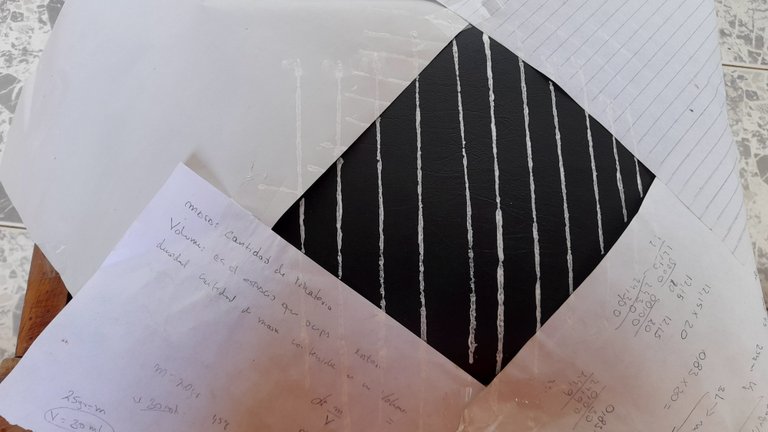
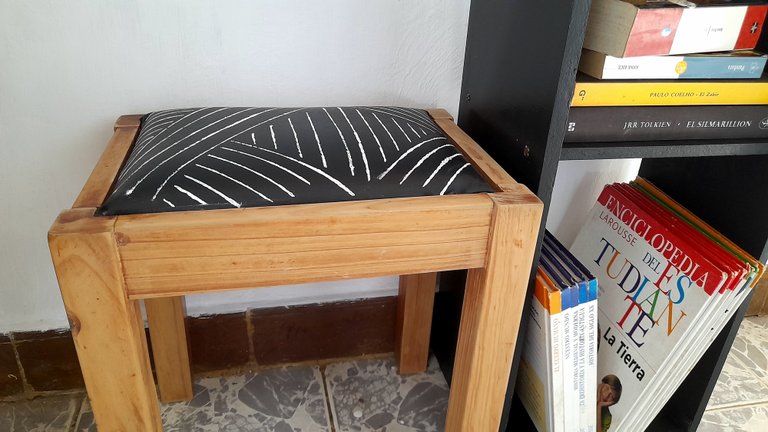
Finalmente la solución fue usar hojas de papel para fijarla con cinta adhesiva y así poder delimitar las zonas a pintar y proteger las que ya estaban listas para no dañarlas, y fue así como después de quitar y quitar pintura pude terminar con este diseño que me encantó y que sin dudas le dio una nueva cara y muchos años más de uso a este pequeño banquito que ya está ubicado en el mini recibidor que creé para que Miri tuviese su recibidor soñado 🤩
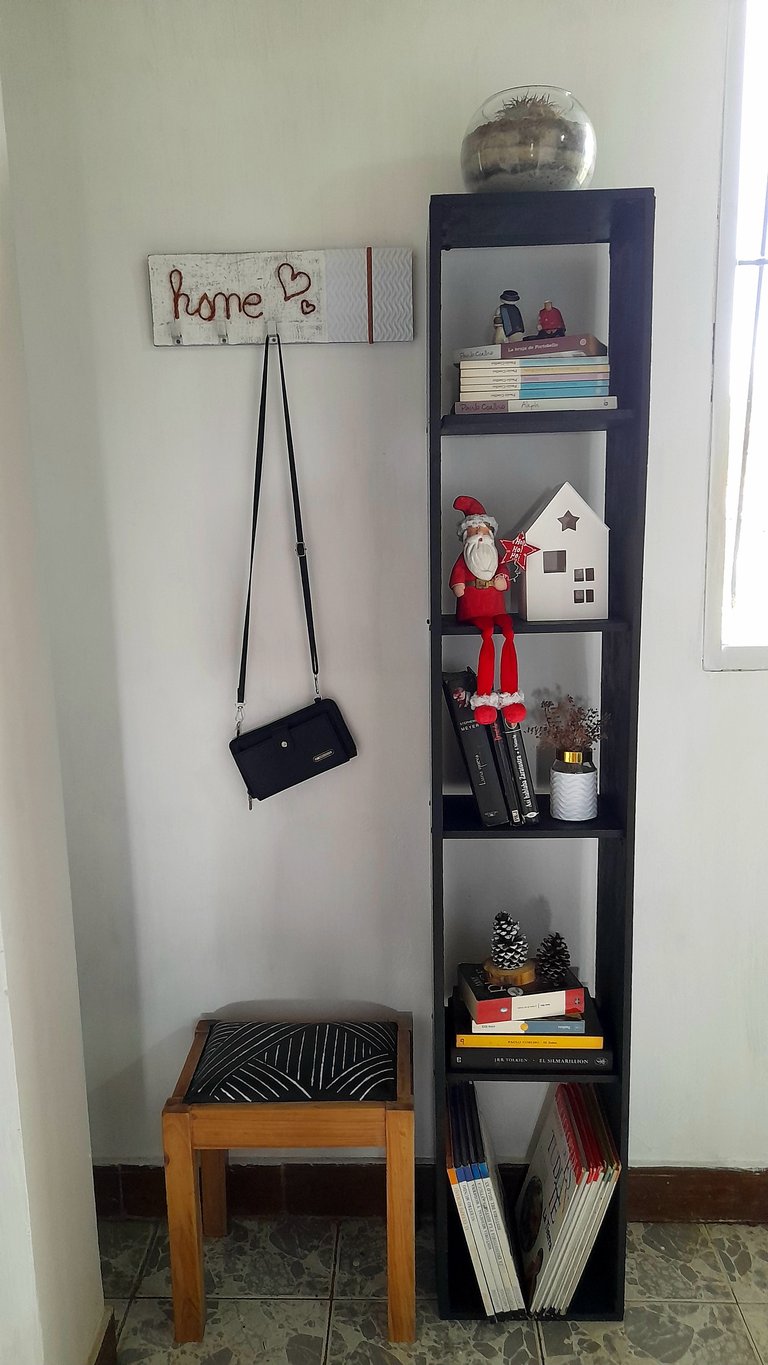
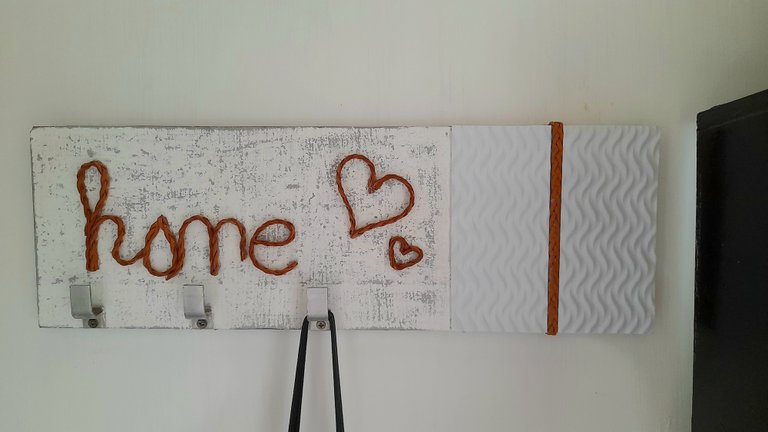
Ya solo me falta agregar una bufanda tejida sobre el banquito, un revistero que será un nuevo proyecto, y una plantita para que este espacio se vea mucho más lindo, y si se fijan un poco, incorporé el perchero que hice hace unos días para las llaves y le di un pequeño cambio porque como saben no estaba al 100% conforme, y aún no lo estoy, pero seguro lo estaré en algún punto, porque si algo tengo yo, es que no me rindo hasta que tengo justo lo que quiero. Así que atentos 🤣

For as long as I can remember I have loved decorating programs, remodeling, DIY, etc., and that is why in my blog you will find projects that involve the transformation not only of spaces, but of some furniture that you have at home, and today I share with you one that I really liked, a makeover to a small pine bench.

This little bench was part of a comb or chest of drawers that one of my sisters and I had at home when we shared a room as teenagers, and as you can see it is made of pine, but it had a coat of varnish that at the time I'm sure it was what was in trend, but nowadays it is not used, but the wood is kept natural, so I wanted to give it a change to use it in another small project that was the idea of my daughter Miranda, who shares with me the taste for interior design programs.
She has wanted a foyer for a long time (she watches too much the siblings to work programs 🤣), but the truth is that we don't have much space for that, but while we were painting the living room and dining room we decided to disassemble the house of our little bunny Brownie who died a few months ago and that left me the ideal space for a mini foyer, which is the first thing you see when you open the door of the house, and this bench would be an important piece, so let's go with this simple tutorial.
Materials
Pine bench
Sandpaper
White cold paint
Yarn or yarn strand
Recycled sheets of paper
Tape
Step by step
The first thing I needed to do eta remove that orange color that takes the pine with the varnish to let see its nice natural tone, so with a sandpaper, and help from my son Matias we got down to work to free the wood from the varnish and although it was a tiresome process because we did not have a sufficiently coarse sandpaper, the smell of pine as we were sanding compensated, so we were sanding until we had a nice matte color.
And once it was done, we just wiped it off really well with a damp wipe, and the first step was done.


The other thing I wanted to do was to give it a little bit of character, and since I didn't want to reupholster it because I didn't have the material at home, I decided to give the leather a change with some white details, since the color changes we are doing at home include white, gray and black, so I thought it was great to give it that touch of color to unify the whole environment.
For that I was thinking a lot about what design to use that were not flowers or leaves, because the truth is that I have never liked them, so I was between points of different sizes or lines in different directions and the winners were the lines, which gave me some work, but in the end they were just as I wanted.

And for this result I tried several ways: first I tried making the white lines with a very fine brush, but I didn't like how it looked at all, so with a damp cloth I removed it, then I remembered a technique I saw some time ago in which a cord dipped in paint was used to make lines in a flowerpot and that's what I did.

I just cut a strip of string (you can also use worsted for a little thicker lines), dipped it in the white paint, pulled it taut with my hands and pressed it onto the leather where I wanted the line, and presto, I had some pretty neat lines, but remember that I wanted them in different directions and when I tried to change the orientation of the line everything became a mess so I removed it again 🤣


Finally the solution was to use sheets of paper to fix it with tape to delimit the areas to be painted and protect the ones that were already ready so as not to damage them, and that's how after removing and removing paint I could finish with this design that I loved and that undoubtedly gave a new face and many more years of use to this little stool that is already located in the mini hall that I created for Miri to have her dreamed hall 🤩


Now I just need to add a knitted scarf on the bench, a magazine rack that will be a new project, and a little plant to make this space look much nicer, and if you look a little, I incorporated the coat rack I made a few days ago for the keys and gave it a little change because as you know I was not 100% satisfied, and still am not, but surely I will be at some point, because if I have something, is that I do not give up until I have just what I want. So stay tuned 🤣

Posted Using InLeo Alpha
Discord Server.This post has been manually curated by @steemflow from Indiaunited community. Join us on our
Do you know that you can earn a passive income by delegating to @indiaunited. We share more than 100 % of the curation rewards with the delegators in the form of IUC tokens. HP delegators and IUC token holders also get upto 20% additional vote weight.
Here are some handy links for delegations: 100HP, 250HP, 500HP, 1000HP.
100% of the rewards from this comment goes to the curator for their manual curation efforts. Please encourage the curator @steemflow by upvoting this comment and support the community by voting the posts made by @indiaunited.
Thank you so much
Ami que buen trabajo de restauración 🥰 se ve muy lindo ese banco con ese nuevo aspecto
Gracias mi Mary bella!! Te mando abrazos
Congratulations @rlathulerie! You received a personal badge!
You can view your badges on your board and compare yourself to others in the Ranking
Check out our last posts:
Se ve muy bien y más moderno, tuviste una buena idea decorando la cuerina sin tener que cambiar todo. Hace un tiempo tapicé yo misma las sillas del comedor y no fue tarea fácil, además que me costó conseguir la goma espuma pero yo no tenía otra opción porque los asientos eran de tela 😅 Buen trabajo!
Muchas gracias amiga, aquí también me toco hace un tiempo tapizar los del comedor y fue una locurita jaja
Una belleza total, solo con lijarlo ya se veía totalmente diferente 💕. Me encantó la idea del cordon Ami 💕
Gracias amiga bella, a mi me gustó mucho el cambio no parece el jeje
Mami gracias quedó todo bien bonito me encantó te amo
También te amo mi muñeca
Wow se ve genial 😍y más en ese lugar ,que buen trabajo me encantó, necesito uno así 🤭
Muchas gracias amiga, de verdad que a mí me gustó mucho, quedó más lindo de lo que me había imaginado