¡SALUDOS cordiale a mis amigos creadores de hivediy!
Cordial greetings to my hivediy creator friends!
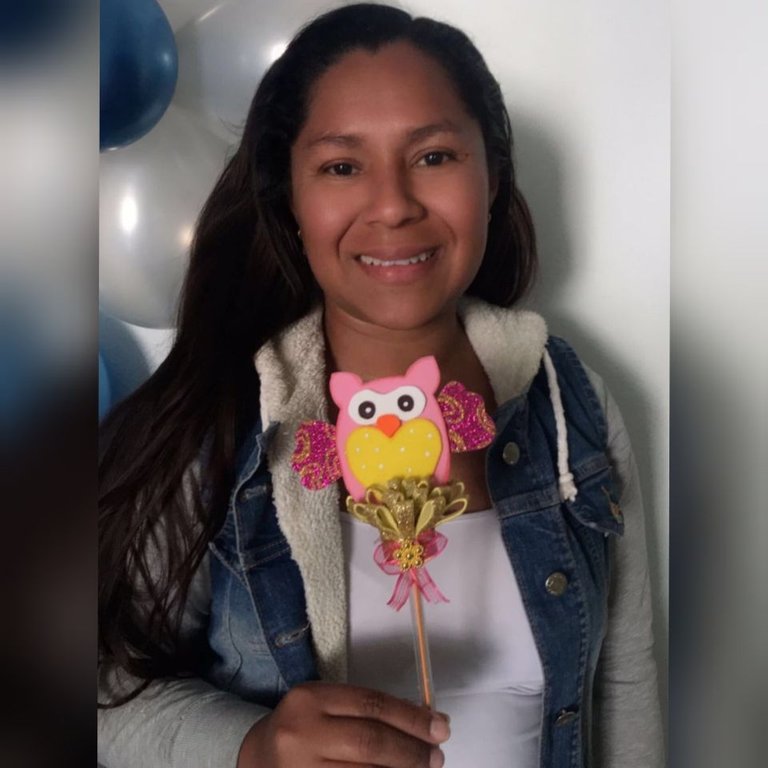
En esta oportunidad lesbquiero compartir la elaviracion de un lapicero adornado con una linda bua es un lindo detalle que sebpuedo obsequiar a esa persona especial en estas navidades, les comento el paso a paso de esta creación.
In this opportunity I want to share the elaviracion of a pencil decorated with a nice bua is a nice detail that sebpuedo gift to that special person this Christmas, I comment the step by step of this creation.
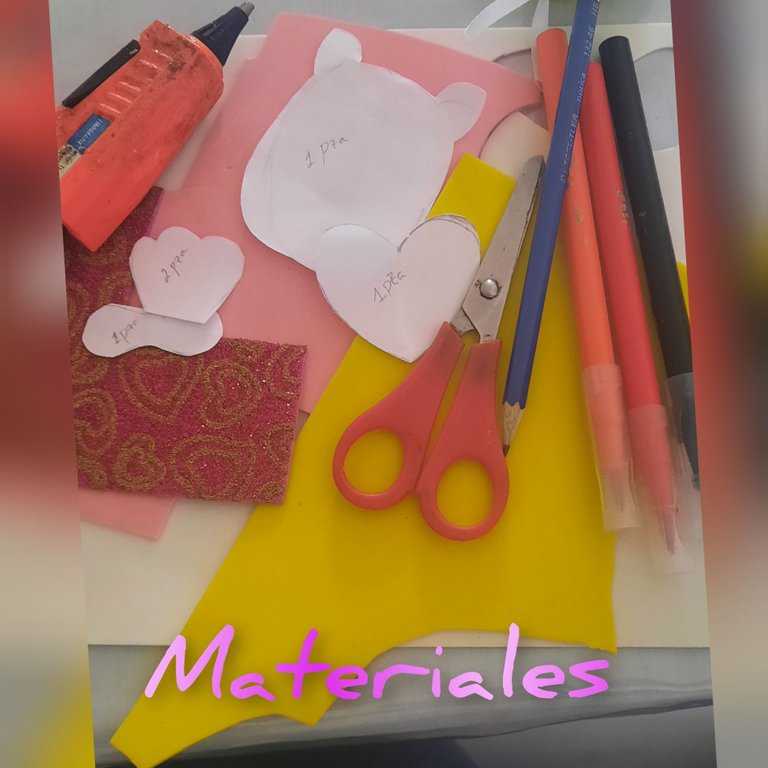
Materiales
♻️
🔴 Foami de colores
🔴Marcadores: rojo,negro y anaranjado
🔴 Tijera
🔴 Patrones
🔴 Lapiz
🔴 Pistola de silicón
🔴 Barras de silicon
🔴 Lapicero
Materials
♻️
🔴 Colored Foami
🔴 Markers: red,black and orange.
🔴 Scissors
🔴 Patterns
🔴 Pencil
🔴 Silicone gun
🔴 Silicone sticks
🔴 Pencil
🌟🌟🌟 ⭐️ 🌟🌟🌟 ⭐️ 🌟🌟🌟 ⭐️ 🌟🌟🌟
Manos a la elaboración.
Hands to the elaboration.
🌟🌟🌟 ⭐️ 🌟🌟🌟 ⭐️ 🌟🌟🌟 ⭐️ 🌟🌟🌟
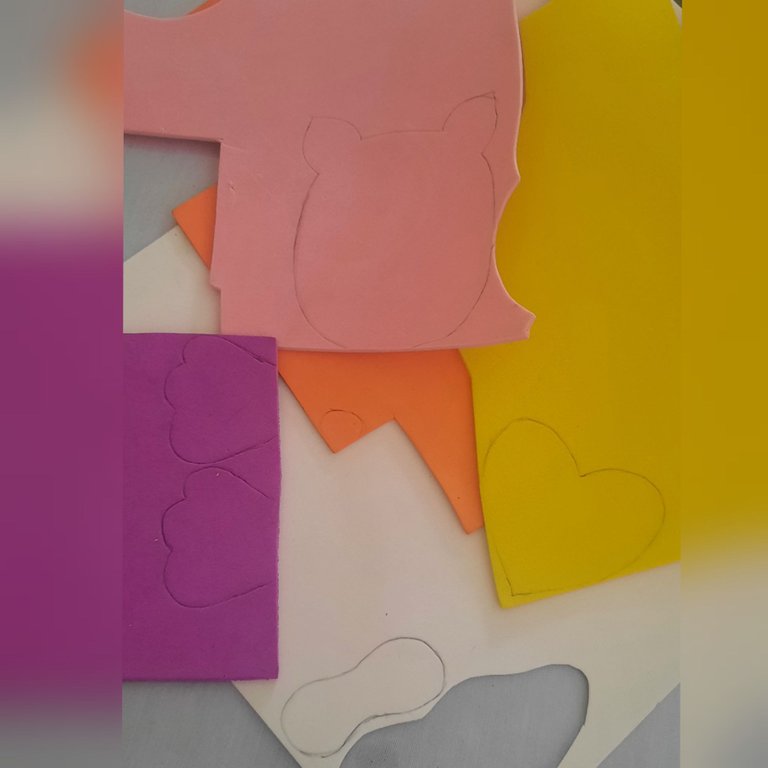
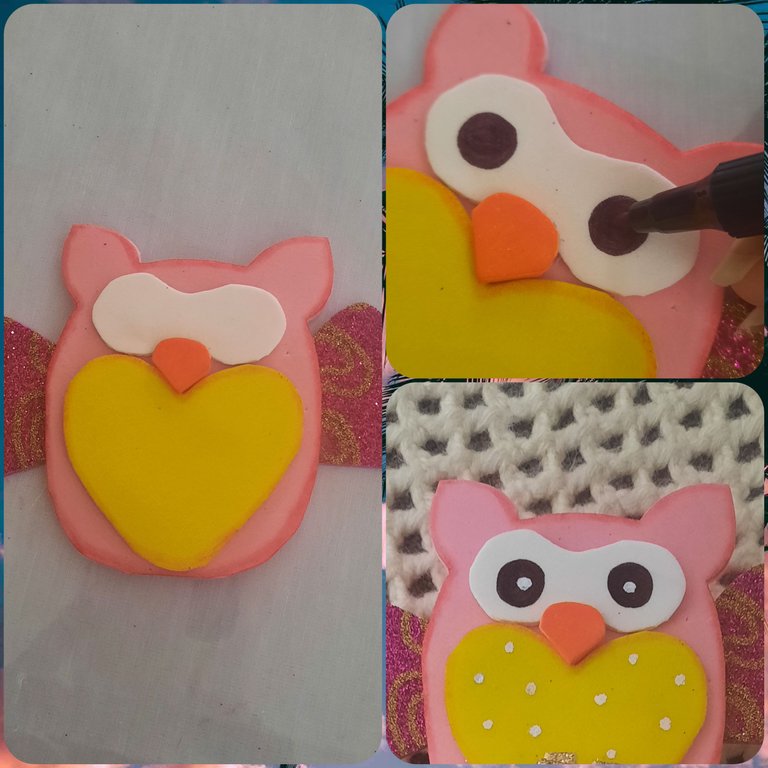
Comenzamos marcando los patrones en los distintos colores de foami en mi caso utilice anaranjado para la boca,amarillo para la barriga en forma de corazón, piel para todo el cuerpo, fucsia escarchado para las alas y blanco para el área de los ojos.
In my case I used orange for the mouth, yellow for the heart-shaped belly, skin for the whole body, frosted fuchsia for the wings and white for the eye area.
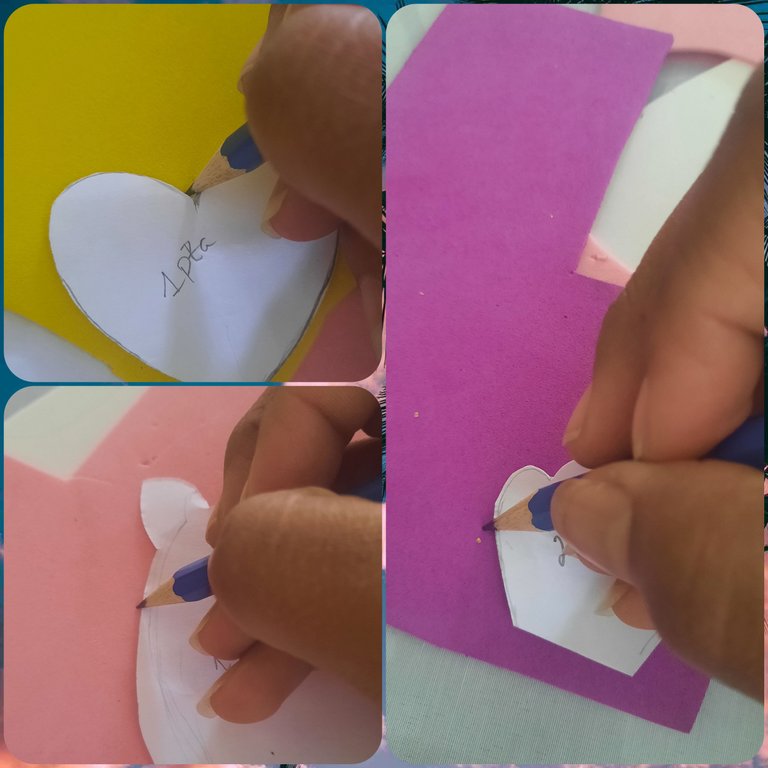
Teniendo marcado como vemos en la imagen pasamos al segundo paso
Having marked as shown in the image we move on to the second step
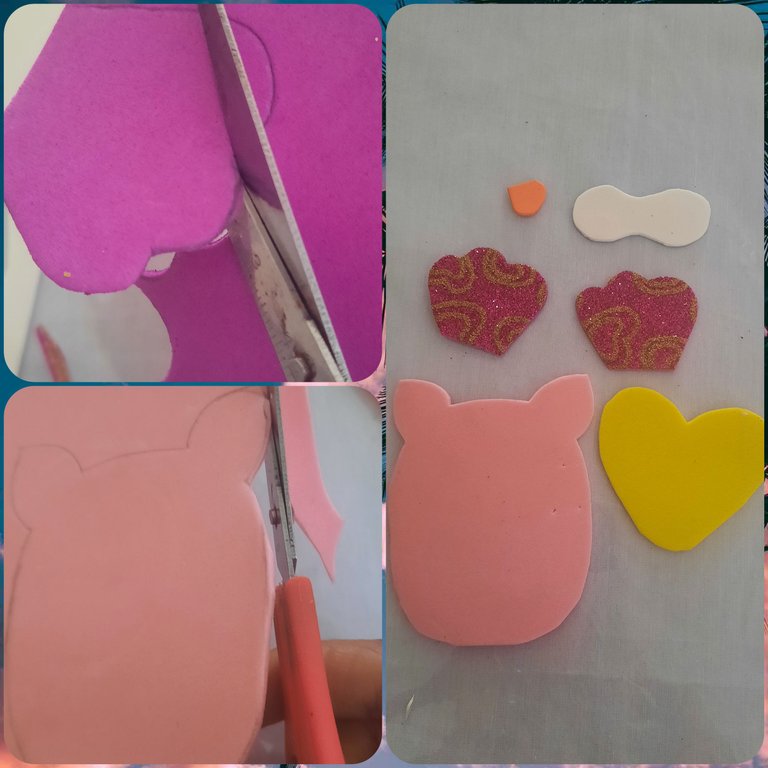
Recortamos con cuidado cada pieza de la buha y nos queda así como en la imagen 👇
Carefully cut out each piece of the buha and it looks like the image 👇
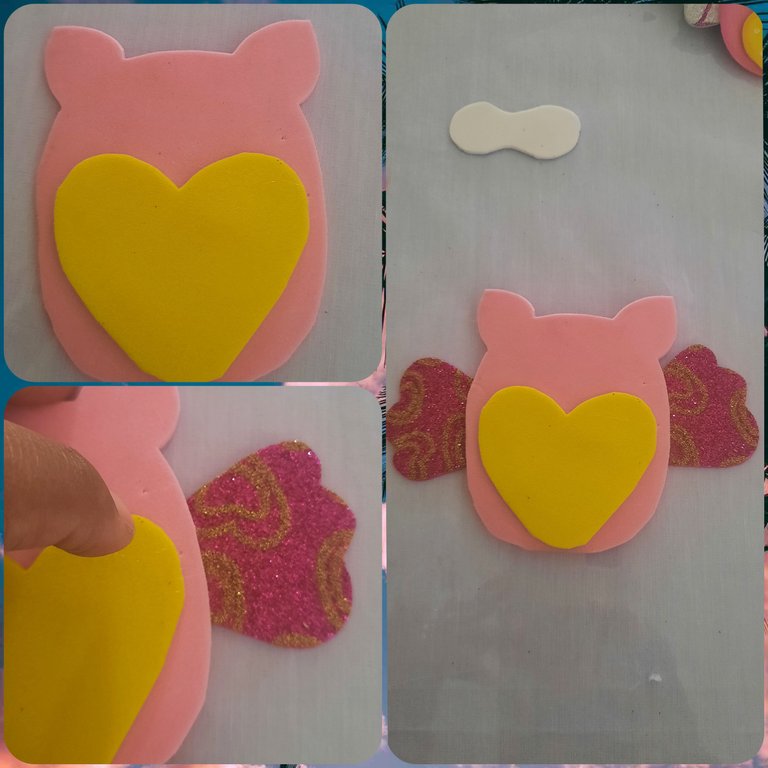
En este paso vamos a empalmar todos las piezas para así darle forma a la buha, primero colocamos silicón a la barriga con forma de corazón 💛 y lo pegamos al cuerpo, luego le pegamos las alas de color fucsia, la boca y por último el área de los ojos de color blanco.
In this step we are going to join all the pieces to give shape to the buha, first we put silicone to the heart-shaped belly 💛 and glue it to the body, then we glue the fuchsia wings, the mouth and finally the white eye area.
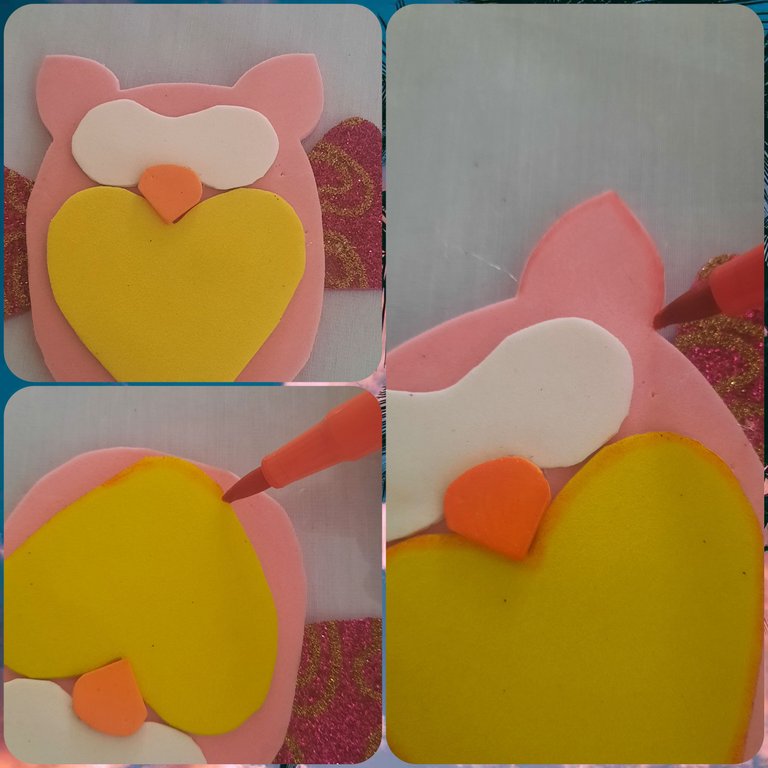
Despues de pegar todas las piezas vamos a resaltar todo el borde de la buha con los marcadares para darle más iluminación y realce a los colores de foami.
After gluing all the pieces we are going to highlight all the edge of the buha with the markers to give more illumination and highlight the foami colors.
Luego tomamos el marcador negro y hacemos 2 círculos en el área blanca para formar los ojos y le colocamos puntos blancos en los ojos y en toda la barriga en forma de corazón.
Then we take the black marker and make 2 circles in the white area to form the eyes and we place white dots in the eyes and all over the belly in the shape of a heart.
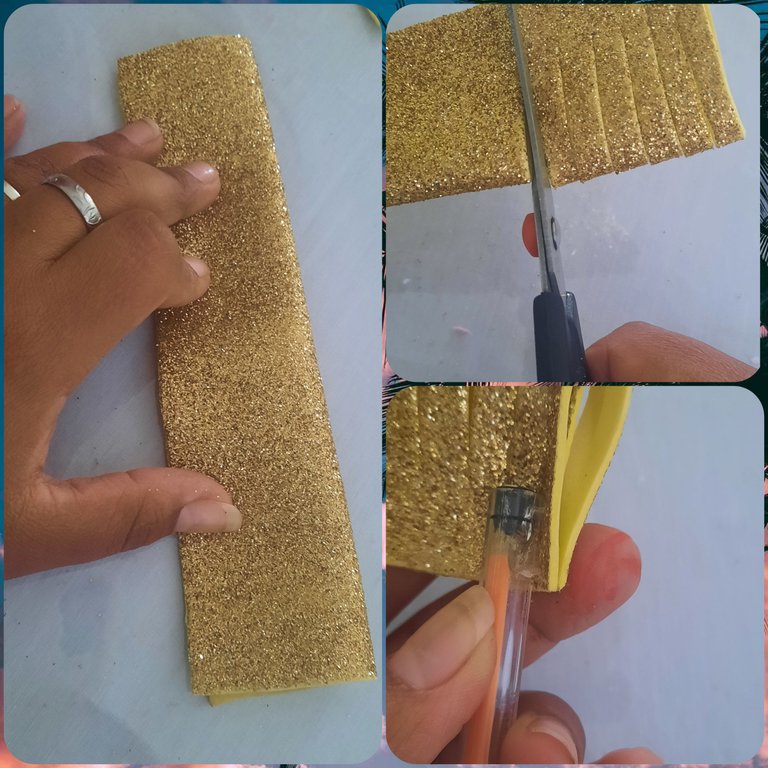
Luego borramos un pedazo de foami color dorado escarchado y con ayuda de la Tijera hacemos vatios cortes sin finalizarlos de modo que queden unidos.
Then we erase a piece of frosted gold colored foami and with the help of the scissors we make watt cuts without finishing them so that they are joined together.
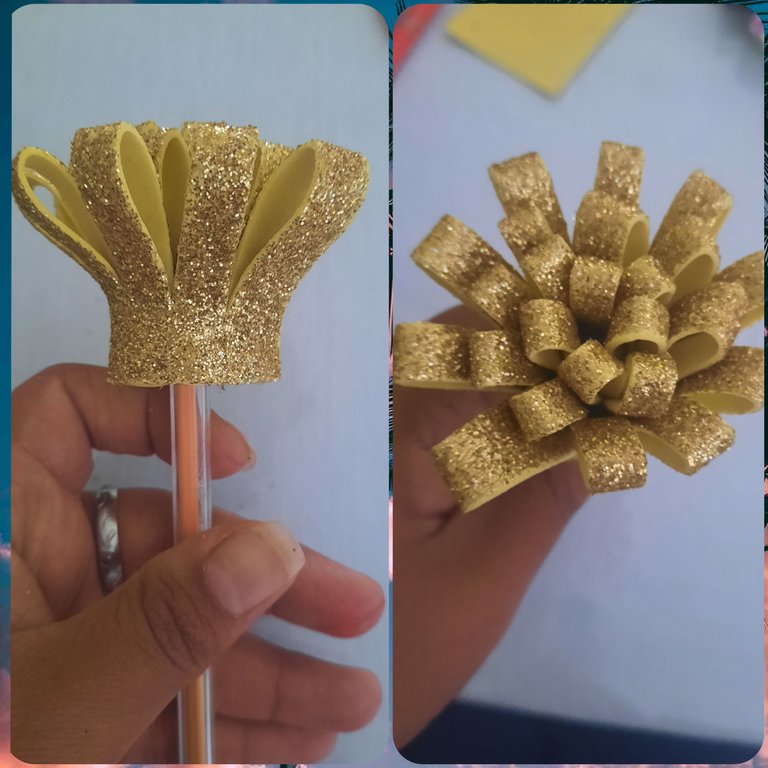
Agarramos la tira de foami dorado y la vamos pegando en el lapicero dando vueltas, aseguramos bien en la punta para que no de despegue, nos quedará como una flor en un extremo del lapicero.
We take the strip of gold foami and stick it on the pen by turning it around, we secure it well at the tip so that it doesn't come off, it will look like a flower at one end of the pen.
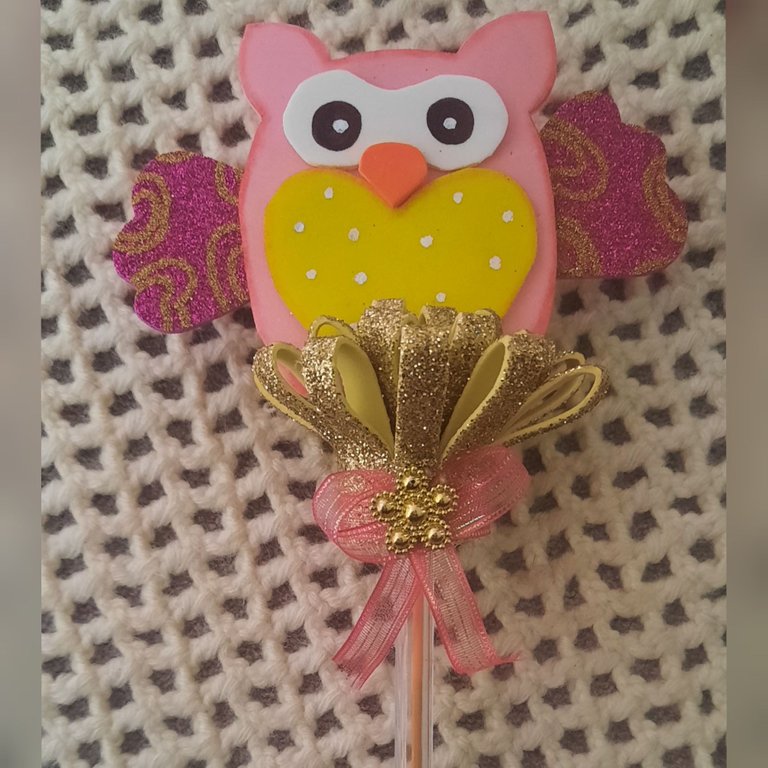
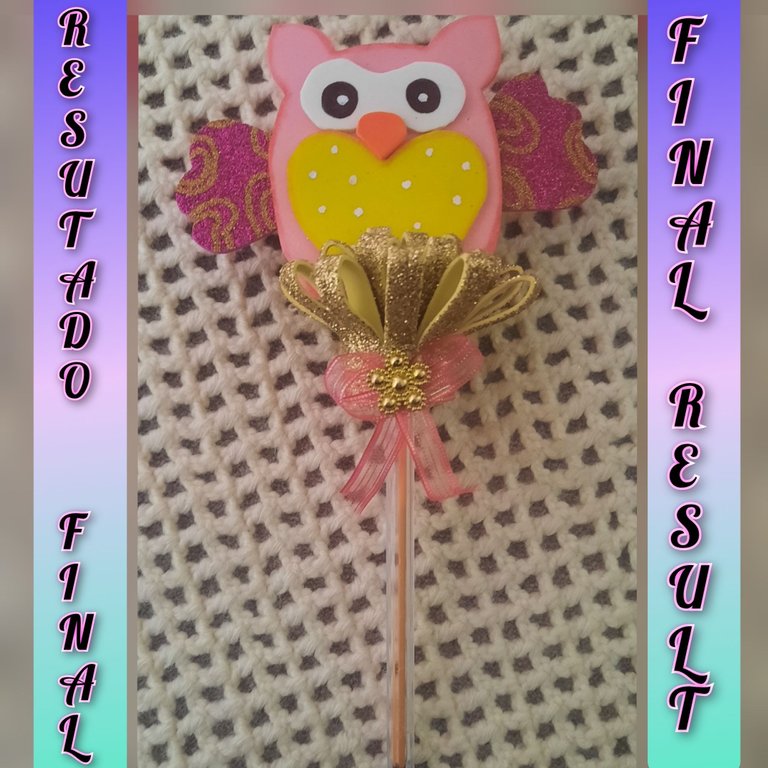
Por último vamos pegar la buha encima de la flor 🌼 que hicimos anteriormente y decoramos con un lazo, así nos quedo el resultado final del lapicera con una hermosa buha.
Finally we glue the buha on top of the flower 🌼 that we made earlier and decorate it with a bow, so we have the final result of the pen with a beautiful buha.
Me agradezco por pasar a mi blod, espero les guste y puedan elaborarlo en casa, me despido de todos ustedes deseándoles un excelente y Bendecido día 🙏 dios los bendice siempre
I thank you for visiting my blod, I hope you like it and you can make it at home, I say goodbye to all of you wishing you an excellent and blessed day 🙏 god bless you always.
Thank you for sharing this post on HIVE!
Your content got selected by our fellow curator hafizullah & you just received a little thank you upvote from us for your great work! Your post will be featured in one of our recurring compilations which are aiming to offer you a stage to widen your audience within the DIY scene of Hive. Stay creative & HIVE ON!
Please vote for our hive witness <3
Te quedo muy lindo! seria una buena idea para hacer recuerditos para regalar, me encantan los buhitos y el color rosado asi que me gusto muchisimo tutorial!!
Gracias amiga @isabella.art me gusta mucho tu comentario, saludos.
Your support for the current HiveBuzz proposal (#199) is much appreciated but the proposal will expire soon!
May we ask you to review and support the new proposal so our team can continue its work?
You can support the new proposal (#248) on Peakd, Ecency, or using HiveSigner.
Thank you!Dear @rodnellys31,
Hola.
La verificacion ha sido rechazada:
https://hivewatchers.com/verifications?utf8=%E2%9C%93&verification%5Busername_search%5D=rodnellys31
Para confirmar su autoría del contenido, ¿podría mencionar la palabra "Hive" en su cuenta de redes sociales bien establecida como Facebook, Instagram o Twitter (que no se ha creado recientemente).
Después de añadir la palabra "Hive", responda a este comentario con el enlace URL a ese sitio web.
Puede eliminar esta mención, una vez que confirmemos la autoría.
Gracias
Hivewatchers
Mas Info: Presentación de informes y búsqueda de verificación de identidad / contenido
Hivewatchers