

Versión en Español
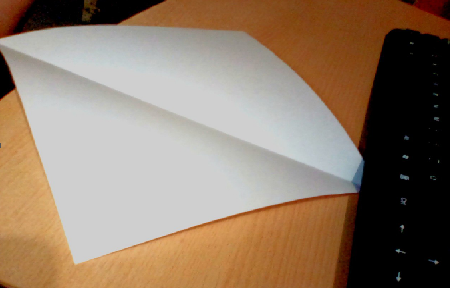
Hola querido HIVER, debes ser muy curioso para querer saber como se hace este increíble y sencillo Origami. No te preocupes, yo te enseño. Y si no tienes papel especial para Origamis, tranquilo, lo puedes hacer con una hoja de papel cuadrada, para eso primero tendremos que doblarla y cortar el restante.
Después de tener la hoja perfectamente cuadrada, podremos comenzar
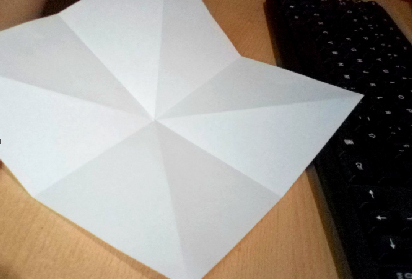
Abrimos la hoja y volvemos a doblar en la esquina contraria
Abrimos y damos de vuelta a la hoja y doblamos a la mitad. Abrimos y volvemos a doblar la hoja por la mitad. Al abrirla nos debe quedar así:
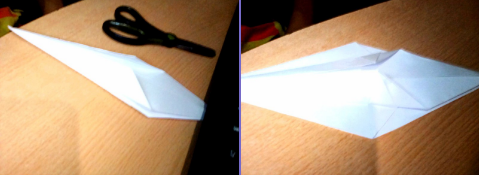
Ahora llevaremos las dos esquinas de los lados hasta el centro de hacia abajo
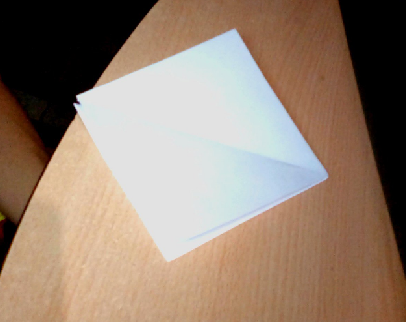
Ahora por la parte que se puede abrir doblaremos hasta la división. Le damos la vuelta y lo hacemos de la misma manera para que se vea igual por los dos lados
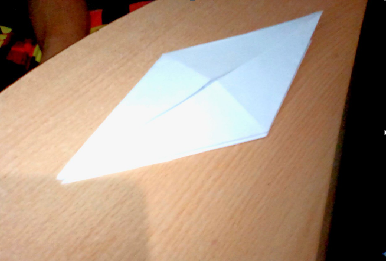
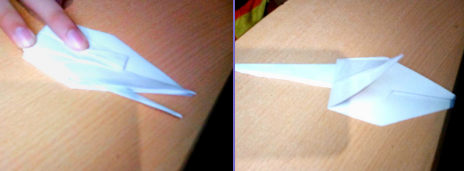
También doblaremos por los dos lados la parte de arriba, ya que más adelante lo necesitaremos. Abrimos los laterales y abriremos hacia arriba de esta manera:
Damos vuelta y hacemos lo mismo. Ahora doblaremos el borde en las partes que se pueden abrir, después doblamos el papel y hacemos lo mismo.
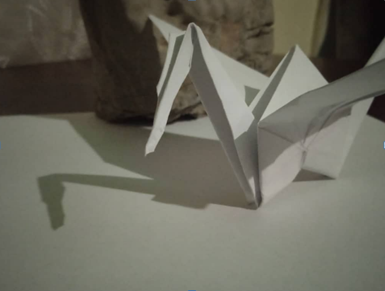
Agarramos una de las partes y la doblamos hacia el otro lado, para así poder doblar la esquina hacia arriba. Ahora volvemos la parte que habíamos doblado, otra vez a su sitio. Llevamos la otra parte hacia el otro lado para subir la otra esquina, estando arriba dobla un poco la esquina hacia abajo, para así tener la cabeza de la grulla. Y doblamos de nuevo. Ahora sacamos un poco la cola hacia afuera, presionando la parte de abajo para que se quede en su lugar.
Ahora sacamos y le damos forma al cuello y a la cabeza. Y por último solo tenemos que abrirle las alas. Y este es el resultado final:
Si te gustó el resultado puedes decírmelo en los comentarios. Esto fue todo por hoy, después volveré con nuevas manualidades. Si me quieres conocer más, estas son mis redes sociales:
Instagram: ronn__a
Discord: IJRonn#1392
FIN
English Version
Hello dear HIVER, you must be very curious to want to know how this incredible and simple Origami is made. Do not worry I will teach you. And if you don't have special paper for Origamis, don't worry, you can do it with a square sheet of paper, for that we will first have to fold it and cut the remaining one.
After having the sheet perfectly square, we can begin
We open the sheet and fold again in the opposite corner
We open and turn the sheet over and fold it in half. We open and fold the sheet in half again. When we open it it should look like this:
Now we will take the two corners of the sides to the center down
Now on the part that can be opened we will fold until the division. We turn it over and do it the same way so that it looks the same on both sides.
We will also fold the top part on both sides, since we will need it later. We open the sides and we will open upwards in this way:
We turn around and do the same. Now we will fold the edge in the parts that can be opened, then we fold the paper and do the same.
We take one of the parts and fold it to the other side, so we can fold the corner upwards. Now we return the part that we had folded, back to its place. We take the other part to the other side to raise the other corner, being at the top, fold the corner down a little, in order to have the head of the crane.
And we fold again. Now we pull the tail out a little, pressing the bottom part so that it stays in place.
Now we take out and shape the neck and head. And finally we just have to spread its wings. And this is the final result:
If you liked the result you can tell me in the comments. That's all for today, then I'll be back with new crafts. If you want to know me more, these are my social networks:
Instagram: ronn__a
Discord: IJRonn#1392
Definitivamente me encantó este resultado. Hacer origamis es un hermoso arte. La explicación y las imágenes hacen posible entender todo el proceso muy bien. Gracias por compartir esta manualidad.
Muchas gracias, me alegra que te haya gustado