Holis gente bonita! 🥰🫰🏻
Hello beautiful people! 🥰🫰🏻
Espero que estén muy bien el día de hoy mis queridos Hivers y sobre todo muy motivados, si no lo estan espero que este post les ayude con eso.😉
I hope you are very well today my dear Hivers and above all very motivated, if you are not I hope this post will help you with that.😉.
Últimamente he estado tratando de no desanimarme, con el arte y con la creación de contenido en Hive, ya saben que a veves hay momentos en los que nos sentimos estancados o que nuestros esfuerzos no valen la pena y ahí es donde viene el desánimo la desmotivación y esas ganas horribles de rendirnos, es por eso que decidí hacer un sticker motivacional casero y muy fácil para ponerlo en mi pared y así cuando vengan estos pensamientos negativos hacerlos a un lado.
Lately I've been trying not to get discouraged, with art and with the creation of content in Hive, you know that sometimes there are times when we feel stagnant or that our efforts are not worth it and that's where discouragement comes, demotivation and those horrible desire to give up, that's why I decided to make a homemade and very easy motivational sticker to put it on my wall and so when these negative thoughts come I can put them aside.
Sin más preámbulo los invito a ver la elaboración de esta sencilla manualidad, empezamos.
Without further ado, I invite you to watch the making of this simple craft, let's get started.

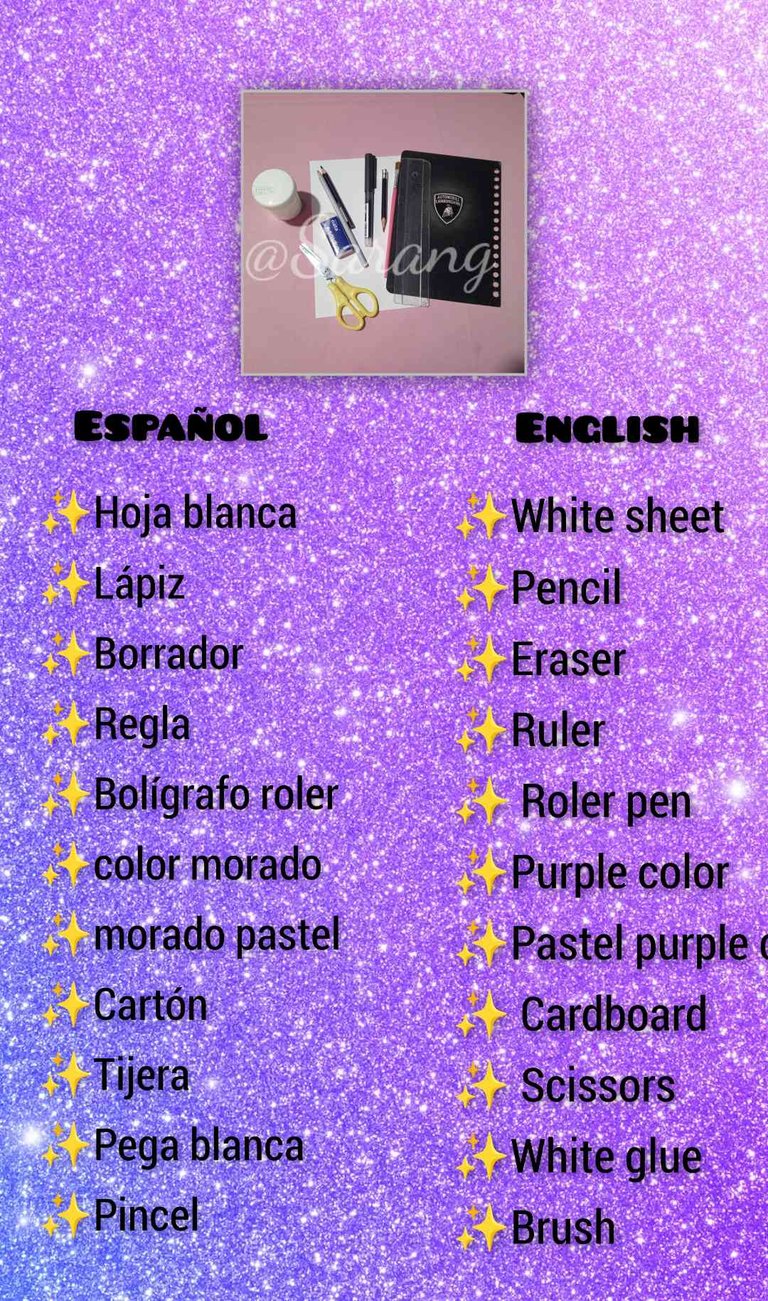
Lista de materiales/Bill of Materials
Como pueden ver en la imagen la pega la tengo dosificada en un frasco de pintura al frio para facilitar su uso, y el cartón que use es de la portada de un cuaderno viejo, ya saben la importancia del reciclaje. ♻️🥰
As you can see in the image the glue I have it dosed in a bottle of cold paint for ease of use, and the cardboard I used is from the cover of an old notebook, you know the importance of recycling. ♻️🥰

🌟Step-by-step🌟
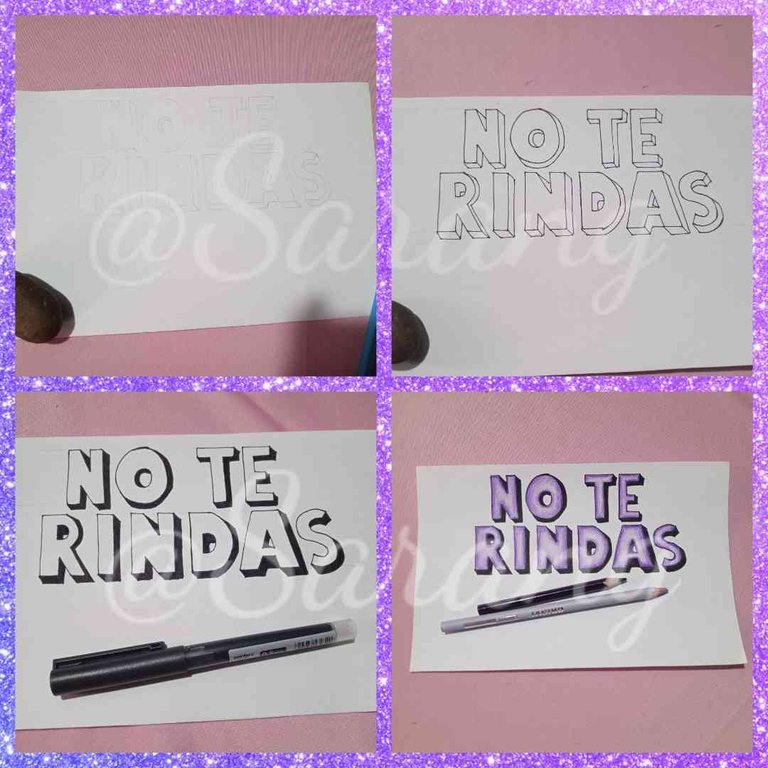
Elaboración de las letras/ Elaboration of the letters
Lo primero que hice fue elaborar la frase con el mensaje que quería que tuviera mi sticker en este caso fue la frase "NO TE RINDAS" luego con el bolígrafo roler hice el LineArt de cada letra, a continuación también con el bolígrafo roler comencé a rellenar los espacios que vendrían siendo la sombra de las letras, luego de ese paso procedí a darle color a las letras con lápices de colores en este caso use el color morado y el morado pastel.
The first thing I did was to develop the phrase with the message I wanted my sticker to have in this case was the phrase "DON'T GIVE UP " then with the roler pen I made the LineArt of each letter, then also with the roler pen I began to fill in the spaces that would be the shadow of the letters, after that step I proceeded to color the letters with colored pencils in this case I used the purple and purple pastel color.
La verdad no soy muy buena con el lettering y confieso que es algo que me encantaría aprender, porque me parece un mundo facinante siendo amante del dibujo dibujar letras es algo que llama poderosamente mi atención.
The truth is that I am not very good at lettering and I confess that it is something I would love to learn, because it seems to me a fascinating world, being a lover of drawing, drawing letters is something that attracts my attention.
En cuanto a la frase, elegí "no te rindas" porque es justo lo que quiero hacer cuando me siento sobre pasada, estancanda o estresada por algo y me repito muchas veces que no debo hacerlo, así que sentí que tener un stiker en mi pared que me animé a no rendirme me haría muy bien.
As for the phrase, I chose "don't give up" because it's just what I want to do when I feel overdone, stuck or stressed about something and I repeat to myself many times that I shouldn't do it, so I felt that having a sticker on my wall that encouraged me not to give up would do me a lot of good.
Como dato curioso:mientras eloboraba las letras no me sentía muy bien, digamos que tenia malestar de gripe y uno que otro malestar por allí y adivinen qué... Quise darme por vencida 😫 pero el leer la frase me ayudo a no hacerlo 😅 así que justo en ese momento supe que mi stiker iba a funcionar. 🥰
As a fun fact:while I was working on the letters I wasn't feeling very well, let's say I was feeling sick with the flu and one or two other ailments and guess what.... I wanted to give up 😫 but reading the sentence helped me not to 😅 so right then and there I knew my stiker was going to work. 🥰

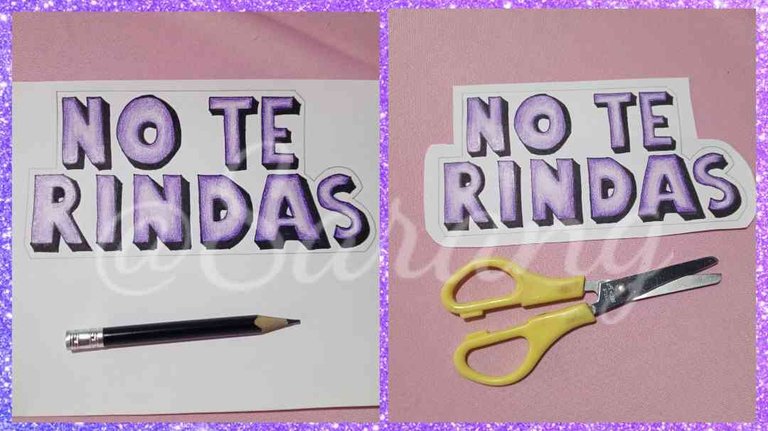
Recortando las letras/Cutting out the letters
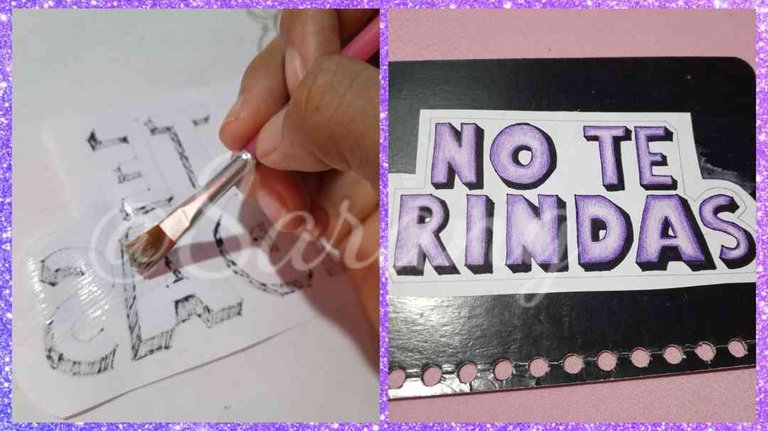
Listas las letras lo que hice fue trazar un contorno al rededor de la frase con un lápiz.
Once the letters were ready, I traced an outline around the phrase with a pencil.
Luego recorte la frese, pero como puede ver en la imagen no lo hice por la linea de contorno que traze si no por fuera.
Then I cut it out, but as you can see in the picture I didn't cut it along the contour line I drew, but on the outside.

Pagando al cartón/Gluing to cardboard
El siguiente paso fue colocar pega en la parte de atras de la frase, con mucho cuidado y con un pincel para que quede mas uniforme, para luego pegarlo con mucho cuidado al cartón.
The next step was to place glue on the back of the phrase, very carefully and with a brush to make it more uniform, and then glue it very carefully to the cardboard.
Luego puse otra capa de pega en la parte de adelante, esto lo hago como para "barnizar" el stiker y que quede mas resistente, luego lo deje secar muy bien y cuando estuvo seco procedi a picar, ahora sí justo por la línea que había trazado al principio, este me garantiza que el stiker quede bien recortado.
Then I put another layer of glue on the front, I do this as to "varnish" the stiker and make it more resistant, then I let it dry very well and when it was dry I proceeded to chop, now just along the line that I had drawn at the beginning, this ensures that the stiker is well trimmed.

resultado/Result
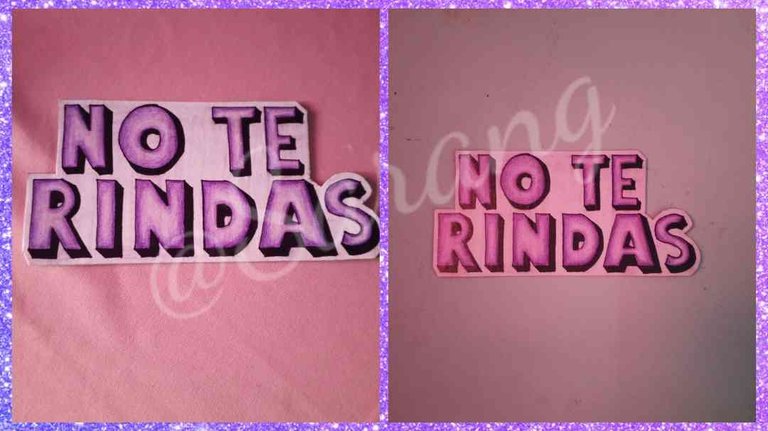
Y este fue el resultado, la verdad es que es un trabajo super sencillo cualquiera lo puede hacer porque son materiales que todos tenemos en casa y además no se necesita ser un experto en manualidades ya que el procedimiento es súper facil, yo lo hice super sencillo, pero con este mismo método pueden hacerlo con con los colores y las frases que quieran.
And this was the result, the truth is that it is a super simple job anyone can do it because they are materials that we all have at home and also do not need to be an expert in crafts because the procedure is super easy, I did it super simple, but with this same method can do it with the colors and phrases you want.
Espero les haya gustado esta sencilla manualidad y les sea de mucha utilidad. 🥰
I hope you liked this simple craft and find it very useful. 🥰

Nos vemos en un próximo post, que estén bien y Dios los bendiga, bye.🥰😘💜🌹🪷
See you in a next post, be well and God bless you, bye.🥰😘💜🌹🪷

Fotografías propias, tomadas con mi Tecno Spark 10 Pro editadas en incollage/ portada creada en Canva. Traducción al inglés con DeepL.
Own photos, taken with my Tecno Spark 10 Pro edited in incollage/ cover created in Canva. Translation to English with DeepL.

~~~ embed:1807724512160395524?t=k5hst2nmhfvWch6rJ7Se-w&s=19 twitter metadata:U2FyYW5nMjFaR3x8aHR0cHM6Ly90d2l0dGVyLmNvbS9TYXJhbmcyMVpHL3N0YXR1cy8xODA3NzI0NTEyMTYwMzk1NTI0fA== ~~~
No me rendiré 🥺❤️
Qué linda ☺️ me hiciste reír 😂
Así es que, no te rindas. 🙏🫰🏻
Congratulations @sarangzg7! You have completed the following achievement on the Hive blockchain And have been rewarded with New badge(s)
Your next payout target is 250 HP.
The unit is Hive Power equivalent because post and comment rewards can be split into HP and HBD
You can view your badges on your board and compare yourself to others in the Ranking
If you no longer want to receive notifications, reply to this comment with the word
STOPCheck out our last posts:
Thank you very much 🥰❤️
Es un boot, no es necesario responderle 👀
Pero yo quiero responder 👀
Awesome job @sarangzg7! Keep pushing yourself and you'll reach your Hive goals before you know it.
Que lindo quedó 💜
Gracias reina 🥰🫰🏻
Esta muy bueno el tutorial, excelentemente explicado, yeahhh
Ooow! Muchas gracias amigo! 🫰🏻❤️