Holis gente bonita de @Hivediy es un gusto volver a saludarlos, espero se encuentren todos muy bien. 🥰
Holis beautiful people of @Hivediy it's a pleasure to greet you again, hope you are all very well. 🥰
Hace un tiempo no publicaba por aquí, he estado un poco complicada de salud, pero gracias a Dios ya estoy mejor y con muchas ganas de compartir mis manualidades con ustedes, en esta oportunidad les quiero mostrar como hice un Topper para el cumpleaños de mi sobrina.
It's been a while since I last posted here, I've been a bit sick, but thank God I'm better now and I'm eager to share my crafts with you, this time I want to show you how I made a Topper for my niece's birthday.
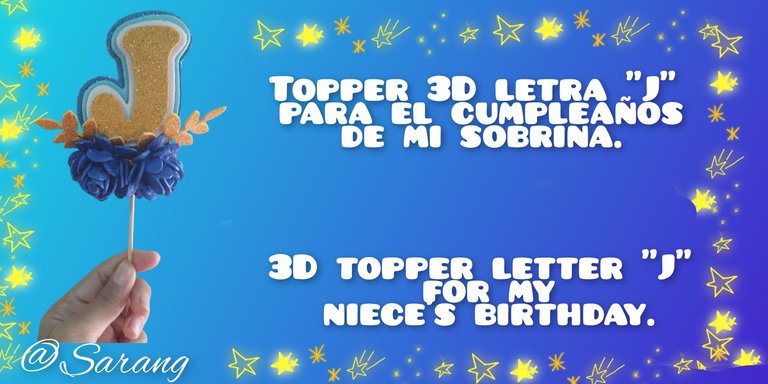
Es un topper muy sencillo y fácil de hacer es solo la inicial del nombre de mi sobrina en 3D y unas rositas azules porque @jhos.indigo ama el color azul o mejor dicho el color indigo. 💙🥰
It's a very simple and easy to make topper is just the initial of my niece's name in 3D and some little blue roses because @jhos.indigo loves the color blue or rather the color indigo. 💙🥰
La verdad si puedo ser sincera me aburrí de hacer el típico topper Feliz cumpleaños pero aun así quería darle un detalle para adornar su torta entonces se me ocurrió hacer su incial, también confieso que quería hacerla mas grande, pero no tenía suficiente foami azul así que tuve que hacerla paqueña.
To be honest I got bored of making the typical topper Happy Birthday but I wanted to give her a detail to decorate her cake so I decided to make her initial, I also confess that I wanted to make it bigger, but I didn't have enough blue foami so I had to make it small.
Ya sin mas preámbulo los invito a seguir leyendo.
Without further ado, I invite you to read on.

🌟Step-by-step🌟

Lo primero que hice fue hacer mis moldes en este caso la letra J y las hojitas, pero en esta ocasión me salte ese paso porque ya lo he mostrado muchas veces. 🤭
The first thing I did was to make my molds in this case the letter J and the little leaves, but this time I skipped that step because I have already shown it many times. 🤭
Para poder sacar la letra J en distintos tamaños para hacer el topper 3D traspase el molde a el foami dorado, pique la pieza y con ella me ayude para sacar la siguiente J un poco mas grende en el foami blanco solo agregandole medio centímetro para que quedará un poco más grende y así mismo hice con las siguientes piezas.
In order to make the letter J in different sizes to make the 3D topper I transferred the mold to the gold foami, I cut the piece and with it I helped me to make the next J a little bit bigger in the white foami adding only half a centimeter to make it a little bigger and I did the same with the following pieces.
Como pueden ver saque una J en foami dorado, otra en blanco escarchado, otra en azul cielo y la última en un azul mas oscuro.
As you can see I made one J in gold foami, one in frosted white, one in sky blue and the last one in a darker blue.
Para darle altura a las letras utilice mi vijeo truco de pegar retazos de foami en la parte de atrás de las letras y luego las peque una encima de otra con silicón caliente.
To give height to the letters I used my old trick of gluing pieces of foami to the back of the letters and then gluing them on top of each other with hot silicone.
Luego hice las rositas azules y aquí siento que me voy a trabar un poco explicando 😆 espero me sepan perdonar. 🙏🏻
Then I made the little blue roses and here I feel like I'm going to get a little stuck explaining 😆 I hope you can forgive me. 🙏🏻
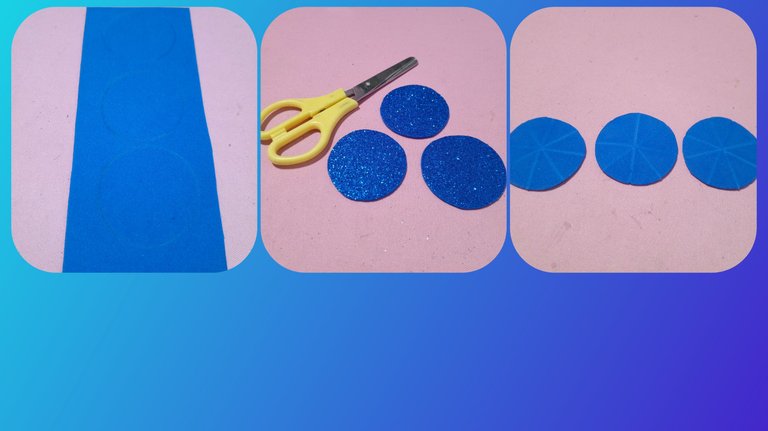
Primero marque en el foami escarchado mas oscuro tres círculos, me ayude con la tapa de un pintura al frio, luego los recorte con la ayuda de unas tijeras.
First I marked on the darker frosted foami three circles, using the lid of a cold paint, then I cut them out with the help of a pair of scissors.
Después les hice a cada círculo unas líneas para así dividirlos en 8 pedazos
Then I made lines on each circle in order to divide them into 8 pieces.
Luego recorte guiandome de las líneas que hice antes, y les fui dando una forma redonda para hacer los pétalos .
Then I cut them out following the lines I made before, and gave them a round shape to make the petals.
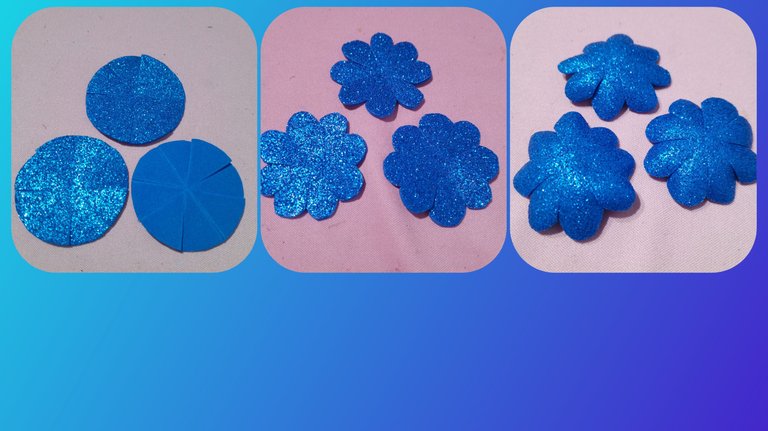
Luego los pase por la planca tibia para que tomaran esa forma como ondulada, por así decirlo, la verdad no se si me quedo bien como siempre les digo siempre estoy experimentando y aprendiendo y me falta mucho por aprender.
Then I put them through the warm plank to make them take that wavy shape, so to speak, the truth is I don't know if they fit me well as I always tell you I am always experimenting and learning and I still have a lot to learn.
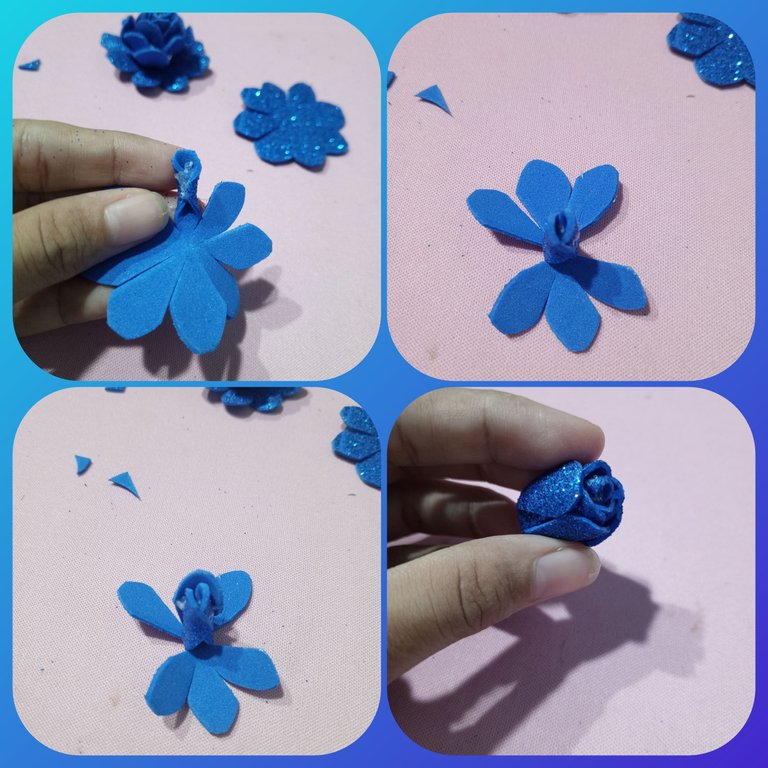
Luego comencé a formar el centro de la rosa, para eso tome uno de los pétalos y con silicón digamos que uni ambos estremos del petalo para quedará como una especie de rollito, luego comencé a unir los demas petalos entre sí con silicón caliente y así quedo hecho el centro de la rosa.
Then I began to form the center of the rose, for that I took one of the petals and with silicone let's say that I joined both ends of the petal to be like a kind of roll, then I began to join the other petals together with hot silicone and thus was made the center of the rose.
Luego tomé el centro de la rosa y con silicón caliente lo pegué a la otra pieza en todo el centro y comencé a pegar cada pétalo al rededor del centro de la rosa y lo mismo hice con la otra pieza.
Then I took the center of the rose and with hot silicone I glued it to the other piece all around the center and started gluing each petal around the center of the rose and did the same with the other piece.
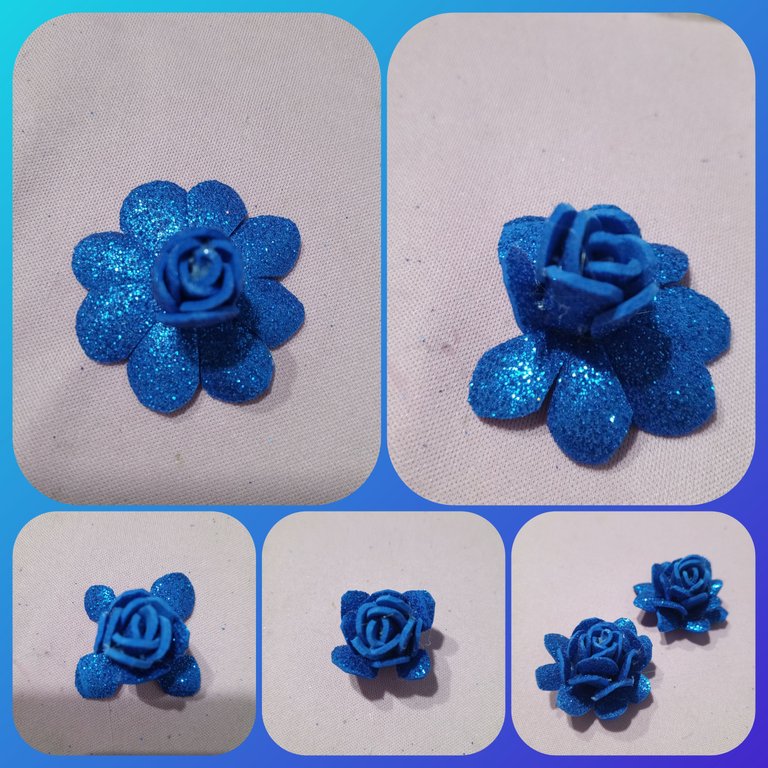
Como pueden ver hice dos mini rositas azules.
As you can see I made two mini blue roses.
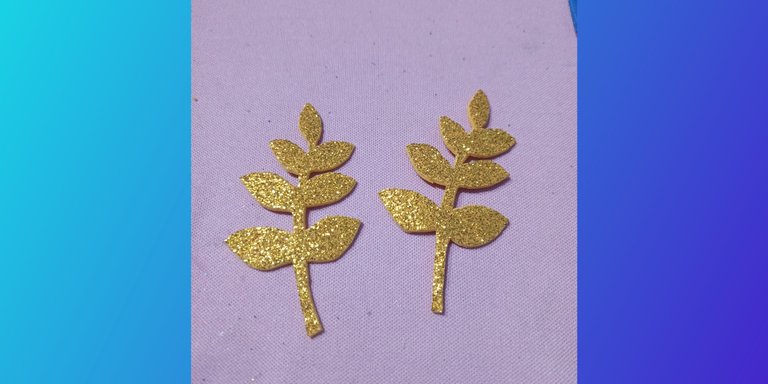
Decidí ponerle unas hojitas para que quedara más bonito y saque estas piezas en foami dorado escarchado.
I decided to add some leaves to make it prettier and I made these pieces in gold frosted foami.
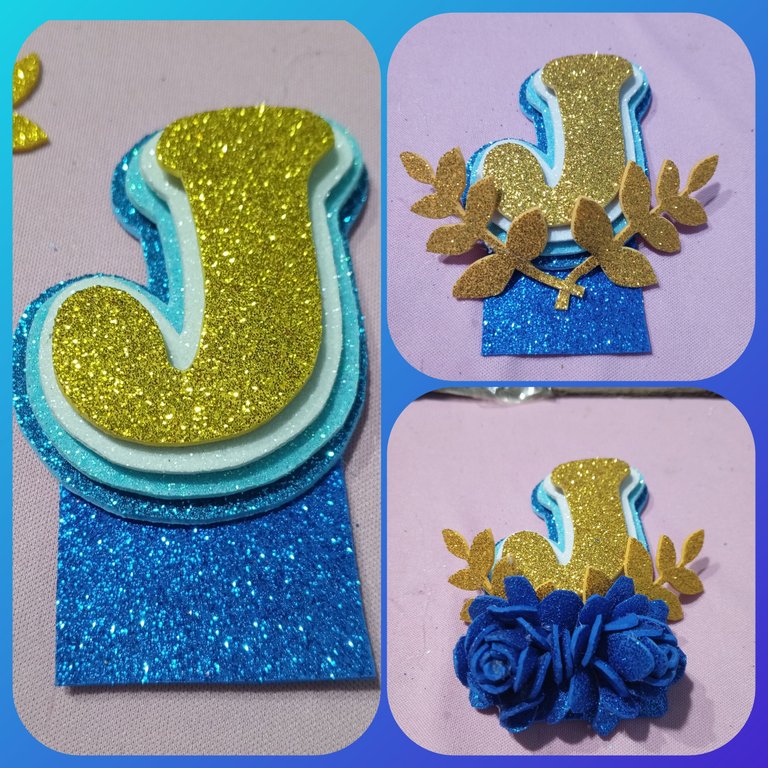
Por último comencé a armar el Topper y créanme no tenía ni idea de donde o cómo distribuir las piezas para que quedara bien, después de probar con varias combinaciones decidí poner las rosas debajo de la letra y para eso pique un trocito de foami azul (del mismo tono de las flores) y lo pegue a la letra como pueden ver en la imagen para luego poner los demas elementos del Topper o sea, las hojas y las rosas.
Finally I started to assemble the Topper and believe me I had no idea where or how to distribute the pieces to make it look good, after trying several combinations I decided to put the roses under the letter and for that I cut a small piece of blue foami (the same tone of the flowers) and glued it to the letter as you can see in the image and then put the other elements of the Topper, that is, the leaves and roses.
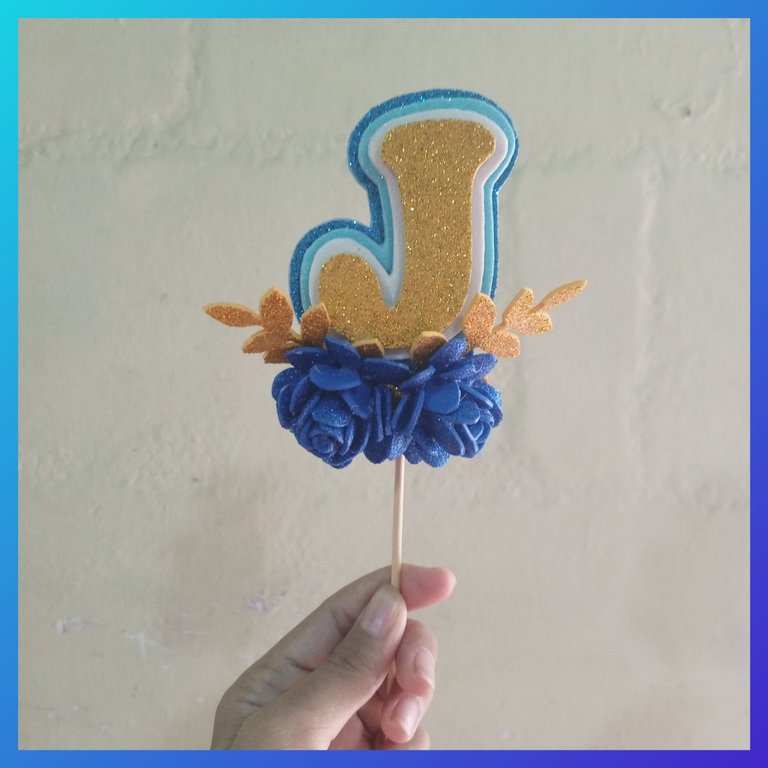
Y este fue el resultado, lo ame 🤩 y a mi sobrina le encanto. 😍
And this was the result, I loved it 🤩 and my niece loved it. 😍
Este es el tipo de manualidades que hago sobre la marcha sin saber si me va a quedar bien o no, solo me arriesgo y gracias a Dios me sale bien, pero admito que tengo que seguir practicando las rosas para mejorarlas.
This is the kind of craft I do on the fly without knowing if it's going to look good or not, I just take a chance and thank God it turns out well, but I admit that I have to keep practicing the roses to improve them.
Nos vemos en un próximo post, que estén bien y Dios los bendiga, bye.🥰😘💜🌹🪷
See you in a next post, be well and God bless you, bye.🥰😘💜🌹🪷
Fotografías propias, tomadas con mi Tecno Spark 10 Pro editadas en incollage/ portada creada en Incollage. Traducción al inglés con DeepL.
My own photos, taken with my Tecno Spark 10 Pro edited in incollage/ cover created in Incollage. Translation to English with DeepL.

Sin duda una gran idea para sorprender a un ser querido, me encanto tu topper @sarangzg7.
Te quedó hermoso ! ,ese contraste de azules con blanco y dorado lo hace ver muy elegante ,y el detalle de la rosa con el ramillete en dorado eleva totalmente el diseño ✨