Greetings to the Hive DIY community, hoping that you are doing well and are in good spirits to get all your projects done.
Finally, I have recovered enough from my labyrinthitis to be able to go back to work. I had a few weeks that were a bit complicated, everything was going around in my head, it was not easy to work and much less write.
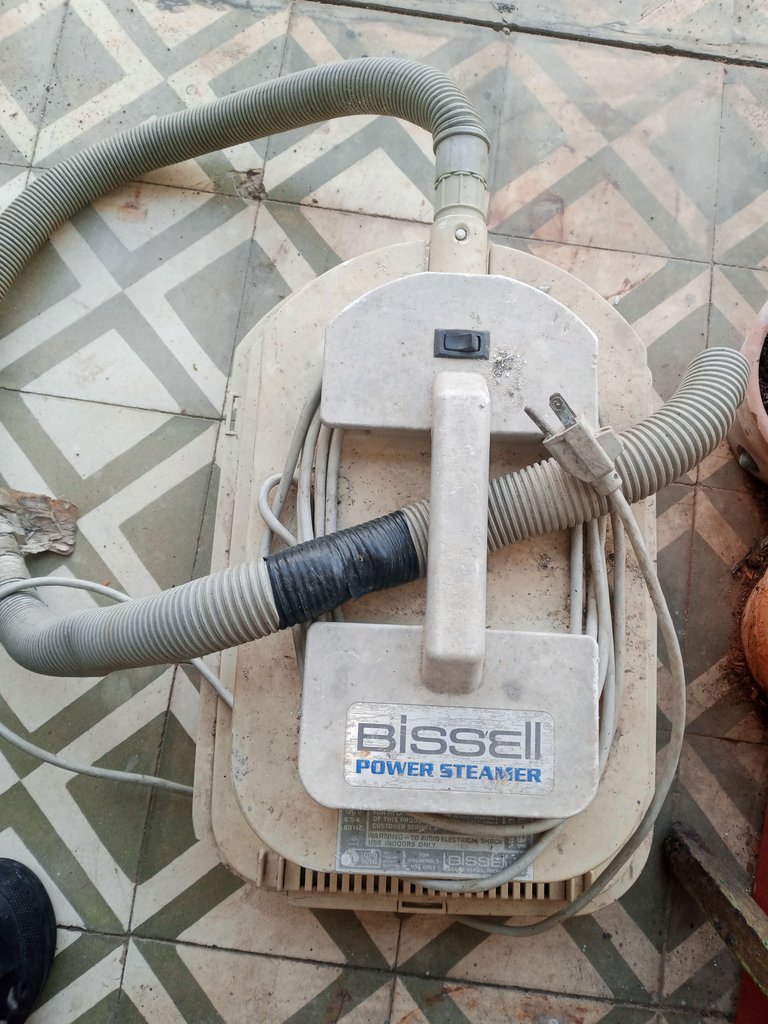
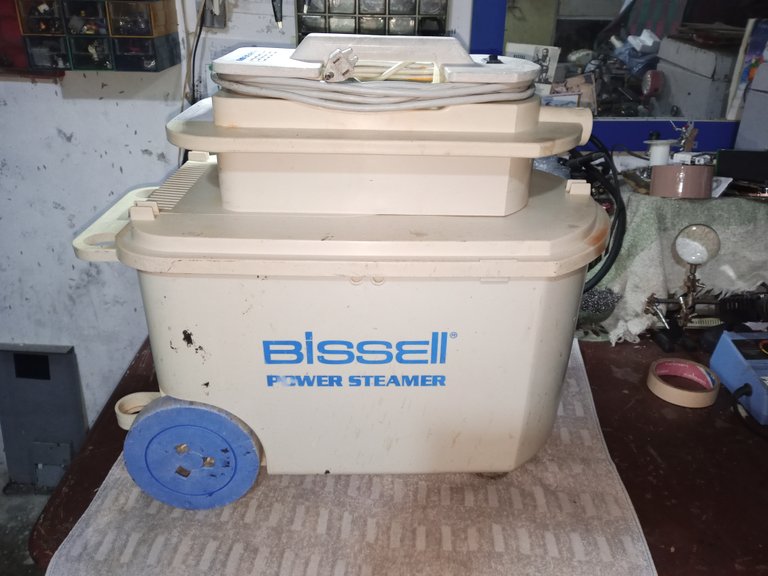
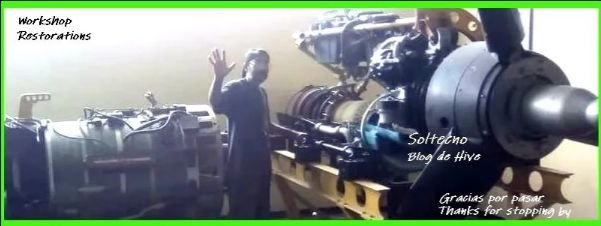
On this occasion, they left me a deteriorated and very neglected vacuum cleaner in the workshop. I take the opportunity to share the maintenance and restoration that I did to it, to leave it operational.
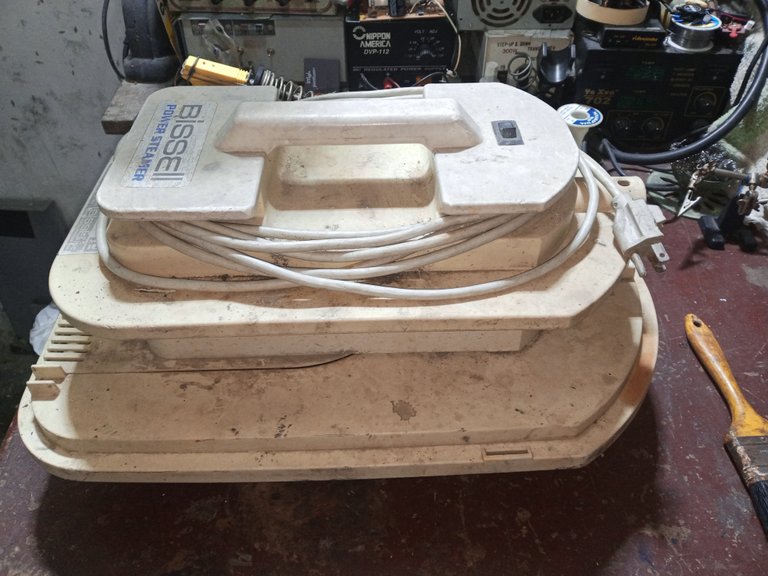
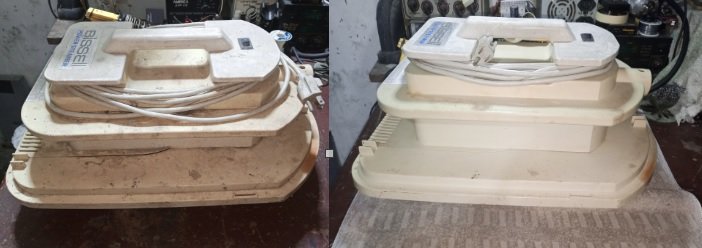
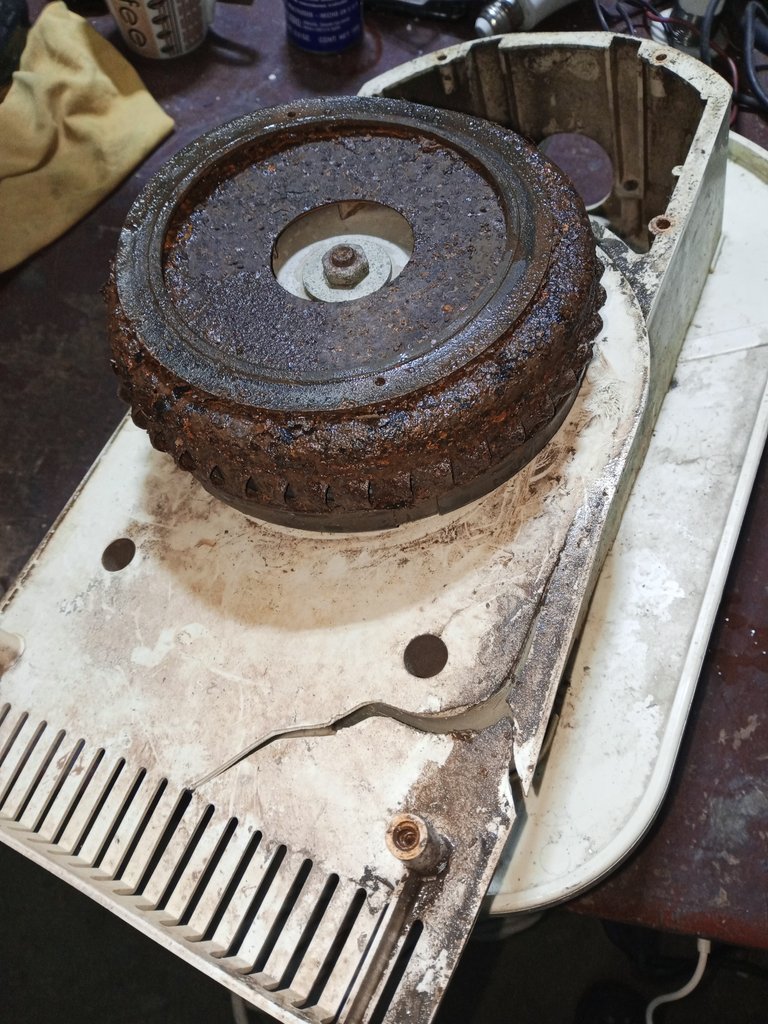
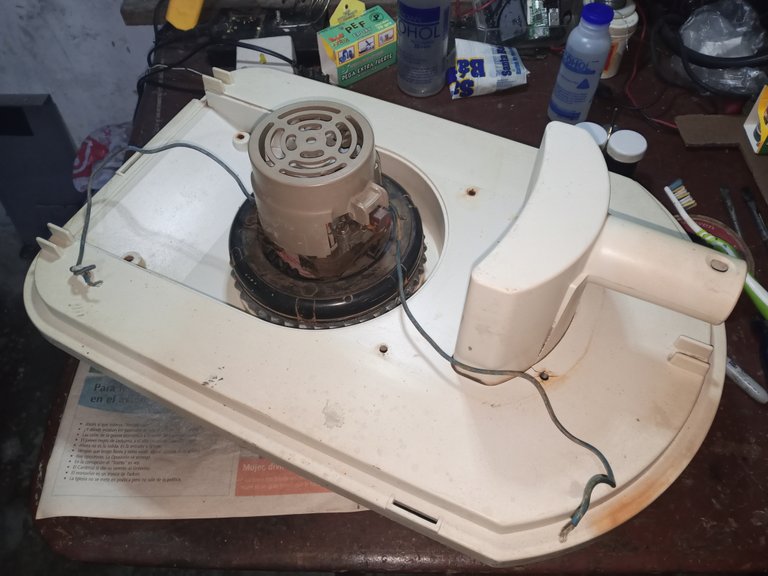
The first thing is to disassemble and wash the entire vacuum cleaner and its component parts.
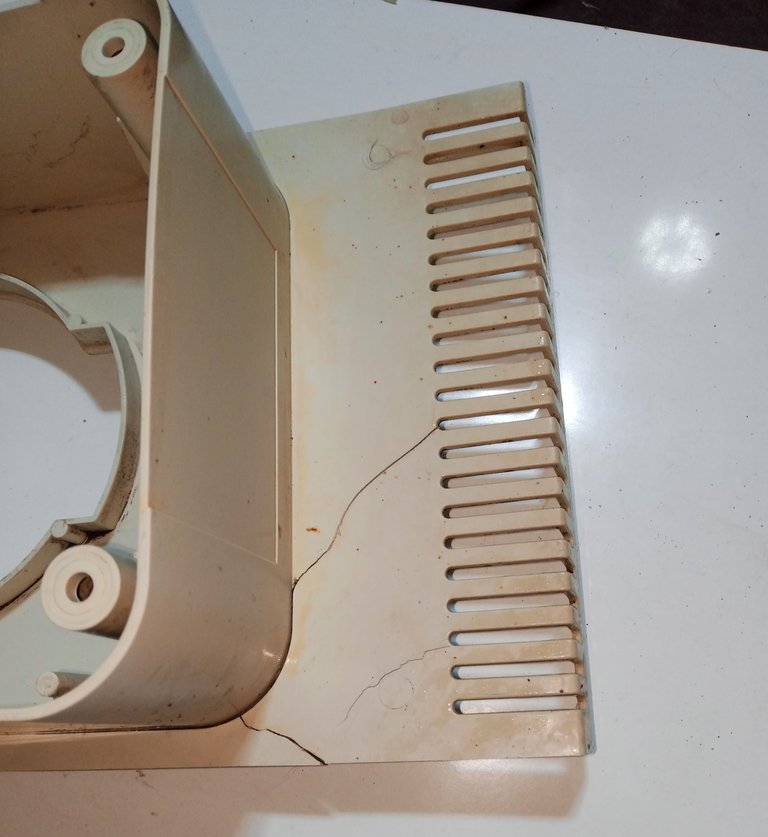
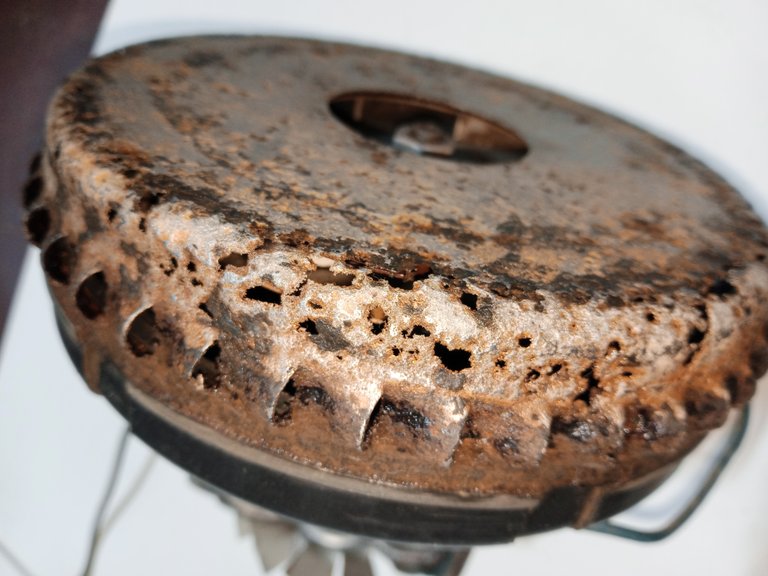
The metal on the turbine cover is quite deteriorated, and the plastic is quite broken.
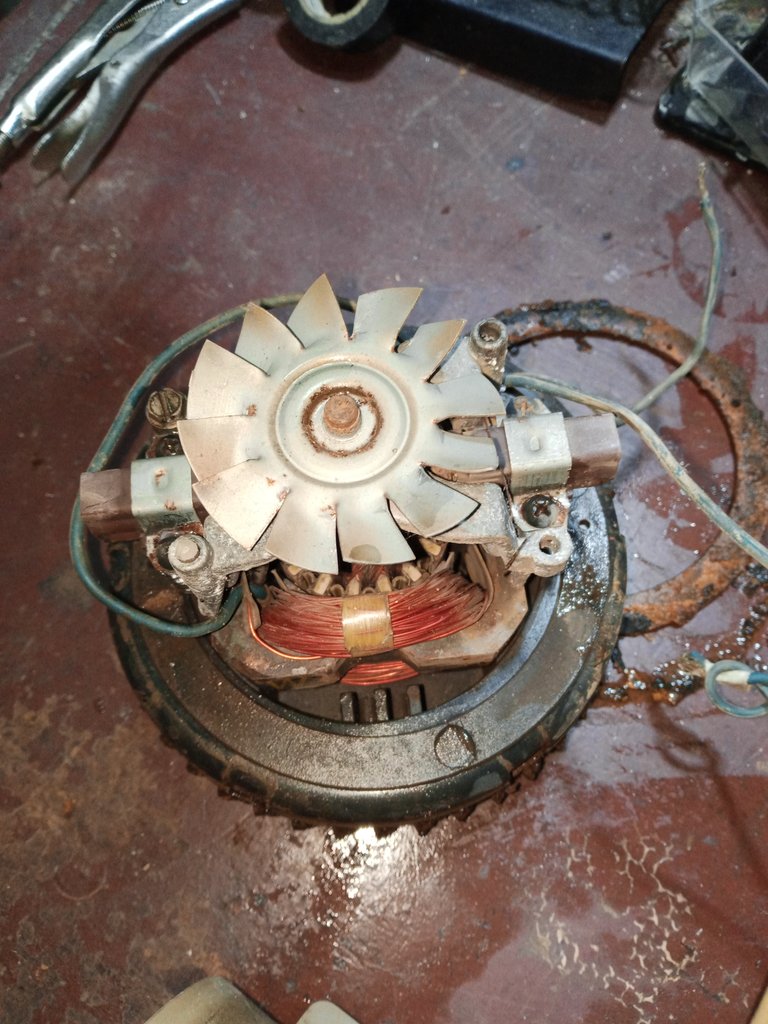
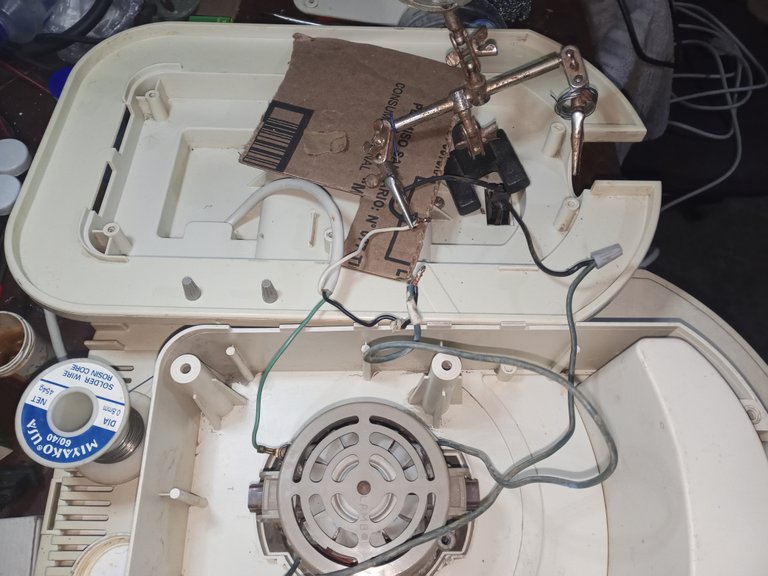
The electrical control part and the electric power are very simple and robust.

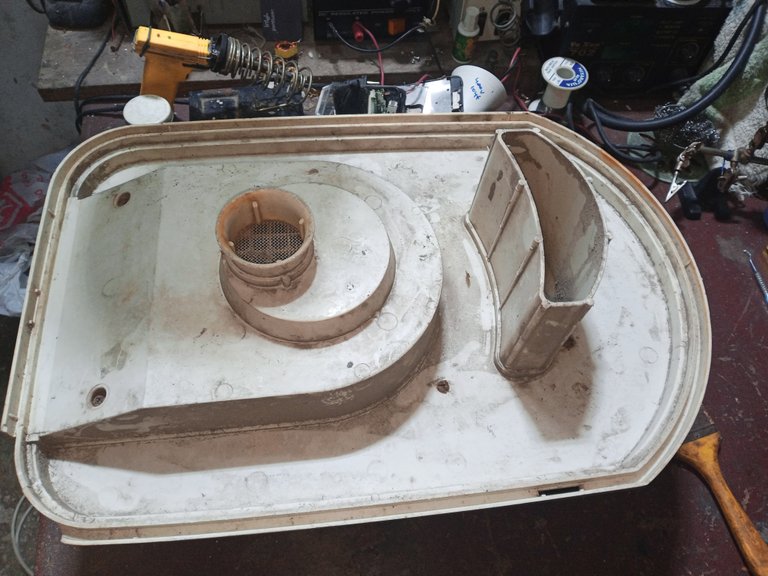
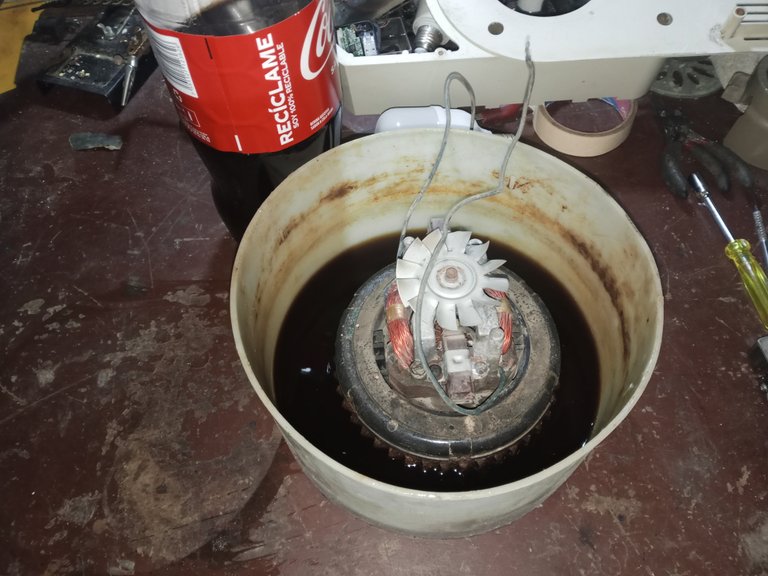
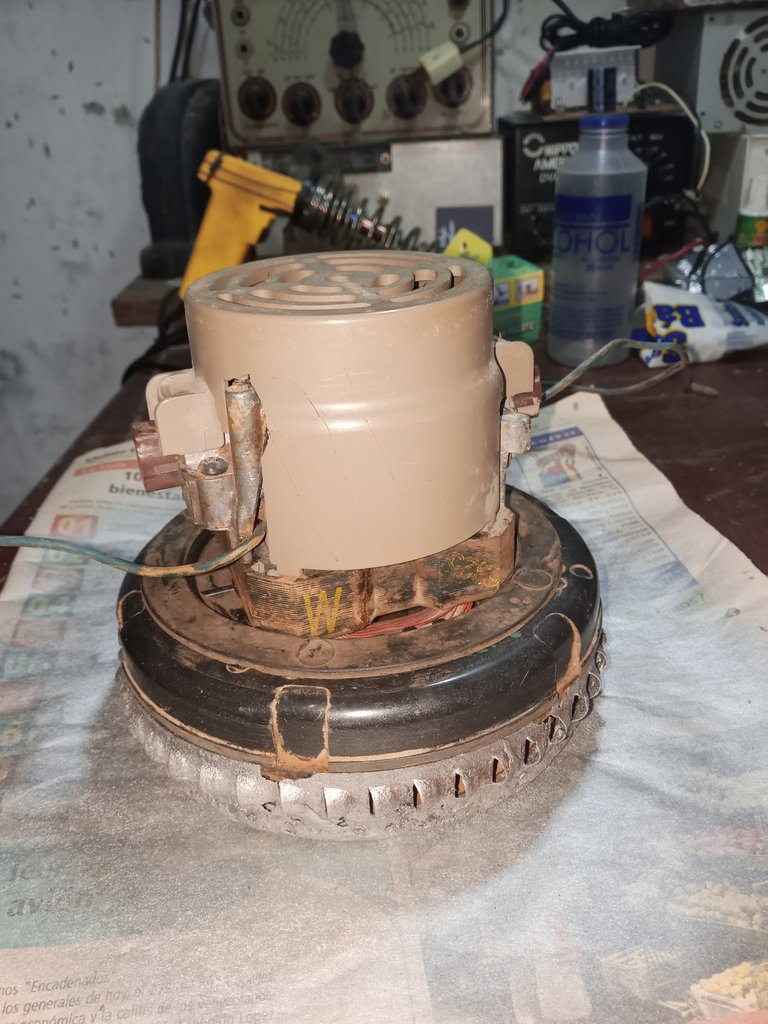
The turbine motor was in very good condition, I am really surprised by the good quality of these equipment from a few years ago, I just need a little cleaning and some lubrication.
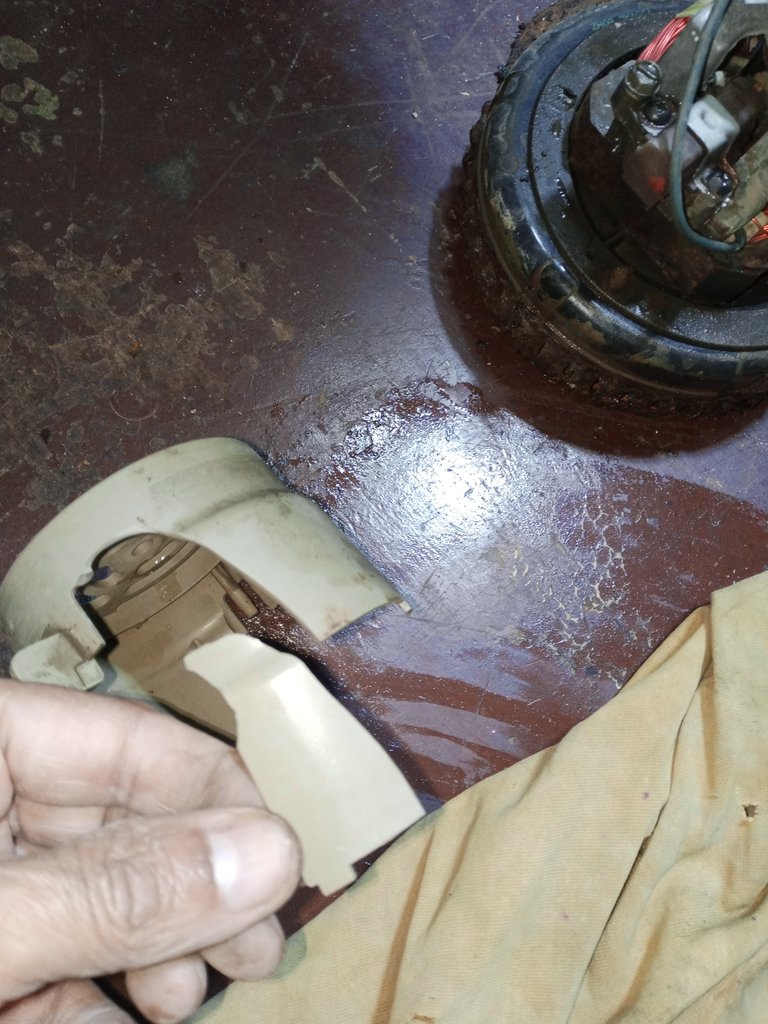
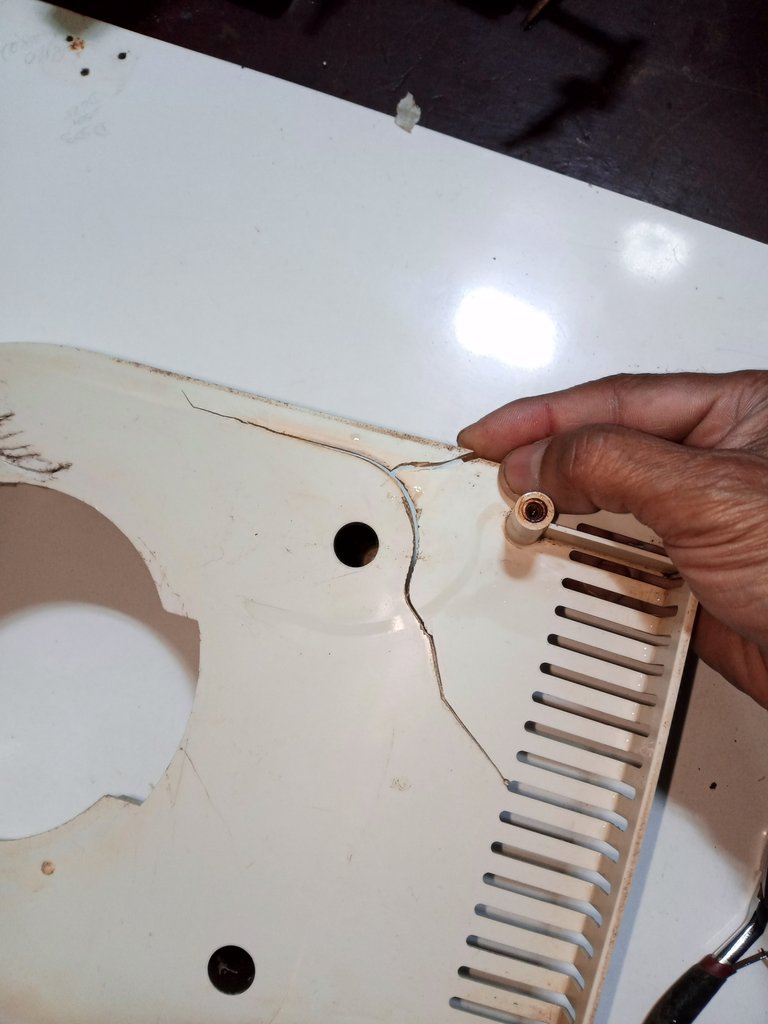
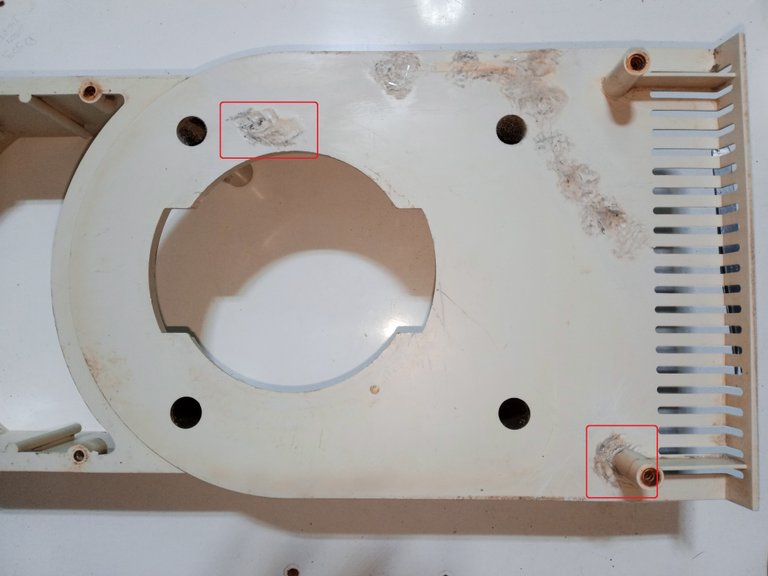
The plastic cover or the helmet that goes over the engine, if it was damaged, was broken into several uneven pieces, I could only get one of the pieces, luckily the largest piece.
Welding on plastic parts
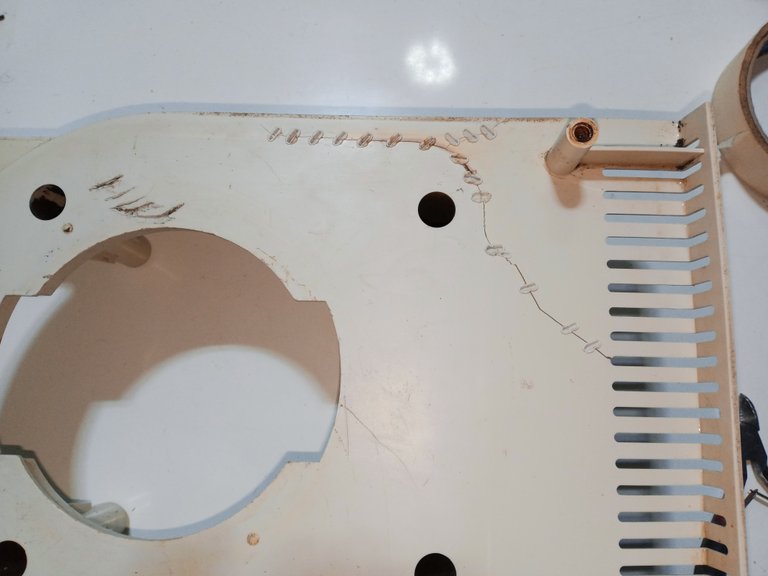
After disassembling and washing the covers, I begin to weld the broken plastic parts with the heat of a soldering iron, I help myself to reinforce the joints with the use of staples or pieces of wire to give enough resistance to the joints.
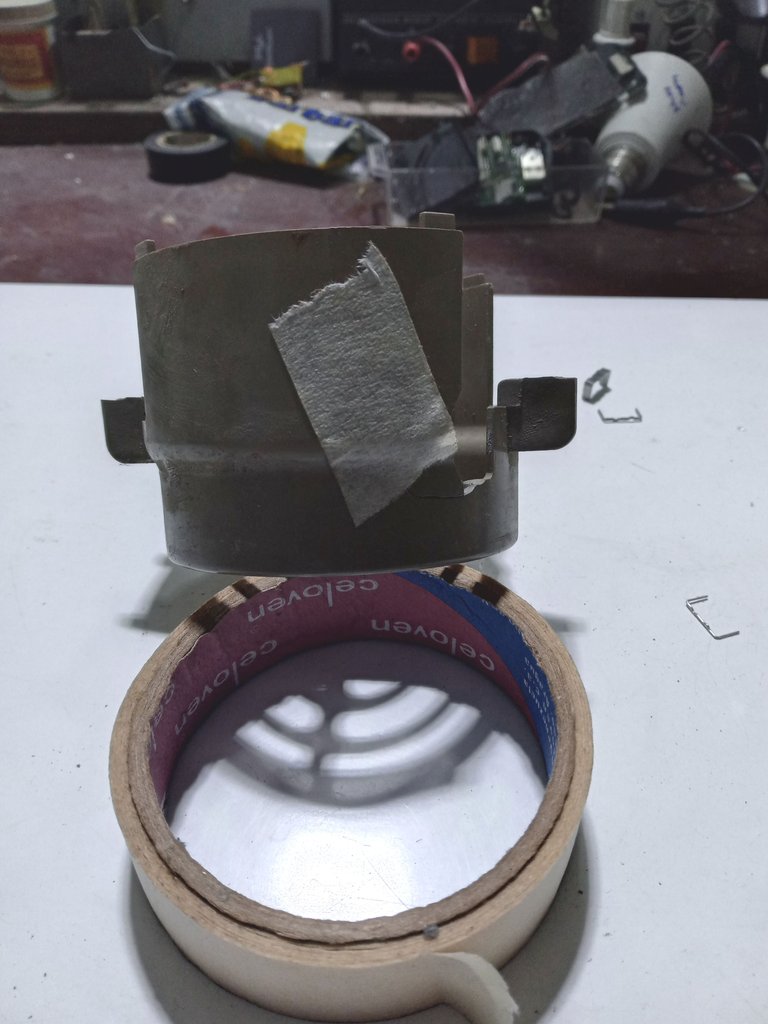
I fixed the broken part of the engine housing with masking tape.
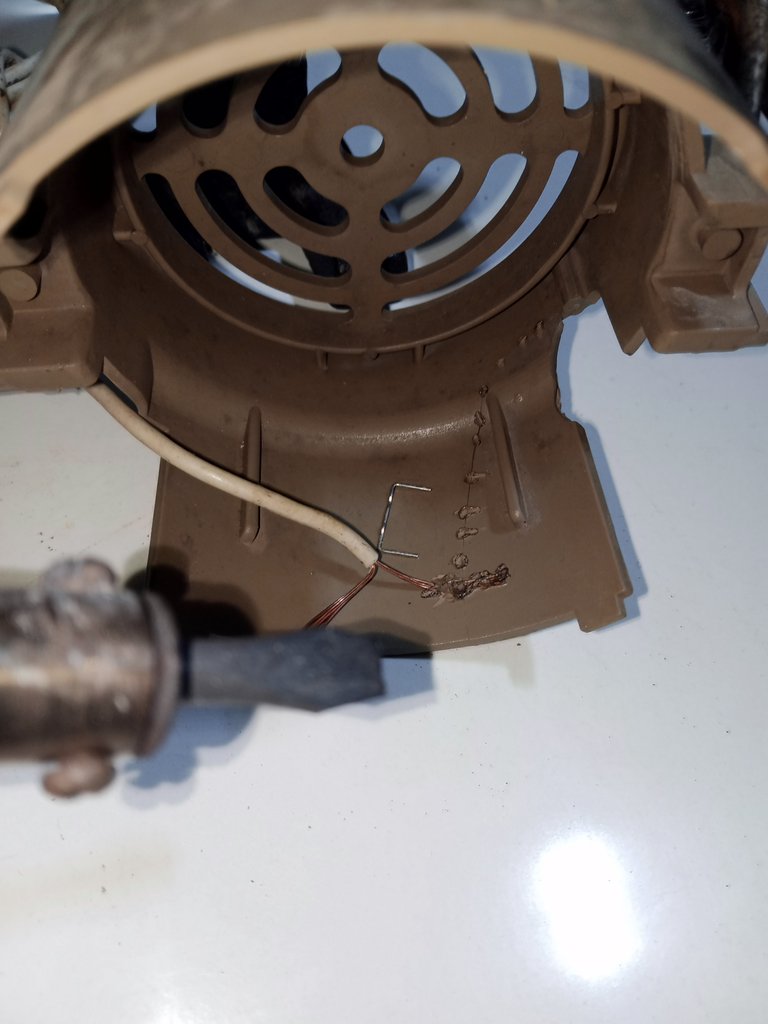
With the soldering iron I melt and join the edges of the plastic, and when the joint is firmer, I melt pieces of wire or metal staples between both broken parts, so that the joint is stronger.
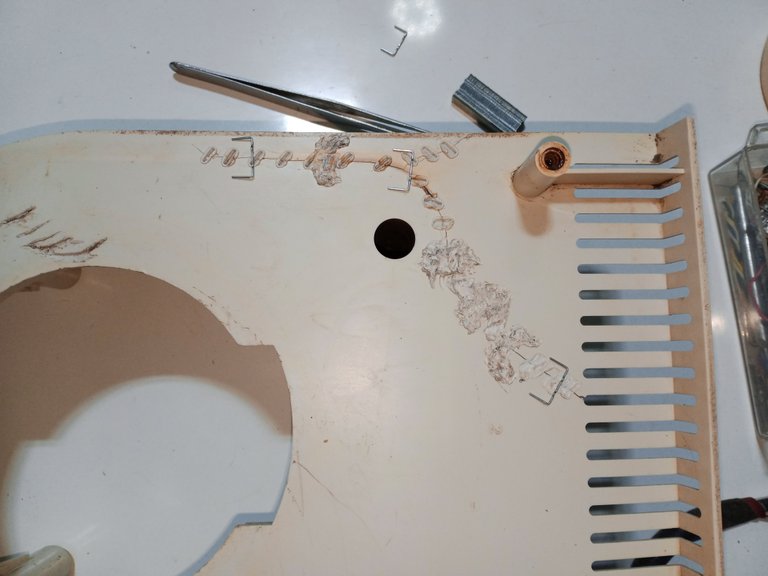
You can then add staples or wire as you wish until you are satisfied.
I don't usually use glue to make these joints, I prefer to weld this way, the plastic joint is very firm and looks pretty good to the eye.

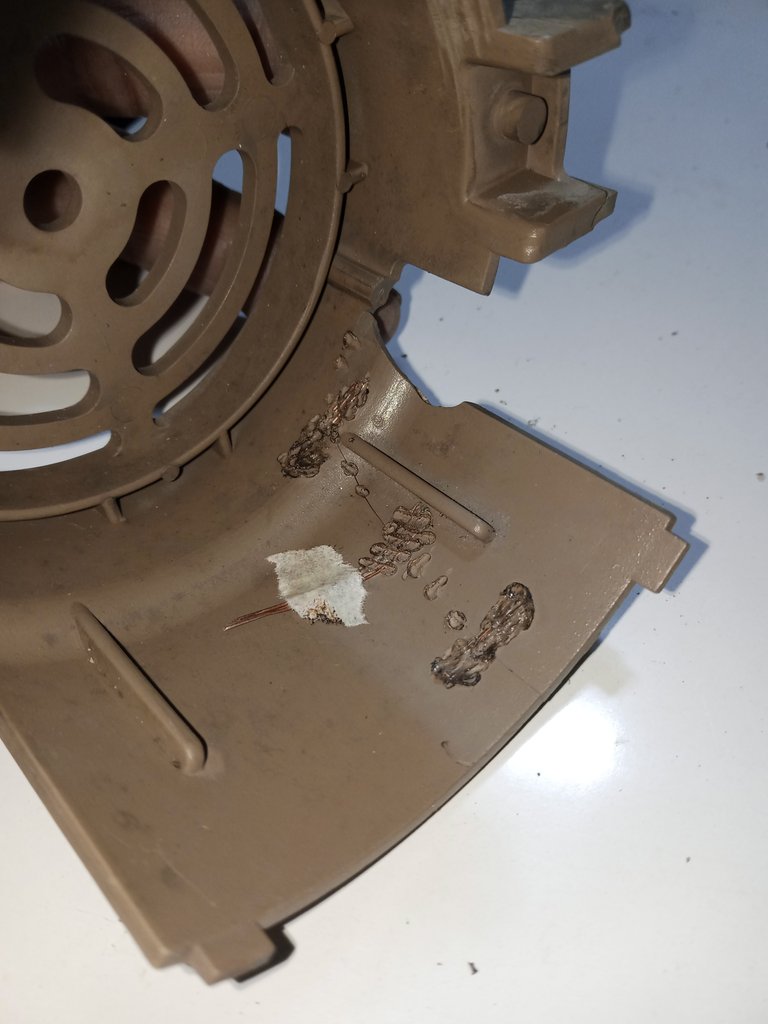
There were more broken parts in other plastic covers, but because of the flat shape it is much easier to work with, the round parts require more care so that the welding maintains the correct shape.
I'm going to use the same technique to join and strengthen the welded joints.
I secure the broken parts in place and with small stitches I fix the plastic joints.
Then I melt the staples along all the joints with the heat of the soldering iron, to strengthen the welds.
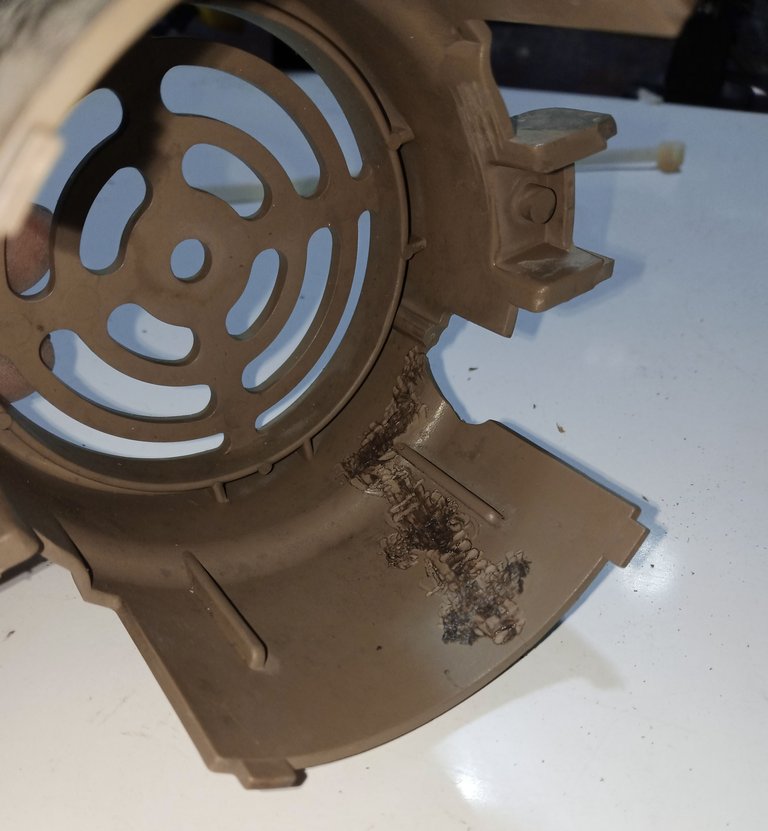
Then to fill the surfaces I use pieces of recycled plastic clamps as an electrode or as a source of material, they are pieces of clamp left over from other jobs.
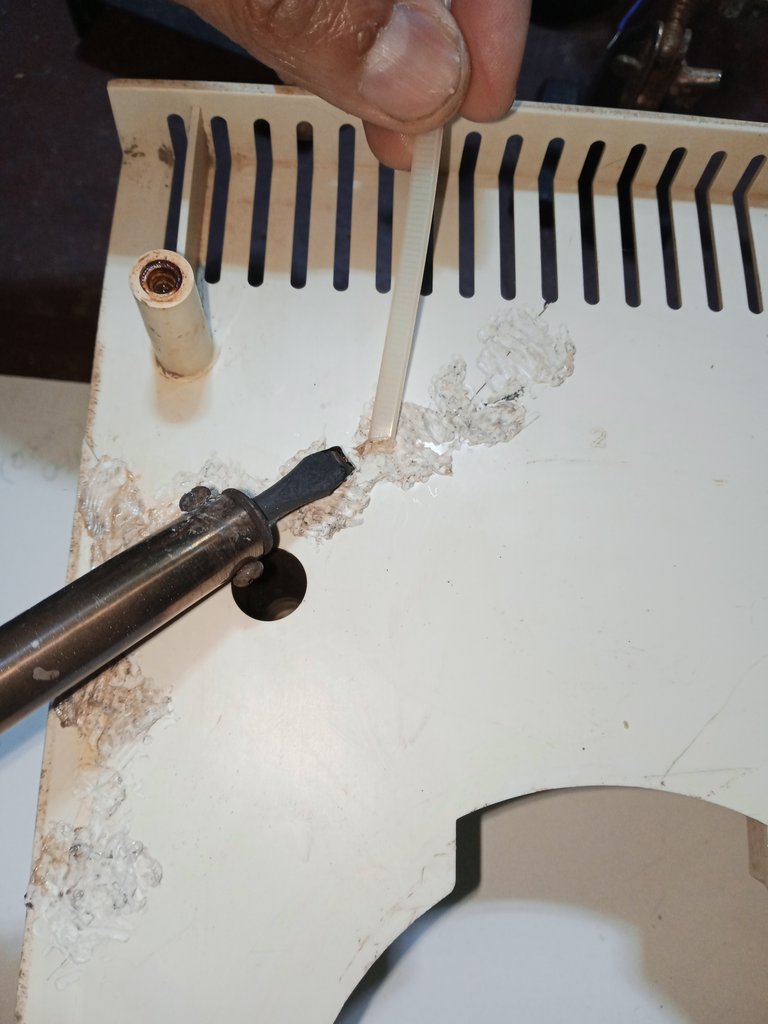
I filled in other damaged parts of the plastic cover and welded the screw holder that was broken, finally I sanded it to smooth and improve the finish of the work.
Restoration of the protective cover for the rusty turbine.
If we had a better budget, it would be worth manufacturing or ordering the turbine cover, but we have to work with what is within reach.
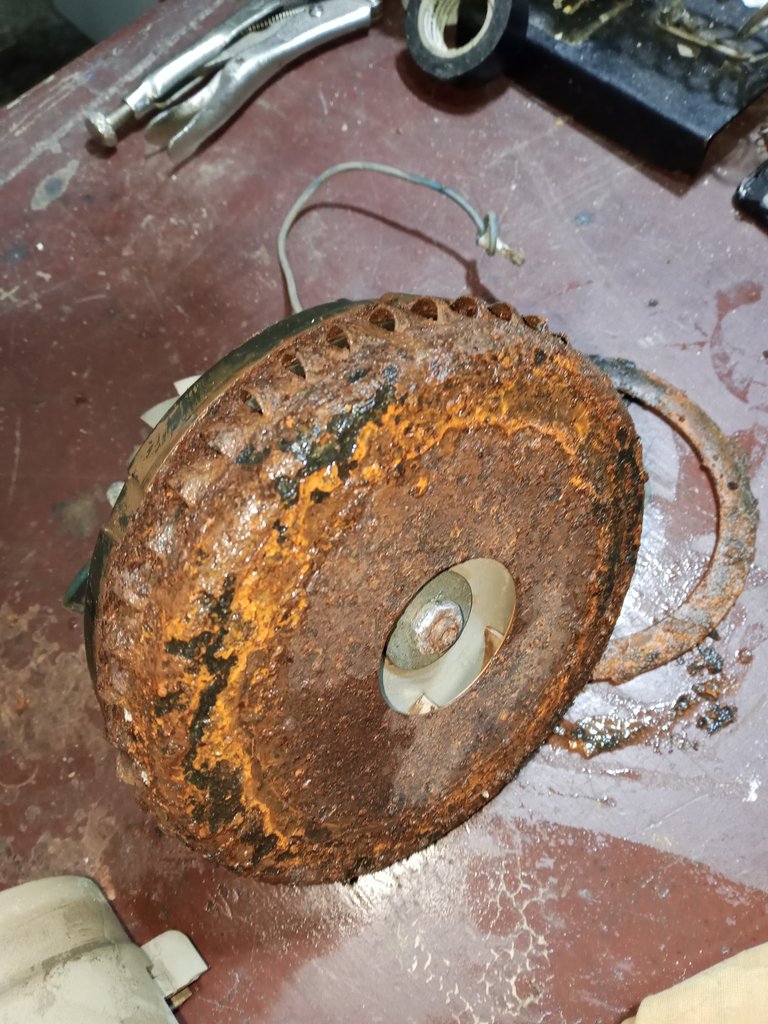
I'm going to restore it, so I have to get rid of the rust first, I apply a good amount of coke and leave it overnight.
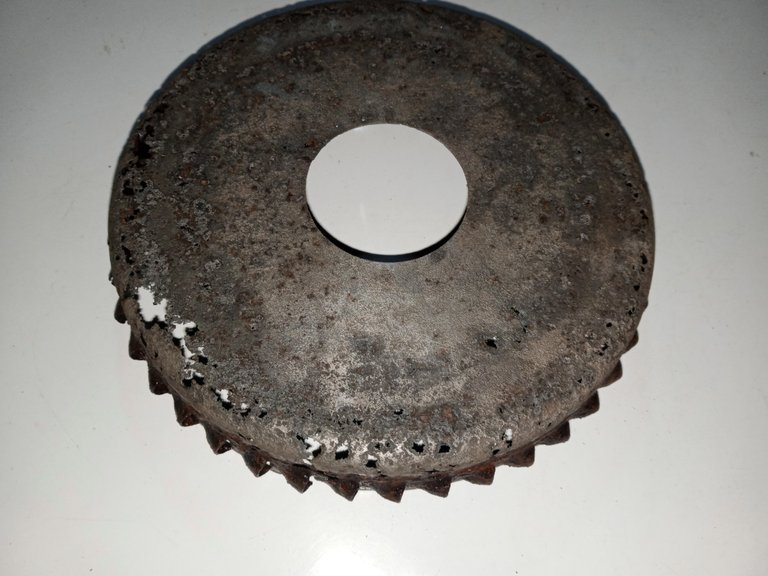
The corrosion damaged the material a lot, in the end it is so weak that I can't weld on the metal.
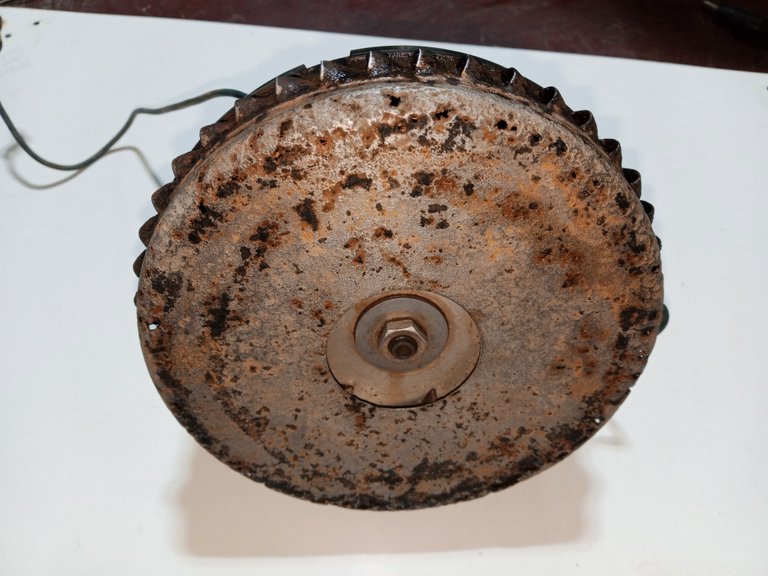
It has a solution despite looking so damaged.
After a second rust cleaning, you are ready to try several possible solutions.
I tried several solutions, in the end the one that gave me the best result was using eight-hour epoxy glue mixed with alcohol, it fills the holes, serves as a protective layer and gives strength to the material.

By adding a few drops of alcohol to the epoxy glue after it has been mixed well, it becomes much more malleable.
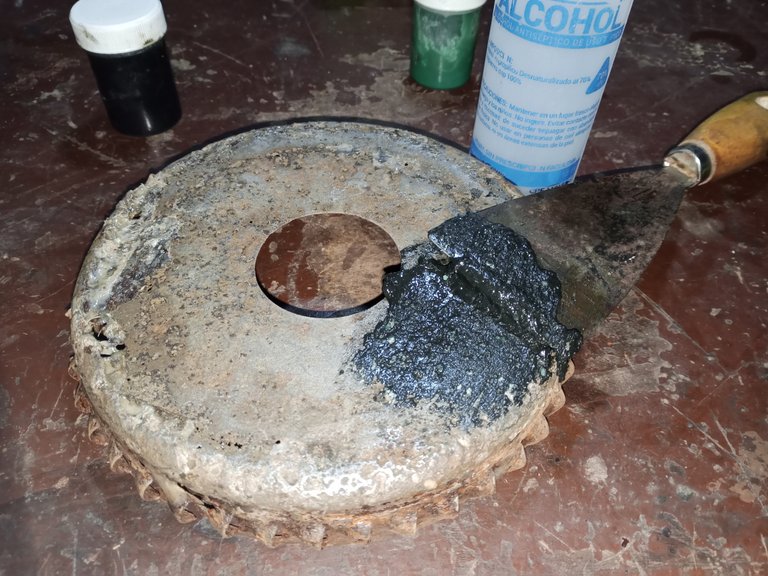
If you apply enough alcohol to the epoxy mixture, it can be applied with a brush on the surface, it's a trick to make the fuel tank of old wooden model cars and airplanes.
In this case I needed the epoxy layer to be a little thicker.
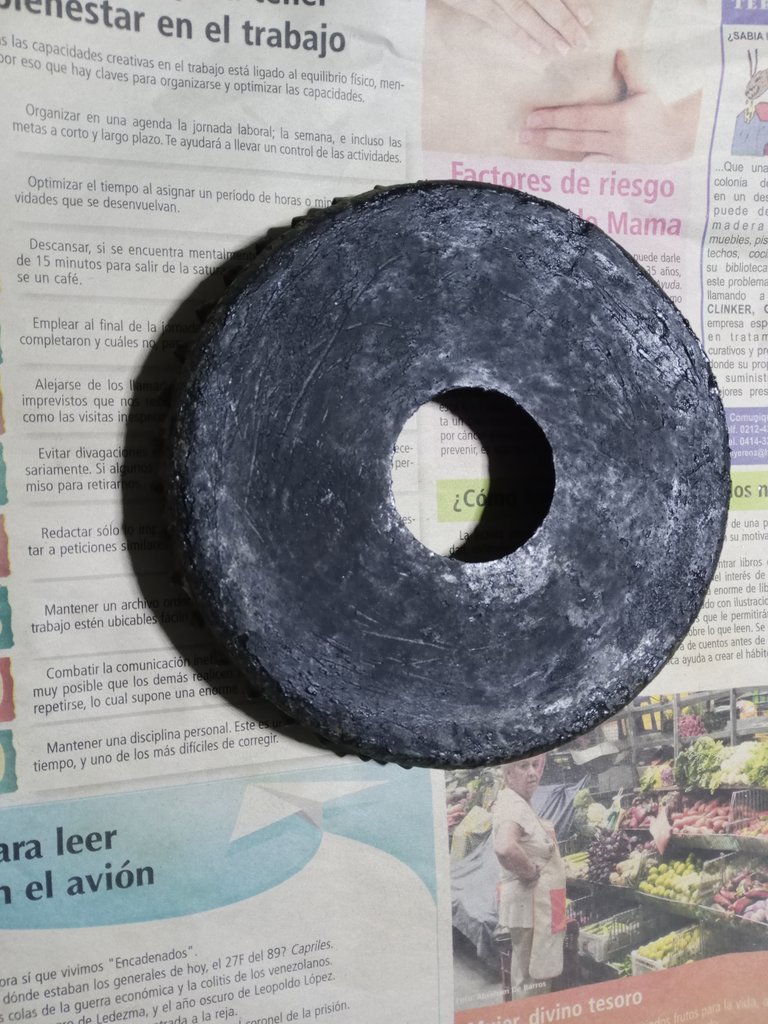
After applying two layers of epoxy on both sides of the piece, a little paint and that's it.
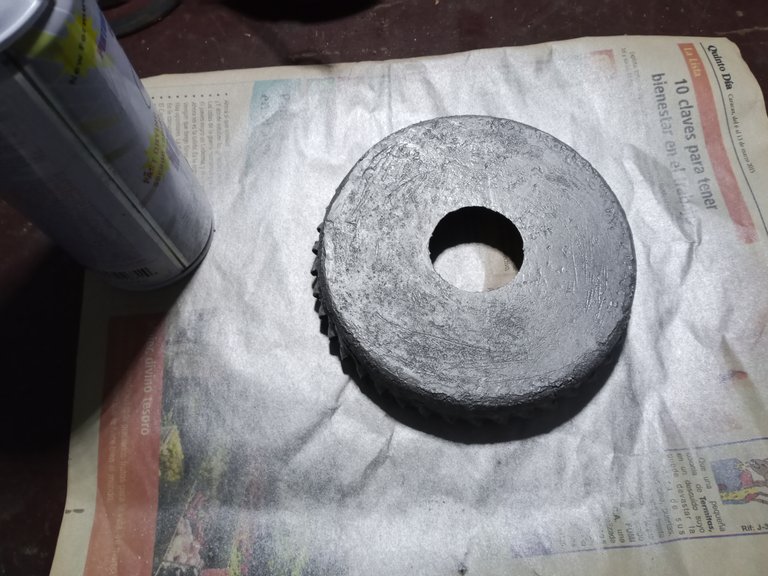
It's hard to notice that the plastic was repaired, we're putting everything together and leaving it ready.
This vacuum cleaner had the most important parts in good condition, this time I did not have to repair the motor or replace damaged parts.

Since the unit has no electronic parts, the electrical connections are pretty basic.
Check the current draw with the ammeter after assembling the entire vacuum cleaner.
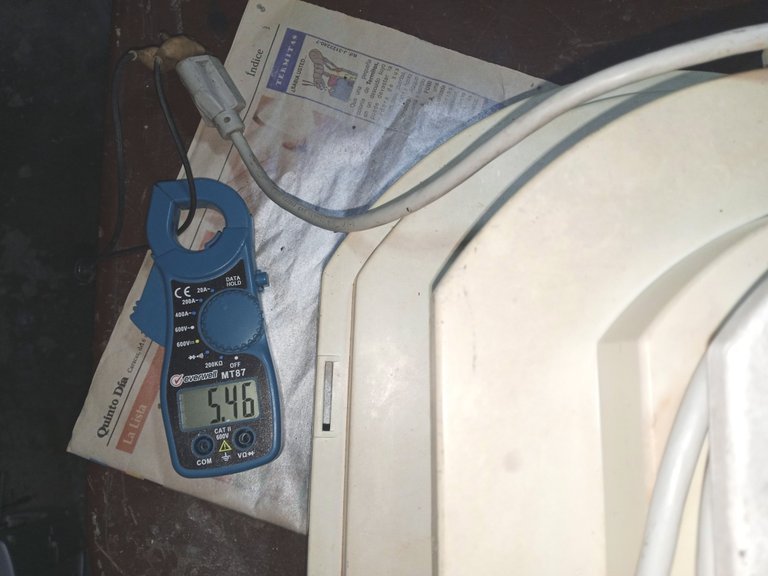
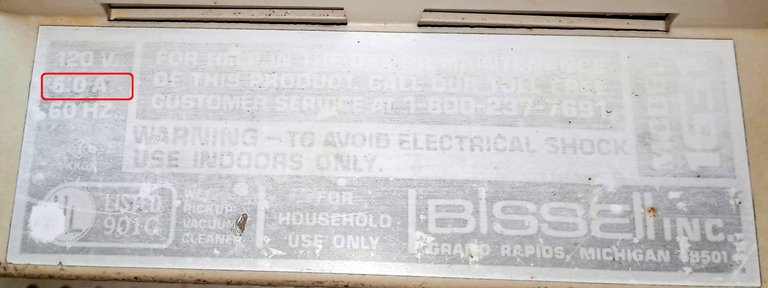
The current draw is not higher than what is specified on the manufacturer's plate (6 amps).
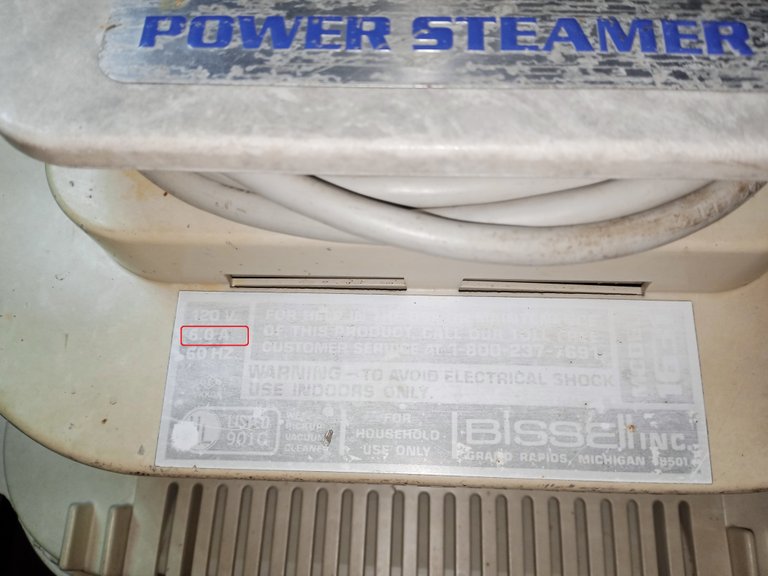
In the future I hope to learn how to make these labels for refurbished equipment with the printer, the instructions are barely legible, but for now I am satisfied with the work.
The job is well done, I just need to get a vacuum cleaner hose in good condition or buy the material to make a new one.
Thank you very much for stopping by and reading me.
Have a great week.
Peace.
If any of you like this kind of work as a hobby or to dedicate some time to it, please always remember: take a basic training course in electricity and mechanics. Let's avoid accidents or damaging equipment.
- I used Google Translate for the English language.
- For the decorative banner in Spanish, I used TextStudio.
- Images unless otherwise noted are screenshots of my work in my workshop.

Saludos a la comunidad de Hive DIY, deseando que estén muy bien y con mucho ánimo para sacar adelante todos sus proyectos.
Finalmente, ya me he recuperado lo suficiente de mi laberintitis, para poder volver a trabajar. Yo pasé unas semanas un poco complicado, todo me daba vueltas en mi cabeza, no era nada fácil trabajar ni mucho menos escribir.
En esta ocasión me dejaron en el taller una deteriorada y muy descuidada aspiradora, aprovecho para compartir el mantenimiento y la restauración que le hice, para dejarla operativa.
Lo primero es desarmar y lavar toda la aspiradora y sus partes componentes.
El metal de la cubierta para la turbina está bastante deteriorado, y el plástico está bastante roto.
La parte de control eléctrico y la fuerza eléctrica, es muy simple y robusta.
El motor de la turbina estaba en muy buenas condiciones, realmente me sorprende la buena calidad de estos equipos de hace unos años, solo necesito de una pequeña limpieza y algo de lubricación.
La cubierta plástica o el casco que va sobre el motor, si estaba dañada, estaba partida en varias partes desiguales, solo pude conseguir uno de los pedazos, por suerte el pedazo más grande.
Soldaduras en partes de plástico
Después de desarmar y lavar las cubiertas, comienzo a soldar las partes plásticas rotas con el calor de un cautín, me ayudo para reforzar las uniones con el uso de grapas o trozos de cable para darle suficiente resistencia a las uniones.
Le fijé la parte rota del casco del motor con cinta de carrocero.
Con el cautín voy derritiendo y uniendo los bordes del plástico, y cuando está más firme la unión, fundo trozos de cable o grapas de metal entre ambas partes rotas, para que la unión sea más resistente.
Así pueden agregarse a discreción, grapas o cable hasta quedar conforme.
No suelo usar pegamento para hacer estas uniones, prefiero soldar de esta manera, la unión del plástico queda muy firme y luce bastante bien a la vista.
Había más partes partidas en otras de las cubiertas plásticas, pero por la forma plana es mucho más sencillo trabajar, las partes redondas se requieren de más cuidado para que la soldadura mantenga la forma correcta.
Voy a usar la misma técnica para unir y fortalecer las uniones soldadas.
Aseguro las partes rotas en su posición y con pequeños puntos voy fijando las uniones del plástico.
Luego voy derritiendo con el calor del cautín las grapas a lo largo de todas las uniones, para fortalecer las soldaduras.
Luego para rellenar la superficies uso trozos de abrazaderas plásticas recicladas como electrodo o aporte de material, son trozos de abrazadera que sobran de otros trabajos.
Rellene otras partes de la cubierta plástica dañadas y soldé el soporte para tornillo que estaba partido, al final lije para alisar y mejorar el acabado del trabajo.
Restauración de la cubierta protectora para la turbina oxidada.
Teniendo un mejor presupuesto valdría la pena fabricar o mandar hacer la cubierta de la turbina, pero tenemos que trabajar con lo que está al alcance.
Voy a restaurarla, por lo que primero tengo que librarme del óxido, aplico una buena cantidad de coca cola y dejo toda la noche.
La corrosión dañó mucho el material, al final está tan débil que no puedo soldar sobre el metal.
Tiene solución a pesar de verse tan dañado.
Después de una segunda limpieza contra el óxido, está listo para ir probando varias soluciones posibles.
Probé con varias soluciones, al final con la que obtuve mejor resultado fue usando pegamento epoxi de ocho horas mezclado con alcohol, rellena los agujeros, sirve como una capa protectora y le da fuerza al material.
Al agregar unas pocas gotas de alcohol al pegamento epoxi después de haberlo mezclado bien, se hace mucho más maleable.
Si le aplicas suficiente alcohol a la mezcla de epoxi, se puede aplicar con un pincel en la superficie, es un truco para hacer el depósito de combustible de los aviones y coches a escala de madera antiguos.
En este caso yo necesitaba que la capa de epoxi fuese un poco más gruesa.
Después de aplicar dos capas de epoxi por ambos lados de la pieza, un poco de pintura y listo.
Es difícil notar que el plástico fue reparado, vamos armando y dejando todo a punto.
Esta aspiradora tenía las partes más importante en buen estado, esta vez no tuve que reparar el motor ni cambiar partes dañadas.
Como el equipo no tiene partes electrónicas, las conexiones eléctricas son bastante básicas.
Revise el consumo de corriente con el amperímetro después de armar toda la aspiradora.
El consumo de corriente no es mayor que el que se especifica en la placa del fabricante (de 6 amperios).
En un futuro aspiro en aprender a hacer estas etiquetas de los equipos restaurados con la impresora, apenas se lee las indicaciones, pero por ahora quedo conforme con el trabajo.
Bien terminado el trabajo, solo me queda conseguir una manguera de aspiradora en buen estado o comprar el material para fabricar una nueva.
Muchas gracias por pasar y leerme.
Que tengan una excelente semana.
Paz.
Sí a alguno de ustedes les gusta esta clase de trabajo como pasatiempo o para dedicarle algo de tiempo, por favor recordar siempre: hacer un curso de capacitación básica en electricidad y mecánica. Evitemos accidentes o dañar equipos.
- He usado el traductor de Google para el idioma inglés.
- Para el banner decorativo en español, he usado TextStudio.
- Las imágenes a menos que se indique son capturas de mi trabajo en mi taller.
Siempre sorprende el uso tan diverso que puede tener una Coca-Cola.
!ALIVE !LUV !DIY !BBH
(1/4) sent you LUV. | tools | discord | community | HiveWiki | <>< daily@soltecno, @pedrobrito2004
Tremendo ver como es el producto, en el estado que llegó pero a pesar de eso soporto tantos años de uso sin mantenimiento jajaja imaginate si lo cuidaran, sería un producto eterno. Como me encantan ver las soldaduras del plástico, son trabajos quirúrgicos y me sorprendió muchísimo el desgaste de esa pieza metálica, no existen palabras para felicitarte tanto por este como por otros milagros, porque no son trabajos, son milagros los que haces con estas cosas jajajaj
Celebro que te gustara amigo. Tengo que aprender muchas cosas más para hacer una restauración como sueño, por ahora estoy en un nivel regular.
Muchas gracias por pasarte y comentar.
Saludos querido amigo, que bueno que ya estas mejor, y bueno solo me queda felicitarte por toda la magia que hiciste con esta pieza, perdurara por mucho tiempo.
Me alegra mucho que usted pasara a leerme y comentara, espero que tengan una excelente semana.
Gracias!! feliz fin de semana, siempre me agrada leerte.💙
wao eres un mago! Por como esta de oxidado sospechoque tambien el dueño no tenia cuidado y aspiraba agua. Esta es una reparación estupenda como todas las que nos muestras, me encanta y mas me encanta leer que te sientes mejor de tu oido.
Gracias por pasar y comentar, milagrosamente el corazón del equipo estaba en muy buenas condiciones, solo tuve que batallar con la suciedad y el óxido.
Tengo un montón de trabajos acumulados, ahora que estoy mejor de salud me toca ponerme al día.
Aprecio mucho sus buenos deseos, que el buen dios le multiplique su bondad.
You can query your personal balance by
@pedrobrito2004 just sent you a DIY token as a little appreciation for your post dear @soltecno! Feel free to multiply it by sending someone else !DIY in a comment :) You can do that x times a day depending on your balance so:!DIYSTATSDiscord Server.This post has been manually curated by @bhattg from Indiaunited community. Join us on our
Do you know that you can earn a passive income by delegating to @indiaunited. We share more than 100 % of the curation rewards with the delegators in the form of IUC tokens. HP delegators and IUC token holders also get upto 20% additional vote weight.
Here are some handy links for delegations: 100HP, 250HP, 500HP, 1000HP.
100% of the rewards from this comment goes to the curator for their manual curation efforts. Please encourage the curator @bhattg by upvoting this comment and support the community by voting the posts made by @indiaunited.
I wish you all a great week.Thankful to my friend @bhattg and the @indiaunited community for supporting my work.
Hola hermano, me alegro que te encuentres mucho mejor de salud. Esa restauración quedó muy bien, la verdad tienes buena paciencia jjj, no creo que la mía hubiera dado para tanto jj, demasiadas partes en mal estado para mí gusto jjjj. Pero el trabajo te quedó muy bien, buena técnica la de la Coca- Cola jjjj, pensar que ingerimos eso por dios!!😲. Saludos
Gracias por comentar, no suelo consumir refrescos, pero es excelente para desincrustar loza, remover óxido, algunos incluso lo usan para lavar el cabello.
No llego hasta allí, pero en verdad es que es muy útil.
Me han tocado equipos más dañados, pero yo no estaba en Hive entonces, gracias a dios el motor de la aspiradora estaba bastante bien conservado.
Muy agradecido por sus palabras de ánimo, en verdad aprecio el gesto.
Saludos hermano