Hello! Good afternoon my creative family of Hive Diy. Blessed start of the week for everyone, we are already coming to the end of the month, I just wish you to take advantage of each day, may you not lack productivity, health, love and creativity to continue creating and sharing in the community, I also hope that the new month of September will be doubly blessed.♡
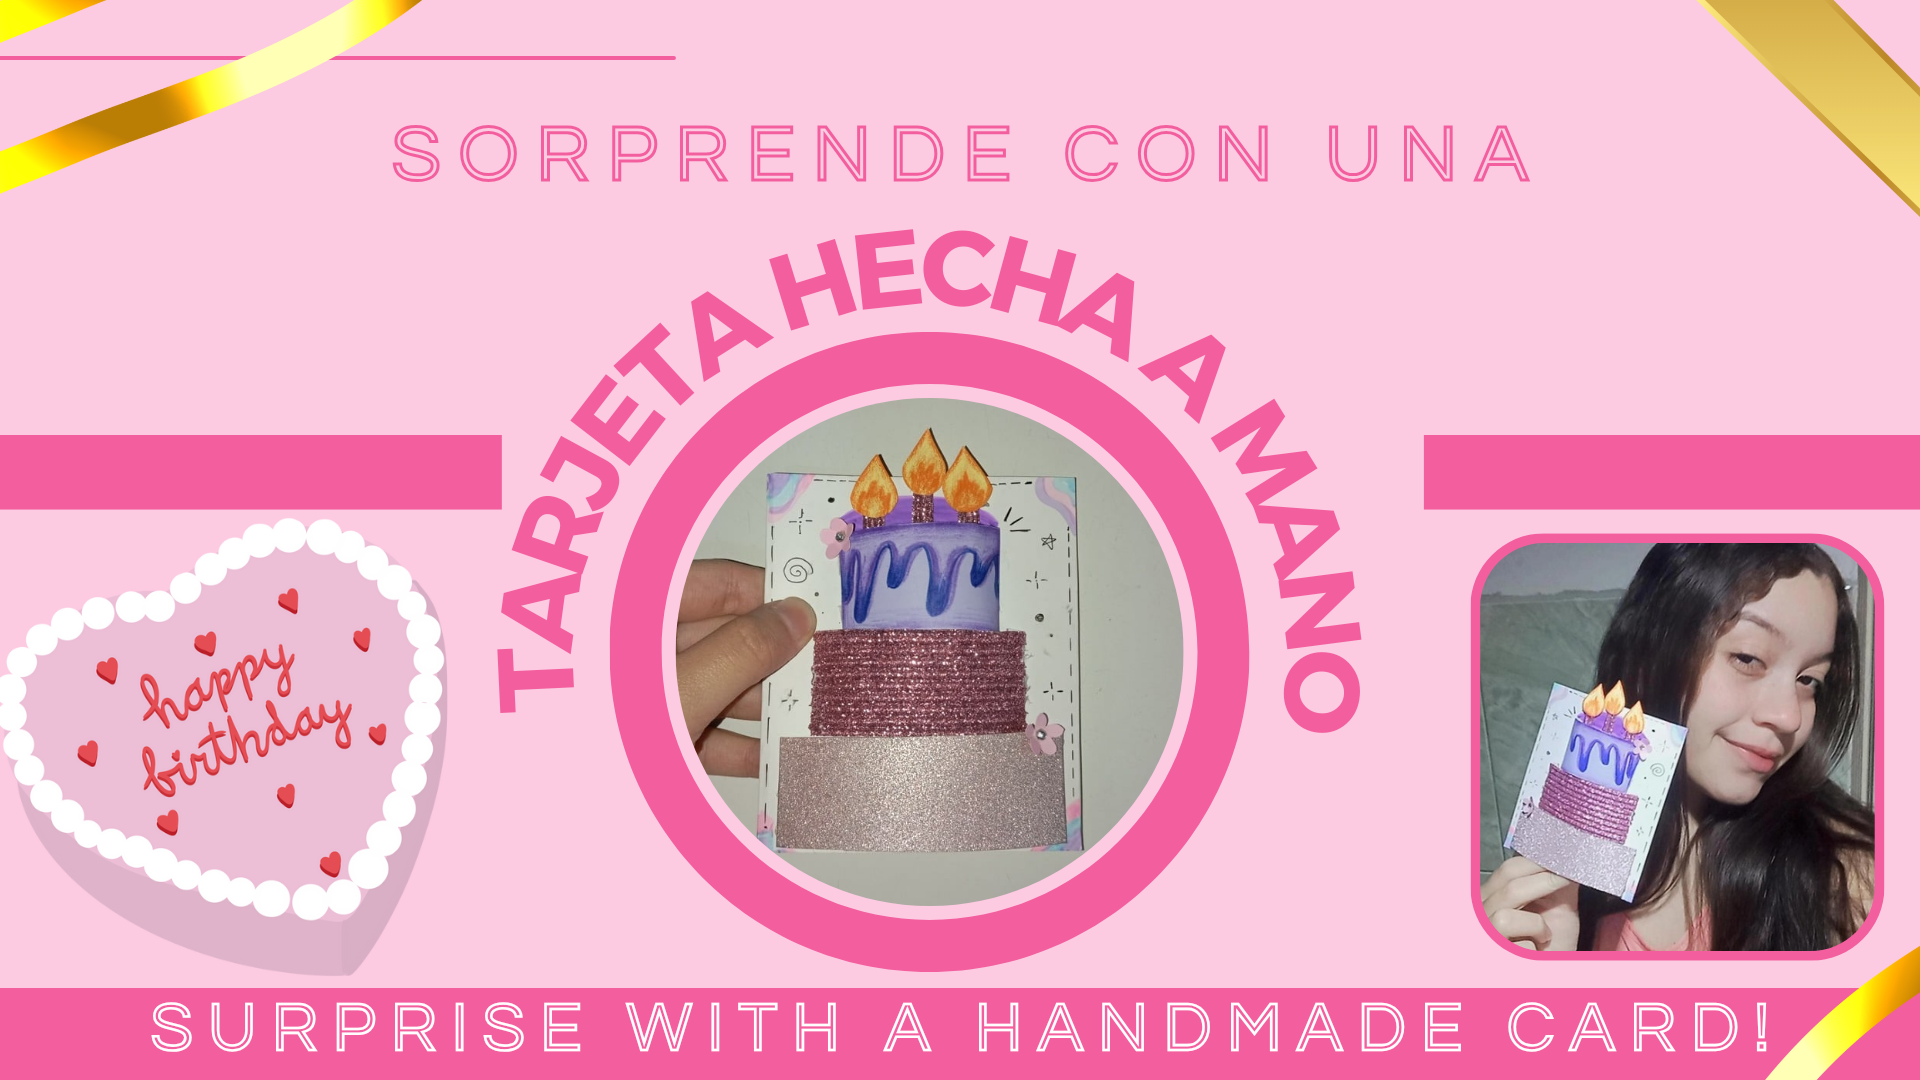
En está oportunidad les presento un idea creativa, única y diferente, que les será útil a la hora de hacer tarjetas de cumpleaños para nuestras personas especiales. Está es una tarjeta ideal para acompañar esos regalos especiales, a nuestros amigos, familiares, pareja, entre otros. Así que si te gusta la idea, acompáñame y te muestro el paso a paso, empezando por sus materiales.💗
This time I present a creative, unique and different idea, which will be useful when making birthday cards for our special people. This is an ideal card to accompany those special gifts, to our friends, family, partner, among others. So if you like the idea, join me and I show you the step by step, starting with its materials.💗
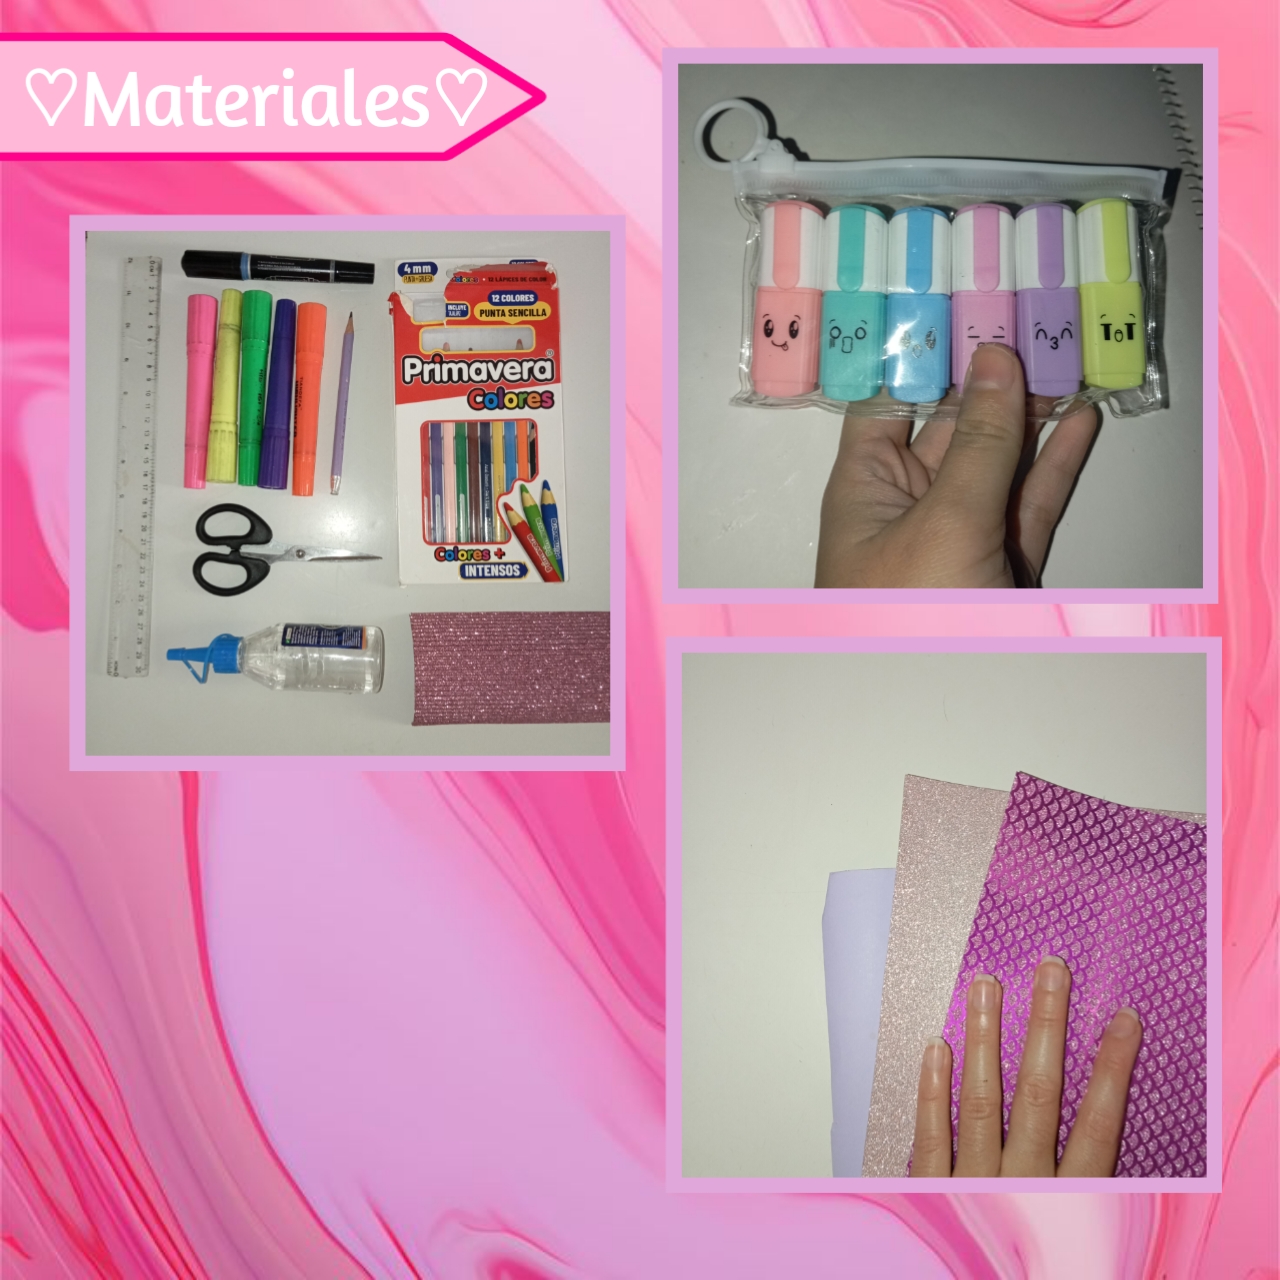
♡💗🌷Materials🌷💗♡
- Cartulinas
- Silicón
- Marcadores
- Colores
- Regla
- Lápiz
- Cardboard
- Silicone
- Marker pens
- Colors
- Ruler
- Pencil
♡💗🌷Step by Step🌷💗♡
Paso 1:
Step 1:
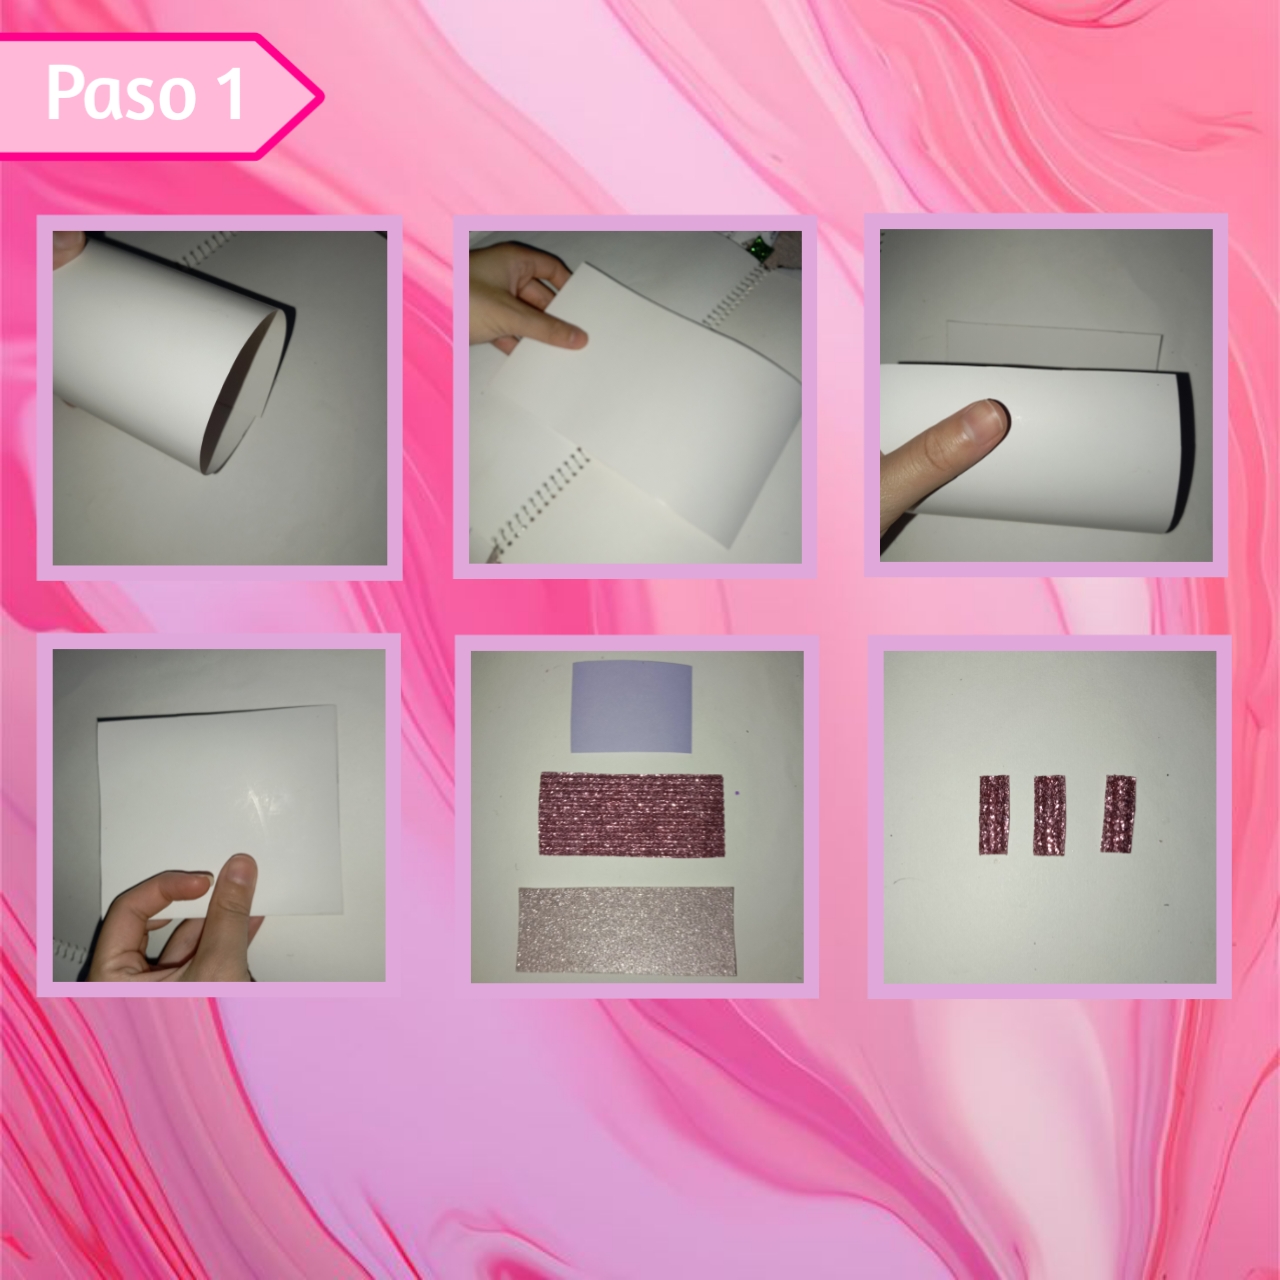
Para empezar, tomaremos nuestra cartulina base, yo en este caso uso en color blanco, así marcamos y recortamos un rectángulo del tamaño de nuestra preferencia, yo lo hice de 20cm de largo y 12cm de ancho. Después tomé un extremo y lo llevé hacia el otro, doblando justo a la mitad, por otro lado, recorte tres rectángulos en diferentes colores de cartulina uno más grande que el otro en secuencia, así también recorte tres diminutos rectángulos, que usaré para las velas.
To start, we will take our base cardboard, I in this case use white color, so we mark and cut out a rectangle of the size of our preference, I did it 20cm long and 12cm wide. Then I took one end and brought it to the other, folding it right in half, on the other side, I cut out three rectangles in different colors of cardboard one bigger than the other in sequence, so I also cut out three tiny rectangles, which I will use for the candles.
Paso 2:
Step 2:
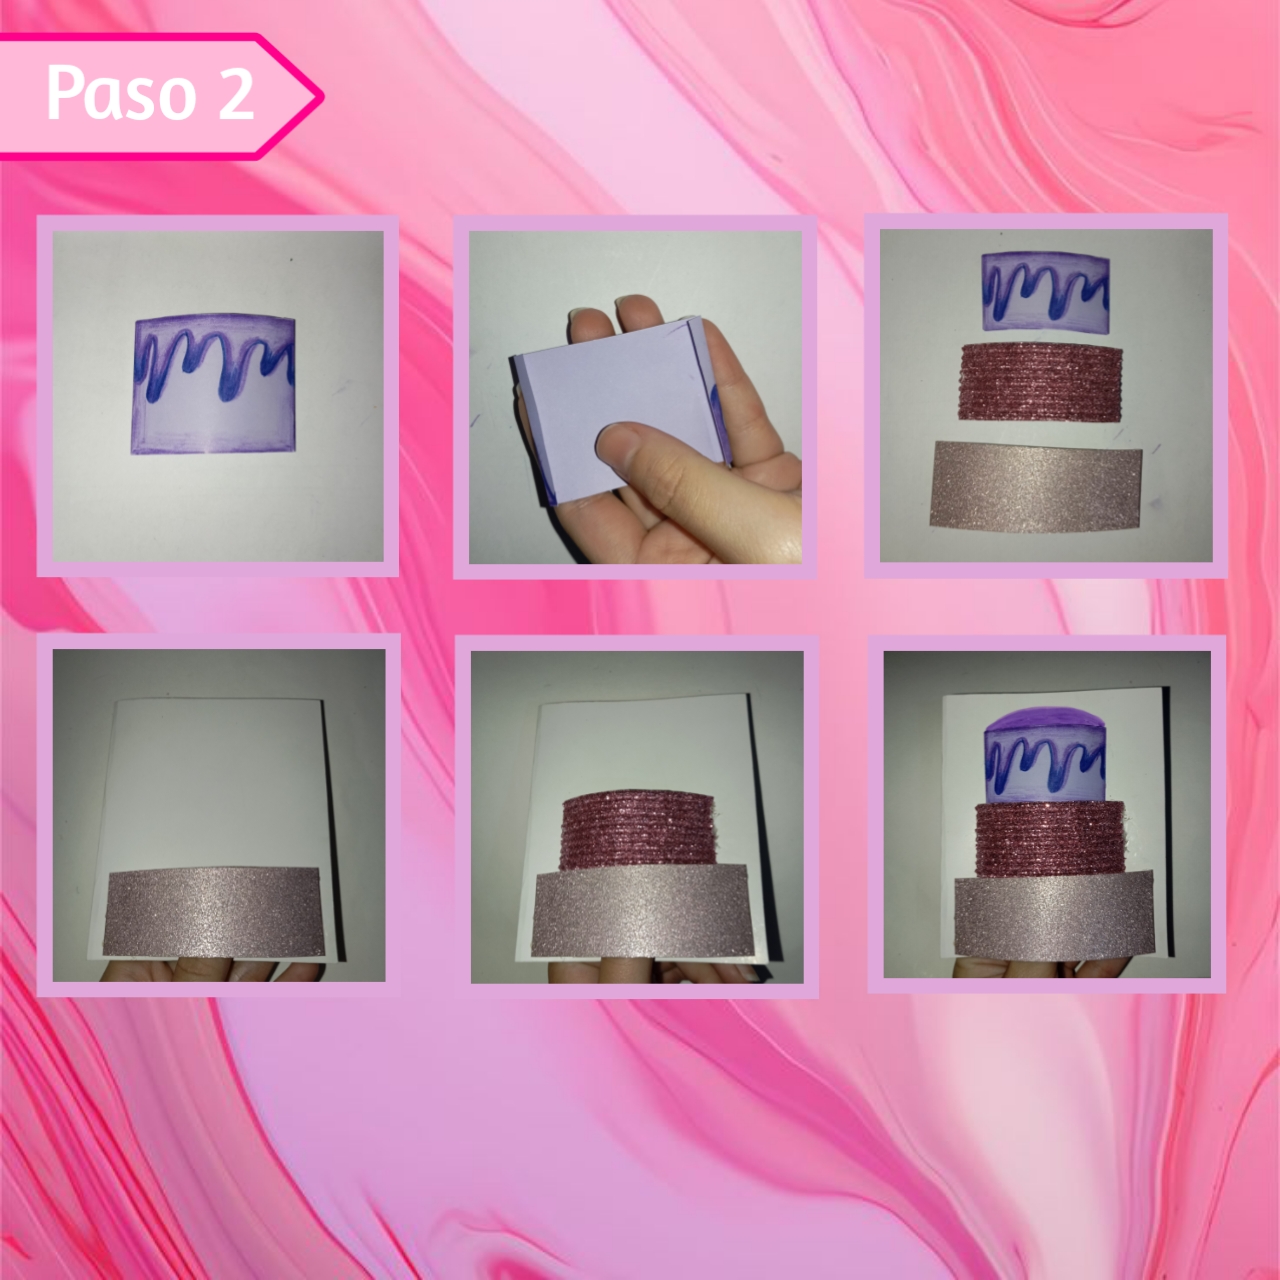
Continuamos, le agregaremos unos detalles con color a aquellos pisos que se puedan colorear, como es el caso de la cartulina de papel, luego a cada uno de los pisos les haremos un dobles en cada extremo de 0.50 cm aproximadamente, ya listos estos, vamos a agregar silicón y pegaremos muy bien a la portada de la tarjeta, uno sobre el otro en orden de tamaño, hasta formar el pastel, también complete la forma en la parte de arriba con marcador, para dar profundidad.
We continue, we will add some details with color to those apartments that can be colored, as is the case of the paper cardboard, then to each of the apartments we will make a double at each end of about 0.50 cm, and ready these, we will add silicone and paste very well to the cover of the card, one on top of the other in order of size, to form the cake, also complete the shape at the top with marker, to give depth.
Paso 3:
Step 3:
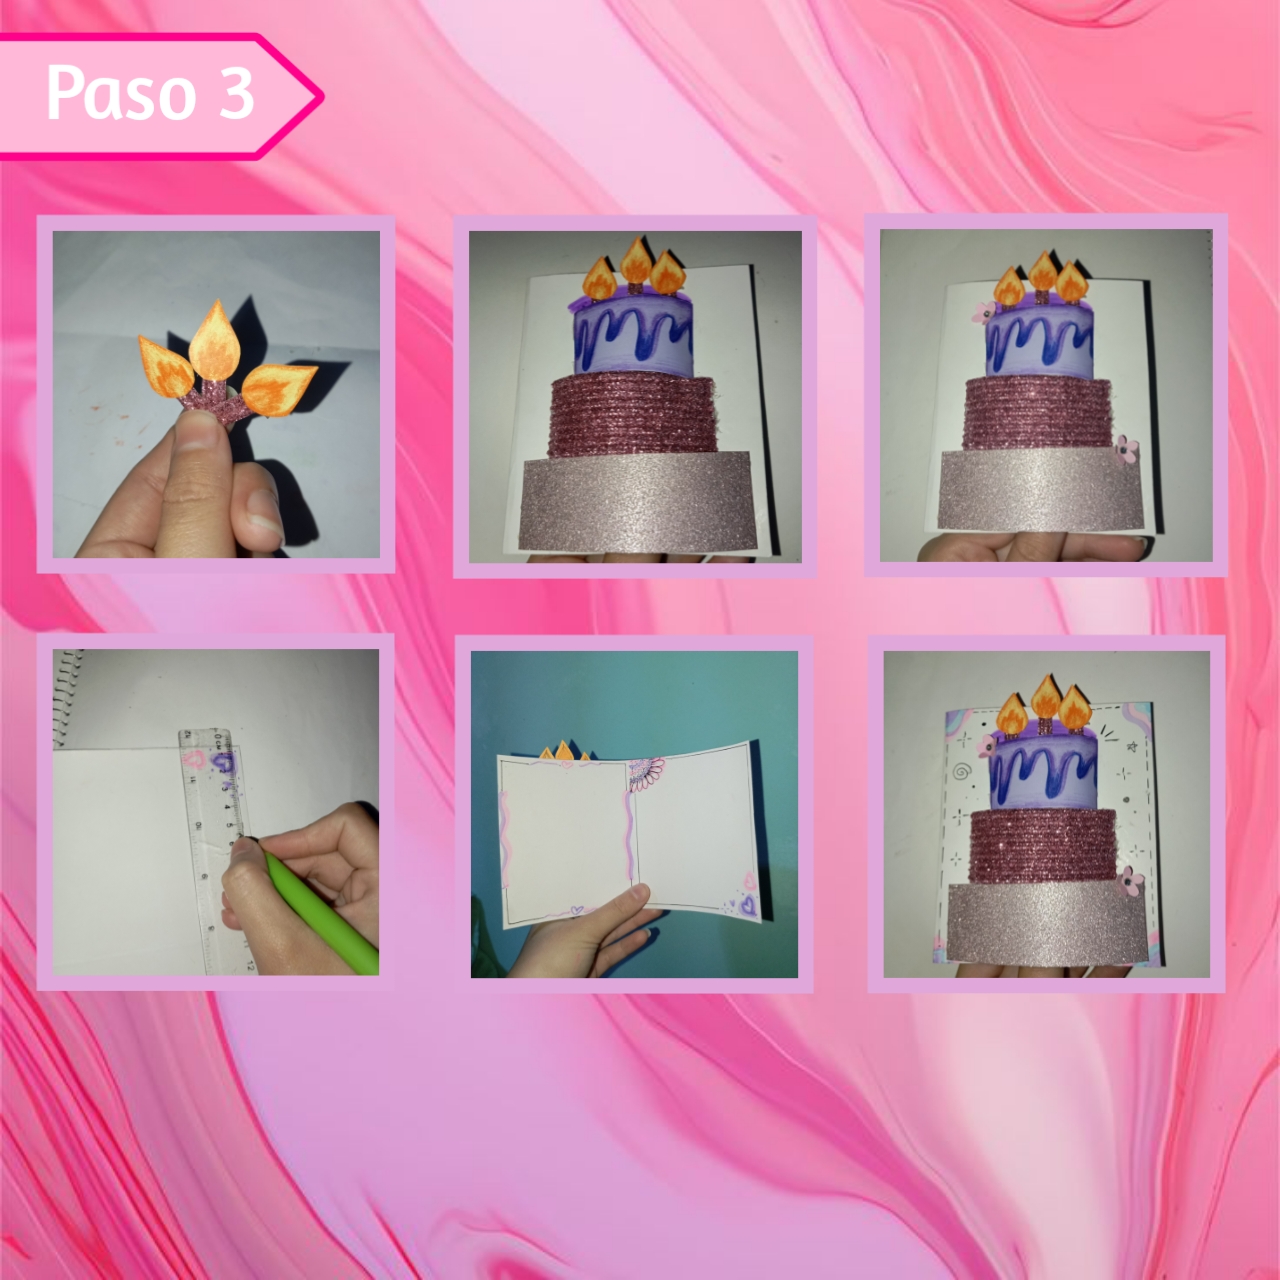
Ahora bien, vamos con los detalles, así haremos tres llamas de un tamaño adecuado para los palitos de las velas y uniremos, además pegaremos las velas en la parte de arriba del pastel con silicón. Por último agregamos unas flores en las esquinas del pastel, además decoramos por dentro y la portada con colores y marcadores, todo a nuestro gusto.
Now, let's go with the details, so we will make three flames of a suitable size for the candle sticks and we will join them together, we will also glue the candles on the top of the cake with silicone. Finally we add some flowers in the corners of the cake, and decorate the inside and the cover with colors and markers, all to our liking.
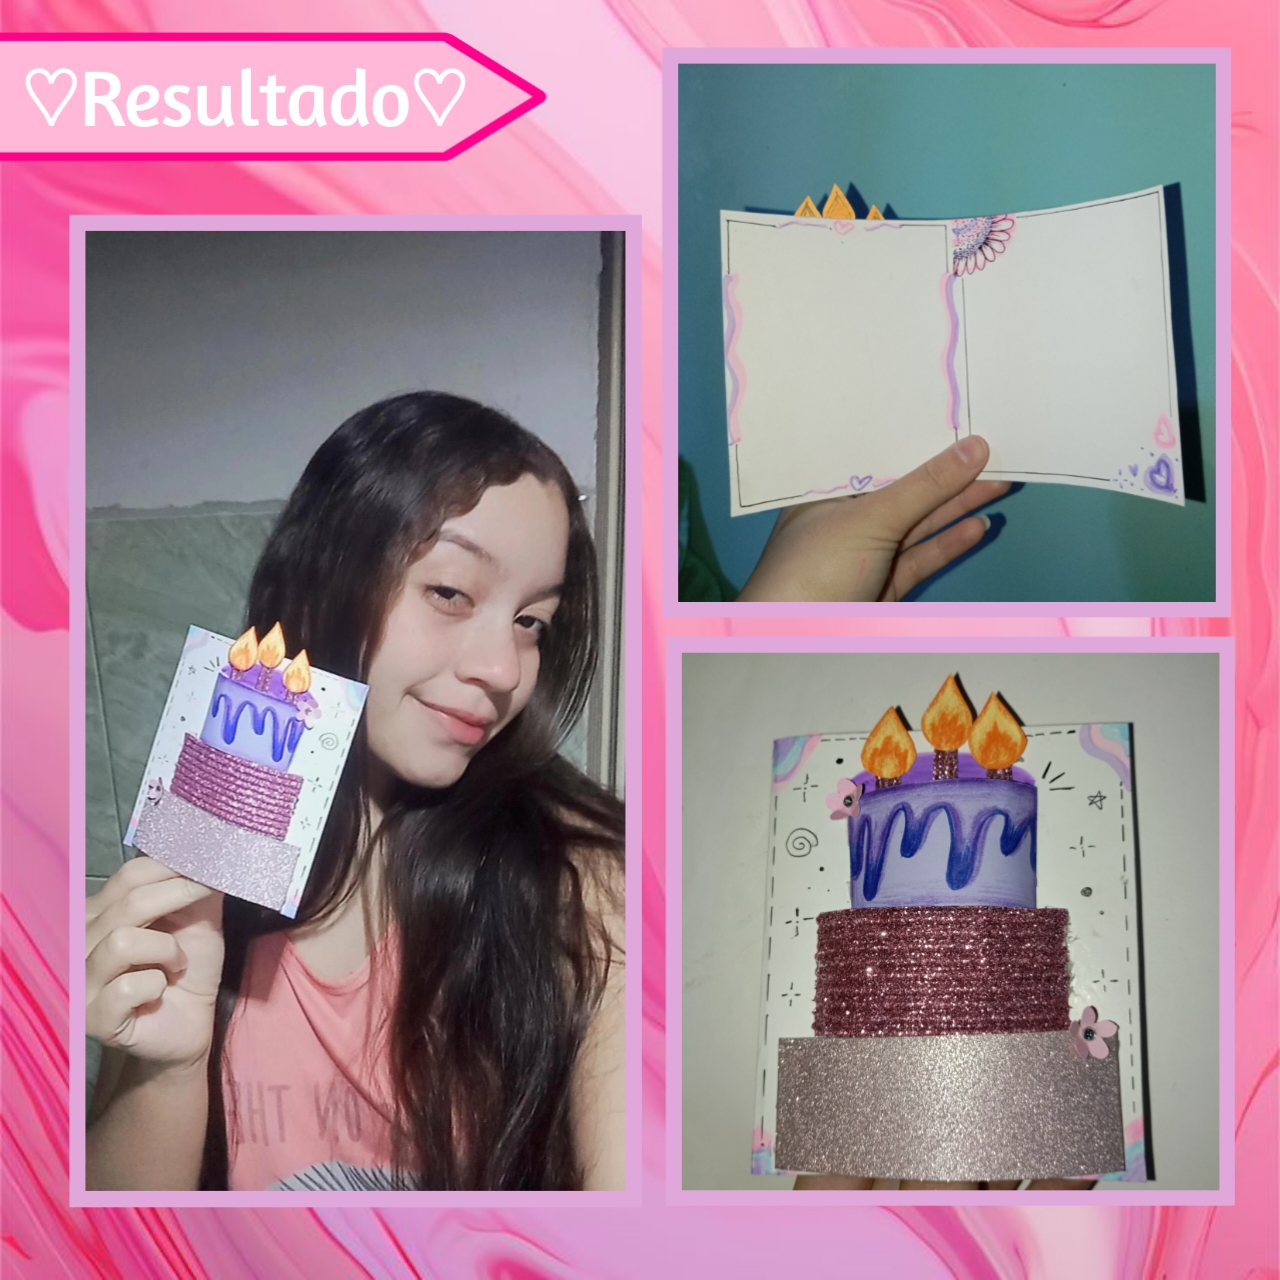
Así terminamos con nuestra tarjeta creativa en 3D, que podemos obsequiar con mucho amor a los cumpleañeros especiales que más queremos. Está idea es bastante original y práctica, ya que podemos personalizarla a nuestro gusto totalmente, desde el color, hasta el tamaño e incluso la decoración, les comparto esta idea con mucho cariño.🌷✨
This way we end up with our creative 3D card, which we can give with love to the special birthday boys and girls we love the most. This idea is quite original and practical, since we can customize it to our taste completely, from the color, to the size and even the decoration, I share this idea with much affection.🌷
Así, llegamos al final de la manualidad de hoy, es un DIY sencillo para crear sin límites hermosas tarjetas creativas, espero les haya gustado, que comenten y compartan, aprecio que hayan llegado hasta aquí, un abrazo grande y ¡Hasta la próximo DIY.✨🩷
So, we come to the end of today's craft, it is a simple DIY to create without limits beautiful creative cards, I hope you liked it, that you comment and share, I appreciate that you have come this far, a big hug and See you next DIY.✨🩷
🩷🌷¡Gracias por leer, mi gente creativa!🌷🩷
🩷🌷Thanks for reading, my creative people!🌷🩷
Photos of my authorship taken from my Xiaomi Redmi 13C phone, edited in the free version of PixeLab and Canva.
✨❤️
Hola amiga, esta muy bonita esa tarjeta, donde me gusto la manera como fuiste diseñando y de esa manera lograr un gran resultado, además esa torta en la parte de afuera está muy bonita y le da un toque especial a la misma y permite que sea muy llamativa. Excelente esta manualidad y con pocas cosas salió lago de maravilla. Gracias por compartirlo con nosotros.
¡Holaaa! Amigo, me gusta mucho la manera en la que apareciste cada detalle, agradezco tu apreciación, saludos.✨💙
Que hermosa tarjeta, el efecto 3D del pastel le dio un toque unico y diferente, ahora tengo ganas de comer pastel jaja
Bonita manualidad 😘
Siii, verdaderamente es una idea diferente que da un toque especial y el pastel siempre es bien recibido muy bueno JAJAJA.
Gracias un abrazo.❤️