Hello, hello! My beautiful people of Hive Diy, I am here as usual, in order to bring you a nice craft, so before I want to wish you an excellent day, as I usually say, full of good things and blessings to the fullest, hoping it will be a nice and blessed day, full of happiness and creative crafts, as well as wonderful in the community.♡
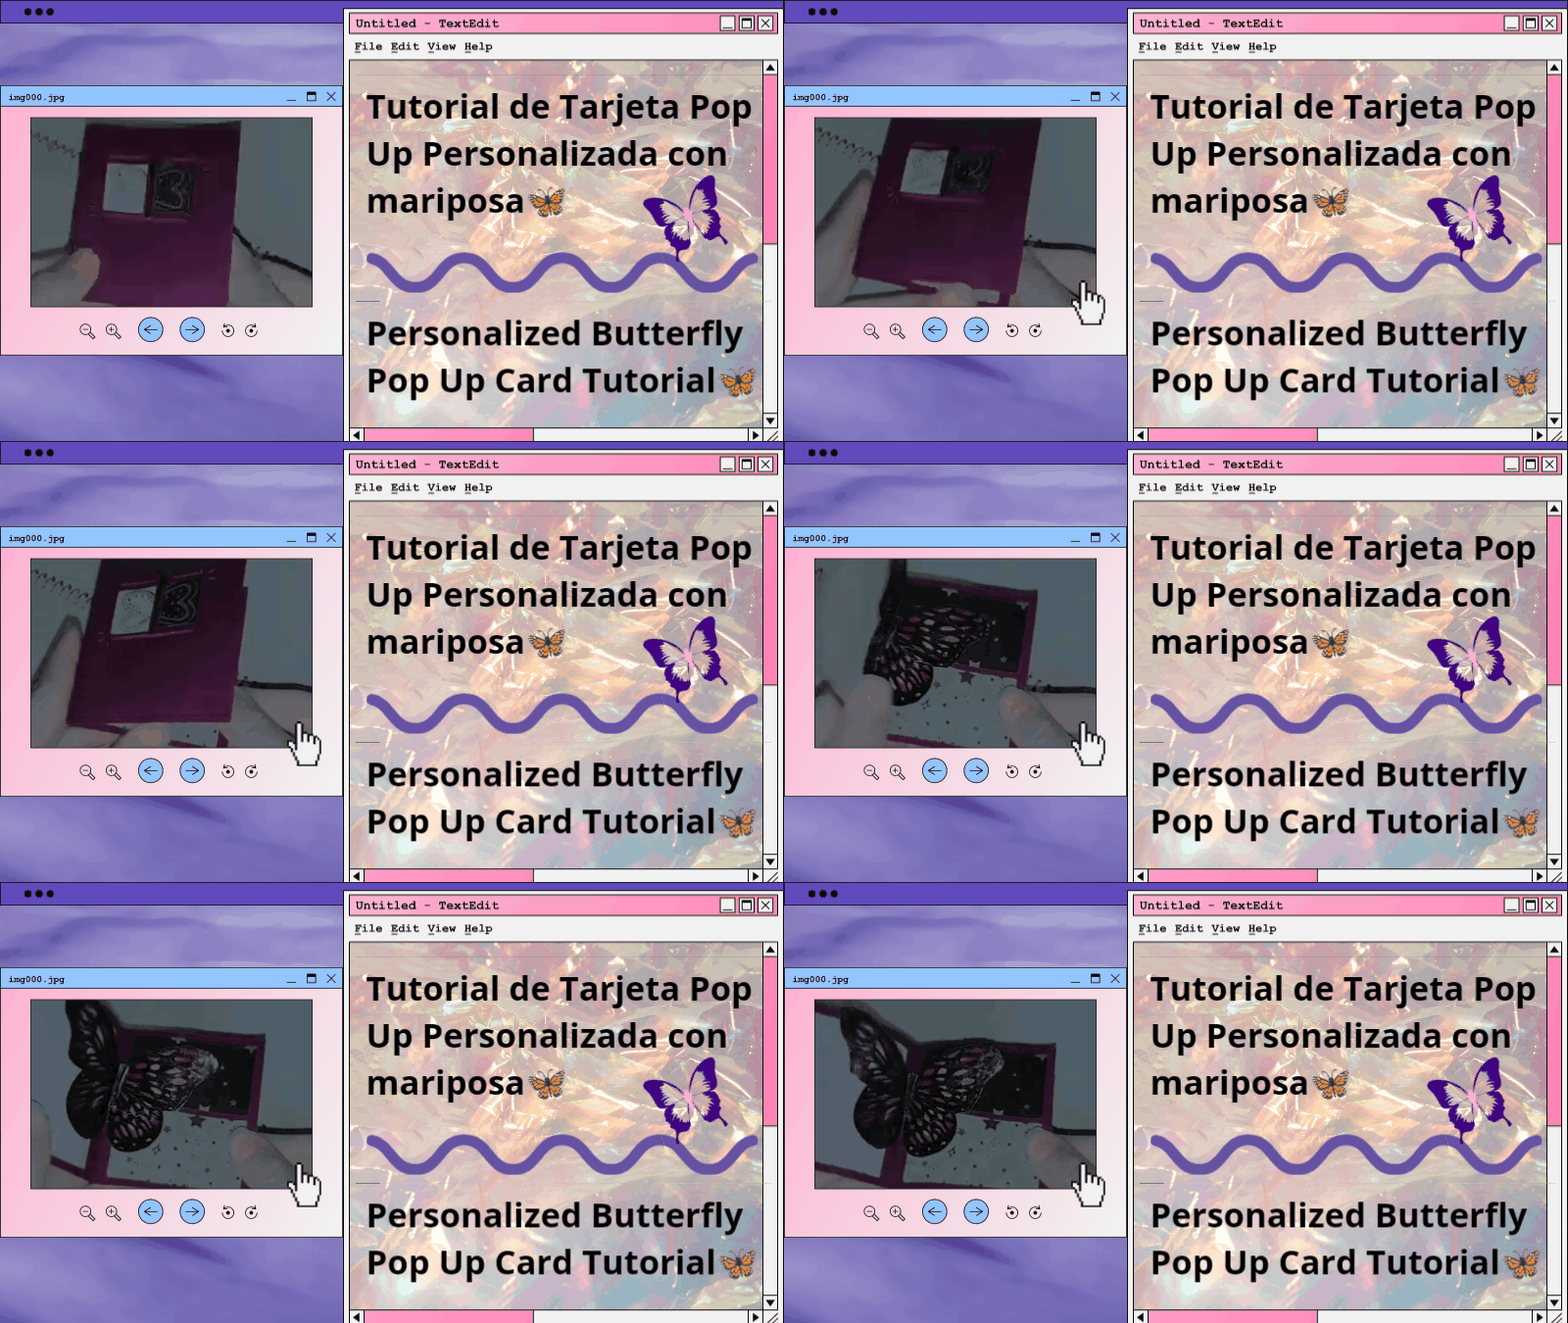
Ahora bien, últimamente estoy obsesionada con hacer el tipo de tarjetas que al abrir traen una sorpresa, estás llamadas "Tarjetas Pop Up", que están perfectas para acompañar algún obsequio especial, de una manera única y diferente, porque cualquiera con esto se lleva una gran sorpresa. Además como ya les he mencionado tantas veces me fascinan las mariposas y me parecen preciosas, así una amiga me enseñó está tarjeta y porsupuesto no dude en lo absoluto de recrearla y mostrarles cómo se hace, así ya les conté de dónde vino mi inspiración y espero que les guste tanto como a mí está pequeña manualidad.
Now, lately I am obsessed with making the kind of cards that when opened bring a surprise, these so-called "Pop Up Cards", which are perfect to accompany a special gift, in a unique and different way, because anyone with this will get a big surprise. Also as I have already mentioned so many times I love butterflies and I find them beautiful, so a friend of mine showed me this card and of course I did not hesitate at all to recreate it and show you how to make it, so I told you where my inspiration came from and I hope you like this little craft as much as I do.
Así que es eso, les daré el paso a paso estructurado para que puedan realizar esta linda tarjeta pop up, que al abrir nos trae una linda y delicada mariposa. Sin más preámbulo voy con los materiales a utilizar.
So that's it, I will give you the structured step by step so you can make this cute pop up card, which when opened brings us a cute and delicate butterfly. Without further ado I'll go with the materials to use.
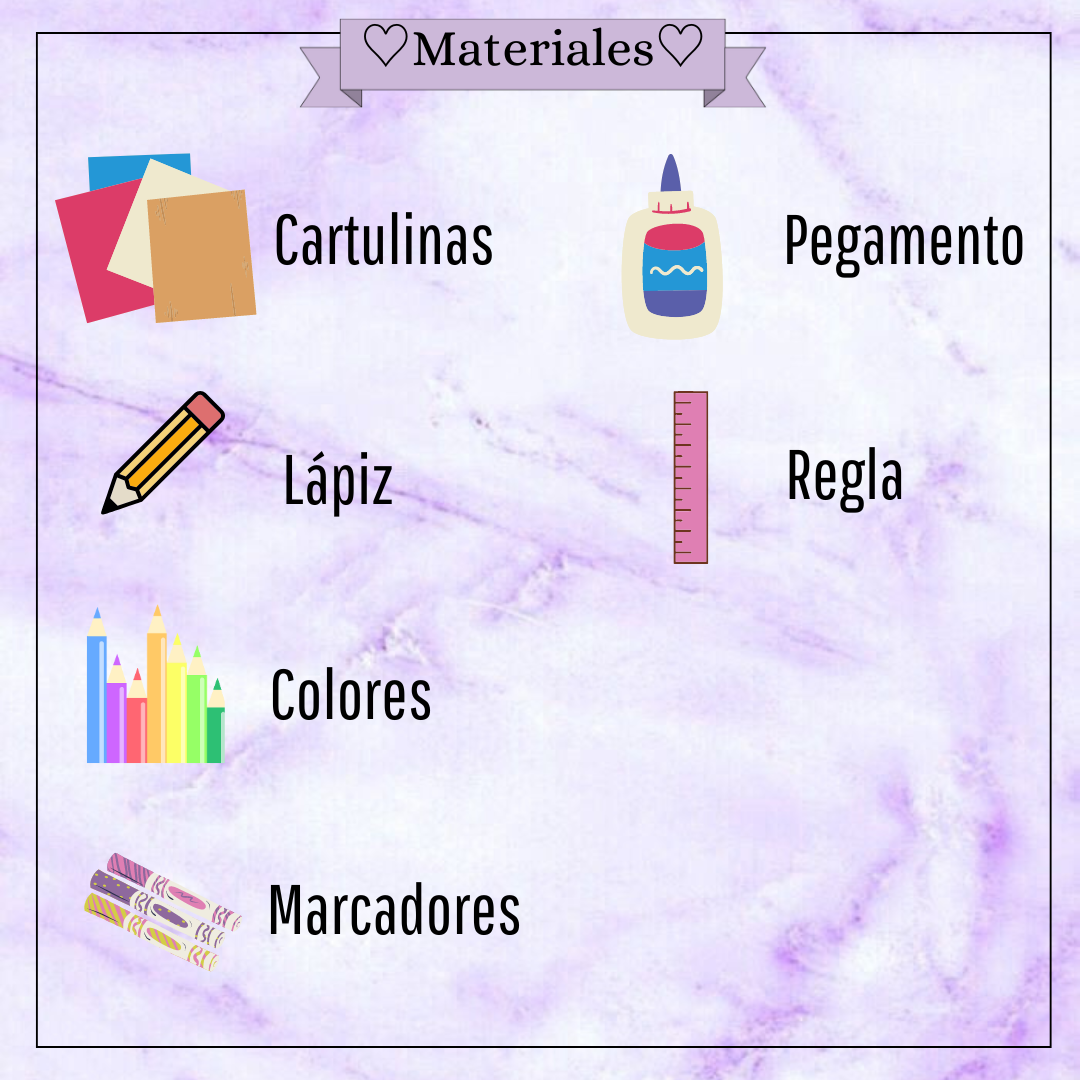
♡Materials♡
- Cartulina
- Colores
- Marcadores
- Lápiz
- Regla
- Pegamento
- Cardboard
- Coloring paper
- markers
- Pencil
- Ruler
- Glue stick
♡Step by Step♡
Paso 1:
Step 1:
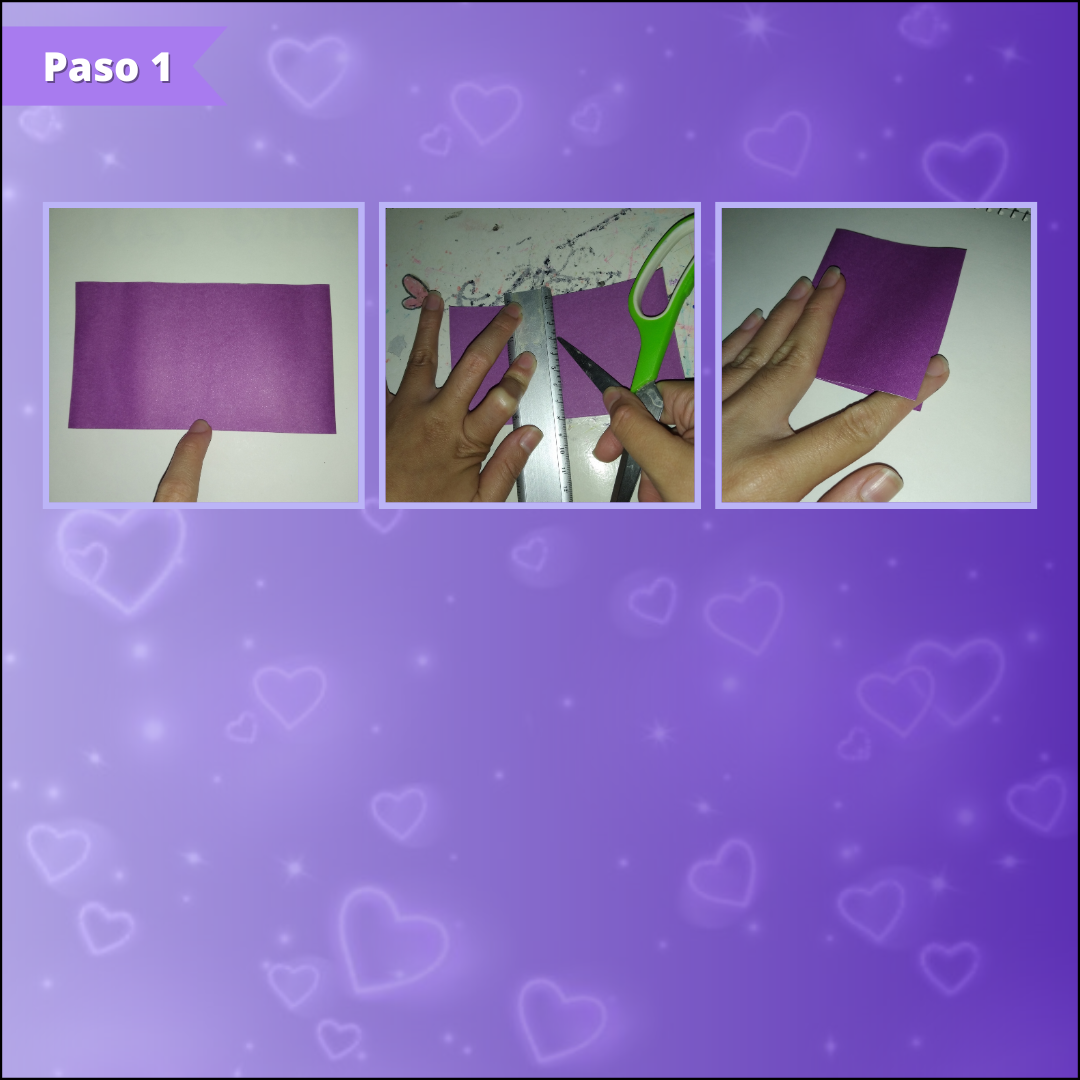
Comenzaremos tomando una cartulina del color de nuestra preferencia y vamos a recortar un rectángulo del tamaño que queramos que sea la tarjeta, yo en este caso use una medida de 14 cm de largo, por 8cm de ancho, así luego con la ayuda de una regla, vamos a marcar con el filo de la tijera una línea recta justo a la mitad y doblaremos.
We will start by taking a cardboard of the color of our preference and we will cut a rectangle of the size we want the card to be, in this case I used a measure of 14 cm long, by 8cm wide, and then with the help of a ruler, we will mark with the edge of the scissors a straight line right in the middle and fold.
Paso 2:
Step 2:
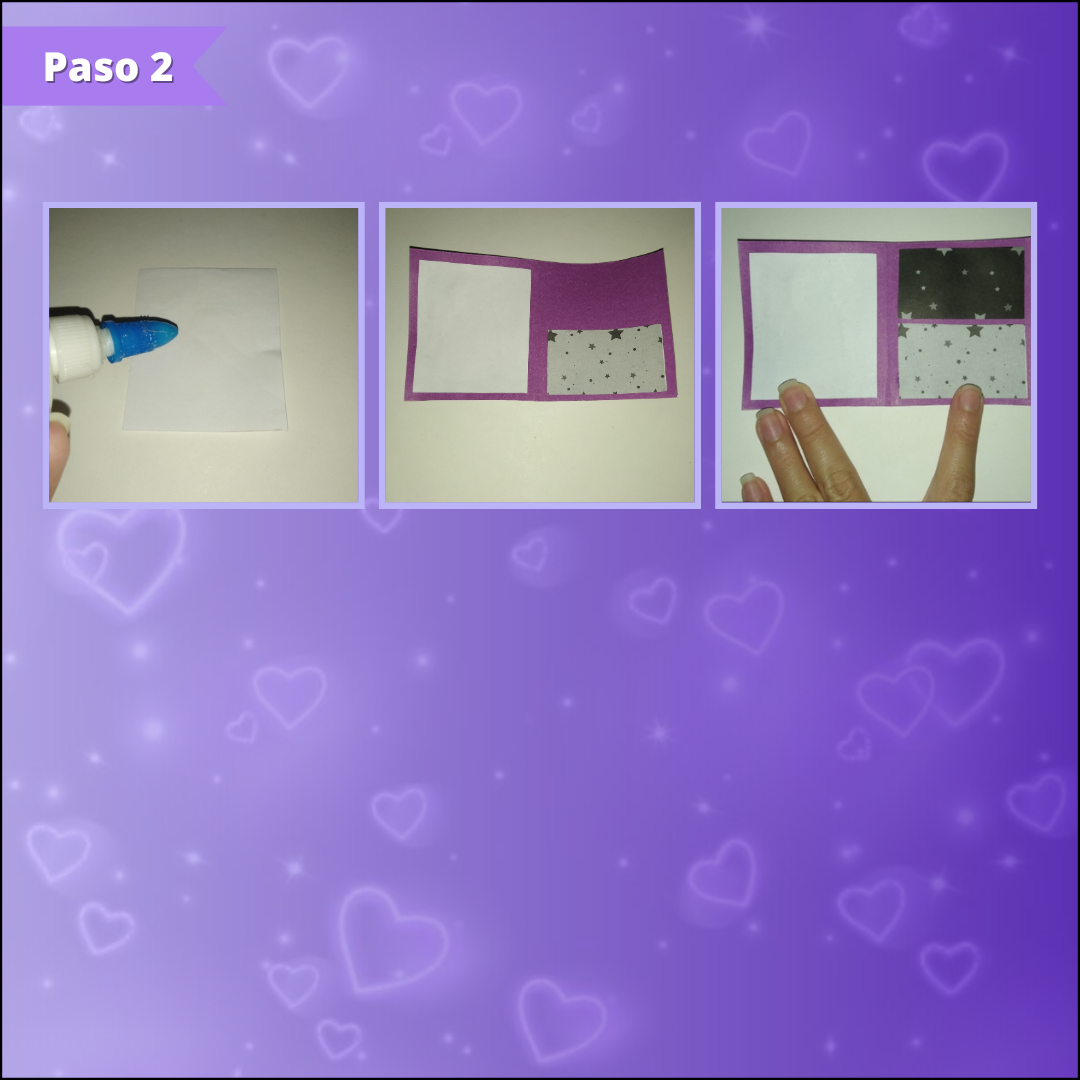
Ahora vamos a proseguir a marcar y recortar dos pequeños rectángulos de cartulina, de 7cm x 6cm un centímetro menos del rectángulo de la tarjeta, uno en una cartulina decorada o negra y el otro en cualquier color de nuestra preferencia para escribir algún mensaje. Después tomaremos pegamento blanco y lo vamos a esparcir en la parte de atrás de cada rectángulo, pegue primero el de color blanco y después la de cartulina decorada, debido a que está decorada la recorte a la mitad y pegue una sobre otra de diferente lado, dejando un pequeño espacio entre estos.
Now we will proceed to mark and cut out two small rectangles of cardboard, 7cm x 6cm, one centimeter less than the rectangle of the card, one in a decorated or black cardboard and the other in any color of our preference to write a message. Then we will take white glue and we will spread it on the back of each rectangle, glue first the white one and then the decorated cardboard, because it is decorated, cut it in half and glue one on top of the other on different sides, leaving a small space between them.
Paso 3:
Step 3:
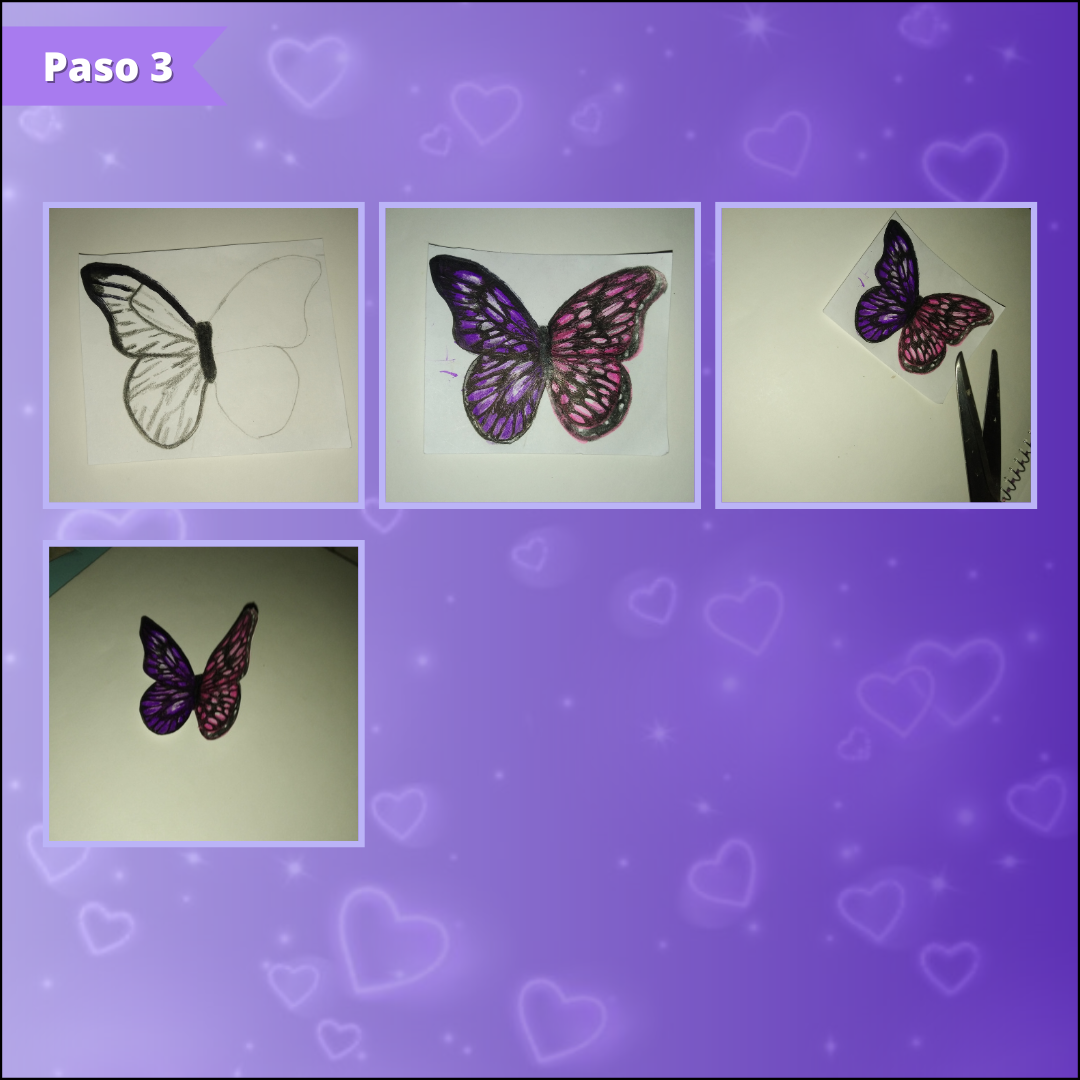
Por otro lado, haremos una mariposa en cartulina blanca de cualquier color que nos guste, dónde seguiremos a marcar la figura de nuestra mariposa con lápiz, para luego remarcar con color negro y colorear a nuestro gusto una mitad de un color y la otra mitad de diferente color, así marque algunas líneas con marcador y el resto lo termine con diferentes colores del mismo color en diferente tono, luego solo culminé de marcar el borde de está con marcador negro agregué detalles con un lapicero, así al final recorte está y le coloque por encima cinta transparente para agregar brillo, al igual que protección.
On the other hand, we will make a butterfly on white cardboard of any color we like, where we will continue to mark the figure of our butterfly with pencil, then highlight with black color and color to our liking one half of a color and the other half of a different color, so mark some lines with marker and the rest I finished with different colors of the same color in different tone, then I just finished marking the edge of it with black marker and added details with a pencil, so at the end I cut it out and put transparent tape on top to add shine, as well as protection.
Paso 4:
Step 4:
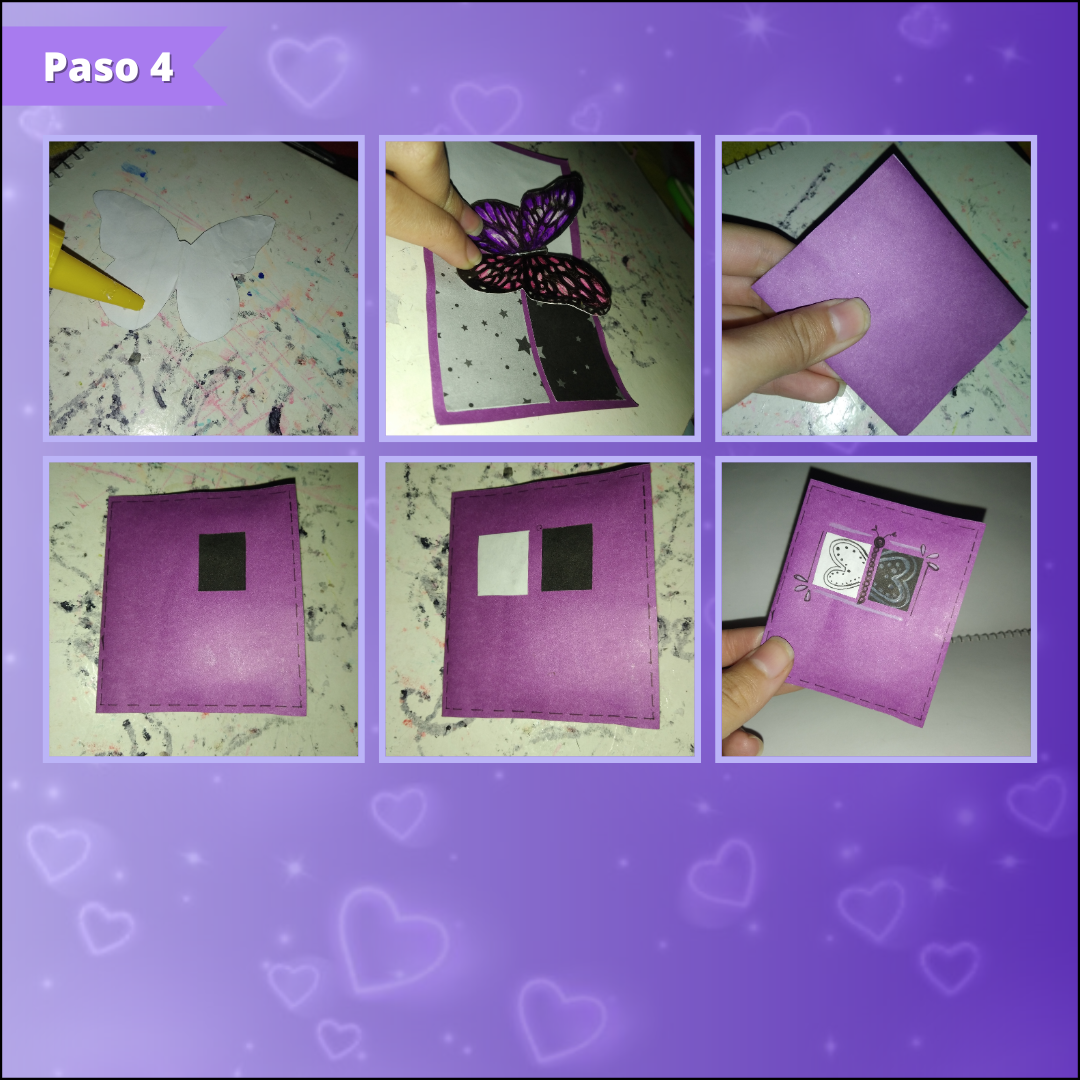
Cómo cuarto y último paso tomé la mariposa, para luego atrás en la parte de abajo de ambas alas colocar silicón frío y así pegar está en la mitad de la tarjeta de manera un poco centrada, más abajo que arriba, está mariposa la pegue de manera que quedará levantada, presioné bien y cerré para añadir presión. Después como decoración de esta hice un borde con lapicero de líneas discontinuas y luego recorte dos pequeños rectángulos, uno en color blanco y otro en negro, así dibuje una mariposa y finalicé.
As fourth and last step I took the butterfly, and then back on the bottom of both wings put cold silicone and glue it in the middle of the card in a slightly centered way, more down than up, I glued this butterfly so that it will be raised, I pressed well and closed to add pressure. Then as a decoration I made a border with a pencil with broken lines and then cut out two small rectangles, one in white and the other in black, so I drew a butterfly and finished.
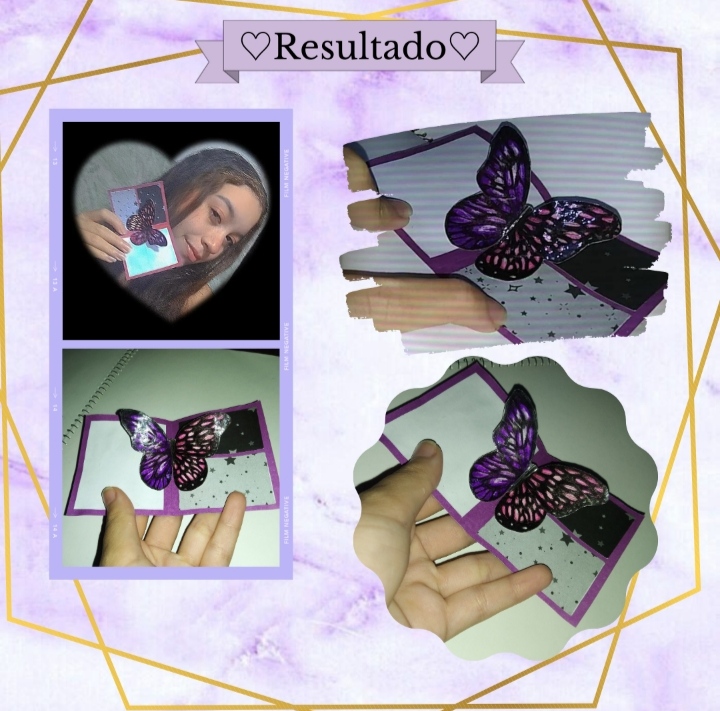
Y así de fácil y rápido tenemos una hermosa tarjeta creativa que al abrir nos muestra una preciosa mariposa un poco elevada, perfecta para sorprender de una forma diferente a nuestras personas especiales, más aún si son amantes de las mariposas, de esta manera hay pequeños espacios para colocar un mensaje especial, corto y preciso. Así que espero que les haya gustado este sencillo tutorial, que hice con mucho cariño y dedicación.
And so easy and quick we have a beautiful creative card that when opened shows us a beautiful butterfly a little high, perfect to surprise in a different way to our special people, even more if they are lovers of butterflies, this way there are small spaces to place a special message, short and precise. So I hope you liked this simple tutorial, which I made with love and dedication.
Muchas gracias por estar una vez más acompañándome en una nueva manualidad, espero que tengan un bonito día y bendecida semana, un abrazo, byee.♡
Thank you very much for being once again joining me in a new craft, I hope you have a nice day and blessed week, a hug, byee.♡
¡Gracias por Leer!♡
Thank you for reading! ♡
Photos of my authorship taken from my Xiaomi Redmi 7 phone, edited in the free version of Canva.
~~~ embed:1644677141513084930 twitter metadata:MTY0NDQxOTQ1NTI5MDYwMTQ5NHx8aHR0cHM6Ly90d2l0dGVyLmNvbS8xNjQ0NDE5NDU1MjkwNjAxNDk0L3N0YXR1cy8xNjQ0Njc3MTQxNTEzMDg0OTMwfA== ~~~
The rewards earned on this comment will go directly to the people( @yolimarag ) sharing the post on Twitter as long as they are registered with @poshtoken. Sign up at https://hiveposh.com.
❤️😍
Te quedo muy hermoso esa tarjeta, me encantan los colores y el resultado 😉
¡Hola! Muchas gracias, me alegra que te haya gustado, un abrazo.✨💙
Esto es tan hermoso, me encanta la mariposa creativa que hizo, Se añade más belleza a la tarjeta.
Debo felicitarte por recrear esta hermosa tarjeta y el tutorial paso a paso, has hecho un gran trabajo. Gracias por compartir @stefania16
Muchas gracias, le da un toque especial. Aprecio mucho su lindo comentario, saludos.✨💜
Te ha quedado muy hermosa amiga, que gran trabajo. Me encanto como te quedo la mariposa😍 Gracias por compartirla💜