Hello dear friends of this beautiful Hive Diy community today I want to tell you what happened to me with my bike, yesterday I went to take my wife to work on the bike after leaving it at work, I was returning home but on the way a small glass opened a hole between the rubber and the guts. From there I came walking because the bike was flat, when I got home I immediately checked the tools necessary to take apart the bike and be able to repair it. I took the opportunity to change the rear rubber for the front rubber to prevent it from flattening again since the rear rubber was very smooth and also to take the opportunity to grease the bearings.
Hola queridos amigos de esta hermosa comunidad Hive Diy hoy les quiero contar lo que me paso con la Bicicleta, el día de ayer fui a llevar a mi esposa para su trabajo en la Bicicleta luego de dejarla en el trabajo, me regreso para la casa pero cuando venía un pequeño vidrio abrió un orificio entre el caucho y la tripa. De hay me vine caminando porque la bicicleta se espicho, llegó a la casa revisó inmediatamente las herramientas necesarias para desarmar la Bicicleta y poder hacer la reparación de la misma. Aproveche para cambiar el caucho trasero por el caucho de alante para evitar que se vuelva a espichar ya que el caucho de atrás estaba muy liso y también aprovechar para el engrasado de las rolineras.
Tools used in bicycle repair:
1). 9/16 millimeter wrench
2). 3/8 millimeter wrench
3). 5/8 millimeter wrench
4). Adjustable wrench
5). Locking pliers
6). Flathead screwdriver
7). Knife
8). Air pump
9). Patches
10). Glue
11). Grease
12). Rustic stone
Herramientas utilizadas en la reparación de la Bicicleta:
1). Llave milimétrica 9/16
2). Llave milimetrica 3/8
3). Llave milimetrica 5/8
4). Llave ajustable
5). Alicate de presión
6). Destornillador de pala
7). Cuchillo
8). Bomba de aire
9). Parchos
10). Pega
11). Grasa
12). Piedra rustica
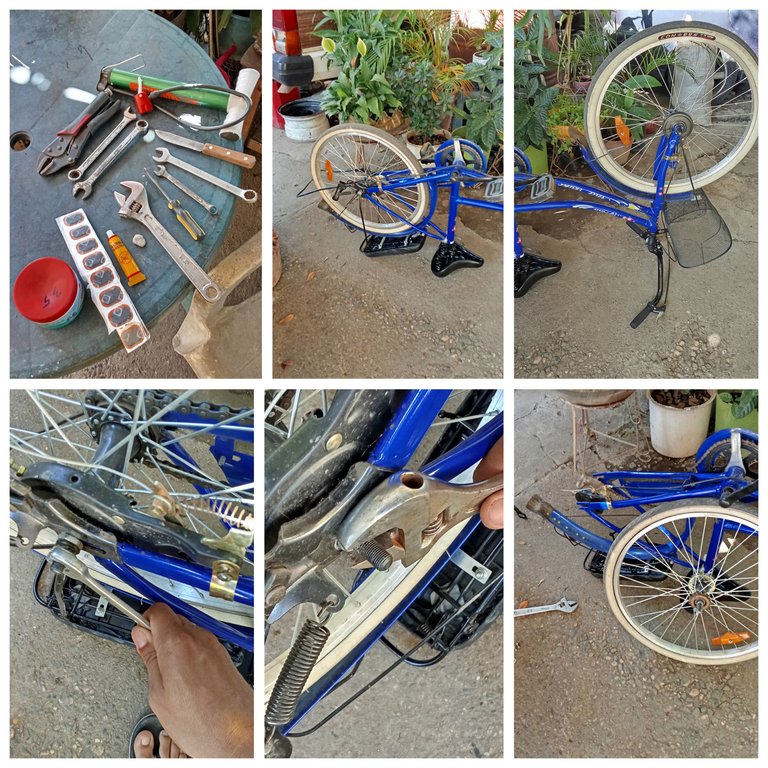
Well, to begin the repair of the bicycle, I put it upside down to disassemble the rear rubber that was affected by the glass. There I used the 9/16 millimeter wrench to remove the two nuts that it has in the back, I used the adjustable wrench to loosen two more that it has additionally, I loosened the chain to remove the rim and rubber.
Bueno para empezar la reparación de la Bicicleta la puse boca abajo para desarmar el caucho de atras que era el afectado por el vidrio hay utilice la llave milimetrica 9/16 para sacar las dos tuercas que lleva atrás, utilice la llave ajustable para aflojar otras dos más que lleva adicional afloje la cadena para sacar rin y caucho.
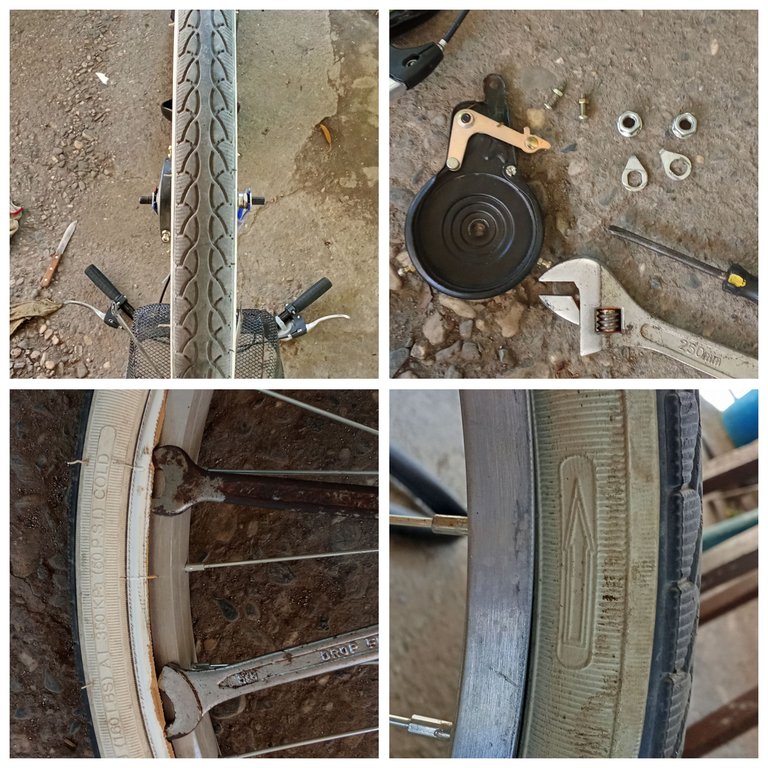
The next step was to check the front tire to see if it was in good condition so I could move the one from the back to the front, then I took apart the front tire using the 9/16 wrench to remove the two nuts it has, with the flathead screwdriver I took out the brake bands which have two screws and nuts. I began to remove the tires with the 9/16.5/8 wrench very carefully because the rims are made of aluminum and can bend, in order to change the tire I looked at the date so that it would not be badly mounted since I had to do the change because the rear tire was very smooth due to the use it had been given for 7 months, since the rear rubber suffers more than the front one.
Lo siguiente fue revisar el caucho de alante para visualizar que esta en buen estado para pasar el de atrás para adelante, luego desarme el caucho de alante utilizado la llave 9/16 para sacar las dos tuerca que lleva, con el destornillador de pala saque las bandas de frenos lleva dos tornillos con tuercas. Empecé a extraer los cauchos con la llave 9/16,5/8 con mucho cuidado porque los rines son de aluminio y se pueden doblar, para poder hacer el cambio de caucho me fije en la fecha para que no quede mal montado ya que tenia que hacer el cambio porque el caucho de atrás estaba muy liso por el uso que se le había dado durante 7 meses, ya que el caucho de atras sufre más que el de alante.
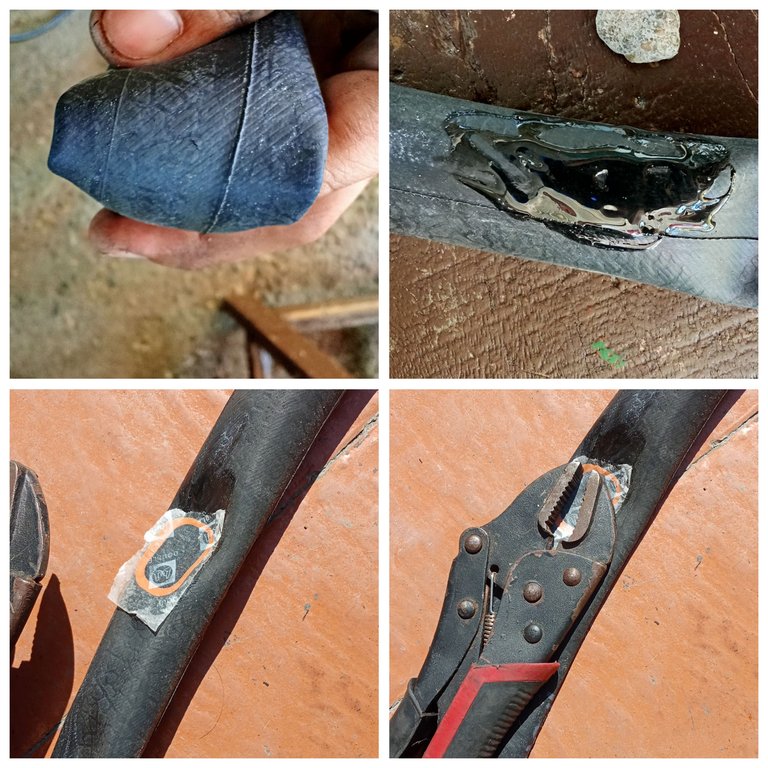
Well, once the rubber was removed, I proceeded to repair the casing, since it had suffered damage from the glass, which was a small hole. First, I scraped the casing where the hole was with a rough stone to add the glue. After adding the glue, I waited 5 minutes for it to dry a little and then applied the patch. Once this was done, I used the pressure pliers to apply weight to the casing so that the patch would stick well.
Bueno una vez extraído los caucho procedi a la reparación de la tripa ya que había sufrido un daño con el vidrio lo cual era un pequeño orificio, raspé primero la tripa donde estaba el orificio con una piedra rustica para añadir la pega, luego de añadir la pega espere 5 minutos para que secara un poco para luego poner el parcho, una vez hecho esto utilice el alicate de presión para hacer peso en la tripa para que el parcho quedara bien pegado.
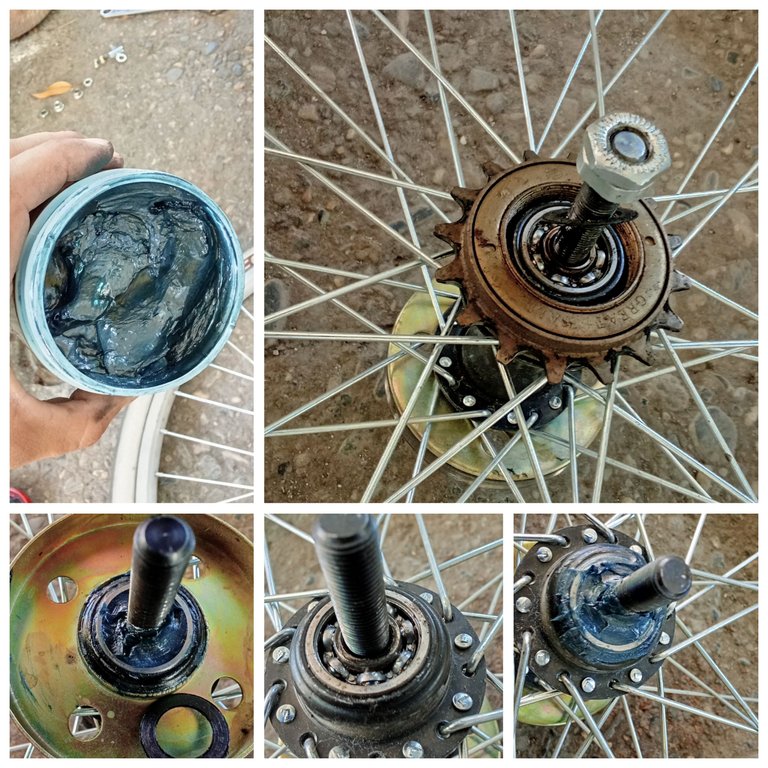
The next step was to view the bearings to grease there I used the knife to remove the safety rubber to proceed with the lubrication, I did the entire lubrication procedure since the bearings were very dry that makes the bearings wear out faster and with the lubrication process the bearings are lubricated so that they last a little longer.
El siguiente paso fue visualizar las rolineras para engrasar allí utilice el cuchillo para sacar la goma de seguridad para proceder con el engrase, hice todo el procedimiento de engrase ya que las rolineras estaban muy secas eso hace que las rolineras se desgasten más rápido y con el proceso de engrase se lubrican las rolineras para que duren un poco más.
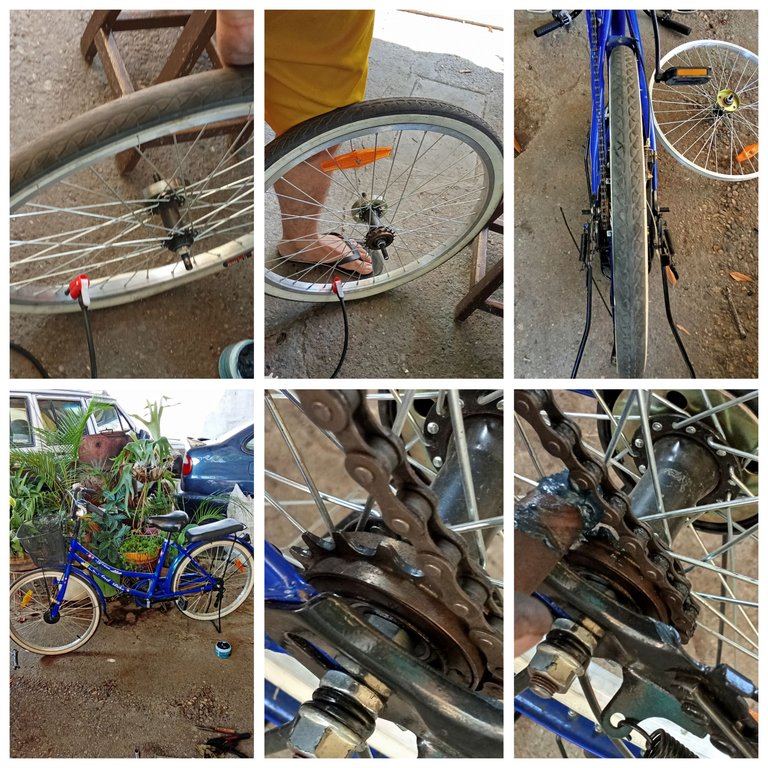
Almost finished I proceeded to assemble the rubber and casing to fill with the air pump, to test that the casing I repaired would not be leaking air. As you can see, I put the front rubber for the back and the other for the front, once this was done I got to work to assemble everything completely, I put the back rubber first to adjust the chain, so that it would not be so hard there I used the 3/8 millimeter wrench, then I started to grease the chain because it had been a long time since I had greased it to do a single job and so it would be ready for that other day since it is our means of transport for that reason we have to keep the Bike up to date.
Finally I want to thank God for the knowledge to do things ourselves, thanks to this beautiful Hive Diy community for the support a big hug to everyone.
Ya casi terminando procedí a montar caucho y tripa para llenar con la bomba de aire, probar que la tripa que repare no quedará votando aire. Hay como pueden observar puse el caucho de alante para la parte de atrás y el otro para la parte de alante, una vez hecho esto me puse manos a la obra para armar todo completo, puse el caucho de atras primero para graduar la cadena, para que no me quedara tan dura hay utilice la llave milimetrica 3/8, luego me puse a engrasar la cadena porque tenía mucho tiempo que no la engrasaba para hacer un solo trabajo y asi quedara lista para ese otro dia ya que es nuestro medio de transporte por esa razón hay que tener la Bicicleta al dia.
Ya para terminar Quiero darle las gracias a Dios por el conocimiento para hacer las cosas nosotros mismo, gracias a esta hermosa comunidad Hive Diy por el apoyo un fuerte abrazo para todos.
Author: @Tecrreiro
Phone Used: Redmi A3
App Used for Collages: Photo Collage-GridArt
Translator Used: Google
Autor: @Tecrreiro
Teléfono Utilizado: Redmi A3
Aplicación utilizada para los collage: Foto collage-GridArt
Traductor Utilizado: Google
nice to see your fix your bike by yoursel. A really helpful post. Thank you for sharing.
Gracias por la oportunidad me siento muy contento de formar parte de esta comunidad.
A mí los ponches me preocupan mucho porque cada vez que desarmo la bici por un pinchazo termino encontrando más de un problema y se me complica el día.
Buenas tarde hermano tranquilo solo hay que tener paciencia y veras que lo puedes hacer tú mismo, Gracias por el apoyo saludos.
Hola corazon, bienvenido, te dejo la actualización de las reglas de la comunidad, son excelentes tips para mejorar la presentación de nuestros proyectos y tener mayor alcance en curación.
https://peakd.com/hive-130560/@hive-130560/actualizacion-de-nuestras-reglas-en-la-comunidad-updating-our-community-rules-espeng
Me encantó tu DIY es uno de los temas en preferidos en Hive DIY. Recuerda visitar el enlace y hacer comunidad con los miembros que publican en ella.