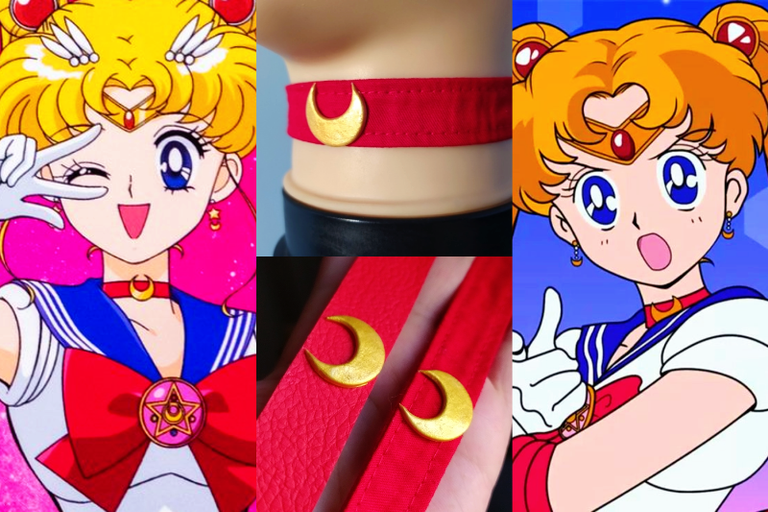
✦ You don't have to be an expert Craftsman to have amazing results with this easy and fun manual - Collage and Editing made with FotoJet, photos by @Tesmoforia / / / Art Source 1 - 2 ✦

🇪🇸 ~ Cuando se trata de tutoriales "diy" ofrecer distintas opciones de métodos, diseños y materiales es muy importante, ¿por qué motivos?:
Todos tenemos diferentes habilidades manuales desde el amateur al experto.
Es muy bonito ayudar a otros a recrear su visión personal sobre lo que les gustaria lograr, si expresamos nuestro conocimiento como guía y sugerencia en lugar de un manual estricto; podríamos ayudar a que la experiencia de los demás sea más enriquecedora.
🇺🇸 ~ When it comes to "diy" tutorials offering different choices of methods, designs and materials is very important, for what reasons?:
- We all have different manual skills from amateur to expert.
- It is very nice to help others to recreate their personal vision of what they would like to achieve, if we express our knowledge as guidance and suggestion instead of a strict manual; we could help others' experience to be more enriching.

 |  |  |
|---|

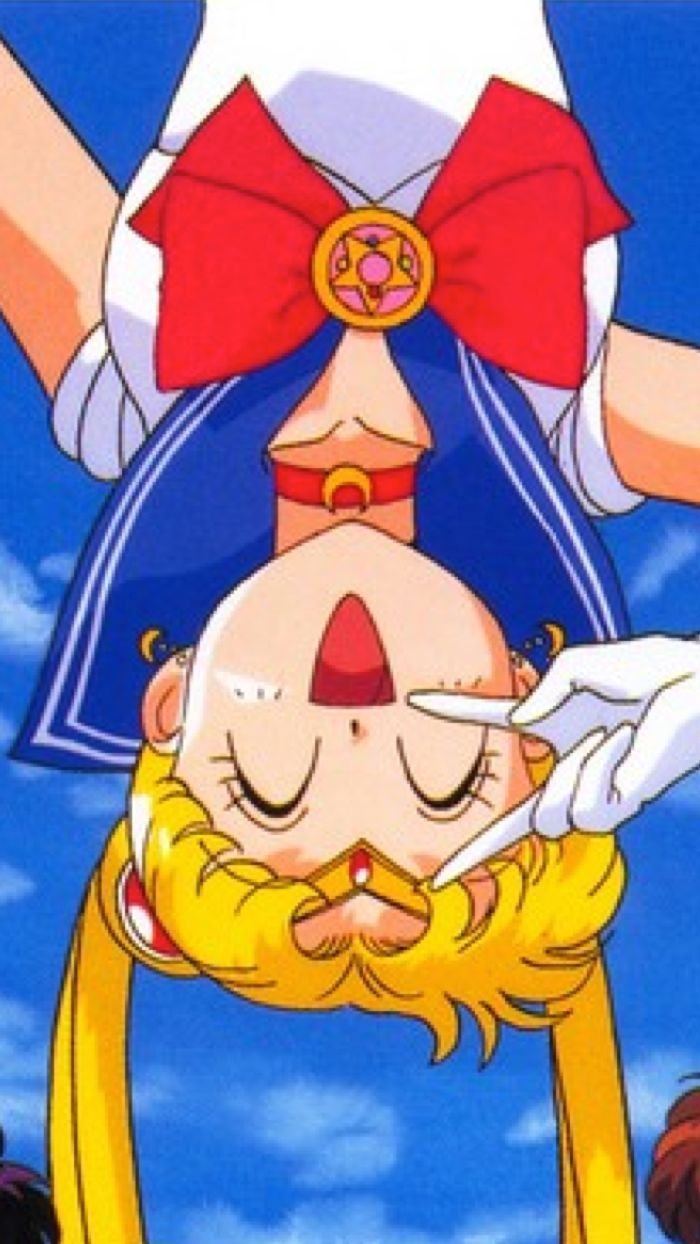
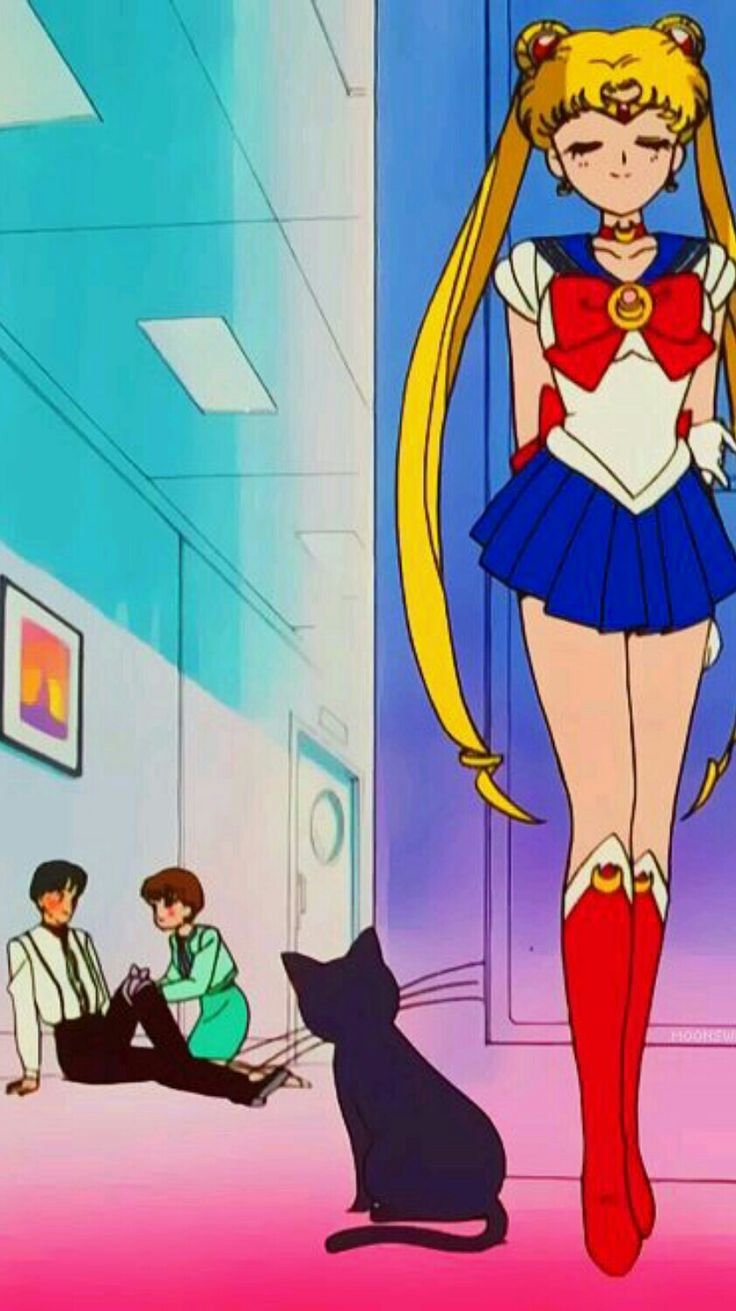
¡Las referencias!, ¿qué referencias necesitas para este proyecto?: "Bishoujo Senshi Sailor Moon" es una obra extensa que cuenta con muchas ilustraciones oficiales, y especialmente en el caso de los accesorios encontraras cambios en cada arco y temporada de su manga y adaptaciones al anime. Siendo asi, escoge la versión que más te guste y toma ejemplos desde diferentes angulos y perspectivas.
The references! What references do you need for this project?: "Bishoujo Senshi Sailor Moon" is an extensive work with many official illustrations, and especially in the case of accessories you will find changes in each arc and season of her manga and anime adaptations. So, choose the version you like the most and take examples from different angles and perspectives.

 |  |  |
|---|---|---|
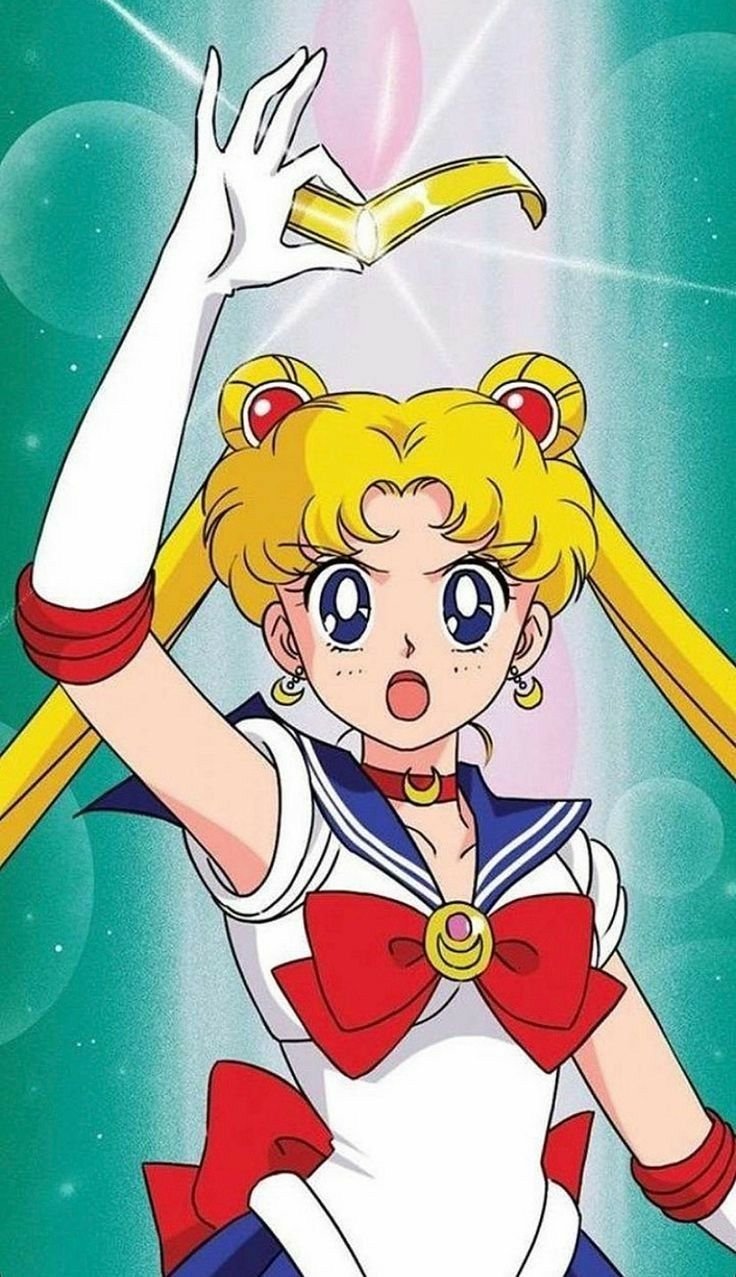 | 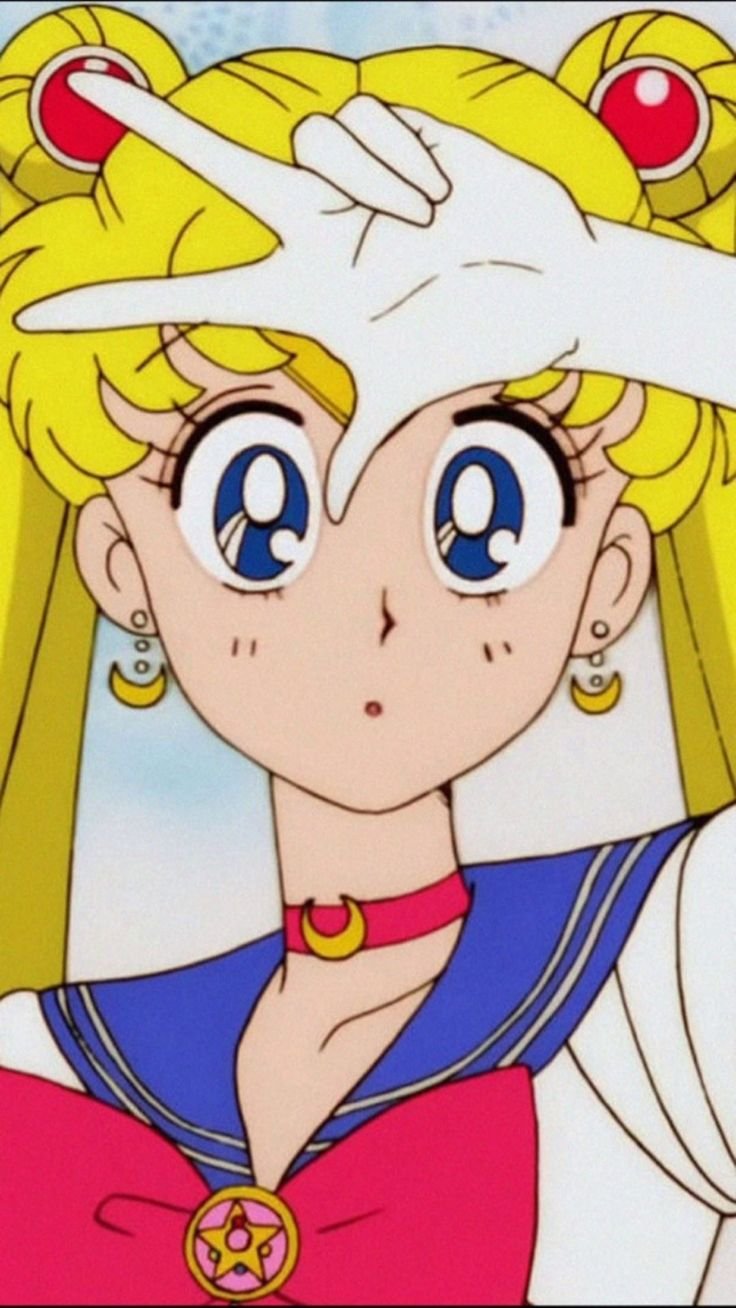 | 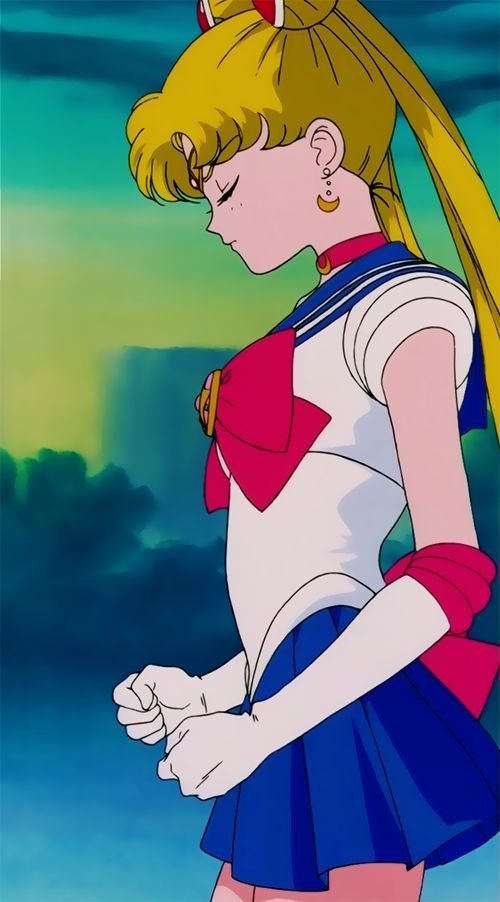 |

Para este proyecto he elegido el collar de la primera temporada de la adaptación al anime de 1992, que por su diseño no será dificil de recrear pero a la vez luce elegante y encantador: ¡He aquí una propuesta doble!, ¡dos maneras diferentes de fabricarlo, con dos opciones de material distintos!, ¿ready? 🧵 🎨 👏
For this project I have chosen the necklace from the first season of the 1992 anime adaptation, which by design will not be difficult to recreate but at the same time looks elegant and charming: Here's a double proposal, two different ways to make it, with two different material options, ready? 🧵 🎨 👏

✦ The brand of materials is indifferent, work with what you can get and don't worry too much ✦

✦ The shade of red of the synthetic leather and the fabric is entirely to personal taste ✦

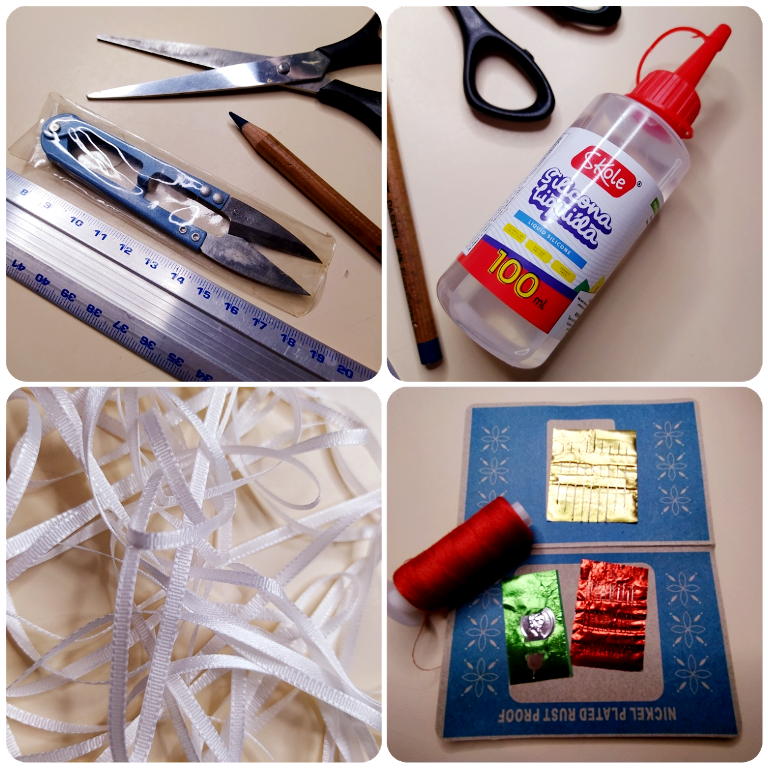
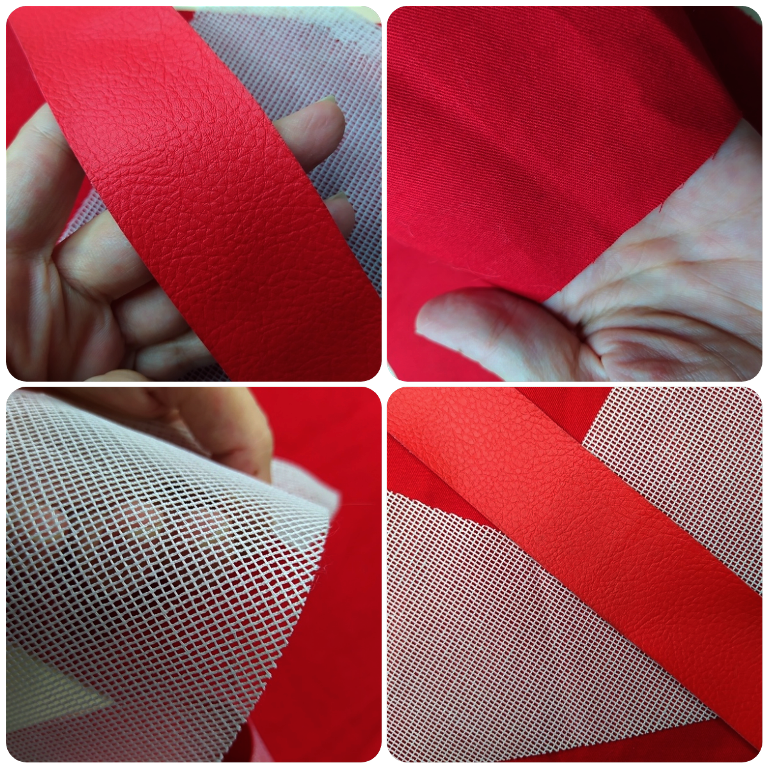
📝 Herramientas y Materiales para elaborar este proyecto: Tela color rojo, cuerina sintética color rojo, hilo color rojo, silicón frio, regla escolar, lápiz, marcador fino, tijeras de tela, tijeras escolares, cintas de encaje o cintas de seda de tu preferencia, pinzas de bisutería pequeñas, masa flexible o porcelana fría, rodillo pequeño, máquina de coser (opcional), encendedor de mano, 2 terminal de apriete, tul (opcional), pintura acrílica color dorado, cortadores pequeños de fondant, plancha para ropa y una esponja o pedazo pequeño de goma espuma.
📝 The tools and materials to make this project are: Red colored fabric, red colored synthetic leather, red colored thread, cold silicone, school ruler, pencil, fine marker, fabric scissors, school scissors, lace ribbons or silk ribbons of your choice, small jewelry clips, flexible dough or cold porcelain, small rolling pin, sewing machine (optional), cigarette lighter, 2 squeezing terminals, tulle (optional), gold colored acrylic paint, small fondant cutters, clothes iron and a sponge or small piece of foam rubber.

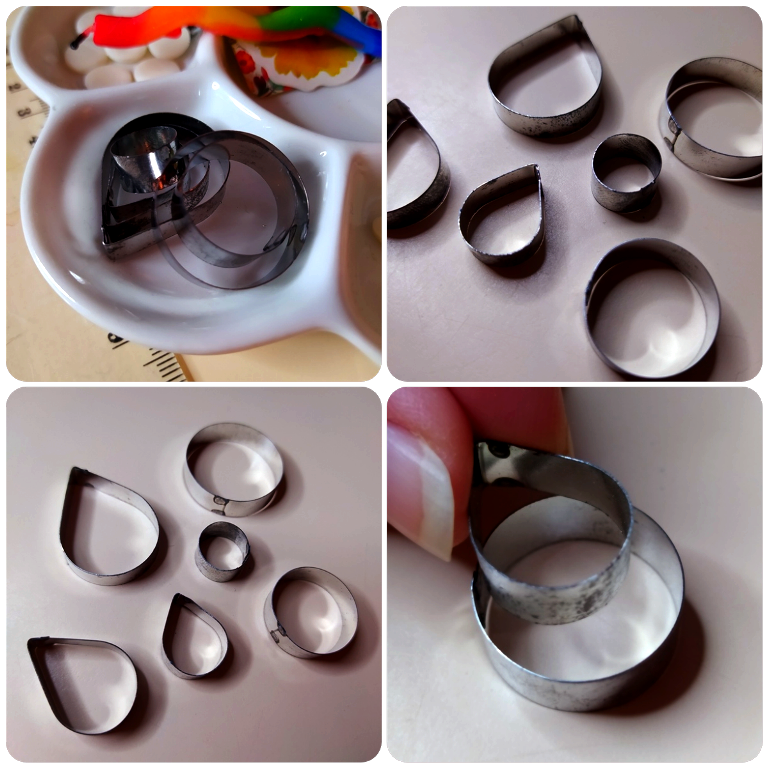
✦ You can get these molds at craft or baking stores. They must be clean and dry at the time of use ✦

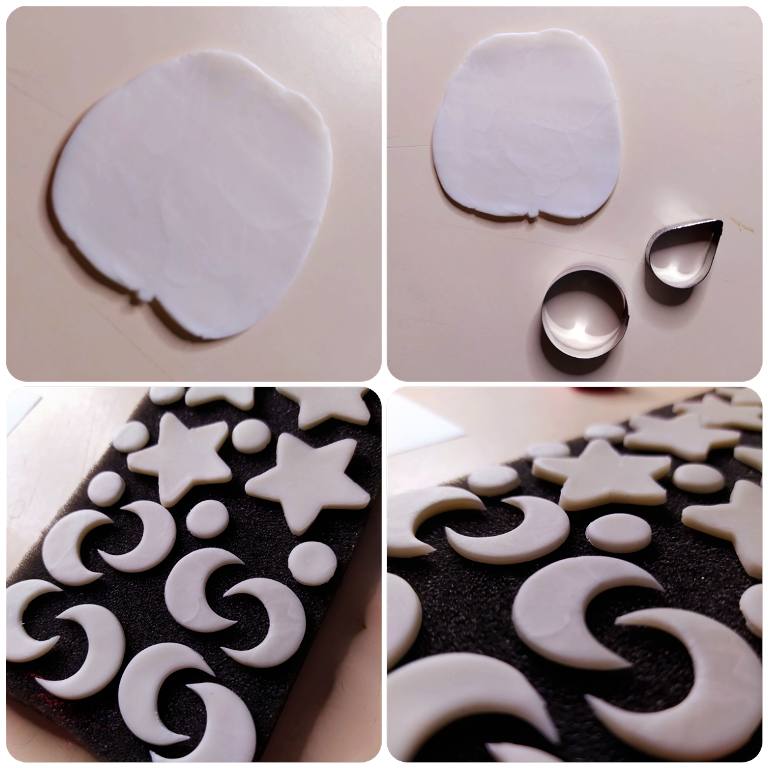
✦ You can also get cold porcelain in yellow or gold color! It exists in the market and the cost is almost the same, but I prefer to buy white and paint it. You can also color the white porcelain with colored chalk powder ✦

✦ PASO 1 ✦ La primera etapa de este proyecto comienza con la elaboración de las lunas. Para eso vas a tomar una pequeña porción de porcelana fría o masa flexible, y la aplanaras con el rodillo en una superficie plana y previamente higienizada. Utilizaras los moldes redondos para cortar primero un par de círculos, y luego otro molde de forma redonda o con forma de gota mas pequeño, para cortar justo en la mitad del círculo y asi obtener la forma de luna. Retira el exceso de material y deja secar durante 48 horas sobre una esponja o pieza de goma espuma.
✦ STEP 1 ✦ The first stage of this project begins with the elaboration of the moons. To do this you will take a small portion of cold porcelain or flexible dough, and flatten it with a rolling pin on a flat and previously sanitized surface. You will use the round molds to cut first a couple of circles, and then another smaller round or drop-shaped mold, to cut right in the middle of the circle to obtain the moon shape. Remove the excess material and let it dry for 48 hours on a sponge or piece of foam rubber.

✦ Leave to dry away from the window in a place that is neither too hot nor too cold ✦

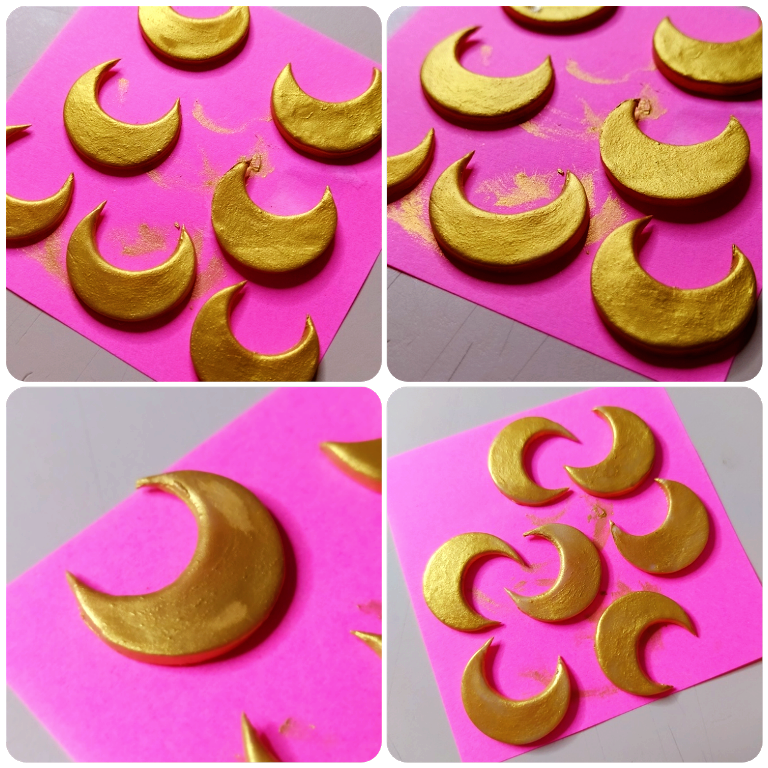
✦ PASO 2 ✦ ¿Por qué esperar 48 horas?, es necesaria que las piezas estén completamente secas para evitar que se desfiguren o que cuartee la pintura. Una vez transcurridas las 48 horas, pinta con dos capas ligeras de pintura acrílica color dorado y deja secar por 3 horas. Luego sella con un poco de silicona fría y deja reposar para continuar el proceso con las siguientes partes.
✦ STEP 2 ✦ Why wait 48 hours, the pieces need to be completely dry to avoid marring or cracking of the paint. After 48 hours, paint with two light coats of gold acrylic paint and let dry for 3 hours. Then seal with a little cold silicone and let stand to continue the process with the following parts.

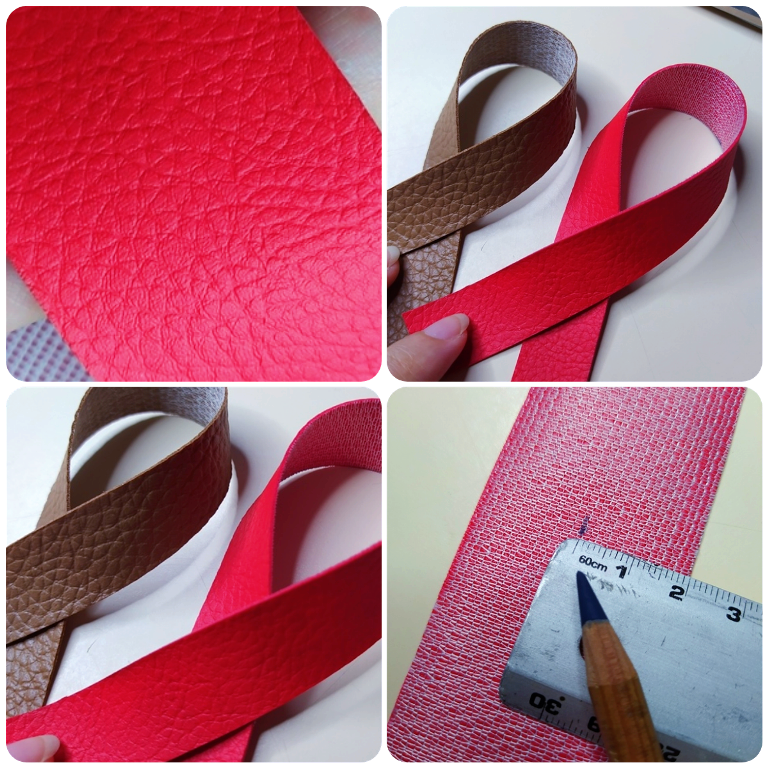
✦ The measurements described below are suggestions, you can first measure the contour of your neck with a measuring tape and be guided by that size for a more personalized result ✦

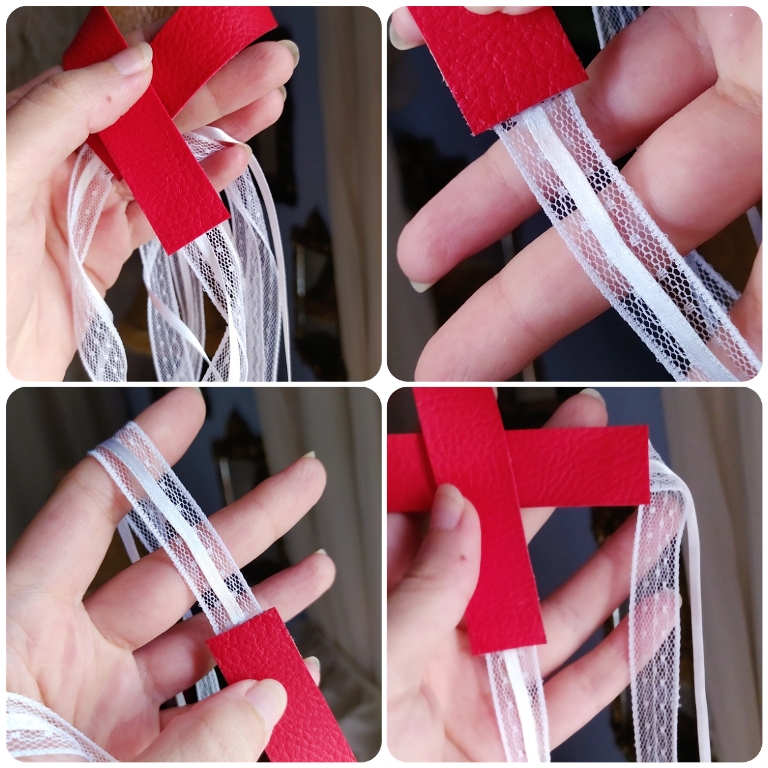
✦ You can place this on a smooth surface and put weight on top of it like a book or an encyclopedia to get a better result, the pressure will prevent air from getting between the glue and the synthetic leather while drying ✦

✦ PASO 3 ✦ VERSIÓN EN CUERO SINTETICO (NO NECESITA COSER) - Para esta primera versión, vas a marcar con ayuda del lápiz y regla, 2 tiras de 2 cm x 28 cm (pueden ser del mismo color o de color diferente la segunda). Procura que los cortes sean lo mas precisos posibles, hazlo con calma. A continuación corta 4 piezas de la cinta de seda o encaje con el largo de tu preferencia y pégalos con silicón frío en los extremos de la pieza de cuerina roja; después, agrega más silicón frio a lo largo del reverso de la segunda pieza de cuerina y únelas. Haz pequeños toques presionando con tus pulgares e índices sobre ambas piezas unidas hasta que sientas que estan completamente adheridas. Deja reposar al menos medio día antes de volver a manipular la pieza.
✦ STEP 3 ✦ SYNTHETIC LEATHER VERSION (NO SEWING NECESSARY) - For this first version, you will mark with a pencil and ruler, 2 strips of 2 cm x 28 cm (they can be of the same color or of a different color for the second one). Make sure the cuts are as precise as possible, do it calmly. Next, cut 4 pieces of the silk or lace ribbon to the length of your choice and glue them with cold silicone on the ends of the red leather piece; then, add more cold silicone along the back of the second piece of leather and join them together. Make small touches by pressing with your thumbs and index fingers on both pieces together until you feel that they are fully adhered. Let repose for at least half a day before handling the piece again.

✦ xxx ✦

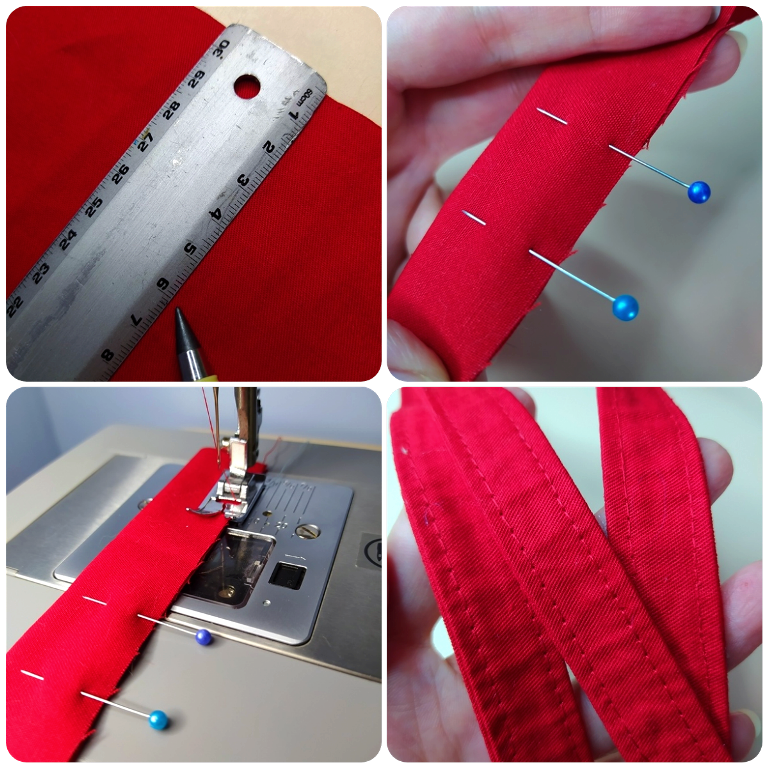
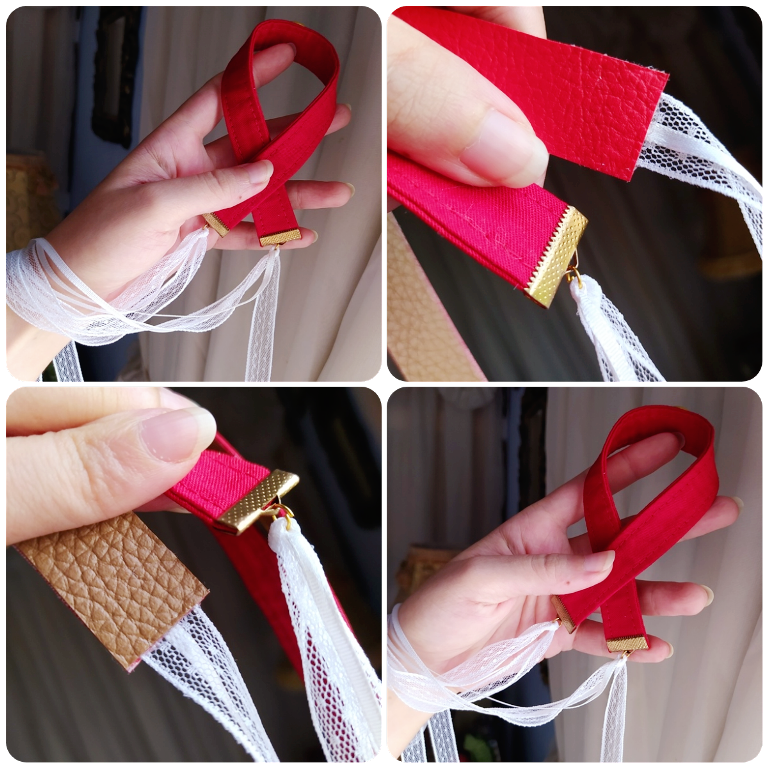
✦ PASO 4 ✦ SEGUNDA VERSIÓN CON TELA (NECESITA COSTURA A MANO O EN MÁQUINA DE COSER) - Para esta segunda versión recortaras un rectángulo de tela de 6 cm de ancho x 28 cm de largo, doblaras por la mitad, sujetaras con alfileres y llevaras a la máquina de coser con una puntada N° 3. Luego voltearas este "tubito de tela", plancharas a temperatura media-alta, y llevaras de nuevo a la máquina de coser para pasar una costura cerca de sus dos bordes horizontales. Si decides coserlo a mano, el proceso es exactamente el mismo.
✦ STEP 4 ✦ SECOND VERSION WITH FABRIC (NEEDS HAND SEWING OR SEWING MACHINE SEWING) - For this second version you will cut a rectangle of fabric 6 cm wide x 28 cm long, fold it in half, pin it and take it to the sewing machine with a stitch N° 3. Then you will turn this "fabric tube" inside out, iron at medium-high temperature, and take it back to the sewing machine to sew a seam near its two horizontal edges. If you decide to sew it by hand, the process is exactly the same.

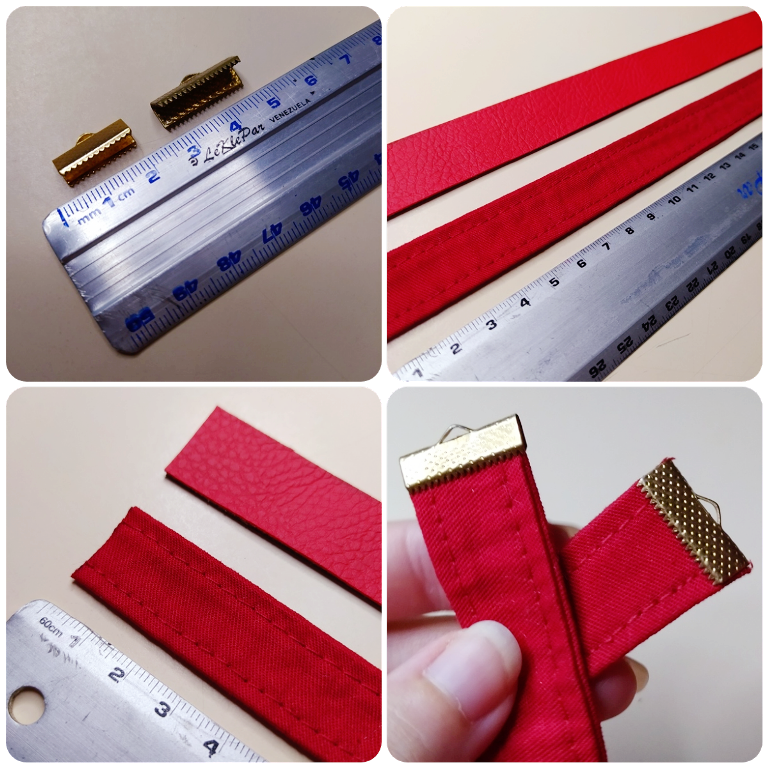
✦ Here you can appreciate the difference in the material finish between one and the other, and also the finishes. As you will notice, the necklace made with fabric needs a solid clasp on its corners ✦

✦ PASO 5 ✦ Para cerrar el collar hecho con tela es momento de fijar con ayuda de las pinzas de bisutería, los dos "terminales de apriete": Básicamente son dos grapas ornamentales con un pequeño pasador al que ajustar directamente las cintas de tu elección o una argolla. ¡Tienen dientes asi que asegúrate de que estén centrados antes de cerrarlos!, porque difícilmente podras retirarlos si te equivocas.
✦ STEP 5 ✦ To close the necklace made with fabric it is time to fix with the help of the jewelry pliers, the two "clamp terminals": Basically they are two ornamental staples with a small pin to which you can adjust directly the ribbons of your choice or a ring. They have teeth so make sure they are centered before closing them!, because you will hardly be able to remove them if you make a mistake.

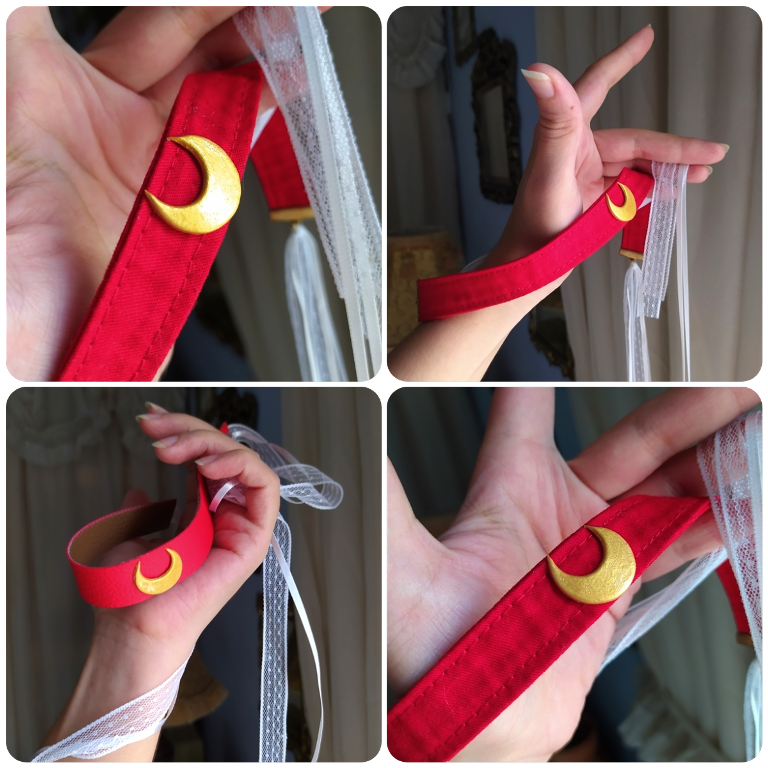
✦ To glue the moons you can use cold silicone on both surfaces. Do not overdo it so that it does not overflow on the margin of the glass and stain the material underneath ✦

✦ PASO FINAL ✦ Como paso final, pega las lunas justo en el centro de cada collar, y deja descansar hasta el día siguiente para asegurar que la adhesión sea efectiva y completa antes de su uso. Ten presente que los elementos curvos o redondeados tienden a desprender mas fácilmente los apliques que le coloquemos si no respetamos los tiempos de secado.
✦ FINAL STEP ✦ As a final step, glue the moons right in the center of each necklace, and let them rest until the next day to ensure that the adhesion is effective and complete before use. Keep in mind that curved or rounded elements tend to detach more easily the appliqués that we place on them if we do not respect the drying times.

✦ RESULTS & COMPARISONS! ✦

✦ Photos with natural light ✦

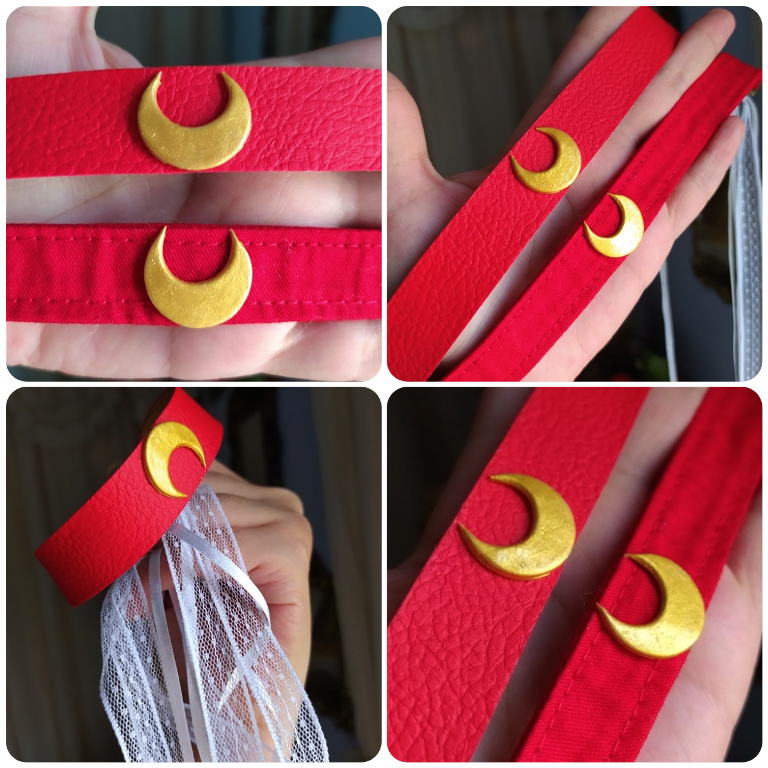
✦ In your opinion, which one is better? I like them both because one has this casual accessory look and the other looks more like an elegant or proper cosplay accessory ✦

| ✦ COMPARACIÓN DE AMBOS MATERIALES: | ✦ COMPARISON OF BOTH MATERIALS: |
|---|---|
| - La cuerina es 100% lavable y no se manchara con la grasa o el sudor de tu piel. | - The synthetic leather is 100% washable and will not stain with grease or sweat from your skin. |
| - La tela es más económica y aunque pide un poco mas de trabajo es más resistente. | - The fabric is more economical and although it requires a little more work, it is more resistant. |
| - En términos de tiempo de elaboración, la cuerina es la opción mas viable! | - In terms of manufacturing time, leather is the most viable option! |

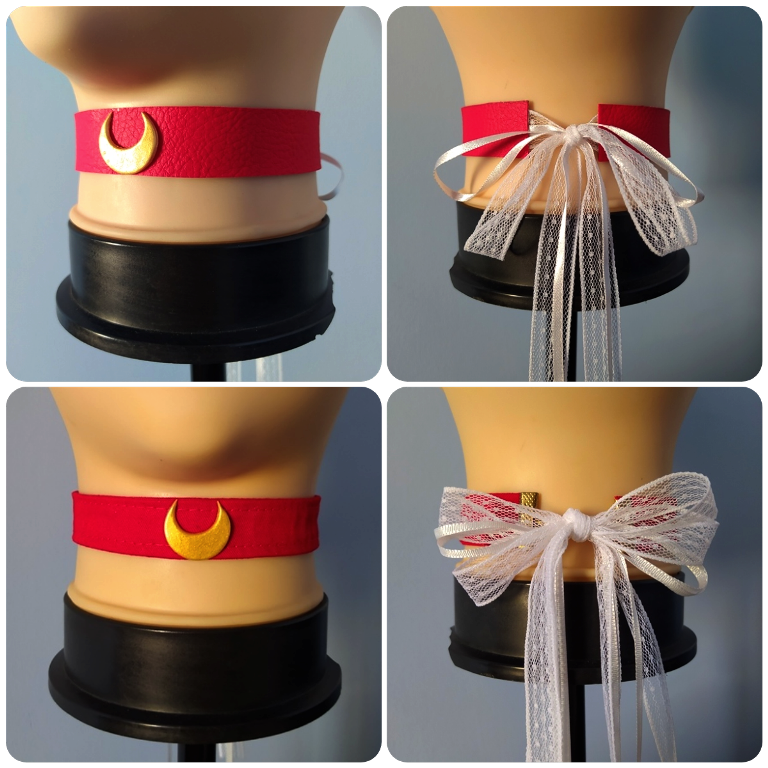
✦ I am head over heels in love with how it looks at the nape of the neck, beautiful, romantic, it's a delicate and feminine touch to have a lace bow in that area! ✦

✦ "CANÓNICAMENTE ARMONIOSO" ✦ Una gran ventaja de tomar como referencia elementos del género "Magical Girl" (o "mahō shōjo" - 魔法少女) como inspiración para crear accesorios es que ostentan de manera asombrosamente acertada combinaciones de colores, tonos, e items que aunque parezcan escasos (una luna con una linea roja) siempre derivan en resultados hermosos y equilibrados.
✦ "CANONICALLY HARMONIOUS" ✦ One great advantage of taking reference elements from the "Magical Girl" genre (or "mahō shōjo" - 魔法少女) as inspiration for creating accessories is that they boast amazingly accurate color combinations, shades, and items that even if they seem sparse (a moon with a red line) always derive in beautiful and balanced results.

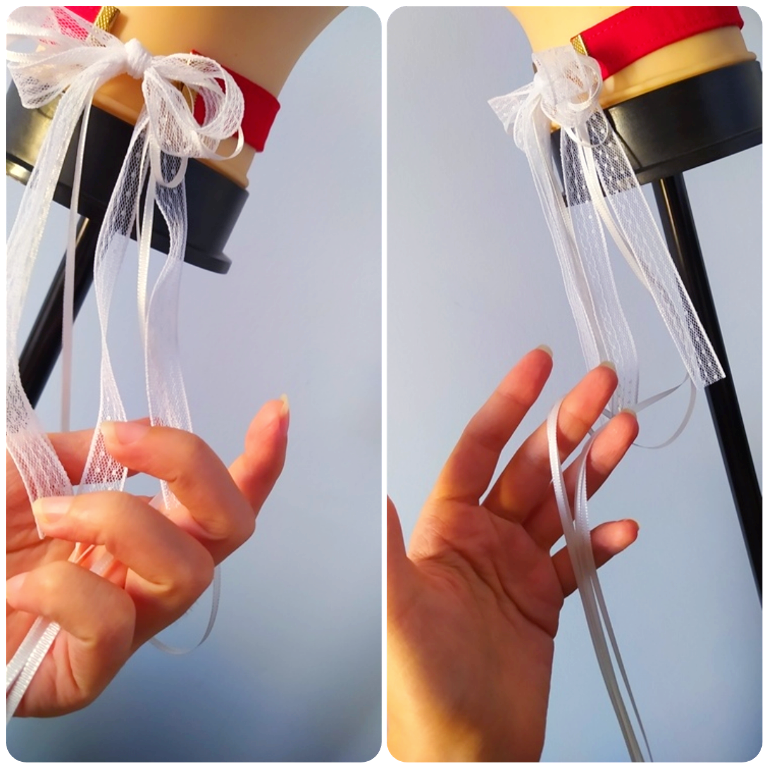
✦ It's so romantic! I already want to take new pictures of myself wearing these collars! ✦

✦ "¿POR QUÉ CINTAS Y NO UNA CADENILLA?" ✦ Te estarás preguntando, ¿por qué no agregar una clásica cadenilla de metal con su respectivo broche?, permíteme explicarlo: La mayoría de las cadenas para bisuteria que se consiguen en el mercado tienen una composición de hierro, lo que con el primer uso hara que la cadenilla se degrade, oscurezca, huela mal y manche tu piel. Las cadenillas de buena calidad para bisutería son aquellas que estan compuestas de aluminio, pero éstas son difíciles de conseguir dependiendo el pais donde te encuentres. Una opción bonita, funcional y rentable es entonces utilizar cintas.
✦ "WHY RIBBONS AND NOT A CHAIN?" ✦ You may be asking yourself, why not add a classic metal chain with a clasp? Let me explain: Most jewelry chains on the market have an iron composition, which with the first use will cause the chain to degrade, darken, smell bad and stain your skin. The good quality jewelry chains are those composed of aluminum, but these are difficult to find depending on the country you are in. A beautiful, functional and cost-effective option is to use ribbons.

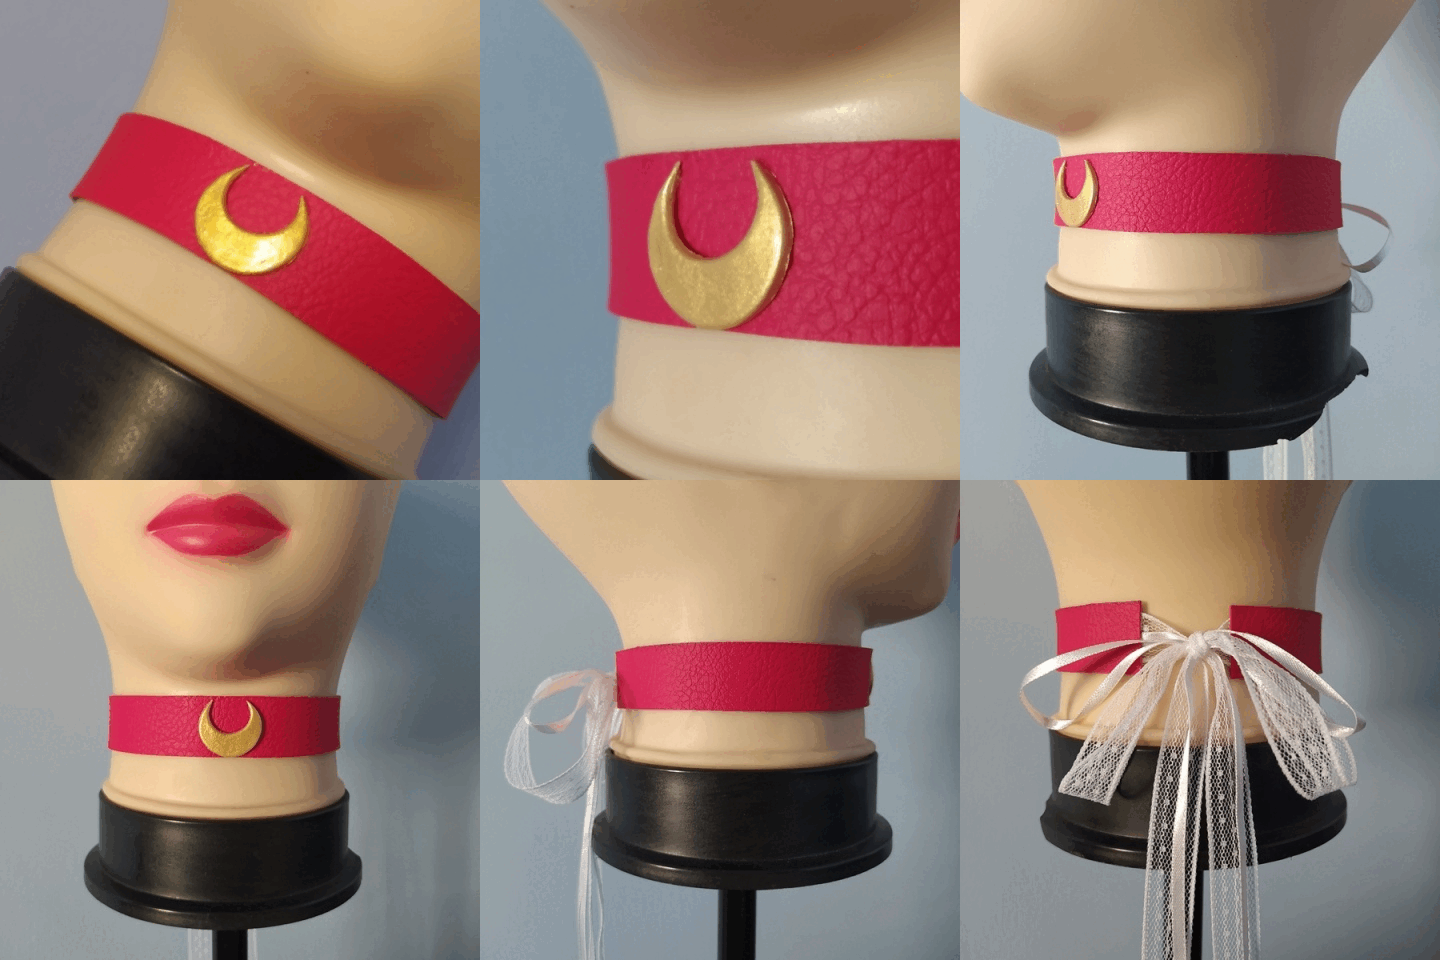
✦ A multi-perspective approach ✦

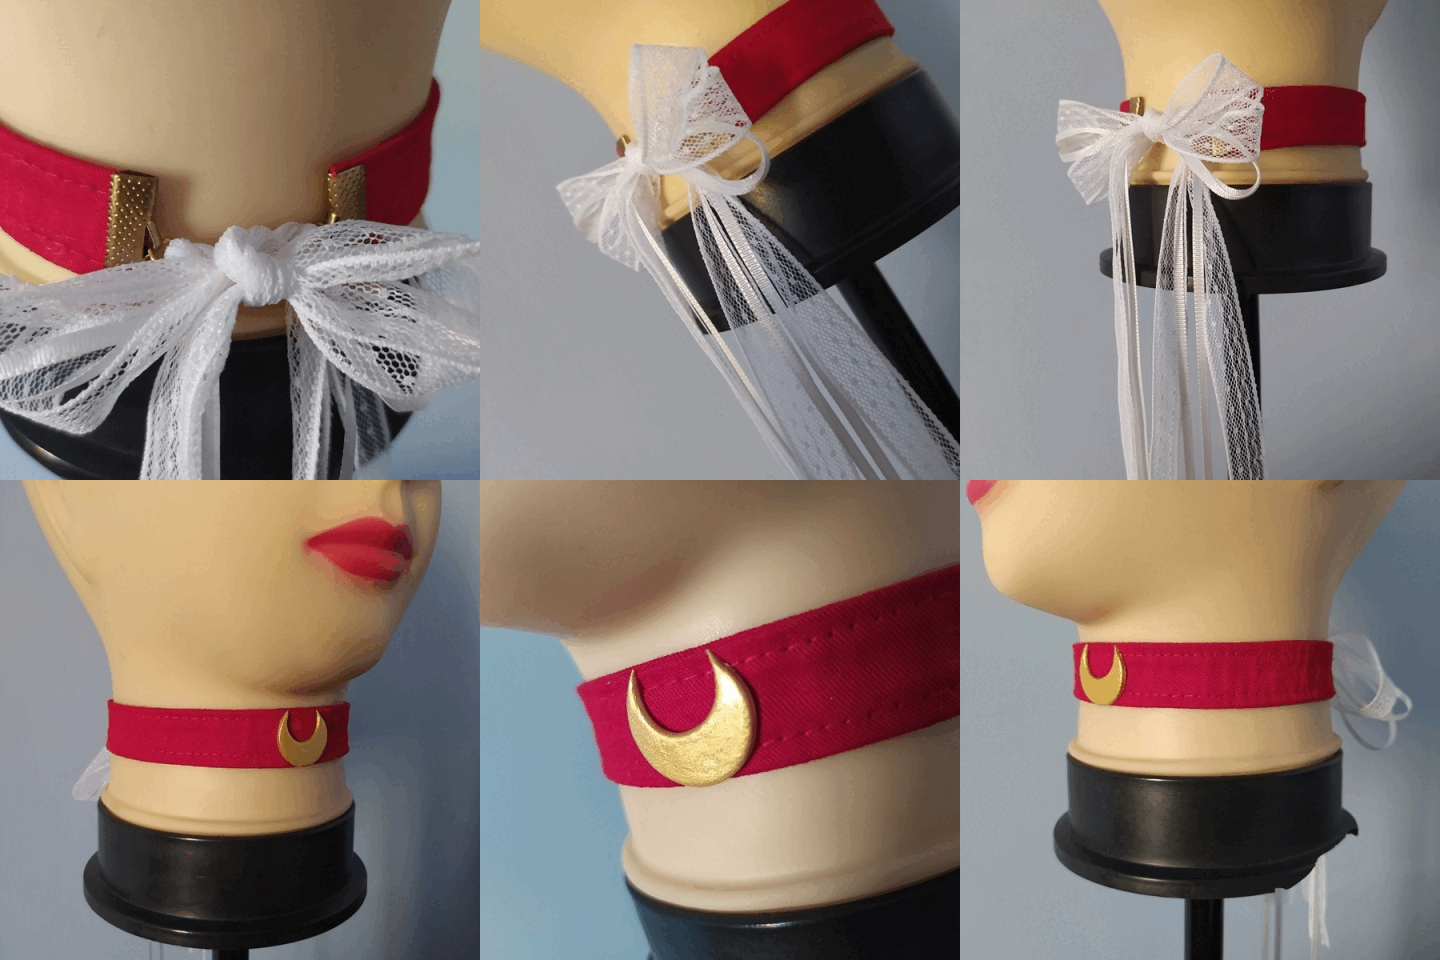
✦ In my closest circle the one that received the most votes was the necklace made of fabric ~ ! ✦

✦ INTRUCCIONES DE MANTENIMIENTO ✦ Para mantener la apariencia y alargar la vida útil de estos accesorios, la recomendación es: 1) Guarda en un lugar seco y fresco donde no estén aplastados o con cosas pesadas encima. 2) Siempre despues de utilizarlos déjalos refrescarse en alguna superficie para que el sudor se evapore. 3) Lava cuando lo sientas necesario con jabón suave y abundante agua, frotando el cuero sintético o la tela con suaves movimientos circulares de las yemas de tus dedos, no exprimas, y deja secar a la sombra.
✦ MAINTENANCE INSTRUCTIONS ✦ To maintain the appearance and extend the life of these accessories, the recommendation is: 1) Store them in a cool, dry place where they are not crushed or with heavy things on top of them. 2) Always after use let them cool on a surface to evaporate the sweat. 3) Wash when you feel it necessary with gentle soap and plenty of water, rubbing the synthetic leather or fabric with gentle circular movements of your fingertips, do not squeeze, and let dry in the shade.

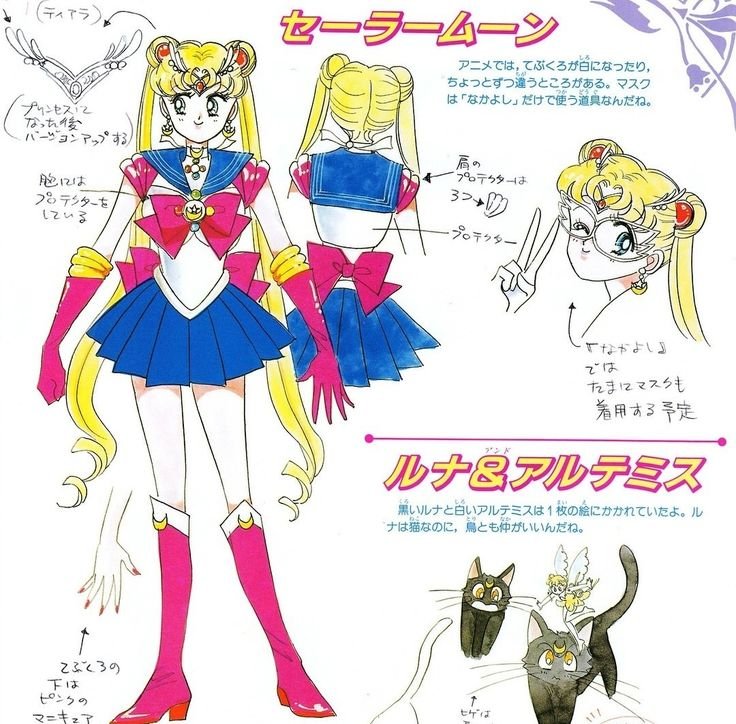
✦ Of all the book this is one of the arts that I liked the most! ✦

✦ ¡MAS OPCIONES QUE NUNCA! ✦ ¿Sabias que en Abril de este 2024 se ha estrenado un nuevo libro de ilustraciones originales de la mano de la autora de Sailor Moon, Naoko Takeuchi? Existe multitud de artes oficiales pero no aprobados por la producción que adapto esta historia al anime. Por ejemplo, Sailor Moon originalmente tendría el cabello blanco, pero no lo aceptaron, luego la autora hizo una propuesta en rosa, que tampoco aceptaron, finalmente, Usagi termino siendo rubia. Y así como sucedió el tema del cabello, MIRA ESE ARTE OFICIAL REVELADO ALLA ARRIBA!, en este arte el collar de Sailor Moon originalmente tenía un pequeño lazo atado, y es de allí donde he tomado inspiración para recrear ese detalle en estos accesorios.
✦ MORE OPTIONS THAN EVER! ✦ Did you know that in April 2024, a new book of original illustrations by the author of Sailor Moon, Naoko Takeuchi, was released? There is a multitude of official artwork, but not approved by the production that adapted this story to anime. For example, Sailor Moon originally had white hair, but they didn't accept it, then the author made a proposal in pink, which they didn't accept either, finally, Usagi ended up being blonde. And just as the hair issue happened, LOOK AT THAT OFFICIAL ART REVEALED ABOVE, in this art the necklace of Sailor Moon originally had a small bow tied, and it is from there where I have taken inspiration to recreate that detail in these accessories.


✦ SINOPSIS ✦ Siendo que la moda es una forma de expresión y una declaración de quienes somos, tener opciones de cómo crear nosotros mismos accesorios puntuales y tan icónicos como lo es un item de Sailor Moon (obra revolucionaria que impacto a más de una generación) para crear o complementar outfits me parece muy valioso. En un mundo donde tantos quieren ser el foco de atención creando contenido destinado a entretener y no a educar en las redes sociales convencionales, yo quiero compartir de manera simple y gentil instrucciones que te ayuden a crear tu mismo ésta clase de complementos, garantizándote un resultado con calidad y belleza sin importar tu grado de experiencia o especialización en las manualidades. ¡Un abrazo a todos! 🫂 💕
✦ SYNOPSIS ✦ Since fashion is a form of expression and a statement of who we are, having options on how to create our own iconic and timely accessories such as an item from Sailor Moon (revolutionary work that impacted more than one generation) to create or complement outfits seems very valuable to me. In a world where so many want to be the focus of attention by creating content intended to entertain and not to educate in conventional social networks, I want to share in a simple and gentle way instructions that will help you to create this kind of complements yourself, guaranteeing you a result with quality and beauty regardless of your degree of experience or specialization in crafts. A hug to everyone! 🫂 💕

✨ 🍓 All texts and images by @Tesmoforia 🍓 ✨
📸 Tools: Xiaomi Redmi Note 8 📲 Snow 🎬 Remini 🌓 FotoJet 📐
🚨 ¡Please do not take, edit or republish my material without my permission! 🚨
💌 ¿Do you wish to contact me? [email protected] 💌
🌙 Banner, signature and separators by Keili Lares
Posted Using InLeo Alpha
Como siempre, un trabajo admirable, prolijo y hermoso
YENNY QUE BELLA TU 😳 💞 ¡Muchisimas gracias! 🫂
Hello everyone! 😊 I hope you are all well 🌸 I'm taking advantage of the first comment on my new post for a mini update after that unscheduled mini hiatus, omg, little Apollo kitty got really messed up with his paw, but he is doing much better now, and Galatea has been through a very complicated pregnancy (my calico cat on her second pregnancy, she only had 1 kitten and was born lifeless this past weekend, it has been a very sad time), so much stress has taken its toll on me and I also got sick, but I am recovering step by step and we are going to resume the nice tutorials and useful processes; I will be experimenting also with new formats, some cleaner and some more reloaded 😳 I love you all very much and hope you have a great start of the week! 🌈 🌈 🌈
¡Hola a todos! 😊 Espero se encuentren muy bien 🌸 Aprovecho el primer comentario en mi nuevo post para un mini update despues de ese no programado mini hiatus, omg, ¡gatito Apolo se complico mucho con su pata!, pero ya esta mucho mejor, y Galatea ha pasado por un embarazo muy complicado (mi gata calico en su segundo embarazo, solo tuvo 1 gatito y nació sin vida este pasado fin de semana, han sido horas muy tristes), tanto stress me ha pasado factura y también me enfermé, pero ya me estoy recuperando paso a paso y vamos a retomar los tutoriales bonitos y procesos útiles; estare experimentando tambien con nuevos formatos, algunos mas limpios y otros más recargados 😳 ¡Los quiero mucho y espero tengan un grandioso inicios de semana! 🌈 🌈 🌈
Has sido votado por
PROYECTO ENLACE
'Conectando Ideas y Comunidades'
PROYECTO ENLACE es un proyecto de curación de habla hispana enfocado en recompensar contenido de calidad y apoyar autores en su proceso de crecimiento en HIVE.
Creemos y apostamos por el futuro de esta gran plataforma, y estamos muy emocionados de poder hacerla crecer junto a esta comunidad. Así que te invitamos a publicar en nuestra COMUNIDAD y estar atento a todas las actividades que tenemos preparadas y que estaremos publicando en breve.
¿QUIERES AUTOMATIZAR TUS GANANCIAS DE CURACIÓN? SE PARTE DEL PROYECTO ENLACE APOYANDO A NUESTRO TRAIL EN HIVE.VOTE INGRESA AQUÍ PARA CONOCER LOS DETALLES.
¿QUIERES INVERTIR ENLACE? DESCUBRE COMO HACERLO Y GENERAR INGRESOS DE FORMA SEMANAL MEDIANTE TU DELEGACIÓN DE HP AQUÍ TE EXPLICAMOS COMO.
Te invitamos a participar en nuestro servidor de Discord: https://discord.gg/3S9y7BbWfS
Atentamente
EQUIPO ENLACE 2024
¡Hola! Un gusto conocerlos 💖 Ya voy a unirme a su discord, muchas gracias por su apoyo y mis mejores deseos para ustedes ouo)/ 🌷 🌷 🌷
Hermosa la gargantilla de Sailor Moon, te quedo identica a la original, amo Sailor Moon, todo lo relacionado a ella siempre me fascino jaja por eso me volvia loca cada que veia accesorios de esta serie 😂
Excelente el tutorial y muy bonito el resultado 😘
Que maravilla es recibir feedback tan bonito como el tuyo dear Buhito, de verdad que alegría si te gustó esta aventura, estoy muy ansiosa por replicar mas cosas de Sailor Moon ; un super abrazo y espero estes pasando una semana bonita y agradable 🌻 🫂 💛
Me encanta amiga, quiero una, excelente trabajo como siempre. Soy fan de Sailor Moon, me identifico con tus palabras.
Isa preciosa me encanta leerte, espero estes muy muy bien y claro que si 😍 siempre es maravilloso saber que coincidimos en opiniones o métodos 👏 un super abrazo y cuando tenga mas cosas bonitas listas te llego al discord para cuadrar un envío, yo te lo regalo 🥳
Que bonito te ha quedado ese choker saludos!!
¡Muchas gracias Lismar bomnita! 💙
¡Espectacular! De los trabajos más limpios y hermosos que he visto en Hive, ya te lo he dicho antes, pero lo repito, tienes muchísimo talento en esas manos @tesmoforia 🤗 podrías hacer tu propia línea de ropa si quisieras. Saludos 💙.
Gracias por las excelentes recomendaciones para guiarnos con las ideas, es un proyecto encantador, muy lindo y como siempre, bien elaborado e impecable paso a paso. ¡Felicidades.!!!🌙❤️
Hola,que maravilla
ciertamente muy bonita ese choker.
saludos cordiales éxitos...
Sensacional trabajo amiga tesmo, tienes habilidades increíbles para el Coosplay, nos han encantado mucho los acabados que le agregaste.
Escrito por lionsaturbix / Written by lionsaturbix
¡¡¡Buen trabajo!!! Gracias por publicar tu excelente contenido en Hive Diy.
Congratulations @tesmoforia! You have completed the following achievement on the Hive blockchain And have been rewarded with New badge(s)
Your next target is to reach 40000 upvotes.
You can view your badges on your board and compare yourself to others in the Ranking
If you no longer want to receive notifications, reply to this comment with the word
STOPCheck out our last posts: