
Hello to all friends of #hivediy, I hope you are well here I bring you another creation very easy to make is a gift bag type shirt and I do the step by step only see well and you will do it with very little material, it will serve to make your gift for both children, youth and adults or also for cotillion for the holidays.
MATERIALES
MATERIALS
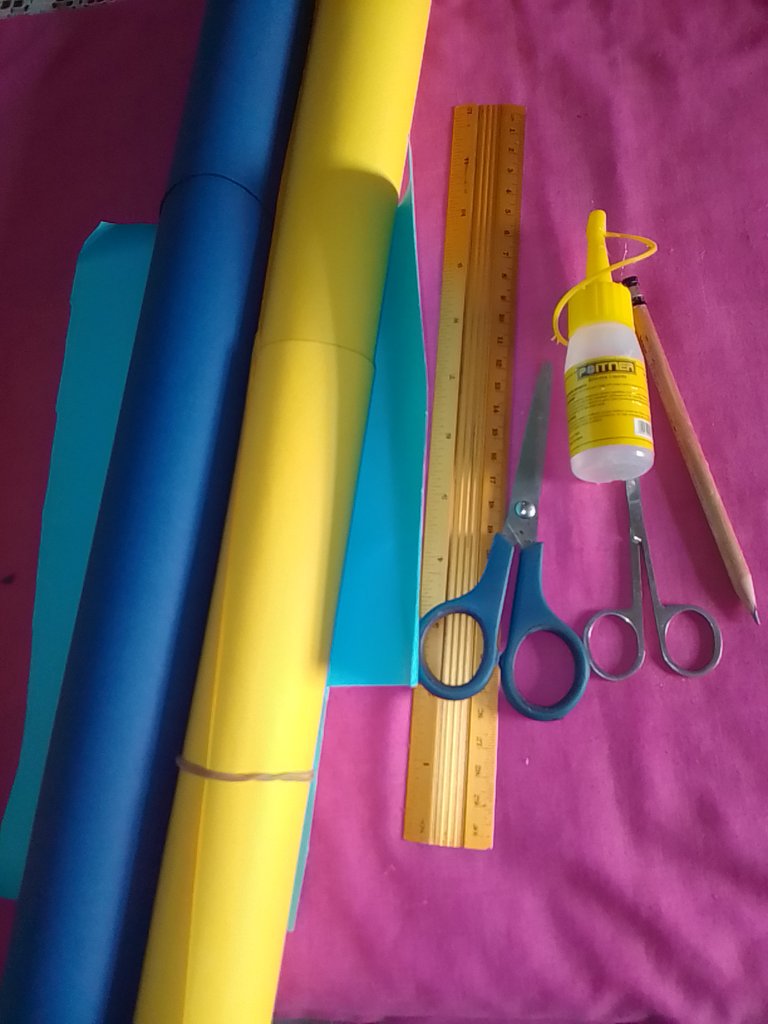
- Cartulinas Amarilla, azul oscuro y azul Claro
- Tijeras
- Regla
- Silicón líquido
- Lápiz de creyón.
- Yellow, dark blue and light blue cardstock
- Scissors
- Ruler
- Liquid Silicone
- Crayon pencil.
PROCEDIMIENTO
PROCEDURE
Paso 1
Step 1
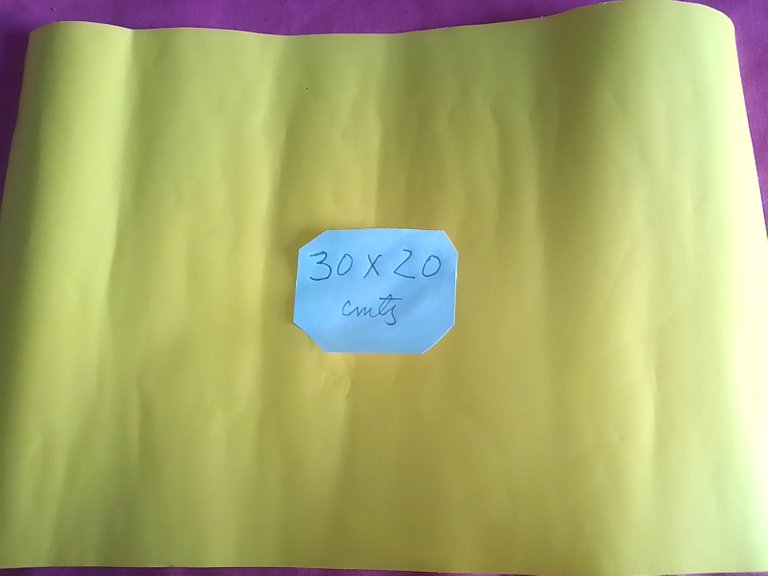
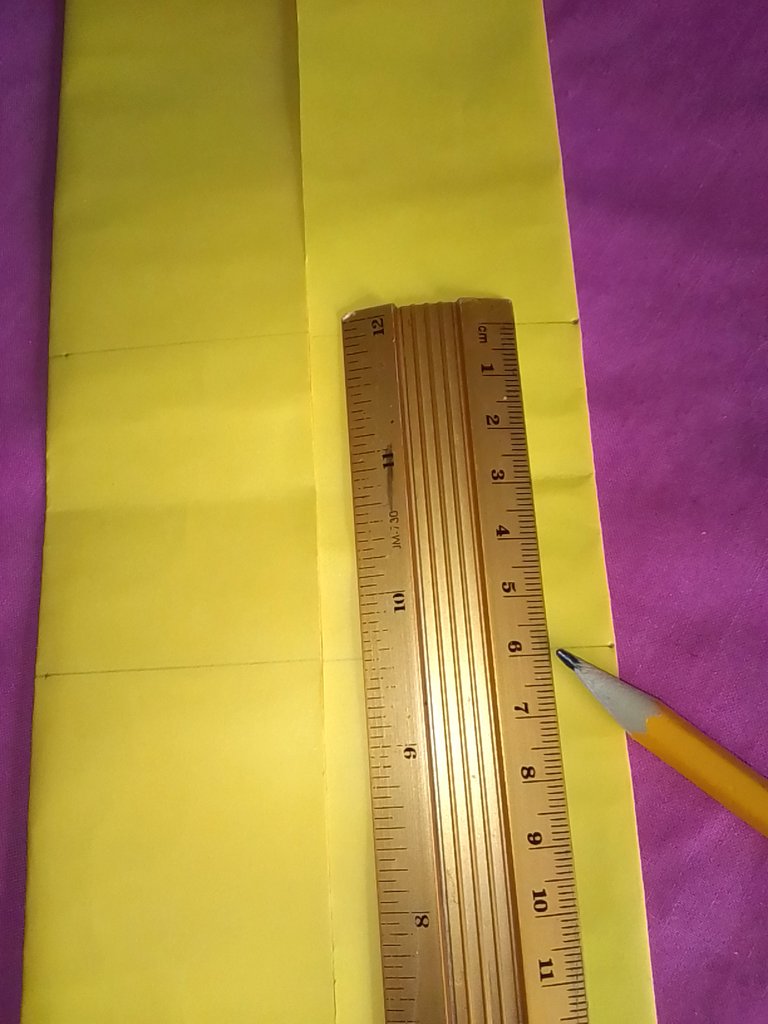
Bueno yo escogí la cartulina amarilla y luego tomé la regla y el lápiz para medir 30 cmts X 20.
Well I chose the yellow cardboard and then took the ruler and pencil to measure 30 cm X 20.
Paso 2
Step 2
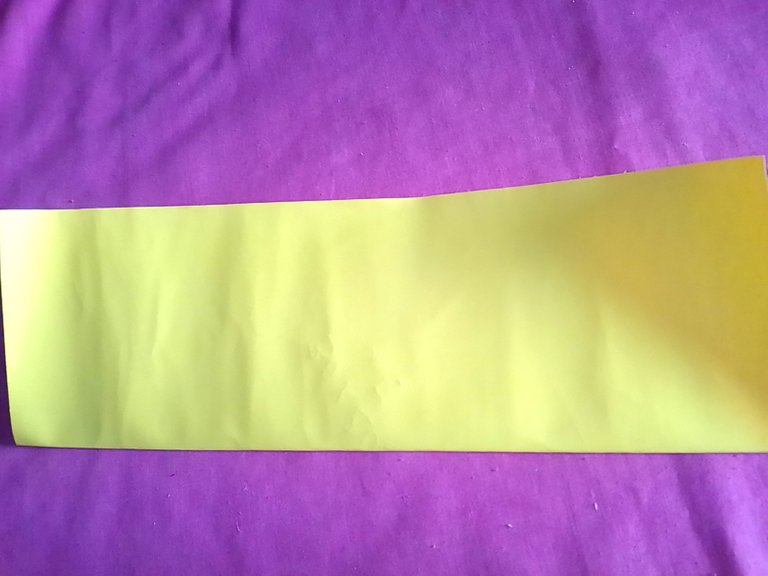
Una vez recortada la cartulina con las medidas anteriores procedemos a doblar a la mitad por donde te indica los 30 cmts.
Once the cardboard has been cut with the above measurements, proceed to fold it in half where it indicates the 30 cm.
Paso 3
Step 3
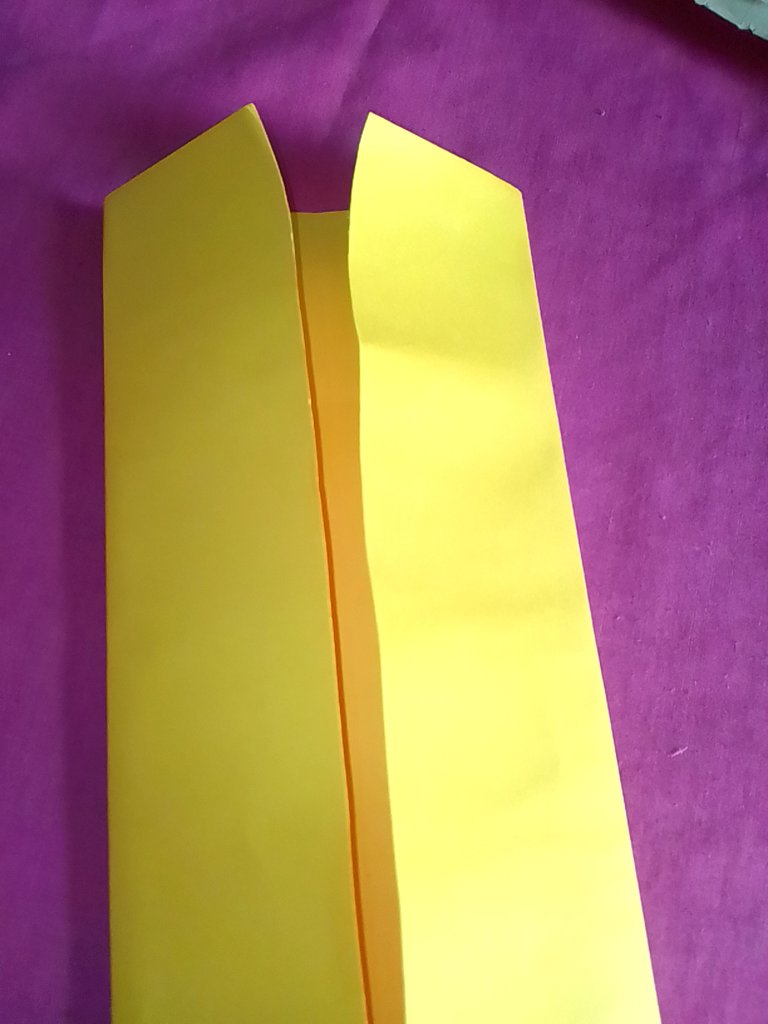
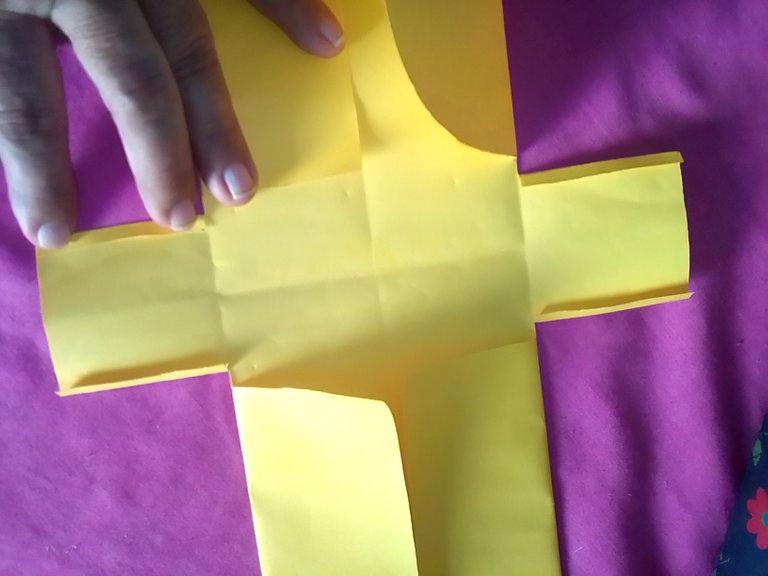
Una vez que hayamos doblado la cartulina a la mitad la abrimos y después dobla los dos lados hacia la mitad donde había quedado la marca y te queda exactamente iguales el doblez.
Once we have folded the cardboard in half we open it and then fold the two sides towards the middle where the mark had been and you have exactly the same fold.
Paso 4
Step 4
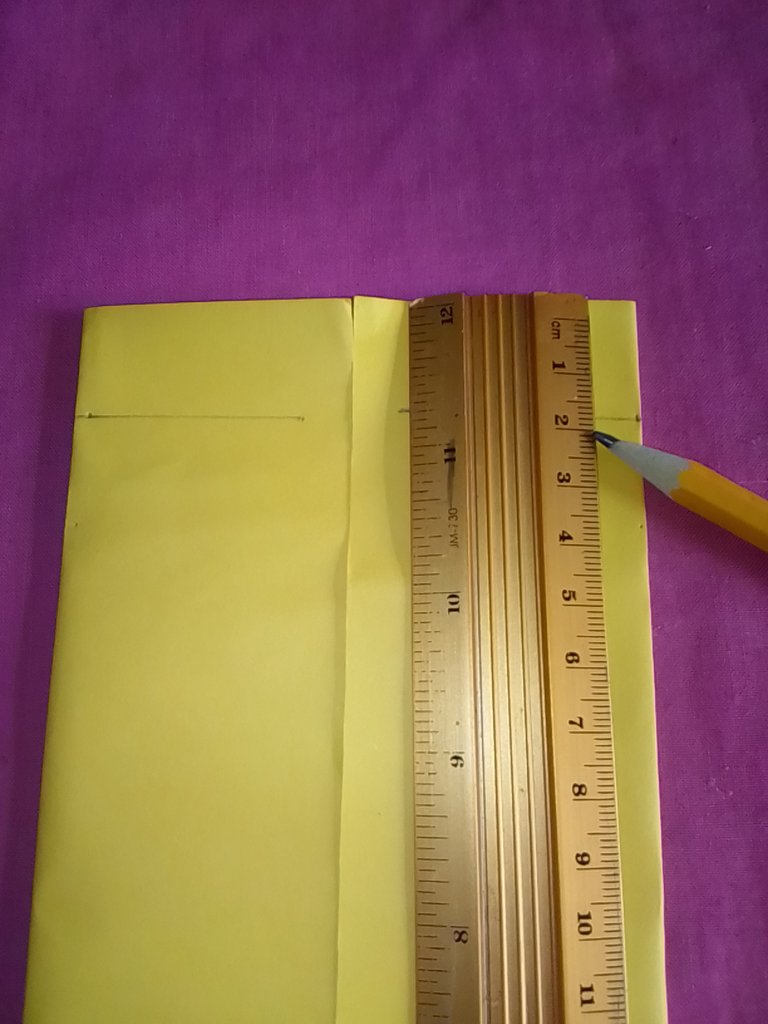
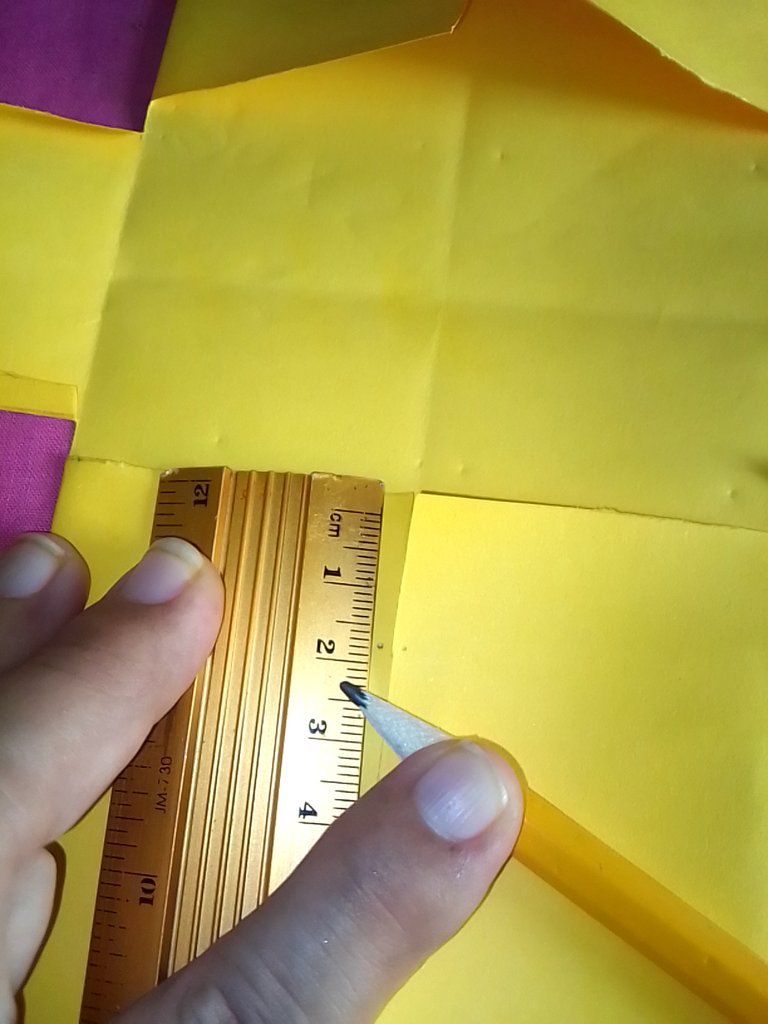
Luego con la ayuda de la regla los dos lados que doblaste vas a tomar la siguientes medidas de arriba hacia abajo mide 2 cmts y marca con el lápiz y desde allí hacia adentro mide 4cmts y ahora pasa una línea.
Then with the help of the ruler the two sides that you folded you are going to take the following measurements from top to bottom measure 2 cmts and mark with the pencil and from there inwards measure 4cmts and now pass a line.
Paso 5
Step 5
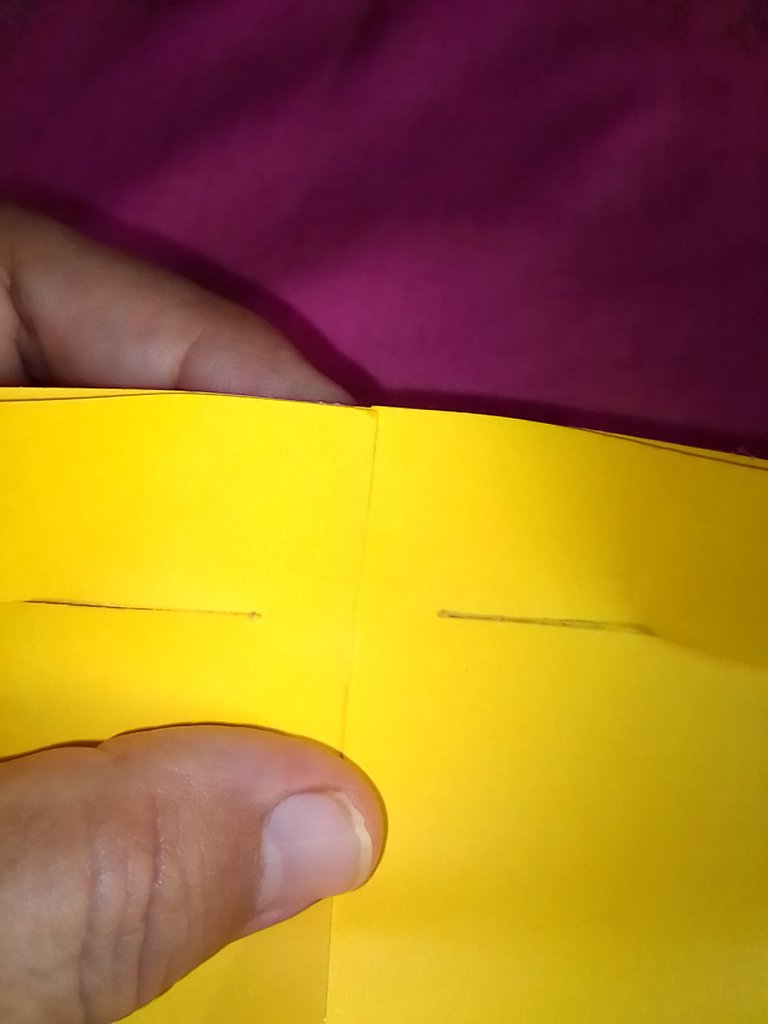
Ahora seguimos con lo siguiente esa línea que pasaste lo vas a cortar hasta donde marcaste.
Now we continue with the following, that line that you passed you are going to cut it up to where you marked.
Paso 6
Step 6
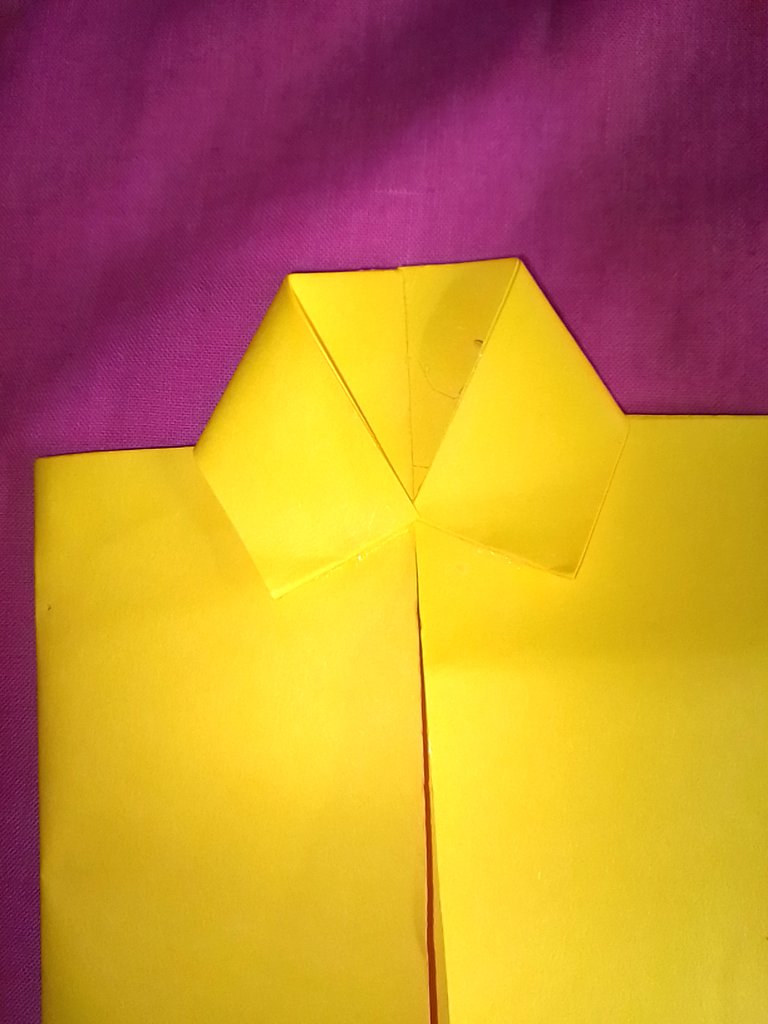
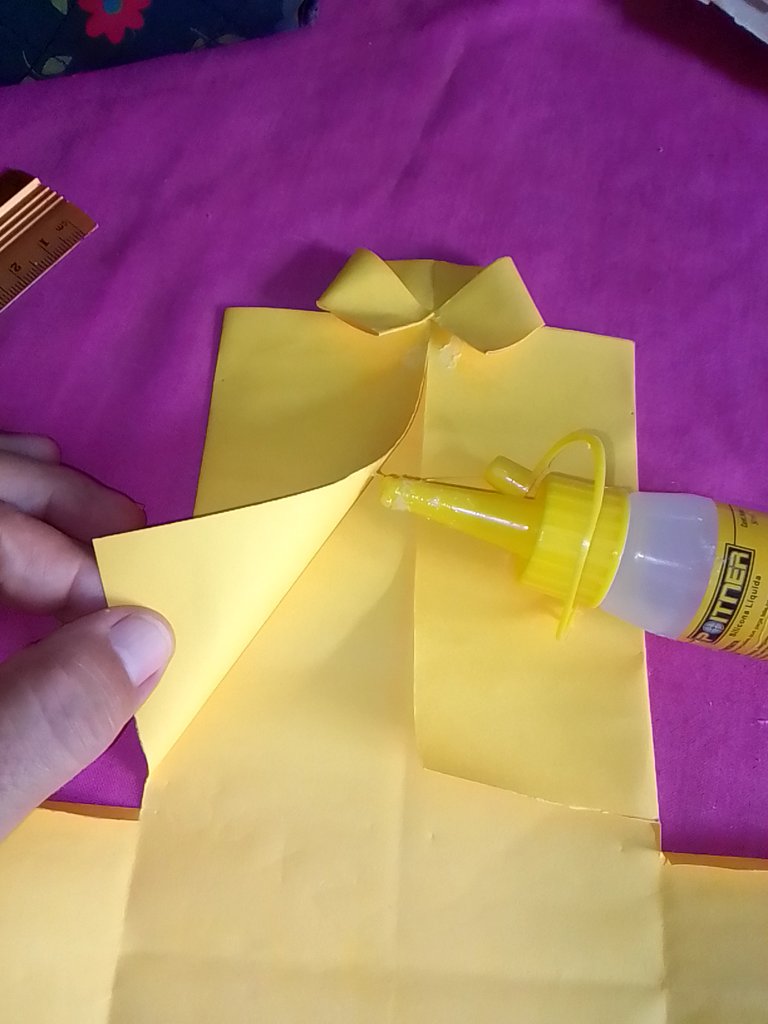
Ok ahora donde cortaste tomamos eso dos cortes y en la punta le agregamos silicón líquido y pegamos ve que ya esta dando forma de camisa este es el cuello.
Ok now where you cut we take that two cuts and at the tip we add liquid silicone and glue and see that it is already giving shape of a shirt this is the neck.
Paso 7
Step 7
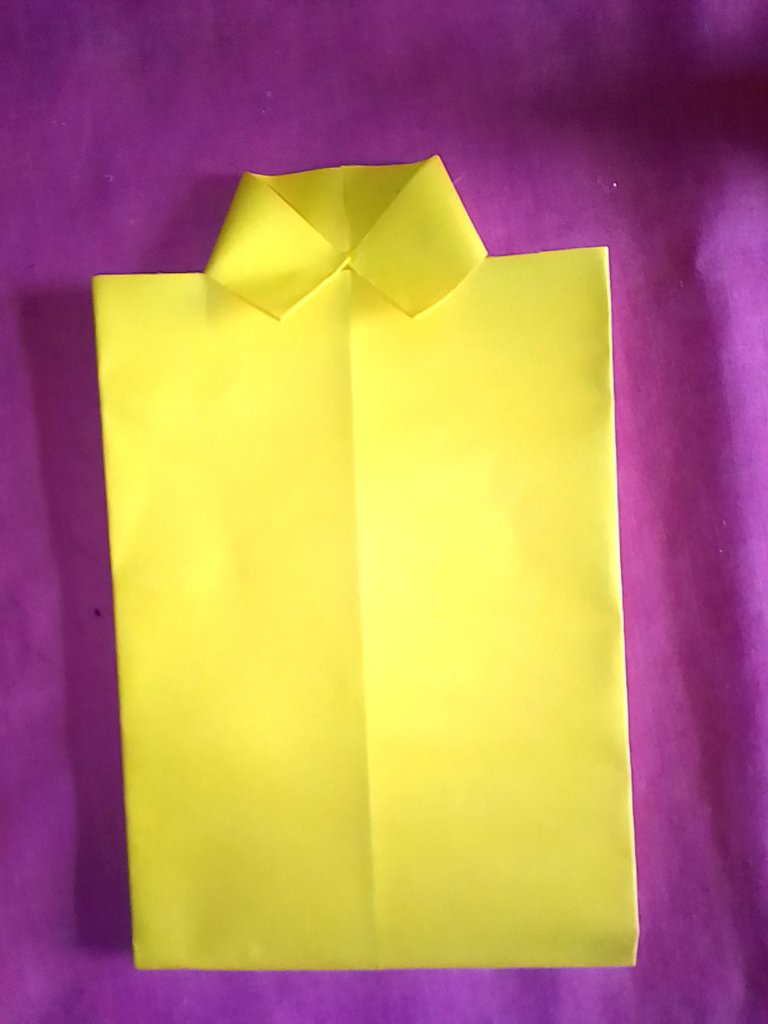
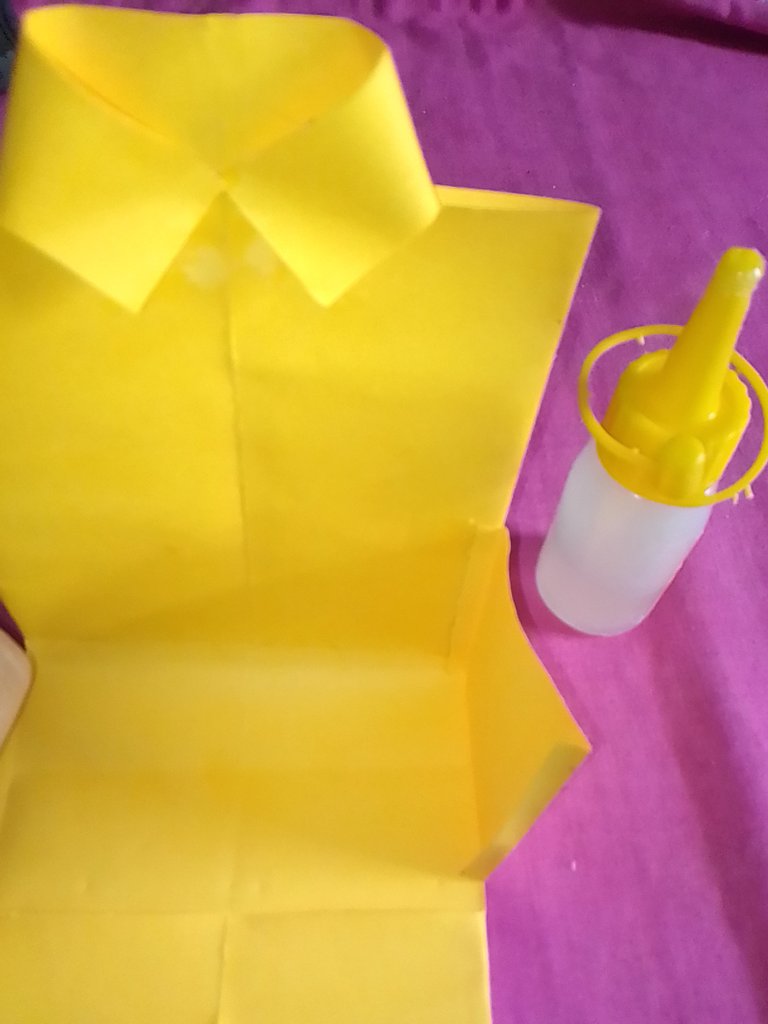
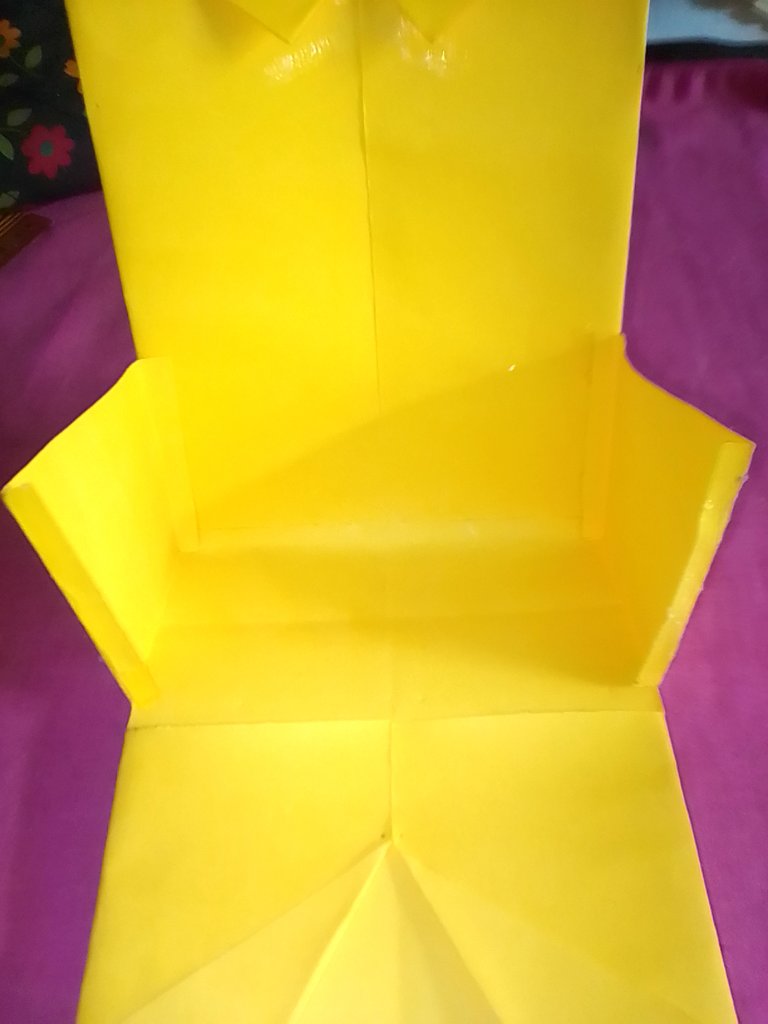
Luego acá vamos hacia el próximo extremo abajo doblamos la cartulina ya en forma de la camisa introducimos por dentro del cuello
y doblamos y marcamos bien esa va hacer nuestra guía.
Then here we go to the next end down and fold the cardboard into the shape of the shirt and insert it inside the collar and fold and mark it well.
and fold and mark well that will be our guide.
Paso 8
Step 8
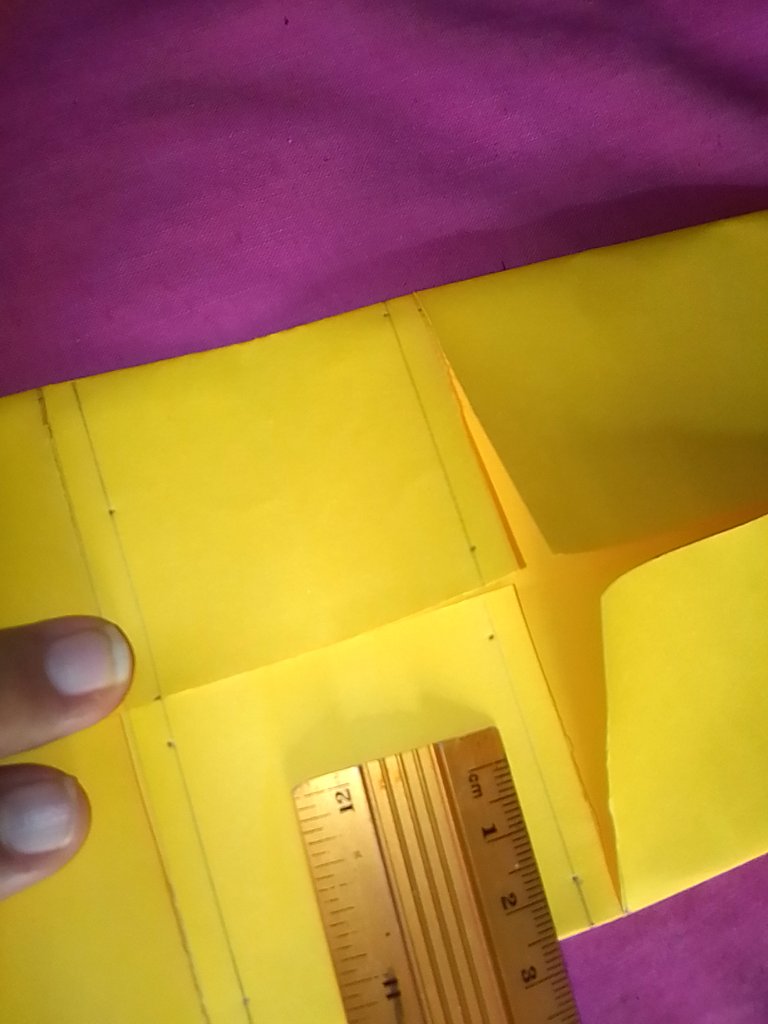
Luego observa bien como muestra la imagen desde donde señalamos la mitad trazamos 6 cmts de cada lado es decir sería 3 y 3. a la mitad desde la línea y trazamos una línea de cada lado.
Then observe well as shown in the image from where we point to the middle we draw 6 cmts on each side that is to say it would be 3 and 3 to the middle from the line and draw a line on each side.
Paso 9
Step 9
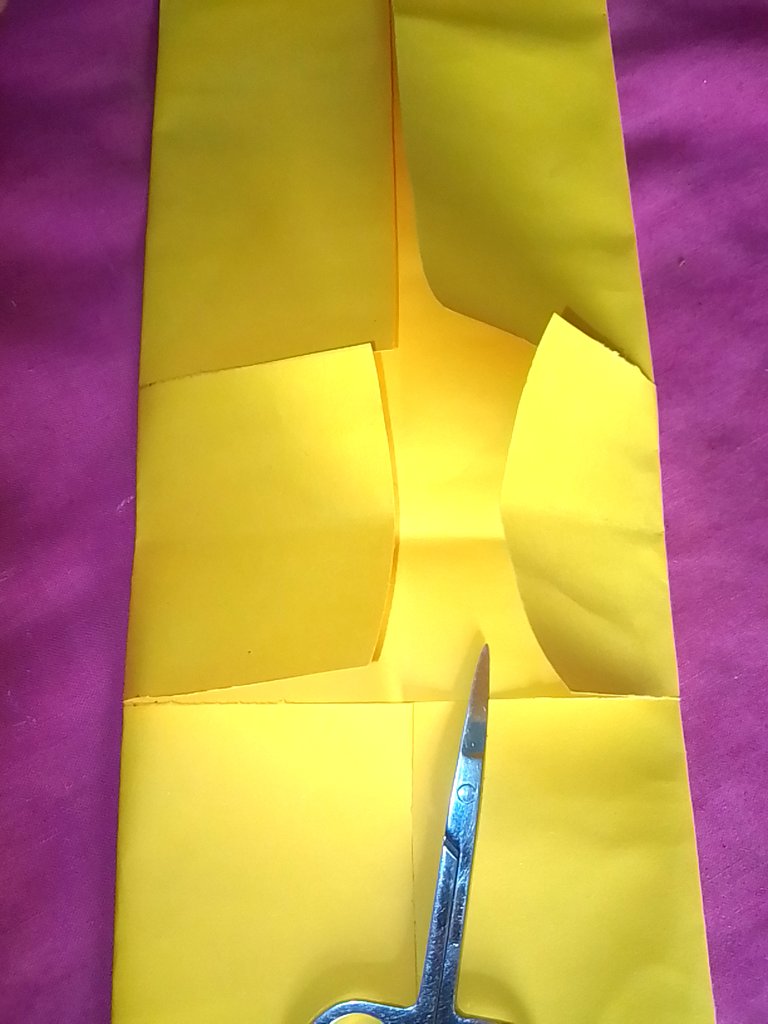
Después de haber trazado la línea cortamos y te queda de esta manera lo haces con una tijerita más pequeña para hacer el corte mejor.
After having traced the line we cut and it looks like this and you do it with a smaller scissors to make the cut better.
Paso 10
Step 10
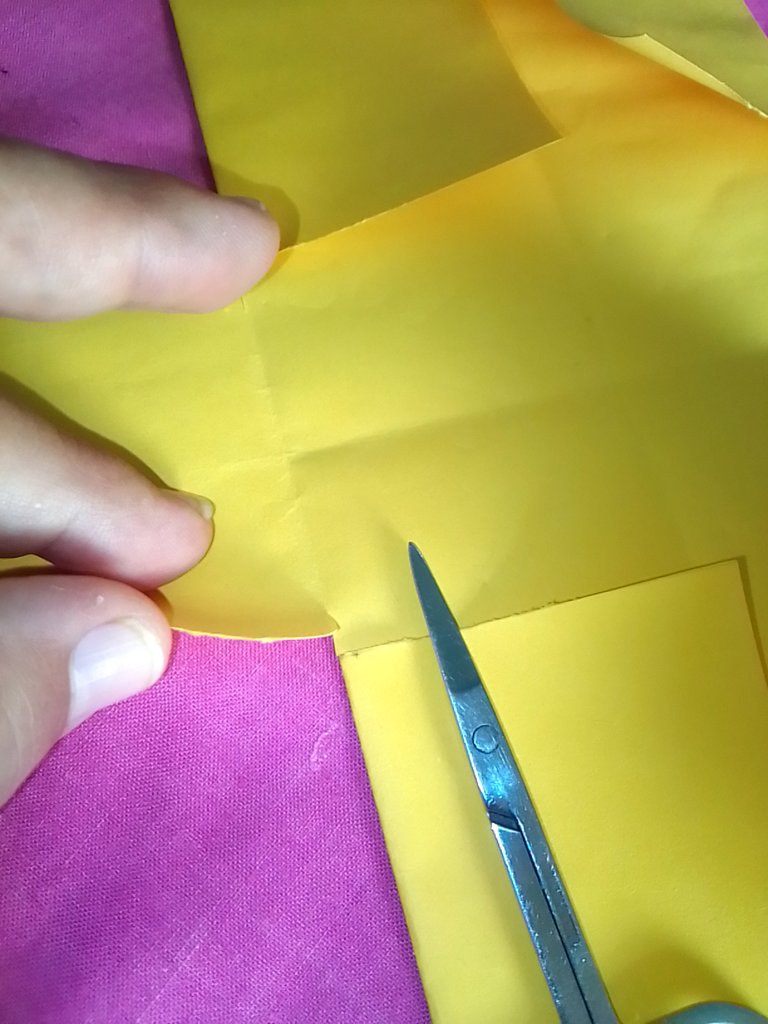
Cuando ya tengas cortados las piezas vamos a señalar 1/2 cmts de cada lado y luego traza una línea.
Once you have the pieces cut, we will mark 1/2 cm on each side and then draw a line.
Paso 11
Step 11
Procedemos ahora a cortar el trazado que anteriormente habíamos hecho del 1/2 centímetros.
We now proceed to cut the tracing that we had previously made of 1/2 centimeters.
Paso 12
Step 12
Después que ya hemos trazado y cortado el 1/2 cmts ahora doblamos de ambos lados.
After we have already traced and cut the 1/2 cm, we now fold on both sides.
Paso 13
Step 13
Ya doblaste ahora desde allí hasta abajo de ese corte mides 2 cmts hacia abajo y agregas silicón líquido espera que sequé y luego doblas las puntas hacia afuera de cada lados y te sobresale las puntas esta va hacer tus mangas y le agrega un poquito de silicón.
Now you have folded from there to the bottom of that cut, measure 2 cm down and add liquid silicone, wait for it to dry and then fold the ends outwards on each side, and you will have the ends sticking out, this will make your sleeves and add a little bit of silicone.
Paso 14
Step 14
Luego te vas hacia arriba de la camisa agregas silicón líquido en las orillas de ambos lados y pegas bien.
Then you go to the top of the shirt, add liquid silicone to the edges on both sides and glue well.
Paso 15
Step 15
Aquí donde habías hecho el doblez de 1/2 cmts le agregas silicón líquido y lo pegas al otro extremo
Here where you had made the 1/2 cm fold, you add liquid silicone and glue it to the other end.
Paso 16
Step 16
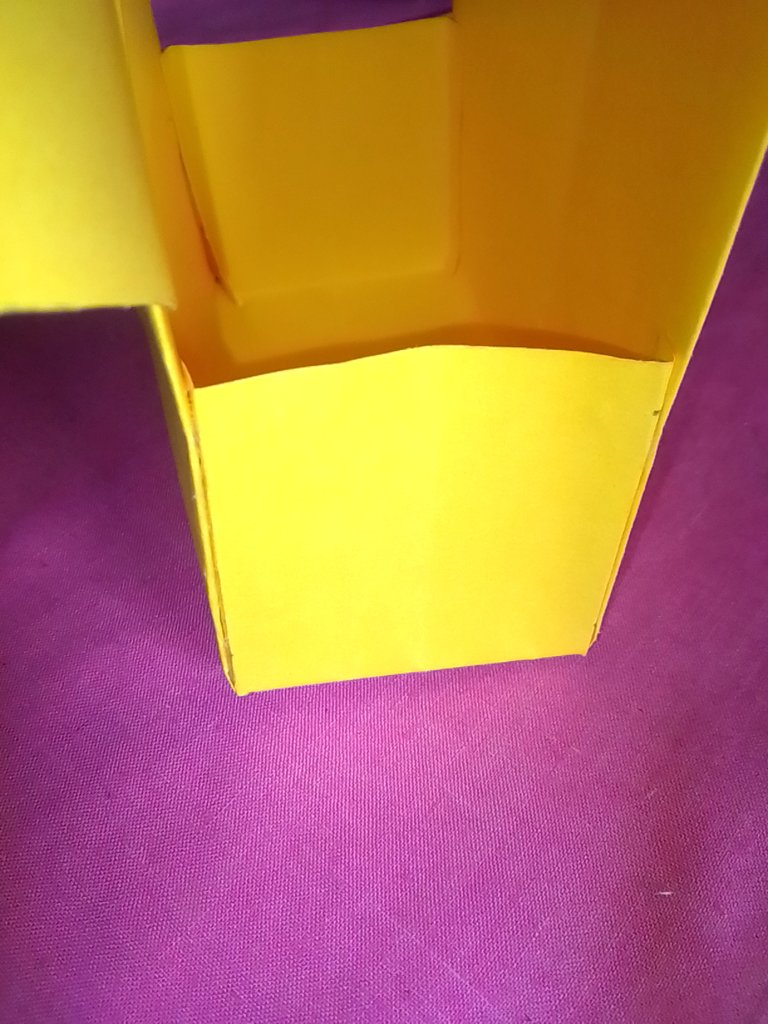
Acá se puede observar una primera parte doblada y pegada falta el otro extremo.
Here you can see the first part folded and glued, the other end is missing.
Paso 17
Step 17
De este modo va quedando la camisa en forma de cajita y acá la vas a doblar y queda la marca para luego cerrarla y te quede bien.
In this way the shirt will be in the shape of a little box and here you will fold it and the mark will be left so that you can close it and it will fit well.
Paso 18
Step 18
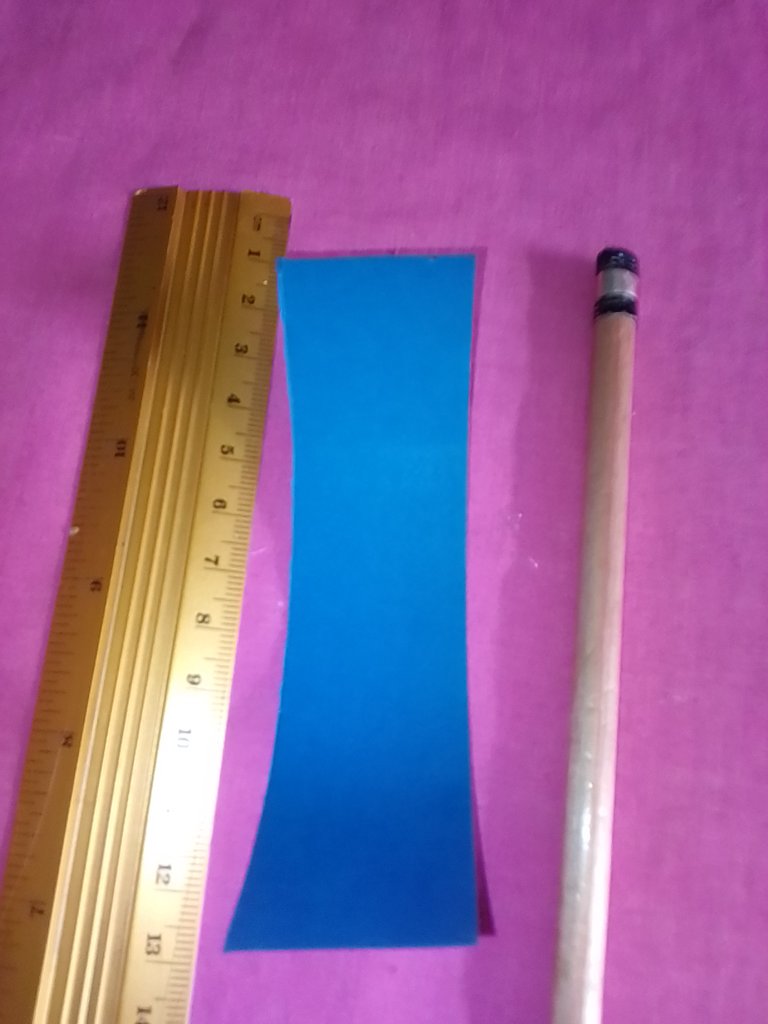
Acá tomamos un pedazo de cartulina azul oscuro, la regla y el lápiz para medir 12 X 3 cmts esto es para hacer el lazo tipo pajarita.
Here we take a piece of dark blue cardboard, the ruler and the pencil to measure 12 X 3 cm, this is to make the bow tie.
Paso 19
Step 19
Y de esta forma nos queda nuestro molde para hacer el lazo tipo pajarita lo vas a doblar a la mitad y desde una punta de un lado empiezas a recortar dandole la forma y llega hasta abajo y así lo haces del otro extremo y te queda así.
And in this way we have our mold to make the bow tie type bow tie you are going to fold it in half and from one end of one side you start to cut giving it the shape and reaches the bottom and so you do it from the other end and you have it like this.

Paso 20
Step 20
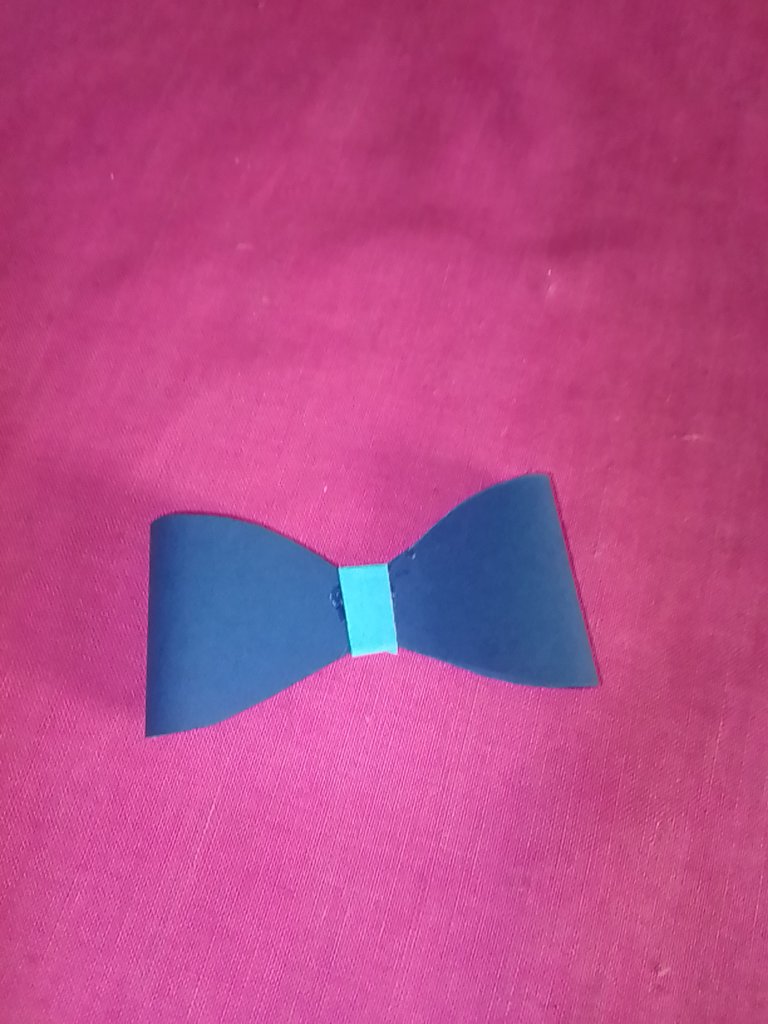
Luego lleva los extremos hasta el medio con otro pedacito de cartulina de otro color para hacerle la combinación te queda así solamente agregando pega.
Then bring the ends to the middle with another piece of cardboard of a different color to make the combination, just by adding glue.
Paso 21
Step 21
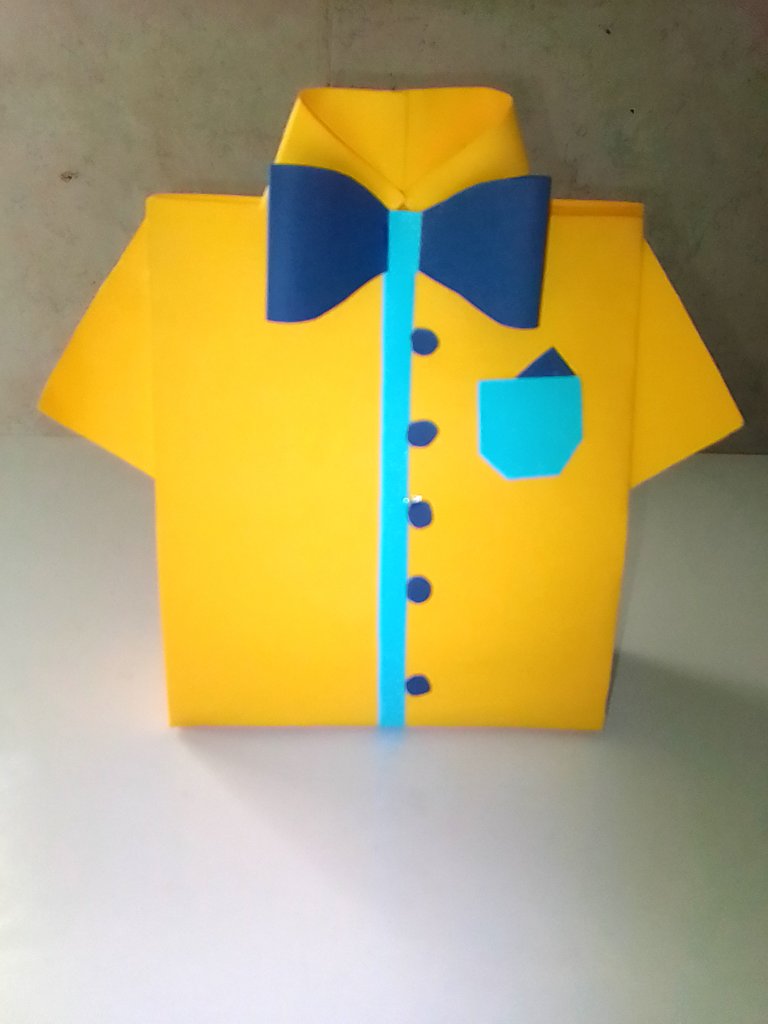
Luego vas a decorarla con estos detalles corta una cinta de 1/2 cmts y se la pega por toda la línea que habías marcado y cortas peloticas y la pegas que serían los botones y después un cuadrado de 2 cmts y le cortas de lado a lado las puntas que esta sería el bolsillo y le pegas detras un pedacito de cartulina como un triángulo que sería un pañuelo, ponlo coqueto y por último le pegas el lazo tipo pajarita.
Then you are going to decorate it with these details cut a 1/2 cm ribbon and glue it along the line that you had marked and cut small balls and glue it which would be the buttons and then a square of 2 cm and cut from side to side the ends that this would be the pocket and glue behind a piece of cardboard as a triangle that would be a handkerchief, put it flirty and finally you glue the bow tie type bow tie.
Paso 22
Step 22
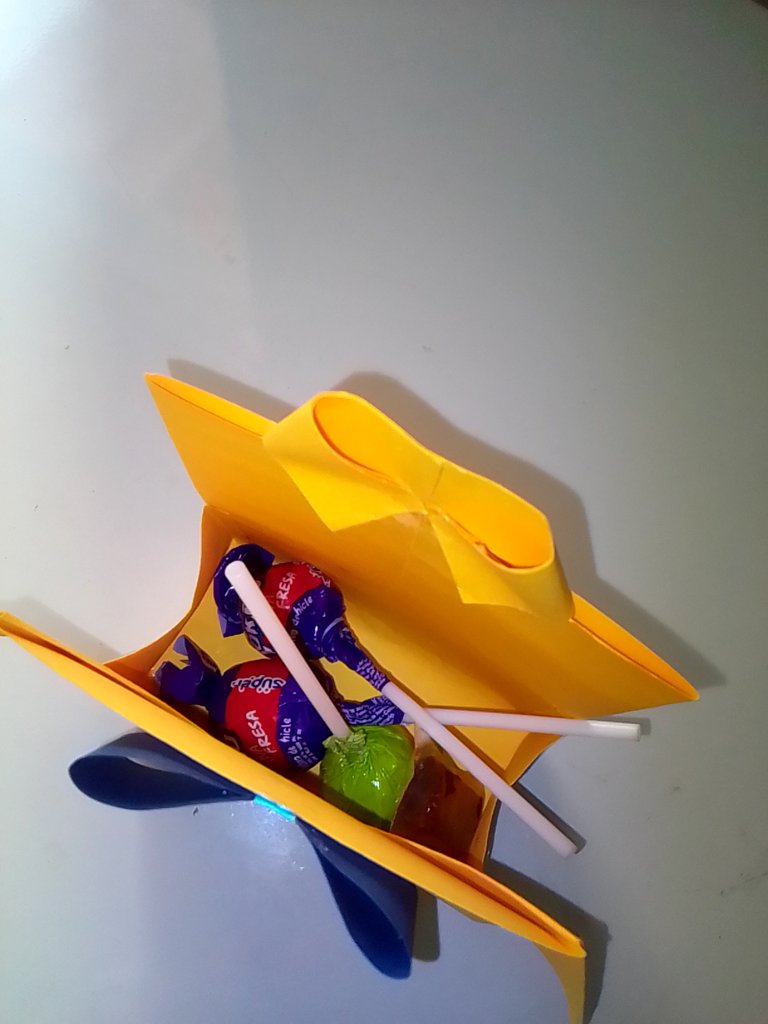
Ahora la abres e introduce lo que quieras obsequiar y cierra.
Now open it and insert what you want to give as a gift and close it.
Gracias por visitarme y leerme espero te guste y lo hagas y después me comentes.
Thank you for visiting me and reading my work, I hope you like it and I hope you do it and then let me know what you think.
Todas las imágenes son de mi autoría tomada con mi celular Logicl55b.
Traducido a través deepl translate.
All images are of my authorship taken with my Logicl55b cell phone.
Translated through deepl translate.
SALUDOS Y BENDICIONES PARA TODOS.
GREETINGS AND BLESSINGS TO ALL.

Congratulations @tibisayq23! You have completed the following achievement on the Hive blockchain And have been rewarded with New badge(s)
Your next target is to reach 300 replies.
You can view your badges on your board and compare yourself to others in the Ranking
If you no longer want to receive notifications, reply to this comment with the word
STOPCheck out our last posts:
Gracias feliz noche bendiciones.
¡Eso es genial @tibisayq23! ¡Estamos emocionados de ver tus logros en Hive! ¡Sigue adelante y logra este nuevo objetivo!
Por cierto, también necesitamos tu ayuda. ¿Podemos pedirle que apoye nuestra propuesta para que nuestro equipo pueda continuar con su trabajo?
Todo lo que necesita hacer es hacer clic en el botón "soporte" en esta página: https://peakd.com/proposals/248.
Gracias!
Gracias.
Me encantó esta manualidad hecha con materiales que tenemos a la mano en casa. Explicaste muy bien el paso a paso. Excelente trabajo. 👏👏👏
Gracias amiga me alegro que te haya gustado si es muy fácil de hacer feliz noche. Bendiciones.
Very original and cute. Congratulations for having the patience for it :)
Thank you I'm glad you liked it happy afternoon blessings.
Ohh pero qué hermosa! es como trabajar un origame tamaño gigante jejeje quedó espectacular!
Gracias amiga me alegra que te haya gustado tal cual feliz noche.