
Español
Hola todos, espero que se encuentren bien💖 hace mucho que no publico algún tutorial pero también tenía tiempo sin poder hacer alguna manualidad especial para mostrárselas. Hoy les quiero enseñar cómo hacer un hermoso cotillón en forma de sombrero ideal para hacer un detalle lindo como regalo🎁✨.
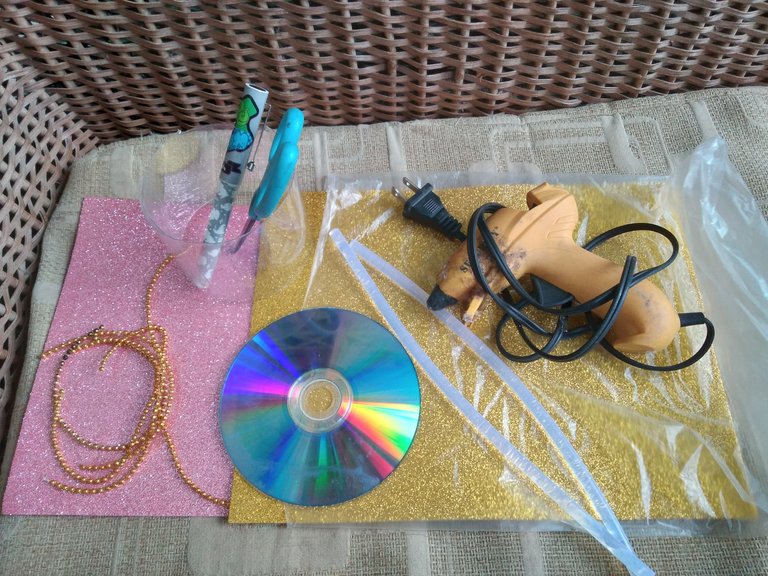
Este presente lo elabore para el día de las madres para dárselo a mi tía después de su jornada de trabajo por lo que los colores que use fueron acorde a ella pero cada persona puede personalizarlo a su gusto💝. Los materiales que use fueron los siguientes:
- Foami escarchado, dorado y rosado
- Tijeras
- Silicón caliente
- Pistola de silicón
- Botella de plástico
- Perla corrida dorada
- Cd
- Lapicero
- Regla
Primer paso:
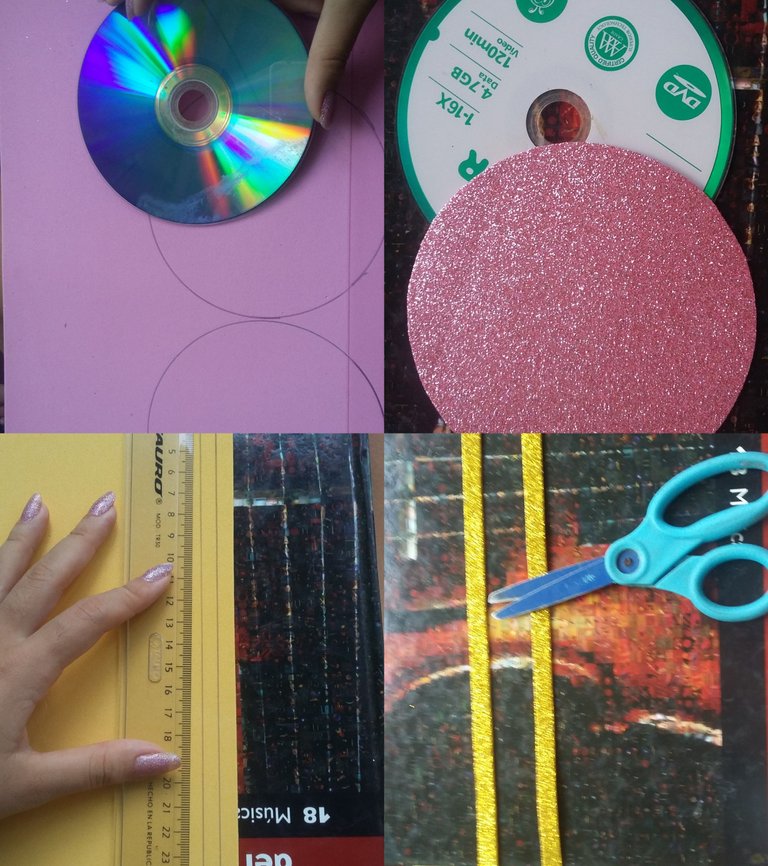
Para elaborar la base de nuestro sombrero, utilizamos un Cd dañado y con el marcamos dos circulo en el foami rosado, ambos deben ser pegados tanto por la parte de arriba como de abajo del Cd (este será el soporte). En el foami dorado con ayuda de la regla marcaremos dos tiras de aproximadamente 38 cm x 0.5 cm .
Segundo paso:
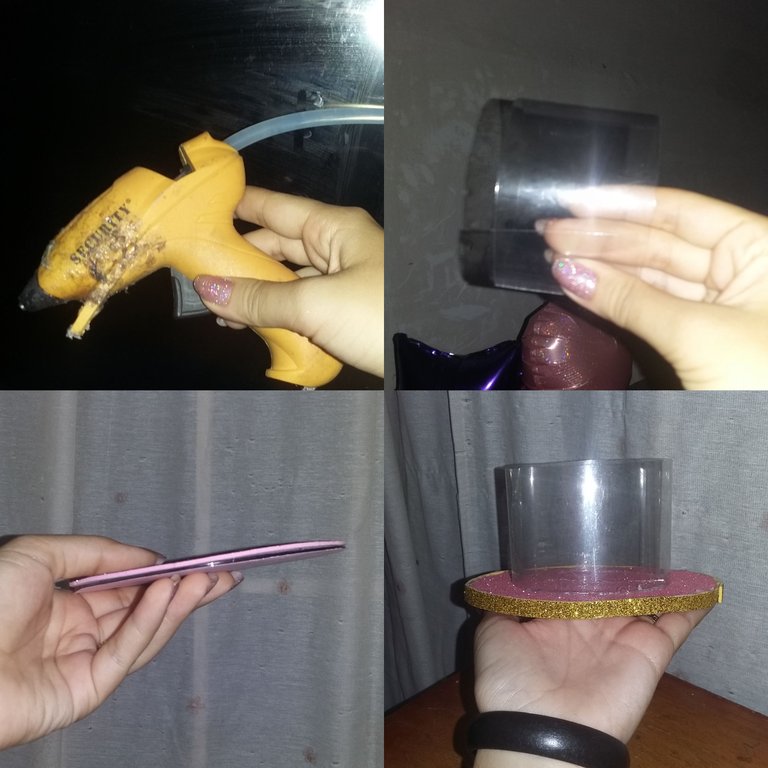
Siguiendo con lo anterior pegamos con silicón las tiras alrededor del círculo. También pasamos a pegar el plástico de la botella, en este caso la corte como una tira de 4 cm y pegue para armar una especie de vasito.

Tercer paso:
Una vez que estén bien pegadas las partes de abajo pasamos hacer la tapita de este cotillón. Para ello debemos corta una tira del foami rosado de 21 x 4.5 cm y un circulo este debe ser un poco más grande que el circulo de plástico. Para hacerlo más resistente al círculo de foami pequeño le haremos con cartón una base de su mismo tamaño (5cm).

Cuarto paso:
Pasamos a pegar con cuidado a la tapa de nuestro cotillón una tira dorada y perlas corridas como decoración para así comenzar a ser el pequeño lacito.
Quinto paso:
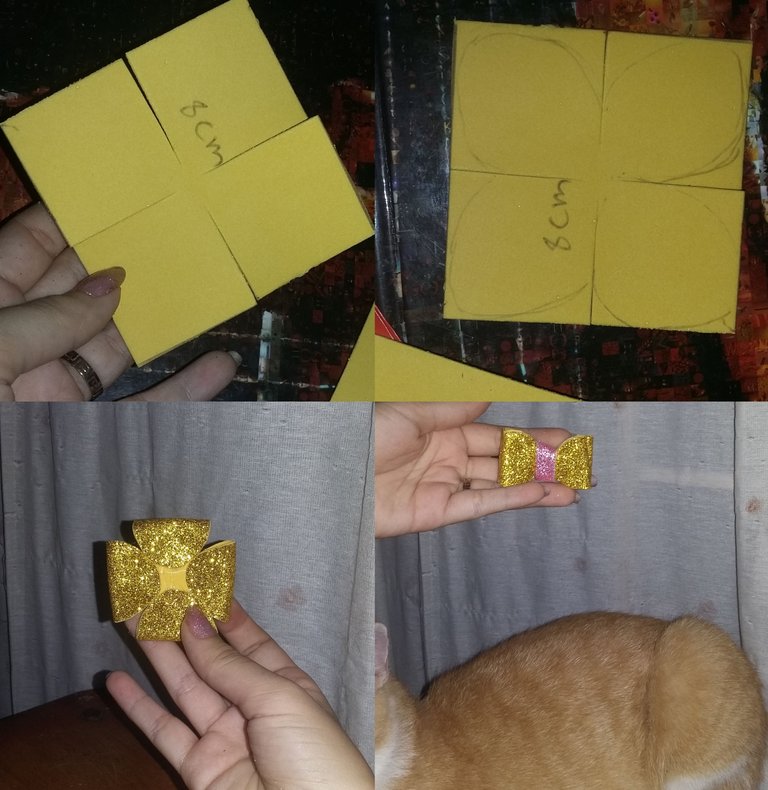
Corte un cuadrito de 8 cm y doble dos veces para marcar una x en él , con cuidado cortamos la X pero dejando un espacio en el medio y luego le daremos formas de pétalos , estos se doblan y pegan (como en la imagen). Una vez secos se giran para darle la forma de lazo. Finalmente con una mini tirita rozada lo cerramos y pegamos a la copa del sombrero.
Sexto paso:
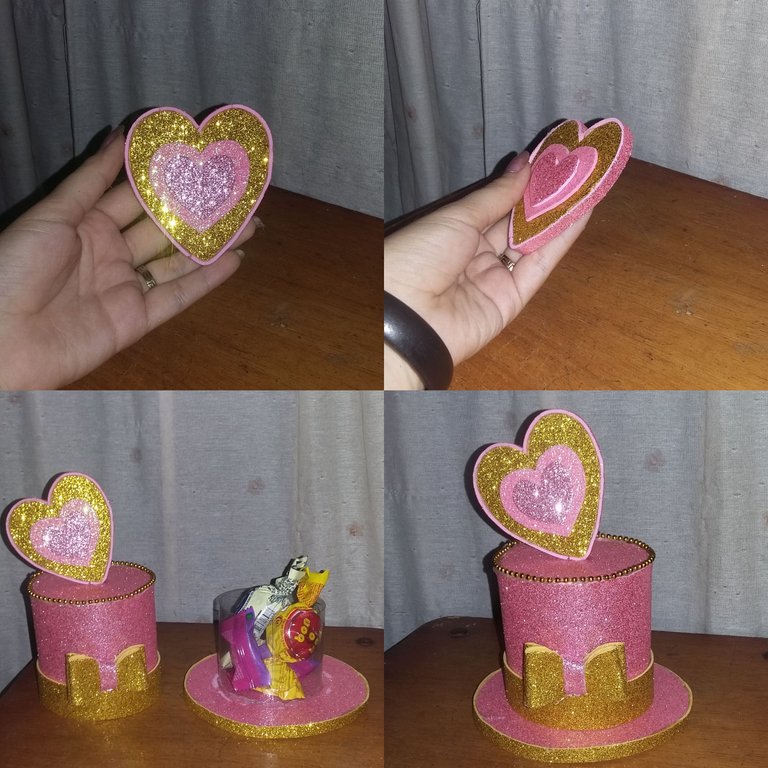
Para el corazón del tope del sombrero hacemos dos caras con esta forma, cortamos una tirita de 0.5 cm para pegarla alrededor de este y con foami restante hacemos dos corazones (uno más grande que el otro) para pegarlo en el centro y terminar de unirlo a nuestra tapa.
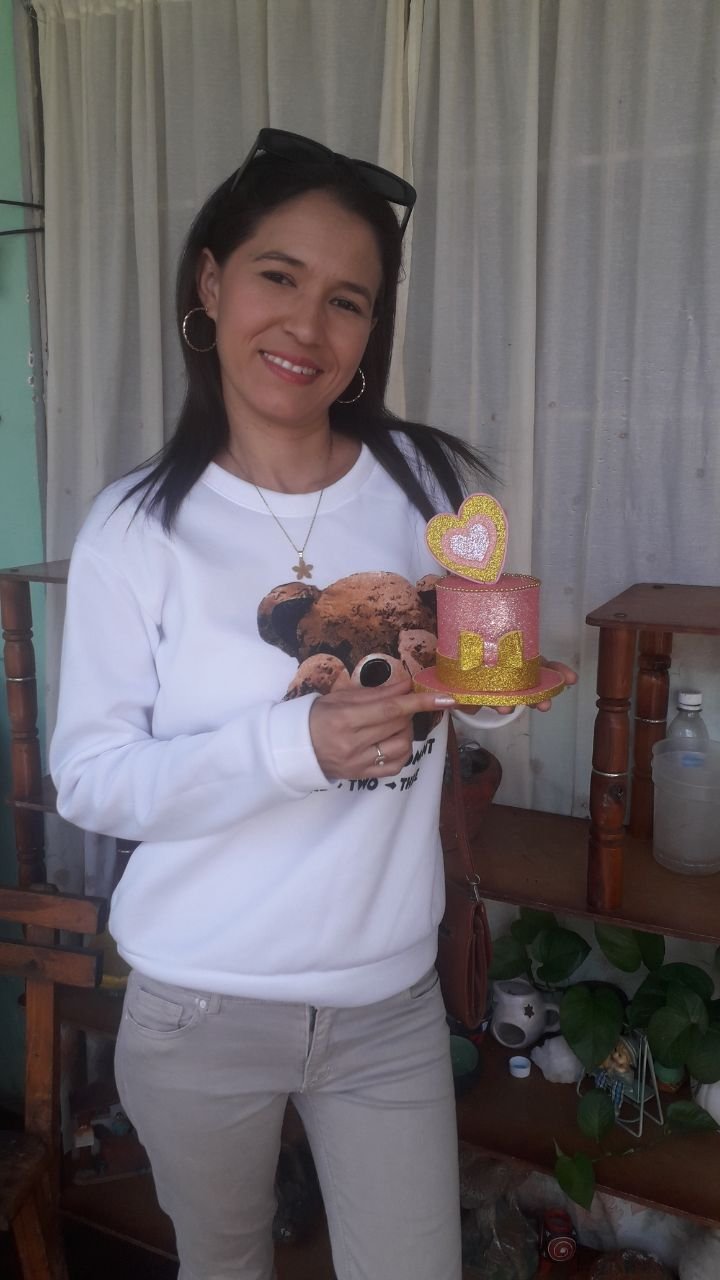
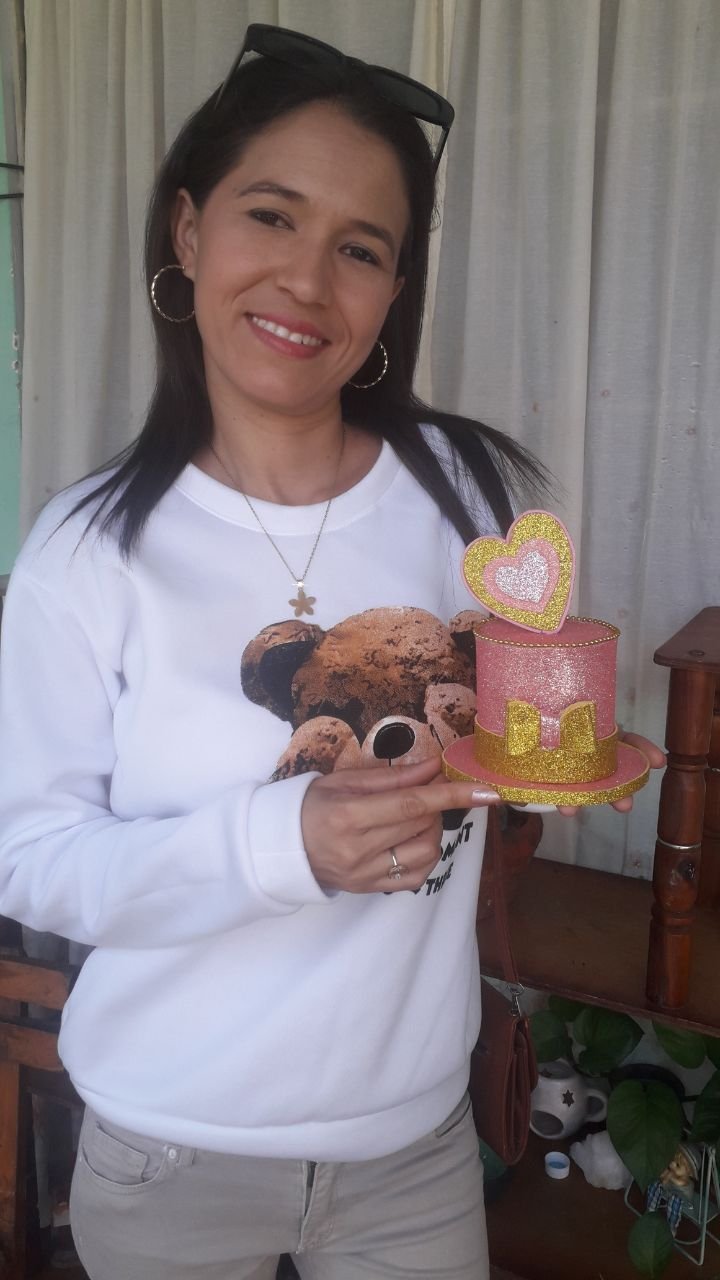
Resultado:
Este lindo cotillón puedes ponerle algunos dulces 🍬 o accesorios como pulseras, collar o aretes dentro de el para regalar, queda una hermosa decoración como resultado, además de ser un lindo gesto. Yo lo hice para el día de las madres pero este modelo de cotillón también podría ser ideal para dar el día del padre solo que invirtiendo los colores y hacerlo un poco más masculino… Como siempre espero que este tutorial pueda ser útil para ustedes y le agradezco que hayan leído hasta aquí💖.
✨¡Hasta una próxima oportunidad!✨

English
Hello everyone I hope you are well💖, it's been a long time since I posted a tutorial but I also had time without being able to make a special craft to show you. Today I want to show you how to make a beautiful hat shaped cotillion ideal to make a nice detail as a gift🎁✨.
I made this present for Mother's Day to give it to my aunt after her work day so the colors I used were according to her but each person can customize it to your liking. The materials I used were the following:
- Gold and pink Foami
- Scissors
- Hot glue
- Silicone gun
- plastic bottle
- gold-colored pearl
- Cd
- pencil
- Ruler
First step:
To make the base of our hat, we use a damaged CD and with it we mark two circles on the pink foami, both must be glued both on the top and bottom of the CD (this will be the support). On the golden foami with the help of the ruler we will mark two strips of approximately 38 cm x 0.5 cm.
Second step:
following the previous step, we glue the strips around the circle with silicone. We also glue the plastic of the bottle, in this case cut it as a 4 cm strip and glue it to form a kind of cup.
Third step:
once the bottom parts are well glued, we make the lid of this cotillion. To do this we must cut a strip of pink foami 21 x 4.5 cm and a circle this should be a little larger than the plastic circle. To make it more resistant to the small foami circle we will make with cardboard a base of the same size (5cm).
Fourth step:
we carefully glue to the top of our cotillion a golden strip and pearls as decoration to start being the little bow.
Fifth step:
Cut a square of 8 cm and fold twice to mark an x on it, carefully cut the X but leaving a space in the middle and then we will give petal shapes, these are folded and glued (as in the image). Once they are dry, turn them to give the bow shape. Finally, with a mini strip, we close it and glue it to the top of the hat.
Sixth step:
for the heart of the top of the hat we make two faces with this shape, cut a 0.5 cm strip to glue around it and with the remaining foami we make two hearts (one bigger than the other) to glue it in the center and finish attaching it to our cap.
Result:
You can put some candies 🍬 or accessories such as bracelets, necklaces or earrings inside this cute cotillion to give as a gift, it is a beautiful decoration as a result, besides being a nice gesture. I did it for Mother's Day but this cotillion model could also be ideal to give on Father's Day just reversing the colors and making it a little more masculine... As always I hope this tutorial can be useful for you and I thank you for reading this far💖.
✨See you next time!✨

Congratulations @tifany!
You raised your level and are now a Minnow!
Check out our last posts: