✨🐻¡Hola amigos amantes de la creatividad! Espero que hayan pasado un muy buen comienzo de semana.🐻✨
🔸Sin más que añadir, a continuación los dejo con el paso a paso:
✨🐻¡Hello friends who love creativity! I hope you had a very good start to the week.🐻✨
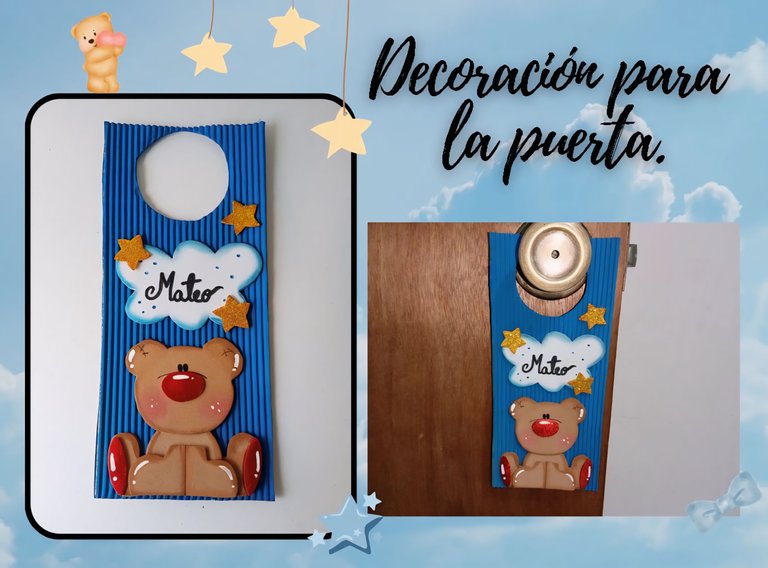
Good afternoon friends. I hope you are having a great week. For my part, it's pretty good, I'm still mentally exhausted, but thank God everything is going to get better. Today I share with you the step by step to make a beautiful decoration for the door. I know that on many occasions I have shared pendants with you to decorate your doors, but I had never made a decoration like this that hangs from the lock and I loved it so much that I plan to add this idea to the list of things to do each month.
I didn't have much of an idea how I was going to decorate it, but I did know that it would be for a baby's or a boy's room, since I almost always make decorations for girls and I wanted that to change. But hey, the final result was quite charming, I must say that it is one of my favorites.
🔸Without more to add, then I leave you with the step by step:
♥️ESPERO QUE TE GUSTE,
¡Empecemos!
♥️I HOPE YOU LIKE IT,
Let's start!

✂️ MATERIALES | ✂️ MATERIALS

- Cartulina corrugada.
- Foami marrón.
- Foami metalizado rojo.
- Foami blanco.
- Foami escarchado dorado.
- Pinturas y marcadores.
- Pegamento.
- Hoja blanca.
- Tijeras.
- Lápiz.
- Regla.
- Corrugated cardboard.
- Brown foam.
- Red metallic foam.
- White foam.
- Gold frosted foam.
- Paints and markers.
- Glue.
- White sheet.
- Scissors.
- Pencil.
- Ruler.

🐻 PROCEDIMIENTO | 🐻 PROCESS

- PASO 1:
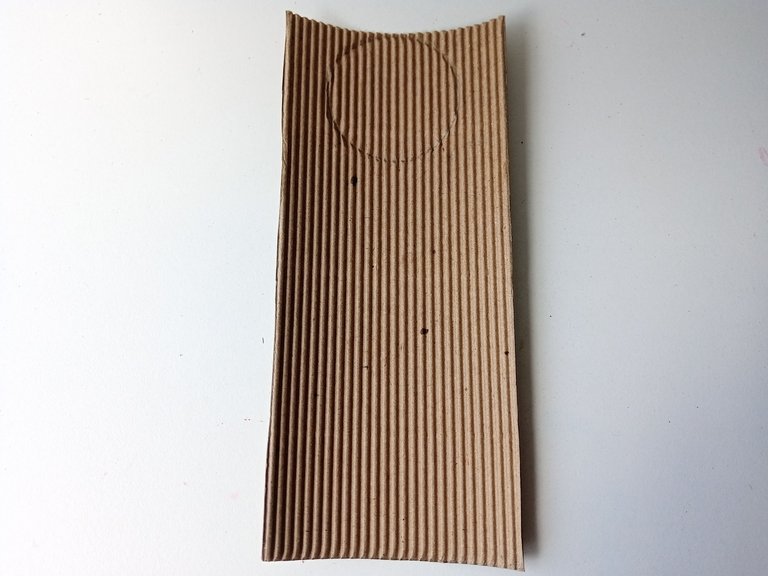
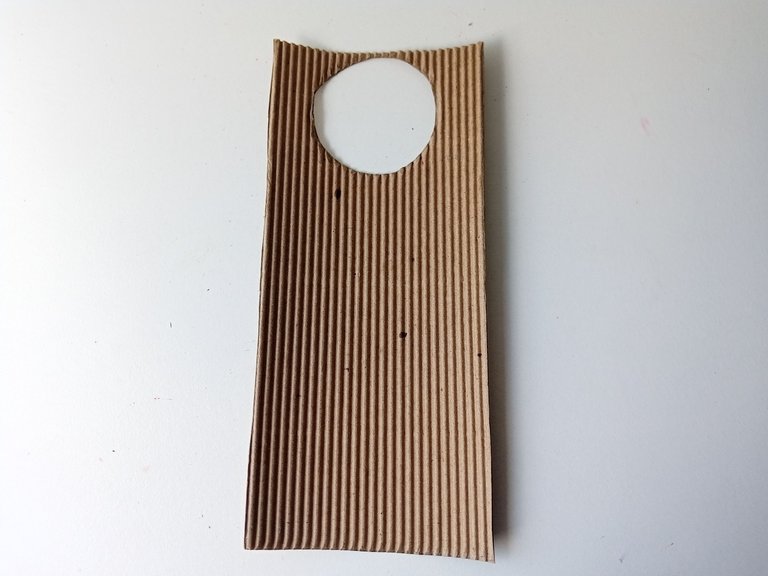
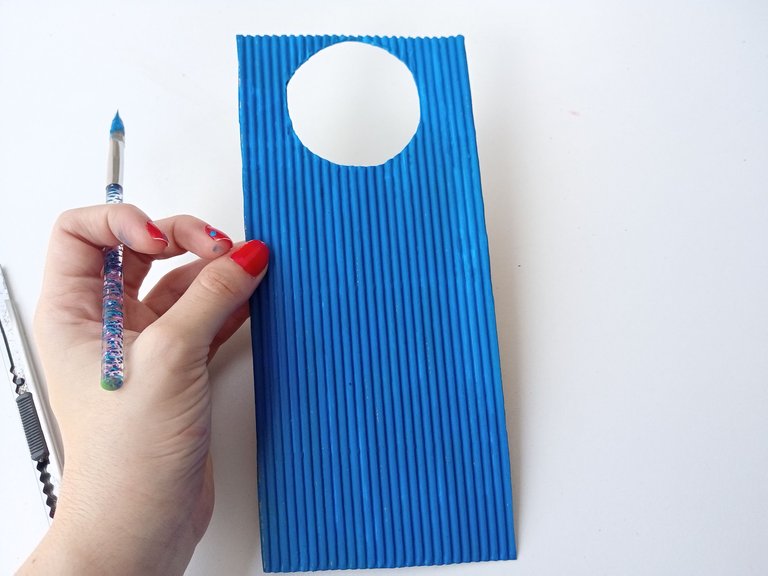
Lo primero que hice fue tomar las medidas de la base en papel corrugado de 21 cm x 9 cm y recorté. Luego, en medio de la parte superior, tracé una circunferencia con el tamaño de la cerradura que en este caso fue de 5 cm de circunferencia e igualmente, recorté.
- STEP 1:
The first thing I did was take the measurements of the base on corrugated paper measuring 21 cm x 9 cm and cut it out. Then, in the middle of the upper part, I drew a circle with the size of the lock, which in this case was 5 cm in circumference and also cut out.


- PASO 2:
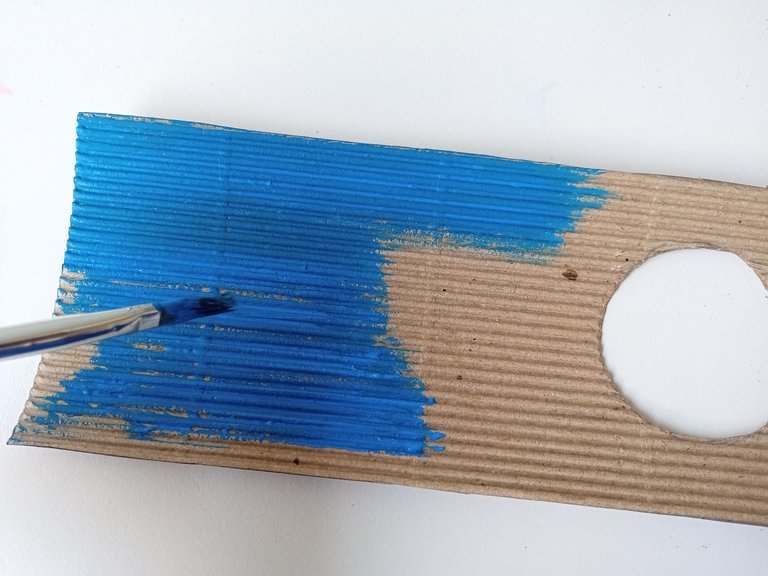
Como no contaba con la cartulina del color que quería o tenía pensado para esta decoración, tuve que pintarla con pintura azul, así que pasé dos capas y la verdad que quedo excelente, no se nota la diferencia. Luego de cubrir con pintura, dejé secar.
- STEP 2:
Since I didn't have the cardboard of the color I wanted or had in mind for this decoration, I had to paint it with blue paint, so I applied two coats and the truth is that it turned out excellent, you can't tell the difference. After covering with paint, I let it dry.


- PASO 3:
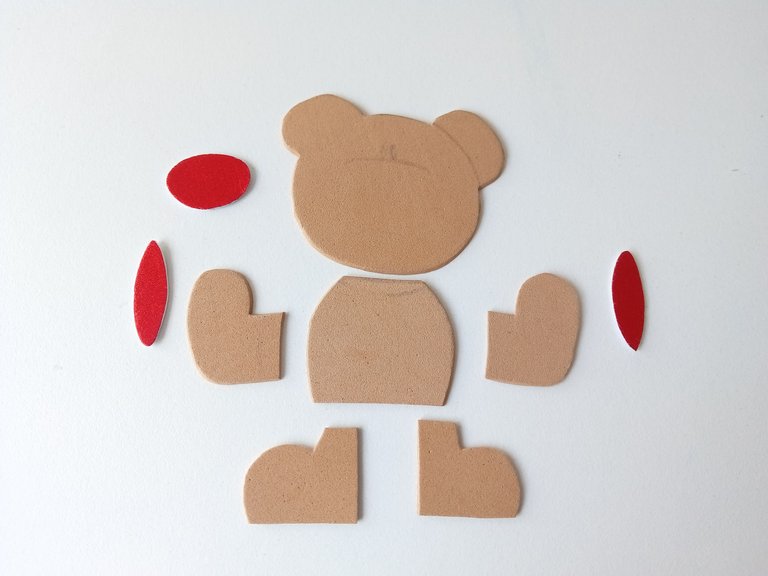
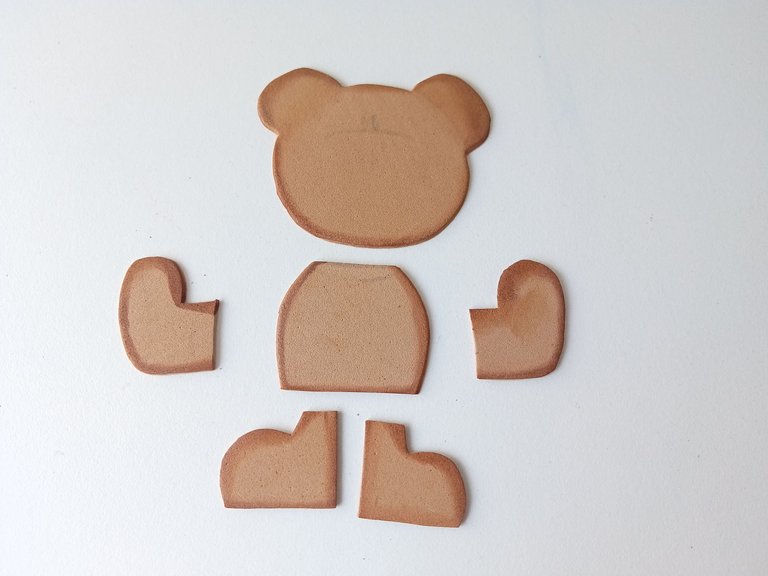
Después, comencé a dibujar los patrones del oso en una hoja blanca y luego los transferí a los colores correspondientes de foami, de la siguiente manera: la cabeza, cuerpo y patas, en foami marrón, y para la nariz y parte interna de las patas, en foami metalizado rojo. Una vez recortadas todas las piezas, tomé pintura marrón y con ayuda de un pañito, froté los bordes de las piezas del oso.
- STEP 3:
Afterwards, I began to draw the bear's patterns on a white sheet and then transferred them to the corresponding colors of foam, as follows: the head, body and legs, in brown foam, and for the nose and inner part of the legs. , in red metallic foam. Once all the pieces were cut out, I took brown paint and with the help of a cloth, I rubbed the edges of the bear pieces.


- PASO 4:
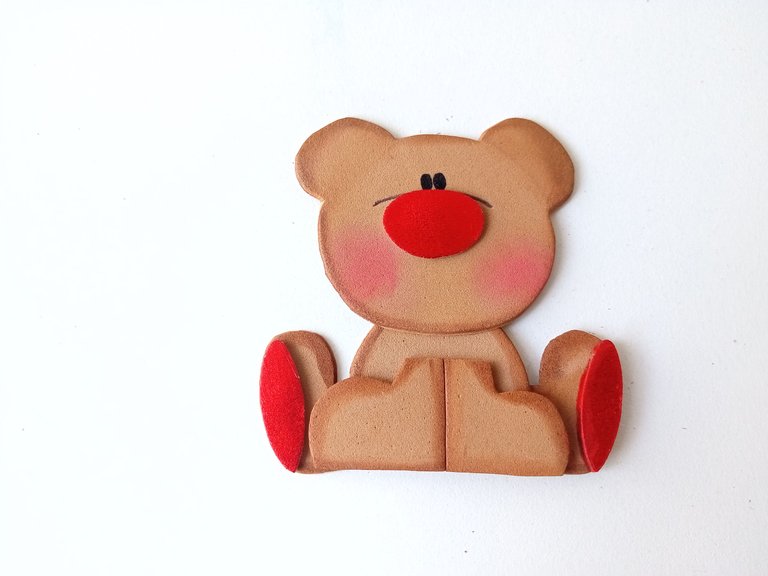
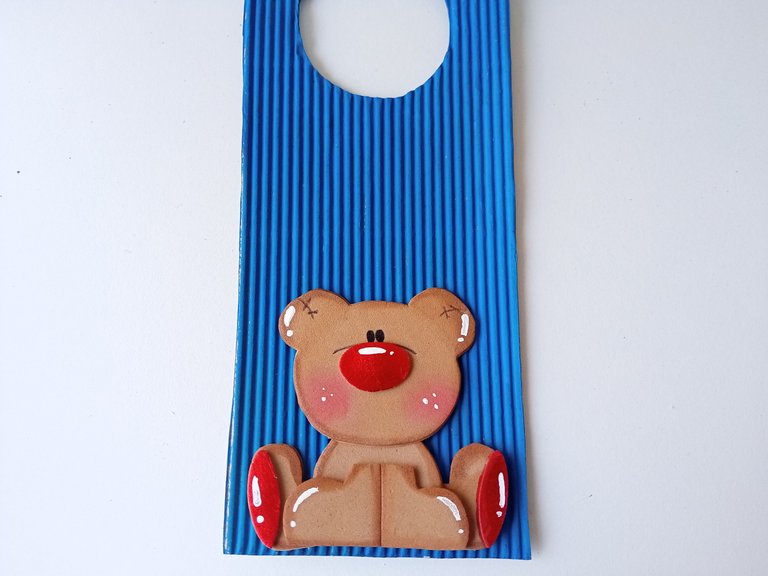
Al estar las piezas listas, me centré en dar detalles al rostro del oso, dibujando los ojos y dando color en las mejillas con un poco de pintura rosada. Pegué todas las piezas, hasta formar al oso, incluyendo la nariz y parte interna de las patas. Di toques de luz con pintura blanca, detalles en las orejas para que parezca un peluche y pegué en la parte inferior de la base.
- STEP 4:
Once the pieces were ready, I focused on giving details to the bear's face, drawing the eyes and coloring the cheeks with a little pink paint. I glued all the pieces together until the bear was formed, including the nose and the inside of the legs. I gave highlights with white paint, details on the ears to make it look like a stuffed animal and glued it to the bottom of the base.


- PASO 5:
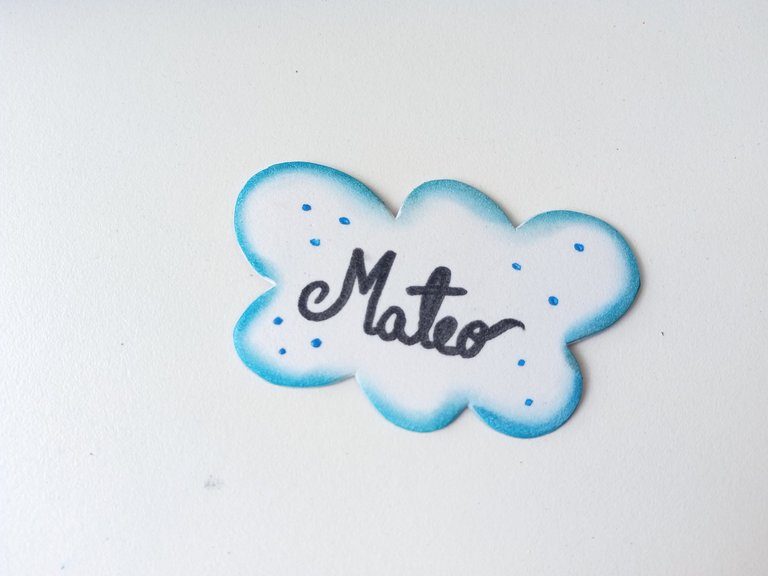
Como últimos detalles, dibujé una nube en foami blanco, tres estrellas en foami dorado escarchado y recorté. Luego, con pintura azul y un pañito, froté los bordes de la nube, escribí el nombre del niño, pinté algunos puntos por toda la nube y, por último, pegué la nube sobre la cabeza del oso y las estrellas las pegué donde creí que se verían bien.
- STEP 5:
As last details, I drew a cloud in white foam, three stars in frosty gold foam and cut out. Then, with blue paint and a cloth, I rubbed the edges of the cloud, wrote the child's name, painted some dots all over the cloud and, lastly, I glued the cloud over the bear's head and glued the stars where I thought they would. they would look good.


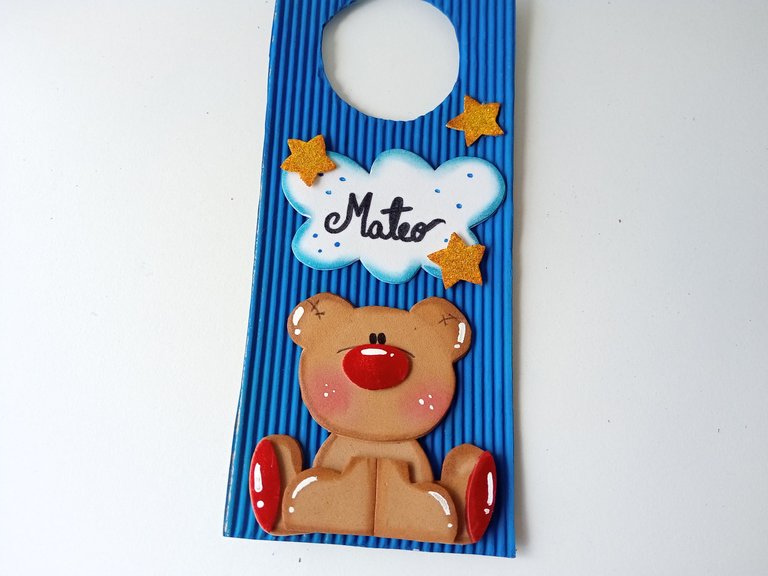

✨🐻¡And ready!🐻✨In this simple way, you can make beautiful decorations to decorate your doors, whether it is the children's room or any room you want. On the other hand, it is not necessary to use large quantities of materials and they can create the design they want. I hope you liked it and are encouraged to make it.
❤️Until the next post.

✨RESULTADO: | ✨RESULT:

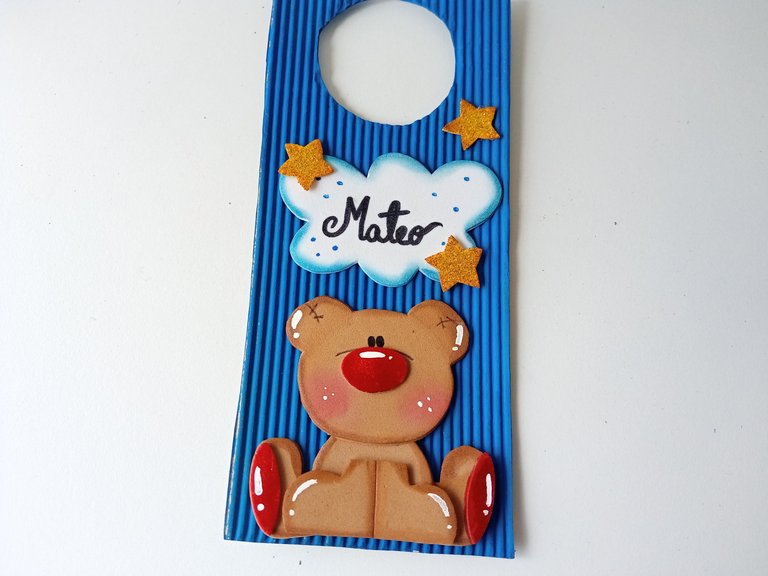


Todas las fotografías son de mi propiedad.
Separador y Fotos editadas en Canva
All photographs are my property.
Photos edited in Canva
Congratulations, your post has been upvoted by @dsc-r2cornell, which is the curating account for @R2cornell's Discord Community.
Muchas gracias por el apoyo, amigos. Saludos.✨
Muy interesante y sobre todo muy sencillo de hacer. Gracias por compartir. Puede que lo tenga detalle como parte de un presente para el dia de los niños.
Muchas gracias, amigo. Es verdad, quedaría muy bonito como un detalle para el día del niño. ✨
Saludos!
https://reddit.com/r/crafts/comments/1cmeesf/decoration_for_the_door/
The rewards earned on this comment will go directly to the people( @yolimarag ) sharing the post on Reddit as long as they are registered with @poshtoken. Sign up at https://hiveposh.com.
Muchas gracias, amigos.✨💕
Que creativo y sencillo de hacer, felicidades💛
Muchas gracias, me alegra mucho que te haya gustado 💕
Se ve muy bonito sobre todo el oso
Muchas gracias, me alegra que te haya gustado, amigo. Saludos! ✨
Esto está precioso ami, me encanta la idea de decorar la puerta con ese adornito, está super cuchi y amé esos colores que elegiste, te quedó perfecto ❤️
Cierto? Es una idea bien tierna, yo pienso que a ti te quedaría bello a ti estilo , Mary. Muchas gracias por pasarte , preciosa 💕
Que preciosidad amiga, yo amo este tipo de decoraciones quedan súper hermosas. La combinación estuvo perfecta🥰
Muchas gracias, amiga. Este tipo de decoración son mis favoritas, pero nunca hacía elaborado una.
Me alegra que te haya gustado, bella!
Hola amiga, que bonito ese trabajo que nos compartes, la cual es perfecto para decorar toda la casa y de esa manera darle un poco mas de colores. Me gusto los colores y los materiales que usas y de esa manera obtener una gran pieza.
Hola, amigo! Muchas gracias por tus palabras. Es verdad, este tipo de decoraciones le dan un poco más de color a algunos espacios de la casa.
Muchas gracias por comentar, amigo. Saludos! ✨
Ayyyyyyyy, pero que es esta cosita tan preciosa valeeeeee🌷🥹
Quiero uno jaja , chama te pasaste, ese osito está mega tierno ¡LO AMEEE!😍
Ayyyyy, gracias amiga preciosa. Mis comentarios favoritos son los tuyos 💖. Me alegra que te haya gustado la decoración, me puedes hacer uno a Lio 💖
Muchas gracias por el apoyo, amigos ✨
Amiga, como siempre te quedo precioso, muy útil para las decoraciones en la casa.
Las cosas para niños también quedan lindas.
Amiga, muchas gracias. Asi es, a veces se me olvida y hago puras cositas para niña , jaja .
Gracias por comentar, bella.✨💕
Está precioso!
Muchas gracias,linda.✨
Que belleza Valen 🥺🥺 El detalle del osito me pareció demasiado tierno. Por fa puedes traer un tutorial para hacer un separador de libro? Sería lindo verlo con tu creatividad. Te mando un abrazo 🩷✨
Muchas gracias por tus palabras, mi Vane! Hace poquito hice un separador y lo publiqué Ami , pero pronto vuelvo a hacer otro 💗 Tan bella, también te mando un abrazote 💖
Amiga esa decoración esta muy cuchi, me encantan los colores y el osito, siempre como tu haciendo cosas lindas! Gracias por compartir! 😍
Muchas gracias, amiga, Agradezco tus palabras. A mí también me gustaron mucho los colores. Gracias por comentar, bella! 💕
Que preciosura ami, ese me iba perfecto para poner en la puerta de Matías cuando era un bebé
Me parece que sería un lindo souvenir también
Esta hermoso
Es verdad,Ami, sería una bonita idea para el cuarto de un niño 🤭
Gracias por pasarte, mi Rosita bella 💕
Un osito muy bonito. Me encantó amiga! 😍