✨¡Hola amigos amantes de la creatividad! Espero que estén todos bien.✨
🔸Sin más que añadir, a continuación los dejo con el paso a paso:
✨¡Hello friends who love creativity! I hope you are all well.✨
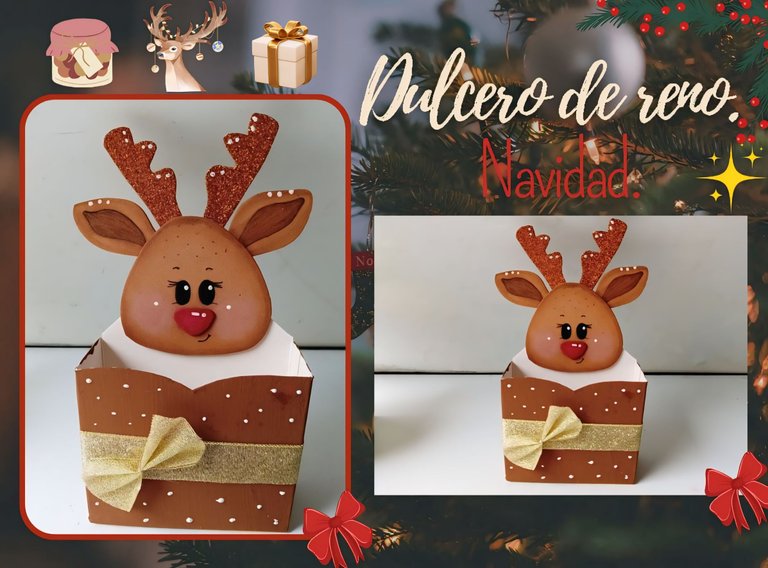
Good afternoon, friends! I hope you are having a great week. For my part, I am happy to stop by here to share a new creation with you. On this occasion, I am sharing with you the step-by-step instructions for making a cute Christmas candy dish with a reindeer theme. You do not know how happy I am to share Christmas creations with you. For me, it is like going back to my childhood, and remembering when I saw my mother making decorations to decorate the whole house. Obviously, at that time I would have wanted to help, but I knew I was very small, so I just watched everything she did.
But anyway, returning to the main topic, for Christmas you cannot miss candy dishes or boxes to give details, I say candy dishes, but you can give whatever you want in this creation that I share with you.
🔸Without more to add, then I leave you with the step by step:
♥️ESPERO QUE TE GUSTE,
¡Empecemos!
♥️I HOPE YOU LIKE IT,
Let's start!

✂️ MATERIALES | ✂️ MATERIALS

- Caja de cartón.
- Foami escarchado marrón.
- Foami marrón.
- Foami rojo.
- Pinturas y marcadores.
- Cinta dorada.
- Pegamento.
- Hoja blanca.
- Tijeras.
- Regla.
- Lápiz.
- Cardboard box.
- Brown frosted foam.
- Brown foam.
- Red foam.
- Paints and markers.
- Gold ribbon.
- Glue.
- White sheet.
- Scissors.
- Ruler.
- Pencil.

🌟 PROCEDIMIENTO | 🌟 PROCESS

✨PASO 1:
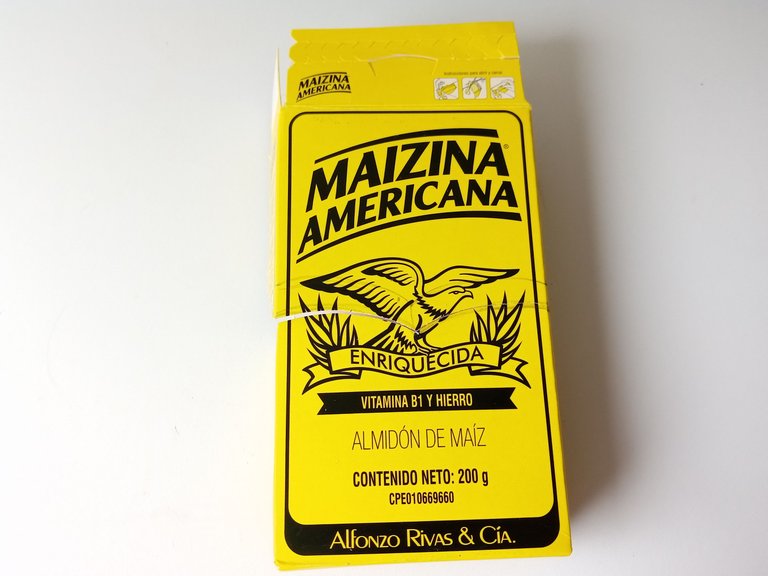
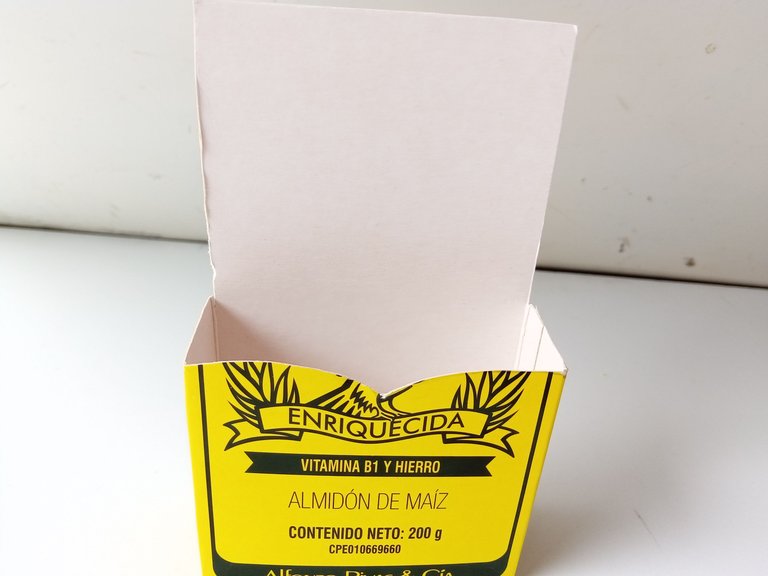
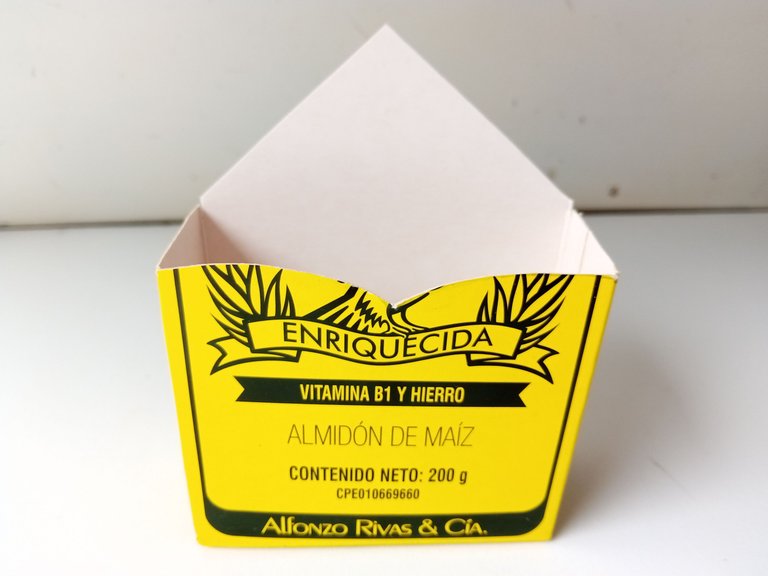
Lo primero que hice fue tomar la caja de cartón que iba a utilizar para la base de este dulcero. Como pueden ver, yo utilicé una caja de maicena, pero pueden utilizar la que deseen. Al tener la caja, comencé a trazar las medidas para cortar y darle forma. Las medidas que tomé fueron las siguientes: para la parte delantera, tome las medidas del ancho de 10 cm y marqué a la mitad y recorté a los 7 cm de largo, dándole una forma ovalada al borde superior. Para la pared trasera, corté a la mitad, pero dándole forma triangular.
✨STEP 1:
The first thing I did was take the cardboard box that I was going to use for the base of this candy dish. As you can see, I used a cornstarch box, but you can use whatever you want. Once I had the box, I started to trace the measurements to cut and shape it. The measurements I took were the following: for the front, I took the measurements of the width of 10 cm and marked it in the middle and cut it to 7 cm long, giving the top edge an oval shape. For the back wall, I cut it in half, but giving it a triangular shape.


✨PASO 2:
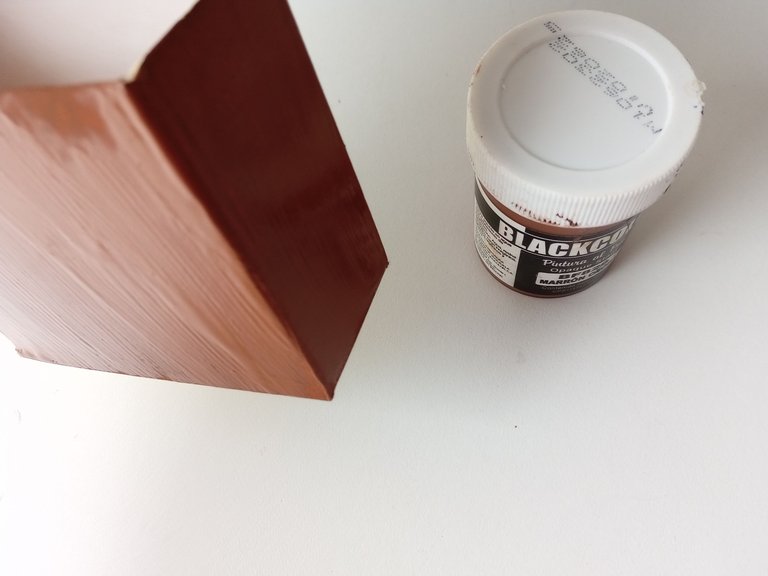
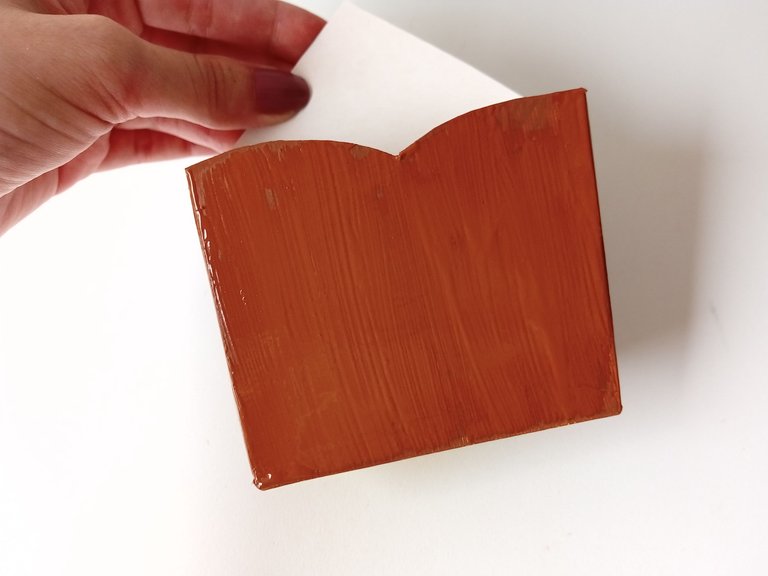
Al tener lista la forma de la base, tomé mi pincel y pintura marrón para pintar todas las paredes externas. Quise pintarlo de marrón para que diera a entender que es parte del cuerpo del reno o que simplemente combine con la decoración y se vea uniforme. En mi caso, le di dos capas de pintura, pero ustedes pueden forrar con telas o pintarlo del color deseado.
✨STEP 2:
Once I had the shape of the base ready, I took my brush and brown paint to paint all the external walls. I wanted to paint it brown to make it seem like it is part of the reindeer's body or to simply match the decoration and look uniform. In my case, I gave it two coats of paint, but you can cover it with fabric or paint it the desired color.


✨PASO 3:
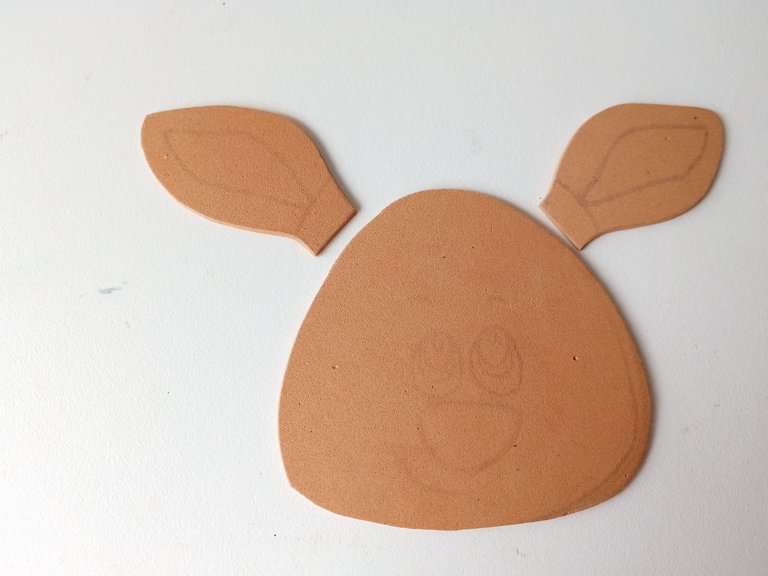
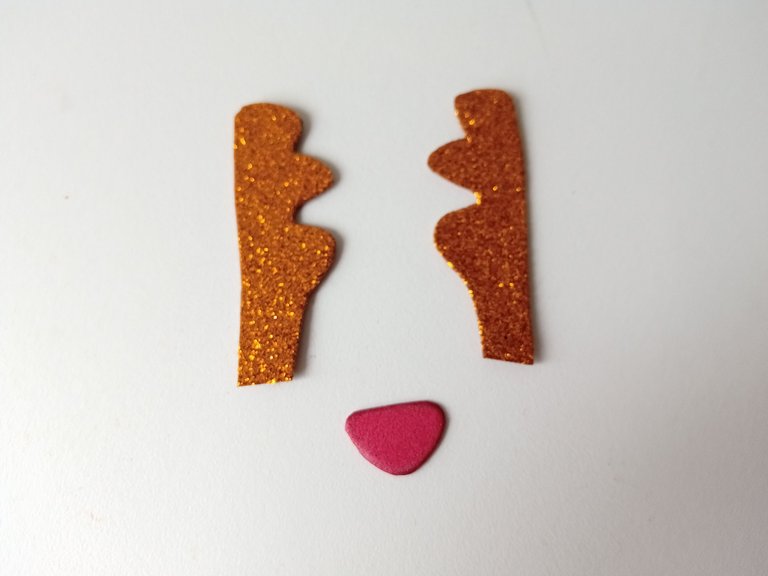
Mientras la base secaba, comencé a dibujar el patrón de la decoración en una hoja blanca, que en este caso es el reno y luego, pase a los colores correspondientes de foami, como explico a continuación: cuernos en foami escarchado marrón, nariz en foami rojo, cabeza y orejas en foami marrón. Al estar listas, recortamos.
✨STEP 3:
While the base was drying, I started drawing the decoration pattern on a white sheet, which in this case is the reindeer and then, I moved on to the corresponding colors of foam, as I explain below: antlers in brown frosted foam, nose in red foam, head and ears in brown foam. When they were ready, we cut them out.


✨PASO 4:
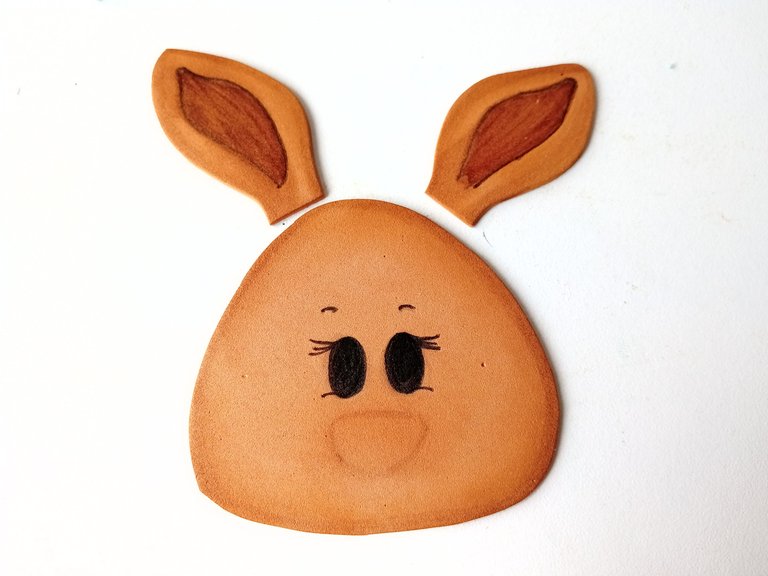
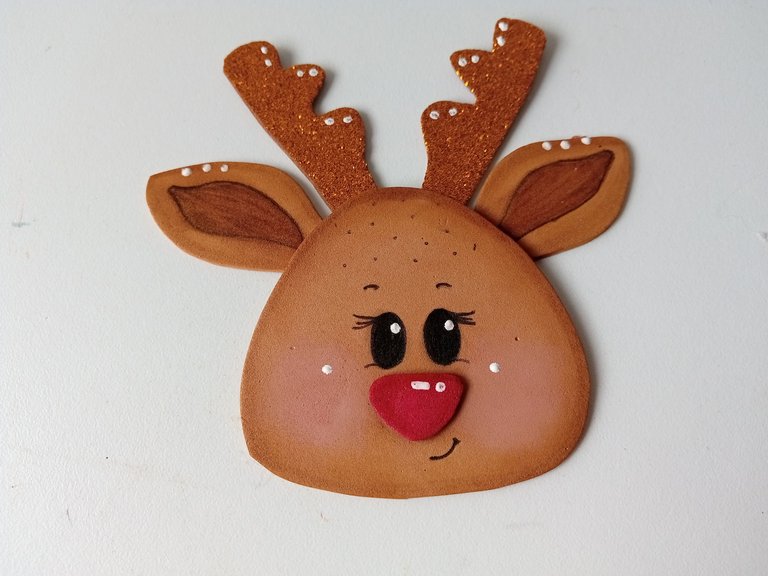
Seguidamente, di color con pinturas a los bordes de las piezas de foami liso, además pinté la parte interna de las orejas con marcador. Al estar seco pinté el rostro del reno, pinté las mejillas con rubor, pegué las piezas hasta formarlo y di puntos de luz a los ojos, nariz, cuernos, mejillas y orejas.
✨STEP 4:
Next, I colored the edges of the pieces of smooth foam with paints, and I also painted the inside of the ears with a marker. When it was dry, I painted the face of the reindeer, painted the cheeks with blush, glued the pieces together until it was formed and gave points of light to the eyes, nose, horns, cheeks and ears.


✨PASO 5:
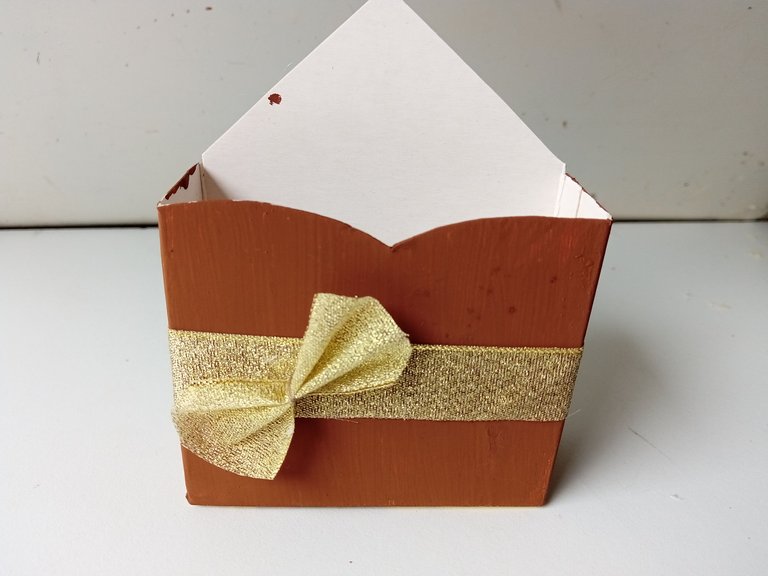
Mientras se secaba, para agregar más decoración a la caja y que no se viera tan vacía, pegué una cinta dorada en medio de la base y un lazo encima de la misma cinta. Al estar seca la decoración, pegué el reno en la pared superior de la caja y pinté puntos blancos por toda la caja.
✨STEP 5:
While it was drying, to add more decoration to the box and make it not look so empty, I glued a gold ribbon in the middle of the base and a bow on top of the same ribbon. Once the decoration was dry, I glued the reindeer to the top of the box and painted white dots all over the box.

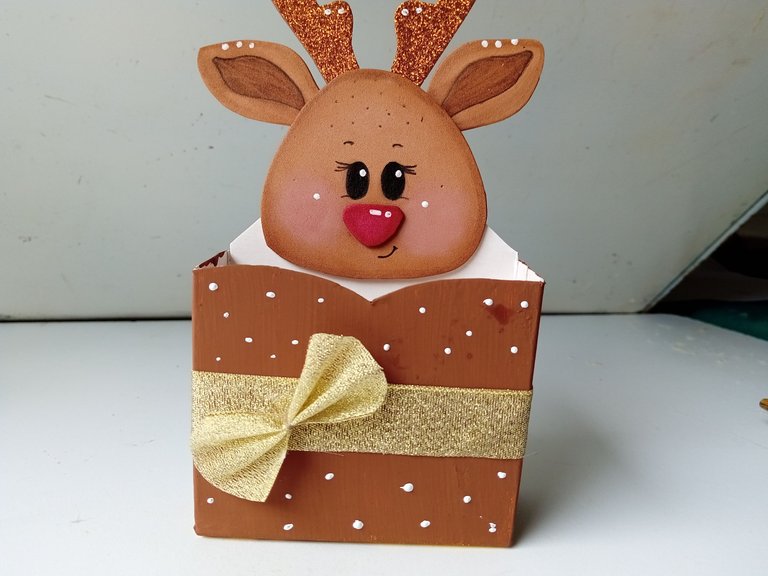

✨This is how you can make a cute candy box or gift box to give to your loved ones this Christmas. Remember that you can decorate it with the figure, creature or character of your choice. I hope you liked the step-by-step instructions and are encouraged to make it at home.
❤️Until the next post.

✨RESULTADO: | ✨RESULT:

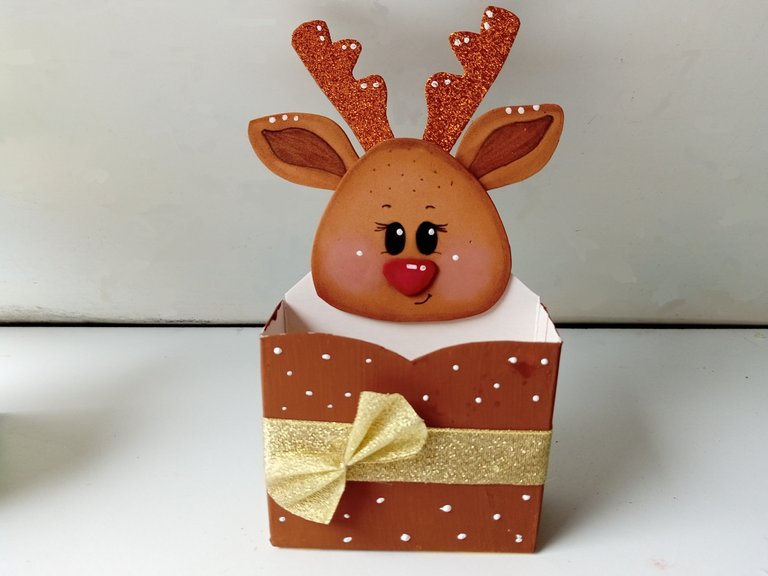


Todas las fotografías son de mi propiedad.
Separador y Fotos editadas en Canva
All photographs are my property.
Photos edited in Canva
Posted Using InLeo Alpha
Happy holiday! It is great idea to recyle too 😊
Thank you very much! Absolutely, whenever I can, I recycle material and thus get the most out of it and contribute to a great cause.💕✨
Nooooo puedo con tanta belleza DIOSSSSMIOOOO🩷🥰🥰
AMI esto quedó hermosamente tierno, me super encanta!!
Gracias amiga bella! Sabía que te iba a gustar el resultado 🤭💕
Ya quiero ver qué nos compartes para estas navidades.💕🎄
Que lindo, esa cinta que le has colocado por el centro le ha quedado muy linda, le da como un toque fino. No pasó por mi mente inicialmente que era una caja de Maizina inicialmente. Magia!
Cierto? Al momento no estaba muy segura de la cinta, pero le da un toque que ayuda a resaltar aún más y combina perfecto con el marrón.
Muchas gracias! Saludos ✨✨
Amo los renos y este te quedó hermoso 🥰🥰
Está perfecto para darle dulcitos a Olí 🤭💕
Que bonito, gracias por el tutorial 🤗
Muchas gracias, amiga. Me alegra que te haya gustado 💕
Amigaaaa ese dulcero te quedo bellisimo, muy lindo para regalar o incluso tenerlo en casa! Me encanto! 😍
Totalmente amiga! Es perfecto para dar un detalle o para decorar y poner el ambiente más navideño jaja.
Gracias bella!💕
Que cuchitura, necesito muchos dulceros así🥰🥰
Gracias mi Yage! Me alegra que te haya gustado 🤭. Es mi favorito, hasta ahora.
Ay nooo, se ve demasiado hermosooo 😍 Me encanta como le hiciste la carita tierna al renito mi Valen. Te quedó precioso!!!
Qué cuchituraa. Te quedó super bello, valen. Excelente para los regalos navideños.
Congratulations, your post has been curated by @dsc-r2cornell. You can use the tag #R2cornell. Also, find us on Discord
Felicitaciones, su publicación ha sido votada por @ dsc-r2cornell. Puedes usar el tag #R2cornell. También, nos puedes encontrar en Discord
Muchas gracias por el apoyo, amigos 💕
Demasiado lindiisiiimo amii😍😍 o sea aprendiste mientras veias a tu mami jeje mas finooo