✨🐝¡Hola amigos amantes de la creatividad! Espero que hayan pasado un muy buen comienzo de semana.🐝✨
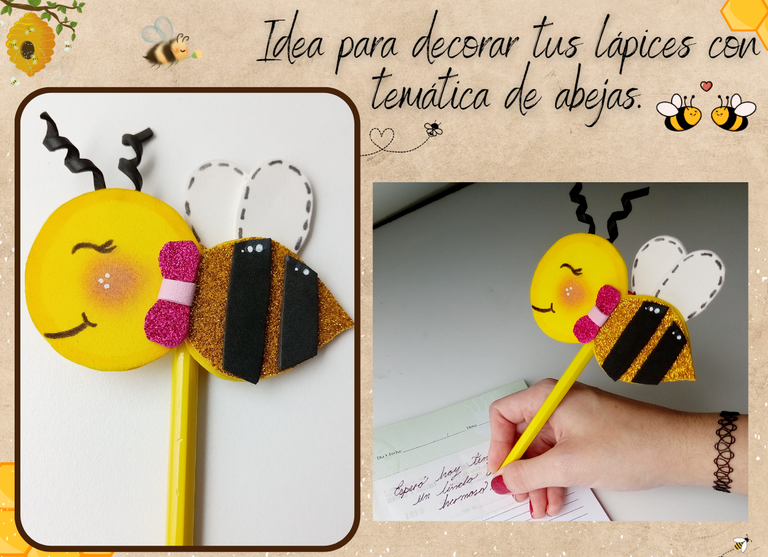
En esta ocasión les traigo una linda idea para decorar sus lápices con temática de abejas, me parece una linda idea y muy fácil de hacer. Por otro lado, recuerda que puedes hacerlo con la temática de tu elección y que simplemente comparto ideas contigo, ya sea para que las tomes tal cual o para que te inspires a crear algo mucho más bonito. Hace unas semanas les traje una idea muy linda para decorar sus bolígrafos y la verdad me enamoró, me sentí muy bien con el resultado final, pues poco a poco voy mejorando en cuanto al tema de dibujar caritas en foami, obviamente no profesionalmente porque estoy aprendiendo pero he visto una mejora en mi pulso y técnica. Por eso, hoy les traigo una idea que me pareció muy linda, sin duda me gustó mucho más la creación de hace unas semanas, pero aun así me pareció que quedó muy linda y es una muy buena idea porque me ayuda a seguir practicando, poco a poco a aprender y tener más soltura a la hora de crear.
🔸Sin más que añadir, a continuación los dejo con el paso a paso:
✨🐝¡Hello friends who love creativity! I hope you had a very good start to the week.🐝✨
This time I bring you a nice idea to decorate your bee-themed pencils, I think it's a nice idea and very easy to make. On the other hand, remember that you can do it with the theme of your choice and that I simply share ideas with you, either for you to take them as is or to be inspired to create something much more beautiful. A few weeks ago I brought you a very nice idea to decorate your pens and I really fell in love, I felt very good with the final result, because little by little I am improving regarding the subject of drawing faces in foam, obviously not professionally because I am learning but I have seen an improvement in my pulse and technique. That is why, today I bring you an idea that seemed very cute to me, without a doubt I liked the creation from a few weeks ago much more, but even so, it seemed to me that it turned out very nice and it is a very good idea, because I It helps to keep practicing, little by little to learn and have more ease when creating.
🔸Without more to add, then I leave you with the step by step:
♥️ESPERO QUE TE GUSTE,
¡Empecemos!
♥️I HOPE YOU LIKE IT,
Let's start!

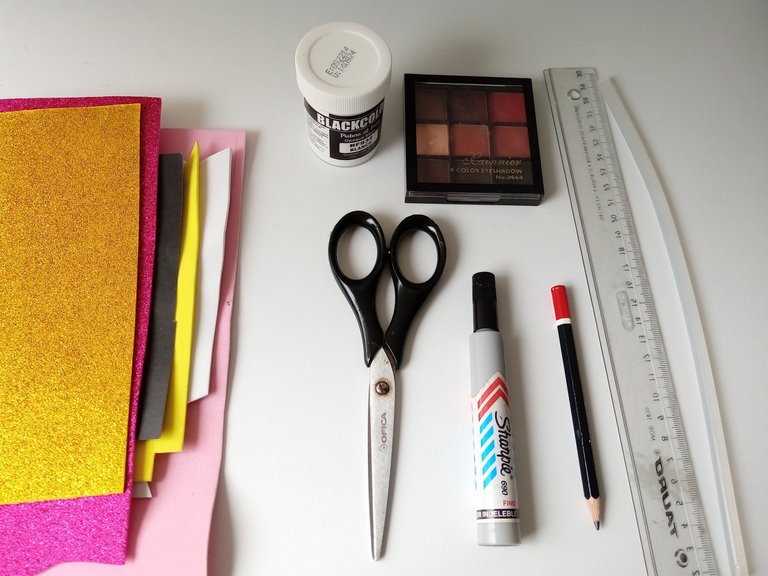
🌼 MATERIALES | 🌼 MATERIALS

- Foami escarchado dorado.
- Foami amarillo.
- Foami negro.
- Foami blanco.
- Tizas, sombras o marcadores.
- Marcador negro.
- Pintura blanca.
- Silicona caliente.
- Tijeras.
- Regla.
- Papel.
- Lápiz.
- Golden frostety foam.
- Yellow foam.
- Black foam.
- White foam.
- Chalks, shadows or markers.
- Black marker.
- White paint.
- Hot silicone.
- Scissors.
- Ruler.
- Paper.
- Pencil.


🐝 PROCEDIMIENTO | 🐝 PROCESS

- PASO 1:
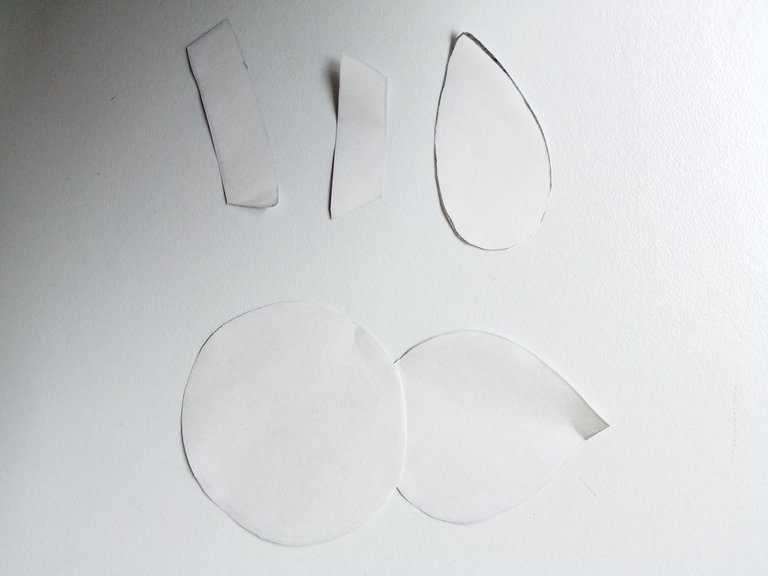
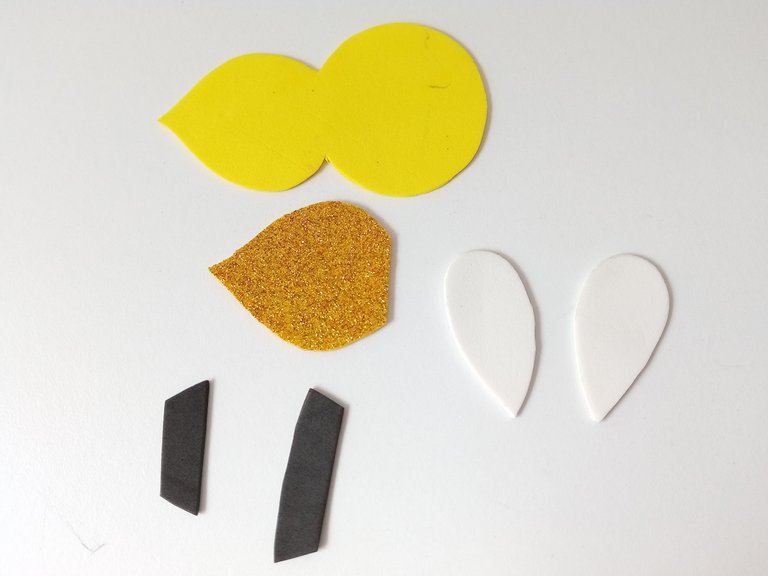
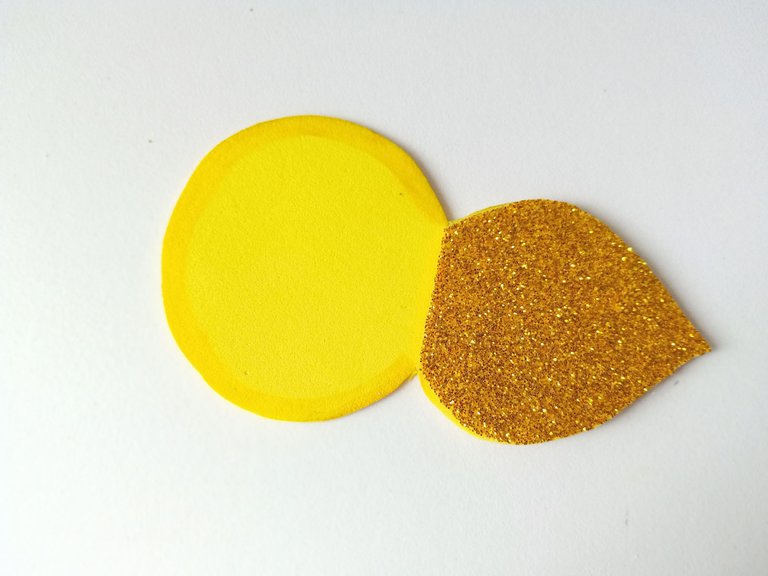
Comenzar dibujando el cuerpo de la abeja individualmente en una hoja de papel y recortar. Luego trazar y cortar cada pieza en el color de foami correspondiente, es decir: el cuerpo de 9 cm en foami amarillo, la parte de la cola de 4,5 cm en foami escarchado dorado, las rayas de la abeja una de 4 cm y otra de 3,3 cm en foami negro y por último, 2 alas de 4 cm en fomami blanco.
- STEP 1:
Begin by drawing the body of the bee individually on a sheet of paper and cut out. Then trace and cut each piece in the corresponding foam color, that is: the 9 cm body in yellow foam, the 4.5 cm tail part in golden frosted foam, the stripes of the bee one of 4 cm and another 3.3 cm in black foam and finally, 2 wings of 4 cm in white foam.


- PASO 2:
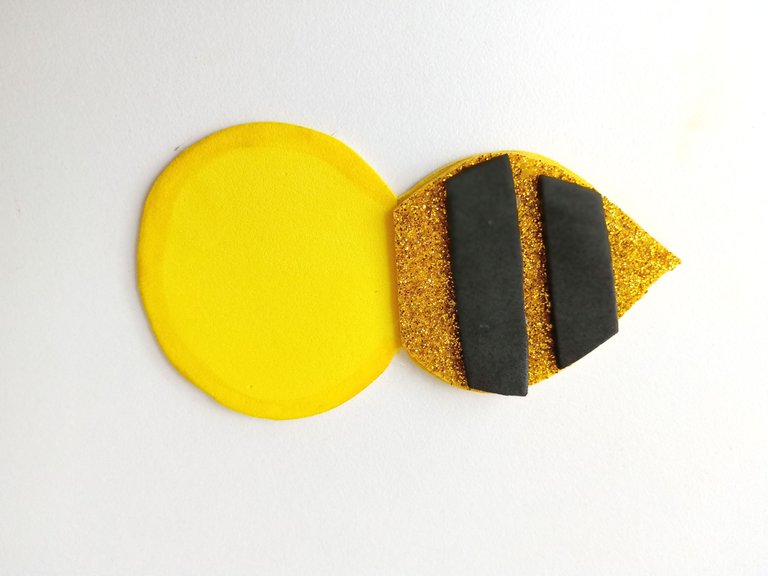
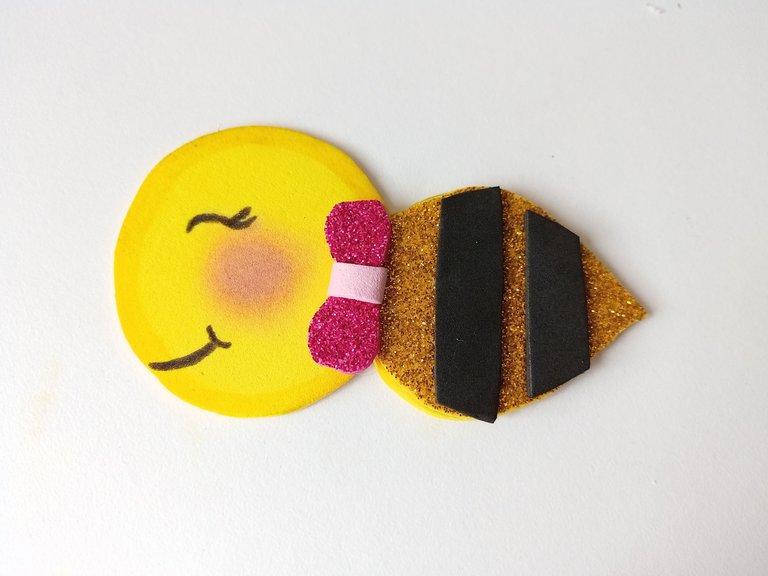
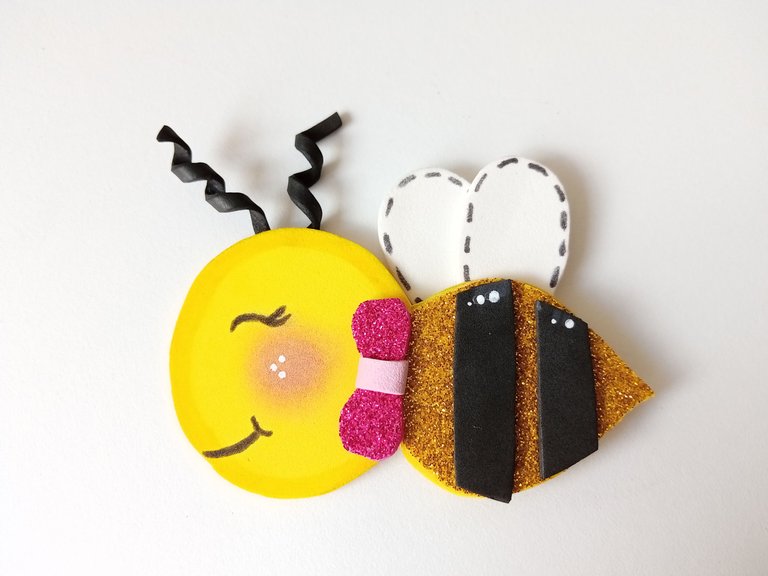
Pegar la cola dorada en la mitad del cuerpo y trazar el borde de la cabeza con un color más oscuro. Luego, pegar las rayas negras en foami dorado escarchado, dejando un espacio de distancia entre cada una.
- STEP 2:
Glue the golden tail in the middle of the body and trace the edge of the head with a darker color. Then, glue the black stripes on the frosted gold foami, leaving a space between each one.


- PASO 3:
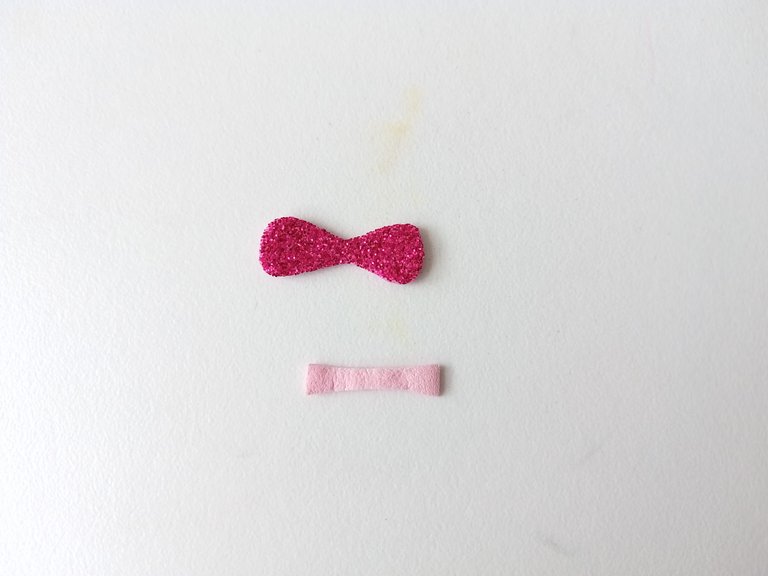
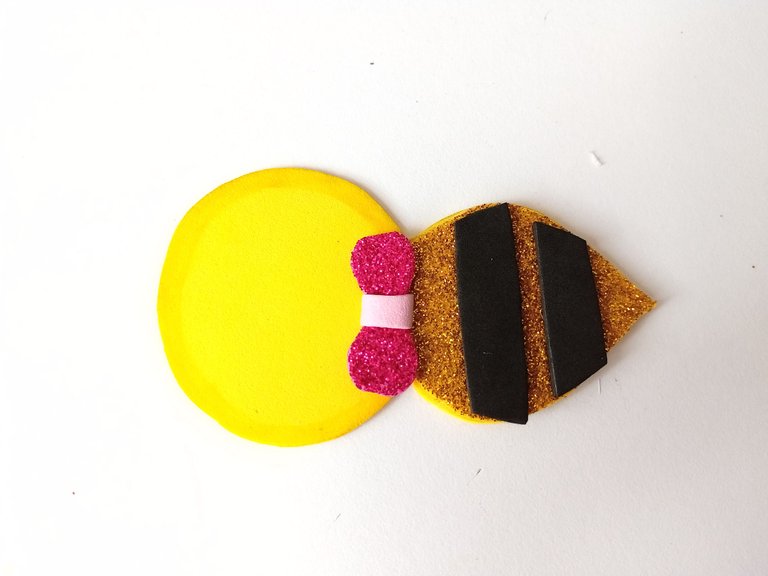
Luego, si quieres haz un pequeño lazo en foami o cinta delgada y pégalo justo en la separación del cuerpo. En mi caso; Dibujé un lazo de foami escarchado fucsia de 3 cm y corté una tira de foami rosa de 0,5 cm de ancho, que pegué por todo el centro del lazo. A continuación, lo pequé en medio del cuerpo como mencioné anteriormente.
- STEP 3:
Then, if you want, make a small bow in foam or thin tape and stick it right in the parting of the body. In my case; I drew a 3 cm fuchsia frosted foam bow and cut a 0.5 cm wide pink foam strip, which I glued all over the center of the bow. Next, I sinned it in the middle of the body as I mentioned before.


- PASO 4:
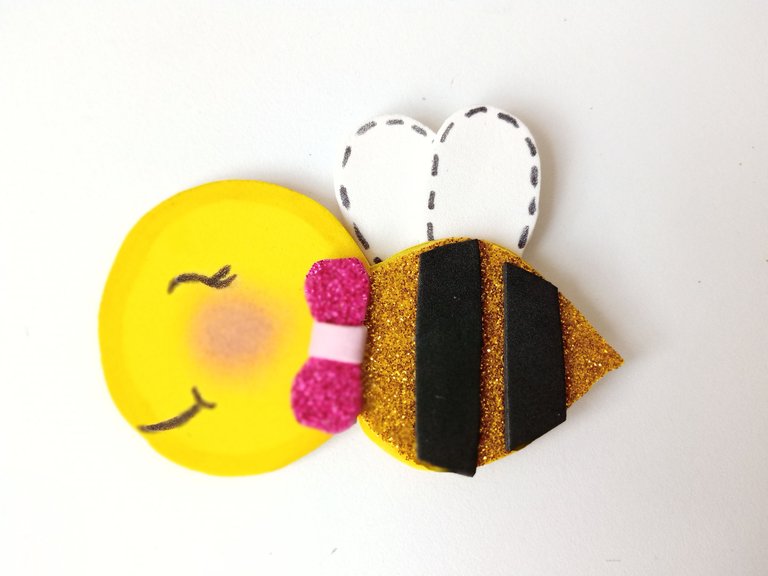
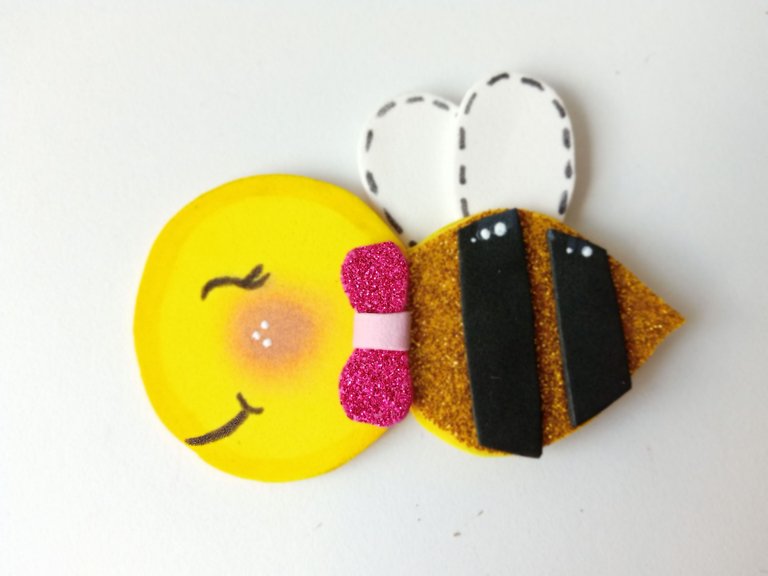
Luego, con la ayuda de un dedo o un paño, coloca rubor en las mejillas, dibuja el ojo curvo y una pestaña, así como la boca. Por otro lado, dibujar por el borde de las alas pequeñas líneas en marcador negro, pegar y dibujar puntos de luz con pintura blanca en las mejillas y en la parte superior de las franjas negras del cuerpo.
- STEP 4:
Then, with the help of a finger or a cloth, place blush on the cheeks, draw the curved eye and one eyelash, as well as the mouth. On the other hand, draw small lines in black marker along the edge of the wings, glue and draw light points with white paint on the cheeks and on the upper part of the black stripes on the body.


- PASO 5:
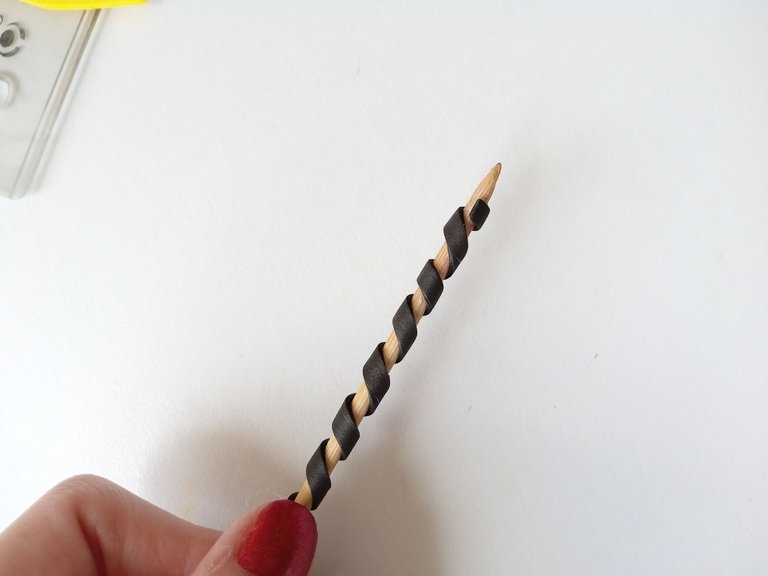
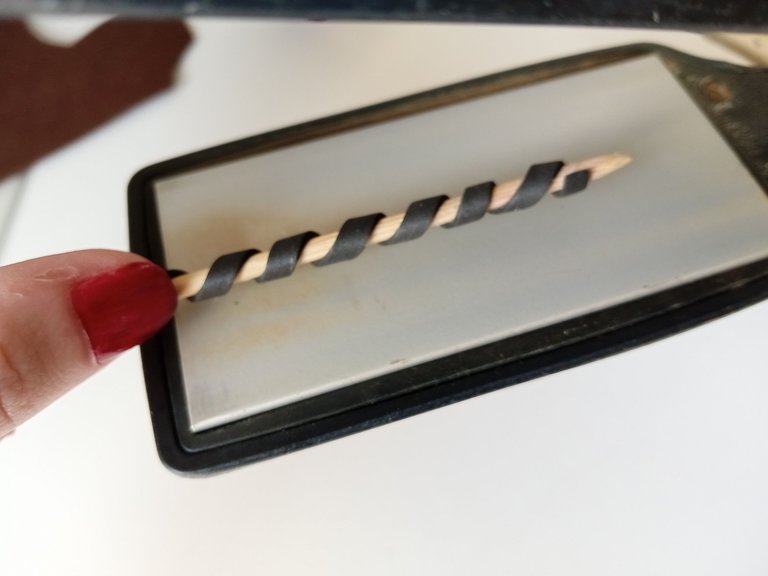
Para las antenas; cortar dos tiras de 4 cm por 0,5 cm en foami negro, tomar una y enrrollar en un palito delgado. Para que se mantengan las ondas, vamos a colocar el palito sobre la plancha unos segundos y al retirar el palito se mantiene la forma ondulada, repetir el mismo proceso con la otra tira. Luego pagar en la parte superior trasera de la cabeza.
- STEP 5:
For the antennae; cut two strips of 4 cm by 0.5 cm in black foam, take one and roll it into a thin stick. So that the waves are maintained, we are going to place the stick on the iron for a few seconds and when removing the stick the wavy shape is maintained, repeat the same process with the other strip. Then pay at the top back of the head.


- PASO 6:
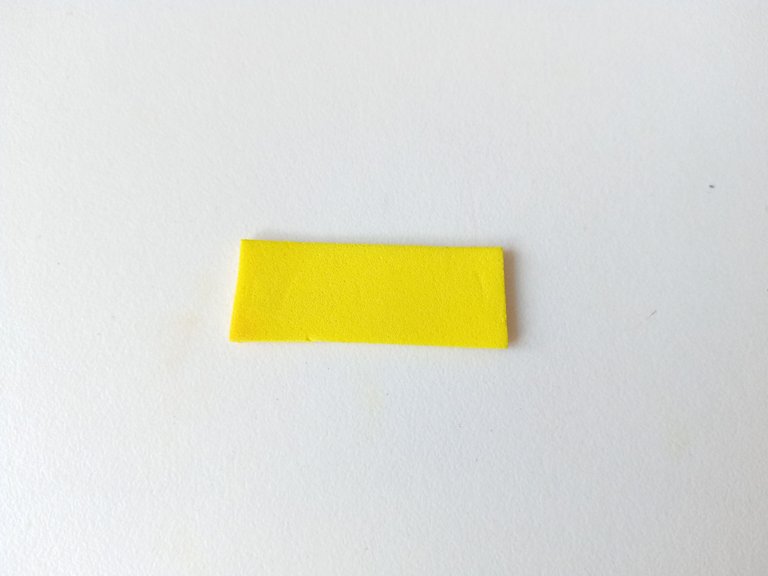
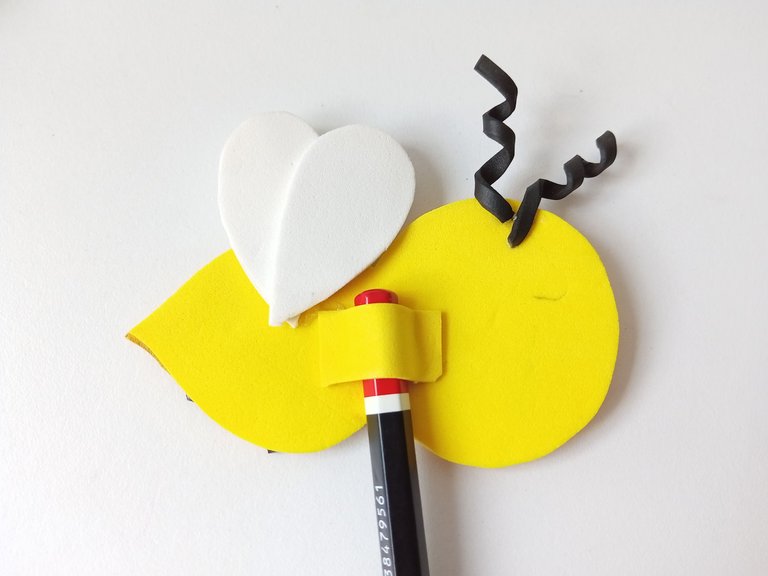
Para terminar, cortar una tira de foami de 3 cm x 1,5 cm y pegar en la parte trasera del cuerpo de la abeja. Pega solo los bordes de la tira, dejando un espacio en el medio donde irá el lápiz.
- STEP 6:
To finish, cut a 3 cm x 1.5 cm strip of foam and glue to the back of the bee's body. Glue only the edges of the strip, leaving a space in the middle where the pencil will go.


✨🐝¡Y listo!🐝✨ Así podemos hacer una decoración fácil y rápida para nuestros lápices, esta vez quise hacer algo mucho más sencillo pero que igual puede quedar lindo. Es una bonita idea para dar un detalle y decorar los lápices de tus hijos, sobrinos o por qué no, una persona mayor a la que le gusten este tipo de temas tiernos. Espero que les haya gustado el paso a paso y se animen a elaborarlo.
❤️Hasta la próxima publicación.
✨🐝¡And ready!🐝✨ This way we can make a quick and easy decoration for our pencil, this time I wanted to do something much simpler but that could still be beautiful. It is a nice idea to give a detail and decorate the pencils of your children, nephews or why not, an older person who likes this type of tender subject. I hope you liked the step by step and you are encouraged to elaborate it.
❤️Until the next post.

✨RESULTADO: | ✨RESULT:

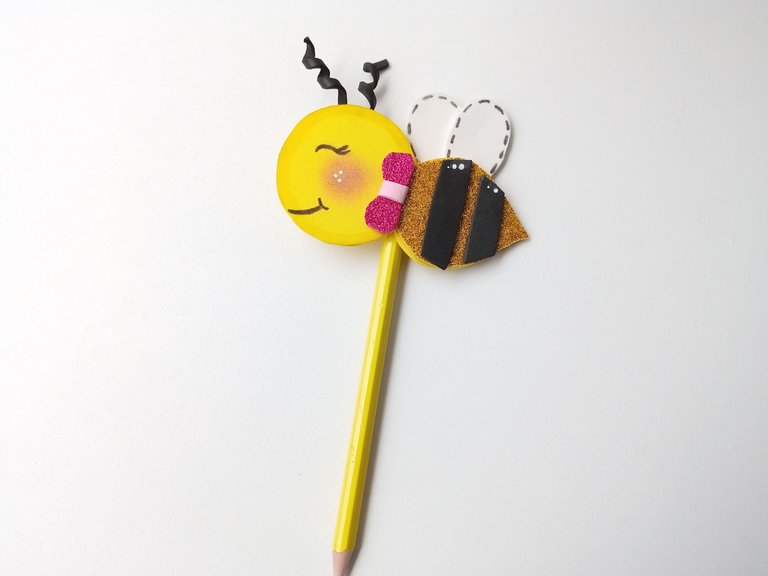
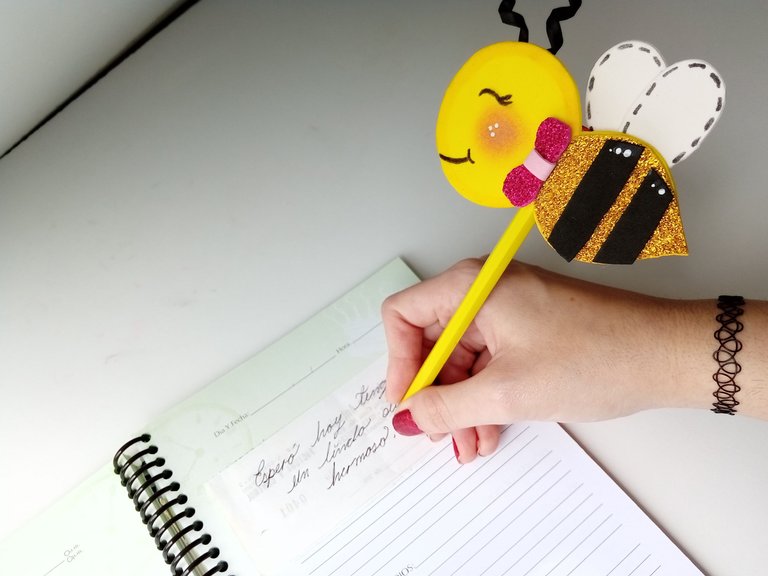


Todas las fotografías son de mi propiedad.
Separador y Fotos editadas en Canva
All photographs are my property.
Photos edited in Canva
~~~ embed:1640746496143372288 twitter metadata:Mjc1MDI2ODk4fHxodHRwczovL3R3aXR0ZXIuY29tLzI3NTAyNjg5OC9zdGF0dXMvMTY0MDc0NjQ5NjE0MzM3MjI4OHw= ~~~
~~~ embed:1640825181424738305 twitter metadata:Mjc3NDcyMzU2OXx8aHR0cHM6Ly90d2l0dGVyLmNvbS8yNzc0NzIzNTY5L3N0YXR1cy8xNjQwODI1MTgxNDI0NzM4MzA1fA== ~~~
The rewards earned on this comment will go directly to the people( @valenpba, @alizmarpaola, @kristal24, @naty16 ) sharing the post on Twitter as long as they are registered with @poshtoken. Sign up at https://hiveposh.com.
Congratulations @valenpba! You have completed the following achievement on the Hive blockchain And have been rewarded with New badge(s)
Your next target is to reach 35000 upvotes.
You can view your badges on your board and compare yourself to others in the Ranking
If you no longer want to receive notifications, reply to this comment with the word
STOPCheck out our last posts:
Support the HiveBuzz project. Vote for our proposal!
Eso está tan hermoso, me encanta!! cada detallito tuyo es tan perfecto! que hermosura. buen post mi Valen. Gracias por compartir!!
Ay amiga linda! Muchas gracias por tus palabras, muy contenta de que te gusten las cositas que elaboró.
❤️
Definitivamente todo te queda hermoso mi valen. Otra idea excelente y muy linda 😍😍
Muchas gracias mi Val, me alegra mucho que te haya gustado mi abejita 🤭 a ver si un día se la haces a Alison. 😅💗
Que cosita más bella 😍😍. Paso a paso bien explicadito, te felicito.
Consejo, si puedes usar las 10 etiquetas, úsalas.
We are sending you HUESO tokens to appreciate your work and the effort you make to share your content with us.
🤭 Mucho gracias por el apoyo. Me alegra mucho que te haya gustado mi abejita.
Perfecto, tendré en cuenta lo de las etiquetas. Muchas gracias por todo.
Saludos y lindo día. ✨
Pero que abejita más bella, 😍
Ami, te quedo super tierna esta decoración para lápices y me encanta que sigas practicando a fin de ser mejor cada día.. Haces unas cosas preciosas😍💗
Me encantó!
Muchas gracias amiga bella! ✨
Ahí voy amiga, poco a poco, intentando hacer cosas más bonitas con el tiempo. Lo importante es disfrutar el proceso.✨
Muchas gracias por tus palabras,amiga.💗
Great work. The pencil look well decorated now.
That's right, it gives her a nice style 🤭 Thank you very much for the support friends @diyhub ❤️
Yay! 🤗
Your content has been boosted with Ecency Points
Use Ecency daily to boost your growth on platform!
Support Ecency
Vote for new Proposal
Delegate HP and earn more, by @valenpba.
Muchas gracias ✨
Hola bonita, tus creaciones son MUY hermosas, se puede apreciar el cariño que pones en el proceso, te quedó espectacular!
Feliz tarde, besitos!
Hola amiga! Muchas gracias por tus palabras, a veces siento que no me quedan muy bien, pero como dices, siempre con cariño y disfrutando del proceso. 💗
Feliz día, bella!❤️
Que cosita tan bella! Te quedó hermoso amiga. Tu paso a paso esta perfecto, pues nos permite poder seguirlo sin problemas.
Muchas gracias mi Rosa! La verdad que es bastante sencillito y puede ser elaborado con la temática de preferencia.
Muchas gracias por comentar, amiga.💗
Que idea tan hermosa y tierna amiga, una avejita pensando en Hive ♥️ Te quedó preciosa y coqueta, los detalles son perfectos, grandioso e impecable trabajo.
Jaja, que ternura de gif Mary. 🤭
Así es amiga, lo elaboré pensando en hive. Me alegra mucho que te haya gustado y por tus lindas palabras.❤️
Que ternurita, te quedo demasiado bella amiga. Me encanto lo linda y tierna que se ve, el paso a paso estuvo super bien explicado, excelente post amiga 💗
Muchas gracias amiga, me alegra mucho que te haya gustado.💗
Te mando un gran abrazo.✨
Amiga, tienes unas manos mágicas. Todo lo que haces te queda hermoso. Si llegas a tener hijos imagino todas las bellezas que podrías hacerles para decorar sus cosas.
Muchas gracias amiga 🤭 ya hasta haciéndome mamá, jaja. La verdad que sí, creo que disfrutaría mucho haciendo pequeños detalles para ellos. 💗
Me encanta las abejas para decorar porque es sinónimo de colmena y nuestro bello Hive, te felicito por las fotos de calidad que nos muestras y la presentación de tu trabajo, éxitos.
Disculpa la demora, amiga.😥 Totalmente, tenía la idea en mente hace un tiempo y decidí llevarla a cabo.
Muchas gracias, me alegra mucho que sea de tu agrado.
Saludos, linda.✨
Me encantan las abejas en dibujo y esto está muy bonito amiga!
Muchas gracias amiga, me alegra mucho que te haya gustado 💗
Cada vez haces creaciones más hermosas amiga! está precioso y muy tierno me encantaaa 😍😍😍
Muchas gracias por tus palabras amiga, me animan. Me alegra mucho que te haya gustado.
Saludos, bella!
Que ternurita amiga, me alegro que vayas mejorando en cada creacion. Gracias por compartir tu proceso. Bendiciones💜
Muchas gracias amiga, que bella!
Me alegra mucho que te haya gustado.💗 Bendiciones!
Me encanta el resultado final, es colorido y original.!
Muchas gracias 🤭 me alegra que sea de tu agrado. 💗
Ayyy que belloooo!! Lo ví hace días pero no disponía de tiempo para comentar 🥹 te quedó precioso y es súper creativo. Me encanta mucho todo lo que elaboras siempre te queda muy lindo todo. ❤️
Ay amiga muchas gracias y tranquila 🤭 tarde pero seguro. Lo que importa es la intención.
Muchas gracias por tus lindas palabras, extrañaba tus comentarios de ánimo, jaja.
Un abrazo, bella!✨💗