TUTORIAL: ELABORACIÓN DE ANILLO 💍/TUTORIAL: RING MAKING 💍/ESPAÑOL-ENGLISH.

in Hive Diy3 years ago

Screenshot_2022-01-28-17-54-51-59.jpg

Amigos, amigas, tengan todos un excelente día, nuevamente paso por acá para compartir con ustedes un tutorial para la elaboración de un anillo usando la técnica de alambrismo, vengan conmigo y les mostraré como lo elabore.

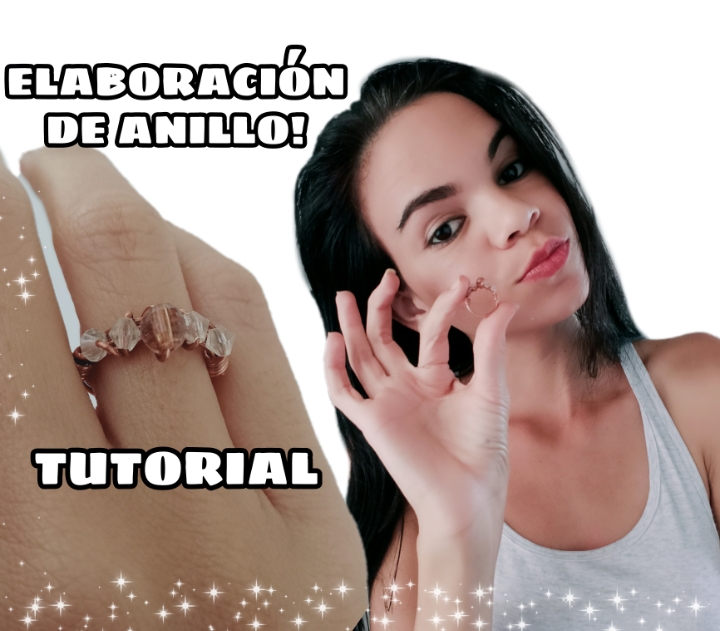
Friends, friends, have a great day everyone, I'm here again to share with you a tutorial for making a ring using the wire technique, come with me and I'll show you how I made it.

Screenshot_2022-01-28-18-17-05-29.jpg

Es muy fácil de elaborar, Los materiales a utilizar son los siguientes:

It is very easy to make, the materials to use are the following:
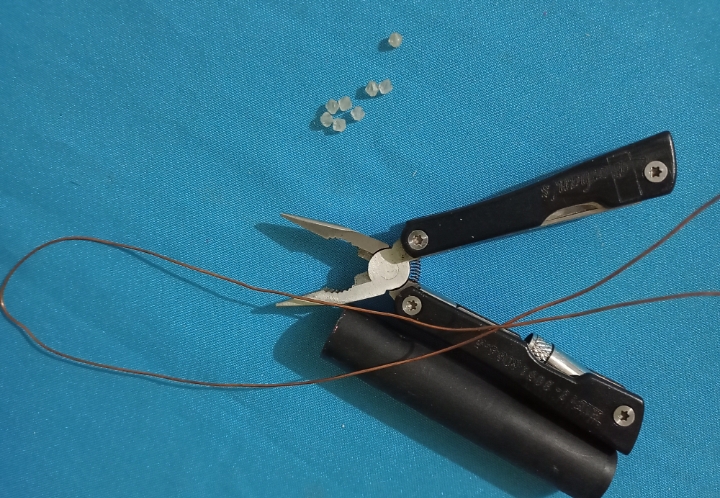
MATERIALES

-Alambre de Cobre fino.
-pinza
-5 piedras de tu preferencia.
-objeto cilíndrico

MATERIALS

-Fine copper wire.
-gripper
-5 stones of your choice.
-cylindrical object

Screenshot_2022-01-28-17-56-17-23.jpg

PASO A PASO

STEP BY STEP

1. Lo primero que hice fue tomar el alambre de cobre y el objeto cilíndrico que permitirá tomar la medida de nuestro dedo.

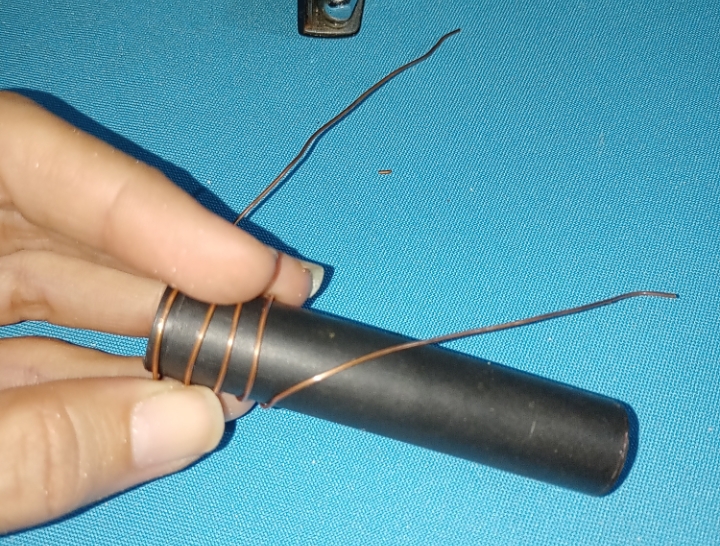
1 . The first thing I did was take the copper wire and the cylindrical object that will allow us to measure our finger.

Screenshot_2022-01-28-17-59-22-43.jpg

2. Dejando aproximadamente unos tres centímetros del alambre comence a las vueltas en torno al objeto cilindro (aproximadamente unos 5 vueltas).

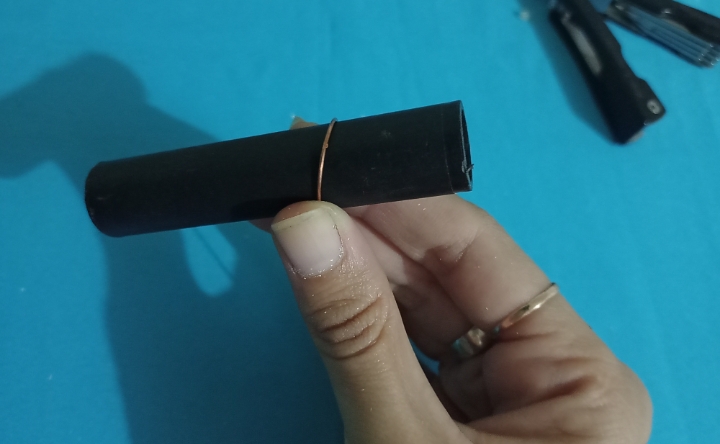
2 . Leaving approximately three centimeters of the wire began to wrap around the cylinder object (approximately about 5 turns).

Screenshot_2022-01-28-18-00-32-32.jpg

3. Retiré el objeto cilíndrico y uní las vueltas, con un extremo del alambre realice 5 vueltas que las uniría, cortando el sobrante con la pinza.

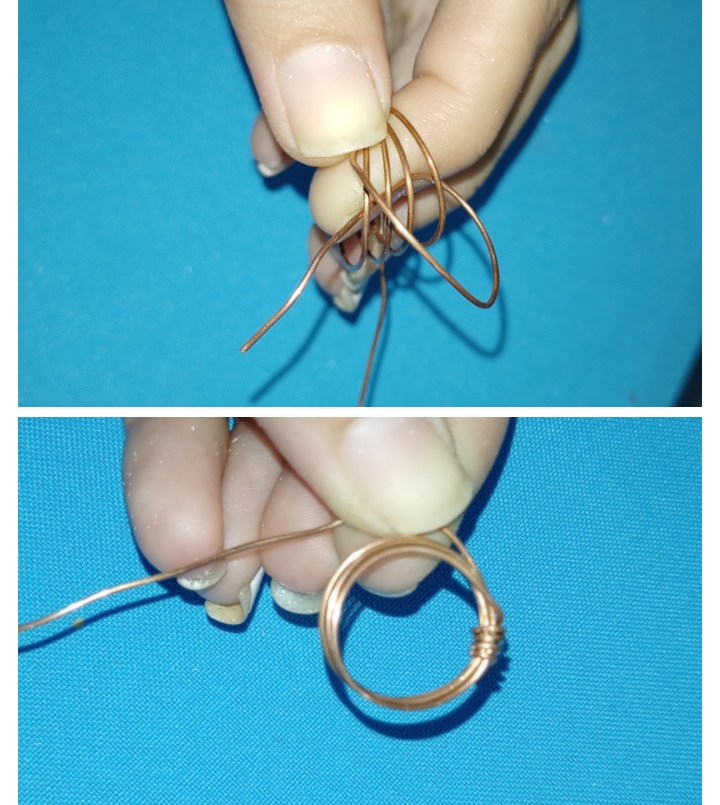
3 . I removed the cylindrical object and joined the turns, with one end of the wire make 5 turns that would join them, cutting the excess with the pliers.

Screenshot_2022-01-28-18-02-10-02.jpg

4. El siguiente paso es tomar el otro extremo y comenzar introducir las piedras una a una. Introducimos una piedra damos una vuelta, introducimos la otra y así vamos sucesivamente hasta introducir las 5 piedras.

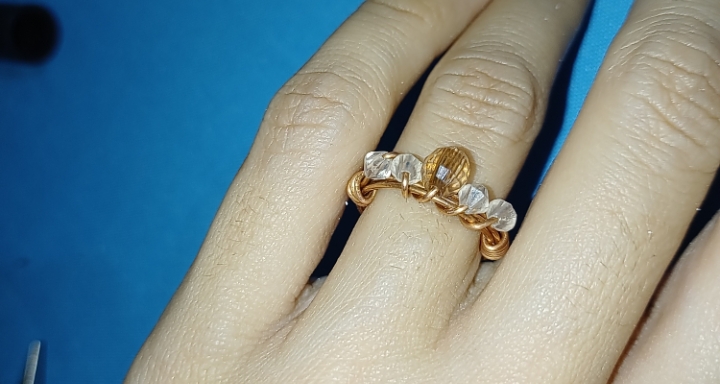
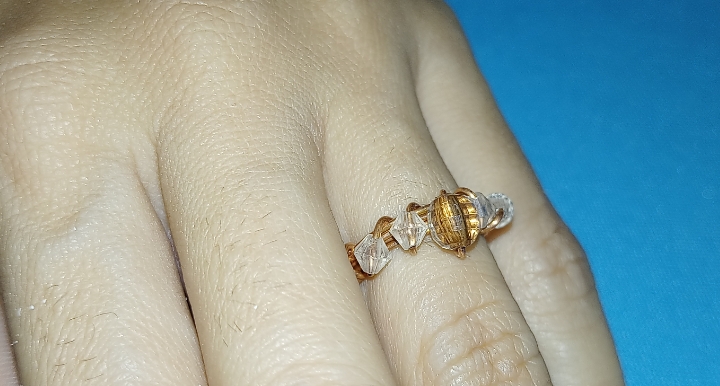
4 . The next step is to take the other end and start inserting the stones one by one. We introduce a stone, we turn around, we introduce the other and so on until we introduce the 5 stones.

Screenshot_2022-01-28-18-04-18-92.jpg

5. Al introducir la última piedra no haremos solo una vuelta, daremos 5 vueltas para que quede igual al otro extremo, cortando con la pinza el alambre sobrante.

5 . When inserting the last stone, we will not make just one turn, we will make 5 turns so that it is equal to the other end, cutting the excess wire with the pliers.

Screenshot_2022-01-28-18-05-41-24.jpg

y listo, RESULTADO FINAL

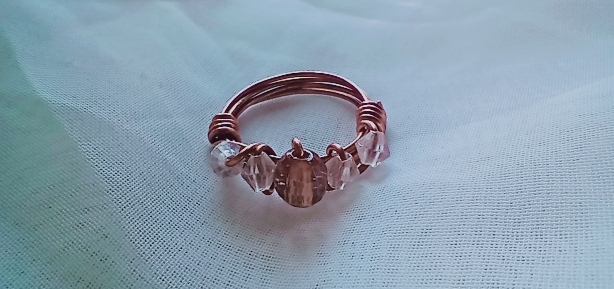
and voila, FINAL RESULT

Screenshot_2022-01-28-18-16-19-03.jpg

Screenshot_2022-01-28-18-06-59-70.jpg

Screenshot_2022-01-28-18-15-16-97.jpg

Screenshot_2022-01-28-18-06-48-58.jpg

Feliz de compartir con ustedes mi creación, espero haya sido de su agrado! Pueden encontrar más tutoriales cómo está en mi blog, variados estilo de accesorios será hasta una próxima oportunidad!

Happy to share with you my creation, I hope you liked it! You can find more tutorials how it is on my blog, varied style of accessories will be until a next opportunity!

Fotografías propias tomadas con mi REALME 7i

Own photographs taken with my REALME 7i

Portada: diseño propio creado en PicsArt/ own design created in PicsArt

Sort:  
 3 years ago  

Te quedó hermoso 😍🤗😉👍🏼
Gracias por compartir ☺️☺️😊
🌷🌸💮🌺🏵️🥀

 3 years ago  

El anillo quedo hermoso me super encanto....