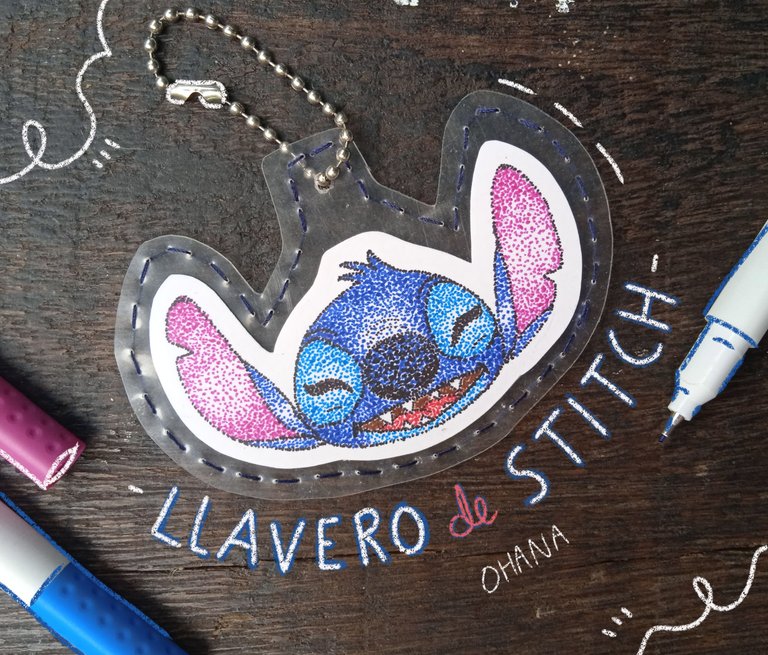
¡Hola comunidad HiveDiy! Hoy vengo dispuesta a enseñarles la técnica de puntillismo ✏️ con marcadores a través de un reconocido personaje de películas animadas.
Y si piensan que por no saber pintar o dibujar no lograrán hacerlo, pues... Incorrecto. El puntillismo principalmente busca generar profundidad mediante manchas. También se genera la ilusión cromática de colores, todo depende de los colores que se utilizan y lo que se quiera lograr con el trabajo.
Pero, aquí vamos poco a poco. Así que empezaremos con este personaje que no requiere de muchos colores o degradados. Estoy segura de que lo lograrán en el primer intento.
Stitch se ha puesto muy de moda en estos días. En todas partes hay algo relacionado con el personaje, lo he visto en peluches, vasos, globos, ropa... Lilo y Stitch son de las películas que más veía junto a mi hermano cuando éramos más pequeños, la pasaban prácticamente todos los días 😅.
Buscando entre las cosas que he dejado en casa de mi mamá, encontré hojas de acetato, las usaba para entregar los ensayos en el bachillerato, por supuesto no serían desechadas. 🤭 Algo había que hacer para sacarles provecho.
Y como me gusta identificar los bolsos con algo, pensé que un llavero sería buena idea para utilizar ese material.
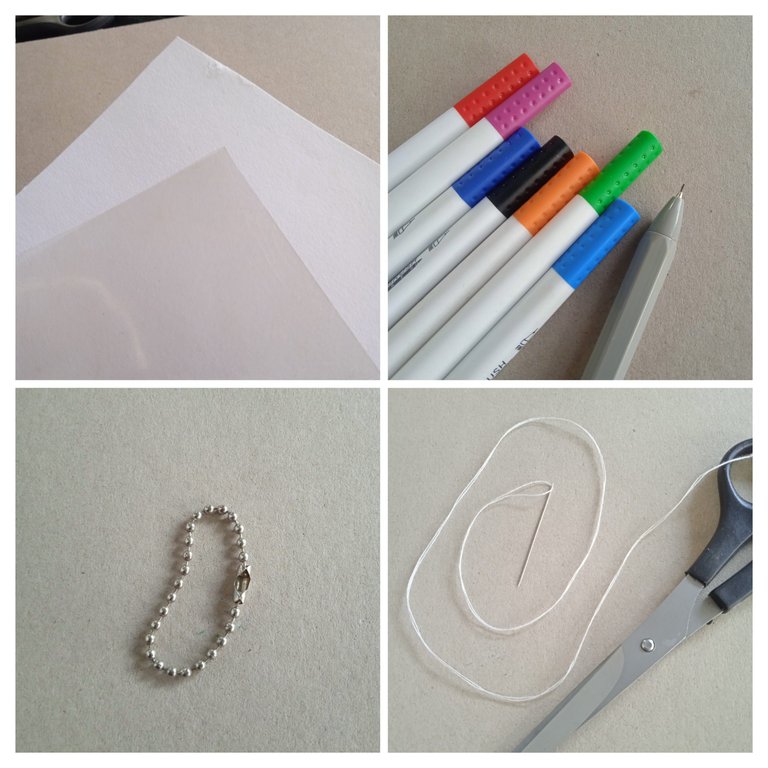
Así que manos a la obra, necesitaremos:
- Cartulina blanca.
- Hoja de acetato.
- Tijera.
- Hilo de coser y aguja.
- Lápiz.
- Marcadores de colores.
- Yesquero (encendedor).
- Cadena para llavero.
- Pega.

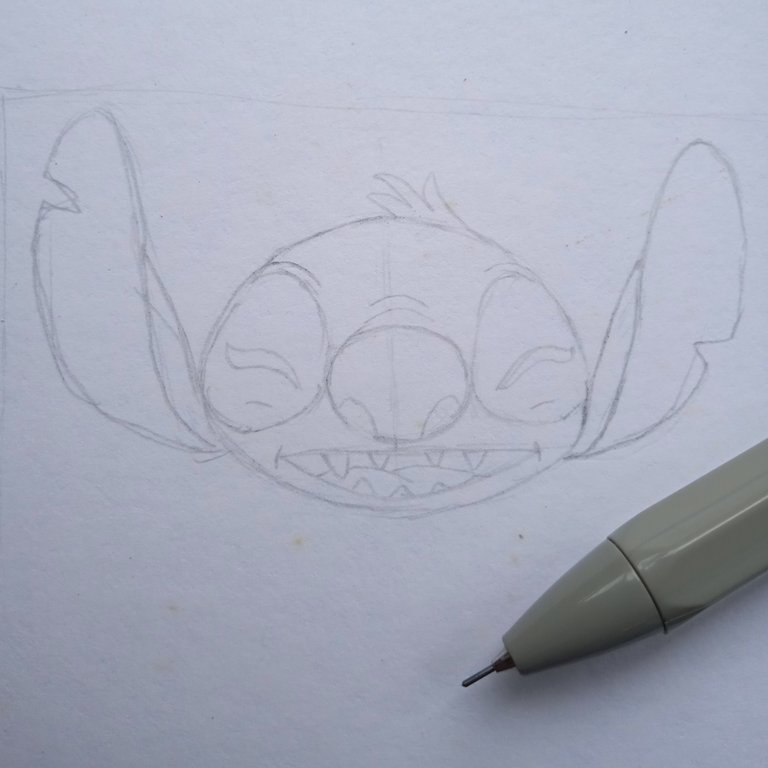
Paso 1
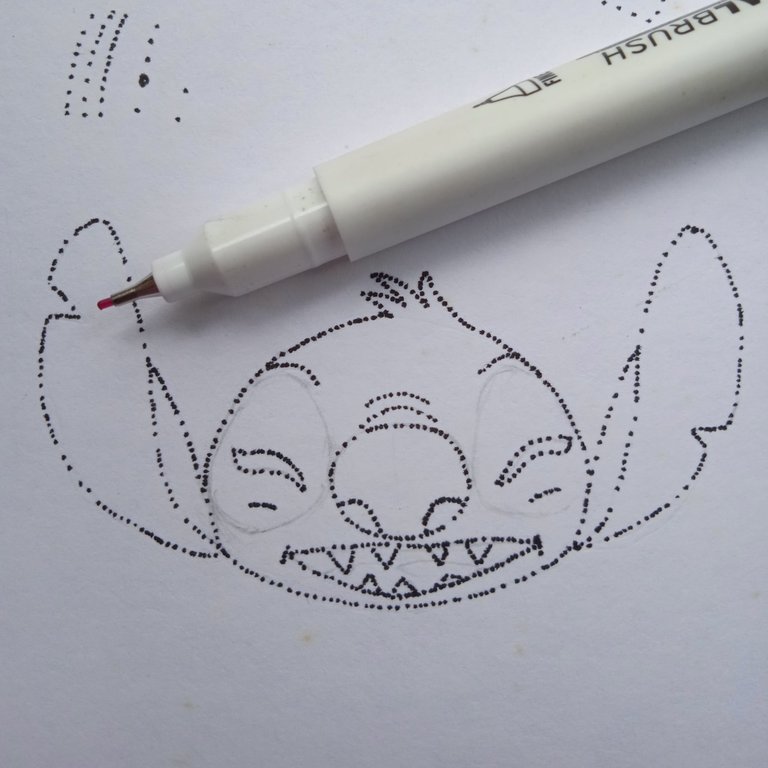
Puedes calcar a Stitch, dibujarlo a mano alzada o también imprimir su cara, pero sin color. El tamaño de este dibujo fue de 6.5 cm x 3.5 cm.
Recuerda que si lo haces más grande, estarás haciendo puntos toda la tarde. Así que lo mejor es comenzar por algo suave para ir agarrando el ritmo.
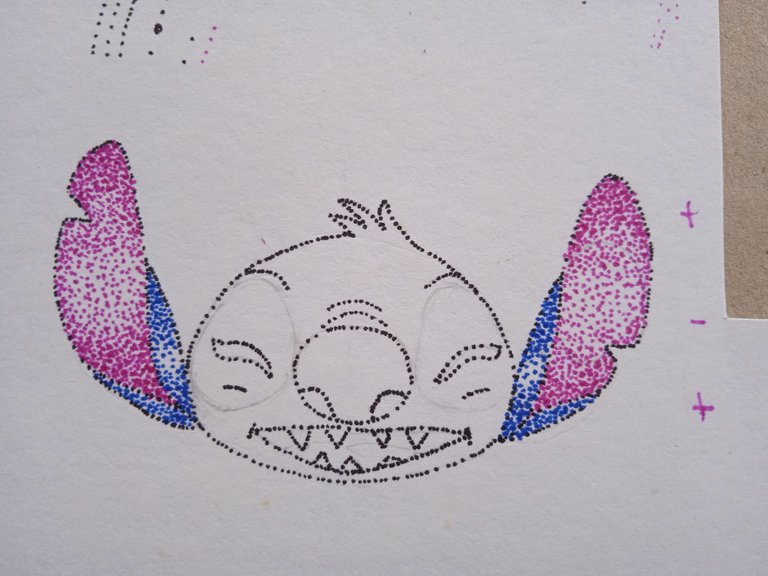
Paso 2
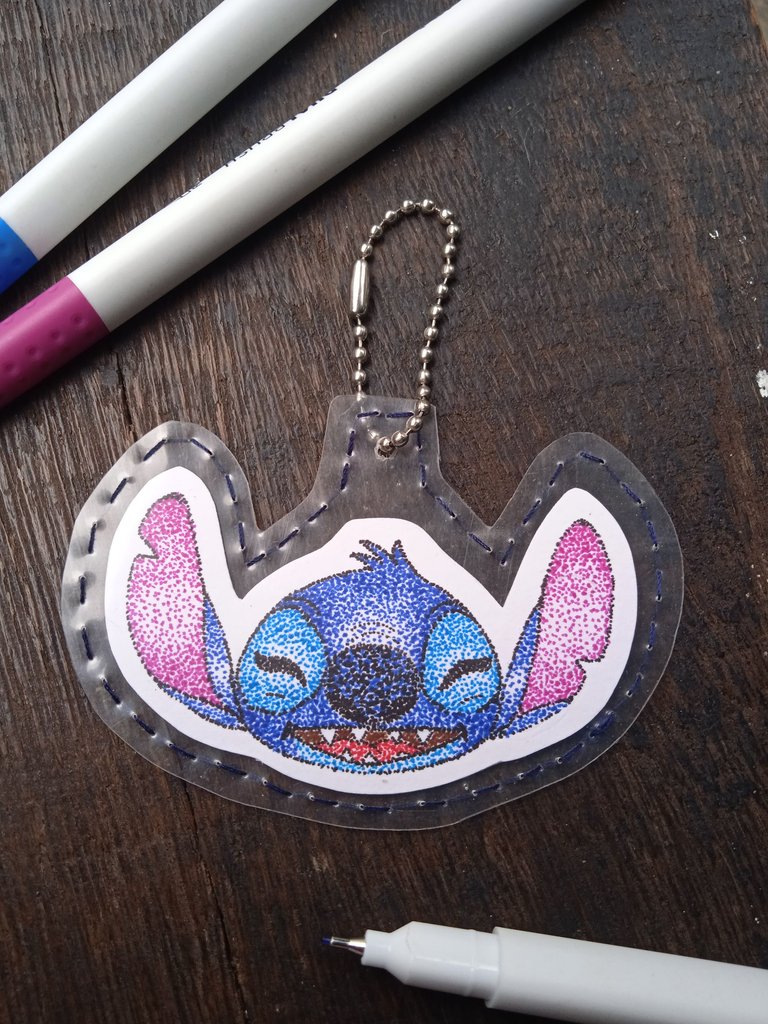
Los colores que usaremos para pintar a Stitch son: azul claro, azul oscuro, negro, rojo, rosa y marrón.
Empezando por el color negro, vamos a delinear todo el dibujo: ojos, boca, dientes, todo... ¡Con puntos!
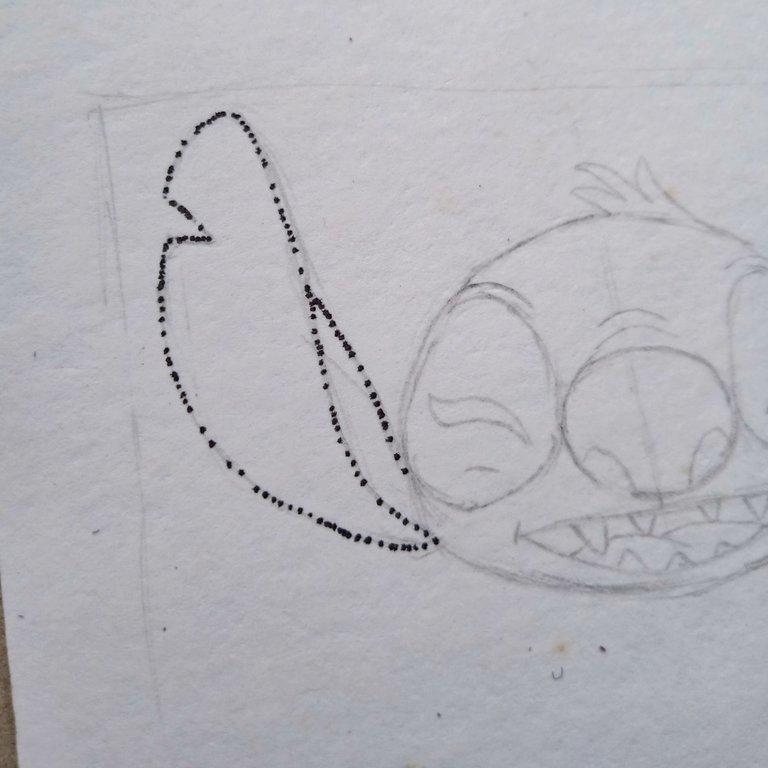
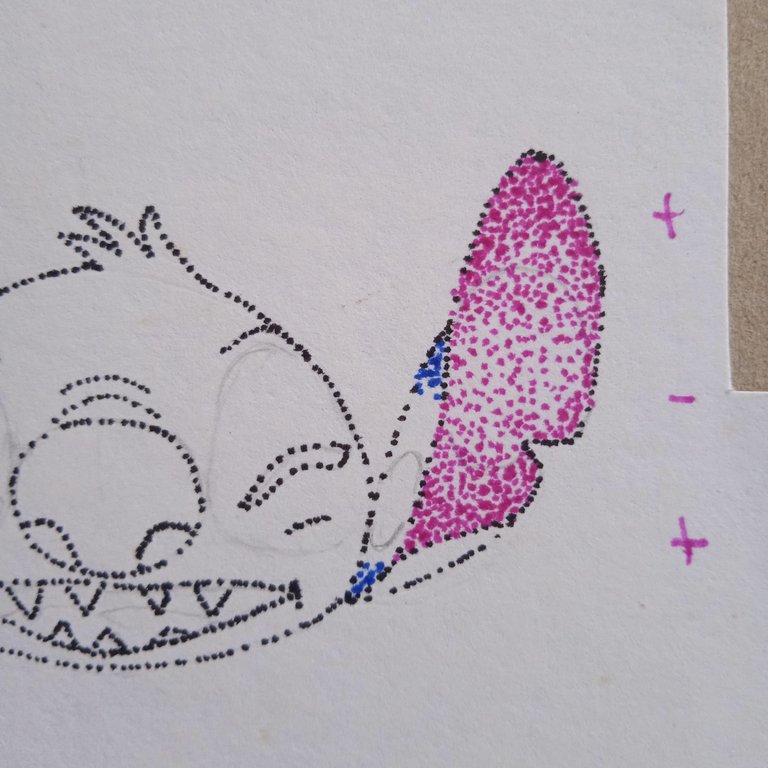
Paso 3
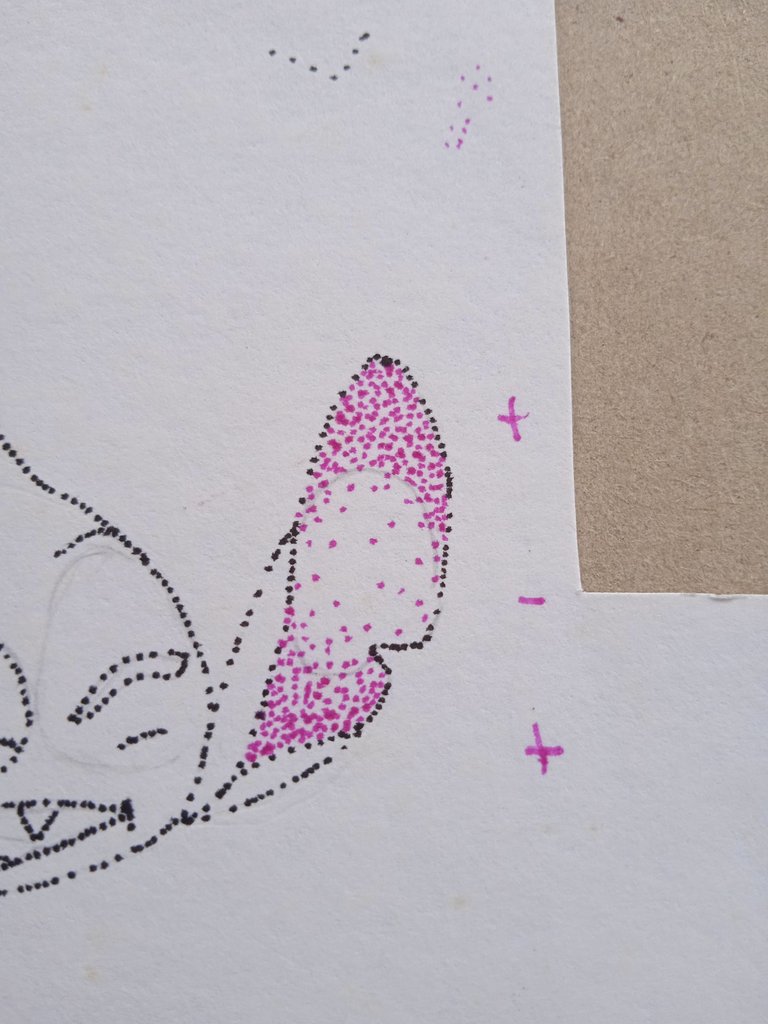
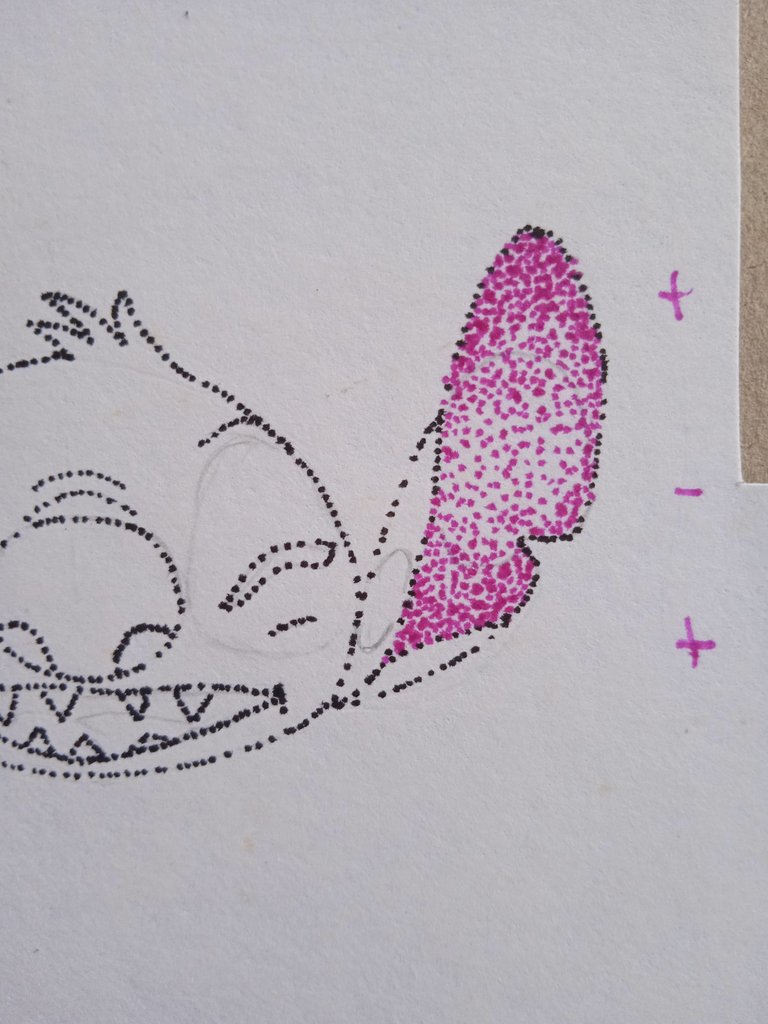
Este es el secreto: dibuja un óvalo dentro de la oreja y comienza a hacer puntos desde los extremos, cubriendo todos los espacios blancos. A medida que te vayas acercando al centro del óvalo, los puntos van disminuyendo. Observa la imagen. ¿Ves lo fácil que es?
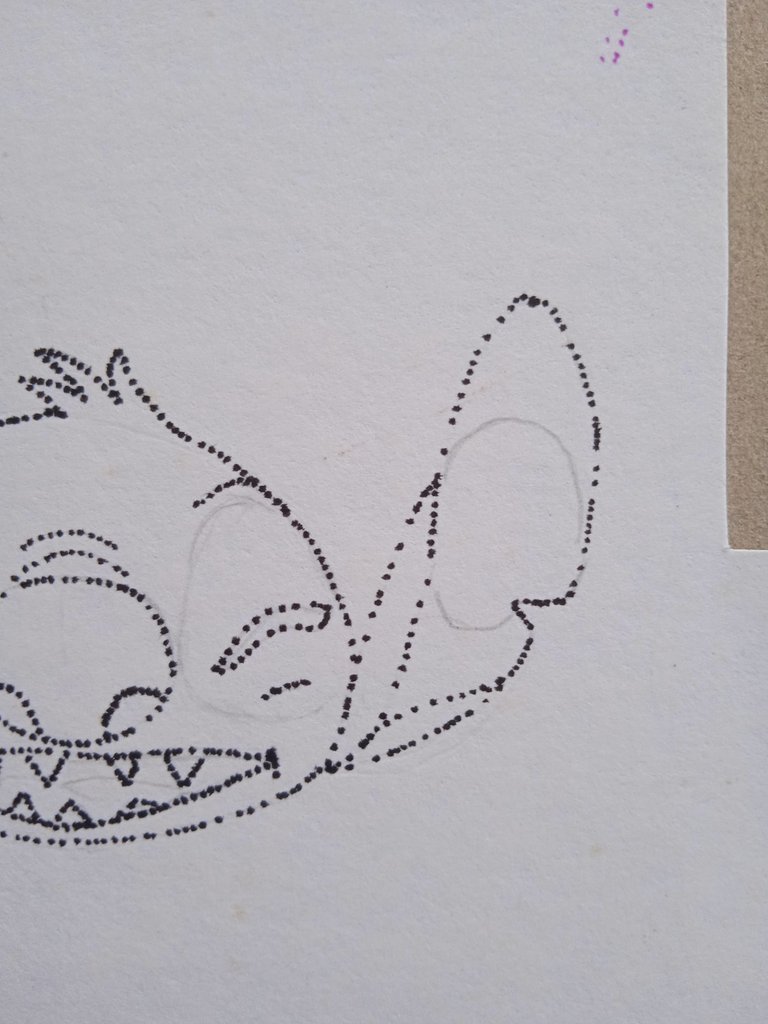
Las primeras prácticas puedes hacerlas dibujando esos pequeños óvalos para recordar donde van más y menos puntos.
La otra parte de las orejas va en color azul oscuro. Usa el mismo método para crear focos de luz, pero solo en las partes que están cerca de los ojos.
Paso 4
Ahora vamos con los ojos, puntos de color azul más claro para poder diferenciar cada parte de la cara. Y color negro para unos ojos que transmiten alegría aunque estén cerrados. 🤭
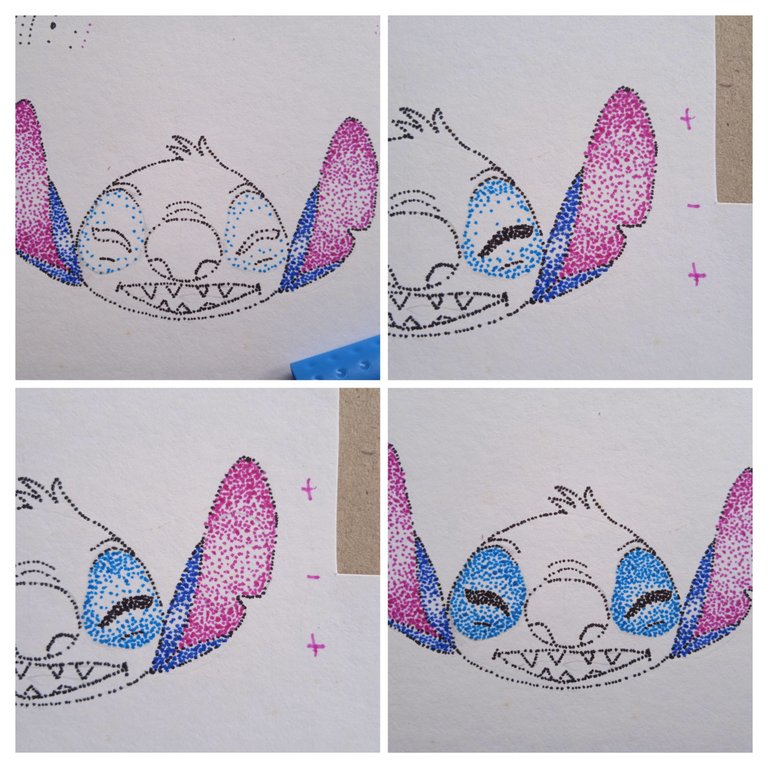
Su nariz es de color más oscuro, pero usando azul y negro se puede generar un poquito de contraste.
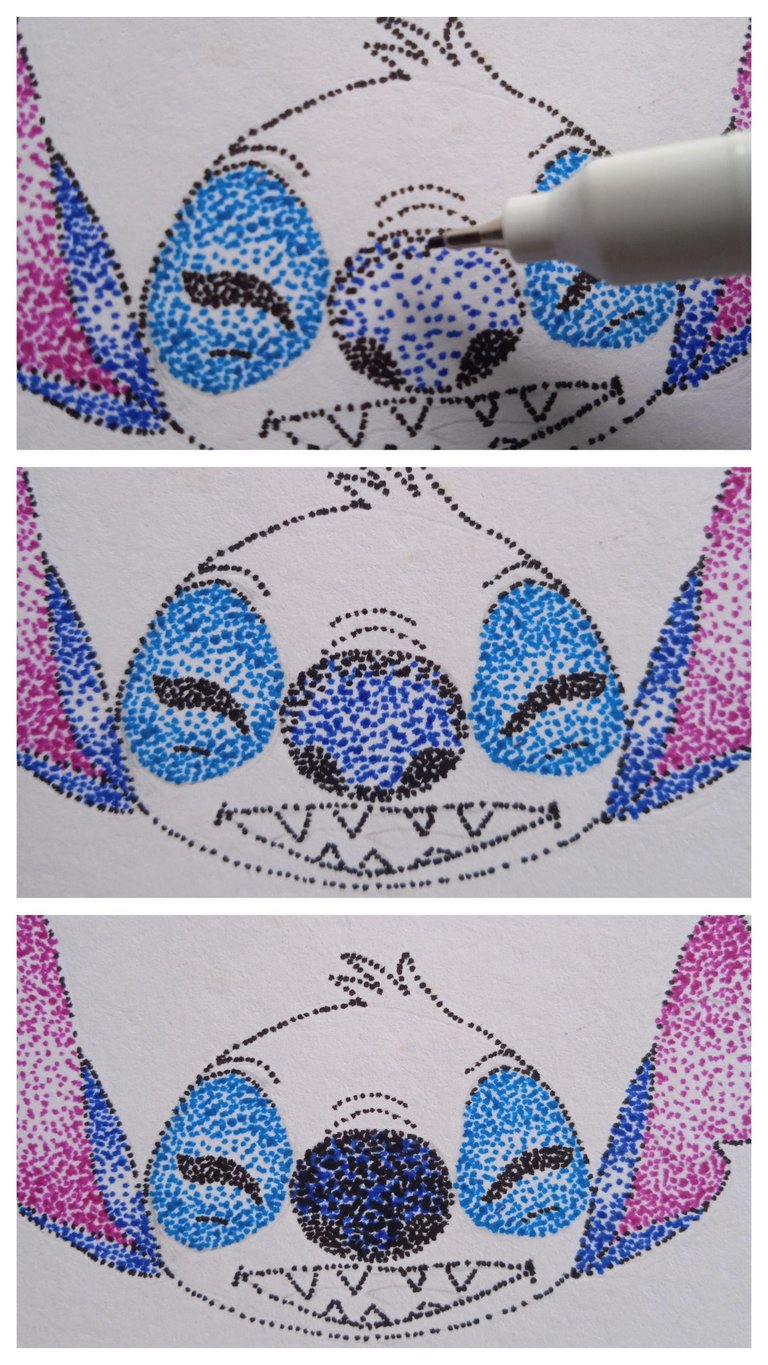
Paso 5
Arriba de su nariz imagina que tiene un semi-círculo y mientras más te acercas a su nariz, menos puntos y más separados deben estar entre ellos.

La parte de abajo de su boca es de azul claro y el resto de su cara es de azul oscuro.
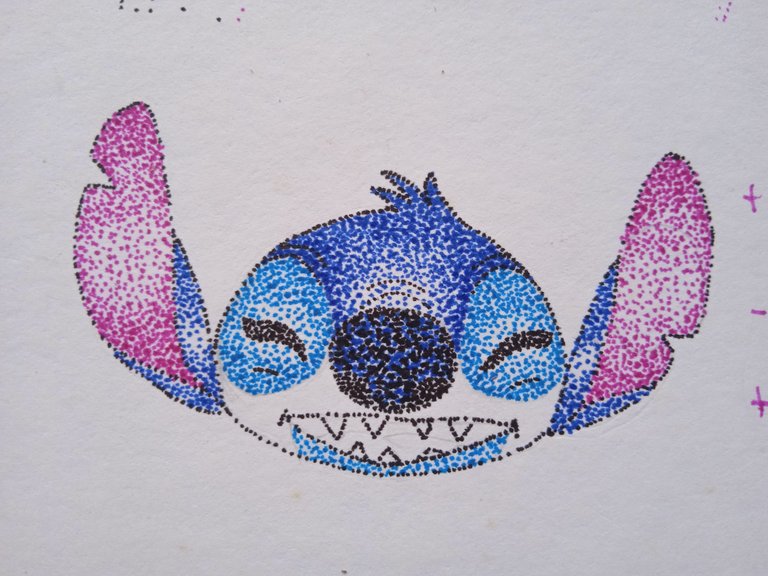

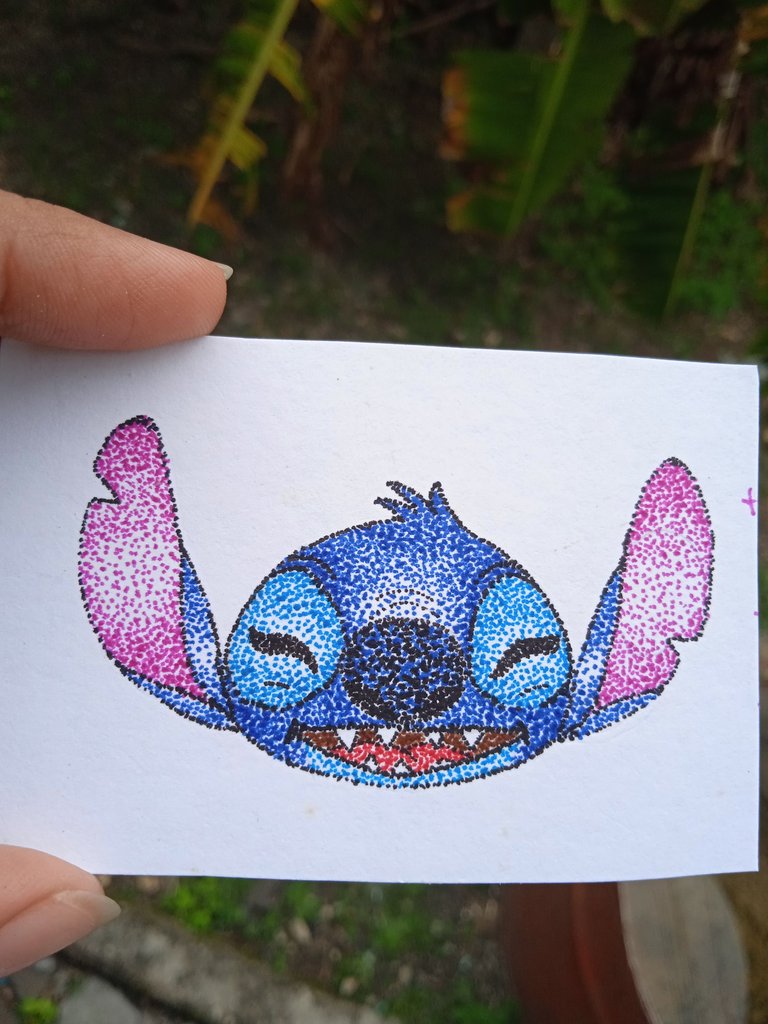
Por último, su boca en color marrón y su lengua en rojo. Para marcar bien cada zona se puede volver a delinear todo el dibujo con el marcador negro.
Paso 6
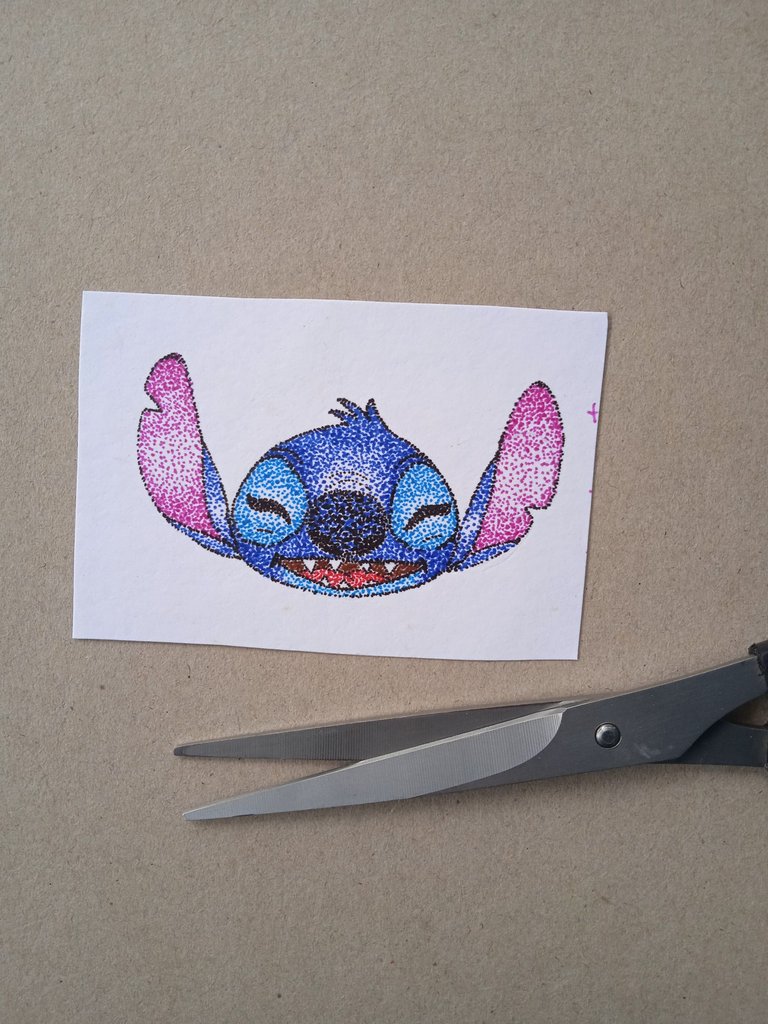
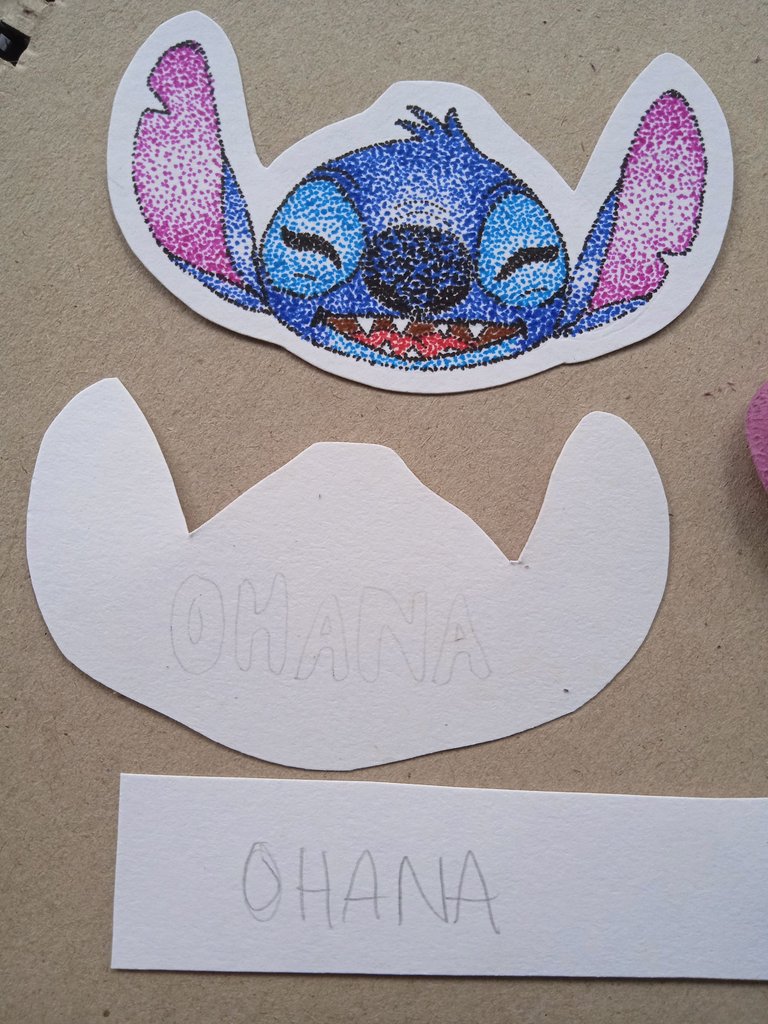
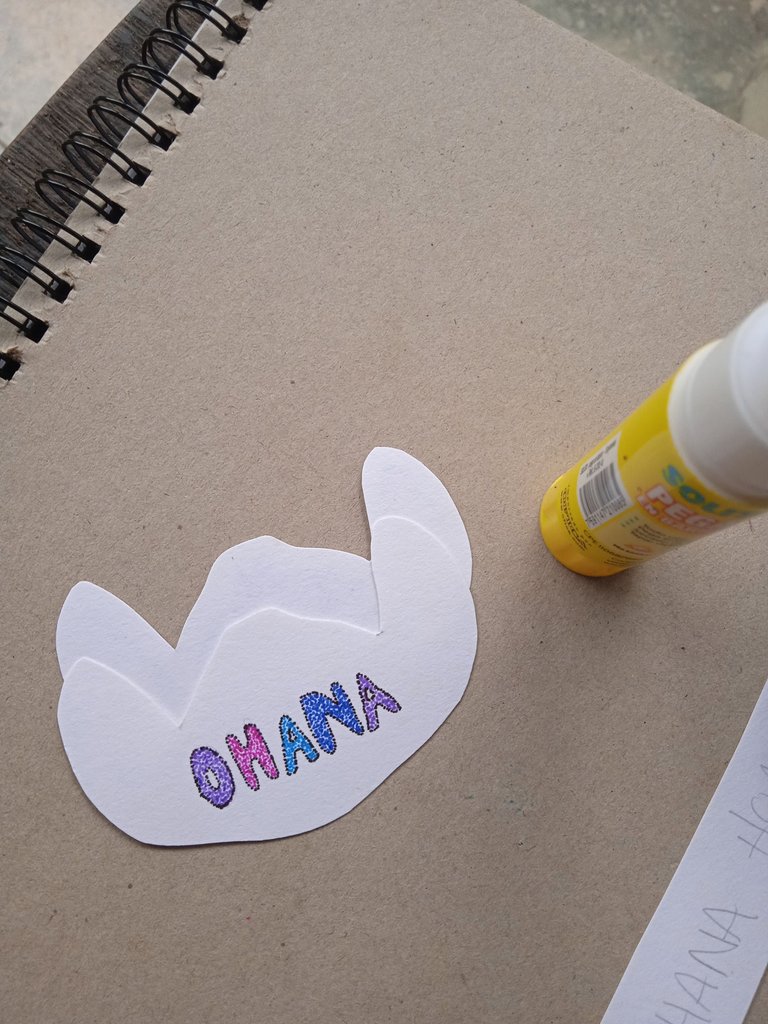
Ahora recortamos la silueta de Stitch y hacemos un fondo para el otro lado. Yo escribí Ohana y luego lo pegué con pega en barra.
Paso 7
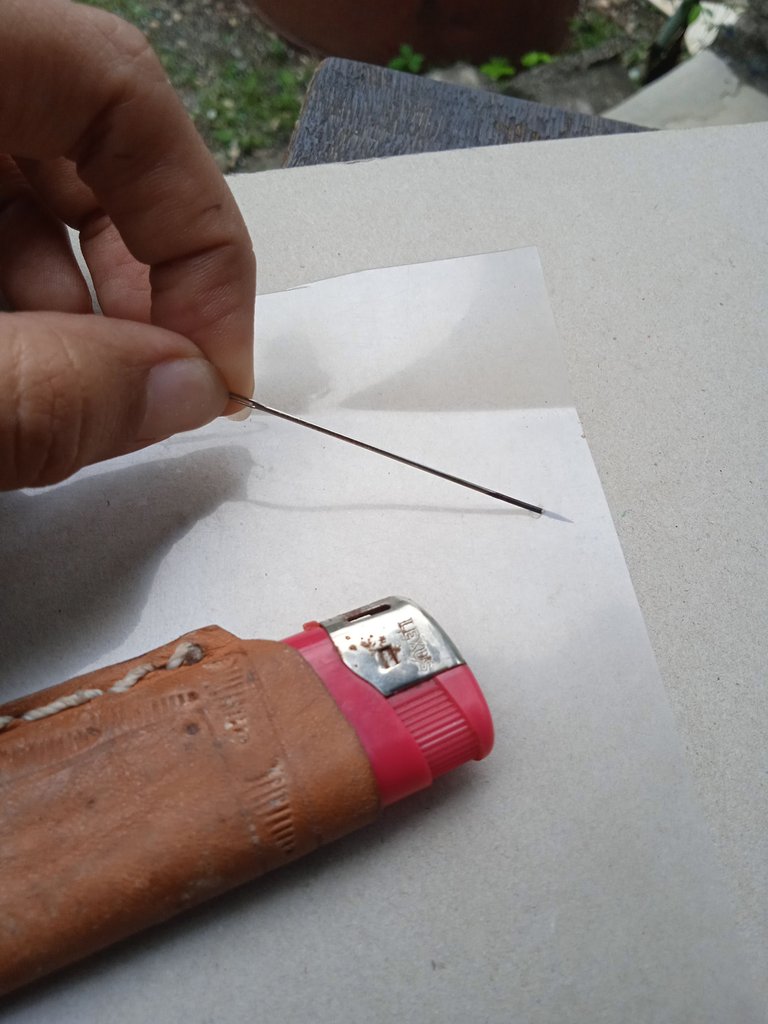
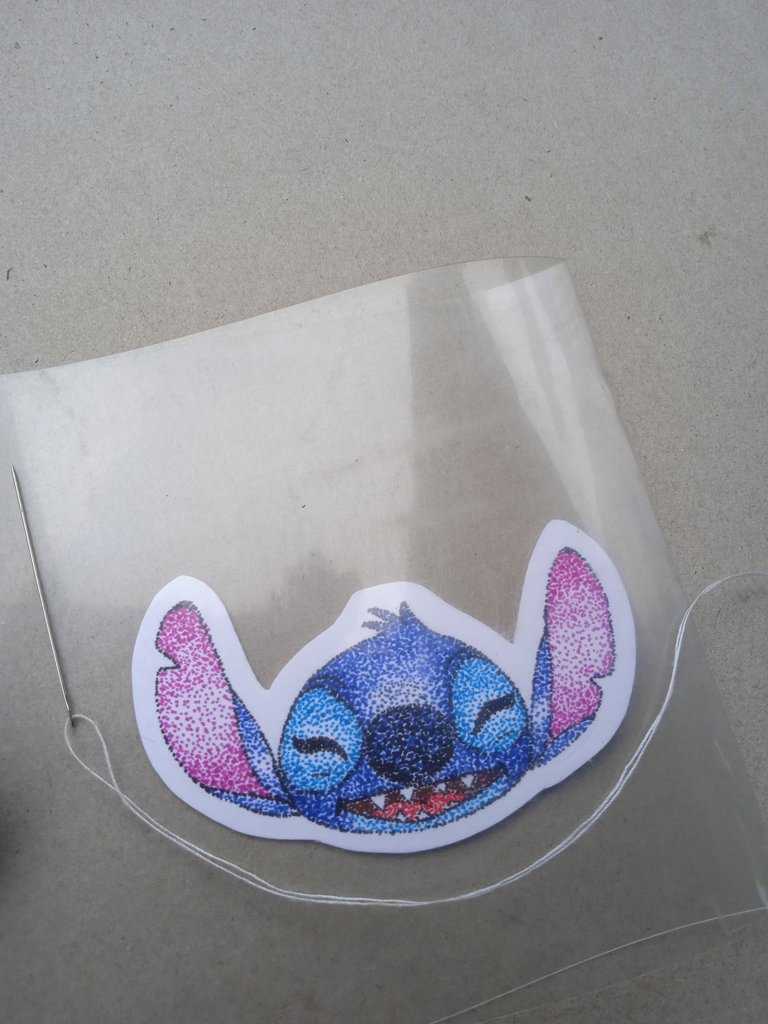
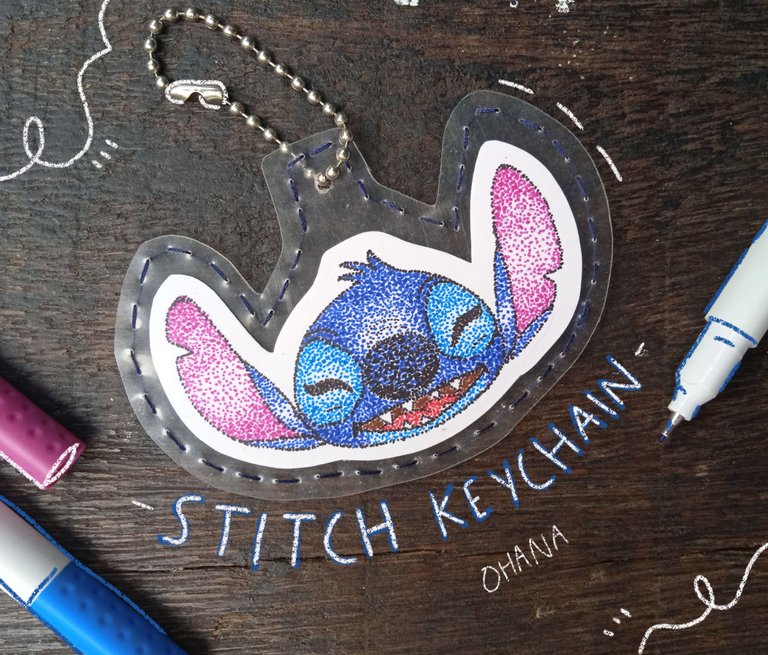
Solo falta coserlo... con el marcador hice un punto que abrí con ayuda de una aguja caliente. Primero practiqué y menos mal, porque el agujero que había hecho en la práctica fue gigante 😂.

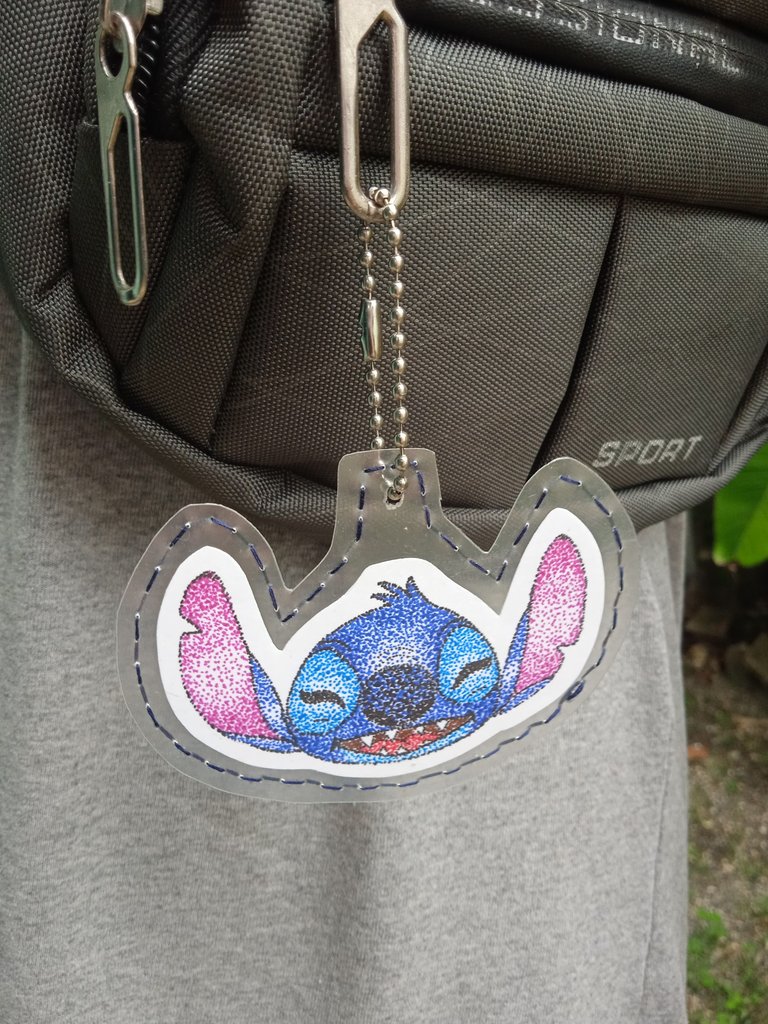
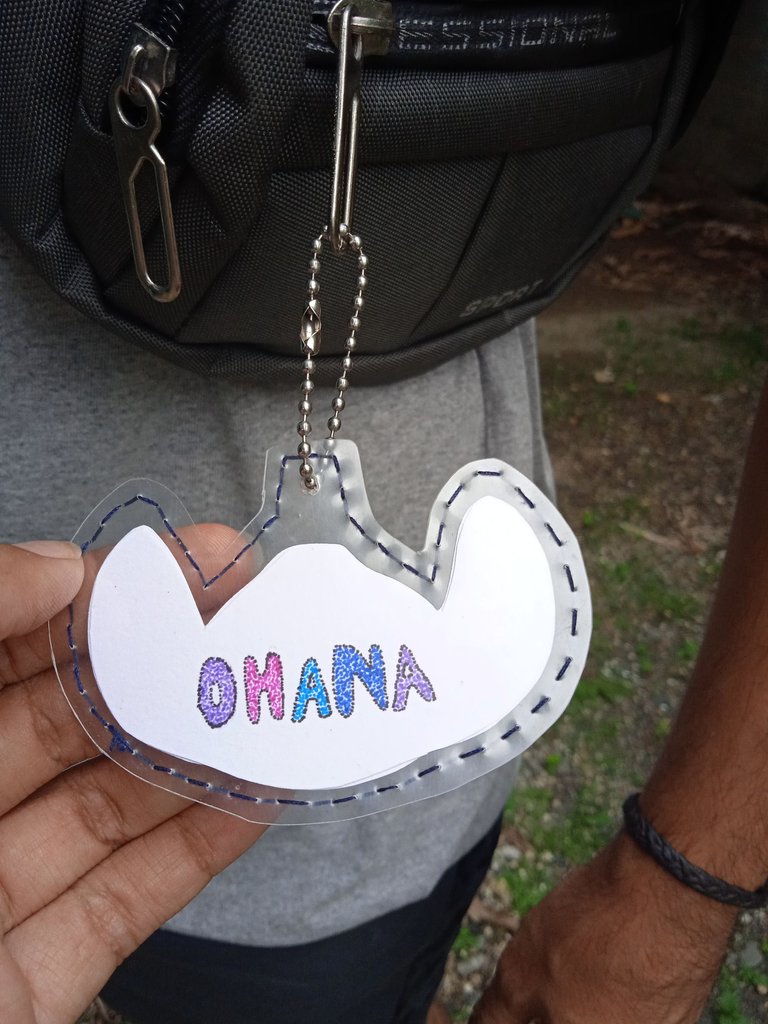

Así quedó finalmente nuestra pequeña obra de arte de Stitch 👌🏻
¡Facilito! ¿Te animas? Una gran manera de reciclar material y también de trabajar la creatividad.
P.D. Recuerden que Ohana significa familia y la familia nunca te abandona, consejo de Lilo. 🤭
Gracias por leer y hasta un próximo post.🐝🌺
Créditos:
- Traducido en DeepL.
- Foto editada en IbisPaint X.
- Separador hecho por mí en Adobe Illustrator.
English
Hello HiveDiy community! Today I come ready to teach you the technique of pointillism ✏️ with markers through a well-known character from animated films.
And if you think that because you don't know how to paint or draw you won't be able to do it, well.... Wrong. Pointillism mainly seeks to generate depth through stains. It also generates the chromatic illusion of colours, it all depends on the colours used and what you want to achieve with the work.
But, here we go little by little. So let's start with this character that doesn't require a lot of colours or gradients. I'm sure you'll get it right on the first try.
Stitch has become very fashionable these days. Everywhere there is something related to the character, I have seen him on soft toys, glasses, balloons, clothes.... Lilo and Stitch are one of the films I used to watch the most with my brother when we were younger, it was on practically every day 😅.
Looking through the things I left at my mum's house, I found sheets of acetate, I used them to hand in essays in high school, of course they wouldn't be thrown away. Something had to be done to make the most of them.
And as I like to identify the bags with something, I thought that a keyring would be a good idea to use that material.
So let's get to work, we will need:
- White cardboard.
- Acetate sheet.
- Scissors.
- Sewing thread and needle.
- Pencil.
- coloured markers
- Tinder.
- Chain for key ring.
- Glue.
Step 1
You can trace Stitch, draw him freehand or print his face, but without colour. The size of this drawing was 6.5 cm x 3.5 cm.
Remember that if you make it bigger, you will be doing stitches all afternoon. So it's best to start with something soft to get into the rhythm.
Step 2
The colours we will use to paint Stitch are: light blue, dark blue, black, red, pink and brown.
Starting with the black colour, we are going to outline the whole drawing: eyes, mouth, teeth, everything... With dots!
Step 3
Here's the secret: draw an oval inside the ear and start making dots from the ends, covering all the white spaces. As you get closer to the centre of the oval, the dots get smaller and smaller, and as you get closer to the centre of the oval, the dots get smaller and smaller. Look at the picture, see how easy it is?
The first practices can be done by drawing those little ovals to remember where more and less stitches go.
The other part of the ears goes in dark blue. Use the same method to create spotlights, but only on the parts near the eyes.
Step 4
Now we go with the eyes, lighter blue dots to be able to differentiate each part of the face. And black colour for eyes that transmit joy even if they are closed. 🤭
His nose is darker in colour, but using blue and black can generate a little bit of contrast.
Step 5
Above his nose imagine he has a semi-circle and the closer you get to his nose, the fewer and further apart the dots should be.
The bottom of his mouth is light blue and the rest of his face is dark blue.
Finally, his mouth in brown and his tongue in red. To mark each area well, you can outline the whole drawing again with the black marker.
Step 6
Now we cut out the silhouette of Stitch and make a background for the other side. I wrote Ohana and then glued it with glue stick.
Step 7
The only thing left to do is to sew it... with the marker I made a stitch that I opened with the help of a hot needle. First I practised and thank goodness, because the hole I had made in practice was gigantic 😂.
This is how our little work of art by Stitch 👌🏻 finally turned out.
Easy! Are you up for it? A great way to recycle material and also to work on creativity.
P.S. Remember that Ohana means family and family never leaves you, Lilo's advice. 🤭
Thank you for reading, until a future post.🐝🌺
Credits:
- Translated at DeepL.
- Photo edited in IbisPaint X.
- Divider made by me in Adobe Illustrator.
Posted Using InLeo Alpha
We believe we are familiar with Stitch and Lilo and this post took us down memory lane. Thinking of using pointillism to bring Stitch to life is so creative. We enjoyed reading the process and the humor you added as you described the process. And yes, we will always remember that family will never leave us
How nice! We are a hive family, one that writes, shares, learns and teaches 🤗🌷🐝
Wow. Excelente puntillismo @verdeayer una tecnica con buena factura.
¡Gracias, gracias! 🥰
Me encanta la técnica del puntillismo quedó muy lindo. Saludos ☺️
¡Muchas gracias!✌🏼 El puntillismo es para relajarse o por lo menos a mí me sirve para eso 😁. Bonito día para tí.
Muy bonito amiga. Bendiciones 😘.
¡Gracias! ☺️ Feliz día ✌🏼
Congratulations @verdeayer! You have completed the following achievement on the Hive blockchain And have been rewarded with New badge(s)
Your next payout target is 2000 HP.
The unit is Hive Power equivalent because post and comment rewards can be split into HP and HBD
You can view your badges on your board and compare yourself to others in the Ranking
If you no longer want to receive notifications, reply to this comment with the word
STOPCheck out our last posts:
¡Enhorabuena!
✅ Has hecho un buen trabajo, por lo cual tu publicación ha sido valorada y ha recibido el apoyo de parte de CHESS BROTHERS ♔ 💪
♟ Te invitamos a usar nuestra etiqueta #chessbrothers y a que aprendas más sobre nosotros.
♟♟ También puedes contactarnos en nuestro servidor de Discord y promocionar allí tus publicaciones.
♟♟♟ Considera unirte a nuestro trail de curación para que trabajemos en equipo y recibas recompensas automáticamente.
♞♟ Echa un vistazo a nuestra cuenta @chessbrotherspro para que te informes sobre el proceso de curación llevado a diario por nuestro equipo.
🏅 Si quieres obtener ganancias con tu delegacion de HP y apoyar a nuestro proyecto, te invitamos a unirte al plan Master Investor. Aquí puedes aprender cómo hacerlo.
Cordialmente
El equipo de CHESS BROTHERS