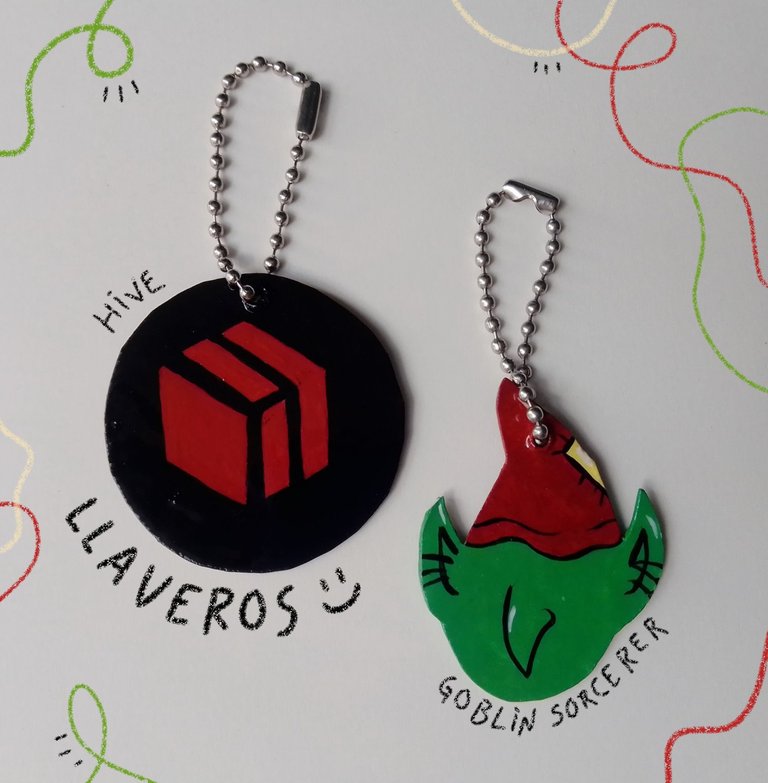
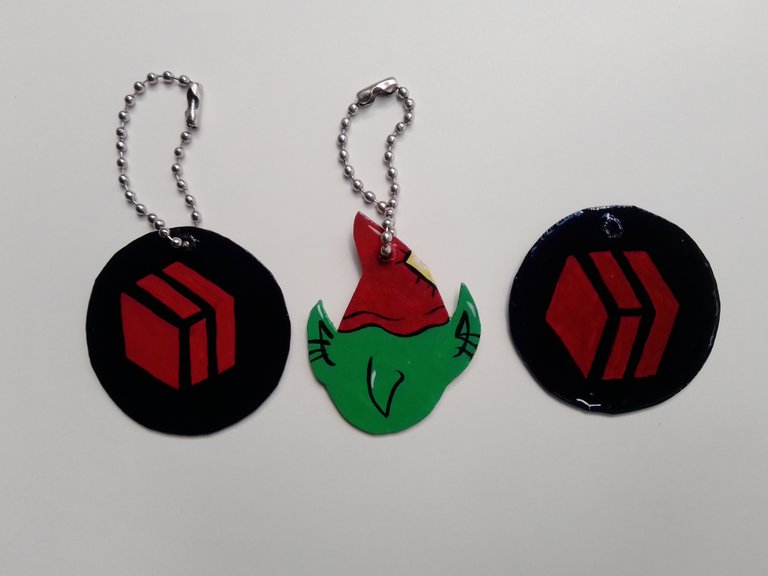
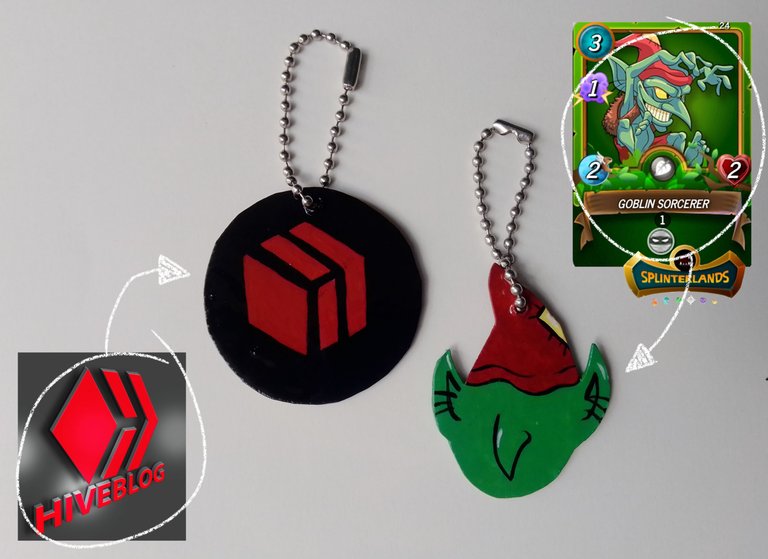
¡Un saludo dominguero a los amigos de hivediy!🐝 traigo para ustedes dos llaveros hechos a mano. El primero lo hago inspirado en Goblin Sorcerer de Splinterland y el segundo es la imagen gráfica que representa a HIVE, estaré utilizando cartón y una lámpara de manicura para esta manualidad.
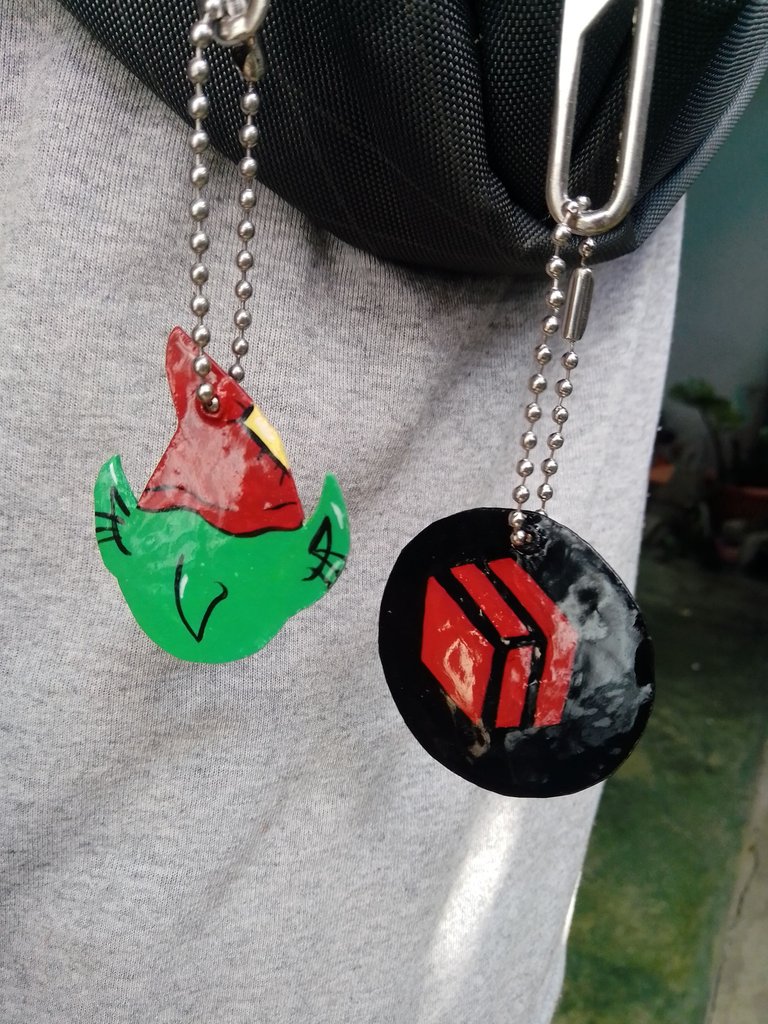
Estos dos llaveros los estaré utilizando en mi día a día, ya que es una de las formas de dar a conocer a la web 3 de hive. 😉
Elegí especialmente el logo de hive porque me siento orgullosa de haber llegado a esta red social y también de poder conocer las distintas comunidades. 😁
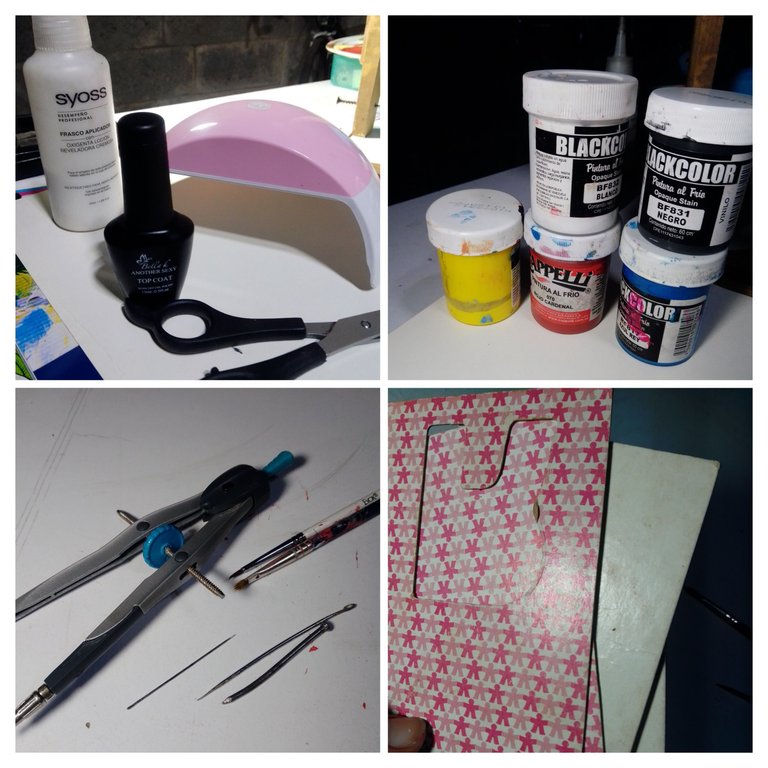
Estos son los materiales que se necesitan:
Cartón de 0,07 mm.
Tijera.
Pintura al frío en color, blanco, negro, amarillo, azul y rojo.
Pincel número 2 y 0.
Pega, clavo y aguja de coser.
Lámpara para manicura.
Top coat.
Cadena para colgar el llavero.
![20240811_003546-COLLAGE.jpg](https://images.hive.blog/768x0/https://files.peakd.com/file/peakd-hive/verdeayer/AK2EKHhuZ9DagYzmg4aYf5rr9JYH6Cpzhcs1BGfc1ZJtyt8wQdmw8NVkB5hcpry.jpg)
![divisor roxy hive flores.png](https://images.hive.blog/768x0/https://files.peakd.com/file/peakd-hive/verdeayer/23tbnkg6U1KqBP3AQvHMRruQmFhoSxnq8dvDKGU7YBrabvTFbNqo52ddRUoQ7aeQ6iWik.png)
Proceso del llavero inspirado en Goblin Sorcerer de Splinterland ✨
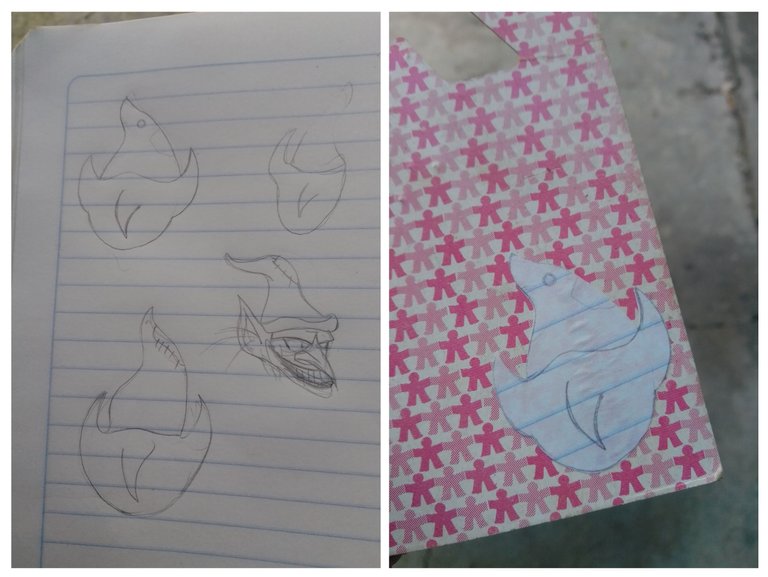
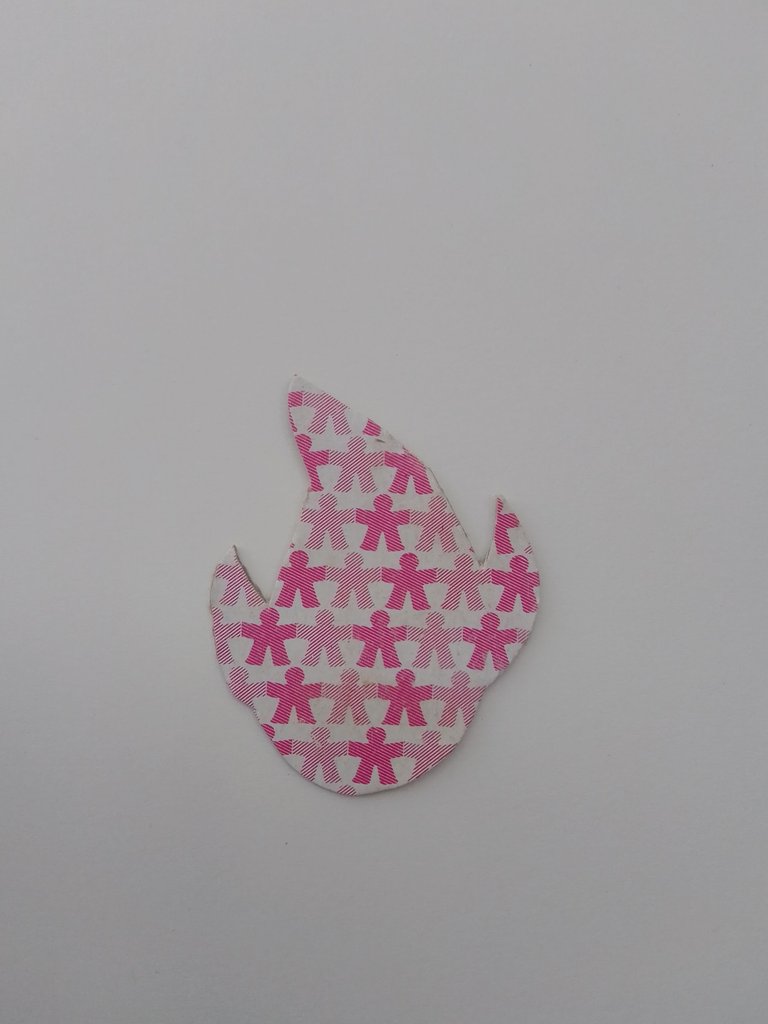
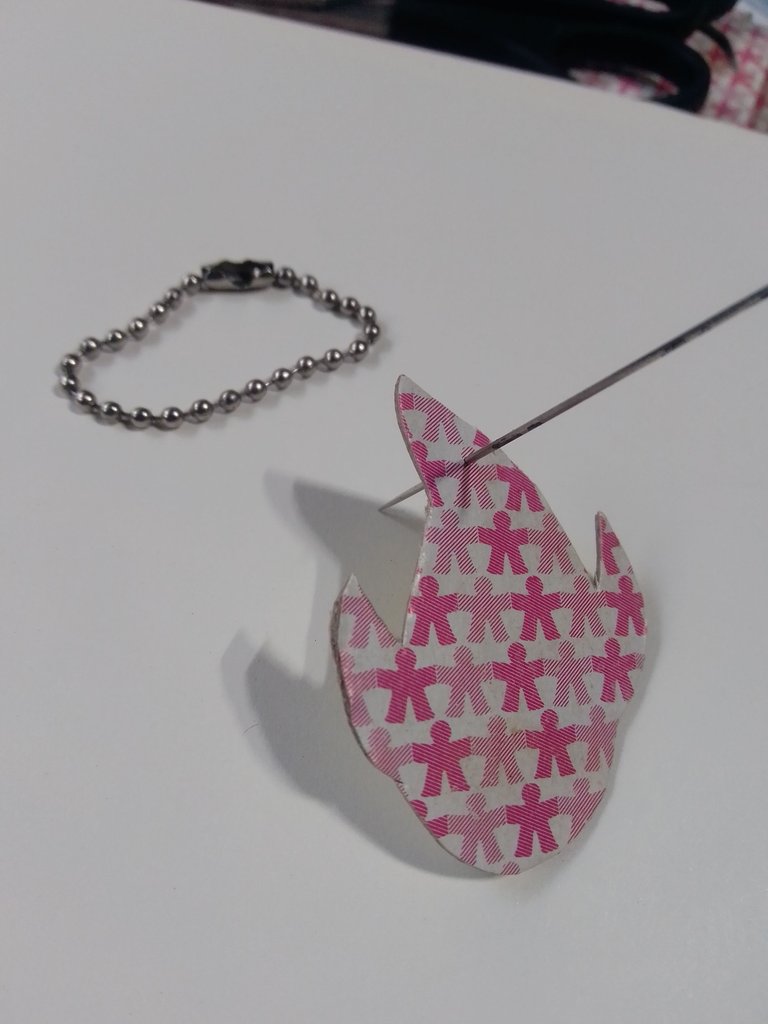
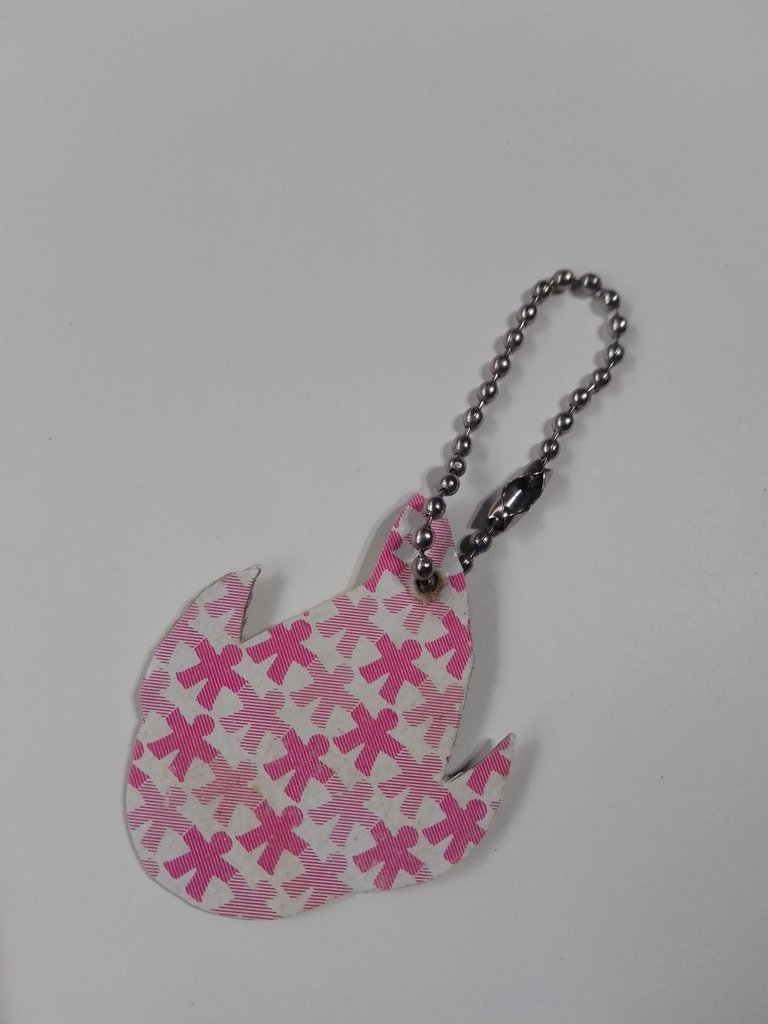
Empezaré dibujando, tengo una referencia del personaje en mi teléfono y diseño una versión minimal, recorto el dibujo y lo pego sobre el cartón con muy poca pega, así es mucho más fácil recortarlo.
![20240811_141942-COLLAGE.jpg](https://images.hive.blog/768x0/https://files.peakd.com/file/peakd-hive/verdeayer/EoK7HT59TmBkFGhvTSypUwUVXEL6NxZGRHZtqLkPpUFnGeoVqLbL8GUzADRYnY9GZJH.jpg)
![IMG_20240810_153551.jpg](https://images.hive.blog/768x0/https://files.peakd.com/file/peakd-hive/verdeayer/23vi6PpU4K226Pea33KC8wKd2vvK2Zvz8SZ7iWyzyfwK7HE8amAbLYmqqxhaYznKNX6Vg.jpg)
Con la aguja abro un orificio, que haré más grande con la ayuda del clavo.
![IMG_20240810_153832.jpg](https://images.hive.blog/768x0/https://files.peakd.com/file/peakd-hive/verdeayer/23u6Bn6gvabZsaveKAbVcTgrjDXh2XRNzHxfsXdUzLUYwRaB8BgZT4fXJR4PvYfq9BWmM.jpg)
![IMG_20240810_154224.jpg](https://images.hive.blog/768x0/https://files.peakd.com/file/peakd-hive/verdeayer/23tvo7PSjazJQTUcfSPfHRcSuvPAebzuS4ydzPRPq7TD5uv5dUB1HEyqjJkzVUkLT6V9V.jpg)
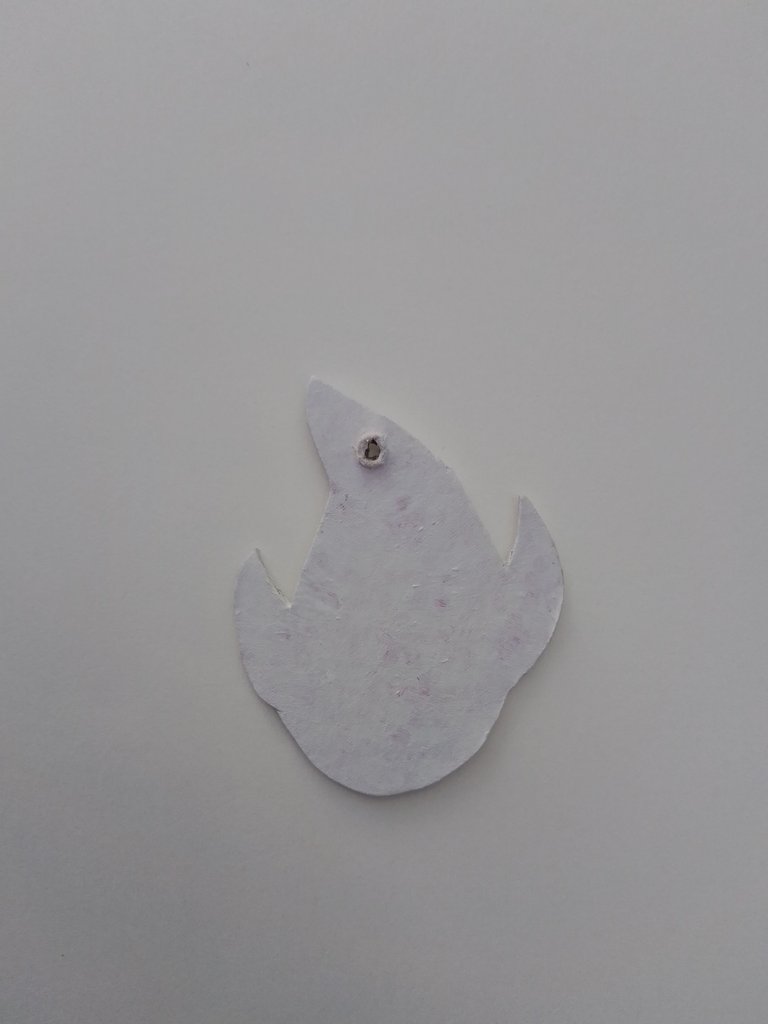
Ya con el diseño recortado, lo siguiente es dar una capa de color blanco, yo tuve que dar 4 capas pintura 😅, esto es necesario para que así los colores se vean mucho más brillantes.
![IMG_20240810_160519~2.jpg](https://images.hive.blog/768x0/https://files.peakd.com/file/peakd-hive/verdeayer/23uQvsHs9p9iTYRyHKHW3gwYTDSoUc7KRrmrDd2i2bCEBJMouvvyLePHC7MkwtGaqMQKJ.jpg)
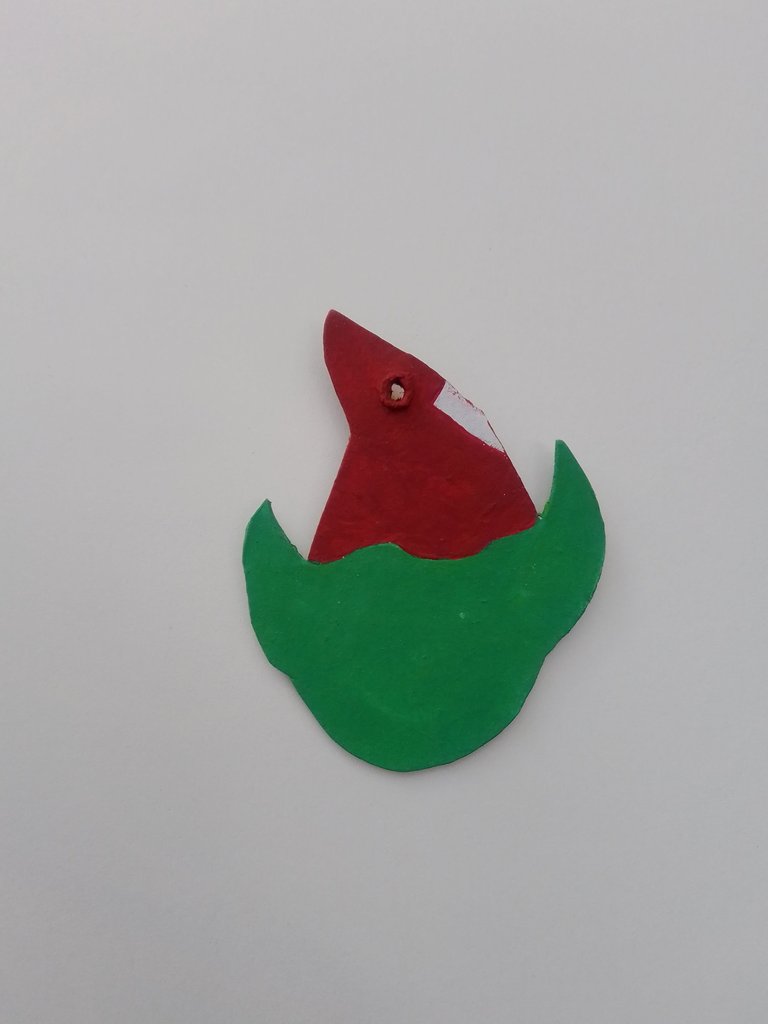
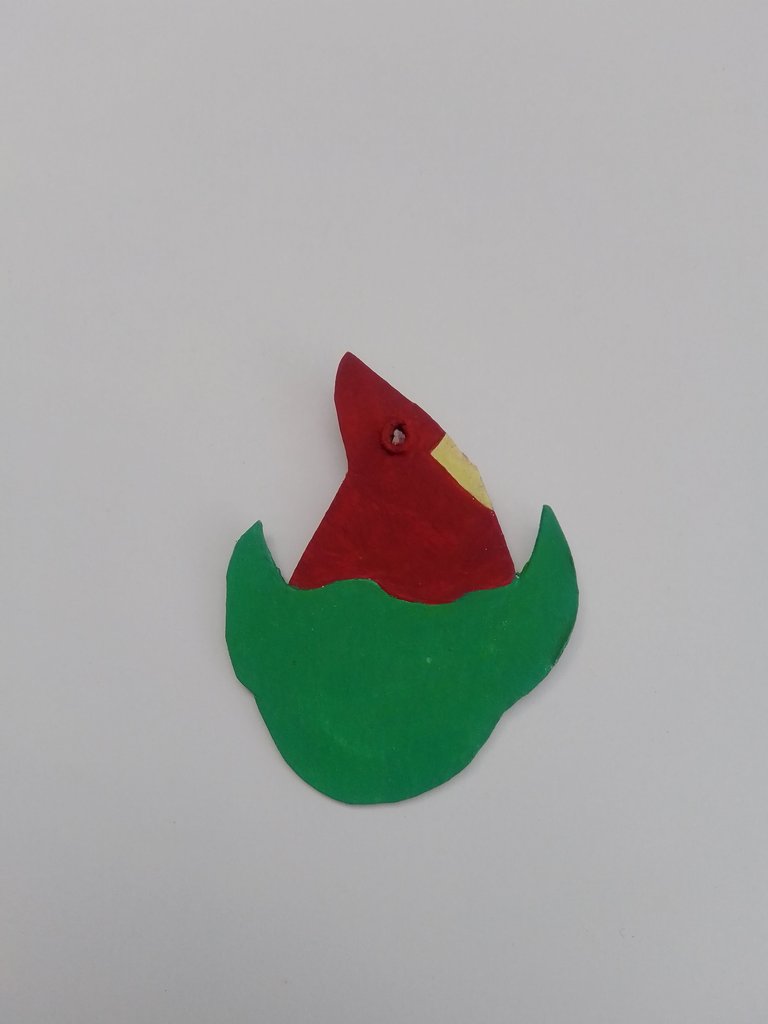
Ahora es momento de pintar, comenzando por el sombrero que es de color rojo y luego la parte de su cabeza de color verde.
![IMG_20240810_162756~2.jpg](https://images.hive.blog/768x0/https://files.peakd.com/file/peakd-hive/verdeayer/23u6BhPM2VKVfUpdpHS4iymt7PUKTu9iczEcFyB5eTc2dExLc9RT2aaLCRkWEKgmSXnxS.jpg)
![IMG_20240810_165122.jpg](https://images.hive.blog/768x0/https://files.peakd.com/file/peakd-hive/verdeayer/23wCHukXV3d3YmgrGELFg5swr6Zz2TdnP4zvZ9K5nb41necJnLctSQyZNZz9ShDYn5m79.jpg)
![IMG_20240810_165555.jpg](https://images.hive.blog/768x0/https://files.peakd.com/file/peakd-hive/verdeayer/23wCHukXTRHp4cLpvaguo6BUHifoDJk8Vdexb9FgngTHiCepr5qnwEPLZ3GSav3T3bhyw.jpg)
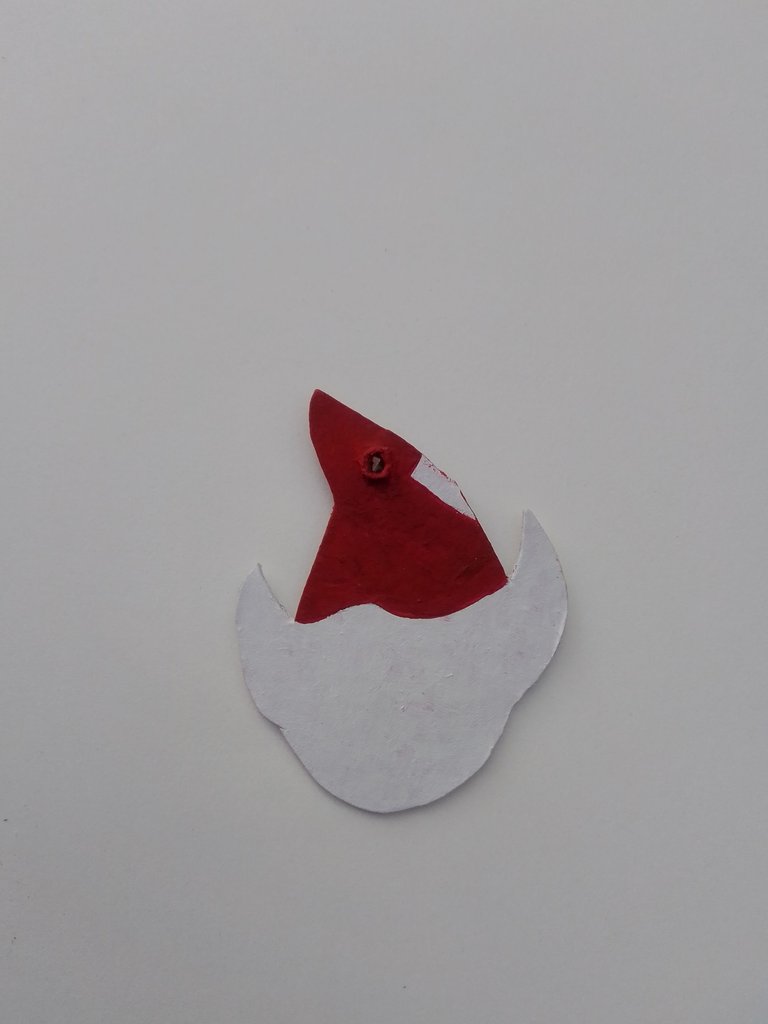
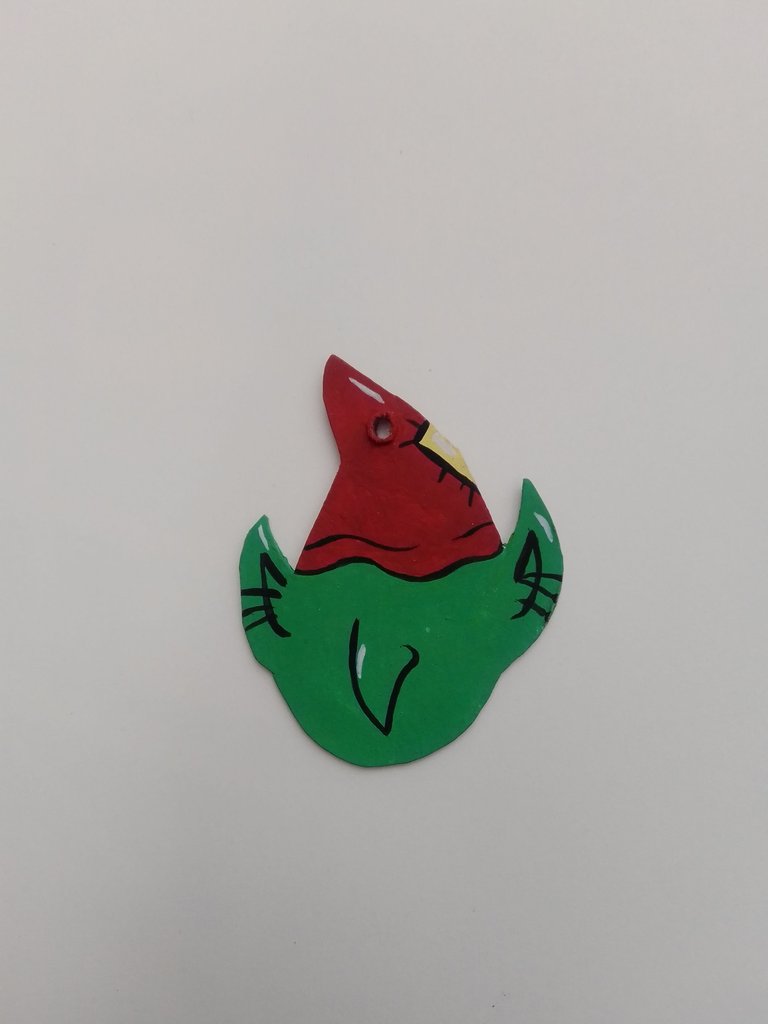
Con el pincel número 0 hago el detalle de la nariz, las orejas y el sombrero y de esta manera ya tendríamos terminada la parte de la pintura.
![IMG_20240810_173336~2.jpg](https://images.hive.blog/768x0/https://files.peakd.com/file/peakd-hive/verdeayer/23wquFNTSMojYZhGwziL8QgwkHxR8LkquTSNtump1TpUHkGtDiFWC7yzgASXwf7jjdyeZ.jpg)
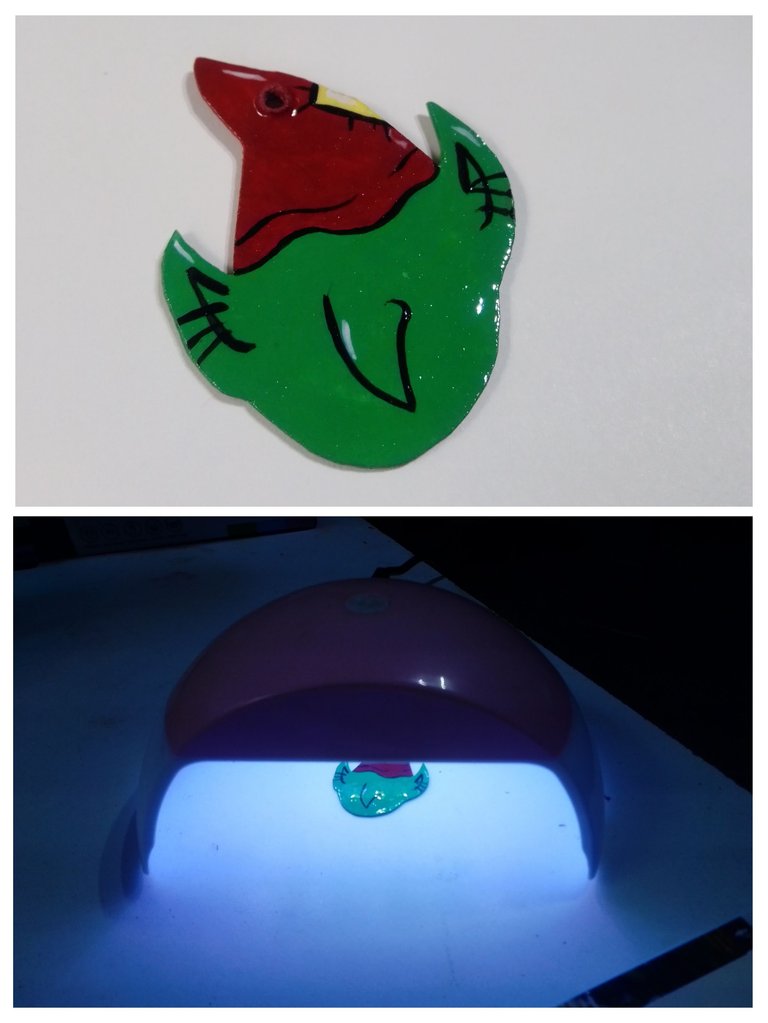
Por último, le daré solo una capa de top coat y lo meteré a la lámpara solo 2 minutos, luego repito el proceso por la parte trasera del diseño y de esta manera quedaría listo para colgarlo en nuestras llaves o bolso.
![20240811_143304-COLLAGE.jpg](https://images.hive.blog/768x0/https://files.peakd.com/file/peakd-hive/verdeayer/23zkpGr261wiNV8bQz2Sa4UVXXF219SpfcTZYpMjAvE8ScXTsHQom71VUvB4XnULXv4GY.jpg)
![divisor roxy hive flores.png](https://images.hive.blog/768x0/https://files.peakd.com/file/peakd-hive/verdeayer/23tbnkg6U1KqBP3AQvHMRruQmFhoSxnq8dvDKGU7YBrabvTFbNqo52ddRUoQ7aeQ6iWik.png)
Proceso del llavero de HIVE ♦️
Este se realiza en un dos por tres 😁
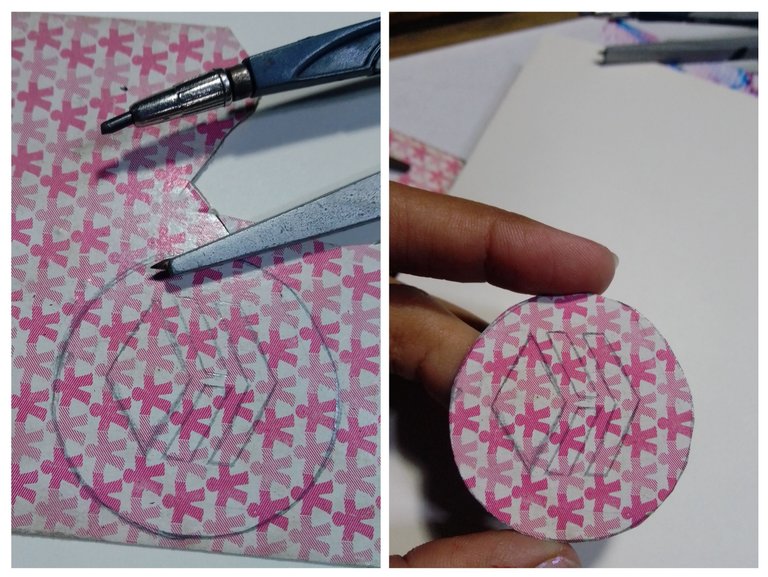
Lo primero que hago es trazar una circunferencia con el compás y dibujo el logo de hive, no nos olvidemos de hacer el orificio por donde pasará la argolla o cadena.
![20240811_143634-COLLAGE.jpg](https://images.hive.blog/768x0/https://files.peakd.com/file/peakd-hive/verdeayer/EonmzynZvg7JAxwTmzXZadETFahxb6tU4TshUzQ7C9S6PcwjQiddWw564ShCariE64B.jpg)
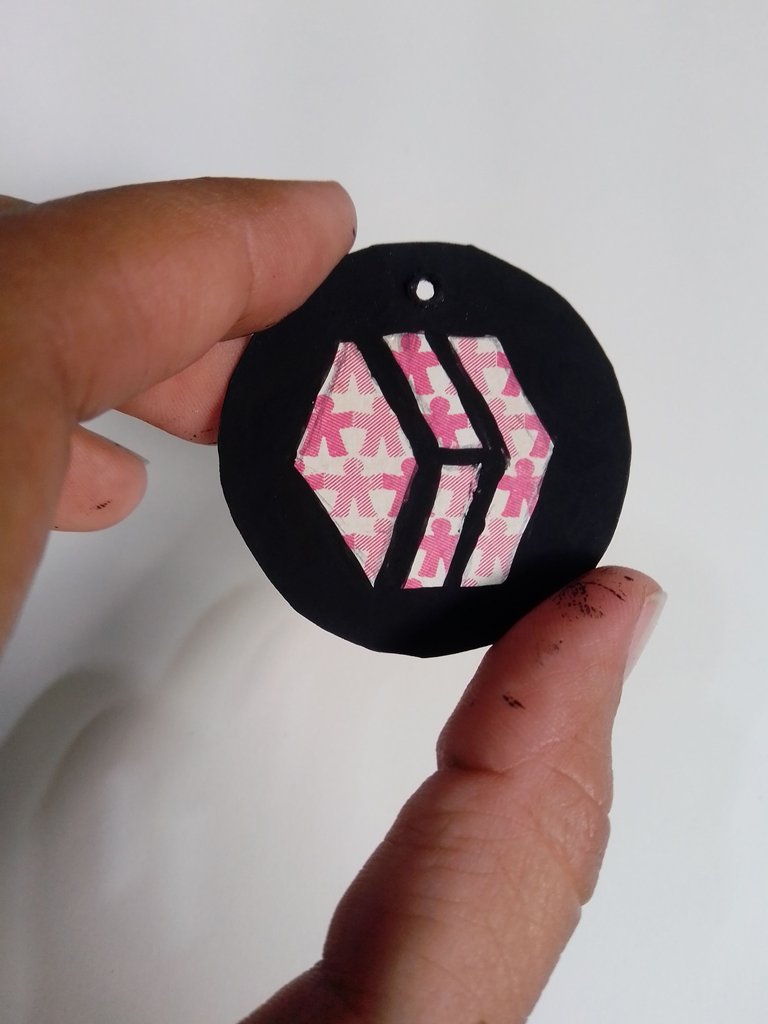
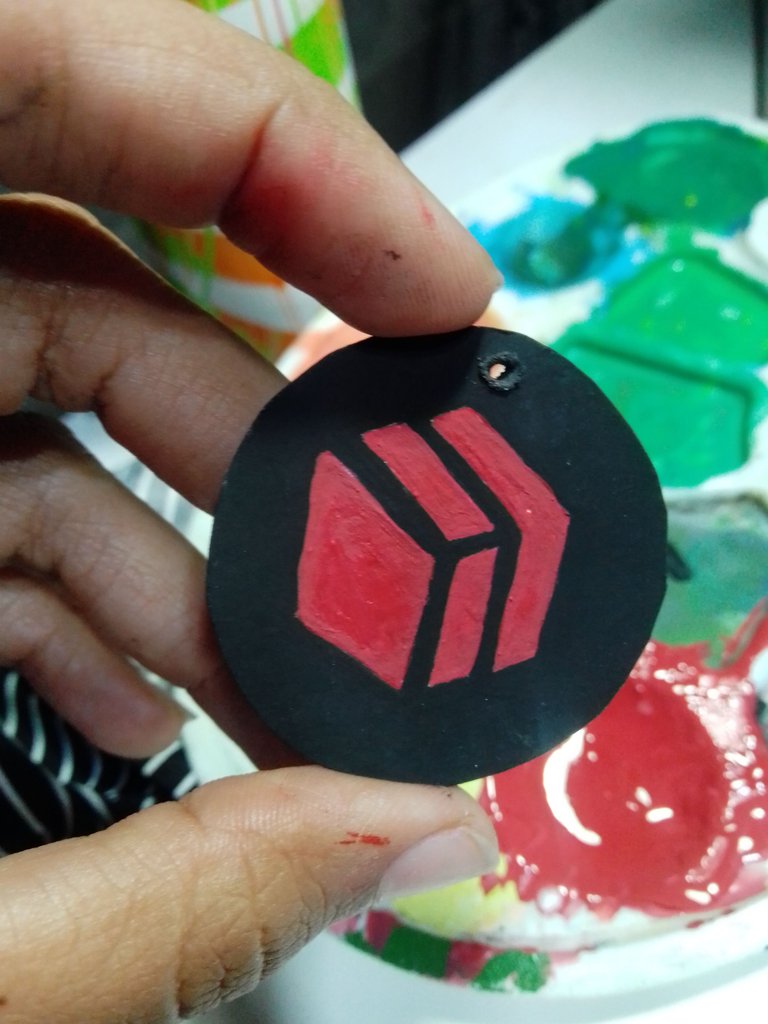
Luego se procede a pintar todo el fondo de color negro, la parte de atrás también de negro y el logo de color rojo.
![IMG_20240811_124848.jpg](https://images.hive.blog/768x0/https://files.peakd.com/file/peakd-hive/verdeayer/23xVRpFRF6nr9fSjVWbRTqBr6wq4L8wNwqCDxHt79LZQPSZkjaSe2DiFT13q1hjL9sRZM.jpg)
![IMG_20240810_202222.jpg](https://images.hive.blog/768x0/https://files.peakd.com/file/peakd-hive/verdeayer/23xyV4ZNFxSaKRZRnfnTdLmAFcB5B4LAKEAzrdZcy1PPFudFrELMBARzdGHiasypwXwYi.jpg)
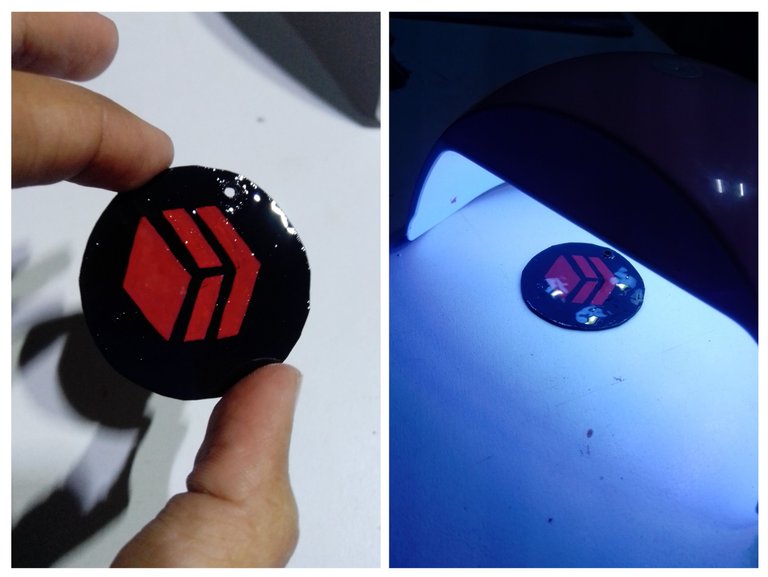
Al estar seco le aplico una capa de top coat al igual que en el llavero anterior, luego lo coloco en la lámpara 2 minutos por cada lado.
![20240811_144143-COLLAGE.jpg](https://images.hive.blog/768x0/https://files.peakd.com/file/peakd-hive/verdeayer/Ep3ePrgxkLnTDx95CyxWakyAr2LU7XhpLBuuNE6YFJeu2DdVfPX8d5tidQSKfXAWW9g.jpg)
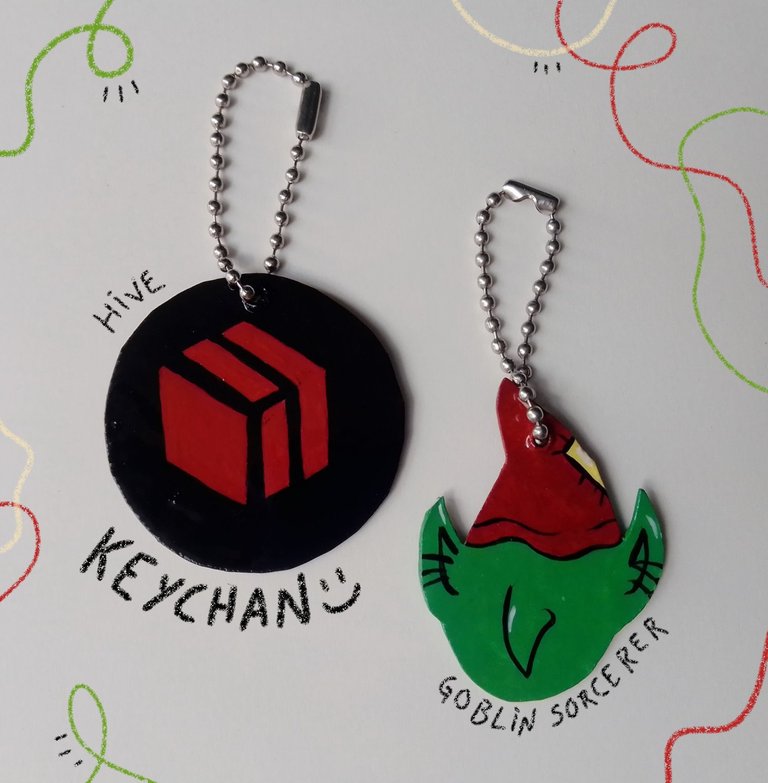
Y así de fácil tenemos listos dos llaveros que representan nuestra colmena, el lugar donde podemos escribir, aprender, y enseñar desde cualquier parte del mundo.
![](https://images.hive.blog/768x0/https://img.inleo.io/DQmTmT6FvDK3PDDpBkgTFiAZcqnkzkfS6MTXAy4NU9Vz5zu/IMG_20240811_150315~2.jpg)
![57 sin título_20240811155630.jpg](https://images.hive.blog/768x0/https://files.peakd.com/file/peakd-hive/verdeayer/23wqrtTDoBTCyP8qcdyvLEyYooGegAMznYu4mzKGA52H7QXqsiuP9Mw7BexcsDApi2nGf.jpg)
![IMG_20240811_151149.jpg](https://images.hive.blog/768x0/https://files.peakd.com/file/peakd-hive/verdeayer/23xehwthpd6x3A47q9Hp5j997A2x8RcRFpsVDQjbLhdCTeV2XanTyGNjvwgYexNvMZbFZ.jpg)
![IMG_20240811_151110.jpg](https://images.hive.blog/768x0/https://files.peakd.com/file/peakd-hive/verdeayer/23u65BxHxxvXPPmNcLVW1kML59TVZgD4enKYB3q1RNPMuwiEVga8pfZ6NBQDUQN5Q6QoH.jpg)
Estos llaveros pueden durar muchísimo tiempo, solo hay que evitar mojarlos.😉
Espero que se animen a realizar esta manualidad ✌🏼 les deseo ¡feliz día! 🐝
![divisor roxy hive flores.png](https://images.hive.blog/768x0/https://files.peakd.com/file/peakd-hive/verdeayer/23tbnkg6U1KqBP3AQvHMRruQmFhoSxnq8dvDKGU7YBrabvTFbNqo52ddRUoQ7aeQ6iWik.png)
Créditos
Traducido en DeepL.
Fotos editada en IbisPaint X.
Separador hecho por mí en Adobe Illustrator.
![divisor roxy hive flores.png](https://images.hive.blog/768x0/https://files.peakd.com/file/peakd-hive/verdeayer/23tbnkg6U1KqBP3AQvHMRruQmFhoSxnq8dvDKGU7YBrabvTFbNqo52ddRUoQ7aeQ6iWik.png)
English
Sunday greetings to the friends of hivediy!🐝 I bring for you two handmade keychains. The first one I make inspired by Goblin Sorcerer from Splinterland and the second one is the graphic image representing HIVE, I will be using cardboard and a manicure lamp for this craft.
These two keychains I will be using them in my day to day life, as it is one of the ways to make hive web 3 known 😉.
I specially chose the hive logo because I feel proud to have reached this social network and also to be able to know the different communities. 😁
These are the materials needed:
0.07 mm cardboard.
Scissors.
Cold paint in color, white, black, yellow, blue and red.
Brush number 2 and 0.
Glue, nail and sewing needle.
Manicure lamp.
Top coat.
Chain to hang the key ring.
![20240811_003546-COLLAGE.jpg](https://images.hive.blog/768x0/https://files.peakd.com/file/peakd-hive/verdeayer/AK2EKHhuZ9DagYzmg4aYf5rr9JYH6Cpzhcs1BGfc1ZJtyt8wQdmw8NVkB5hcpry.jpg)
![divisor roxy hive flores.png](https://images.hive.blog/768x0/https://files.peakd.com/file/peakd-hive/verdeayer/23tbnkg6U1KqBP3AQvHMRruQmFhoSxnq8dvDKGU7YBrabvTFbNqo52ddRUoQ7aeQ6iWik.png)
Process of the keychain inspired by Goblin Sorcerer from Splinterland ✨.
I'll start by drawing, I have a reference of the character on my phone and design a minimal version, I cut out the drawing and glue it on the cardboard with very little glue, so it's much easier to cut it out.
![20240811_141942-COLLAGE.jpg](https://images.hive.blog/768x0/https://files.peakd.com/file/peakd-hive/verdeayer/EoK7HT59TmBkFGhvTSypUwUVXEL6NxZGRHZtqLkPpUFnGeoVqLbL8GUzADRYnY9GZJH.jpg)
![IMG_20240810_153551.jpg](https://images.hive.blog/768x0/https://files.peakd.com/file/peakd-hive/verdeayer/23vi6PpU4K226Pea33KC8wKd2vvK2Zvz8SZ7iWyzyfwK7HE8amAbLYmqqxhaYznKNX6Vg.jpg)
With the needle I open a hole, which I will make bigger with the help of the nail.
![IMG_20240810_153832.jpg](https://images.hive.blog/768x0/https://files.peakd.com/file/peakd-hive/verdeayer/23u6Bn6gvabZsaveKAbVcTgrjDXh2XRNzHxfsXdUzLUYwRaB8BgZT4fXJR4PvYfq9BWmM.jpg)
![IMG_20240810_154224.jpg](https://images.hive.blog/768x0/https://files.peakd.com/file/peakd-hive/verdeayer/23tvo7PSjazJQTUcfSPfHRcSuvPAebzuS4ydzPRPq7TD5uv5dUB1HEyqjJkzVUkLT6V9V.jpg)
With the design already cut out, the next thing is to give a layer of white color, I had to give 4 layers of paint 😅, this is necessary so that the colors look much brighter.
![IMG_20240810_160519~2.jpg](https://images.hive.blog/768x0/https://files.peakd.com/file/peakd-hive/verdeayer/23uQvsHs9p9iTYRyHKHW3gwYTDSoUc7KRrmrDd2i2bCEBJMouvvyLePHC7MkwtGaqMQKJ.jpg)
Now it's time to paint, starting with the hat which is red and then the green part of his head.
![IMG_20240810_162756~2.jpg](https://images.hive.blog/768x0/https://files.peakd.com/file/peakd-hive/verdeayer/23u6BhPM2VKVfUpdpHS4iymt7PUKTu9iczEcFyB5eTc2dExLc9RT2aaLCRkWEKgmSXnxS.jpg)
![IMG_20240810_165122.jpg](https://images.hive.blog/768x0/https://files.peakd.com/file/peakd-hive/verdeayer/23wCHukXV3d3YmgrGELFg5swr6Zz2TdnP4zvZ9K5nb41necJnLctSQyZNZz9ShDYn5m79.jpg)
![IMG_20240810_165555.jpg](https://images.hive.blog/768x0/https://files.peakd.com/file/peakd-hive/verdeayer/23wCHukXTRHp4cLpvaguo6BUHifoDJk8Vdexb9FgngTHiCepr5qnwEPLZ3GSav3T3bhyw.jpg)
With brush number 0 I make the detail of the nose, the ears and the hat and in this way we would already have finished the painting part.
![IMG_20240810_173336~2.jpg](https://images.hive.blog/768x0/https://files.peakd.com/file/peakd-hive/verdeayer/23wquFNTSMojYZhGwziL8QgwkHxR8LkquTSNtump1TpUHkGtDiFWC7yzgASXwf7jjdyeZ.jpg)
Finally, I will give it just one coat of top coat and put it in the lamp for only 2 minutes, then repeat the process for the back of the design and this way it would be ready to hang on our keys or purse.
![20240811_143304-COLLAGE.jpg](https://images.hive.blog/768x0/https://files.peakd.com/file/peakd-hive/verdeayer/23zkpGr261wiNV8bQz2Sa4UVXXF219SpfcTZYpMjAvE8ScXTsHQom71VUvB4XnULXv4GY.jpg)
![divider roxy hive flowers.png](https://images.hive.blog/768x0/https://files.peakd.com/file/peakd-hive/verdeayer/23tbnkg6U1KqBP3AQvHMRruQmFhoSxnq8dvDKGU7YBrabvTFbNqo52ddRUoQ7aeQ6iWik.png)
HIVE Keychain Process ♦️
This one is done in no time 😁.
The first thing I do is trace a circle with the compass and draw the hive logo, let's not forget to make the hole where the ring or chain will go through.
![20240811_143634-COLLAGE.jpg](https://images.hive.blog/768x0/https://files.peakd.com/file/peakd-hive/verdeayer/EonmzynZvg7JAxwTmzXZadETFahxb6tU4TshUzQ7C9S6PcwjQiddWw564ShCariE64B.jpg)
Then proceed to paint the entire background black, the back also black and the logo red.
![IMG_20240811_124848.jpg](https://images.hive.blog/768x0/https://files.peakd.com/file/peakd-hive/verdeayer/23xVRpFRF6nr9fSjVWbRTqBr6wq4L8wNwqCDxHt79LZQPSZkjaSe2DiFT13q1hjL9sRZM.jpg)
![IMG_20240810_202222.jpg](https://images.hive.blog/768x0/https://files.peakd.com/file/peakd-hive/verdeayer/23xyV4ZNFxSaKRZRnfnTdLmAFcB5B4LAKEAzrdZcy1PPFudFrELMBARzdGHiasypwXwYi.jpg)
When dry I apply a coat of top coat as in the previous keychain, then I place it in the lamp 2 minutes on each side.
![20240811_144143-COLLAGE.jpg](https://images.hive.blog/768x0/https://files.peakd.com/file/peakd-hive/verdeayer/Ep3ePrgxkLnTDx95CyxWakyAr2LU7XhpLBuuNE6YFJeu2DdVfPX8d5tidQSKfXAWW9g.jpg)
And just like that we have two key chains ready that represent our beehive, the place where we can write, learn, and teach from anywhere in the world.
![](https://images.hive.blog/768x0/https://img.inleo.io/DQmTmT6FvDK3PDDpBkgTFiAZcqnkzkfS6MTXAy4NU9Vz5zu/IMG_20240811_150315~2.jpg)
![57 sin título_20240811155630.jpg](https://images.hive.blog/768x0/https://files.peakd.com/file/peakd-hive/verdeayer/23wqrtTDoBTCyP8qcdyvLEyYooGegAMznYu4mzKGA52H7QXqsiuP9Mw7BexcsDApi2nGf.jpg)
![IMG_20240811_151149.jpg](https://images.hive.blog/768x0/https://files.peakd.com/file/peakd-hive/verdeayer/23xehwthpd6x3A47q9Hp5j997A2x8RcRFpsVDQjbLhdCTeV2XanTyGNjvwgYexNvMZbFZ.jpg)
![IMG_20240811_151110.jpg](https://images.hive.blog/768x0/https://files.peakd.com/file/peakd-hive/verdeayer/23u65BxHxxvXPPmNcLVW1kML59TVZgD4enKYB3q1RNPMuwiEVga8pfZ6NBQDUQN5Q6QoH.jpg)
These key chains can last a very long time, just avoid getting them wet 😉.
I hope you are encouraged to make this craft ✌🏼 I wish you happy day! 🐝
![divisor roxy hive flores.png](https://images.hive.blog/768x0/https://files.peakd.com/file/peakd-hive/verdeayer/23tbnkg6U1KqBP3AQvHMRruQmFhoSxnq8dvDKGU7YBrabvTFbNqo52ddRUoQ7aeQ6iWik.png)
Credits
Translated at DeepL.
Photos edited in IbisPaint X.
Separator made by me in Adobe Illustrator.
Posted Using InLeo Alpha
This keychains would be gold if you choose to sell them. Beautiful work
Wow that's amazing🙀 thank you so much! Happy day!
Muy buenos los llaveros y los diseños, me gusta el de Hive jeje y se ven faciles de hacer, quiza Buhito me ayude a hacer uno o solo se quede mirando jaja
¡Muchas gracias! Jeje yo creo que Buhito puede ayudar de muchas formas, es un genio 😁
Los trabajos en resina se me hacen fascinantes 😁 pero no es tan accesible de trabajar hablando económicamente (al menos en el país donde vivo 😅)
Creo que con este método o experimento me acerco un poco más a esos trabajos en resina.
¡Feliz lunes! ✨
Hermosos llaveros @verdeayer, se ven sencillos de hacer y requieren pocos materiales, una gran idea para personalizar los bolsos y carteras.
Feliz y bendecida semana!
Saludos @belkyscabrera y gracias! 😁 quién diría que las lámparas para uñas servirían para tantas cosas 🤗
¡Amén!¡Feliz semana para ti también!